VIDEO-CLIPS-4h
Taijiquan on the Blue Mountain 2009
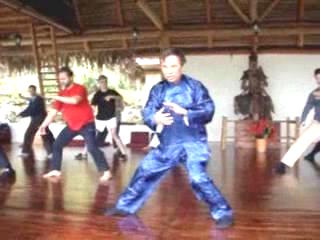
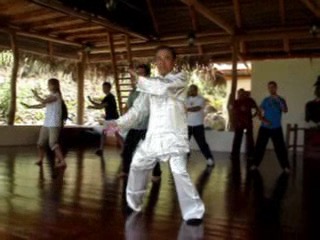
Taijiquan Blue Mountain -- Taijiquan 04
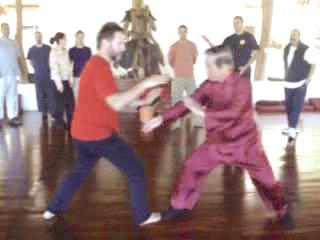
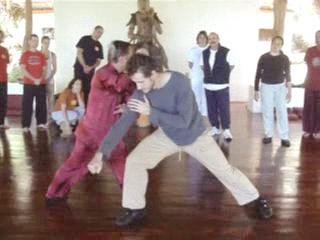
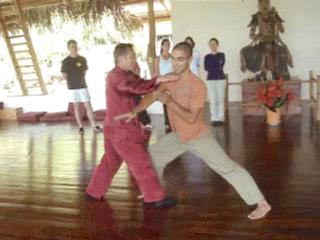
Progressing to Da Shou or Striking Hands -- OverviewWhite Snake Shoots Venom and its Various
Counters -- Overview
Striking the Opponent's Top, Middle or Bottom
Level -- Overview
Why do We Use Poise Patterns at the Start of
Combat?-- Overview
The Three Arrivals and the Four Preparations -- Overview
Important Lessons in Initiating an Attack and in
Responding to an Initiate Attack -- Overview
Third Class, Second Class and First Class Response -- Overview
Using Genuine Taijiquan Techniques in Attack and Defence -- Overview
Abridged Combat Sequence 1: Striking -- Overview
Progressing to Da Shou or Striking Hands -- Part 1
Progressing to Da Shou or Striking Hands -- Part 2
Progressing to Da Shou or Striking Hands -- Part 3
Progressing to Da Shou or Striking Hands -- Part 4
Progressing to Da Shou or Striking Hands -- Part 5
Progressing to Da Shou or Striking Hands -- Part 6
Progressing to Da Shou or Striking Hands -- Part 7
Progressing to Da Shou or Striking Hands -- Part 8
Progressing to Da Shou or Striking Hands -- Part 9
White Snake Shoots Venom and its Various Counters -- Part 2
White Snake Shoots Venom and its Various Counters -- Part 3
White Snake Shoots Venom and its Various Counters -- Part 4
White Snake Shoots Venom and its Various Counters -- Part 5
White Snake Shoots Venom and its Various Counters -- Part 6
White Snake Shoots Venom and its Various Counters -- Part 7
White Snake Shoots Venom and its Various Counters -- Part 8
White Snake Shoots Venom and its Various Counters -- Part 9
White Snake Shoots Venom and its Various Counters -- Part 10
Striking the Opponent's Top, Middle or Bottom Level -- Part 1
Striking the Opponent's Top, Middle or Bottom Level -- Part 2
Striking the Opponent's Top, Middle or Bottom Level -- Part 3
 Striking the Opponent's Top, Middle or Bottom Level -- Part 4
Striking the Opponent's Top, Middle or Bottom Level -- Part 5
Striking the Opponent's Top, Middle or Bottom Level -- Part 6
Striking the Opponent's Top, Middle or Bottom Level -- Part 7
Why do We Use Poise Patterns at the Start of Combat?-- Part 1
Why do We Use Poise Patterns at the Start of Combat?-- Part 2
Why do We Use Poise Patterns at the Start of Combat?-- Part 3
Why do We Use Poise Patterns at the Start of Combat?-- Part 4
Why do We Use Poise Patterns at the Start of Combat?-- Part 5
Why do We Use Poise Patterns at the Start of Combat?-- Part 6
Why do We Use Poise Patterns at the Start of Combat?-- Part 7
Why do We Use Poise Patterns at the Start of Combat?-- Part 8
The Three Arrivals and the Four Preparations -- Part 1
The Three Arrivals and the Four Preparations -- Part 2
The Three Arrivals and the Four Preparations -- Part 3
The Three Arrivals and the Four Preparations -- Part 4
The Three Arrivals and the Four Preparations -- Part 5
The Three Arrivals and the Four Preparations -- Part 6
The Three Arrivals and the Four Preparations -- Part 7
The Three Arrivals and the Four Preparations -- Part 8
The Three Arrivals and the Four Preparations -- Part 9
The Three Arrivals and the Four Preparations -- Part 10
The Three Arrivals and the Four Preparations -- Part 11
The Three Arrivals and the Four Preparations -- Part 12
The Three Arrivals and the Four Preparations -- Part 13
The Three Arrivals and the Four Preparations -- Part 14
The Three Arrivals and the Four Preparations -- Part 15
Important Lessons in Initiating an Attack and in Responding to an Innitiate Attack -- Part 1
Important Lessons in Initiating an Attack and in Responding to an Innitiate Attack -- Part 2
Important Lessons in Initiating an Attack and in Responding to an Innitiate Attack -- Part 3
 Important Lessons in Initiating an Attack and in
Responding to an Innitiate Attack -- Part 4
Important Lessons in Initiating an Attack and in
Responding to an Innitiate Attack -- Part 5
Important Lessons in Initiating an Attack and in
Responding to an Innitiate Attack -- Part 6
Important Lessons in Initiating an Attack and in
Responding to an Innitiate Attack -- Part 7
Important Lessons in Initiating an Attack and in
Responding to an Innitiate Attack -- Part 8
Important Lessons in Initiating an Attack and in
Responding to an Innitiate Attack -- Part 9
Important Lessons in Initiating an Attack and in Responding to an Innitiate Attack -- Part 10
Important Lessons in Initiating an Attack and in Responding to an Innitiate Attack -- Part 11
Third Class, Second Class and First Class Response -- Part 1
Third Class, Second Class and First Class Response -- Part 2
Third Class, Second Class and First Class Response -- Part 3
Third Class, Second Class and First Class Response -- Part 4
Third Class, Second Class and First Class Response -- Part 5
Third Class, Second Class and First Class Response -- Part 6
Third Class, Second Class and First Class Response -- Part 7
Third Class, Second Class and First Class Response -- Part 8
Third Class, Second Class and First Class Response -- Part 9
Using Genuine Taijiquan Techniques in Attack and Defence -- Part 1
Using Genuine Taijiquan Techniques in Attack and Defence -- Part 2
Using Genuine Taijiquan Techniques in Attack and Defence -- Part 3
Using Genuine Taijiquan Techniques in Attack and Defence -- Part 4
Using Genuine Taijiquan Techniques in Attack and Defence -- Part 5
Using Genuine Taijiquan Techniques in Attack and Defence -- Part 6
Using Genuine Taijiquan Techniques in Attack and Defence -- Part 7
Using Genuine Taijiquan Techniques in Attack and Defence -- Part 8
Using Genuine Taijiquan Techniques in Attack and Defence -- Part 9
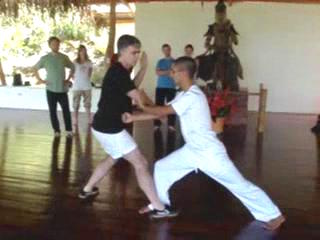
Abridged Combat Sequence 1: Striking -- Part 1
Abridged Combat Sequence 1: Striking -- Part 2
Abridged Combat Sequence 1: Striking -- Part 3
 Abridged Combat Sequence 1: Striking -- Part 4
Abridged Combat Sequence 1: Striking -- Part 5
Abridged Combat Sequence 1: Striking -- Part 6
Abridged Combat Sequence 1: Striking -- Part 7
Abridged Combat Sequence 1: Striking -- Part 8
Abridged Combat Sequence 1: Striking -- Part 9
Taijiquan Blue Mountain -- Taijiquan 05 Old Eagle Catches Snake in Pictures -- Overview
Old Eagle Catches Snake 2009 in Videos -- Overview
Old Eagle Catches Snake -- Portugal Verson Sequence 1
Old Eagle Catches Snake -- Portugal Verson Sequence 2
Old Eagle Catches Snake -- Portugal Verson Sequence 3
Old Eagle Catches Snake -- Portugal Verson Sequence 4
Themes for the Combat Sequences -- Overview
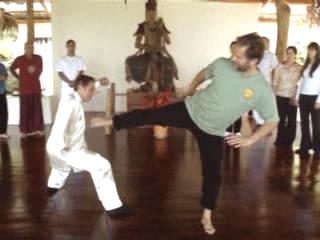
Abridged Combat Sequence 2: Kicking -- Overview
Continuation of One Sequence to Another Sequence -- Overview
Chasing after a Retreating Opponent -- Overview
Carry Tiger Back to Mountain -- Overview
Naughty Monkey Kicks at Tree -- Overview
Abridged Combat Sequence 3: Felling -- Overview
Eagle Claw in Taijiquan! -- Overview
Hiding Flower in the Sleeves -- Overview
Abridged Combat Sequence 4: Chin-Na -- Overview
The Four Attacks: Striking, Kicking, Felling and Chin-Na -- Overview
Old Eagle Catches Snake in Remembrance of Zhang San Feng -- Overview
From Combat Sequences to Free Sparring -- Overview
Themes for the Combat Sequences -- Part 1
Themes for the Combat Sequences -- Part 2
4 Abridged Sequences in Solo Performance -- Sequence 1 Initiator
Themes for the Combat Sequences -- Part 3
4 Abridged Sequences in Solo Performance -- Sequence 1 Responder
Themes for the Combat Sequences -- Part 4
Themes for the Combat Sequences -- Part 5
Themes for the Combat Sequences -- Part 6
Themes for the Combat Sequences -- Part 7
Themes for the Combat Sequences -- Part 8
Themes for the Combat Sequences -- Part 9
 Abridged Combat Sequence 2: Kicking -- Part 1
Abridged Combat Sequence 2: Kicking -- Part 2
Abridged Combat Sequence 2: Kicking -- Part 3
Abridged Combat Sequence 2: Kicking -- Part 4
Abridged Combat Sequence 2: Kicking -- Part 5
Abridged Combat Sequence 2: Kicking -- Part 6
Abridged Combat Sequence 2: Kicking -- Part 7
Abridged Combat Sequence 2: Kicking -- Part 8
Abridged Combat Sequence 2: Kicking -- Part 9
Abridged Combat Sequence 2: Kicking -- Part 10
Abridged Combat Sequence 2: Kicking -- Part 11
4 Abridged Sequences in Solo Performance -- Sequence 2 Initiator
Continuation of One Sequence to Another Sequence -- Part 1
4 Abridged Sequences in Solo Performance -- Sequence 2 Responder
Continuation of One Sequence to Another Sequence -- Part 2
Continuation of One Sequence to Another Sequence -- Part 3
Continuation of One Sequence to Another Sequence -- Part 4
Continuation of One Sequence to Another Sequence -- Part 5
Continuation of One Sequence to Another Sequence -- Part 6
Continuation of One Sequence to Another Sequence -- Part 7
Continuation of One Sequence to Another Sequence -- Part 8
Continuation of One Sequence to Another Sequence -- Part 9
Continuation of One Sequence to Another Sequence -- Part 10
Continuation of One Sequence to Another Sequence -- Part 11
Continuation of One Sequence to Another Sequence -- Part 12
Chasing after a Retreating Opponent -- Part 1
Chasing after a Retreating Opponent -- Part 2
Chasing after a Retreating Opponent -- Part 3
Chasing after a Retreating Opponent -- Part 4
Chasing after a Retreating Opponent -- Part 5
 Chasing after a Retreating Opponent -- Part 6
Chasing after a Retreating Opponent -- Part 7
Chasing after a Retreating Opponent -- Part 8
Chasing after a Retreating Opponent -- Part 9
Carry Tiger Back to Mountain -- Part 1
Carry Tiger Back to Mountain -- Part 2
Carry Tiger Back to Mountain -- Part 3
Carry Tiger Back to Mountain -- Part 4
Carry Tiger Back to Mountain -- Part 5
Carry Tiger Back to Mountain -- Part 6
Carry Tiger Back to Mountain -- Part 7
Carry Tiger Back to Mountain -- Part 8
Carry Tiger Back to Mountain -- Part 9
Carry Tiger Back to Mountain -- Part 10
Carry Tiger Back to Mountain -- Part 11
Naughty Monkey Kicks at Tree -- Part 1
Naughty Monkey Kicks at Tree -- Part 2
Naughty Monkey Kicks at Tree -- Part 3
Naughty Monkey Kicks at Tree -- Part 4
Naughty Monkey Kicks at Tree -- Part 5
Naughty Monkey Kicks at Tree -- Part 6
Naughty Monkey Kicks at Tree -- Part 7
Naughty Monkey Kicks at Tree -- Part 8
Naughty Monkey Kicks at Tree -- Part 9
Naughty Monkey Kicks at Tree -- Part 10
Naughty Monkey Kicks at Tree -- Part 11
Abridged Combat Sequence 3: Felling -- Part 1
Abridged Combat Sequence 3: Felling -- Part 2
4 Abridged Sequences in Solo Performance
-- Sequence 3 Initiator
Abridged Combat Sequence 3: Felling -- Part 3
 4 Abridged Sequences in Solo Performance
-- Sequence 3 Responder
Abridged Combat Sequence 3: Felling -- Part 4
Abridged Combat Sequence 3: Felling -- Part 5
Abridged Combat Sequence 3: Felling -- Part 6
Abridged Combat Sequence 3: Felling -- Part 7
Abridged Combat Sequence 3: Felling -- Part 8
Eagle Claw in Taijiquan! -- Part 1
Eagle Claw in Taijiquan! -- Part 2
Eagle Claw in Taijiquan! -- Part 3
Eagle Claw in Taijiquan! -- Part 4
Eagle Claw in Taijiquan! -- Part 5
Eagle Claw in Taijiquan! -- Part 6
Eagle Claw in Taijiquan! -- Part 7
Eagle Claw in Taijiquan! -- Part 8
Eagle Claw in Taijiquan! -- Part 9
Hiding Flower in the Sleeves -- Part 1
Hiding Flower in the Sleeves -- Part 2
Hiding Flower in the Sleeves -- Part 3
Hiding Flower in the Sleeves -- Part 4
Hiding Flower in the Sleeves -- Part 5
Hiding Flower in the Sleeves -- Part 6
Hiding Flower in the Sleeves -- Part 7
Hiding Flower in the Sleeves -- Part 8
Hiding Flower in the Sleeves -- Part 9
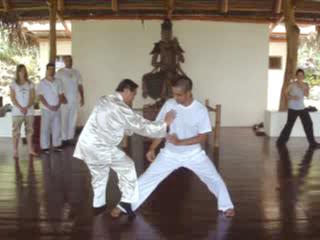
Abridged Combat Sequence 4: Chin-Na -- Part 1
Abridged Combat Sequence 4: Chin-Na -- Part 2
4 Abridged Seqences in Solo Performance -- Sequence 4 Initiator
Abridged Combat Sequence 4: Chin-Na -- Part 3
4 Abridged Seqences in Solo Performance -- Sequence 4 Responder
Abridged Combat Sequence 4: Chin-Na -- Part 4
 Abridged Combat Sequence 4: Chin-Na -- Part 5
Abridged Combat Sequence 4: Chin-Na -- Part 6
Abridged Combat Sequence 4: Chin-Na -- Part 7
Abridged Combat Sequence 4: Chin-Na -- Part 8
The Four Attacks: Striking, Kicking, Felling and
Chin-Na -- Part 1
The Four Attacks: Striking, Kicking, Felling and
Chin-Na -- Part 2
The Four Attacks: Striking, Kicking, Felling and
Chin-Na -- Part 3
The Four Attacks: Striking, Kicking, Felling and
Chin-Na -- Part 4
The Four Attacks: Striking, Kicking, Felling and Chin-Na -- Part 5
The Four Attacks: Striking, Kicking, Felling and Chin-Na -- Part 6
The Four Attacks: Striking, Kicking, Felling and Chin-Na -- Part 7
The Four Attacks: Striking, Kicking, Felling and Chin-Na -- Part 8
The Four Attacks: Striking, Kicking, Felling and Chin-Na -- Part 9
Old Eagle Catches Snake in Remembrance of Zhang San Feng -- Part 1
Old Eagle Catches Snake in Remembrance of Zhang San Feng -- Part 2
Old Eagle Catches Snake in Remembrance of Zhang San Feng -- Part 3
Old Eagle Catches Snake in Remembrance of Zhang San Feng -- Part 4
Old Eagle Catches Snake in Remembrance of Zhang San Feng -- Part 5
Old Eagle Catches Snake -- Sequence 1
Old Eagle Catches Snake in Remembrance of Zhang San Feng -- Part 6
Old Eagle Catches Snake -- Sequence 2
Old Eagle Catches Snake in Remembrance of Zhang San Feng -- Part 7
Old Eagle Catches Snake -- Sequence 3
Old Eagle Catches Snake in Remembrance of Zhang San Feng -- Part 8
Old Eagle Catches Snake -- Sequence 4
Old Eagle Catches Snake in Remembrance of Zhang San Feng -- Part 9
From Combat Seqjences to Free Sparring< -- Part 1
From Combat Seqjences to Free Sparring< -- Part 2
From Combat Seqjences to Free Sparring< -- Part 3
From Combat Seqjences to Free Sparring< -- Part 4
 From Combat Seqjences to Free Sparring< -- Part 5
From Combat Seqjences to Free Sparring< -- Part 6
From Combat Seqjences to Free Sparring< -- Part 7
From Combat Seqjences to Free Sparring< -- Part 8
From Combat Seqjences to Free Sparring< -- Part 9
From Combat Seqjences to Free Sparring< -- Part 10
Taijiquan Blue Mountain -- Youtube Taijiquan for Health, Combat and Spiritua
l Cultivation -- Overview
Taiji Originates from Wuji and Returns to Wuji
Philosophy and Methodology of Stance Training
Subtle Joys of Three-Circle Stance
Kungfu Stances -- Horse-Riding, Bow-Arrow and False-Leg
Kungfu Stances -- Four-Six, Unicorn and Single-Leg/a>
Flexibility Exercises that also Enhance Internal Force
Importance of Body-movement and Footwork
Three Harmonies in Immortal Waves Sleeves
Chin-Na Techniques in Double Dragons and Push Boat
Grasping Sparrow's Tail
Short and Medium Range in Stationary Pushing Hands
Frontal Push in Mobile Pushing Hands
Rolling and Stepping Forward and Backward
Technical and Tactical Advantages
Neutralizing, Exploiting and Creating Advantages
Side Push from Left and from Right
Skills and Techniques in Pushing Hands
Picture-Perfect From and Sophisticated Skills
Moving to an Opponent's Back
Taijiquan Chin-Na Techniques and Counters
Progressing to Da Shou or Striking Hands
White Snake Shoots Venom and Various Counters
Striking Opponent's Top, Middle and Bottom Level
Why do We Use Poise Patterns at Start of Combat
Three Arrivals and Four Preparations
Important Lessons in Initiating an Attack and
in Responding to an Initial Attack
Third Class, Second Class and First Class Response
Using Genuine Taijiquan Techniques in Attack and Defence
Abridged Combat Sequence 1 -- Striking
 Themes for Combat Sequences
Abridged Combat Sequence 2 -- Kicking
Continuation from One Sequence to Another Sequence
Chasing after a Retreating Opponent
Carry Tiger Back to Mountain
Naughty Monkey Kicks at Tree
Abridged Combat Sequence 3 -- Felling
Eagle Claw in Taijiquan
Hiding Flowers in Sleeves
Abridged Combat Sequence 4 -- Chin-Na
The Four Attacks -- Striking, Kicking, Felling and Chin-Na
Old Eagle Catches Snake in Remembrance of Zhang San Feng
From Combat Sequences to Free Sparring