VIDEO-CLIPS-4i
The Internal Force Masters
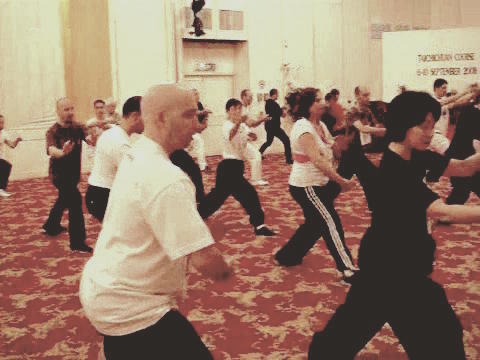
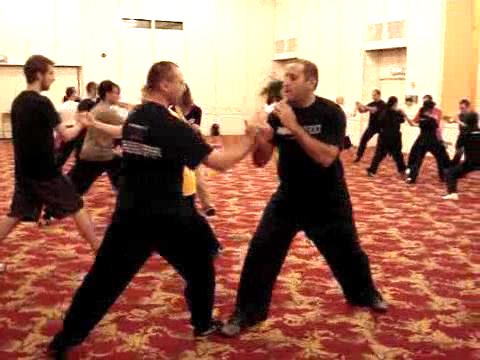
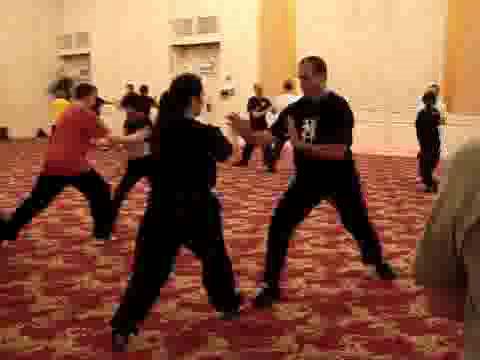
 Taijiquan 2008 -- Taijiquan 01
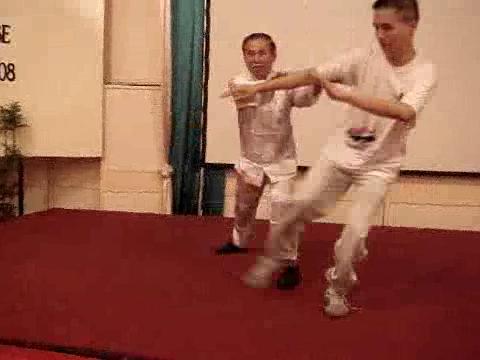
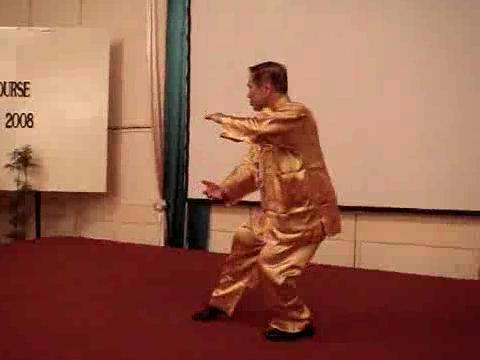
Secrets of the Internal Force Masters -- Overview
Taijiquan 2008 -- Taijiquan 01
Secrets of the Internal Force Masters -- OverviewThe Most Important Lessons in Wahnam Taijiquan -- Part 1
The Most Important Lessons in Wahnam Taijiquan -- Part 2
The Most Important Lessons in Wahnam Taijiquan -- Part 3
The Most Important Lessons in Wahnam Taijiquan -- Part 4
The Most Important Lessons in Wahnam Taijiquan -- Part 5
The Most Important Lessons in Wahnam Taijiquan -- Part 6
The Most Important Lessons in Wahnam Taijiquan -- Part 7
The Most Important Lessons in Wahnam Taijiquan -- Part 8
The Most Important Lessons in Wahnam Taijiquan -- Part 9
The Most Important Lessons in Wahnam Taijiquan -- Part 10
The Most Important Lessons in Wahnam Taijiquan -- Part 11
The Most Important Lessons in Wahnam Taijiquan -- Part 12
The Most Important Lessons in Wahnam Taijiquan -- Part 13
The Most Important Lessons in Wahnam Taijiquan -- Part 14
The Most Important Lessons in Wahnam Taijiquan -- Part 15
The Art of Flexibility -- Part 1
The Art of Flexibility -- Part 2
The Art of Flexibility -- Part 3
The Art of Flexibility -- Part 4
The Art of Flexibility -- Part 5
Reliving Taijiquan Footwork Principles of Past Masters -- Part 1
Reliving Taijiquan Footwork Principles of Past Masters -- Part 2
Reliving Taijiquan Footwork Principles of Past Masters -- Part 3
Reliving Taijiquan Footwork Principles of Past Masters -- Part 4
Reliving Taijiquan Footwork Principles of Past Masters -- Part 5
Reliving Taijiquan Footwork Principles of Past Masters -- Part 6
Reliving Taijiquan Footwork Principles of Past Masters -- Part 7
Reliving Taijiquan Footwork Principles of Past Masters -- Part 8
Reliving Taijiquan Footwork Principles of Past Masters -- Part 9
 Reliving Taijiquan Footwork Principles of Past
Masters -- Part 10
Reliving Taijiquan Footwork Principles of Past
Masters -- Part 11
Reliving Taijiquan Footwork Principles of Past
Masters -- Part 12
From Moving Slowly and Gracefully to Moving
Fast and Spontaneously -- Part 1
From Moving Slowly and Gracefully to Moving
Fast and Spontaneously -- Part 2
From Moving Slowly and Gracefully to Moving
Fast and Spontaneously -- Part 3
From Moving Slowly and Gracefully to Moving Fast and Spontaneously -- Part 4
From Moving Slowly and Gracefully to Moving Fast and Spontaneously -- Part 5
From Moving Slowly and Gracefully to Moving Fast and Spontaneously -- Part 6
From Moving Slowly and Gracefully to Moving Fast and Spontaneously -- Part 7
From Moving Slowly and Gracefully to Moving Fast and Spontaneously -- Part 8
From Moving Slowly and Gracefully to Moving Fast and Spontaneously -- Part 9
From Moving Slowly and Gracefully to Moving Fast and Spontaneously -- Part 10
From Moving Slowly and Gracefully to Moving Fast and Spontaneously -- Part 11
The is More in Changing Directions that What most People Think -- Part 1
The is More in Changing Directions that What most People Think -- Part 2
The is More in Changing Directions that What most People Think -- Part 3
The is More in Changing Directions that What most People Think -- Part 4
The is More in Changing Directions that What most People Think -- Part 5
The is More in Changing Directions that What most People Think -- Part 6
The is More in Changing Directions that What most People Think -- Part 7
The is More in Changing Directions that What most People Think -- Part 8
The is More in Changing Directions that What most People Think -- Part 9
The is More in Changing Directions that What most People Think -- Part 10
The is More in Changing Directions that What most People Think -- Part 11
The is More in Changing Directions that What most People Think -- Part 12
he is More in Changing Directions that What most People Think -- Part 13
The Most Important Lessons in WahnamTaijiquan -- Overview
The Art of Flexibility -- Overview
Reliving Taijiquan Footwork Principles of
Past Masters -- Overview
From Moving Slowly and Gracefully to Moving
Fast and Spontaneously -- Overview
The is More in Changing Directions that What
most People Think -- Overview
Taijiquan 2008 -- Taijiquan 02 The Importance of Waist Rotation in Taijiquan -- Part 1
The Importance of Waist Rotation in Taijiquan -- Part 2
The Importance of Waist Rotation in Taijiquan -- Part 3
The Importance of Waist Rotation in Taijiquan -- Part 4
The Importance of Waist Rotation in Taijiquan -- Part 5
The Importance of Waist Rotation in Taijiquan -- Part 6
The Importance of Waist Rotation in Taijiquan -- Part 7
The Importance of Waist Rotation in Taijiquan -- Part 8
The Importance of Waist Rotation in Taijiquan -- Part 9
The Importance of Waist Rotation in Taijiquan -- Part 10
Applying Waist Rotation to Realize using Minimum Force
against Maximum Strength -- Part 1
Applying Waist Rotation to Realize using Minimum Force
against Maximum Strength -- Part 2
From Tao to Cloud Hands to Grasping Sparrow's Tail -- Part 1
Applying Waist Rotation to Realize using Minimum Force
against Maximum Strength -- Part 3
Applying Waist Rotation to Realize using Minimum Force
against Maximum Strength -- Part 4
Applying Waist Rotation to Realize using Minimum Force
against Maximum Strength -- Part 5
Applying Waist Rotation to Realize using Minimum Force
against Maximum Strength -- Part 6
Applying Waist Rotation to Realize using Minimum Force
against Maximum Strength -- Part 7
Applying Waist Rotation to Realize using Minimum Force
against Maximum Strength -- Part 8
From Tao to Cloud Hands to Grasping Sparrow's Tail -- Part 2
 From Tao to Cloud Hands to Grasping Sparrow's Tail -- Part 3
From Tao to Cloud Hands to Grasping Sparrow's Tail -- Part 4
Solo Form Prractice is Not just to Please Spectators -- Part 1
From Tao to Cloud Hands to Grasping Sparrow's Tail -- Part 5
From Tao to Cloud Hands to Grasping Sparrow's Tail -- Part 6
From Tao to Cloud Hands to Grasping Sparrow's Tail -- Part 7
From Tao to Cloud Hands to Grasping Sparrow's Tail -- Part 8
Solo Form Prractice is Not just to Please Spectators -- Part 2
Solo Form Prractice is Not just to Please Spectators -- Part 3
From Tao to Cloud Hands to Grasping Sparrow's Tail -- Part 9
Solo Form Practice is Not just to Please Spectators -- Part 4
Solo Form Practice is Not just to Please Spectators -- Part 5
Solo Form Practice is Not just to Please Spectators -- Part 6
Solo Form Practice is Not just to Please Spectators -- Part 7
Solo Form Practice is Not just to Please Spectators -- Part 8
Solo Form Practice is Not just to Please Spectators -- Part 9
Developing Skills in Stationary Pushing Hands -- Part 1
Developing Skills in Stationary Pushing Hands -- Part 2
Developing Skills in Stationary Pushing Hands -- Part 3
Developing Skills in Stationary Pushing Hands -- Part 4
Developing Skills in Stationary Pushing Hands -- Part 5
Developing Skills in Stationary Pushing Hands -- Part 6
Developing Skills in Stationary Pushing Hands -- Part 7
Developing Skills in Stationary Pushing Hands -- Part 8
Developing Skills in Stationary Pushing Hands -- Part 9
The Six Harmonies of Hands, Body, Feet, Essence, Energy and Spirit -- Part 1
The Six Harmonies of Hands, Body, Feet, Essence, Energy and Spirit -- Part 2
The Six Harmonies of Hands, Body, Feet, Essence, Energy and Spirit -- Part 3
The Six Harmonies of Hands, Body, Feet, Essence, Energy and Spirit -- Part 4
The Six Harmonies of Hands, Body, Feet, Essence, Energy and Spirit -- Part 5
The Six Harmonies of Hands, Body, Feet, Essence, Energy and Spirit -- Part 6
 The Importance of Waist Rotation in Taijiquan -- Overview
Applying Waist Rotation to Realize using Minimum
Force against Maximum Strength -- Overview
From Tao to Cloud Hands to Grasping Sparrow's
Tail -- Overview
Solo Form Practice is Not just to Please Spectators
-- Overview
Developing Skills in Stationary Pushing Hands
-- Overview
The Six Harmonies of Hands, Body, Feet, Essence,
Energy and Spirit -- Overview
Taijiquan 2008 -- Taijiquan 03 Basic Principles and Safety Precautions in Pushing Hands -- Part 1
Basic Principles and Safety Precautions in Pushing Hands -- Part 2
Basic Principles and Safety Precautions in Pushing Hands -- Part 3
Basic Principles and Safety Precautions in Pushing Hands -- Part 4
Basic Principles and Safety Precautions in Pushing Hands -- Part 5
Basic Principles and Safety Precautions in Pushing Hands -- Part 6
Basic Principles and Safety Precautions in Pushing Hands -- Part 7
Basic Principles and Safety Precautions in Pushing Hands -- Part 8
Basic Principles and Safety Precautions in Pushing Hands -- Part 9
How to Have Leverage Advantage in Pushing Hands -- Part 1
How to Have Leverage Advantage in Pushing Handss -- Part 2
How to Have Leverage Advantage in Pushing Hands -- Part 3
How to Have Leverage Advantage in Pushing Hands -- Part 4
How to Have Leverage Advantage in Pushing Hands -- Part 5
How to Have Leverage Advantage in Pushing Hands -- Part 6
How to Have Leverage Advantage in Pushing Hands -- Part 7
How to Have Leverage Advantage in Pushing Hands -- Part 8
The Standard Mode and the Advanced Mode of Rolling Back -- Part 1
The Standard Mode and the Advanced Mode of Rolling Back -- Part 2
The Standard Mode and the Advanced Mode of Rolling Back -- Part 3
 The Standard Mode and the Advanced Mode of
Rolling Back -- Part 4
The Standard Mode and the Advanced Mode of
Rolling Back -- Part 5
The Standard Mode and the Advanced Mode of
Rolling Back -- Part 6
The Standard Mode and the Advanced Mode of
Rolling Back -- Part 7
The Standard Mode and the Advanced Mode of
Rolling Back -- Part 8
Age, Size and Sex are not Decisive Factors in
Pushing Hands -- Part 1
Age, Size and Sex are not Decisive Factors in Pushing Hands -- Part 2
Age, Size and Sex are not Decisive Factors in Pushing Hands -- Part 3
Age, Size and Sex are not Decisive Factors in Pushing Hands -- Part 4
Age, Size and Sex are not Decisive Factors in Pushing Hands -- Part 5
Age, Size and Sex are not Decisive Factors in Pushing Hands -- Part 6
Ensure your Safety First when you Push or Execute any Attack -- Part 1
Ensure your Safety First when you Push or Execute any Attack -- Part 2
Ensure your Safety First when you Push or Execute any Attack -- Part 3
Ensure your Safety First when you Push or Execute any Attack -- Part 4
Ensure your Safety First when you Push or Execute any Attack -- Part 5
Ensure your Safety First when you Push or Execute any Attack -- Part 6
Ensure your Safety First when you Push or Execute any Attack -- Part 7
Ensure your Safety First when you Push or Execute any Attack -- Part 8
Ensure your Safety First when you Push or Execute any Attack -- Part 9
Ensure your Safety First when you Push or Execute any Attack -- Part 10
Ensure your Safety First when you Push or Execute any Attack -- Part 11
Ensure your Safety First when you Push or Execute any Attack -- Part 12
Ensure your Safety First when you Push or Execute any Attack -- Part 13
Gaining a Tactical Advantage by Maneuvering your Opponent to Use an
Unfavoured Hand or Leg Mode -- Part 1
Gaining a Tactical Advantage by Maneuvering your Opponent to Use an
Unfavoured Hand or Leg Mode -- Part 2
Gaining a Tactical Advantage by Maneuvering your Opponent to Use an
Unfavoured Hand or Leg Mode -- Part 3
Gaining a Tactical Advantage by Maneuvering your Opponent to Use an
Unfavoured Hand or Leg Mode -- Part 4
Gaining a Tactical Advantage by Maneuvering your Opponent to Use an
Unfavoured Hand or Leg Mode -- Part 5
Gaining a Tactical Advantage by Maneuvering your Opponent to Use an
Unfavoured Hand or Leg Mode -- Part 6
 Gaining a Tactical Advantage by Maneuvering your
Opponent to Use an Unfavoured Hand or Leg Mode -- Part 7
Gaining a Tactical Advantage by Maneuvering your
Opponent to Use an Unfavoured Hand or Leg Mode -- Part 8
Gaining a Tactical Advantage by Maneuvering your
Opponent to Use an Unfavoured Hand or Leg Mode -- Part 9
Gaining a Tactical Advantage by Maneuvering your
Opponent to Use an Unfavoured Hand or Leg Mode -- Part 10
Gaining a Tactical Advantage by Pushing or
Attacking your Opponent from a Side -- Part 1
Gaining a Tactical Advantage by Pushing or
Attacking your Opponent from a Side -- Part 2
Gaining a Tactical Advantage by Pushing or Attacking your Opponent from a Side -- Part 3
Gaining a Tactical Advantage by Pushing or Attacking your Opponent from a Side -- Part 4
Gaining a Tactical Advantage by Pushing or Attacking your Opponent from a Side -- Part 5
Gaining a Tactical Advantage by Pushing or Attacking your Opponent from a Side -- Part 6
Gaining a Tactical Advantage by Pushing or Attacking your Opponent from a Side -- Part 7
Gaining a Tactical Advantage by Pushing or Attacking your Opponent from a Side -- Part 8
Gaining a Tactical Advantage by Pushing or Attacking your Opponent from a Side -- Part 9
You can Enjoy Pushing or Being Pushed Around Irrespective of Age, Sex and Size -- Part 1
You can Enjoy Pushing or Being Pushed Around Irrespective of Age, Sex and Size -- Part 2
You can Enjoy Pushing or Being Pushed Around Irrespective of Age, Sex and Size -- Part 3
You can Enjoy Pushing or Being Pushed Around Irrespective of Age, Sex and Size -- Part 4
You can Enjoy Pushing or Being Pushed Around Irrespective of Age, Sex and Size -- Part 5
You can Enjoy Pushing or Being Pushed Around Irrespective of Age, Sex and Size -- Part 6
You can Enjoy Pushing or Being Pushed Around Irrespective of Age, Sex and Size -- Part 7
You can Enjoy Pushing or Being Pushed Around Irrespective of Age, Sex and Size -- Part 8
You can Enjoy Pushing or Being Pushed Around Irrespective of Age, Sex and Size -- Part 9
You can Enjoy Pushing or Being Pushed Around Irrespective of Age, Sex and Size -- Part 10
You can Enjoy Pushing or Being Pushed Around Irrespective of Age, Sex and Size -- Part 11
You can Enjoy Pushing or Being Pushed Around Irrespective of Age, Sex and Size -- Part 12
Defence against the Right and the Left Push -- Part 1
Defence against the Right and the Left Push -- Part 2
Defence against the Right and the Left Push -- Part 3
Defence against the Right and the Left Push -- Part 4
Defence against the Right and the Left Push -- Part 5
 Defence against the Right and the Left Push -- Part 6
Defence against the Right and the Left Push -- Part 7
Defence against the Right and the Left Push -- Part 8
Defence against the Right and the Left Push -- Part 9
Defence against the Right and the Left Push -- Part 10
Defence against the Right and the Left Push -- Part 11
Defence against the Right and the Left Push -- Part 12
Defence against the Right and the Left Push -- Part 13
How to Get to your Opponent's Nack and How to
Neuralize It -- Part 1
How to Get to your Opponent's Nack and How to
Neuralize It -- Part 2
How to Get to your Opponent's Nack and How to Neuralize It -- Part 3
How to Get to your Opponent's Nack and How to Neuralize It -- Part 4
How to Get to your Opponent's Nack and How to Neuralize It -- Part 5
How to Get to your Opponent's Nack and How to Neuralize It -- Part 6
How to Get to your Opponent's Nack and How to Neuralize It -- Part 7
How to Get to your Opponent's Nack and How to Neuralize It -- Part 8
How to Get to your Opponent's Nack and How to Neuralize It -- Part 9
How to Get to your Opponent's Nack and How to Neuralize It -- Part 10
How to Get to your Opponent's Nack and How to Neuralize It -- Part 11
How to Get to your Opponent's Nack and How to Neuralize It -- Part 12
The Proactive Tactics lof Continuous Attacks and Confusing Attacks -- Part 1
The Proactive Tactics lof Continuous Attacks and Confusing Attacks -- Part 2
The Proactive Tactics lof Continuous Attacks and Confusing Attacks -- Part 3
The Proactive Tactics lof Continuous Attacks and Confusing Attacks -- Part 4
The Proactive Tactics lof Continuous Attacks and Confusing Attacks -- Part 5
The Proactive Tactics lof Continuous Attacks and Confusing Attacks -- Part 6
The Proactive Tactics lof Continuous Attacks and Confusing Attacks -- Part 7
The Proactive Tactics lof Continuous Attacks and Confusing Attacks -- Part 8
The Proactive Tactics lof Continuous Attacks and Confusing Attacks -- Part 9
The Proactive Tactics lof Continuous Attacks and Confusing Attacks -- Part 10
 The Reactive Tactics of Immediate Counter and
Interception -- Part 1
The Reactive Tactics of Immediate Counter and
Interception -- Part 2
The Reactive Tactics of Immediate Counter and
Interception -- Part 3
The Reactive Tactics of Immediate Counter and
Interception -- Part 4
The Reactive Tactics of Immediate Counter and
Interception -- Part 5
The Reactive Tactics of Immediate Counter and
Interception -- Part 6
The Reactive Tactics of Immediate Counter and Interception -- Part 7
The Reactive Tactics of Immediate Counter and Interception -- Part 8
The Reactive Tactics of Immediate Counter and Interception -- Part 9
The Reactive Tactics of Immediate Counter and Interception -- Part 10
The Reactive Tactics of Immediate Counter and Interception -- Part 11
The Reactive Tactics of Immediate Counter and Interception -- Part 12
The Reactive Tactics of Immediate Counter and Interception -- Part 13
The Reactive Tactics of Immediate Counter and Interception -- Part 14
Pushing Hands brings many Benefits and is a Lot of Fun -- Part 1
Pushing Hands brings many Benefits and is a Lot of Fun -- Part 2
Pushing Hands brings many Benefits and is a Lot of Fun -- Part 3
Pushing Hands brings many Benefits and is a Lot of Fun -- Part 4
Pushing Hands brings many Benefits and is a Lot of Fun -- Part 5
Pushing Hands brings many Benefits and is a Lot of Fun -- Part 6
Pushing Hands brings many Benefits and is a Lot of Fun -- Part 7
Basic Principles and Safety Precautions in Pushing Hands -- Overview
How to Have Leverage Advantage in Pushing Hands -- Overview
The Standard Mode and the Advanced Mode of Rolling Back -- Overview
Age, Size and Sex are not Decisive Factors in Pushing Hands -- Overview
Ensure your Safety First when you Push or Execute any Attack -- Overview
Gaining a Tactical Advantage by Maneuvering your Opponent to
Use an Unfavoured Hand or Leg Mode -- Overview
 Gaining a Tactical Advantage by Pushing or Attacking
your Opponent from a Side -- Overview
You can Enjoy Pushing or Being Pushed Around Irrespective
of Age, Sex and Size -- Overview
Defence against the Right and the Left Push -- Overview
How to Get to your Opponent's Nack and How to Neuralize
It -- Overview
The Proactive Tactics lof Continuous Attacks and
Confusing Attacks -- Overview
The Reactive Tactics of Immediate Counter and
Interception -- Overview
Pushing Hands brings many Benefits and is a
Lot of Fun -- Overview