VIDEO CLIPS 6g
Taijiquan in Portugal 2010 (Cont)
 Taijiquan in Portugal 2010 -- Taijiquan 02
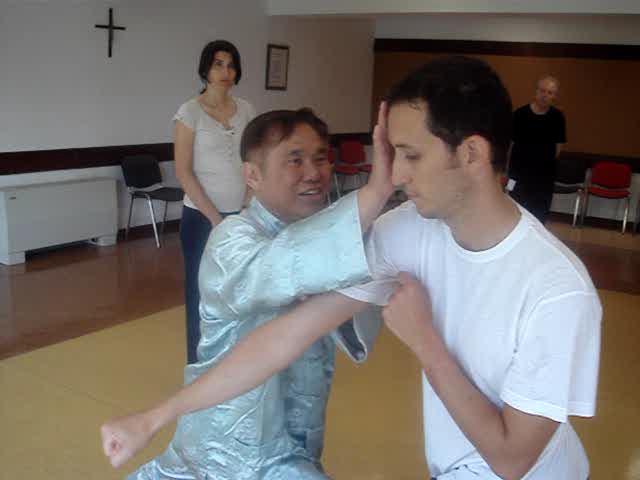
Lifting Water and Internal Force -- Part 1
Taijiquan in Portugal 2010 -- Taijiquan 02
Lifting Water and Internal Force -- Part 1Lifting Water and Internal Force -- Part 2
Lifting Water and Internal Force -- Part 3
Lifting Water and Internal Force -- Part 4
Lifting Water and Internal Force -- Part 5
Lifting Water and Internal Force -- Part 6
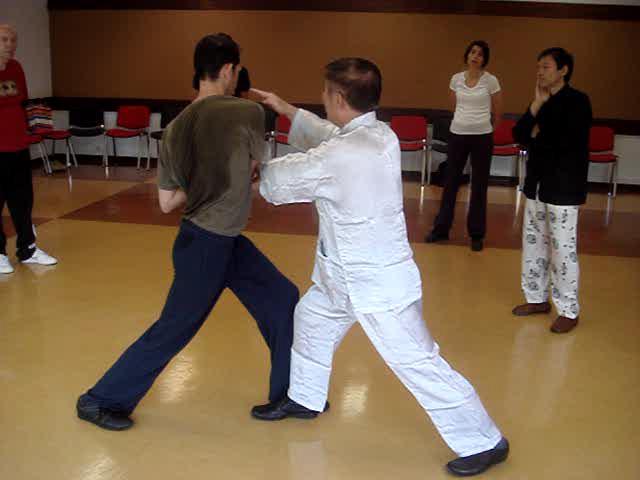
Using Guard-Hand against a Boxer's Jabs and Crosses -- Part 1
Using Guard-Hand against a Boxer's Jabs and Crosses -- Part 2
Using Guard-Hand against a Boxer's Jabs and Crosses -- Part 3
Using Guard-Hand against a Boxer's Jabs and Crosses -- Part 4
Using Guard-Hand against a Boxer's Jabs and Crosses -- Part 5
Using Guard-Hand against a Boxer's Jabs and Crosses -- Part 6
Using Guard-Hand against a Boxer's Jabs and Crosses -- Part 7
Using Guard-Hand against a Boxer's Jabs and Crosses -- Part 8
Overcoming a Boxer's Speed by Using Body-Movement -- Part 1
Overcoming a Boxer's Speed by Using Body-Movement -- Part 2
Overcoming a Boxer's Speed by Using Body-Movement -- Part 3
Overcoming a Boxer's Speed by Using Body-Movement -- Part 4
Overcoming a Boxer's Speed by Using Body-Movement -- Part 5
Overcoming a Boxer's Speed by Using Body-Movement -- Part 6
Overcoming a Boxer's Speed by Using Body-Movement -- Part 7
Overcoming a Boxer's Speed by Using Body-Movement -- Part 8
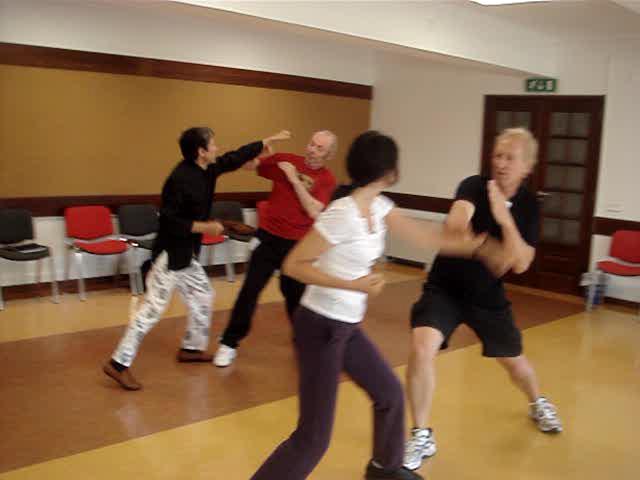
Flowing with Opponent's Momentum -- Part 1
Flowing with Opponent's Momentum -- Part 2
Flowing with Opponent's Momentum -- Part 3
Flowing with Opponent's Momentum -- Part 4
Flowing with Opponent's Momentum -- Part 5
Flowing with Opponent's Momentum -- Part 6
Flowing with Opponent's Momentum -- Part 7
Flowing with Opponent's Momentum -- Part 8
 Flowing with Opponent's Momentum -- Part 9
Flowing with Opponent's Momentum -- Part 10
Having Reach and Element of Threat in Attacks -- Part 1
Having Reach and Element of Threat in Attacks -- Part 2
Having Reach and Element of Threat in Attacks -- Part 3
Having Reach and Element of Threat in Attacks -- Part 4
Having Reach and Element of Threat in Attacks -- Part 5
Having Reach and Element of Threat in Attacks -- Part 6
Having Reach and Element of Threat in Attacks -- Part 7
Having Reach and Element of Threat in Attacks -- Part 8
Having Reach and Element of Threat in Attacks -- Part 9
Outside-In and Inside-Out Approach -- Part 1
Outside-In and Inside-Out Approach -- Part 2
Outside-In and Inside-Out Approach -- Part 3
Outside-In and Inside-Out Approach -- Part 4
Outside-In and Inside-Out Approach -- Part 5
Outside-In and Inside-Out Approach -- Part 6
Outside-In and Inside-Out Approach -- Part 7
Outside-In and Inside-Out Approach -- Part 8
Outside-In and Inside-Out Approach -- Part 9
Outside-In and Inside-Out Approach -- Part 10
Being Safe from Boxers' Jabs and Crosses -- Part 1
Being Safe from Boxers' Jabs and Crosses -- Part 2
Being Safe from Boxers' Jabs and Crosses -- Part 3
Being Safe from Boxers' Jabs and Crosses -- Part 4
Being Safe from Boxers' Jabs and Crosses -- Part 5
Being Safe from Boxers' Jabs and Crosses -- Part 6
Being Safe from Boxers' Jabs and Crosses -- Part 7
Being Safe from Boxers' Jabs and Crosses -- Part 8
Being Safe from Boxers' Jabs and Crosses -- Part 9
 How to Deal with a Boxer Bouncing Around -- Part 1
How to Deal with a Boxer Bouncing Around -- Part 2
How to Deal with a Boxer Bouncing Around -- Part 3
How to Deal with a Boxer Bouncing Around -- Part 4
How to Deal with a Boxer Bouncing Around -- Part 5
How to Deal with a Boxer Bouncing Around -- Part 6
How to Deal with a Boxer Bouncing Around -- Part 7
How to Deal with a Boxer Bouncing Around -- Part 8
How to Deal with a Boxer Bouncing Around -- Part 9
How to Deal with a Boxer Bouncing Around -- Part 10
How to Deal with a Boxer Bouncing Around -- Part 11
The Tactic of Cover and Strike -- Part 1
The Tactic of Cover and Strike -- Part 2
The Tactic of Cover and Strike -- Part 3
The Tactic of Cover and Strike -- Part 4
The Tactic of Cover and Strike -- Part 5
The Tactic of Cover and Strike -- Part 6
The Tactic of Cover and Strike -- Part 7
The Tactic of Cover and Strike -- Part 8
The Tactic of Cover and Strike -- Part 9
The Tactic of Cover and Strike -- Part 10
The Tactic of Cover and Strike -- Part 11
Covering and Striking with Leopard Fist -- Part 1
Covering and Striking with Leopard Fist -- Part 2
Covering and Striking with Leopard Fist -- Part 3
Covering and Striking with Leopard Fist -- Part 4
Covering and Striking with Leopard Fist -- Part 5
Covering and Striking with Leopard Fist -- Part 6
Covering and Striking with Leopard Fist -- Part 7
Covering and Striking with Leopard Fist -- Part 8
 Covering and Striking with Leopard Fist -- Part 9
Covering and Striking with Leopard Fist -- Part 10
Covering and Striking with Leopard Fist -- Part 11
Covering and Striking with Leopard Fist -- Part 12
Progressing from Point 3 to Point 2 in
Pre-Arranged Sparring -- Part 1
Progressing from Point 3 to Point 2 in
Pre-Arranged Sparring -- Part 2
Progressing from Point 3 to Point 2 in
Pre-Arranged Sparring -- Part 3
Progressing from Point 3 to Point 2 in
Pre-Arranged Sparring -- Part 4
Progressing from Point 3 to Point 2 in Pre-Arranged Sparring -- Part 5
Progressing from Point 3 to Point 2 in Pre-Arranged Sparring -- Part 6
Progressing from Point 3 to Point 2 in Pre-Arranged Sparring -- Part 7
Progressing from Point 3 to Point 2 in Pre-Arranged Sparring -- Part 8
Progressing from Point 3 to Point 2 in Pre-Arranged Sparring -- Part 9
Progressing from Point 3 to Point 2 in Pre-Arranged Sparring -- Part 10
Progressing from Point 3 to Point 2 in Pre-Arranged Sparring -- Part 11
From Pre-Arranged to Conditional Free Sparring using Jabs and Crosses -- Part 1
From Pre-Arranged to Conditional Free Sparring using Jabs and Crosses -- Part 2
From Pre-Arranged to Conditional Free Sparring using Jabs and Crosses -- Part 3
From Pre-Arranged to Conditional Free Sparring using Jabs and Crosses -- Part 4
From Pre-Arranged to Conditional Free Sparring using Jabs and Crosses -- Part 5
From Pre-Arranged to Conditional Free Sparring using Jabs and Crosses -- Part 6
From Pre-Arranged to Conditional Free Sparring using Jabs and Crosses -- Part 7
From Pre-Arranged to Conditional Free Sparring using Jabs and Crosses -- Part 8
From Pre-Arranged to Conditional Free Sparring using Jabs and Crosses -- Part 9
From Pre-Arranged to Conditional Free Sparring using Jabs and Crosses -- Part 10
From Pre-Arranged to Conditional Free Sparring using Jabs and Crosses -- Part 11
 Lifting Water and Internal Force -- Overview
Using Guard-Hand against a Boxer's Jabs and
Crosses -- Overview
Overcoming a Boxer's Speed by Using
Body-Movement -- Overview
Flowing with an Opponent's Momentum -- Overview
Having Reach and Element of Threat in Attacks
-- Overview
Outside-In or Inside-Out Approach -- Overview
Being Safe from Boxers' Jabs and Crosses -- Overview
How to Deal with a Boxer Bouncing Around -- Overview
The Tactic of Cover and Strike -- Overview
Covering and Striking with Leopard Fist -- Overview
Progressing from Point 3 to Point 2 in Pre-Arranged Sparring -- Overview
From Pre-Arranged to Conditional Free Sparring using Jabs and Crosses -- Overview
Taijiquan in Portugal 2010 -- Taijiquan 03 Beware of a Boxer's Hooks -- Part 1
Beware of a Boxer's Hooks -- Part 2
Beware of a Boxer's Hooks -- Part 3
Beware of a Boxer's Hooks -- Part 4
Beware of a Boxer's Hooks -- Part 5
Beware of a Boxer's Hooks -- Part 6
Beware of a Boxer's Hooks -- Part 7
Beware of a Boxer's Hooks -- Part 8
Beware of a Boxer's Hooks -- Part 9
Effective Use of Body-Movement -- Part 1
Effective Use of Body-Movement -- Part 2
Effective Use of Body-Movement -- Part 3
Effective Use of Body-Movement -- Part 4
Effective Use of Body-Movement -- Part 5
Effective Use of Body-Movement -- Part 6
Effective Use of Body-Movement -- Part 7
Effective Use of Body-Movement -- Part 8
Countering Hooks and Continuous Strikes -- Part 1
Countering Hooks and Continuous Strikes -- Part 2
Countering Hooks and Continuous Strikes -- Part 3
 Countering Hooks and Continuous Strikes -- Part 4
Countering Hooks and Continuous Strikes -- Part 5
Countering Hooks and Continuous Strikes -- Part 6
Countering Hooks and Continuous Strikes -- Part 7
Countering Hooks and Continuous Strikes -- Part 8
Giving Boxers a Fair Chance -- Part 1
Giving Boxers a Fair Chance -- Part 2
Giving Boxers a Fair Chance -- Part 3
Giving Boxers a Fair Chance -- Part 4
Giving Boxers a Fair Chance -- Part 5
Giving Boxers a Fair Chance -- Part 6
Giving Boxers a Fair Chance -- Part 7
Giving Boxers a Fair Chance -- Part 8
Locking a Boxer's Both Arms -- Part 1
Locking a Boxer's Both Arms -- Part 2
Locking a Boxer's Both Arms -- Part 3
Locking a Boxer's Both Arms -- Part 4
Locking a Boxer's Both Arms -- Part 5
Locking a Boxer's Both Arms -- Part 6
Locking a Boxer's Both Arms -- Part 7
Locking a Boxer's Both Arms -- Part 8
Chasing after a Boxer -- Part 1
Chasing after a Boxer -- Part 2
Chasing after a Boxer -- Part 3
Chasing after a Boxer -- Part 4
Chasing after a Boxer -- Part 5
Chasing after a Boxer -- Part 6
Chasing after a Boxer -- Part 7
Chasing after a Boxer -- Part 8
Stepping on a Boxer or Felling him onto the Ground -- Part 1
Stepping on a Boxer or Felling him onto the Ground -- Part 2Stepping on a Boxer or Felling him onto the Ground -- Part 3
Stepping on a Boxer or Felling him onto the Ground -- Part 4
Stepping on a Boxer or Felling him onto the Ground -- Part 5
Stepping on a Boxer or Felling him onto the Ground -- Part 6
Stepping on a Boxer or Felling him onto the Ground -- Part 7
Stepping on a Boxer or Felling him onto the Ground -- Part 8
Stepping on a Boxer or Felling him onto the Ground -- Part 9
Stepping on a Boxer or Felling him onto the Ground -- Part 10
Stepping on a Boxer or Felling him onto the Ground -- Part 11
Stepping on a Boxer or Felling him onto the Ground -- Part 12
Stepping on a Boxer or Felling him onto the Ground -- Part 13
White Monkey against Boxer's Undercuts -- Part 1
White Monkey against Boxer's Undercuts -- Part 2
White Monkey against Boxer's Undercuts -- Part 3
White Monkey against Boxer's Undercuts -- Part 4
White Monkey against Boxer's Undercuts -- Part 5
White Monkey against Boxer's Undercuts -- Part 6
White Monkey against Boxer's Undercuts -- Part 7
White Monkey against Boxer's Undercuts -- Part 8
White Monkey against Boxer's Undercuts -- Part 9
White Monkey against Boxer's Undercuts -- Part 10
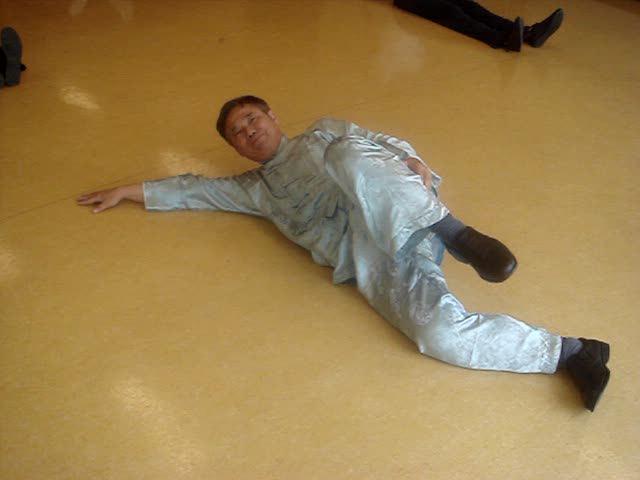
How to Fall Safely -- Part 1
How to Fall Safely -- Part 2
How to Fall Safely -- Part 3
How to Fall Safely -- Part 4
How to Fall Safely -- Part 5
How to Fall Safely -- Part 6
How to Fall Safely -- Part 7
How to Fall Safely -- Part 8
 How to Fall Safely -- Part 9
Don't Expose Groin with Opponent on Ground -- Part 1
Don't Expose Groin with Opponent on Ground -- Part 2
Don't Expose Groin with Opponent on Ground -- Part 3
Don't Expose Groin with Opponent on Ground -- Part 4
Don't Expose Groin with Opponent on Ground -- Part 5
Don't Expose Groin with Opponent on Ground -- Part 6
Don't Expose Groin with Opponent on Ground -- Part 7
Don't Expose Groin with Opponent on Ground -- Part 8
Beware of a Boxer's Hooks -- Overview
Effective Use of Body-Movement -- Overview
Countering Hooks and Continuous Strikes -- Overview
Giving Boxers a Fair Chance -- Overview
Locking a Boxer's Both Arms -- Overview
Chasing after a Boxer -- Overview
Stepping on a Boxer or Felling him onto the Ground -- Overview
White Monkey against Boxer's Undercuts -- Overview
How to Fall Safely -- Overview
Don't Expose Groin with Opponent on Ground -- Overview