VIDEO-CLIPS-4g
Taiji Sabre, Taiji Staff, Taijiquan 2009
 Taiji Sabre
Pattern Names of Taiji Sabre -- Overview
Taiji Sabre
Pattern Names of Taiji Sabre -- OverviewCombat Application of Taiji Sabre
Taiji Sabre
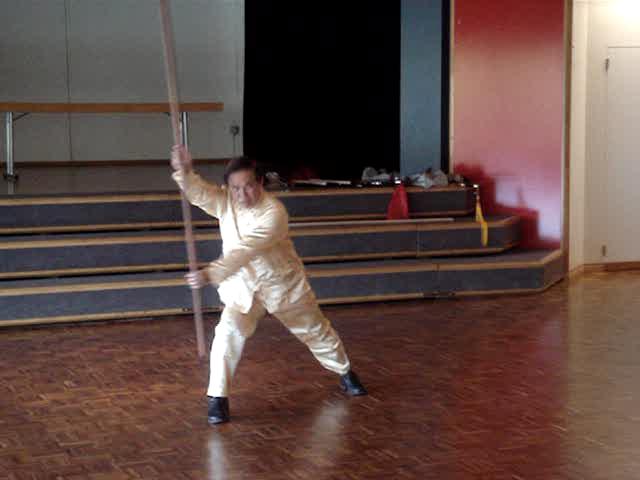
Taiji Staff Pattern Names of Taiji Staff -- Overview
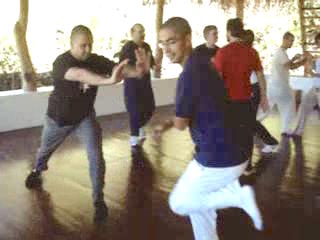
Combat Application of Taiji Staff
Taiji Staff
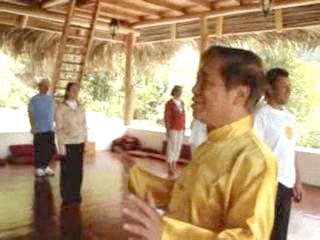
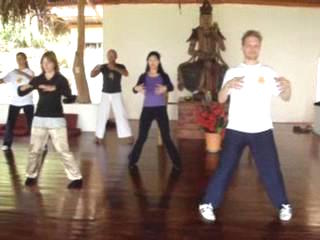
Taijiquan Blue Mountain -- Taijiquan 01 Taijiquan on the Blue Mountain 2009 -- Overview
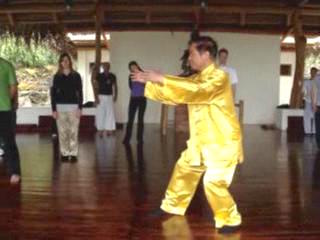
Taiji Originates from Wuji and Returns to Wuji -- Overview
Philosophy and Methodology of Stance Training -- Overview
Experiencing the Subtle Joys of the Three-Circle Stance -- Overview
The Horse-Riding, the Bow-Arrow and the False-Leg -- Overview
The Four-Six, the Unicorn and the Single-Leg -- Overview
Flexibility Exercises that also Enhance your Internal Force -- Overview
Taiji Originates from Wuji and Returns to Wuji -- Part 1
Taiji Originates from Wuji and Returns to Wuji -- Part 2
Taiji Originates from Wuji and Returns to Wuji -- Part 3
Taiji Originates from Wuji and Returns to Wuji -- Part 4
Taiji Originates from Wuji and Returns to Wuji -- Part 5
Taiji Originates from Wuji and Returns to Wuji -- Part 6
Taiji Originates from Wuji and Returns to Wuji -- Part 7
Taiji Originates from Wuji and Returns to Wuji -- Part 8
Philosophy and Methodology of Stance Training -- Part 1
Philosophy and Methodology of Stance Training -- Part 2
Philosophy and Methodology of Stance Training -- Part 3
Philosophy and Methodology of Stance Training -- Part 4
Philosophy and Methodology of Stance Training -- Part 5
 Philosophy and Methodology of Stance Training -- Part 6
Philosophy and Methodology of Stance Training -- Part 7
Philosophy and Methodology of Stance Training -- Part 8
Experiencing the Subtle Joys of the Three-Circle
Stance -- Part 1
Experiencing the Subtle Joys of the Three-Circle
Stance -- Part 2
Experiencing the Subtle Joys of the Three-Circle
Stance -- Part 3
Experiencing the Subtle Joys of the Three-Circle
Stance -- Part 4
Experiencing the Subtle Joys of the Three-Circle Stance -- Part 5
Experiencing the Subtle Joys of the Three-Circle Stance -- Part 6
Experiencing the Subtle Joys of the Three-Circle Stance -- Part 7
Experiencing the Subtle Joys of the Three-Circle Stance -- Part 8
Experiencing the Subtle Joys of the Three-Circle Stance -- Part 9
The Horse-Riding, the Bow-Arrow and the False-Leg -- Part 1
The Horse-Riding, the Bow-Arrow and the False-Leg -- Part 2
The Horse-Riding, the Bow-Arrow and the False-Leg -- Part 3
The Horse-Riding, the Bow-Arrow and the False-Leg -- Part 4
The Horse-Riding, the Bow-Arrow and the False-Leg -- Part 5
The Horse-Riding, the Bow-Arrow and the False-Leg -- Part 6
The Horse-Riding, the Bow-Arrow and the False-Leg -- Part 7
The Horse-Riding, the Bow-Arrow and the False-Leg -- Part 8
The Horse-Riding, the Bow-Arrow and the False-Leg -- Part 9
The Horse-Riding, the Bow-Arrow and the False-Leg -- Part 10
The Horse-Riding, the Bow-Arrow and the False-Leg -- Part 11
The Horse-Riding, the Bow-Arrow and the False-Leg -- Part 12
The Horse-Riding, the Bow-Arrow and the False-Leg -- Part 13
The Horse-Riding, the Bow-Arrow and the False-Leg -- Part 14
The Four-Six, the Unicorn and the Single-Leg -- Part 1
The Four-Six, the Unicorn and the Single-Leg -- Part 2
The Four-Six, the Unicorn and the Single-Leg -- Part 3
The Four-Six, the Unicorn and the Single-Leg -- Part 4
The Four-Six, the Unicorn and the Single-Leg -- Part 5The Four-Six, the Unicorn and the Single-Leg -- Part 6
The Four-Six, the Unicorn and the Single-Leg -- Part 7
The Four-Six, the Unicorn and the Single-Leg -- Part 8
The Four-Six, the Unicorn and the Single-Leg -- Part 9
The Four-Six, the Unicorn and the Single-Leg -- Part 10
Flexibility Exercises that also Enhance your Internal
Force -- Part 1
Flexibility Exercises that also Enhance your Internal
Force -- Part 2
Flexibility Exercises that also Enhance your Internal
Force -- Part 3
Flexibility Exercises that also Enhance your Internal Force -- Part 4
Flexibility Exercises that also Enhance your Internal Force -- Part 5
Flexibility Exercises that also Enhance your Internal Force -- Part 6
Flexibility Exercises that also Enhance your Internal Force -- Part 7
Taijiquan Blue Mountain -- Taijiquan 02 Importance of Body-Movement and Footwork -- Overview
Three Harmoines in Immortal Waves Sleeves -- Overview
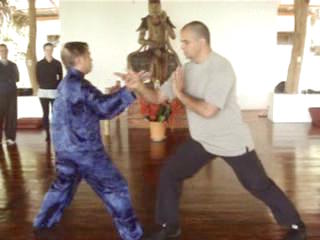
Chin-Na Patterns in Double Dragons and Pushing Boat -- Overview
Grasping Sparrow's Tail -- Overview
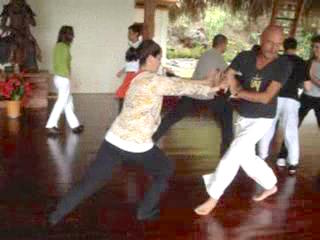
Short and Medium Range in Stationary Pushing Hands -- Overview
The Frontal Push in Mobile Pushing Hands -- Overview
Importance of Body-Movement and Footwork -- Part 1
Importance of Body-Movement and Footwork -- Part 2
Importance of Body-Movement and Footwork -- Part 3
Importance of Body-Movement and Footwork -- Part 4
Importance of Body-Movement and Footwork -- Part 5
Importance of Body-Movement and Footwork -- Part 6
Importance of Body-Movement and Footwork -- Part 7
Importance of Body-Movement and Footwork -- Part 8
Importance of Body-Movement and Footwork -- Part 9
Importance of Body-Movement and Footwork -- Part 10
Importance of Body-Movement and Footwork -- Part 11
Importance of Body-Movement and Footwork -- Part 12
Importance of Body-Movement and Footwork -- Part 13
Three Harmonies in Immortal Waves Sleeves -- Part 1
 Three Harmonies in Immortal Waves Sleeves -- Part 2
Three Harmonies in Immortal Waves Sleeves -- Part 3
Three Harmonies in Immortal Waves Sleeves -- Part 4
Three Harmonies in Immortal Waves Sleeves -- Part 5
Three Harmonies in Immortal Waves Sleeves -- Part 6
Three Harmonies in Immortal Waves Sleeves -- Part 7
Three Harmonies in Immortal Waves Sleeves -- Part 8
Three Harmonies in Immortal Waves Sleeves -- Part 9
Three Harmonies in Immortal Waves Sleeves -- Part 10
Chin-Na Patterns in Double Dragons and
Pushing Boat -- Part 1
Chin-Na Patterns in Double Dragons and Pushing Boat -- Part 2
Chin-Na Patterns in Double Dragons and Pushing Boat -- Part 3
Chin-Na Patterns in Double Dragons and Pushing Boat -- Part 4
Chin-Na Patterns in Double Dragons and Pushing Boat -- Part 5
Chin-Na Patterns in Double Dragons and Pushing Boat -- Part 6
Chin-Na Patterns in Double Dragons and Pushing Boat -- Part 7
Chin-Na Patterns in Double Dragons and Pushing Boat -- Part 8
Chin-Na Patterns in Double Dragons and Pushing Boat -- Part 9
Chin-Na Patterns in Double Dragons and Pushing Boat -- Part 10
Chin-Na Patterns in Double Dragons and Pushing Boat -- Part 11
Chin-Na Patterns in Double Dragons and Pushing Boat -- Part 12
Chin-Na Patterns in Double Dragons and Pushing Boat -- Part 13
Chin-Na Patterns in Double Dragons and Pushing Boat -- Part 14
Grasping Sparrow's Tail -- Part 1
Grasping Sparrow's Tail -- Part 2
Grasping Sparrow's Tail -- Part 3
Grasping Sparrow's Tail -- Part 4
Grasping Sparrow's Tail -- Part 5
Grasping Sparrow's Tail -- Part 6
Grasping Sparrow's Tail -- Part 7
 Grasping Sparrow's Tail -- Part 8
Grasping Sparrow's Tail -- Part 9
Grasping Sparrow's Tail -- Part 10
Grasping Sparrow's Tail -- Part 12
Grasping Sparrow's Tail -- Part 12
Grasping Sparrow's Tail -- Part 13
Short and Medium Range in Stationary Pushing
Hands -- Part 1
Short and Medium Range in Stationary Pushing
Hands -- Part 2
Short and Medium Range in Stationary Pushing
Hands -- Part 3
Short and Medium Range in Stationary Pushing
Hands -- Part 4
Short and Medium Range in Stationary Pushing Hands -- Part 5
Short and Medium Range in Stationary Pushing Hands -- Part 6
Short and Medium Range in Stationary Pushing Hands -- Part 7
Short and Medium Range in Stationary Pushing Hands -- Part 8
Short and Medium Range in Stationary Pushing Hands -- Part 9
The Frontal Push in Mobile Pushing Hands -- Part 1
The Frontal Push in Mobile Pushing Hands -- Part 2
The Frontal Push in Mobile Pushing Hands -- Part 3
The Frontal Push in Mobile Pushing Hands -- Part 4
The Frontal Push in Mobile Pushing Hands -- Part 5
The Frontal Push in Mobile Pushing Hands -- Part 6
The Frontal Push in Mobile Pushing Hands -- Part 7
The Frontal Push in Mobile Pushing Hands -- Part 8
The Frontal Push in Mobile Pushing Hands -- Part 9
The Frontal Push in Mobile Pushing Hands -- Part 10
The Frontal Push in Mobile Pushing Hands -- Part 11
The Frontal Push in Mobile Pushing Hands -- Part 12
 Taijiquan Blue Mountain -- Taijiquan 03
Rolling and Stepping Forward and Backward -- Overview
Taijiquan Blue Mountain -- Taijiquan 03
Rolling and Stepping Forward and Backward -- OverviewTechnical and Tactical Advantages -- Overview
Neutralizing, Exploiting and Creating Advantages -- Overview
Side Push from Left and from Right -- Overview
Skills and Techniques in Pushing Hands -- Overview
Picture-Perfect Form and Sophisticated Skills -- Overview
Moving to an Opponent's Back -- Overview
Taijiquan Chin-Na Techniques and their Counters -- Overview
Taijiquan Chin-Na Techniques and their Counters -- Part 1
Taijiquan Chin-Na Techniques and their Counters -- Part 2
Taijiquan Chin-Na Techniques and their Counters -- Part 3
Rolling and Stepping Forward and Backward -- Part 1
Rolling and Stepping Forward and Backward -- Part 2
Rolling and Stepping Forward and Backward -- Part 3
Rolling and Stepping Forward and Backward -- Part 4
Rolling and Stepping Forward and Backward -- Part 5
Rolling and Stepping Forward and Backward -- Part 6
Rolling and Stepping Forward and Backward -- Part 7
Rolling and Stepping Forward and Backward -- Part 8
Rolling and Stepping Forward and Backward -- Part 9
Technical and Tactical Advantages -- Part 1
Technical and Tactical Advantages -- Part 2
Technical and Tactical Advantages -- Part 3
Technical and Tactical Advantages -- Part 4
Technical and Tactical Advantages -- Part 5
Technical and Tactical Advantages -- Part 6
Technical and Tactical Advantages -- Part 7
Technical and Tactical Advantages -- Part 8
Technical and Tactical Advantages -- Part 9
Taijiquan Chin-Na Techniques and their Counters -- Part 4
 Technical and Tactical Advantages -- Part 10
Technical and Tactical Advantages -- Part 11
Neutralizing, Exploiting and Creating Advantages -- Part 1
Neutralizing, Exploiting and Creating Advantages -- Part 2
Neutralizing, Exploiting and Creating Advantages -- Part 3
Neutralizing, Exploiting and Creating Advantages -- Part 4
Neutralizing, Exploiting and Creating Advantages -- Part 5
Neutralizing, Exploiting and Creating Advantages -- Part 6
Neutralizing, Exploiting and Creating Advantages -- Part 7
Neutralizing, Exploiting and Creating Advantages -- Part 8
Neutralizing, Exploiting and Creating Advantages -- Part 9
Side Push from Left and from Right -- Part 1
Side Push from Left and from Right -- Part 2
Side Push from Left and from Right -- Part 3
Side Push from Left and from Right -- Part 4
Side Push from Left and from Right -- Part 5
Side Push from Left and from Right -- Part 7
Side Push from Left and from Right -- Part 8
Side Push from Left and from Right -- Part 9
Skills and Techniques in Pushing Hands -- Part 1
Taijiquan Chin-Na Techniques and their Counters -- Part 5
Taijiquan Chin-Na Techniques and their Counters -- Part 6
Taijiquan Chin-Na Techniques and their Counters -- Part 7
Skills and Techniques in Pushing Hands -- Part 2
Skills and Techniques in Pushing Hands -- Part 3
Skills and Techniques in Pushing Hands -- Part 4
Skill6s and Techniques in Pushing Hands -- Part 5
Skills and Techniques in Pushing Hands -- Part 6
Skills and Techniques in Pushing Hands -- Part 7
Skills and Techniques in Pushing Hands -- Part 8
 Skills and Techniques in Pushing Hands -- Part 9
Skills and Techniques in Pushing Hands -- Part 10
Skills and Techniques in Pushing Hands -- Part 11
Skills and Techniques in Pushing Hands -- Part 12
Picture-Perfect Form and Sophisticated Skills -- Part 1
Picture-Perfect Form and Sophisticated Skills -- Part 2
Picture-Perfect Form and Sophisticated Skills -- Part 3
Picture-Perfect Form and Sophisticated Skills -- Part 4
Picture-Perfect Form and Sophisticated Skills -- Part 5
Picture-Perfect Form and Sophisticated Skills -- Part 6
Picture-Perfect Form and Sophisticated Skills -- Part 7
Picture-Perfect Form and Sophisticated Skills -- Part 8
Picture-Perfect Form and Sophisticated Skills -- Part 9
Picture-Perfect Form and Sophisticated Skills -- Part 10
Picture-Perfect Form and Sophisticated Skills -- Part 11
Taijiquan Chin-Na Techniques and their Counters -- Part 8
Taijiquan Chin-Na Techniques and their Counters -- Part 9
Taijiquan Chin-Na Techniques and their Counters -- Part 10
Taijiquan Chin-Na Techniques and their Counters -- Part 11
Moving to an Opponent's Back -- Part 1
Moving to an Opponent's Back -- Part 2
Moving to an Opponent's Back -- Part 3
Moving to an Opponent's Back -- Part 4
Moving to an Opponent's Back -- Part 5
Moving to an Opponent's Back -- Part 6
Moving to an Opponent's Back -- Part 7
Moving to an Opponent's Back -- Part 8
Moving to an Opponent's Back -- Part 9
Moving to an Opponent's Back -- Part 10
Moving to an Opponent's Back -- Part 11
Moving to an Opponent's Back -- Part 12
Moving to an Opponent's Back -- Part 13