VIDEO-CLIPS-5i
Shaolin Kungfu in Sabah 2010 (Cont)
 Sabah Shaolin 2010 -- Shaolin 09
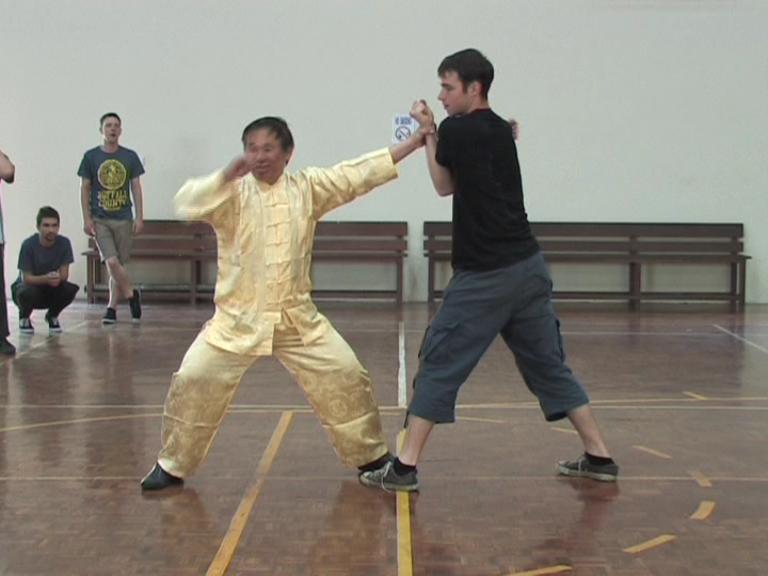
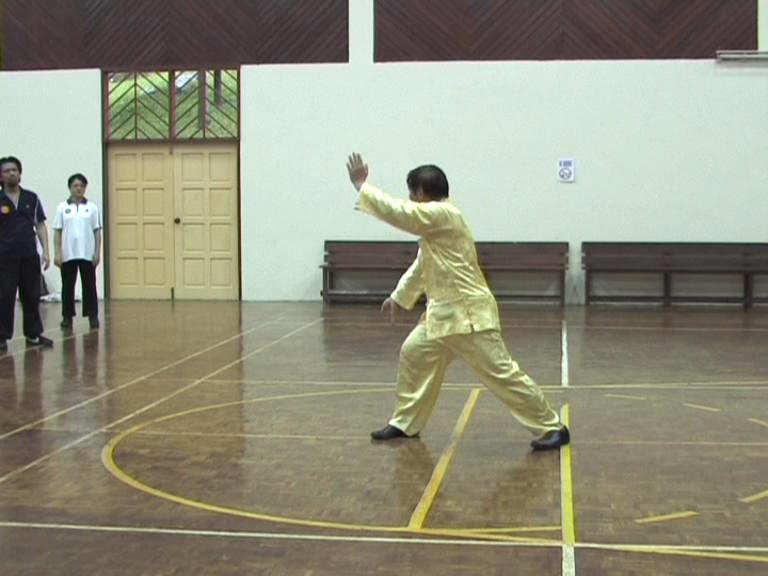
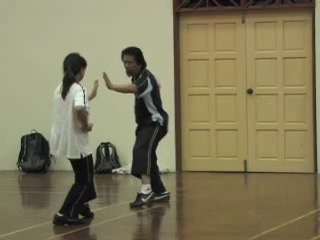
Combat Sequence 10: White Horse Presents Hoof -- Part 1
Sabah Shaolin 2010 -- Shaolin 09
Combat Sequence 10: White Horse Presents Hoof -- Part 1Combat Sequence 10: White Horse Presents Hoof -- Part 2
Combat Sequence 10: White Horse Presents Hoof -- Part 3
Combat Sequence 10: White Horse Presents Hoof -- Part 4
Combat Sequence 10: White Horse Presents Hoof -- Part 5
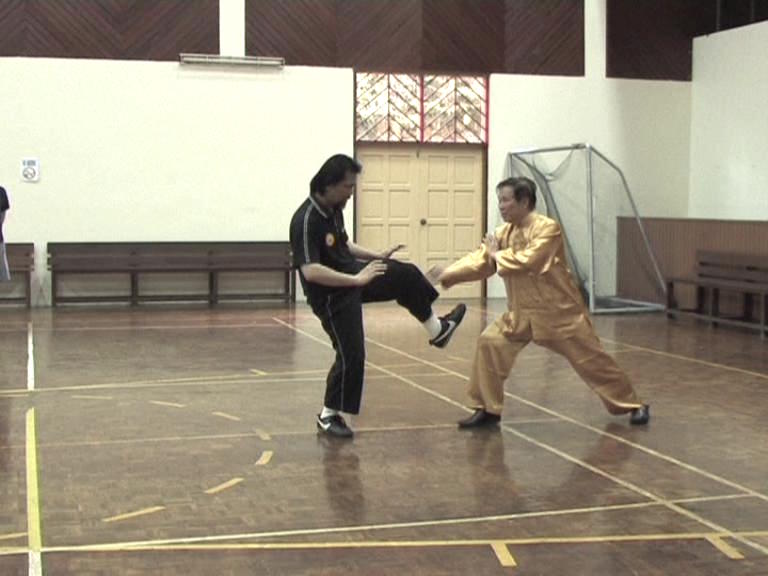
Combat Sequence 10: White Horse Presents Hoof -- Part 7
Combat Sequence 10: White Horse Presents Hoof -- Part 7
Combat Sequence 10: White Horse Presents Hoof -- Part 8
Combat Sequence 10: White Horse Presents Hoof -- Part 9
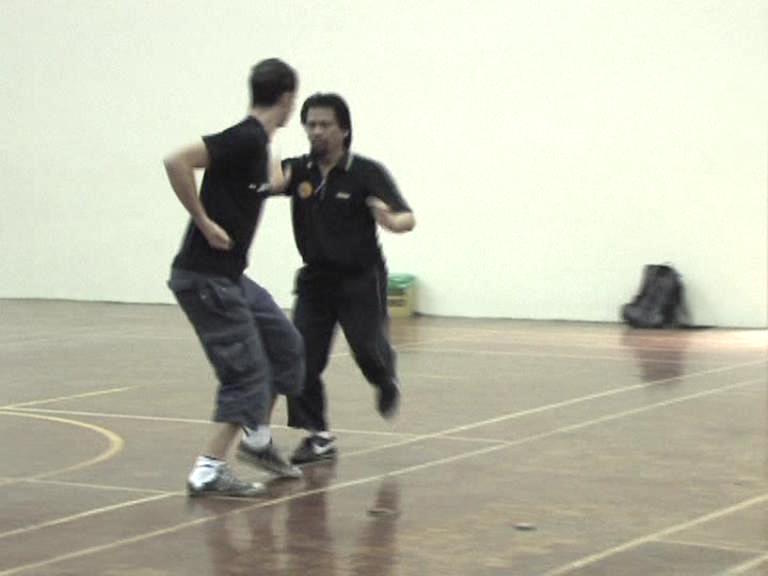
How to Stop Pressing Attacks -- Part 1
How to Stop Pressing Attacks -- Part 2
How to Stop Pressing Attacks -- Part 3
How to Stop Pressing Attacks -- Part 4
How to Stop Pressing Attacks -- Part 5
How to Stop Pressing Attacks -- Part 6
How to Stop Pressing Attacks -- Part 7
How to Stop Pressing Attacks -- Part 8
How to Stop Pressing Attacks -- Part 9
Opening or Closing an Opponent -- Part 1
Opening or Closing an Opponent -- Part 2
Opening or Closing an Opponent -- Part 3
Opening or Closing an Opponent -- Part 4
Opening or Closing an Opponent -- Part 5
Opening or Closing an Opponent -- Part 6
Opening or Closing an Opponent -- Part 7
Combat Sequence 11: Yellow Bird Drinks Water -- Part 1
Combat Sequence 11: Yellow Bird Drinks Water -- Part 2
Combat Sequence 11: Yellow Bird Drinks Water -- Part 3
Combat Sequence 11: Yellow Bird Drinks Water -- Part 4
Combat Sequence 11: Yellow Bird Drinks Water -- Part 5
 Combat Sequence 11: Yellow Bird Drinks Water -- Part 6
Combat Sequence 11: Yellow Bird Drinks Water -- Part 7
Combat Sequence 11: Yellow Bird Drinks Water -- Part 8
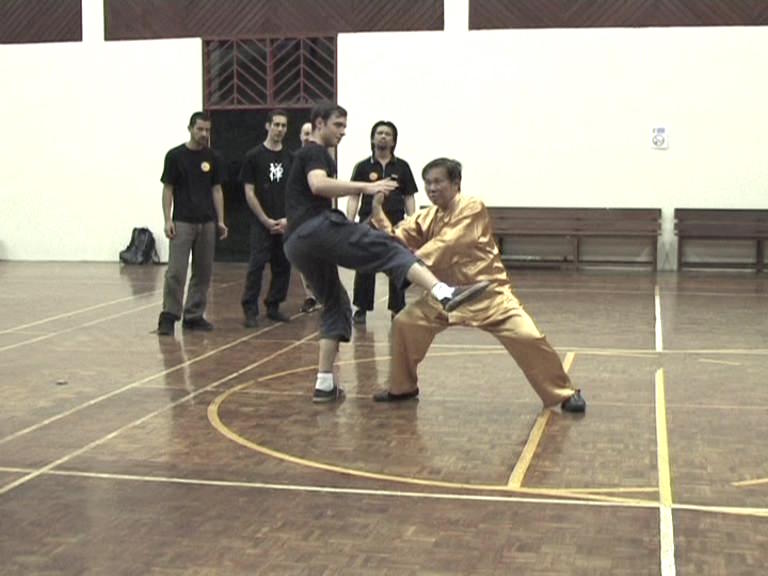
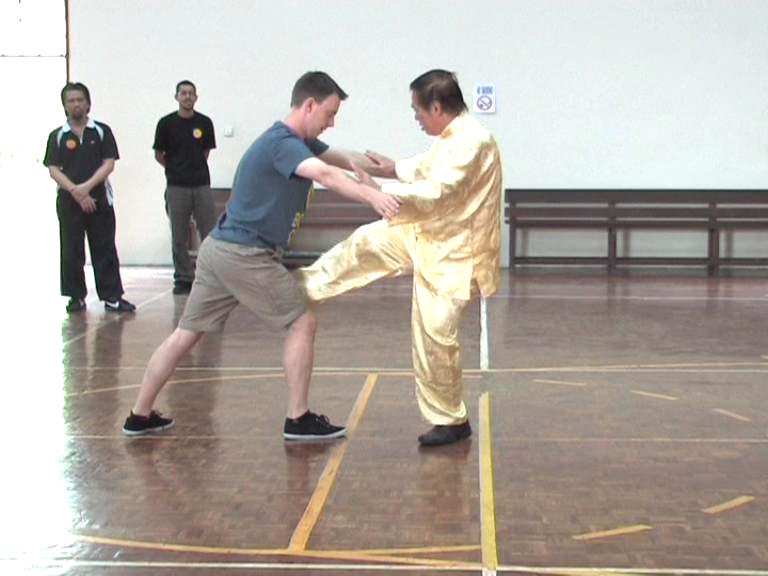
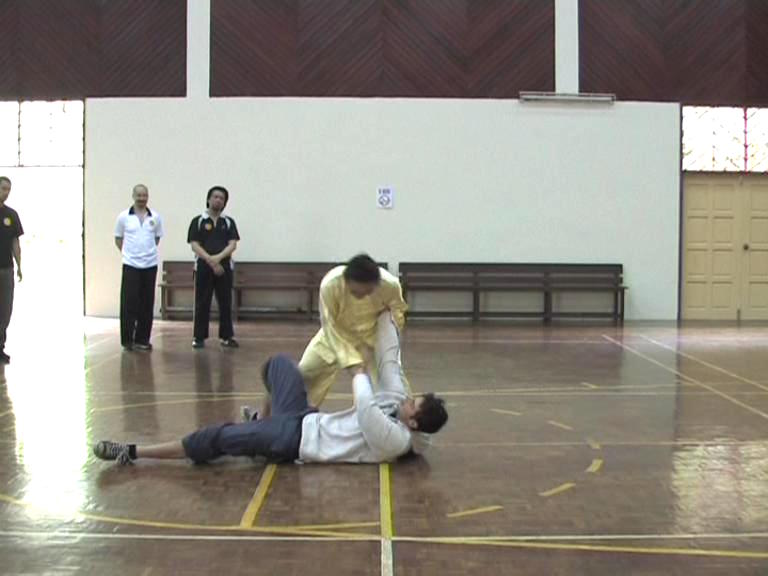
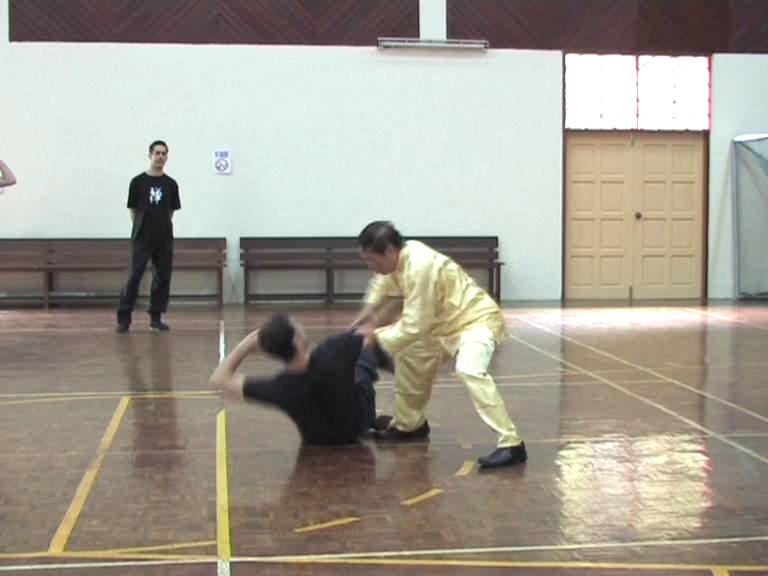
Combat Sequence 12: Naughty Monkey kicks at Tree -- Part 1
Combat Sequence 12: Naughty Monkey kicks at Tree -- Part 2
Combat Sequence 12: Naughty Monkey kicks at Tree -- Part 3
Combat Sequence 12: Naughty Monkey kicks at Tree -- Part 4
Combat Sequence 12: Naughty Monkey kicks at Tree -- Part 5
Combat Sequence 12: Naughty Monkey kicks at Tree -- Part 6
Combat Sequence 12: Naughty Monkey kicks at Tree -- Part 7
Combat Sequence 12: Naughty Monkey kicks at Tree -- Part 8
One Pattern against All Kicks -- Part 1
One Pattern against All Kicks -- Part 2
One Pattern against All Kicks -- Part 3
One Pattern against All Kicks -- Part 4
One Pattern against All Kicks -- Part 5
One Pattern against All Kicks -- Part 6
One Pattern against All Kicks -- Part 7
One Pattern against All Kicks -- Part 8
One Pattern against All Kicks -- Part 9
One Pattern against All Kicks -- Part 10
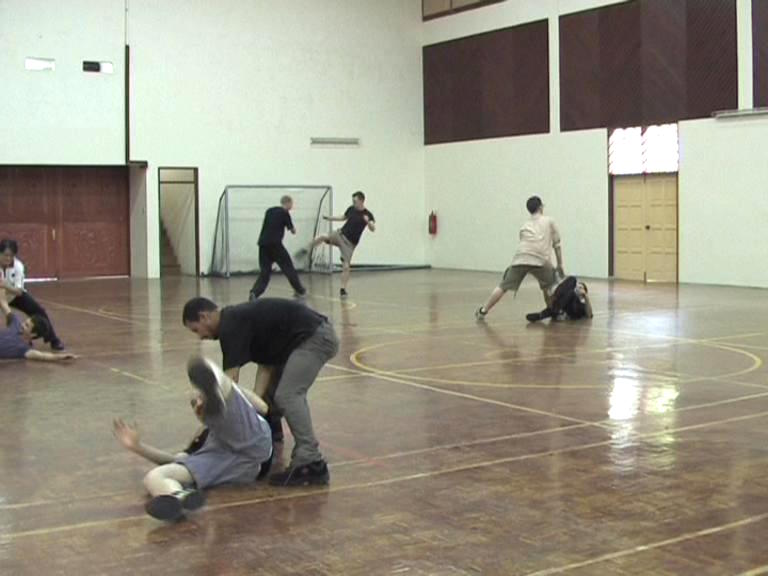
Conditional Free Sparring using Sequences 1 to 12 -- Part 1
Conditional Free Sparring using Sequences 1 to 12 -- Part 2
Conditional Free Sparring using Sequences 1 to 12 -- Part 3
Conditional Free Sparring using Sequences 1 to 12 -- Part 4
Conditional Free Sparring using Sequences 1 to 12 -- Part 5
Conditional Free Sparring using Sequences 1 to 12 -- Part 6
Conditional Free Sparring using Sequences 1 to 12 -- Part 7
Conditional Free Sparring using Sequences 1 to 12 -- Part 8
Conditional Free Sparring using Sequences 1 to 12 -- Part 9
 Combat Sequence 10: White Horse Presents Hoof
-- Overview
How to Stop Pressing Attacks -- Overview
Opening or Closing an Opponent -- Overview
Combat Sequence 11: Yellow Bird Drinks Water
-- Overview
Combat Sequence 12: Naughty Monkey Kicks
at Tree -- Overview
One Pattern against All Kicks -- Overview
Conditional Free Sparring using Sequences 1 to 12
-- Overview
Sabah Shaolin 2010 -- Shaolin 10 Combat-Sequence Set 2: Fierce Tiger Speeds through Valley -- Part 1
Combat-Sequence Set 2: Fierce Tiger Speeds through Valley -- Part 2
Combat-Sequence Set 2: Fierce Tiger Speeds through Valley -- Part 3
Combat-Sequence Set 2: Fierce Tiger Speeds through Valley -- Part 4
Combat-Sequence Set 2: Fierce Tiger Speeds through Valley -- Part 5
Combat-Sequence Set 2: Fierce Tiger Speeds through Valley -- Part 6
Combat-Sequence Set 2: Fierce Tiger Speeds through Valley -- Part 7
Combat-Sequence Set 2: Fierce Tiger Speeds through Valley -- Part 8
Combat Sequence Set 3: Happy Bird Hops up Branch -- Part 1
Combat Sequence Set 3: Happy Bird Hops up Branch -- Part 2
Combat Sequence Set 3: Happy Bird Hops up Branch -- Part 3
Combat Sequence Set 3: Happy Bird Hops up Branch -- Part 4
Combat Sequence Set 3: Happy Bird Hops up Branch -- Part 5
Combat Sequence Set 3: Happy Bird Hops up Branch -- Part 6
Combat Sequence Set 3: Happy Bird Hops up Branch -- Part 7
Combat Sequence Set 3: Happy Bird Hops up Branch -- Part 8
Combat Sequence 13: Fell Tree with Roots -- Part 1
Combat Sequence 13: Fell Tree with Roots -- Part 2
Combat Sequence 13: Fell Tree with Roots -- Part 3
Combat Sequence 13: Fell Tree with Roots -- Part 4
 Combat Sequence 13: Fell Tree with Roots -- Part 5
Combat Sequence 13: Fell Tree with Roots -- Part 6
Combat Sequence 13: Fell Tree with Roots -- Part 7
The Deadly Organ-Seeking Kick -- Part 1
The Deadly Organ-Seeking Kick -- Part 2
The Deadly Organ-Seeking Kick -- Part 3
The Deadly Organ-Seeking Kick -- Part 4
The Deadly Organ-Seeking Kick -- Part 5
The Deadly Organ-Seeking Kick -- Part 6
Combat Sequence 16: Fierce Tiger Pushes Mountain -- Part 1
Combat Sequence 16: Fierce Tiger Pushes Mountain -- Part 2
Combat Sequence 16: Fierce Tiger Pushes Mountain -- Part 3
Combat Sequence 16: Fierce Tiger Pushes Mountain -- Part 4
Combat Sequence 16: Fierce Tiger Pushes Mountain -- Part 5
Combat Sequence 16: Fierce Tiger Pushes Mountain -- Part 6
Combat Sequence 16: Fierce Tiger Pushes Mountain -- Part 7
Combat Sequence 15: Farmer Hoes Rice Field -- Part 1
Combat Sequence 15: Farmer Hoes Rice Field -- Part 2
Combat Sequence 15: Farmer Hoes Rice Field -- Part 3
Combat Sequence 15: Farmer Hoes Rice Field -- Part 4
Combat Sequence 15: Farmer Hoes Rice Field -- Part 5
Combat Sequence 15: Farmer Hoes Rice Field -- Part 6
Combat Sequence 15: Farmer Hoes Rice Field -- Part 7
Combat Sequence 15: Farmer Hoes Rice Field -- Part 8
Combat Sequence 13: Lead Horse Back to Stable -- Part 1
Combat Sequence 13: Lead Horse Back to Stable -- Part 2
Combat Sequence 13: Lead Horse Back to Stable -- Part 3
Combat Sequence 13: Lead Horse Back to Stable -- Part 4
Combat Sequence 13: Lead Horse Back to Stable -- Part 5
Combat Sequence 13: Lead Horse Back to Stable -- Part 6
 Combat Sequence 13: Lead Horse Back to Stable -- Part 7
Combat Sequence 13: Lead Horse Back to Stable -- Part 8
Combat Sequence 16: Fierce Tiger Pushes Mountain -- Part 8
Combat Sequence 16: Fierce Tiger Pushes Mountain -- Part 9
Combat Sequence 16: Fierce Tiger Pushes Mountain -- Part 10
Combat Sequence 16: Fierce Tiger Pushes Mountain -- Part 11
Combat-Sequence Set 2: Fierce Tiger Speeds through
Valley -- Overview
Combat Sequence Set 3: Happy Bird Hops up
Branch -- Overview
Combat Sequence 13: Fell Tree with Roots -- Overview
The Deadly Organ-Seeking Kick -- Overview
Combat Sequence 14: Lead Horse Back to Stable -- Overview
Combat Sequence 15: Farmer Hoes Rice Field -- Overview
Combat Sequence 16: Fierce Tiger Pushes Mountain -- Overview
Sabah Shaolin 2010 -- Shaolin 11 How to Cover a Boxer Adequately -- Part 1
How to Cover a Boxer Adequately -- Part 2
How to Cover a Boxer Adequately -- Part 3
How to Cover a Boxer Adequately -- Part 4
How to Cover a Boxer Adequately -- Part 5
How to Cover a Boxer Adequately -- Part 6
How to Cover a Boxer Adequately -- Part 7
How to Cover a Boxer Adequately -- Part 8
How to Cover a Boxer Adequately -- Part 9
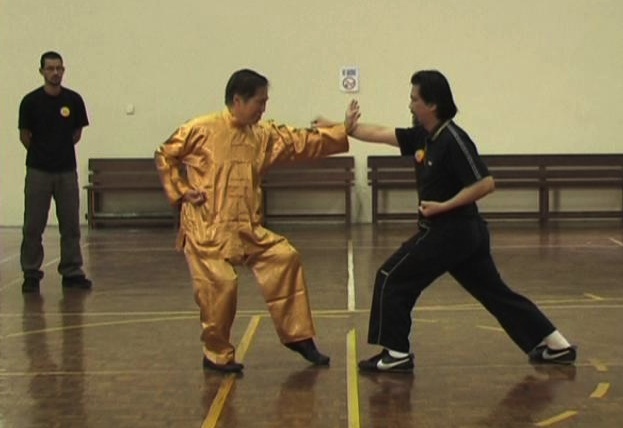
Great Advantage of the Bow-Arrow Stance -- Part 1
Great Advantage of the Bow-Arrow Stance -- Part 2
Great Advantage of the Bow-Arrow Stance -- Part 3
Great Advantage of the Bow-Arrow Stance -- Part 4<
Great Advantage of the Bow-Arrow Stance -- Part 5
Great Advantage of the Bow-Arrow Stance -- Part 6
Great Advantage of the Bow-Arrow Stance -- Part 7
Great Advantage of the Bow-Arrow Stance -- Part 8
Great Advantage of the Bow-Arrow Stance -- Part 9
The Tactic of Close-Chase-Strike -- Part 1
The Tactic of Close-Chase-Strike -- Part 2
The Tactic of Close-Chase-Strike -- Part 3The Tactic of Close-Chase-Strike -- Part 4
The Tactic of Close-Chase-Strike -- Part 5
The Tactic of Close-Chase-Strike -- Part 6
The Tactic of Close-Chase-Strike -- Part 7
The Tactic of Close-Chase-Strike -- Part 8
The Tactic of Close-Chase-Strike -- Part 9
The Tactic of Close-Chase-Strike -- Part 10
Locking Both Arms of the Opponent -- Part 1
Locking Both Arms of the Opponent -- Part 2
Locking Both Arms of the Opponent -- Part 3
Locking Both Arms of the Opponent -- Part 4
Locking Both Arms of the Opponent -- Part 5
Locking Both Arms of the Opponent -- Part 6
Locking Both Arms of the Opponent -- Part 7
Locking Both Arms of the Opponent -- Part 8
Locking Both Arms of the Opponent -- Part 9
Locking Both Arms of the Opponent -- Part 10
White Monkey Holds Brranch against Undercuts -- Part 1
White Monkey Holds Brranch against Undercuts -- Part 2
White Monkey Holds Brranch against Undercuts -- Part 3
White Monkey Holds Brranch against Undercuts -- Part 4
White Monkey Holds Brranch against Undercuts -- Part 5
White Monkey Holds Brranch against Undercuts -- Part 6
White Monkey Holds Brranch against Undercuts -- Part 7
White Monkey Holds Brranch against Undercuts -- Part 8
White Monkey Holds Brranch against Undercuts -- Part 9
White Monkey Holds Brranch against Undercuts -- Part 10
White Monkey Holds Brranch against Undercuts -- Part 11
Intercepting a Hook with Bouble Bows -- Part 1
 Intercepting a Hook with Bouble Bows -- Part 2
Intercepting a Hook with Bouble Bows -- Part 3
Intercepting a Hook with Bouble Bows -- Part 4
Intercepting a Hook with Bouble Bows -- Part 5
Intercepting a Hook with Bouble Bows -- Part 6
Intercepting a Hook with Bouble Bows -- Part 7
Intercepting a Hook with Bouble Bows -- Part 8
Intercepting a Hook with Bouble Bows -- Part 9
Avoid the Mistake of Conditioned but Uncessary
Moving Back -- Part 1
Avoid the Mistake of Conditioned but Uncessary
Moving Back -- Part 2
Avoid the Mistake of Conditioned but Uncessary Moving Back -- Part 3
Avoid the Mistake of Conditioned but Uncessary Moving Back -- Part 4
Avoid the Mistake of Conditioned but Uncessary Moving Back -- Part 5
Avoid the Mistake of Conditioned but Uncessary Moving Back -- Part 6
Avoid the Mistake of Conditioned but Uncessary Moving Back -- Part 7
Avoid the Mistake of Conditioned but Uncessary Moving Back -- Part 8
Avoid the Mistake of Conditioned but Uncessary Moving Back -- Part 9
How to Cover a Boxer Adequately -- Overview
Great Advantage of the Bow-Arrow Stance -- Overview
The Tactic of Close-Chase-Strike -- Overview
Locking Both Arms of the Opponent-- Overview
White Monkey Holds Brranch against Undercuts -- Overview
Intercepting a Hook with Bouble Bows -- Overview
Avoid the Mistake of Conditioned but Uncessary Moving Back -- Overview
 Sabah Shaolin 2010 -- Shaolin 12
Felling Kick-Boxers when they Kick -- Part 1
Sabah Shaolin 2010 -- Shaolin 12
Felling Kick-Boxers when they Kick -- Part 1Felling Kick-Boxers when they Kick -- Part 2
Felling Kick-Boxers when they Kick -- Part 3
Felling Kick-Boxers when they Kick -- Part 4
Felling Kick-Boxers when they Kick -- Part 5
Felling Kick-Boxers when they Kick -- Part 6
Felling Kick-Boxers when they Kick -- Part 7
Felling Kick-Boxers when they Kick -- Part 8
Felling Kick-Boxers when they Kick -- Part 9
The Tactic of Avoiding and Felling -- Part 1
The Tactic of Avoiding and Felling -- Part 2
The Tactic of Avoiding and Felling -- Part 3
The Tactic of Avoiding and Felling -- Part 4
The Tactic of Avoiding and Felling -- Part 5
The Tactic of Avoiding and Felling -- Part 6
The Tactic of Avoiding and Felling -- Part 7
The Tactic of Avoiding and Felling -- Part 8
Excellent Counter against Muay Thai Knee Jabs -- Part 1
Excellent Counter against Muay Thai Knee Jabs -- Part 2
Excellent Counter against Muay Thai Knee Jabs -- Part 3
Excellent Counter against Muay Thai Knee Jabs -- Part 4
Excellent Counter against Muay Thai Knee Jabs -- Part 5
Excellent Counter against Muay Thai Knee Jabs -- Part 6
Excellent Counter against Muay Thai Knee Jabs -- Part 7
Excellent Counter against Muay Thai Knee Jabs -- Part 8
Fascinating Application of Planting Willow in Front of Camp -- Part 1
Fascinating Application of Planting Willow in Front of Camp -- Part 2
Fascinating Application of Planting Willow in Front of Camp -- Part 3
Fascinating Application of Planting Willow in Front of Camp -- Part 4
Fascinating Application of Planting Willow in Front of Camp -- Part 5
 Fascinating Application of Planting Willow in
Front of Camp -- Part 6
Fascinating Application of Planting Willow in
Front of Camp -- Part 7
Fascinating Application of Planting Willow in
Front of Camp -- Part 8
Fascinating Application of Planting Willow in
Front of Camp -- Part 9
Countering Muay Thai Attacks Progressively -- Part 1
Countering Muay Thai Attacks Progressively -- Part 2
Countering Muay Thai Attacks Progressively -- Part 3
Countering Muay Thai Attacks Progressively -- Part 4
Countering Muay Thai Attacks Progressively -- Part 5
Countering Muay Thai Attacks Progressively -- Part 6
Countering Muay Thai Attacks Progressively -- Part 7
Ensure Adequate Coverage when Moving into Attack -- Part 1
Ensure Adequate Coverage when Moving into Attack -- Part 2
Ensure Adequate Coverage when Moving into Attack -- Part 3
Ensure Adequate Coverage when Moving into Attack -- Part 4
Ensure Adequate Coverage when Moving into Attack -- Part 5
Ensure Adequate Coverage when Moving into Attack -- Part 6
Ensure Adequate Coverage when Moving into Attack -- Part 7
Who Ways there's No Ground Fighting in Kungfu? -- Part 1
Who Ways there's No Ground Fighting in Kungfu? -- Part 2
Who Ways there's No Ground Fighting in Kungfu? -- Part 3
Who Ways there's No Ground Fighting in Kungfu? -- Part 4
Who Ways there's No Ground Fighting in Kungfu? -- Part 5
Who Ways there's No Ground Fighting in Kungfu? -- Part 6
Who Ways there's No Ground Fighting in Kungfu? -- Part 7
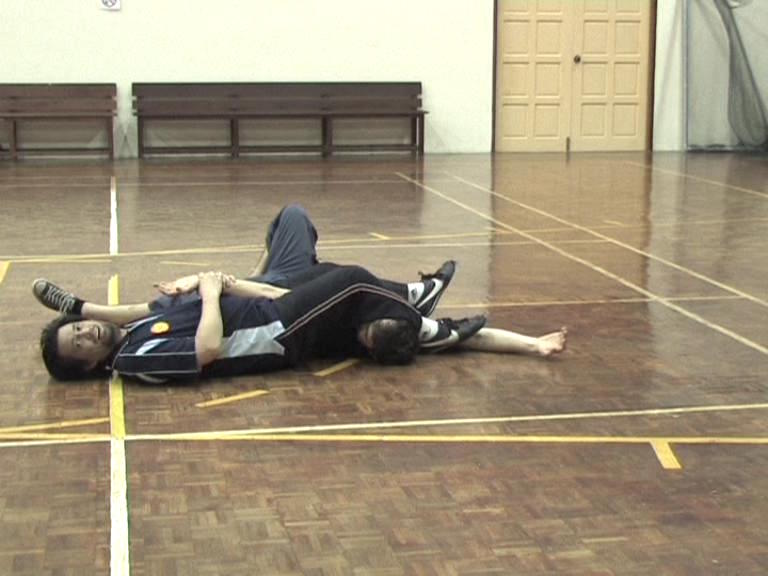
Counters against Various Pin-Downs -- Part 1
Counters against Various Pin-Downs -- Part 2
Counters against Various Pin-Downs -- Part 3
Counters against Various Pin-Downs -- Part 4
Counters against Various Pin-Downs -- Part 5
 Counters against Various Pin-Downs -- Part 6
Counters against Various Pin-Downs -- Part 7
Counters against Various Pin-Downs -- Part 8
Counters against Various Pin-Downs -- Part 9
Countring a Wrestler in the Progress of his Attack -- Part 1
Countring a Wrestler in the Progress of his Attack -- Part 2
Countring a Wrestler in the Progress of his Attack -- Part 3
Countring a Wrestler in the Progress of his Attack -- Part 4
Countring a Wrestler in the Progress of his Attack -- Part 5
Countring a Wrestler in the Progress of his Attack -- Part 6
Countring a Wrestler in the Progress of his Attack -- Part 7
Counters against the Shoot at the Initial Stage -- Part 1
Counters against the Shoot at the Initial Stage -- Part 2
Counters against the Shoot at the Initial Stage -- Part 3
Counters against the Shoot at the Initial Stage -- Part 4
Counters against the Shoot at the Initial Stage -- Part 5
Counters against the Shoot at the Initial Stage -- Part 6
Counters against the Shoot at the Initial Stage -- Part 7
Counters against the Shoot at the Initial Stage -- Part 8
Using Shaolin Kungfu in Free Sparrring -- Part 1
Using Shaolin Kungfu in Free Sparrring -- Part 2
Using Shaolin Kungfu in Free Sparrring -- Part 3
Using Shaolin Kungfu in Free Sparrring -- Part 4
Using Shaolin Kungfu in Free Sparrring -- Part 5
Using Shaolin Kungfu in Free Sparrring -- Part 6
Using Shaolin Kungfu in Free Sparrring -- Part 7
Using Shaolin Kungfu in Free Sparrring -- Part 8
Using Shaolin Kungfu in Free Sparrring -- Part 9
Using Shaolin Kungfu in Free Sparrring -- Part 10
Using Shaolin Kungfu in Free Sparrring -- Part 11
 Felling Kick-Boxers when they Kick -- Overview
The Tactic of Avoiding and Felling -- Overview
Excellent Counter against Muay Thai Knee Jabs
-- Overview
Fascinating Application of Planting Willow in
Front of Camp -- Overview
Countering Muay Thai Attacks Progressively -- Overview
Ensure Adequate Coverage when Moving
into Attack -- Overview
Who Ways there's No Ground Fighting in Kungfu?
-- Overview
Counters against Various Pin-Downs -- Overview
Countering a Wrestler in the Progress of his Attack
-- Overview
Counters against the Shoot at the Initial Stage -- Overview
Using Shaolin Kungfu in Free Sparrring -- Overview
Sabah Shaolin 2010 -- Videos Sabah Intensive Shaolin Kungfu Course 2010 -- Overview
Chi Flow and Standing ZEn
Developing Internal Force and Mental Clarity
Two Crucial Stages in Stance Training
The Art nof Flexibility
Footwork is often More Important than Techniques
Stepping Forward and Goiding Forward
Agile and Stable at thje Same Time
Beig Fast without Consciously Attempting to be Fast
Turning to Diffferent Directions in Numerous Ways
Shaolin Hand Forms
The Three External Harmonies of Feet, Body and Hands
The Three Internal Harmonies of Essemce, Emnergy and Mind
Fa-Jing or Exploding Force
Minimum Force against Maximum Strength
Do Defence Direct Counter
Linking Patterrns into a Set
Moving In and Right Spacing
Developing the Skills of Counter-Striking and of Judgment
Secrets of Single Tiger Emerges from Cave
 Different Responses for Attacks from different Height
The Tactic of No Defence Direct Counter
The Tactic of False-False, Real-Real
Advantage ofusing a Poise Pattern
Asking the Way
The Crucial Last Step in Moving In
Making Footwork Adjustment
Stance Training Poises to Develop Internal Force
Get the Form Correct and be Relaxed
Yin-Yang Harmony of Solidity and Agility
Half a Step back, Half a Step Forward
Going beyond the Surface of a Single Attack
Tempting Opponent to Break your Arrm!
Seventy Percent of Victory Comes from Legs
Subtle hand Movements of Shaolin Kungfu
Don't Give Free Offers to your Opponent
Lohan Asks the Way
Magic Formula of Form-Flow-Force
Importance of Last Step when Moving In
Various Modes and Steps in Moving In
Using Different Leg Modes for Tactical Advantage
Combat SEquence 1 -- Black Tiger Steals Heart
Footwork Constitutes 70% of Victory
Combat Sequences 2 and 3 -- Poisonous Snake and Precious Duck
Combat Sequence 4 -- Hang a Golden Star
Continuing from One Sequence to Another
Shaolin Wahnam Treasure -- One-Finger Shooting Zen
Employing Form-Flow-Force to Generate Internal Force
Generrating Internal Force by Performing a Kungfu Set
Combat Sequence 5 -- Fierce Tiger Speeds through Valley
 Secrets of Pressing Attacks
Combat Sequence 6 -- Dark Dragon Draws Water
Beauty of Shaolin Combat Application
Do Not Use Strength!
Five-Step Formula and Two-Step Formula
Combat Sequence 7 -- Chop the Hua Mountain
Combat Sequence 8 -- Horizontally Sweep Thousand Armies
Tactic of Pressing Attacks
Magical Formula of Addition and Subtraction
Changing Leg Modes and Bridging Gaps
One-Finger Shooting Zen and Bridging Gaps
Changing Steps and Various Leg Modes
Various Combinations of Combat Sequences
Adding and Subtracting Patterns to Confuse Opponents
Conditional Free Sparring
Following Through and Pressing Attacks
Overwhelming Opponents with Sequence Sparring
Intercepting an Opponent's Response
Secrets of Hiding Flower in the Moon
Side-Way Tiger-Tail Kick
Combat Sequence 9 -- Happy bird Hops up Branch
Combat Sequence 10 -- White Horse Prresents Hoof
How to Stop Pressing Attacks
Opening and Closing an Opponent
Combat Sequence 11 -- Yellow Bird Drinks Water
Combat Sequence 12 -- Naughty Monkey Kicks at Tree
One Pattern against All Kicks!
Conditional Free Sparring using Combat Sequences 1 to 12
Combat-Sequence Set 2 -- Fierce Tiger Speeds through Valley
Combat-Sequence Set 3 -- Happy Bird Hops up Branch
 Combat-Sequence 13 -- Fell Tree with Roots
The Deadly Organ-Seeking Kick
Combat Sequence 14 -- Lead Horse Back to Stable
Combat Sequence 15 -- Farmer Hoes Rice Field
Combat Sequence 16 -- Fierce Tiger Pushes Mountain
How to Cover a Boxer Adequately
Great Advantage of Bow-Arrrow Stance
Tactic of Close-Chase-Strike
Locking Both Arms of an Opponent
White Monkey Holds Branch against Undercuts
Intercepting Hooks with Double Bows
Avoid the Mistake of Conditioned but Unnecessary Moving Back
Felling Kick-Boxers as they Kick
Tactic of Avoiding and Felling
Excellent Counter against Muay Thai Knee Jabs
Fascinating Application of Planting Willow in Front of Camp
Countering Muay Thai Attacks Progressively
Ensure Adequate Coverage when Moving In to Attack
Who Says There is No Ground Fighting in Shaolin Kungfu?
Counters against Various Pin-Downs
Countering a Wrestler in the Process of his Attack
Counter against the Shoot at its Initial Stage
Using Shaolin Kungfu in Free Sparring