VIDEO-CLIPS-4e
Shaolin Review
 Shaolin Review -- Shaolin 01
Shaolin Kungfu Review Course 2008 -- Overview
Shaolin Review -- Shaolin 01
Shaolin Kungfu Review Course 2008 -- OverviewCultivation of Jing, Qi and Shen or the Physical, Energy
and Mind -- Overview
Some Finer Points regarding the Bow-Arrow and the
Horse-Riding Stance -- Overview
How to Move Correctly and Speedily in Stances -- Overview
Cultivation of Jing, Qi and Shen or the Physical, Energy
and Mind -- Part 1
Cultivation of Jing, Qi and Shen or the Physical, Energy
and Mind -- Part 2
Cultivation of Jing, Qi and Shen or the Physical, Energy and Mind -- Part 3
Cultivation of Jing, Qi and Shen or the Physical, Energy and Mind -- Part 4
Cultivation of Jing, Qi and Shen or the Physical, Energy and Mind -- Part 5
Cultivation of Jing, Qi and Shen or the Physical, Energy and Mind -- Part 6
Cultivation of Jing, Qi and Shen or the Physical, Energy and Mind -- Part 7
Cultivation of Jing, Qi and Shen or the Physical, Energy and Mind -- Part 8
Cultivation of Jing, Qi and Shen or the Physical, Energy and Mind -- Part 9
Cultivation of Jing, Qi and Shen or the Physical, Energy and Mind -- Part 10
Cultivation of Jing, Qi and Shen or the Physical, Energy and Mind -- Part 11
Cultivation of Jing, Qi and Shen or the Physical, Energy and Mind -- Part 12
Some Finer Points regarding the Bow-Arrow and the Horse-Riding Stance -- Part 1
Some Finer Points regarding the Bow-Arrow and the Horse-Riding Stance -- Part 2
Some Finer Points regarding the Bow-Arrow and the Horse-Riding Stance -- Part 3
Some Finer Points regarding the Bow-Arrow and the Horse-Riding Stance -- Part 4
Some Finer Points regarding the Bow-Arrow and the Horse-Riding Stance -- Part 5
Some Finer Points regarding the Bow-Arrow and the Horse-Riding Stance -- Part 6
Some Finer Points regarding the Bow-Arrow and the Horse-Riding Stance -- Part 7
Some Finer Points regarding the Bow-Arrow and the Horse-Riding Stance -- Part 8
Some Finer Points regarding the Bow-Arrow and the Horse-Riding Stance -- Part 9
Some Finer Points regarding the Bow-Arrow and the Horse-Riding Stance -- Part 10
Some Finer Points regarding the Bow-Arrow and the Horse-Riding Stance -- Part 11
Some Finer Points regarding the Bow-Arrow and the Horse-Riding Stance -- Part 12
Some Finer Points regarding the Bow-Arrow and the Horse-Riding Stance -- Part 13
Some Finer Points regarding the Bow-Arrow and the Horse-Riding Stance -- Part 14
 Some Finer Points regarding the Bow-Arrow and the
Horse-Riding Stance -- Part 15
How to Move Correctly and Speedily in Stances -- Part 1
How to Move Correctly and Speedily in Stances -- Part 2
How to Move Correctly and Speedily in Stances -- Part 3
How to Move Correctly and Speedily in Stances -- Part 4
How to Move Correctly and Speedily in Stances -- Part 5
How to Move Correctly and Speedily in Stances -- Part 6
How to Move Correctly and Speedily in Stances -- Part 7
How to Move Correctly and Speedily in Stances -- Part 8
How to Move Correctly and Speedily in Stances -- Part 9
How to Move Correctly and Speedily in Stances -- Part 10
How to Move Correctly and Speedily in Stances -- Part 11
How to Move Correctly and Speedily in Stances -- Part 12
How to Move Correctly and Speedily in Stances -- Part 13
How to Move Correctly and Speedily in Stances -- Part 14
How to Move Correctly and Speedily in Stances -- Part 15
How to Move Correctly and Speedily in Stances -- Part 16
Shaolin Review -- Shaolin 02 The Mechanics of Exploding Force -- Overview
Exploding Force with Various Patterns -- Overview
Linking Patterns to Form Combat Sequences
-- Overview
Pre-Arranged Sparring to Develop Combat Skills
-- Overview
Important Skills in Combat Sequences 3 and 4 -- Overview
Applying Continuation of Sequence in Sparring
Practice -- Overview
Skilful Manipulation of Combat Sequences
for Sparring -- Overview
The Mechanics of Exploding Force -- Part 1
The Mechanics of Exploding Force -- Part 2
The Mechanics of Exploding Force -- Part 3
 The Mechanics of Exploding Force -- Part 4
The Mechanics of Exploding Force -- Part 5
The Mechanics of Exploding Force -- Part 6
The Mechanics of Exploding Force -- Part 7
The Mechanics of Exploding Force -- Part 8
Exploding Force with Various Patterns -- Part 1
Exploding Force with Various Patterns -- Part 2
Exploding Force with Various Patterns -- Part 3
Exploding Force with Various Patterns -- Part 4
Exploding Force with Various Patterns -- Part 5
Exploding Force with Various Patterns -- Part 6
Exploding Force with Various Patterns -- Part 7
Exploding Force with Various Patterns -- Part 8
Linking Patterns to Form Combat Sequences -- Part 1
Linking Patterns to Form Combat Sequences -- Part 2
Linking Patterns to Form Combat Sequences -- Part 3
Linking Patterns to Form Combat Sequences -- Part 4
Linking Patterns to Form Combat Sequences -- Part 5
Linking Patterns to Form Combat Sequences -- Part 6
Linking Patterns to Form Combat Sequences -- Part 7
Pre-Arranged Sparring to Develop Combat Skills -- Part 1
Pre-Arranged Sparring to Develop Combat Skills -- Part 2
Pre-Arranged Sparring to Develop Combat Skills -- Part 3
Pre-Arranged Sparring to Develop Combat Skills -- Part 4
Pre-Arranged Sparring to Develop Combat Skills -- Part 5
Pre-Arranged Sparring to Develop Combat Skills -- Part 6
Pre-Arranged Sparring to Develop Combat Skills -- Part 7
Pre-Arranged Sparring to Develop Combat Skills -- Part 8
Pre-Arranged Sparring to Develop Combat Skills -- Part 9
Pre-Arranged Sparring to Develop Combat Skills -- Part 10
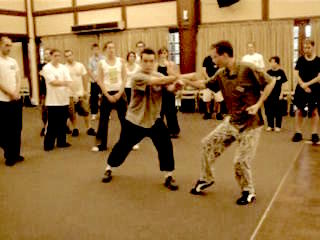 Important Skills in Combat Sequences 3 and 4 -- Part 1
Important Skills in Combat Sequences 3 and 4 -- Part 2
Important Skills in Combat Sequences 3 and 4 -- Part 3
Important Skills in Combat Sequences 3 and 4 -- Part 4
Important Skills in Combat Sequences 3 and 4 -- Part 5
Important Skills in Combat Sequences 3 and 4 -- Part 6
Important Skills in Combat Sequences 3 and 4 -- Part 7
Important Skills in Combat Sequences 3 and 4 -- Part 8
Important Skills in Combat Sequences 3 and 4 -- Part 9
Applying Continuation of Sequence in Sparring
Practice -- Part 1
Applying Continuation of Sequence in Sparring Practice -- Part 2
Applying Continuation of Sequence in Sparring Practice -- Part 3
Applying Continuation of Sequence in Sparring Practice -- Part 4
Applying Continuation of Sequence in Sparring Practice -- Part 5
Applying Continuation of Sequence in Sparring Practice -- Part 6
Applying Continuation of Sequence in Sparring Practice -- Part 7
Applying Continuation of Sequence in Sparring Practice -- Part 8
Applying Continuation of Sequence in Sparring Practice -- Part 9
Applying Continuation of Sequence in Sparring Practice -- Part 10
Applying Continuation of Sequence in Sparring Practice -- Part 11
Applying Continuation of Sequence in Sparring Practice -- Part 12
Skilful Manipulation of Combat Sequences for Sparring -- Part 1
Skilful Manipulation of Combat Sequences for Sparring -- Part 2
Skilful Manipulation of Combat Sequences for Sparring -- Part 3
Skilful Manipulation of Combat Sequences for Sparring -- Part 4
Skilful Manipulation of Combat Sequences for Sparring -- Part 5
Skilful Manipulation of Combat Sequences for Sparring -- Part 6
Skilful Manipulation of Combat Sequences for Sparring -- Part 7
Skilful Manipulation of Combat Sequences for Sparring -- Part 8
Skilful Manipulation of Combat Sequences for Sparring -- Part 9
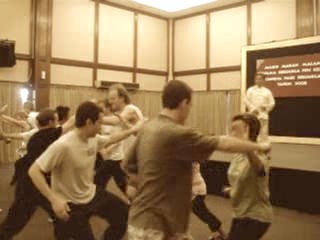 Skilful Manipulation of Combat Sequences for
Sparring -- Part 10
Skilful Manipulation of Combat Sequences for
Sparring -- Part 11
Skilful Manipulation of Combat Sequences for
Sparring -- Part 12
Shaolin Review -- Shaolin 03 Combat Sequence 5: Fierce Tiger Speeds through
Valley -- Overview
Combat Sequence 6: Dark Dragon Draws Water -- Overview
Combat Sequence 7: Chop the Hua Mountain -- Overview
Combat Sequence 8: Horizontally Sweep a Thousand Armies -- Overview
Enjoyjng Chi Flow and Sparring -- Overview
Combat Sequence 5: Fierce Tiger Speeds through Valley -- Part 1
Combat Sequence 5: Fierce Tiger Speeds through Valley -- Part 2
Combat Sequence 5: Fierce Tiger Speeds through Valley -- Part 3
Combat Sequence 5: Fierce Tiger Speeds through Valley -- Part 4
Combat Sequence 5: Fierce Tiger Speeds through Valley -- Part 5
Combat Sequence 5: Fierce Tiger Speeds through Valley -- Part 6
Combat Sequence 5: Fierce Tiger Speeds through Valley -- Part 7
Combat Sequence 6: Dark Dragon Draws Water -- Part 1
Combat Sequence 6: Dark Dragon Draws Water -- Part 2
Combat Sequence 6: Dark Dragon Draws Water -- Part 3
Combat Sequence 6: Dark Dragon Draws Water -- Part 4
Combat Sequence 6: Dark Dragon Draws Water -- Part 5
Combat Sequence 6: Dark Dragon Draws Water -- Part 6
Combat Sequence 6: Dark Dragon Draws Water -- Part 7
Combat Sequence 6: Dark Dragon Draws Water -- Part 8
Combat Sequence 6: Dark Dragon Draws Water -- Part 9
Combat Sequence 6: Dark Dragon Draws Water -- Part 10
Combat Sequence 6: Dark Dragon Draws Water -- Part 11
Combat Sequence 6: Dark Dragon Draws Water -- Part 12
Combat Sequence 6: Dark Dragon Draws Water -- Part 13
Combat Sequence 6: Dark Dragon Draws Water -- Part 14
Combat Sequence 7: Chop the Hua Mountain -- Part 1
Combat Sequence 7: Chop the Hua Mountain -- Part 2
Combat Sequence 7: Chop the Hua Mountain -- Part 3
Combat Sequence 7: Chop the Hua Mountain -- Part 4
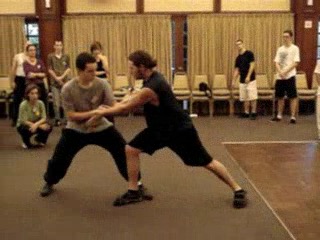 Combat Sequence 7: Chop the Hua Mountain -- Part 5
Combat Sequence 7: Chop the Hua Mountain -- Part 6
Combat Sequence 7: Chop the Hua Mountain -- Part 7
Combat Sequence 7: Chop the Hua Mountain -- Part 8
Combat Sequence 7: Chop the Hua Mountain -- Part 9
Combat Sequence 7: Chop the Hua Mountain -- Part 10
Combat Sequence 7: Chop the Hua Mountain -- Part 11
Combat Sequence 8: Horizontally Sweep a Thousand
Armies -- Part 1
Combat Sequence 8: Horizontally Sweep a Thousand
Armies -- Part 2
Combat Sequence 8: Horizontally Sweep a Thousand Armies -- Part 3
Combat Sequence 8: Horizontally Sweep a Thousand Armies -- Part 4
Combat Sequence 8: Horizontally Sweep a Thousand Armies -- Part 5
Combat Sequence 8: Horizontally Sweep a Thousand Armies -- Part 6
Combat Sequence 8: Horizontally Sweep a Thousand Armies -- Part 7
Combat Sequence 8: Horizontally Sweep a Thousand Armies -- Part 8
Combat Sequence 8: Horizontally Sweep a Thousand Armies -- Part 9
Combat Sequence 8: Horizontally Sweep a Thousand Armies -- Part 10
Combat Sequence 8: Horizontally Sweep a Thousand Armies -- Part 11
Enjoyjng Chi Flow and Sparring -- Part 1
Enjoyjng Chi Flow and Sparring -- Part 2
Enjoyjng Chi Flow and Sparring -- Part 3
Enjoyjng Chi Flow and Sparring -- Part 4
Enjoyjng Chi Flow and Sparring -- Part 5
Enjoyjng Chi Flow and Sparring -- Part 6
Enjoyjng Chi Flow and Sparring -- Part 7
Enjoyjng Chi Flow and Sparring -- Part 8
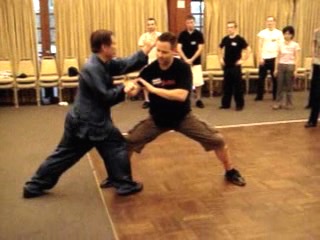 Shaolin Review -- Shaolin 04
Overcoming Two Big Problems in Free Sparring and Real
Shaolin Review -- Shaolin 04
Overcoming Two Big Problems in Free Sparring and RealFighting -- Overview
Using Modifications when Applying Combat Sequences
-- Overview
Countering Surprised Kicks and Throws while Applying Combat Sequences -- Overview
Combat Sequence 9: the Side-Body Tiger Tail Kick -- Overview
Combat Sequence 10: Heart-Piercing Thrust Kick -- Overview
Intercepting and Countering Ferocious Pressing
Attacks -- Overview
The Important Skills of Coverage and Interception -- Overview
Combat Sequence 11: Deadly Organ-Seeking Kick -- Overview
Combat Sequence 12: Formidable Whirlwind Kick -- Overview
Overcoming Two Big Probklems in Frree Sparring and Real Fighting -- Part 1
Overcoming Two Big Probklems in Frree Sparring and Real Fighting -- Part 2
Overcoming Two Big Probklems in Frree Sparring and Real Fighting -- Part 3
Overcoming Two Big Probklems in Frree Sparring and Real Fighting -- Part 4
Overcoming Two Big Probklems in Frree Sparring and Real Fighting -- Part 5
Overcoming Two Big Probklems in Frree Sparring and Real Fighting -- Part 6
Overcoming Two Big Probklems in Frree Sparring and Real Fighting -- Part 7
Overcoming Two Big Probklems in Frree Sparring and Real Fighting -- Part 8
Overcoming Two Big Probklems in Frree Sparring and Real Fighting -- Part 9
Using Modifications when Applying Combat Sequences -- Part 1
Using Modifications when Applying Combat Sequences -- Part 2
Using Modifications when Applying Combat Sequences -- Part 3
Using Modifications when Applying Combat Sequences -- Part 4
Using Modifications when Applying Combat Sequences -- Part 5
Using Modifications when Applying Combat Sequences -- Part 6
Using Modifications when Applying Combat Sequences -- Part 7
Using Modifications when Applying Combat Sequences -- Part 8
Using Modifications when Applying Combat Sequences -- Part 9
Using Modifications when Applying Combat Sequences -- Part 10
Using Modifications when Applying Combat Sequences -- Part 11
Using Modifications when Applying Combat Sequences -- Part 12
 Countering Surprised Kicks and Throws while
Applying Combat Sequences -- Part 1
Countering Surprised Kicks and Throws while
Applying Combat Sequences -- Part 2
Countering Surprised Kicks and Throws while
Applying Combat Sequences -- Part 3
Countering Surprised Kicks and Throws while
Applying Combat Sequences -- Part 4
Countering Surprised Kicks and Throws while
Applying Combat Sequences -- Part 5
Countering Surprised Kicks and Throws while
Applying Combat Sequences -- Part 6
Countering Surprised Kicks and Throws while Applying Combat Sequences -- Part 7
Countering Surprised Kicks and Throws while Applying Combat Sequences -- Part 8
Countering Surprised Kicks and Throws while Applying Combat Sequences -- Part 9
Combat Sequence 9: the Side-Body Tiger Tail Kick -- Part 1
Combat Sequence 9: the Side-Body Tiger Tail Kick -- Part 2
Combat Sequence 9: the Side-Body Tiger Tail Kick -- Part 3
Combat Sequence 9: the Side-Body Tiger Tail Kick -- Part 4
Combat Sequence 9: the Side-Body Tiger Tail Kick -- Part 5
Combat Sequence 9: the Side-Body Tiger Tail Kick -- Part 6
Combat Sequence 9: the Side-Body Tiger Tail Kick -- Part 7
Combat Sequence 9: the Side-Body Tiger Tail Kick -- Part 8
Combat Sequence 9: the Side-Body Tiger Tail Kick -- Part 9
Combat Sequence 10: Heart-Piercing Thrust Kick -- Part 1
Combat Sequence 10: Heart-Piercing Thrust Kick -- Part 2
Combat Sequence 10: Heart-Piercing Thrust Kick -- Part 3
Combat Sequence 10: Heart-Piercing Thrust Kick -- Part 4
Combat Sequence 10: Heart-Piercing Thrust Kick -- Part 5
Combat Sequence 10: Heart-Piercing Thrust Kick -- Part 6
Combat Sequence 10: Heart-Piercing Thrust Kick -- Part 7
Combat Sequence 10: Heart-Piercing Thrust Kick -- Part 8
Combat Sequence 10: Heart-Piercing Thrust Kick -- Part 9
Intercepting and Countering Ferocious Pressing Attacks -- Part 1
Intercepting and Countering Ferocious Pressing Attacks -- Part 2
Intercepting and Countering Ferocious Pressing Attacks -- Part 3
 Intercepting and Countering Ferocious Pressing
Attacks -- Part 4
Intercepting and Countering Ferocious Pressing
Attacks -- Part 5
Intercepting and Countering Ferocious Pressing
Attacks -- Part 6
Intercepting and Countering Ferocious Pressing
Attacks -- Part 7
Intercepting and Countering Ferocious Pressing
Attacks -- Part 8
Intercepting and Countering Ferocious Pressing
Attacks -- Part 9
Intercepting and Countering Ferocious Pressing Attacks -- Part 10
Intercepting and Countering Ferocious Pressing Attacks -- Part 11
Intercepting and Countering Ferocious Pressing Attacks -- Part 12
The Important Skills of Coverage and Interception -- Part 1
The Important Skills of Coverage and Interception -- Part 2
The Important Skills of Coverage and Interception -- Part 3
The Important Skills of Coverage and Interception -- Part 4
The Important Skills of Coverage and Interception -- Part 5
The Important Skills of Coverage and Interception -- Part 6
The Important Skills of Coverage and Interception -- Part 7
The Important Skills of Coverage and Interception -- Part 8
The Important Skills of Coverage and Interception -- Part 9
The Important Skills of Coverage and Interception -- Part 10
The Important Skills of Coverage and Interception -- Part 11
The Important Skills of Coverage and Interception -- Part 12
Combat Sequence 11: Deadly Organ-Seeking Kick -- Part 1
Combat Sequence 11: Deadly Organ-Seeking Kick -- Part 2
Combat Sequence 11: Deadly Organ-Seeking Kick -- Part 3
Combat Sequence 11: Deadly Organ-Seeking Kick -- Part 4
Combat Sequence 11: Deadly Organ-Seeking Kick -- Part 5
Combat Sequence 11: Deadly Organ-Seeking Kick -- Part 6
Combat Sequence 11: Deadly Organ-Seeking Kick -- Part 7
Combat Sequence 11: Deadly Organ-Seeking Kick -- Part 8
Combat Sequence 11: Deadly Organ-Seeking Kick -- Part 9
 Combat Sequence 11: Deadly Organ-Seeking Kick -- Part 10
Combat Sequence 12: Formidable Whirlwind Kick -- Part 1
Combat Sequence 12: Formidable Whirlwind Kick -- Part 2
Combat Sequence 12: Formidable Whirlwind Kick -- Part 3
Combat Sequence 12: Formidable Whirlwind Kick -- Part 4
Combat Sequence 12: Formidable Whirlwind Kick -- Part 5
Combat Sequence 12: Formidable Whirlwind Kick -- Part 6
Combat Sequence 12: Formidable Whirlwind Kick -- Part 7
Combat Sequence 12: Formidable Whirlwind Kick -- Part 8
Combat Sequence 12: Formidable Whirlwind Kick -- Part 9
Combat Sequence 12: Formidable Whirlwind Kick -- Part 10
Combat Sequence 12: Formidable Whirlwind Kick -- Part 11
Shaolin Review -- Shaolin 05 Combat Sequence 13: Fell Tree with Roots -- Overview
Combat Sequence 14: Lead Horse Backto Stable -- Overview
Combat Sequences 15 and 16: Hoe Field and Push Mountain -- Overview
Many Effective Techniques against Boxers -- Overview
Changing a Boxer's Strength into his Weakness -- Overview
Felling Boxers and Kick-Boxers -- Overview
Plant Willow to Counter Formidable Muay Thai Knee Jabs -- Overview
Combat Sequence 13: Fell Tree with Roots -- Part 1
Combat Sequence 13: Fell Tree with Roots -- Part 2
Combat Sequence 13: Fell Tree with Roots -- Part 3
Combat Sequence 13: Fell Tree with Roots -- Part 4
Combat Sequence 13: Fell Tree with Roots -- Part 5
Combat Sequence 13: Fell Tree with Roots -- Part 6
Combat Sequence 13: Fell Tree with Roots -- Part 7
Combat Sequence 13: Fell Tree with Roots -- Part 8
Combat Sequence 13: Fell Tree with Roots -- Part 9
Combat Sequence 13: Fell Tree with Roots -- Part 10
Combat Sequence 13: Fell Tree with Roots -- Part 11
Combat Sequence 14: Lead Horse Backto Stable -- Part 1
Combat Sequence 14: Lead Horse Backto Stable -- Part 2
 Combat Sequence 14: Lead Horse Backto Stable -- Part 3
Combat Sequence 14: Lead Horse Backto Stable -- Part 4
Combat Sequence 14: Lead Horse Backto Stable -- Part 5
Combat Sequence 14: Lead Horse Backto Stable -- Part 6
Combat Sequence 14: Lead Horse Backto Stable -- Part 7
Combat Sequence 14: Lead Horse Backto Stable -- Part 8
Combat Sequences 15 and 16: Hoe Field and Push Mountain
-- Part 1
Combat Sequences 15 and 16: Hoe Field and Push Mountain
-- Part 2
Combat Sequences 15 and 16: Hoe Field and Push Mountain
-- Part 3
Combat Sequences 15 and 16: Hoe Field and Push Mountain -- Part 4
Combat Sequences 15 and 16: Hoe Field and Push Mountain -- Part 5
Combat Sequences 15 and 16: Hoe Field and Push Mountain -- Part 6
Combat Sequences 15 and 16: Hoe Field and Push Mountain -- Part 7
Combat Sequences 15 and 16: Hoe Field and Push Mountain -- Part 8
Combat Sequences 15 and 16: Hoe Field and Push Mountain -- Part 9
Combat Sequences 15 and 16: Hoe Field and Push Mountain -- Part 10
Many Effective Techniques against Boxers -- Part 1
Many Effective Techniques against Boxers -- Part 2
Many Effective Techniques against Boxers -- Part 3
Many Effective Techniques against Boxers -- Part 4
Many Effective Techniques against Boxers -- Part 5
Many Effective Techniques against Boxers -- Part 6
Many Effective Techniques against Boxers -- Part 7
Many Effective Techniques against Boxers -- Part 8
Many Effective Techniques against Boxers -- Part 9
Many Effective Techniques against Boxers -- Part 10
Many Effective Techniques against Boxers -- Part 11
Many Effective Techniques against Boxers -- Part 12
Many Effective Techniques against Boxers -- Part 13
Changing a Boxer's Strength into his Weakness -- Part 1
 Changing a Boxer's Strength into his Weakness -- Part 2
Changing a Boxer's Strength into his Weakness -- Part 3
Changing a Boxer's Strength into his Weakness -- Part 4
Changing a Boxer's Strength into his Weakness -- Part 5
Changing a Boxer's Strength into his Weakness -- Part 6
Changing a Boxer's Strength into his Weakness -- Part 7
Changing a Boxer's Strength into his Weakness -- Part 8
Changing a Boxer's Strength into his Weakness -- Part 9
Changing a Boxer's Strength into his Weakness -- Part 10
Changing a Boxer's Strength into his Weakness -- Part 11
Felling Boxers and Kick-Boxers -- Part 1
Felling Boxers and Kick-Boxers -- Part 2
Felling Boxers and Kick-Boxers -- Part 3
Felling Boxers and Kick-Boxers -- Part 4
Felling Boxers and Kick-Boxers -- Part 5
Felling Boxers and Kick-Boxers -- Part 6
Felling Boxers and Kick-Boxers -- Part 7
Felling Boxers and Kick-Boxers -- Part 8
Felling Boxers and Kick-Boxers -- Part 9
Felling Boxers and Kick-Boxers -- Part 10
Planting Willow to Counter Formidable Muay Thai Knee Jabs -- Part 1
Planting Willow to Counter Formidable Muay Thai Knee Jabs -- Part 2
Planting Willow to Counter Formidable Muay Thai Knee Jabs -- Part 3
Planting Willow to Counter Formidable Muay Thai Knee Jabs -- Part 4
Planting Willow to Counter Formidable Muay Thai Knee Jabs -- Part 5
Planting Willow to Counter Formidable Muay Thai Knee Jabs -- Part 6
Planting Willow to Counter Formidable Muay Thai Knee Jabs -- Part 7
Planting Willow to Counter Formidable Muay Thai Knee Jabs -- Part 8
Planting Willow to Counter Formidable Muay Thai Knee Jabs -- Part 9
Planting Willow to Counter Formidable Muay Thai Knee Jabs -- Part 10
 Planting Willow to Counter Formidable Muay Thai
Knee Jabs -- Part 11
Planting Willow to Counter Formidable Muay Thai
Knee Jabs -- Part 12
Shaolin Review -- Videos Videos of Shaolin Kungfu Review Course -- Overview
Cultivation of Jing, Qi and Shen, or the Physical, Energy
and Mind
Some Finer Points regarding the Bow-Arrrow Stance and
the Horse-Riding Stance
How to Move Correctly and Speedily in Stances
Mechanics of Exploding Force
Exploding Force with Various Patterns
Linking Patterns to Form Combat Sequences
Pre-Arranged Sparring to Develop Combat Skills
Important Skills in Sequences 3 and 4
Applying Continuation of Sequences in Sparring Practice
Skilful Manipulation of Combat Sequences for Sparring
Applying Continuation of Sequences in Sparring Practice
Combat Sequence 6 -- Dark Drragon Draws Water
Combat Sequence 7 -- Chop the Hua Mountain
Combat Sequence 8 -- Horizontally Sweep a Thousand Armies
Enjoying Chi Flow and Sparring and Real Fighting
Overcoming Two Big Problems in Free
Using Modifications when Applying Combat Sequences
Countering Surprised Kicks and Throws while Applying Combat Sequences
Combat Sequence 9 -- Side-Body Tiger Tail Kick
 Combat Sequence 10 -- Heart-Piercing Thrust Kick
Intercepting and Countering Ferocious Pressing Attacks
Skills of Coverage and Interception
Combat Sequence 11 -- Deadly Organ-Seeking Kick
Combat Sequence 12 -- Formidable Whirlwind Kick
Combat Sequence 13 -- Fell Tree with Roots
Combat Sequence 14 -- Lead Horse Back to Stable
Combat Sequences 15 and 16 -- Hoe Field and Push Mountain
Many Effective Techniques against Boxers
Changing a Boexer's Strength into his Weakness
Felling Boxers and Kick-Boxers
Planting Willow to Counter Foridable Muay Thai Knee Jabs
