VIDEO-CLIPS-3j: TITLES
Shaolin Tantui 2007
Shaolin -- Tantui
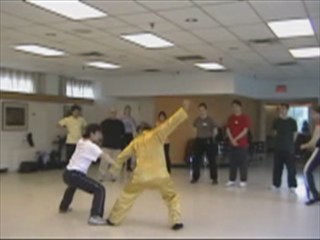
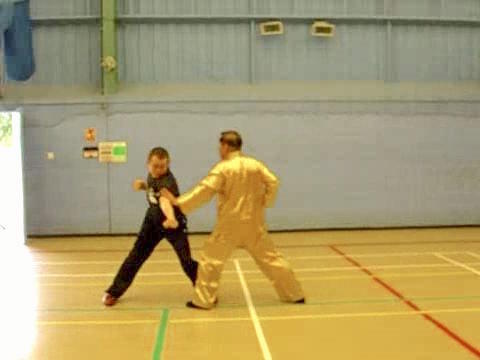
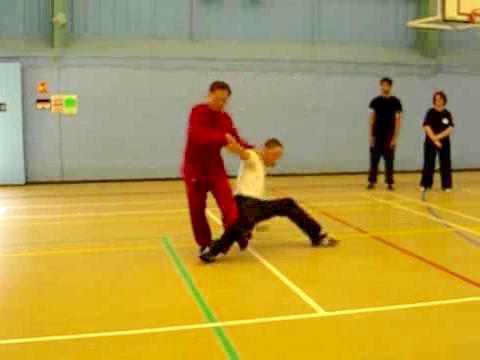
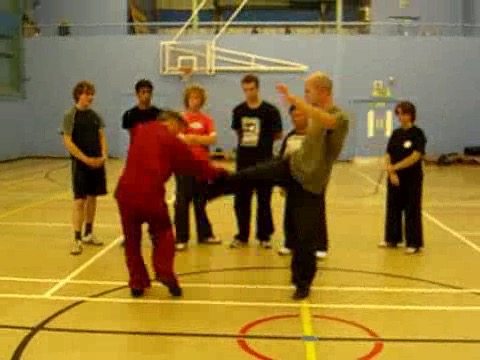
Against KicksAgainst Pin Downs
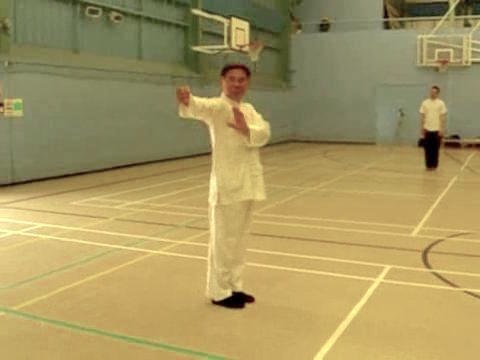
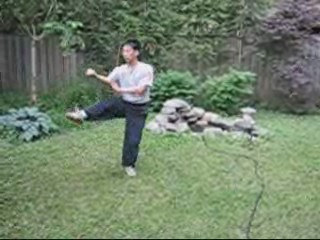
Basics of Tantui
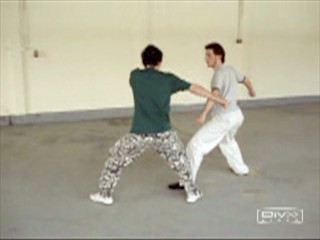
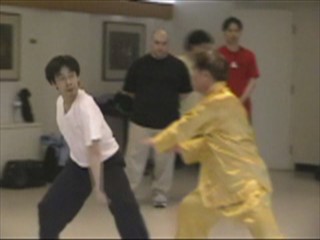
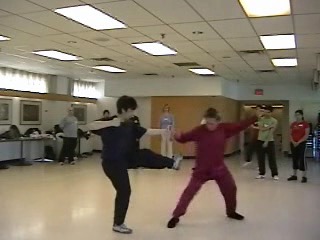
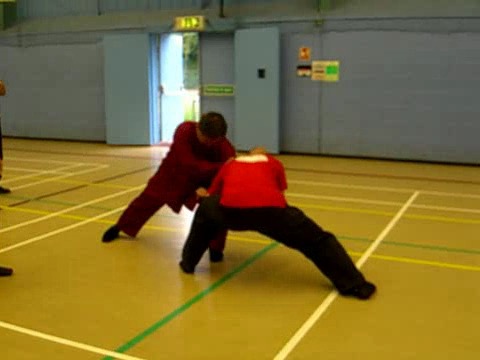
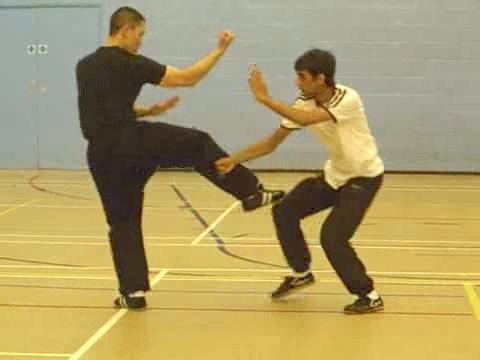
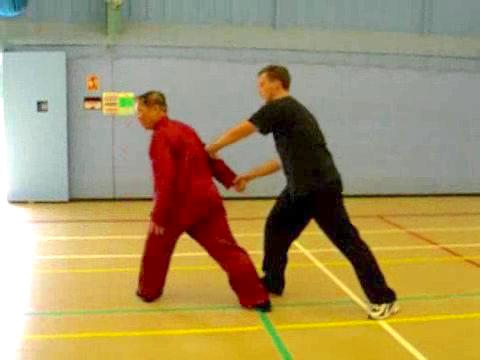
Tantui against Boxer
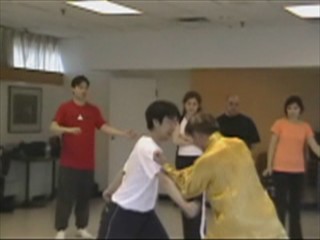
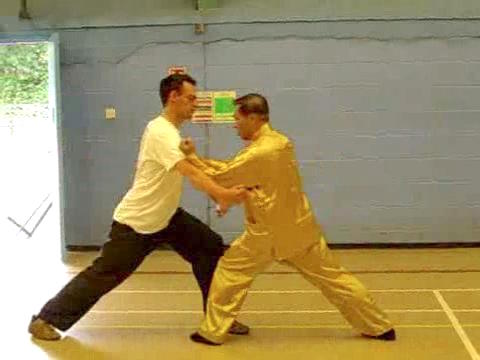
Break Lock
Chasing and Covering
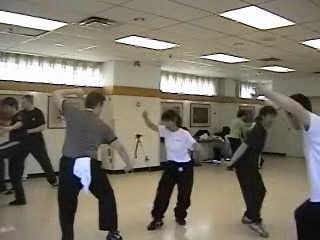
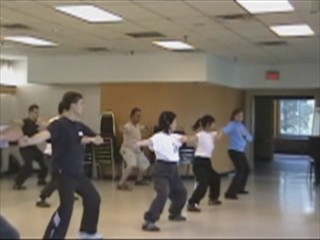
Clas Practice
Covering an Opponent
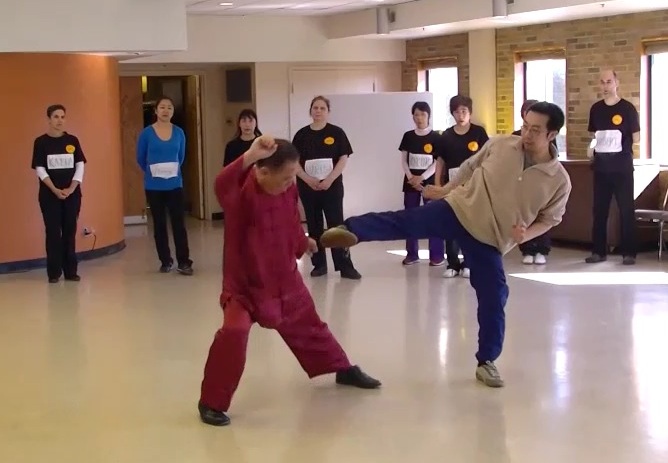
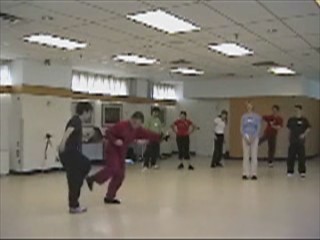
Double Flying Kics
Exploding Force
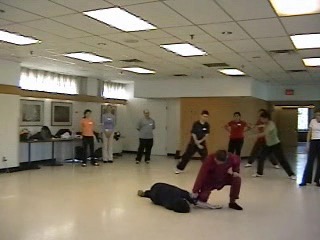
Felling Techniques and Counterrs
Flowing Force
Impirtance of Footwork
Forcing Boxers Back
Grip and Strike
Releasing Grips
Hanging Double Hooks
Hold Horrse before Cliff
Knee Jab
Lift-Strike
 Minimizing Opponent's Force
Organ-Seeking Kick
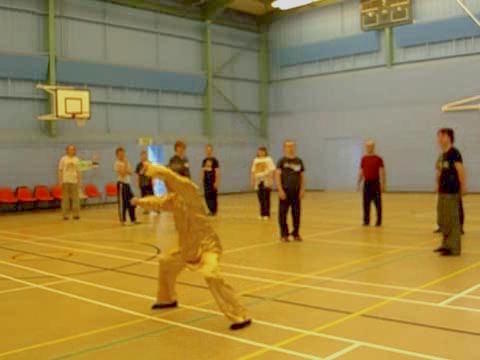
The Magic of Tantui -- Overview
Pressing with Chosen Sequence
Some Questions on Combat
Rotation of Waist
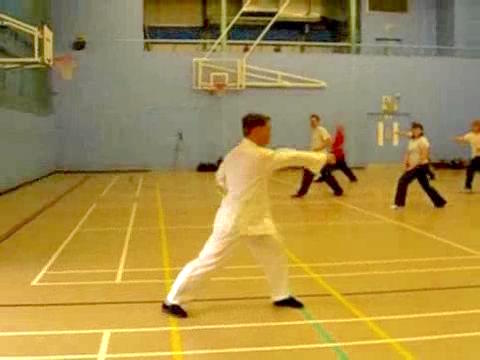
Secrets of Tantui Thrust Punch
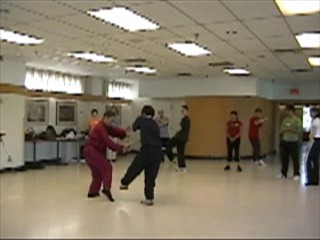
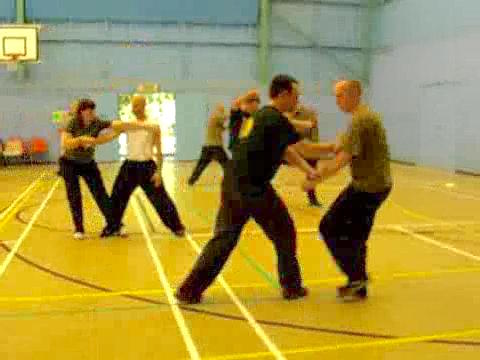
Combat Sequence 1
Combat Sequence 2
Combat Sequence 3
Combat Sequence 4
Combat Sequence 5
Combat Sequence 6
Combat Sequence 7
Combat Sequence 8
Combat Sequence 9
Combat Sequence 10
Combat Sequences 11 and 12
Combat Sequences 4, 5, 6
Three Rings Round the Moon
Wrist, Elbow and Shoulder
Tantui Combat Sequence 7
Tantui Combat Sequence 8
Tantui Combat Sequence 9
Tantui Combat Sequence 10
Tantui Combat Sequence 11
Tantui Combat Sequence 12
Tantui Combat Application Set 3 Part 1
Tantui Combat Application Set 3 Part 2
Tantui Combat Application Set 3 Part 3
 Tantui Combat Application Set 4 Part 1
Tantui Combat Application Set 4 Part 2
Tantui Combat Application Set 4 Part 3
Tantui Combat Application Set 1 Part 1
Tantui Combat Application Set 1 Part 2
Tantui Combat Application Set 1 Part 3
Tantui Combat Application Set 2 Part 1
Tantui Combat Application Set 2 Part 2
Tantui Combat Application Set 2 Part 3
Tantui Combat Sequence 1
Tantui Combat Sequence 2
Tantui Combat Sequence 3
Tantui Combat Sequence 4
Tantui Combat Sequence 5
Tantui Combat Sequence 6
Tantui, the Essence of Northermn Shaolin (with jpg)
Tantui, the Essence of Northern Shaolin
Videos of Tantui Combat Sequences and Combat Application Set
Combat Sequences and Sets of Tantui -- Overview
Video Clips for UK Summer Camp 2007 (Old)
Shaolin -- Tantui 2 The Technical Advantages of Shaolin Kungfu (with jpeg)
The Technical Advantages of Shaolin Kungfu
Tantui against Boxing and Kick-Boxing -- Part 1
Tantui against Boxing and Kick-Boxing -- Part 2
Tantui against Boxing and Kick-Boxing -- Part 3
Tantui against Boxing and Kick-Boxing -- Part 4
Tantui against Boxing and Kick-Boxing -- Part 5
Tantui against Boxing and Kick-Boxing -- Part 6
Tantui against Boxing and Kick-Boxing -- Part 7
The Technical Advantages of Shaolin Kungfu -- Part 1
 The Technical Advantages of Shaolin Kungfu -- Part 2
The Technical Advantages of Shaolin Kungfu -- Part 3
The Technical Advantages of Shaolin Kungfu -- Part 4
The Technical Advantages of Shaolin Kungfu -- Part 5
The Technical Advantages of Shaolin Kungfu -- Part 6
The Technical Advantages of Shaolin Kungfu -- Part 7
The Technical Advantages of Shaolin Kungfu -- Part 8
The Technical Advantages of Shaolin Kungfu -- Part 9
The Technical Advantages of Shaolin Kungfu -- Part 10
The Technical Advantages of Shaolin Kungfu -- Part 11
The Technical Advantages of Shaolin Kungfu -- Part 12
The Technical Advantages of Shaolin Kungfu -- Part 13
Wonders of Tantui Seqence 1 -- Part 1
Wonders of Tantui Seqence 1 -- Part 2
Wonders of Tantui Seqence 1 -- Part 3
Wonders of Tantui Seqence 1 -- Part 4
Wonders of Tantui Seqence 1 -- Part 5
Wonders of Tantui Seqence 1 -- Part 6
Tantui against Boxing and Kick-Boxing (with jpeg)
Tantui against Boxing and Kick-Boxing
The Wonders of Tantui Sequence 1 (with jpg)
The Wonders of Tantui Sequence 1
Shaolin -- Tantui 3 Making Kungfu Alive -- Part 1
Making Kungfu Alive -- Part 2
Making Kungfu Alive -- Part 3
Making Kungfu Alive -- Part 4
Making Kungfu Alive -- Part 5
Making Kungfu Alive -- Part 6
Making Kungfu Alive -- Part 7
Making Kungfu Alive -- Part 8
Two Combat sequences to Handle Most Ordinary Opponents -- Part 1
Two Combat sequences to Handle Most Ordinary Opponents -- Part 2
 Two Combat sequences to Handle Most Ordinary
Opponents -- Part 3
Two Combat sequences to Handle Most Ordinary
Opponents -- Part 4
Two Combat sequences to Handle Most Ordinary
Opponents -- Part 5
Two Combat sequences to Handle Most Ordinary
Opponents -- Part 6
A Counter against any Kick Part 1
A Counter against any Kick Part 2
A Counter against any Kick Part 3
A Counter against any Kick Part 4
A Counter against any Kick Part 5
A Counter against any Kick Part 6
A Counter against any Kick Part 7
A Counter against any Kick Part 8
The Formidable Three Rings Around the Moon -- Part 1
The Formidable Three Rings Around the Moon -- Part 2
The Formidable Three Rings Around the Moon -- Part 3
The Formidable Three Rings Around the Moon -- Part 4
The Formidable Three Rings Around the Moon -- Part 5
The Formidable Three Rings Around the Moon -- Part 6
The Formidable Three Rings Around the Moon -- Part 7
Penetrating the Impernetratable -- Part 1
Penetrating the Impernetratable -- Part 2
Penetrating the Impernetratable -- Part 3
Penetrating the Impernetratable -- Part 4
Penetrating the Impernetratable -- Part 5
Penetrating the Impernetratable -- Part 6
Penetrating the Impernetratable -- Part 7
Penetrating the Impernetratable -- Part 8
Penetrating the Impernetratable -- Part 9
Countering Elbow and Knee Strikes from Muay Thai Fighters -- Part 1
Countering Elbow and Knee Strikes from Muay Thai Fighters -- Part 2
 Countering Elbow and Knee Strikes from Muay Thai
Fighters -- Part 3
Countering Elbow and Knee Strikes from Muay Thai
Fighters -- Part 4
Countering Elbow and Knee Strikes from Muay Thai
Fighters -- Part 5
Countering Elbow and Knee Strikes from Muay Thai
Fighters -- Part 6
Countering Elbow and Knee Strikes from Muay Thai
Fighters -- Part 7
Fascinating Combat Application of Tantui in
Striking, Kicking, Felling and Gripping -- Part 1
Fascinating Combat Application of Tantui in Striking, Kicking,
Felling and Gripping -- Part 2
Fascinating Combat Application of Tantui in Striking, Kicking,
Felling and Gripping -- Part 3
Fascinating Combat Application of Tantui in Striking, Kicking,
Felling and Gripping -- Part 4
Fascinating Combat Application of Tantui in Striking, Kicking,
Felling and Gripping -- Part 5
Fascinating Combat Application of Tantui in Striking, Kicking,
Felling and Gripping -- Part 6
Fascinating Combat Application of Tantui in Striking, Kicking,
Felling and Gripping -- Part 7
Fascinating Combat Application of Tantui in Striking, Kicking,
Felling and Gripping -- Part 8
Fascinating Combat Application of Tantui in Striking, Kicking,
Felling and Gripping -- Part 9
Spotting Secrets Hidden in the Open Part 1
Spotting Secrets Hidden in the Open Part 2
Spotting Secrets Hidden in the Open Part 3
Spotting Secrets Hidden in the Open Part 4
Spotting Secrets Hidden in the Open Part 5
Spotting Secrets Hidden in the Open Part 6
Spotting Secrets Hidden in the Open Part 7
Spotting Secrets Hidden in the Open Part 8
Helping One Another and Having Fun in Sparring -- Part 1
Helping One Another and Having Fun in Sparring -- Part 2
Helping One Another and Having Fun in Sparring -- Part 3
Helping One Another and Having Fun in Sparring -- Part 4
Helping One Another and Having Fun in Sparring -- Part 5
Helping One Another and Having Fun in Sparring -- Part 6
Helping One Another and Having Fun in Sparring -- Part 7
Helping One Another and Having Fun in Sparring -- Part 8
 Combat Application Set 1: Second Brother Asks the
Way -- Part 1
Combat Application Set 2: Lift Lantern Lead Way
-- Part 2
Combat Application Set 3: Actor-Warrior Appears
on Stage -- Part 3
Combat Application Set 4: Second Brother Lifts
Caldron -- Part 4
Makig Kungfu Alive (with jpeg) -- Overview
Making Kungfu Alive -- Overview
Two Combat Sequences to Handle Most Ordinary Opponents
(with jpeg) -- Overview
Two Combat Sequences to Handle Most Ordinary Opponents
-- Overview
A Counter against an Kick (with jpeg) -- Overview
A Counter against an Kick -- Overview
The Formidable Three Rings Around the Moon (with jpeg)
-- Overview
The Formidable Three Rings Around the Moon -- Overview
Penetrating the Impenetrable (with jpeg) -- Overview
Penetrating the Impenetrable -- Overview
Countering Elbow an Knee Strikes from Muay Thai Fighters
(with jpeg) -- Overview
Countering Elbow an Knee Strikes from Muay Thai Fighters -- Overview
Fascinating Combat Applications of Tantui in Striking, Kicking,
Felling and Gripping (with jpeg) -- Overview
Fascinating Combat Applications of Tantui in Striking, Kicking,
Felling and Gripping -- Overview
Spotting Secrets hidden in the Open (with jpeg) -- Overview
Spotting Secrets hidden in the Open -- Overview
Helping One Another and Having Fun in Sparring (with jpeg) -- Overview
Helping One Another and Having Fun in Sparring -- Overview
Linking Sequences to Form Set (with jpeg) -- Overview
Linking Sequences to Form Set -- Overview
Shaolin -- Tantui 4 Produndity of 12 Tantui Combat Sequences -- Part 1
Produndity of 12 Tantui Combat Sequences -- Part 2
Produndity of 12 Tantui Combat Sequences -- Part 3
Produndity of 12 Tantui Combat Sequences -- Part 4
Produndity of 12 Tantui Combat Sequences -- Part 5
Produndity of 12 Tantui Combat Sequences -- Part 6
Produndity of 12 Tantui Combat Sequences -- Part 7
Produndity of 12 Tantui Combat Sequences -- Part 8
Produndity of 12 Tantui Combat Sequences -- Part 9
Produndity of 12 Tantui Combat Sequences -- Part 10
 Produndity of 12 Tantui Combat Sequences -- Part 11
Produndity of 12 Tantui Combat Sequences -- Part 12
Laying Foundation before Training Combat -- Part 1
Laying Foundation before Training Combat -- Part 2
Laying Foundation before Training Combat -- Part 3
Laying Foundation before Training Combat -- Part 4
Laying Foundation before Training Combat -- Part 5
Laying Foundation before Training Combat -- Part 6
Laying Foundation before Training Combat -- Part 7
Laying Foundation before Training Combat -- Part 8
Laying Foundation before Training Combat -- Part 9
Laying Foundation before Training Combat -- Part 10
From Form to Flow to Force -- Part 1
From Form to Flow to Force -- Part 2
From Form to Flow to Force -- Part 3
From Form to Flow to Force -- Part 4
From Form to Flow to Force -- Part 5
From Form to Flow to Force -- Part 6
From Form to Flow to Force -- Part 7
From Form to Flow to Force -- Part 8
From Form to Flow to Force -- Part 9
From Form to Flow to Force -- Part 10
From Form to Flow to Force -- Part 11
Laying Foundation before Training Combat (with jpeg) -- Overview
Laying Foundation before Training Combat -- Overview
From Form to Flow to Force (with jpeg) -- Overview
From Form to Flow to Force -- Overview
The Produndity of 12 Tantui Combat Sequences (with jpeg) -- Overview
Produndity of 12 Tantui Combat Sequences -- Overview
 Shaolin -- Tantui 5
Tantiat UK Summer Camp -- Overview
Shaolin -- Tantui 5
Tantiat UK Summer Camp -- OverviewSecrets of Building Internal Force
Experiencing the Effects of Deviated Practice
Basic Footwork Training
From Correct Movements to Speed and Elegance
Different Ways of Turning
Secrets of Building Internal Force -- Part 1
Secrets of Building Internal Force -- Part 2
Secrets of Building Internal Force -- Part 3
Secrets of Building Internal Force -- Part 4
Secrets of Building Internal Force -- Part 5
Secrets of Building Internal Force -- Part 6
Secrets of Building Internal Force -- Part 7
Secrets of Building Internal Force -- Part 8
Secrets of Building Internal Force -- Part 9
Secrets of Building Internal Force -- Part 10
Secrets of Building Internal Force -- Part 11
Secrets of Building Internal Force -- Part 12
Secrets of Building Internal Force -- Part 13
Secrets of Building Internal Force -- Part 14
Secrets of Building Internal Force -- Part 15
Experiencing the Effects of Deviated Practice 1
Experiencing the Effects of Deviated Practice 2
Experiencing the Effects of Deviated Practice 3
Experiencing the Effects of Deviated Practice 4
Experiencing the Effects of Deviated Practice 5
Experiencing the Effects of Deviated Practice 6
Experiencing the Effects of Deviated Practice 7
Experiencing the Effects of Deviated Practice 8
Experiencing the Effects of Deviated Practice 9
 Basic Footwork Training -- Part 1
Basic Footwork Training -- Part 2
Basic Footwork Training -- Part 3
Basic Footwork Training -- Part 4
Basic Footwork Training -- Part 5
Basic Footwork Training -- Part 6
Basic Footwork Training -- Part 7
Basic Footwork Training -- Part 8
Basic Footwork Training -- Part 9
Basic Footwork Training -- Part 10
From Correct Movements to Speed and Elegance -- Part 1
From Correct Movements to Speed and Elegance -- Part 2
From Correct Movements to Speed and Elegance -- Part 3
From Correct Movements to Speed and Elegance -- Part 4
From Correct Movements to Speed and Elegance -- Part 5
From Correct Movements to Speed and Elegance -- Part 6
From Correct Movements to Speed and Elegance -- Part 7
From Correct Movements to Speed and Elegance -- Part 8
From Correct Movements to Speed and Elegance -- Part 9
From Correct Movements to Speed and Elegance -- Part 10
From Correct Movements to Speed and Elegance -- Part 11
Different Ways of Turning -- Part 1
Different Ways of Turning -- Part 2
Different Ways of Turning -- Part 3
Different Ways of Turning -- Part 4
Different Ways of Turning -- Part 5
Different Ways of Turning -- Part 6
Different Ways of Turning -- Part 7
Different Ways of Turning -- Part 8
Different Ways of Turning -- Part 9
 Different Ways of Turning -- Part 10
Different Ways of Turning -- Part 11
Different Ways of Turning -- Part 12
Shaolin -- Tantui 6 Adding Hand Forms to Stances to Form Patterns -- Overview
The Mechanics of Fa-Jing or Exploding Force -- Overview
Bo-Fa and Shen-Fa or Footwork and
Body-Movement -- Overview
The Three Harmonies of Legs, Body and Hands -- Overview
Tantui Sequence 1 -- Thrust Punch -- Overview
The Three Fs -- Form, Force and Flow -- Overview
Every Kungfu Session is a training of Energy and Mind -- Overview
Adding Hand Forms to Stances to Form Patterns -- Part 1
Adding Hand Forms to Stances to Form Patterns -- Part 2
Adding Hand Forms to Stances to Form Patterns -- Part 3
Adding Hand Forms to Stances to Form Patterns -- Part 4
Adding Hand Forms to Stances to Form Patterns -- Part 5
Adding Hand Forms to Stances to Form Patterns -- Part 6
Adding Hand Forms to Stances to Form Patterns -- Part 7
The Mechanic of Fa-Jing or Exploding Force -- Part 1
The Mechanic of Fa-Jing or Exploding Force -- Part 2
The Mechanic of Fa-Jing or Exploding Force -- Part 3
The Mechanic of Fa-Jing or Exploding Force -- Part 4
The Mechanic of Fa-Jing or Exploding Force -- Part 5
The Mechanic of Fa-Jing or Exploding Force -- Part 6
The Mechanic of Fa-Jing or Exploding Force -- Part 7
The Mechanic of Fa-Jing or Exploding Force -- Part 8
Bo-Fa and Shen-Fa or Footwork and Body-Movement -- Part 1
Bo-Fa and Shen-Fa or Footwork and Body-Movement -- Part 2
Bo-Fa and Shen-Fa or Footwork and Body-Movement -- Part 3
Bo-Fa and Shen-Fa or Footwork and Body-Movement -- Part 4
Bo-Fa and Shen-Fa or Footwork and Body-Movement -- Part 5
Bo-Fa and Shen-Fa or Footwork and Body-Movement -- Part 6
Bo-Fa and Shen-Fa or Footwork and Body-Movement -- Part 7
Bo-Fa and Shen-Fa or Footwork and Body-Movement -- Part 8
 Bo-Fa and Shen-Fa or Footwork and Body-Movement -- Part 9
Bo-Fa and Shen-Fa or Footwork and Body-Movement -- Part 10
The Three Harmonies of Legs, Body and Hands -- Part 1
The Three Harmonies of Legs, Body and Hands -- Part 2
The Three Harmonies of Legs, Body and Hands -- Part 3
The Three Harmonies of Legs, Body and Hands -- Part 4
The Three Harmonies of Legs, Body and Hands -- Part 5
The Three Harmonies of Legs, Body and Hands -- Part 6
The Three Harmonies of Legs, Body and Hands -- Part 7
The Three Harmonies of Legs, Body and Hands -- Part 8
Tantui Sequence 1 -- Thrust Punch -- Part 1
Tantui Sequence 1 -- Thrust Punch -- Part 2
Tantui Sequence 1 -- Thrust Punch -- Part 3
Tantui Sequence 1 -- Thrust Punch -- Part 4
Tantui Sequence 1 -- Thrust Punch -- Part 5
Tantui Sequence 1 -- Thrust Punch -- Part 6
Tantui Sequence 1 -- Thrust Punch -- Part 7
Tantui Sequence 1 -- Thrust Punch -- Part 8
Tantui Sequence 1 -- Thrust Punch -- Part 9
The Three Fs: Form, Force, and Flow -- Part 1
The Three Fs: Form, Force, and Flow -- Part 2
The Three Fs: Form, Force, and Flow -- Part 3
The Three Fs: Form, Force, and Flow -- Part 4
The Three Fs: Form, Force, and Flow -- Part 5
The Three Fs: Form, Force, and Flow -- Part 6
Every Kungfu Session is a training of Energy and Mind -- Part 1
Every Kungfu Session is a training of Energy and Mind -- Part 2
Every Kungfu Session is a training of Energy and Mind -- Part 3
Every Kungfu Session is a training of Energy and Mind -- Part 4
Every Kungfu Session is a training of Energy and Mind -- Part 5
 Every Kungfu Session is a training of Energy and Mind -- Part 6
Bo-Fa and Shen-Fa or Footwork and Body-Movement -- Part 11
Bo-Fa and Shen-Fa or Footwork and Body-Movement -- Part 12
Bo-Fa and Shen-Fa or Footwork and Body-Movement -- Part 13
Bo-Fa and Shen-Fa or Footwork and Body-Movement -- Part 14
Shaolin -- Tantui 7 Simple in Appearance but Profound in Application -- Overview
If you Use a Lot of Kicks, you should also know their
Counters -- Overview
It is Necessary to have an Element of Threat in Combat -- Overview
Counters against Formidabke Muay Thai Knee Jabs -- Overview
Against Shoots, Against Throws, and Felling Opponents -- Overview
Simple in Appearance but Profound in Application -- Part 1
Simple in Appearance but Profound in Application -- Part 2
Simple in Appearance but Profound in Application -- Part 3
Simple in Appearance but Profound in Application -- Part 4
Simple in Appearance but Profound in Application -- Part 5
Simple in Appearance but Profound in Application -- Part 6
Simple in Appearance but Profound in Application -- Part 7
Simple in Appearance but Profound in Application -- Part 8
If you Use a Lot of Kicks, you should also know their Counters -- Part 1
If you Use a Lot of Kicks, you should also know their Counters -- Part 2
If you Use a Lot of Kicks, you should also know their Counters -- Part 3
If you Use a Lot of Kicks, you should also know their Counters -- Part 4
If you Use a Lot of Kicks, you should also know their Counters -- Part 5
If you Use a Lot of Kicks, you should also know their Counters -- Part 6
If you Use a Lot of Kicks, you should also know their Counters -- Part 7
It is Necessary to have an Element of Threat in Combat -- Part 1
It is Necessary to have an Element of Threat in Combat -- Part 2
It is Necessary to have an Element of Threat in Combat -- Part 3
It is Necessary to have an Element of Threat in Combat -- Part 4
It is Necessary to have an Element of Threat in Combat -- Part 5
It is Necessary to have an Element of Threat in Combat -- Part 6
It is Necessary to have an Element of Threat in Combat -- Part 7
It is Necessary to have an Element of Threat in Combat -- Part 8
Counters against Formidable Muay Thai Knee Jabs -- Part 1
Counters against Formidable Muay Thai Knee Jabs -- Part 2
Counters against Formidable Muay Thai Knee Jabs -- Part 3Counters against Formidable Muay Thai Knee Jabs -- Part 4
Counters against Formidable Muay Thai Knee Jabs -- Part 5
Counters against Formidable Muay Thai Knee Jabs -- Part 6
Counters against Formidable Muay Thai Knee Jabs -- Part 7
Counters against Formidable Muay Thai Knee Jabs -- Part 8
Against Shoots, Against Throws, and Felling Opponents
-- Part 1
Against Shoots, Against Throws, and Felling Opponents
-- Part 2
Against Shoots, Against Throws, and Felling Opponents
-- Part 3
Against Shoots, Against Throws, and Felling Opponents -- Part 4
Against Shoots, Against Throws, and Felling Opponents -- Part 5
Against Shoots, Against Throws, and Felling Opponents -- Part 6
Against Shoots, Against Throws, and Felling Opponents -- Part 7
Against Shoots, Against Throws, and Felling Opponents -- Part 8
Against Shoots, Against Throws, and Felling Opponents -- Part 9
Shaolin -- Tantui 8 Learning Tantui Sequences 1, 2 and 3 -- Overview
Learning Tantui Sequences 4, 5 and 6 -- Overview
Learning Tantui Sequences 7, 8 and 9 -- Overview
Learning Tantui Sequences 10, 11 and 12 -- Overview
Applications of Single Spread and Breaking Lock -- Overview
Breaking almost any Lock with the Breaking Lock Technique -- Overview
The Richness of Tantui Combat Applications -- Overview
Learning Tantui Sequences 1, 2 and 3 -- Part 3
Learning Tantui Sequences 1, 2 and 3 -- Part 4
Learning Tantui Sequences 1, 2 and 3 -- Part 5
 Learning Tantui Sequences 1, 2 and 3 -- Part 6
Learning Tantui Sequences 1, 2 and 3 -- Part 7
Learning Tantui Sequences 1, 2 and 3 -- Part 1
Learning Tantui Sequences 1, 2 and 3 -- Part 8
Learning Tantui Sequences 4, 5 and 6 -- Part 11
Learning Tantui Sequences 4, 5 and 6 -- Part 2
Learning Tantui Sequences 4, 5 and 6 -- Part 3
Learning Tantui Sequences 4, 5 and 6 -- Part 4
Learning Tantui Sequences 4, 5 and 6 -- Part 5
Learning Tantui Sequences 4, 5 and 6 -- Part 6
Learning Tantui Sequences 4, 5 and 6 -- Part 7
Learning Tantui Sequences 4, 5 and 6 -- Part 8
Learning Tantui Sequences 7, 8 and 9 -- Part 1
Learning Tantui Sequences 7, 8 and 9 -- Part 4
Learning Tantui Sequences 1, 2 and 3 -- Part 2
Learning Tantui Sequences 7, 8 and 9 -- Part 2
Learning Tantui Sequences 7, 8 and 9 -- Part 3
Learning Tantui Sequences 7, 8 and 9 -- Part 5
Applications of Single Spread and Breaking Lock -- Part 1
Applications of Single Spread and Breaking Lock -- Part 2
Learning Tantui Sequences 7, 8 and 9 -- Part 6
Learning Tantui Sequences 7, 8 and 9 -- Part 7
Learning Tantui Sequences 7, 8 and 9 -- Part 8
Learning Tantui Sequences 7, 8 and 9 -- Part 9
Applications of Single Spread and Breaking Lock -- Part 3
Applications of Single Spread and Breaking Lock -- Part 4
Applications of Single Spread and Breaking Lock -- Part 5
Applications of Single Spread and Breaking Lock -- Part 6
Applications of Single Spread and Breaking Lock -- Part 7
Applications of Single Spread and Breaking Lock -- Part 8
 Breaking Almost any Lock with the Breaking Lock
Technique -- Part 1
Breaking Almost any Lock with the Breaking Lock
Technique -- Part 2
Breaking Almost any Lock with the Breaking Lock
Technique -- Part 3
Breaking Almost any Lock with the Breaking Lock
Technique -- Part 4
Breaking Almost any Lock with the Breaking Lock
Technique -- Part 5
Breaking Almost any Lock with the Breaking Lock
Technique -- Part 6
Breaking Almost any Lock with the Breaking Lock Technique -- Part 7
Breaking Almost any Lock with the Breaking Lock Technique -- Part 8
Breaking Almost any Lock with the Breaking Lock Technique -- Part 9
Learning Tantui Sequences 10, 11 and 12 -- Part 1
Learning Tantui Sequences 10, 11 and 12 -- Part 2
Learning Tantui Sequences 10, 11 and 12 -- Part 3
Learning Tantui Sequences 10, 11 and 12 -- Part 4
Learning Tantui Sequences 10, 11 and 12 -- Part 5
Learning Tantui Sequences 10, 11 and 12 -- Part 6
The Richness of Tantui Combat Applications -- Part 1
The Richness of Tantui Combat Applications -- Part 2
The Richness of Tantui Combat Applications -- Part 3
The Richness of Tantui Combat Applications -- Part 4
The Richness of Tantui Combat Applications -- Part 5
The Richness of Tantui Combat Applications -- Part 6
The Richness of Tantui Combat Applications -- Part 7
The Richness of Tantui Combat Applications -- Part 8
The Richness of Tantui Combat Applications -- Part 9
The Richness of Tantui Combat Applications -- Part 10
Learning Tantui Sequences 10, 11 and 12 -- Part 7
Learning Tantui Sequences 10, 11 and 12 -- Part 8
Learning Tantui Sequences 10, 11 and 12 -- Part 9
The Richness of Tantui Combat Applications -- Part 11
Learning Tantui Sequences 10, 11 and 12 -- Part 10
Learning Tantui Sequences 10, 11 and 12 -- Part 11
 Shaolin -- Tantui 9
Second Brother and White Horse -- Overview
Shaolin -- Tantui 9
Second Brother and White Horse -- OverviewAn Effective Sequence against Boxers -- Overview
Three Harmonies in Tantui Combat Sequence One -- Overview
Second Brother and White Horse -- Part 1
Second Brother and White Horse -- Part 2
Second Brother and White Horse -- Part 3
Second Brother and White Horse -- Part 4
Second Brother and White Horse -- Part 5
Second Brother and White Horse -- Part 6
Second Brother and White Horse -- Part 7
Second Brother and White Horse -- Part 8
Second Brother and White Horse -- Part 9
An Effective Sequence against Boxers -- Part 1
An Effective Sequence against Boxers -- Part 2
An Effective Sequence against Boxers -- Part 3
An Effective Sequence against Boxers -- Part 4
An Effective Sequence against Boxers -- Part 5
An Effective Sequence against Boxers -- Part 6
An Effective Sequence against Boxers -- Part 7
An Effective Sequence against Boxers -- Part 8
An Effective Sequence against Boxers -- Part 9
An Effective Sequence against Boxers -- Part 10
An Effective Sequence against Boxers -- Part 11
An Effective Sequence against Boxers -- Part 11
Three Harmonies in Tantui Combat Sequence One -- Part 1
Three Harmonies in Tantui Combat Sequence One -- Part 2
Three Harmonies in Tantui Combat Sequence One -- Part 3
Three Harmonies in Tantui Combat Sequence One -- Part 4
Three Harmonies in Tantui Combat Sequence One -- Part 5
Three Harmonies in Tantui Combat Sequence One -- Part 6
 Three Harmonies in Tantui Combat Sequence One -- Part 7
Three Harmonies in Tantui Combat Sequence One -- Part 8
Three Harmonies in Tantui Combat Sequence One -- Part 9
Three Harmonies in Tantui Combat Sequence One -- Part 10
Three Harmonies in Tantui Combat Sequence One -- Part 11
Three Harmonies in Tantui Combat Sequence One -- Part 12
Shaolin -- Tantui 10 White Horse Returns Head -- Overview
Adjustments and Modifications in Varied Situations
-- Overview
Effective Techniques against Boxers -- Overview
Combat Skills against Boxers -- Overview
Applying the Tactics of Covering and Chasing against
Boxers -- Overview
The Unbelievable Effectiveness of Tantui Combat Sequence
One -- Overview
Old Elephant Drops Tusk in Combat Seqquence Two -- Overview
Rising Dragon Galloping Tiger -- Overview
Combining Sequences in Combat Training -- Overview
The Importance of Skills in Applying Combat Sequences
-- Overview
Some Effective Skills for Combat -- Overview
White Horse Returns Head -- Part 1
White Horse Returns Head -- Part 2
White Horse Returns Head -- Part 3
White Horse Returns Head -- Part 4
White Horse Returns Head -- Part 5
White Horse Returns Head -- Part 6
White Horse Returns Head -- Part 7
White Horse Returns Head -- Part 8
White Horse Returns Head -- Part 9
 Adjustments and Modifications in Varied Situations -- Part 1
Adjustments and Modifications in Varied Situations -- Part 2
Adjustments and Modifications in Varied Situations -- Part 3
Adjustments and Modifications in Varied Situations -- Part 4
Adjustments and Modifications in Varied Situations -- Part 5
Adjustments and Modifications in Varied Situations -- Part 6
Adjustments and Modifications in Varied Situations -- Part 7
Adjustments and Modifications in Varied Situations -- Part 8
Adjustments and Modifications in Varied Situations -- Part 9
Effective Techniques against Boxers -- Part 1
Effective Techniques against Boxers -- Part 2
Effective Techniques against Boxers -- Part 3
Effective Techniques against Boxers -- Part 4
Effective Techniques against Boxers -- Part 5
Effective Techniques against Boxers -- Part 6
Effective Techniques against Boxers -- Part 7
Effective Techniques against Boxers -- Part 8
Combat Skills against Boxers -- Part 1
Combat Skills against Boxers -- Part 2
Combat Skills against Boxers -- Part 3
Combat Skills against Boxers -- Part 4
Combat Skills against Boxers -- Part 5
Combat Skills against Boxers -- Part 6
Combat Skills against Boxers -- Part 7
Combat Skills against Boxers -- Part 8
Combat Skills against Boxers -- Part 9
Combat Skills against Boxers -- Part 10
Combat Skills against Boxers -- Part 11
Combat Skills against Boxers -- Part 12
 Applying the Tactics of Covering and Chasing against
Boxers -- Part 1
Applying the Tactics of Covering and Chasing against
Boxers -- Part 2
Applying the Tactics of Covering and Chasing against
Boxers -- Part 3
Applying the Tactics of Covering and Chasing against
Boxers -- Part 4
Applying the Tactics of Covering and Chasing against
Boxers -- Part 5
Applying the Tactics of Covering and Chasing against
Boxers -- Part 6
Applying the Tactics of Covering and Chasing against Boxers -- Part 7
Applying the Tactics of Covering and Chasing against Boxers -- Part 8
Applying the Tactics of Covering and Chasing against Boxers -- Part 9
Applying the Tactics of Covering and Chasing against Boxers -- Part 10
The Unbelievable Effectiveness of Tantui Combat Sequence One -- Part 1
The Unbelievable Effectiveness of Tantui Combat Sequence One -- Part 2
The Unbelievable Effectiveness of Tantui Combat Sequence One -- Part 3
The Unbelievable Effectiveness of Tantui Combat Sequence One -- Part 4
The Unbelievable Effectiveness of Tantui Combat Sequence One -- Part 5
The Unbelievable Effectiveness of Tantui Combat Sequence One -- Part 6
The Unbelievable Effectiveness of Tantui Combat Sequence One -- Part 7
The Unbelievable Effectiveness of Tantui Combat Sequence One -- Part 8
Old Elephant Drops Tusk in Combat Seqquence Two -- Part 1
Old Elephant Drops Tusk in Combat Seqquence Two -- Part 2
Old Elephant Drops Tusk in Combat Seqquence Two -- Part 3
Old Elephant Drops Tusk in Combat Seqquence Two -- Part 4
Old Elephant Drops Tusk in Combat Seqquence Two -- Part 5
Old Elephant Drops Tusk in Combat Seqquence Two -- Part 6
Old Elephant Drops Tusk in Combat Seqquence Two -- Part 7
Old Elephant Drops Tusk in Combat Seqquence Two -- Part 8
Old Elephant Drops Tusk in Combat Seqquence Two -- Part 9
Rising Dragon Galloping Tiger -- Part 1
Rising Dragon Galloping Tiger -- Part 2
Rising Dragon Galloping Tiger -- Part 3
 Rising Dragon Galloping Tiger -- Part 4
Rising Dragon Galloping Tiger -- Part 5
Rising Dragon Galloping Tiger -- Part 6
Rising Dragon Galloping Tiger -- Part 7
Rising Dragon Galloping Tiger -- Part 8
Rising Dragon Galloping Tiger -- Part 9
Combining Sequences in Combat Training -- Part 1
Combining Sequences in Combat Training -- Part 2
Combining Sequences in Combat Training -- Part 3
Combining Sequences in Combat Training -- Part 4
Combining Sequences in Combat Training -- Part 5
Combining Sequences in Combat Training -- Part 6
Combining Sequences in Combat Training -- Part 7
Combining Sequences in Combat Training -- Part 8
Combining Sequences in Combat Training -- Part 9
The Importance of Skills in Applying Combat Sequences -- Part 1
The Importance of Skills in Applying Combat Sequences -- Part 2
The Importance of Skills in Applying Combat Sequences -- Part 3
The Importance of Skills in Applying Combat Sequences -- Part 4
The Importance of Skills in Applying Combat Sequences -- Part 5
The Importance of Skills in Applying Combat Sequences -- Part 6
The Importance of Skills in Applying Combat Sequences -- Part 7
The Importance of Skills in Applying Combat Sequences -- Part 8
The Importance of Skills in Applying Combat Sequences -- Part 9
Some Effective Skills for Combat -- Part 1
Some Effective Skills for Combat -- Part 2
Some Effective Skills for Combat -- Part 3
Some Effective Skills for Combat -- Part 4
Some Effective Skills for Combat -- Part 5
Some Effective Skills for Combat -- Part 6
 Some Effective Skills for Combat -- Part 7
Some Effective Skills for Combat -- Part 8
Shaolin -- Tantui 11 Three Rings Around the Moon in Tantui Combat Sequence
Three -- Overview
Applying Chin-Na and Countering Chin-Na -- Overview
Solo Performance to Enhance Combat Efficiency -- Overview
Simple in Solo Performance, Profound in Combat Application
-- Overview
Counter against Formidable Muay Thai Knee Jabs -- Overview
Felling an Opponnt without Throwing Him -- Overview
Tantui Combat Sequences One, Two and Three -- Overview
Chopping Firewood and Hook Thrust in Combat Sequences 3 and
4 -- Overview
Three Rings Around the Moon in Tantui Combat Sequence Three -- Part 1
Three Rings Around the Moon in Tantui Combat Sequence Three -- Part 2
Three Rings Around the Moon in Tantui Combat Sequence Three -- Part 3
Three Rings Around the Moon in Tantui Combat Sequence Three -- Part 4
Three Rings Around the Moon in Tantui Combat Sequence Three -- Part 5
Three Rings Around the Moon in Tantui Combat Sequence Three -- Part 6
Three Rings Around the Moon in Tantui Combat Sequence Three -- Part 7
Three Rings Around the Moon in Tantui Combat Sequence Three -- Part 8
Applying Chin-Na and Countering Chin-Na -- Part 1
Applying Chin-Na and Countering Chin-Na -- Part 2
Applying Chin-Na and Countering Chin-Na -- Part 3
Applying Chin-Na and Countering Chin-Na -- Part 4
Applying Chin-Na and Countering Chin-Na -- Part 5
Applying Chin-Na and Countering Chin-Na -- Part 6
Applying Chin-Na and Countering Chin-Na -- Part 7
Solo Performance to Enhance Combat Efficiency -- Part 1
Solo Performance to Enhance Combat Efficiency -- Part 2
Solo Performance to Enhance Combat Efficiency -- Part 3
Solo Performance to Enhance Combat Efficiency -- Part 4
Solo Performance to Enhance Combat Efficiency -- Part 5
Solo Performance to Enhance Combat Efficiency -- Part 6
Solo Performance to Enhance Combat Efficiency -- Part 7
 Solo Performance to Enhance Combat Efficiency -- Part 8
Simple in Solo Performance, Profound in Combat
Application -- Part 1
Simple in Solo Performance, Profound in Combat
Application -- Part 2
Simple in Solo Performance, Profound in Combat
Application -- Part 3
Simple in Solo Performance, Profound in Combat
Application -- Part 4
Simple in Solo Performance, Profound in Combat
Application -- Part 5
Simple in Solo Performance, Profound in Combat Application -- Part 6
Simple in Solo Performance, Profound in Combat Application -- Part 7
Simple in Solo Performance, Profound in Combat Application -- Part 8
Simple in Solo Performance, Profound in Combat Application -- Part 9
Counter against Formidable Muay Thai Knee Jabs -- Part 1
Counter against Formidable Muay Thai Knee Jabs -- Part 2
Counter against Formidable Muay Thai Knee Jabs -- Part 3
Counter against Formidable Muay Thai Knee Jabs -- Part 4
Counter against Formidable Muay Thai Knee Jabs -- Part 5
Counter against Formidable Muay Thai Knee Jabs -- Part 6
Felling an Opponnt without Throwing Him -- Part 1
Felling an Opponnt without Throwing Him -- Part 2
Felling an Opponnt without Throwing Him -- Part 3
Felling an Opponnt without Throwing Him -- Part 4
Felling an Opponnt without Throwing Him -- Part 5
Felling an Opponnt without Throwing Him -- Part 6
Felling an Opponnt without Throwing Him -- Part 7
Tantui Combat Sequences One, Two and Three -- Part 1
Tantui Combat Sequences One, Two and Three -- Part 2
Tantui Combat Sequences One, Two and Three -- Part 3
Tantui Combat Sequences One, Two and Three -- Part 4
Tantui Combat Sequences One, Two and Three -- Part 5
Tantui Combat Sequences One, Two and Three -- Part 6
Tantui Combat Sequences One, Two and Three -- Part 7
 Chopping Firewood and Hook Thrust in Combat
Sequences 3 and 4 -- Part 1
Chopping Firewood and Hook Thrust in Combat
Sequences 3 and 4 -- Part 2
Chopping Firewood and Hook Thrust in Combat
Sequences 3 and 4 -- Part 3
Chopping Firewood and Hook Thrust in Combat
Sequences 3 and 4 -- Part 4
Chopping Firewood and Hook Thrust in Combat
Sequences 3 and 4 -- Part 5
Chopping Firewood and Hook Thrust in Combat
Sequences 3 and 4 -- Part 6
Chopping Firewood and Hook Thrust in Combat Sequences 3 and 4 -- Part 7
Chopping Firewood and Hook Thrust in Combat Sequences 3 and 4 -- Part 8
Shaolin -- Tantui 12 The Techique of Double Spread in the Pattern Carry
Moon in Bosom -- Overview
Reviewing Combat Sequences 4, 5 and 6 in Solo and
in Partner Combination -- Overview
Sounding the Bell to Handle Fast, Continuous Strikes -- Overview
Using a Nail Kick to Counte a Whirlwind Kick -- Overview
Cloud Hand and Horn Punch against Chin-Na and
Throat Strike -- Overview
A Little Jump as a Trick -- Overview
Striking our Opponent before he Realizes with Shooting Spear
at Yun Pavilion -- Overview
A Hand Technique to Counter any Hand Attatcks, and a Leg
Technique to Counter any Low Kicks -- Overview
Amazing Combat Functions in Combat Sequences
7, 8 and 9 -- Overview
Countering any Attacks and Tempting an Opponent into
a Trap -- Overview
The Technique of Double Spread in the Pattern Carry Moon in
Bosom -- Part 1
The Technique of Double Spread in the Pattern Carry Moon in
Bosom -- Part 2
The Technique of Double Spread in the Pattern Carry Moon in
Bosom -- Part 3
The Technique of Double Spread in the Pattern Carry Moon in
Bosom -- Part 4
The Technique of Double Spread in the Pattern Carry Moon in
Bosom -- Part 5
The Technique of Double Spread in the Pattern Carry Moon in
Bosom -- Part 6
The Technique of Double Spread in the Pattern Carry Moon in
Bosom -- Part 7
The Technique of Double Spread in the Pattern Carry Moon in
Bosom -- Part 8
The Technique of Double Spread in the Pattern Carry Moon in
Bosom -- Part 9
 The Technique of Double Spread in the Pattern Carry
Moon in Bosom -- Part 10
Reviewing Combat Sequences 4, 5 and 6 in Solo and in
Partner Combination -- Part 1
Reviewing Combat Sequences 4, 5 and 6 in Solo and in
Partner Combination -- Part 2
Reviewing Combat Sequences 4, 5 and 6 in Solo and in
Partner Combination -- Part 3
Reviewing Combat Sequences 4, 5 and 6 in Solo and in
Partner Combination -- Part 4
Reviewing Combat Sequences 4, 5 and 6 in Solo and in
Partner Combination -- Part 5
Reviewing Combat Sequences 4, 5 and 6 in Solo and in
Partner Combination -- Part 6
Reviewing Combat Sequences 4, 5 and 6 in Solo and in
Partner Combination -- Part 7
Reviewing Combat Sequences 4, 5 and 6 in Solo and in
Partner Combination -- Part 8
Reviewing Combat Sequences 4, 5 and 6 in Solo and in
Partner Combination -- Part 9
Reviewing Combat Sequences 4, 5 and 6 in Solo and in
Partner Combination -- Part 10
Reviewing Combat Sequences 4, 5 and 6 in Solo and in
Partner Combination -- Part 11
Sounding the Bell to Handle Fast, Continuous Strikes -- Part 1
Sounding the Bell to Handle Fast, Continuous Strikes -- Part 2
Sounding the Bell to Handle Fast, Continuous Strikes -- Part 3
Sounding the Bell to Handle Fast, Continuous Strikes -- Part 4
Sounding the Bell to Handle Fast, Continuous Strikes -- Part 5
Sounding the Bell to Handle Fast, Continuous Strikes -- Part 6
Sounding the Bell to Handle Fast, Continuous Strikes -- Part 7
Using a Nail Kick to Counte a Whirlwind Kick -- Part 1
Using a Nail Kick to Counte a Whirlwind Kick -- Part 2
Using a Nail Kick to Counte a Whirlwind Kick -- Part 3
Using a Nail Kick to Counte a Whirlwind Kick -- Part 4
Using a Nail Kick to Counte a Whirlwind Kick -- Part 5
Using a Nail Kick to Counte a Whirlwind Kick -- Part 6
Using a Nail Kick to Counte a Whirlwind Kick -- Part 7
Cloud Hand and Horn Punch against Chin-Na and
Throat Strike -- Part 1
Cloud Hand and Horn Punch against Chin-Na and
Throat Strike -- Part 2
Cloud Hand and Horn Punch against Chin-Na and
Throat Strike -- Part 3
Cloud Hand and Horn Punch against Chin-Na and
Throat Strike -- Part 4
 Cloud Hand and Horn Punch against Chin-Na and
Throat Strike -- Part 5
Cloud Hand and Horn Punch against Chin-Na and
Throat Strike -- Part 6
A Little Jump as a Trick -- Part 1
A Little Jump as a Trick -- Part 2
A Little Jump as a Trick -- Part 3
A Little Jump as a Trick -- Part 4
A Little Jump as a Trick -- Part 5
A Little Jump as a Trick -- Part 6
A Little Jump as a Trick -- Part 7
A Little Jump as a Trick -- Part 8
Striking our Opponent before he Realizes with Shooting Spear
at Yun Pavilion -- Part 1
Striking our Opponent before he Realizes with Shooting Spear
at Yun Pavilion -- Part 2
Striking our Opponent before he Realizes with Shooting Spear
at Yun Pavilion -- Part 3
Striking our Opponent before he Realizes with Shooting Spear
at Yun Pavilion -- Part 4
Striking our Opponent before he Realizes with Shooting Spear
at Yun Pavilion -- Part 5
Striking our Opponent before he Realizes with Shooting Spear
at Yun Pavilion -- Part 6
A Technique to Counter any Chin-Na or Gripping Attacks -- Part 1
A Technique to Counter any Chin-Na or Gripping Attacks -- Part 2
A Technique to Counter any Chin-Na or Gripping Attacks -- Part 3
A Technique to Counter any Chin-Na or Gripping Attacks -- Part 4
A Technique to Counter any Chin-Na or Gripping Attacks -- Part 5
A Technique to Counter any Chin-Na or Gripping Attacks -- Part 6
A Technique to Counter any Chin-Na or Gripping Attacks -- Part 7
A Technique to Counter any Chin-Na or Gripping Attacks -- Part 8
A Hand Technique to Counter any Hand Attatcks, and a Leg Technique
to Counter any Low Kicks -- Part 1
A Hand Technique to Counter any Hand Attatcks, and a Leg Technique
to Counter any Low Kicks -- Part 2
A Hand Technique to Counter any Hand Attatcks, and a Leg Technique
to Counter any Low Kicks -- Part 3
A Hand Technique to Counter any Hand Attatcks, and a Leg Technique
to Counter any Low Kicks -- Part 4
A Hand Technique to Counter any Hand Attatcks, and a Leg Technique
to Counter any Low Kicks -- Part 5
A Hand Technique to Counter any Hand Attatcks, and a Leg Technique
to Counter any Low Kicks -- Part 6
 A Hand Technique to Counter any Hand Attatcks, and
a Leg Technique to Counter any Low Kicks -- Part 7
A Hand Technique to Counter any Hand Attatcks, and
a Leg Technique to Counter any Low Kicks -- Part 8
A Hand Technique to Counter any Hand Attatcks, and
a Leg Technique to Counter any Low Kicks -- Part 9
A Hand Technique to Counter any Hand Attatcks, and
a Leg Technique to Counter any Low Kicks -- Part 10
A Hand Technique to Counter any Hand Attatcks, and
a Leg Technique to Counter any Low Kicks -- Part 11
Amazing Combat Functions in Combat Sequences 7, 8
and 9 -- Part 1
Amazing Combat Functions in Combat Sequences 7, 8 and 9 -- Part 2
Amazing Combat Functions in Combat Sequences 7, 8 and 9 -- Part 3
Amazing Combat Functions in Combat Sequences 7, 8 and 9 -- Part 4
Amazing Combat Functions in Combat Sequences 7, 8 and 9 -- Part 5
Amazing Combat Functions in Combat Sequences 7, 8 and 9 -- Part 6
Amazing Combat Functions in Combat Sequences 7, 8 and 9 -- Part 7
Amazing Combat Functions in Combat Sequences 7, 8 and 9 -- Part 8
Countering any Attacks and Tempting an Opponent into a Trap -- Part 1
Countering any Attacks and Tempting an Opponent into a Trap -- Part 2
Countering any Attacks and Tempting an Opponent into a Trap -- Part 3
Countering any Attacks and Tempting an Opponent into a Trap -- Part 4
Countering any Attacks and Tempting an Opponent into a Trap -- Part 5
Countering any Attacks and Tempting an Opponent into a Trap -- Part 6
Countering any Attacks and Tempting an Opponent into a Trap -- Part 7
Countering any Attacks and Tempting an Opponent into a Trap -- Part 8
Countering any Attacks and Tempting an Opponent into a Trap -- Part 9
Countering any Attacks and Tempting an Opponent into a Trap -- Part 10
Shaolin -- Tantui 13 Continuou Attcks in Combat Sequence 10 -- Overview
Pressing Attacks with Continuous Spring Kicks -- Overview
Picture-Perfect Form in Planned Sequence of Pressing Attacks -- Overview
Two Sophisticated Felling Techniques in Combat Sequence 11 -- Overview
Arresting Horse and Kicking Carriage -- Overview
Taming Tiger and Striking Rock -- Overview
Solo Practice of Combat Sequences 10, 11 and 12 -- Overview
Using Tantui Patterns in Free Sparring, Especially against Boxing-- Overview
Questions and Answers, and Handling Kick-Boxing -- Overview
Continuou Attcks in Combat Sequence 10 -- Part 1
 Continuou Attcks in Combat Sequence 10 -- Part 2
Continuou Attcks in Combat Sequence 10 -- Part 3
Continuou Attcks in Combat Sequence 10 -- Part 4
Continuou Attcks in Combat Sequence 10 -- Part 5
Continuou Attcks in Combat Sequence 10 -- Part 6
Continuou Attcks in Combat Sequence 10 -- Part 7
Pressing Attakcs with Continuous Spring Kicks -- Part 1
Pressing Attakcs with Continuous Spring Kicks -- Part 2
Pressing Attakcs with Continuous Spring Kicks -- Part 3
Pressing Attakcs with Continuous Spring Kicks -- Part 4
Pressing Attakcs with Continuous Spring Kicks -- Part 5
Pressing Attakcs with Continuous Spring Kicks -- Part 6
Pressing Attakcs with Continuous Spring Kicks -- Part 7
Pressing Attakcs with Continuous Spring Kicks -- Part 8
Pressing Attakcs with Continuous Spring Kicks -- Part 9
Picture-Perfect Form in Planned Sequence of Pressing Attacks -- Part 1
Picture-Perfect Form in Planned Sequence of Pressing Attacks -- Part 2
Picture-Perfect Form in Planned Sequence of Pressing Attacks -- Part 3
Picture-Perfect Form in Planned Sequence of Pressing Attacks -- Part 4
Picture-Perfect Form in Planned Sequence of Pressing Attacks -- Part 5
Picture-Perfect Form in Planned Sequence of Pressing Attacks -- Part 6
Picture-Perfect Form in Planned Sequence of Pressing Attacks -- Part 7
Two Sophisticated Felling Techniques in Combat Sequence 11 -- Part 1
Two Sophisticated Felling Techniques in Combat Sequence 11 -- Part 2
Two Sophisticated Felling Techniques in Combat Sequence 11 -- Part 3
Two Sophisticated Felling Techniques in Combat Sequence 11 -- Part 4
Two Sophisticated Felling Techniques in Combat Sequence 11 -- Part 5
Arresting Horse and Kicking Carriage -- Part 1
Arresting Horse and Kicking Carriage -- Part 2
Arresting Horse and Kicking Carriage -- Part 3
 Arresting Horse and Kicking Carriage -- Part 4
Arresting Horse and Kicking Carriage -- Part 5
Arresting Horse and Kicking Carriage -- Part 6
Arresting Horse and Kicking Carriage -- Part 7
Arresting Horse and Kicking Carriage -- Part 8
Taming Tiger and Striking Rock -- Part 1
Taming Tiger and Striking Rock -- Part 2
Taming Tiger and Striking Rock -- Part 3
Taming Tiger and Striking Rock -- Part 4
Taming Tiger and Striking Rock -- Part 5
Taming Tiger and Striking Rock -- Part 6
Taming Tiger and Striking Rock -- Part 7
Taming Tiger and Striking Rock -- Part 8
Taming Tiger and Striking Rock -- Part 9
Taming Tiger and Striking Rock -- Part 10
Taming Tiger and Striking Rock -- Part 11
Solo Practice of Combat Sequences 10, 11 and 12 -- Part 1
Solo Practice of Combat Sequences 10, 11 and 12 -- Part 2
Solo Practice of Combat Sequences 10, 11 and 12 -- Part 3
Solo Practice of Combat Sequences 10, 11 and 12 -- Part 4
Solo Practice of Combat Sequences 10, 11 and 12 -- Part 5
Solo Practice of Combat Sequences 10, 11 and 12 -- Part 6
Using Tantui Patterns in Free Sparring, Especially against Boxing -- Part 1
Using Tantui Patterns in Free Sparring, Especially against Boxing -- Part 2
Using Tantui Patterns in Free Sparring, Especially against Boxing -- Part 3
Using Tantui Patterns in Free Sparring, Especially against Boxing -- Part 4
Using Tantui Patterns in Free Sparring, Especially against Boxing -- Part 5
Using Tantui Patterns in Free Sparring, Especially against Boxing -- Part 6
Using Tantui Patterns in Free Sparring, Especially against Boxing -- Part 1
Using Tantui Patterns in Free Sparring, Especially against Boxing -- Part 2
 Using Tantui Patterns in Free Sparring, Especially
against Boxing -- Part 3
Using Tantui Patterns in Free Sparring, Especially
against Boxing -- Part 4
Using Tantui Patterns in Free Sparring, Especially
against Boxing -- Part 5
Using Tantui Patterns in Free Sparring, Especially
against Boxing -- Part 6
Shaolin -- Tantui 14 12 Sequences of Shaolin Tantui -- Pictures
Shaolin -- Tantui UK Videos Shaolin Tantui and Combat Application, UK Summer Camp
2007 -- Overview
Secrets of Internal Force Training
Purposely Experiencing the Effects of Deviated Practice
Basic Footwork Training
From Correct Movement to Speed and Elegance
Various Ways of Turning
Adding Hand Forms to Stances to Florm Patterns
Mechanics of Fa-Jing or Explode Force
Bo-Fa and Shen-Fa, or Footwork and Body-Movement
Three Harmonies of Legs, Body and Hands
Tantui Sequence 1 -- Thrrust Punch
The Three Fs -- Fprm, Force and Flow
Every Kungfu Session is a Training of Energy and Mind/a>
Simple in Appearnace but Prodound in Application
If you Use a Lot of Kicks, you should also Know their Counters
It is Necessary to have an Element of Threat in Combat
Felling Opponent as he Execites Knee Strikes
Against Shoots, Against Throws, and Felling Opponents
Learning Tantui Sequences 1, 2 and 3
Learning Tantui Sequences 4, 5 and 6
 Learning Tantui Sequences 7, 8 and 9
Learning Tantui Sequences 10, 11 and 12
Applications of Single Sprread and Breaking Lock
Breaking almost any Lock with Breaking Lock Technique
Richness of Tantui Combat Applications
Second Brother and White Horse
Effective Sequence against Boxers
Three Harmonies in Tantui Sequence 1
White Horse Returns Head
Adjustments and Modifications in Varied Situations
Effective Techniques Against Boxers
Combat Skils against Boxers
Tactics of Covering and Chasing against Boxers
Unbelievable Effectiveness of Tantui Combats Sequence 1
Old Elephant Drops Tusk in Tantui Combat Sequence 2
Rising Dragon Galloping Tiger
Combining Sequences in Combat Training
Importance of Skills in Applying Combat Sequences
Some Effective Skills for Combat
Three Rings Around Moon in Tantui Combat Sequence 3
Applying Chin-Na and Countering Chin-Na
Solo Performance to Enhance Combat Efficiency
Simple in Solo Performance, Profound in Combat Application
Counters against Formidable Muay Thai Knee Jabs
Felling Opponents without Throwing Them
Tantui Combat Sequences 1, 2 and 3
Chopping Firwood and Hook-Thrust in Shaolin Tantui
Technique of Double Spread in Carry Moon in Bosom
Combat Sequences 4, 5 and 6 in Solo Practice and Partner Combination
Sounding Bell to Handle Fast, Continuous Strikes
 Using a Nail Kick to Counter a Whirlwind Kick
Cloud Hans and Horn Punch agaist Chin-Na and Thrust-Strike
A Little Jump as a Trick
Striking Opponent with Shooting Spear before he Realizes
Technique to Counter Chin-Na or Gripping Attack
Hand Techniques to Counter Hand Strikes, and Leg Techniques
to Counter Low Kicks
Amazing Combat Functions in Combat Sequences 7, 8 and 9
Countering any Attack and Tempting Opponent into a Trap
Continuous Attacks of Combat Sequence 10
Pressing Attacks with Continuous Spring Kicks
Picture-Perfect Form of Planned Sequence in Pressing Attacks
Two Sophisticated Felling Techniques in Combat Sequence 11
Arresting Horse and Kicking Carriage
Taming Tiger and Striking Rock
Solo Practice of Combat Sequences 10, 11 and 12
Tantui Patterns in Free Sparring, Especially against Boxing
Questions and Answers, and Handling Kick-Boxing
Shaolin -- Tantui Videos Tantui; Essentail of Northern Shaolin, Toronto and Frankfrut
2007 -- Overview
12 Sequences of Shaolin Tantui
12 Combat Sequences of Tantui
Shaolin Tantui Application Set
Shaolin Tantui against Boxing and Kick-Boxing
Technical Advantages of Shaolin Kungfu as Shown in Tantui
Wonders of Shaolin Tantui Sequence 1
Making Kungfu Alive through Shaolin Tantui
Two Combat Sequecnes Adequate to Handle Almost any
Ordinary Opponents
A Shaolin Tantui Counter against any Kick!
 Formidable Three Ring Around the Moon of Tantui
Sequence 3
Penetrating the Impenetrable in Shaolin Tantui
Countering Elbow and Knee Strikes from Muay Thai Fighters
Shaolin Tantui Applications in Striking, Kicking. Felling
and Gripping
Secrets Hidden in the Open in Shaolin Tantui
Helping One Another and Having Fun in Tantui Sparring
Laying Foundation before Combat Training
From Form to Flow to Force in Shaolin Tantui
Linking Sequences o Form Sets in Shaolin Tantui
Profundity of 12 Tantui Combat Sequences
12 Tantui Sequences at UK Summer Camp