VIDEO-CLIPS-6: TITLES
 Main
Elevation of Spirit and Feeling of Peace from Cosmic Shower
Main
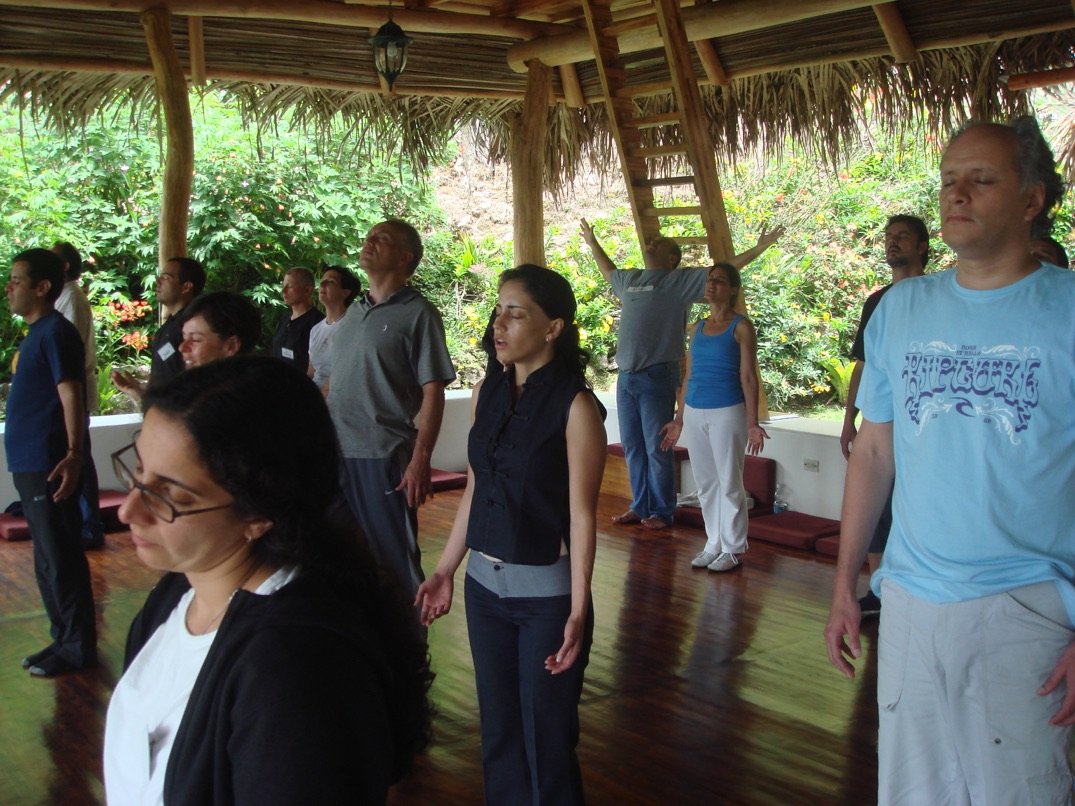
Elevation of Spirit and Feeling of Peace from Cosmic ShowerFeeling of Power, Peace and Freedom from Cosmic Shower
Amazing Confidence of Joy and Confidence from
Cosmic Shower
Emotional Cleansing in Cosmic Shower
Opening the Heart in Cosmic Shower
Spiritual Cultivation in Cosmic Shower
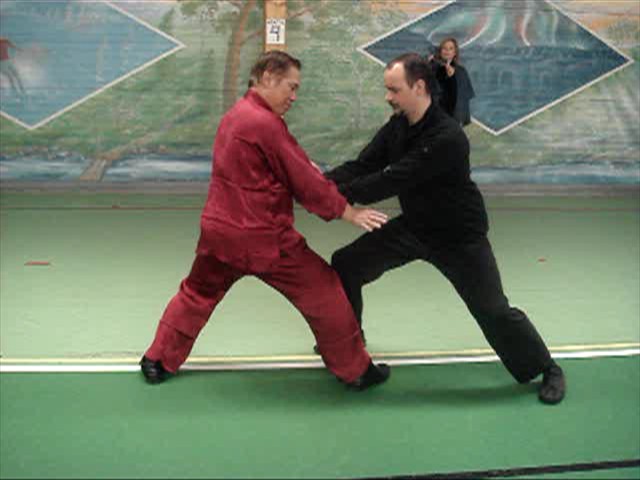
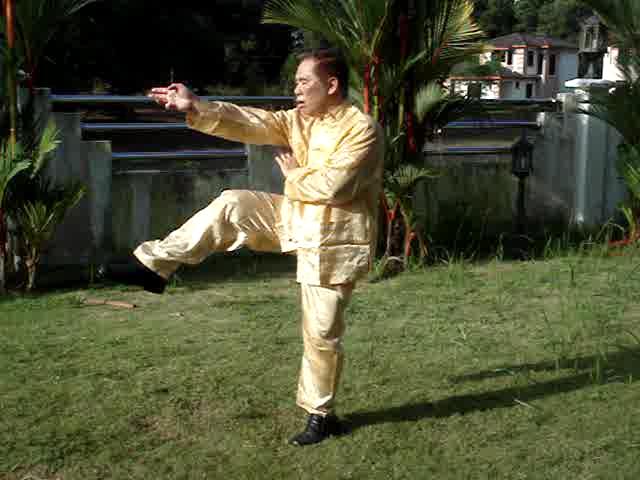
Taijiquan Striking Hands -- Vertical Punch
Video-Clips-6: Titles
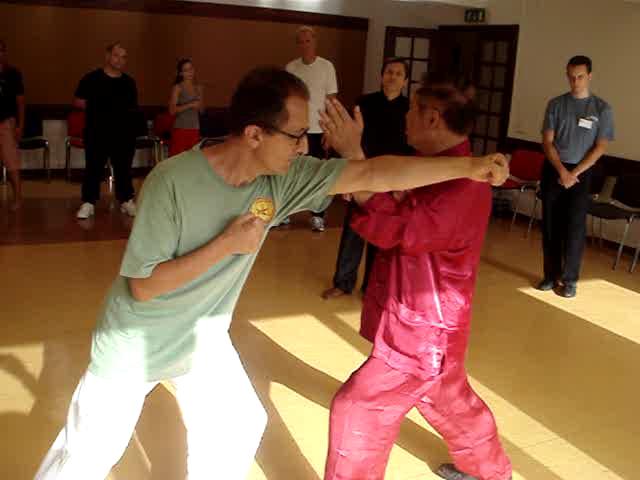
Wing Choon Kungfu against Muay Thai
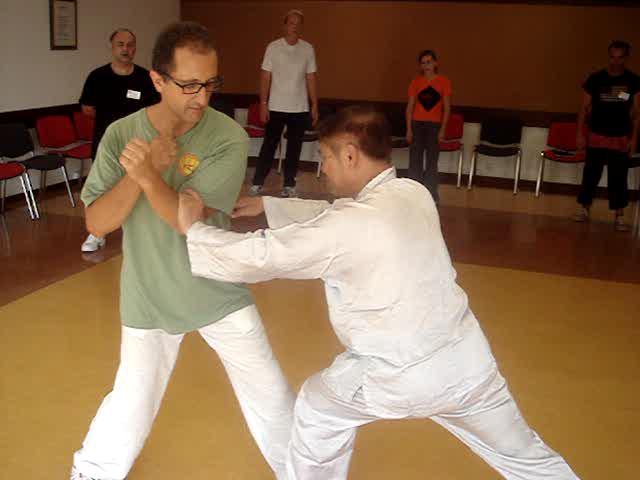
Chi Sau (Sticking Hands)
Applying Counters at Varrious Points of Opponent's Attack
Felling Opponents in Wing Choon Kungfu
Flow Method in Wing Choon Kungfu
Glimpses of Wing Choon Kungfu on Blue Mountain -- Previous
Glimpses of Wing Choon Kungfu on Blue Mountain -- Overview
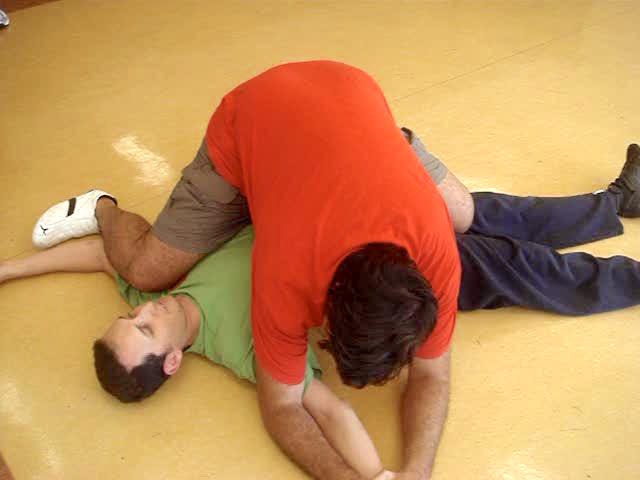
Using Wing Choon Kungfu to Overcome Pin-Dpwns
Using Wing Choon Kungfu to Overcome Shoots
Phee Chee (Thrusting Fingers)
Sap Luk Sau or Sixteen Hands
Sap Luk Sau (Sixteen Hands)
Sap Ye Thiak or Twelve Kicks
Wing Choon Chi Sau Set -- Old
Wing Choon Chi Sau Set -- Overview
Wing Choon Side Kicks
Wing Choon Sweeping Kicks
Thiet Chiet Na or Felling-Kneeing and Gripping
Thiet Chiet Na (Felling-Kneeing-Gripping)
 Wing Choon Thrust Kicks
Some Tricky Wing Choon Patterrns
Videos of Wing Choon Kungfu on Blue Mountain -- Overview
Finland 2011 Developing Sensing Skills -- Part 1
Developing Sensing Skills -- Part 2
Developing Sensing Skills -- Part 3
Developing Sensing Skills -- Part 4
Developing Sensing Skills -- Part 5
Developing Sensing Skills -- Part 6
Sticking Hands and Pushing Hands -- Part 1
Sticking Hands and Pushing Hands -- Part 2
Sticking Hands and Pushing Hands -- Part 3
Sticking Hands and Pushing Hands -- Part 4
Sticking Hands and Pushing Hands -- Part 5
Sticking Hands and Pushing Hands -- Part 6
Asking Bridge -- Part 1
Asking Bridge -- Part 2
Asking Bridge -- Part 3
Asking Bridge -- Part 4
Asking Bridge -- Part 5
Asking Bridge -- Part 6
Kneading Hands -- Part 1
Kneading Hands -- Part 2
Kneading Hands -- Part 3
Kneading Hands -- Part 4
Kneading Hands -- Part 5
Kneading Hands -- Part 6
Fierce Tiger -- Part 1
Fierce Tiger -- Part 2
Fierce Tiger -- Part 3
Fierce Tiger -- Part 4
Fierce Tiger -- Part 5
Fierce Tiger -- Part 6
 Conditional Free Sparring -- Part 1
Conditional Free Sparring -- Part 2
Conditional Free Sparring -- Part 3
Conditional Free Sparring -- Part 4
Conditional Free Sparring -- Part 5
Conditional Free Sparring -- Part 6
Conditional Free Sparring -- Part 7
Conditional Free Sparring -- Part 8
Conditional Free Sparring -- Part 9
Chi Flow amnd Philosophy -- Part 1
Chi Flow amnd Philosophy -- Part 2
Chi Flow amnd Philosophy -- Part 3
Even if Weaker -- Part 1
Even if Weaker -- Part 2
Even if Weaker -- Part 3
Even if Weaker -- Part 4
Even if Weaker -- Part 5
Even if Weaker -- Part 6
Whirlwind Kick -- Part 1
Whirlwind Kick -- Part 2
Whirlwind Kick -- Part 3
Whirlwind Kick -- Part 4
Whirlwind Kick -- Part 5
Whirlwind Kick -- Part 6
Swimming Dragon -- Part 1
Swimming Dragon -- Part 2
Swimming Dragon -- Part 3
Swimming Dragon -- Part 4
Swimming Dragon -- Part 5
Swimming Dragon -- Part 6
 Swimming Dragon -- Part 7
Swimming Dragon -- Part 8
Swimming Dragon -- Part 9
Secrets of Choy-Li- Fatt -- Part 1
Secrets of Choy-Li- Fatt -- Part 2
Secrets of Choy-Li- Fatt -- Part 3
Secrets of Choy-Li- Fatt -- Part 4
Secrets of Choy-Li- Fatt -- Part 5
Secrets of Choy-Li- Fatt -- Part 6
Footwirk Secrets -- Part 1
Footwork Secrets -- Part 2
Footwork Secrets -- Part 3
Footwork Secrets -- Part 4
Footwork Secrets -- Part 5
Footwork Secrets -- Part 6
Enjoying Free Sparring -- Part 1
Enjoying Free Sparring -- Part 2
Enjoying Free Sparring -- Part 3
Enjoying Free Sparring -- Part 4
Enjoying Free Sparring -- Part 5
Enjoying Free Sparring -- Part 6
Flower Set: Against Kicks
The Choy-Li-Fatt Approach of Asking Bridge
Chi Flow and Philosophy in Asking Bridge
Secrets of Choy-Li-Fatt Kungfu in Asking Bridge
Enjoying Free Sp;arring with Asking Bridge
Hoong Ka Kungfu Fierce Tiger Approach of Asking Bridge
Footwork Secrets in Asking Bridge
Applying Asking Bridge in Conditional Free Sparring
Wuzuquan Kneading Hands Approach of Asking Bridge
 Developing Sensing Skills in Asking Bridge
Asking Bridge: Sticking Hands and Pushing Hands
Swimming Dragon Approach of Asking Bridge
Effective Asking Bridge even if You were Weaker
Applying Whirlwind Kick in Asking Bridge
Glimpses of Asking Bridge -- Previous
Videos of Asking Bridge -- Overview
Glimpses of Asking Bridge -- Overview
Flower Set: What Lies Behind?
Flower Set: Chin-Na and Dim Mak
Flower Set: Enjoying Free Sparring
Flower Set: Exploding Force
Flower Set: Felling and Chin-Na
Flower Set: the Flow Method
Glimpses of Shaolin Flower Set -- Previous
Videos of Shaolin Flower Set -- Overview
Glimpses of Shaolin Flower Set -- Overview
Picture-Perrfect Form of Flower Set -- Part 1a
Picture-Perfect Form of Flower Set -- Part 1b
Picture-Perfect Form of Flower Set -- Part 1c
Picture-Perfect Form of Flower Set -- Part 1d
Picture-Perfect Form of Flower Set -- Part 1e
Picture-Perfect Form of Flower Set -- Part 1f
Flow Method of Flower Set -- Part 2a
Flow Method of Flower Set -- Part 2b
Flow Method of Flower Set -- Part 2c
Flow Method of Flower Set -- Part 2d
Flow Method of Flower Set -- Part 2e
Flow Method of Flower Set -- Part 2f
Exploding Force in Shaolin Flower Set -- Part 3a
 Exploding Force in Shaolin Flower Set -- Part 3b
Exploding Force in Shaolin Flower Set -- Part 3c
Exploding Force in Shaolin Flower Set -- Part 3d
Exploding Force in Shaolin Flower Set -- Part 3e
Exploding Force in Shaolin Flower Set -- Part 3f
Exploding Force in Shaolin Flower Set -- Part 3g
Exploding Force in Shaolin Flower Set -- Part 3h
Exploding Force in Shaolin Flower Set -- Part 3i
It is just the Surface of the Flower Set -- 4a
It is just the Surface of the Flower Set -- 4b
It is just the Surface of the Flower Set -- 4c
It is just the Surface of the Flower Set -- 4d
It is just the Surface of the Flower Set -- 4e
It is just the Surface of the Flower Set -- 4f
What Lies Behind the Flower Set -- Part 5a
What Lies Behind the Flower Set -- Part 5b
What Lies Behind the Flower Set -- Part 5c
What Lies Behind the Flower Set -- Part 5d
What Lies Behind the Flower Set -- Part 5e
What Lies Behind the Flower Set -- Part 5f
Where's the Secret -- Part 6a
Where's the Secret -- Part 6b
Where's the Secret -- Part 6c
Where's the Secret -- Part 6d
Where's the Secret -- Part 6e
Where's the Secret -- Part 6f
Where's the Secret -- Part 6g
Where's the Secret -- Part 6h
Where's the Secret -- Part 6i
Secret of Footwork -- Part 7a
 Secret of Footwork -- Part 7b
Secret of Footwork -- Part 7c
Secret of Footwork -- Part 7d
Secret of Footwork -- Part 7e
Secret of Footwork -- Part 7f
Swimming Dragon -- Part 8a
Swimming Dragon -- Part 8b
Swimming Dragon -- Part 8c
Swimming Dragon -- Part 8d
Swimming Dragon -- Part 8e
Swimming Dragon -- Part 8f
The Leak Tactic -- Part 9a
The Leak Tactic -- Part 9b
The Leak Tactic -- Part 9c
The Leak Tactic -- Part 9d
The Leak Tactic -- Part 9e
The Leak Tactic -- Part 9f
The Leak Tactic -- Part 9g
The Leak Tactic -- Part 9h
The Leak Tactic -- Part 9i
Against Kicks -- Part 10a
Against Kicks -- Part 10b
Against Kicks -- Part 10c
Against Kicks -- Part 10d
Against Kicks -- Part 10e
Against Kicks -- Part 10f
Against Felling and Chin-Na -- Part 11a
Against Felling and Chin-Na -- Part 11b
Against Felling and Chin-Na -- Part 11c
Against Felling and Chin-Na -- Part 11d
 Against Felling and Chin-Na -- Part 11e
Against Felling and Chin-Na -- Part 11f
Against Chin-Na and Dim Mark -- Part 12a
Against Chin-Na and Dim Mark -- Part 12b
Against Chin-Na and Dim Mark -- Part 12c
Against Chin-Na and Dim Mark -- Part 12d
Against Chin-Na and Dim Mark -- Part 12e
Against Chin-Na and Dim Mark -- Part 12f
Against Chin-Na and Dim Mark -- Part 12g
Against Chin-Na and Dim Mark -- Part 12h
Against Chin-Na and Dim Mark -- Part 12i
Wonders of Chi Flow -- Part 13a
Wonders of Chi Flow -- Part 13b
Wonders of Chi Flow -- Part 13c
Wonders of Chi Flow -- Part 13d
Wonders of Chi Flow -- Part 13e
Wonders of Chi Flow -- Part 13f
Enjoying Free Sparring -- Part 14a
Enjoying Free Sparring -- Part 14b
Enjoying Free Sparring -- Part 14c
Enjoying Free Sparring -- Part 14d
Enjoying Free Sparring -- Part 14e
Enjoying Free Sparring -- Part 14f
lower Set: Secret of Footwork
Flower Set: the Leak Tactic
Flower Set: Picturre-Perfect Form
Flower Set: Where's the Secret
Flower Set: It's just the Surface
Flower Set: Swimming Dragon
Flower Set: Wonders of Flow
 Finland 2011 -- Asking Bridge
Black Tiger Steals Heart -- Part 1a
Finland 2011 -- Asking Bridge
Black Tiger Steals Heart -- Part 1aBlack Tiger Steals Heart -- Part 1aa
Black Tiger Steals Heart -- Part 1b
Black Tiger Steals Heart -- Part 1c
Black Tiger Steals Heart -- Part 1d
Black Tiger Steals Heart -- Part 1e
Black Tiger Steals Heart -- Part 1f
Black Tiger Steals Heart -- Part 1g
Black Tiger Steals Heart -- Part 1h
Black Tiger Steals Heart -- Part 1i
Black Tiger Steals Heart -- Part 1j
Swimming Dragon Plays with Water -- Part 2a
Swimming Dragon Plays with Water -- Part 2b
Swimming Dragon Plays with Water -- Part 2c
Swimming Dragon Plays with Water -- Part 2d
Swimming Dragon Plays with Water -- Part 2e
Swimming Dragon Plays with Water -- Part 2f
Swimming Dragon Plays with Water -- Part 2g
Swimming Dragon Plays with Water -- Part 2h
Swimming Dragon Plays with Water -- Part 2i
Swimming Dragon Plays with Water -- Part 2j
Swimming Dragon Plays with Water -- Part 2k
Swimming Dragon Plays with Water -- Part 2m
Swimming Dragon Plays with Water -- Part 2n
Swimming Dragon Plays with Water -- Part 2p
Swimming Dragon Plays with Water -- Part 2q
Swimming Dragon Plays with Water -- Part 2r
Swimming Dragon Plays with Water -- Part 2s
Swimming Dragon Plays with Water -- Part 2t
Throw Ball in Waves -- Part 3a
 Throw Ball in Waves -- Part 3b
Throw Ball in Waves -- Part 3c
Throw Ball in Waves -- Part 3d
Throw Ball in Waves -- Part 3e
Throw Ball in Waves -- Part 3f
Throw Ball in Waves -- Part 3g
Throw Ball in Waves -- Part 3h
i Throw Ball in Waves -- Part 3
Throw Ball in Waves -- Part 3j
Throw Ball in Waves -- Part 3k
Throw Ball in Waves -- Part 3m
White Crane Rustles Wings -- Part 4a
White Crane Rustles Wings -- Part 4b
White Crane Rustles Wings -- Part 4c
White Crane Rustles Wings -- Part 4d
White Crane Rustles Wings -- Part 4e
White Crane Rustles Wings -- Part 4f
White Crane Rustles Wings -- Part 4g
White Crane Rustles Wings -- Part 4h
White Crane Rustles Wings -- Part 4i
White Crane Rustles Wings -- Part 4j
White Crane Rustles Wings -- Part 4k
White Crane Rustles Wings -- Part 4m
White Crane Rustles Wings -- Part 4n
White Crane Rustles Wings -- Part 4p
White Crane Rustles Wings -- Part 4q
White Crane Rustles Wings -- Part 4r
White Crane Rustles Wings -- Part 4s
White Crane Rustles Wings -- Part 4t
White Crane Rustles Wings -- Part 4u
 White Crane Rustles Wings -- Part 4v
Black Tiger Presents Claw
Swimming Dragon Plays with Water
Throw Ball in Waves
White Crane Rustles Wings
Four Sequences of Asking Bridge -- Previous
Four Sequences of Asking Bridge -- Overview
Shaolin Flower Set -- Part 2
Shaolin Flower Set -- Part 3
Shaolin Flower Set -- Part 4
Shaolin Flower Set -- Part 5
Shaolin Flower Set -- Part 6
Shaolin Flower Set -- Picture Series
Combat Sequences of Flower Set in Wlow Motion -- Part 1
Combat Sequences of Flower Set in Wlow Motion -- Part 2
Combat Sequences of Flower Set in Wlow Motion -- Part 3
 Combat Sequences of Flower Set in Slow Motion -- Part 4
Shaolin Flower Set -- Overview
Portugal Shaolin 2010 Tactic of Cover and Strike against Karate
Developing Skills to Apply Techiniques Effectively
Be Proficient in Basic Techniques before Learning the Sophisticated
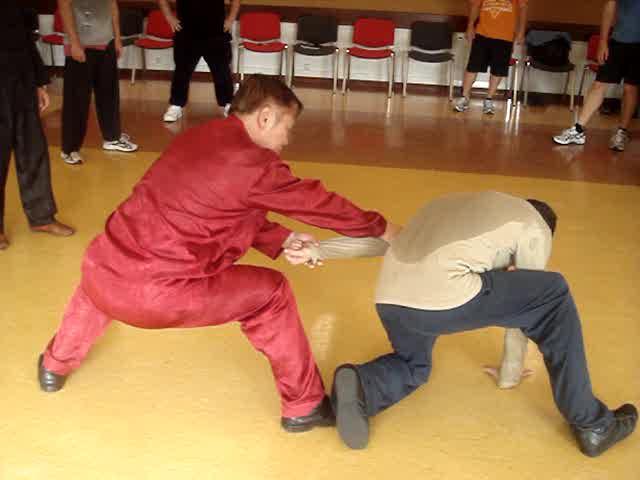
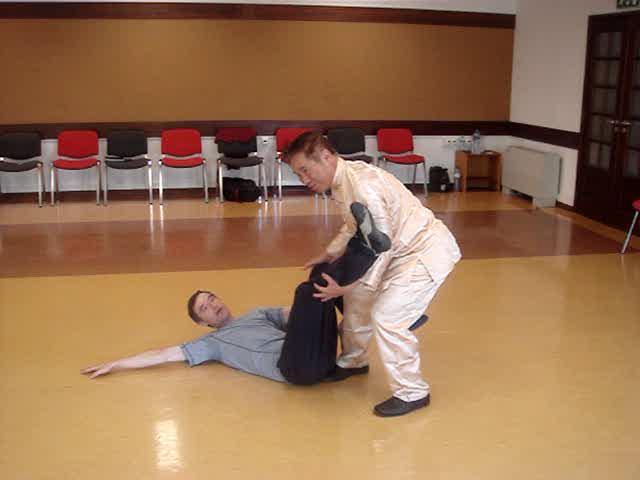
Countering while being Taken Down
Usefulness and Subtlety of Body-Movement
Keeping a Boxer at Bay as he Bounces Around
Usefulness of Bow-Arrow Stance in Combat
How would You Counter a Boxer's Hooks
Planting Willow and Catching Crab
Applying Chin-Na against Karate Exponents
Using Shaolin Kungfu to Counter at Points 3, 2 and 1
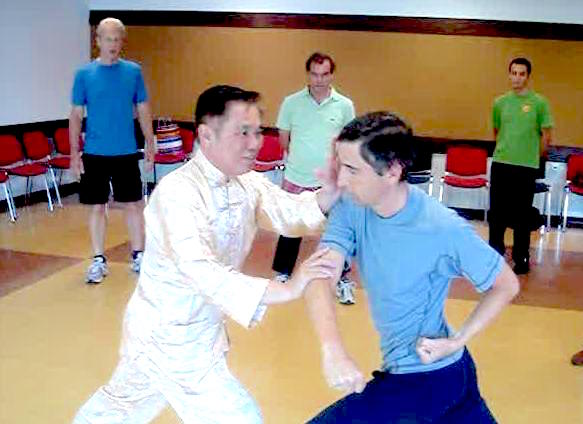
The Tactic of Cover and Strike in Shaolin Kungfu against Boxing
Covering Opponent and Striking his Vital Points
The Amazing Technique of Cross-Road Hook Hand
Hand Guard for Defence and Attack
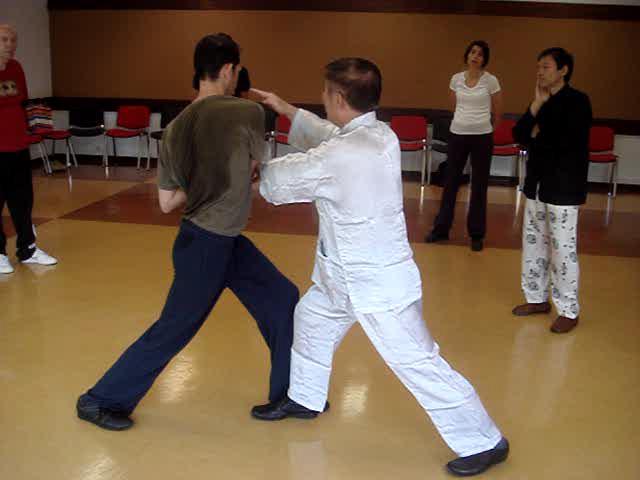
The Tactic of Deflect and Strike
Deflecting, Not Blocking, a Boxer's Jabs
Do You Know why it is Easier to Defeat a Kick-Boxer than a Boxer?
It's Easy to Counter Kicks -- if You Know How
Effective Techniques and Tactics against Karate
 Effectiveness of Guard Hand in Fighting against Boxers
Boxers have No Techniques to Defend against Felling Attacks
Giving or Not Giving Opponents Fighting Chance
Countering Taekwondo Kicks at Finishing Stage
Art of Flexibilty as Chi Kung
Foundation for Form, Energy and Mind Development
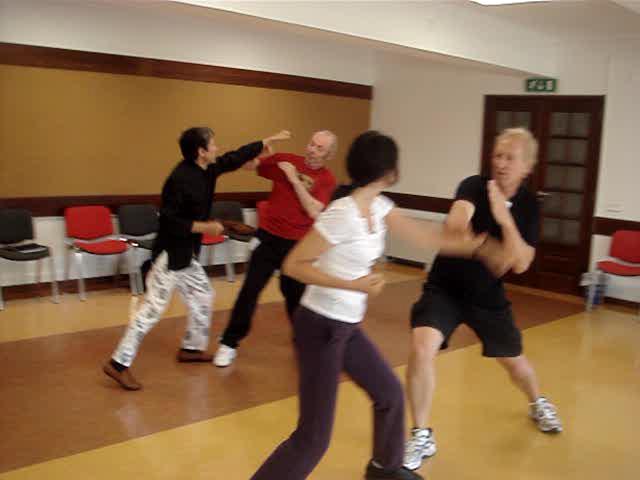
Free Sparring in or School is Injury-Free and Full of Fun
There is Ground Fighting in Shaolin Kungfu
Keeping a Boxer at Bay with Guard Hand
In-Gate and Out-Gate in Defence
Countering Taekwondo Kicks at the Initial Stage
From Countering at Various Points to Initiating an Attack
Taking the Initiative to Attack a Boxer
Our Combat Training is Injury-Free and a Lot of Fun
Shaolin Techniques to Intercept Boxers' Hooks
Countering Taekwondo Kicks at Intermediate Stage
Class Practice against Karate Attacks
Keeping a Boxer away with Guard Hand
Lockimng Opponent's Both Arrms to Strike Him
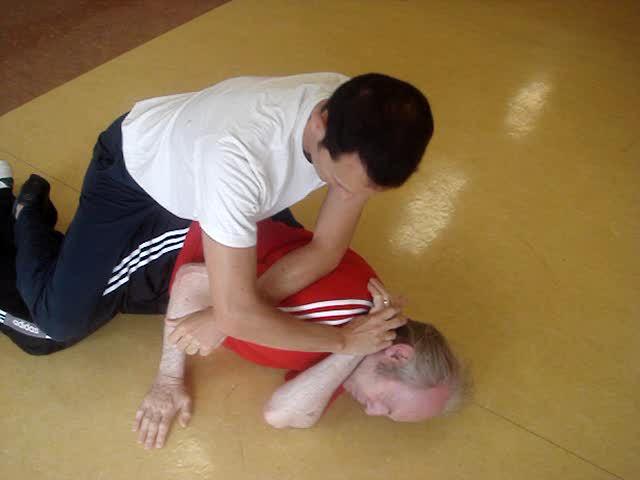
Oveturning Pin-Downs even when Opponents are Bigger-Sized
Take-Down and Pin-Down in Shaolin Kungfu
The Mechanics of Planting Willow
Countering a Boxer at Point 2
How would You Counter a Boxer Raining Blows on You?
Covering your Opponent to Ensure Safety First
Countering the Shoot at the Initial Stage
Stay yourr Ground, and Not Move Away
The Technical Speed of Shaolin over Boxing
Element of Threat in Combat
White Monkey Holds Branch against the Unercut
 First we Need to Understand the Opponent
Countering at Various Points of a Series of Attacks
Videos of Shaolin Kungfu against Other Martial
Arts -- Overview
Portugal Shaolin 2010 -- Shaolin 01 Shaolin Kungfu against Other Martial Arts
-- Abridged Version
Shaolin Kungfu against Boxing
Shaolin Kungfu against Karate
Shaolin Kungfu against Kick-Boxing and Taekwondo
Shaolin Kungfu against Muay Thai
Shaolin Kungfu against Wrestling
Shaolin Kungfu against Other Martial Arts -- Overview (Full Version)
Shaolin Kungfu against Other Martial Arts -- Overview
(Full Version and Abridged Version)
Foundation for Physical, Energetic and Mental Development -- Part 1
Foundation for Physical, Energetic andMental Development -- Part 2
Foundation for Physical, Energetic and Mental Development -- Part 3
Foundation for Physical, Energetic and Mental Development -- Part 4
Foundation for Physical, Energetic and Mental Development -- Part 5
Foundation for Physical, Energetic and Mental Development -- Part 6
Foundation for Physical, Energetic and Mental Development -- Part 7
Foundation for Physical, Energetic and Mental Development -- Part 8
Foundation for Physical, Energetic and Mental Development -- Part 9
Foundation for Physical, Energetic and Mental Development -- Part 10
Art of Flexibility as Chi Kung -- Part 1
Art of Flexibility as Chi Kung -- Part 2
Art of Flexibility as Chi Kung -- Part 3
Art of Flexibility as Chi Kung -- Part 4
Art of Flexibility as Chi Kung -- Part 5
Art of Flexibility as Chi Kung -- Part 6
Art of Flexibility as Chi Kung -- Part 7
Art of Flexibility as Chi Kung -- Part 8
Deflecting, Not Blocking, a Boxer's Jabs -- Part 1
Deflecting, Not Blocking, a Boxer's Jabs -- Part 2
Deflecting, Not Blocking, a Boxer's Jabs -- Part 3
Deflecting, Not Blocking, a Boxer's Jabs -- Part 4
 Deflecting, Not Blocking, a Boxer's Jabs -- Part 5
Deflecting, Not Blocking, a Boxer's Jabs -- Part 6
Deflecting, Not Blocking, a Boxer's Jabs -- Part 7
Deflecting, Not Blocking, a Boxer's Jabs -- Part 8
Stay your Ground, and Not Move Away -- Part 1
Stay your Ground, and Not Move Away -- Part 2
Stay your Ground, and Not Move Away -- Part 3
Stay your Ground, and Not Move Away -- Part 4
Stay your Ground, and Not Move Away -- Part 5
Stay your Ground, and Not Move Away -- Part 6
Stay your Ground, and Not Move Away -- Part 7
Stay your Ground, and Not Move Away -- Part 8
Stay your Ground, and Not Move Away -- Part 9
Stay your Ground, and Not Move Away -- Part 10
Element of Threat in Combat -- Part 1
Element of Threat in Combat -- Part 2
Element of Threat in Combat -- Part 3
Element of Threat in Combat -- Part 4
Element of Threat in Combat -- Part 5
Element of Threat in Combat -- Part 6
Element of Threat in Combat -- Part 7
Element of Threat in Combat -- Part 8
Element of Threat in Combat -- Part 9
Element of Threat in Combat -- Part 10
Element of Threat in Combat -- Part 11
 Foundation for Physical, Energetic and Mental
Development -- Overview
Art of Flexibility as Chi Kung -- Overview
Deflecting, Not Blocking, a Boxer's Jabs -- Overview
Stay your Ground, and Not Move Away -- Overview
Element of Threat in Combat -- Overview
Foundation for Physical, Energetic and Mental
Development -- Previous
Art of Flexibility as Chi Kung -- Previous
Deflecting, Not Blocking, a Boxer's Jabs -- Previous
Stay your Ground, and Not Move Away -- Previous
Element of Threat in Combat -- Previous
 Shaolin in Portugal 2010 -- Shaolin 02
Usefulness of the Boiw-Arrow Stance -- Part 1
Shaolin in Portugal 2010 -- Shaolin 02
Usefulness of the Boiw-Arrow Stance -- Part 1Usefulness of the Boiw-Arrow Stance -- Part 2
Usefulness of the Boiw-Arrow Stance -- Part 3
Usefulness of the Boiw-Arrow Stance -- Part 4
Usefulness of the Boiw-Arrow Stance -- Part 5
Usefulness of the Boiw-Arrow Stance -- Part 6
Usefulness of the Boiw-Arrow Stance -- Part 7
Usefulness of the Boiw-Arrow Stance -- Part 8
Usefulness of the Boiw-Arrow Stance -- Part 9
Keeping a Boxer at Bay with your Guard Hand -- Part 1
Keep a Boxer at Bay with your Guard Hand -- Part 2
Keep a Boxer at Bay with your Guard Hand -- Part 3
Keep a Boxer at Bay with your Guard Hand -- Part 4
Keep a Boxer at Bay with your Guard Hand -- Part 5
Keep a Boxer at Bay with your Guard Hand -- Part 6
Keep a Boxer at Bay with your Guard Hand -- Part 7
Keep a Boxer at Bay with your Guard Hand -- Part 8
Keep a Boxer at Bay with your Guard Hand -- Part 9
In-Gate and Out-Gate in Defence -- Part 1
In-Gate and Out-Gate in Defence -- Part 2
In-Gate and Out-Gate in Defence -- Part 3
In-Gate and Out-Gate in Defence -- Part 4
In-Gate and Out-Gate in Defence -- Part 5
In-Gate and Out-Gate in Defence -- Part 6
In-Gate and Out-Gate in Defence -- Part 7
In-Gate and Out-Gate in Defence -- Part 8
The Tactic of Cover and Strike -- Part 1
The Tactic of Cover and Strike -- Part 2
The Tactic of Cover and Strike -- Part 3
The Tactic of Cover and Strike -- Part 4
 The Tactic of Cover and Strike -- Part 5
The Tactic of Cover and Strike -- Part 6
The Tactic of Cover and Strike -- Part 7
The Tactic of Cover and Strike -- Part 8
Countering at Points 3, 2 and 1 - Part 1
Countering at Points 3, 2 and 1 - Part 2
Countering at Points 3, 2 and 1 - Part 3
Countering at Points 3, 2 and 1 - Part 4
Countering at Points 3, 2 and 1 - Part 5
Countering at Points 3, 2 and 1 - Part 6
Countering at Points 3, 2 and 1 - Part 7
Countering at Points 3, 2 and 1 - Part 8
Countering at Points 3, 2 and 1 - Part 9
Countering at Points 3, 2 and 1 - Part 10
Taking the Initiative to Attack a Boxer -- Part 1
Taking the Initiative to Attack a Boxer -- Part 2
Taking the Initiative to Attack a Boxer -- Part 3
Taking the Initiative to Attack a Boxer -- Part 4
Taking the Initiative to Attack a Boxer -- Part 5
Taking the Initiative to Attack a Boxer -- Part 6
Taking the Initiative to Attack a Boxer -- Part 7
Taking the Initiative to Attack a Boxer -- Part 8
Taking the Initiative to Attack a Boxer -- Part 9
Covering your Opponent to Ensure Safety First -- Part 1
Covering your Opponent to Ensure Safety First -- Part 2
Covering your Opponent to Ensure Safety First -- Part 3
Covering your Opponent to Ensure Safety First -- Part 4
Covering your Opponent to Ensure Safety First -- Part 5
Covering your Opponent to Ensure Safety First -- Part 6
Covering your Opponent to Ensure Safety First -- Part 7
 Covering your Opponent to Ensure Safety First -- Part 8
Usefulness and Subtlety of Body Movement -- Part 1
Usefulness and Subtlety of Body Movement -- Part 2
Usefulness and Subtlety of Body Movement -- Part 3
Usefulness and Subtlety of Body Movement -- Part 4
Usefulness and Subtlety of Body Movement -- Part 5
Usefulness and Subtlety of Body Movement -- Part 6
Usefulness and Subtlety of Body Movement -- Part 7
Usefulness and Subtlety of Body Movement -- Part 8
Locking Opponent's Both Arms to Strike Him -- Part 1
Locking Opponent's Both Arms to Strike Him -- Part 2
Locking Opponent's Both Arms to Strike Him -- Part 3
Locking Opponent's Both Arms to Strike Him -- Part 4
Locking Opponent's Both Arms to Strike Him -- Part 5
Locking Opponent's Both Arms to Strike Him -- Part 6
Locking Opponent's Both Arms to Strike Him -- Part 7
Locking Opponent's Both Arms to Strike Him -- Part 8
Locking Opponent's Both Arms to Strike Him -- Part 9
Locking Opponent's Both Arms to Strike Him -- Part 10
Locking Opponent's Both Arms to Strike Him -- Part 11
Locking Opponent's Both Arms to Strike Him -- Part 12
Developing Skills to Apply Techniques Effectively -- Part 1
Developing Skills to Apply Techniques Effectively -- Part 2
Developing Skills to Apply Techniques Effectively -- Part 3
Developing Skills to Apply Techniques Effectively -- Part 4
Developing Skills to Apply Techniques Effectively -- Part 5
Developing Skills to Apply Techniques Effectively -- Part 6
Developing Skills to Apply Techniques Effectively -- Part 7
Developing Skills to Apply Techniques Effectively -- Part 8
Developing Skills to Apply Techniques Effectively -- Part 9
 Developing Skills to Apply Techniques Effectively -- Part 10
Developing Skills to Apply Techniques Effectively -- Part 11
Developing Skills to Apply Techniques Effectively -- Part 12
Developing Skills to Apply Techniques Effectively -- Part 13
Keeping a Boxer at Bay as he Bounces Around -- Part 1
Keeping a Boxer at Bay as he Bounces Around -- Part 2
Keeping a Boxer at Bay as he Bounces Around -- Part 3
Keeping a Boxer at Bay as he Bounces Around -- Part 4
Keeping a Boxer at Bay as he Bounces Around -- Part 5
Keeping a Boxer at Bay as he Bounces Around -- Part 6
Keeping a Boxer at Bay as he Bounces Around -- Part 7
Keeping a Boxer at Bay as he Bounces Around -- Part 8
Keeping a Boxer at Bay as he Bounces Around -- Part 9
The Tactic of Deflect and Strike -- Part 1
The Tactic of Deflect and Strike -- Part 2
The Tactic of Deflect and Strike -- Part 3
The Tactic of Deflect and Strike -- Part 4
The Tactic of Deflect and Strike -- Part 5
The Tactic of Deflect and Strike -- Part 6
The Tactic of Deflect and Strike -- Part 7
The Tactic of Deflect and Strike -- Part 8
The Tactic of Deflect and Strike -- Part 9
The Tactic of Deflect and Strike -- Part 10
The Tactic of Deflect and Strike -- Part 11
The Tactic of Deflect and Strike -- Part 12
Guard-Hand for Defence and Attack -- Part 1
Guard-Hand for Defence and Attack -- Part 2
Guard-Hand for Defence and Attack -- Part 3
Guard-Hand for Defence and Attack -- Part 4
Guard-Hand for Defence and Attack -- Part 5
 Guard-Hand for Defence and Attack -- Part 6
Guard-Hand for Defence and Attack -- Part 7
Guard-Hand for Defence and Attack -- Part 8
Guard-Hand for Defence and Attack -- Part 9
Guard-Hand for Defence and Attack -- Part 10
Be Proficient in Basic Techniques before
Learning the Sophisticated -- Part 1
Be Proficient in Basic Techniques before
Learning the Sophisticated -- Part 2
Be Proficient in Basic Techniques before
Learning the Sophisticated -- Part 3
Be Proficient in Basic Techniques before Learning the Sophisticated -- Part 4
Be Proficient in Basic Techniques before Learning the Sophisticated -- Part 5
Be Proficient in Basic Techniques before Learning the Sophisticated -- Part 6
Be Proficient in Basic Techniques before Learning the Sophisticated -- Part 7
Be Proficient in Basic Techniques before Learning the Sophisticated -- Part 8
Usefulness of the Boiw-Arrow Stance -- Overview
Keep a Boxer at Bay with your Guard Hand -- Overview
In-Gate and Out-Gate in Defence -- Overview
The Tactic of Cover and Strike -- Overview
Countering at Piints 3, 2 and 1 -- Overview
Taking the Initiative to Attack a Boxer -- Overview
Covering your Opponent to Ensure Safety First -- Overview
Usefulness and Subtlety of Body Movement -- Overview
Locking Opponent's Both Arms to Strike Him -- Overview
Developing Skills to Apply Techniques Effectively -- Overview
 Keeping a Boxer at Bay as he Bounces Around
-- Overview
The Tactic of Deflect and Strike -- Overview
Guard-Hand for Defence and Attack -- Overview
Be Proficient in Basic Techniques before
Learning the Sophisticated -- Overview
Shaolin in Portugal 2010 -- Shaolin 03 Countering a Boxer at Point 2 -- Part 1
Countering a Boxer at Point 2 -- Part 2
Countering a Boxer at Point 2 -- Part 3
Countering a Boxer at Point 2 -- Part 4
Countering a Boxer at Point 2 -- Part 5
Countering a Boxer at Point 2 -- Part 6
Countering a Boxer at Point 2 -- Part 7
Countering a Boxer at Point 2 -- Part 8
Keeping Boxers Away with Guard-Hand -- Part 1
Keeping Boxers Away with Guard-Hand -- Part 2
Keeping Boxers Away with Guard-Hand -- Part 3
Keeping Boxers Away with Guard-Hand -- Part 4
Keeping Boxers Away with Guard-Hand -- Part 5
Keeping Boxers Away with Guard-Hand -- Part 6
Keeping Boxers Away with Guard-Hand -- Part 7
Keeping Boxers Away with Guard-Hand -- Part 8
Keeping Boxers Away with Guard-Hand -- Part 9
Keeping Boxers Away with Guard-Hand -- Part 10
Effectiveness of Guard-Hand in Fighting against Boxers -- Part 1
Effectiveness of Guard-Hand in Fighting against Boxers -- Part 2
 Effectiveness of Guard-Hand in Fighting against
Boxers -- Part 3
Effectiveness of Guard-Hand in Fighting against
Boxers -- Part 4
Effectiveness of Guard-Hand in Fighting against
Boxers -- Part 5
Effectiveness of Guard-Hand in Fighting against
Boxers -- Part 6
Effectiveness of Guard-Hand in Fighting against
Boxers -- Part 7
Effectiveness of Guard-Hand in Fighting against
Boxers -- Part 8
Effectiveness of Guard-Hand in Fighting against Boxers -- Part 9
How would You Counter a Boxer Raining Blows on You? -- Part 1
How would You Counter a Boxer Raining Blows on You? -- Part 2
How would You Counter a Boxer Raining Blows on You? -- Part 3
How would You Counter a Boxer Raining Blows
on You? -- Part 4
How would You Counter a Boxer Raining Blows
on You? -- Part 5
How would You Counter a Boxer Raining Blows
on You? -- Part 6
How would You Counter a Boxer Raining Blows
on You? -- Part 7
How would You Counter a Boxer Raining Blows
on You? -- Part 8
How would You Counter a Boxer Raining Blows
on You? -- Part 9
First we Need to Understand the Opponent -- Part 1
First we Need to Understand the Opponent -- Part 1
First we Need to Understand the Opponent -- Part 2
First we Need to Understand the Opponent -- Part 3
First we Need to Understand the Opponent -- Part 4
First we Need to Understand the Opponent -- Part 5
First we Need to Understand the Opponent -- Part 6
First we Need to Understand the Opponent -- Part 7
First we Need to Understand the Opponent -- Part 8
Technical Speed of Shaolin over Boxing -- Part 1
Technical Speed of Shaolin over Boxing -- Part 2
Technical Speed of Shaolin over Boxing -- Part 3
Technical Speed of Shaolin over Boxing -- Part 4
Technical Speed of Shaolin over Boxing -- Part 5
 Technical Speed of Shaolin over Boxing -- Part 6
Technical Speed of Shaolin over Boxing -- Part 7
Technical Speed of Shaolin over Boxing -- Part 8
Technical Speed of Shaolin over Boxing -- Part 9
Covering Opponent and Striking his Vital Points -- Part 1
Covering Opponent and Striking his Vital Points -- Part 2
Covering Opponent and Striking his Vital Points -- Part 3
Covering Opponent and Striking his Vital Points -- Part 4
Covering Opponent and Striking his Vital Points -- Part 5
Covering Opponent and Striking his Vital Points -- Part 6
Covering Opponent and Striking his Vital Points -- Part 7
Covering Opponent and Striking his Vital Points -- Part 8
Covering Opponent and Striking his Vital Points -- Part 9
How would You Counter a Boxer's Hooks -- Part 1
How would You Counter a Boxer's Hooks -- Part 2
How would You Counter a Boxer's Hooks -- Part 3
How would You Counter a Boxer's Hooks -- Part 4
How would You Counter a Boxer's Hooks -- Part 5
How would You Counter a Boxer's Hooks -- Part 6
How would You Counter a Boxer's Hooks -- Part 7
How would You Counter a Boxer's Hooks -- Part 8
The Amazing Technique of Cross-Road Hook-Hand -- Part 1
The Amazing Technique of Cross-Road Hook-Hand -- Part 2
The Amazing Technique of Cross-Road Hook-Hand -- Part 3
The Amazing Technique of Cross-Road Hook-Hand -- Part 4
The Amazing Technique of Cross-Road Hook-Hand -- Part 5
The Amazing Technique of Cross-Road Hook-Hand -- Part 6
The Amazing Technique of Cross-Road Hook-Hand -- Part 7
The Amazing Technique of Cross-Road Hook-Hand -- Part 8
The Amazing Technique of Cross-Road Hook-Hand -- Part 9
 The Amazing Technique of Cross-Road Hook-Hand
-- Part 10
Boxers have No Techniques to Defend against Felling
Attacks -- Part 1
Boxers have No Techniques to Defend against Felling
Attacks -- Part 2
Boxers have No Techniques to Defend against Felling
Attacks -- Part 3
Boxers have No Techniques to Defend against Felling
Attacks -- Part 4
Boxers have No Techniques to Defend against Felling
Attacks -- Part 5
Boxers have No Techniques to Defend against Felling Attacks -- Part 6
Boxers have No Techniques to Defend against Felling Attacks -- Part 7
Boxers have No Techniques to Defend against Felling Attacks -- Part 8
Boxers have No Techniques to Defend against Felling Attacks -- Part 9
White Monkey Holds Branch against the Undercut -- Part 1
White Monkey Holds Branch against the Undercut -- Part 2
White Monkey Holds Branch against the Undercut -- Part 3
White Monkey Holds Branch against the Undercut -- Part 4
White Monkey Holds Branch against the Undercut -- Part 5
White Monkey Holds Branch against the Undercut -- Part 6
White Monkey Holds Branch against the Undercut -- Part 7
White Monkey Holds Branch against the Undercut -- Part 8
White Monkey Holds Branch against the Undercut -- Part 9
White Monkey Holds Branch against the Undercut -- Part 10
White Monkey Holds Branch against the Undercut -- Part 11
Combat Training is injury-Free and a Lot of Fun -- Part 1
Combat Training is injury-Free and a Lot of Fun -- Part 2
Combat Training is injury-Free and a Lot of Fun -- Part 3
Combat Training is injury-Free and a Lot of Fun -- Part 4
Combat Training is injury-Free and a Lot of Fun -- Part 5
Combat Training is injury-Free and a Lot of Fun -- Part 6
Combat Training is injury-Free and a Lot of Fun -- Part 7
Combat Training is injury-Free and a Lot of Fun -- Part 8
Combat Training is injury-Free and a Lot of Fun -- Part 9
 Countering a Boxer at Point 2 -- Overview
Keeping Boxers Away with Guard-Hand -- Overview
Effectiveness of Guard-Hand in Fighting against
Boxers -- Overview (New)
Effectiveness of Guard-Hand in Fighting against
Boxers -- Overview
How would You Counter a Boxer Raining Blows
on You? -- Overview
First we Need to Understand the Opponent -- Overview
Technical Speed of Shaolin over Boxing -- Overview
Covering Opponent and Striking his Vital Points -- Overview
How would You Counter a Boxer's Hooks -- Overview
The Amazing Technique of Cross-Road Hook-Hand -- Overview
Boxers have No Techniques to Defend against
Felling Attacks -- Overview
White Monkey Holds Branch against the
Undercut -- Overview
Combat Training is injury-Free and a Lot of Fun
-- Overview
 Shaolin in Portugal 2010 -- Shaolin 04
Intercepting Boxers' Hooks -- Part 1
Shaolin in Portugal 2010 -- Shaolin 04
Intercepting Boxers' Hooks -- Part 1Intercepting Boxers' Hooks -- Part 2
Intercepting Boxers' Hooks -- Part 3
Intercepting Boxers' Hooks -- Part 4
Intercepting Boxers' Hooks -- Part 5
Intercepting Boxers' Hooks -- Part 6
Intercepting Boxers' Hooks -- Part 7
Intercepting Boxers' Hooks -- Part 8
Intercepting Boxers' Hooks -- Part 9
Do you Know why it is Easier to Defeat a Kick-Boxer than a Boxer? -- Part 1
Do you Know why it is Easier to Defeat a Kick-Boxer than a Boxer? -- Part 2
Do you Know why it is Easier to Defeat a Kick-Boxer than a Boxer? -- Part 3
Do you Know why it is Easier to Defeat a Kick-Boxer than a Boxer? -- Part 4
Do you Know why it is Easier to Defeat a Kick-Boxer than a Boxer? -- Part 5
Do you Know why it is Easier to Defeat a Kick-Boxer than a Boxer? -- Part 6
Do you Know why it is Easier to Defeat a Kick-Boxer than a Boxer? -- Part 7
Do you Know why it is Easier to Defeat a Kick-Boxer than a Boxer? -- Part 8
Countering at Various Points at a Series of Attacks -- Part 1
Countering at Various Points at a Series of Attacks -- Part 2
Countering at Various Points at a Series of Attacks -- Part 3
Countering at Various Points at a Series of Attacks -- Part 4
Countering at Various Points at a Series of Attacks -- Part 5
Countering at Various Points at a Series of Attacks -- Part 6
Countering at Various Points at a Series of Attacks -- Part 7
Countering at Various Points at a Series of Attacks -- Part 8
Tactic of Cover and Strike against Karate -- Part 1
Tactic of Cover and Strike against Karate -- Part 2
Tactic of Cover and Strike against Karate -- Part 3
Tactic of Cover and Strike against Karate -- Part 4
Tactic of Cover and Strike against Karate -- Part 5
 Tactic of Cover and Strike against Karate -- Part 6
Tactic of Cover and Strike against Karate -- Part 7
Tactic of Cover and Strike against Karate -- Part 8
Giving or Not Giving Opponents Fighting Chance -- Part 1
Giving or Not Giving Opponents Fighting Chance -- Part 2
Giving or Not Giving Opponents Fighting Chance -- Part 3
Giving or Not Giving Opponents Fighting Chance -- Part 4
Giving or Not Giving Opponents Fighting Chance -- Part 5
Giving or Not Giving Opponents Fighting Chance -- Part 6
Giving or Not Giving Opponents Fighting Chance -- Part 7
Giving or Not Giving Opponents Fighting Chance -- Part 8
Applying Chin-Na against Karate Exponents -- Part 1
Applying Chin-Na against Karate Exponents -- Part 2
Applying Chin-Na against Karate Exponents -- Part 3
Applying Chin-Na against Karate Exponents -- Part 4
Applying Chin-Na against Karate Exponents -- Part 5
Applying Chin-Na against Karate Exponents -- Part 6
Applying Chin-Na against Karate Exponents -- Part 7
Applying Chin-Na against Karate Exponents -- Part 8
Applying Chin-Na against Karate Exponents -- Part 9
Class Practice against Karate Attacks -- Part 1
Class Practice against Karate Attacks -- Part 2
Class Practice against Karate Attacks -- Part 3
Class Practice against Karate Attacks -- Part 4
Class Practice against Karate Attacks -- Part 5
Class Practice against Karate Attacks -- Part 6
Class Practice against Karate Attacks -- Part 7
Class Practice against Karate Attacks -- Part 8
Class Practice against Karate Attacks -- Part 9
Class Practice against Karate Attacks -- Part 10
 Class Practice against Karate Attacks -- Part 11
Effective Techniques and Tactics against Karate -- Part 1
Effective Techniques and Tactics against Karate -- Part 2
Effective Techniques and Tactics against Karate -- Part 3
Effective Techniques and Tactics against Karate -- Part 4
Effective Techniques and Tactics against Karate -- Part 5
Effective Techniques and Tactics against Karate -- Part 6
Effective Techniques and Tactics against Karate -- Part 7
Effective Techniques and Tactics against Karate -- Part 8
Intercepting Boxers' Hooks -- Overview
Do you Know why it is Easier to Defeat a Kick-Boxer than a Boxer? -- Overview
Countering at Various Points at a Series of Attacks -- Overview
Tactic of Cover and Strike against Karate -- Overview
Giving or Not Giving Opponents Fighting Chance -- Overview
Applying Chin-Na against Karate Exponents -- Overview
Class Practice against Karate Attacks -- Overview
Effective Techniques and Tactics against Karate -- Overview
Shaolin in Portugal 2010 -- Shaolin 05 There is Ground Fighting in Shaolin Kungfu -- Part 1
There is Ground Fighting in Shaolin Kungfu -- Part 2
There is Ground Fighting in Shaolin Kungfu -- Part 3
There is Ground Fighting in Shaolin Kungfu -- Part 4
There is Ground Fighting in Shaolin Kungfu -- Part 5
There is Ground Fighting in Shaolin Kungfu -- Part 6
There is Ground Fighting in Shaolin Kungfu -- Part 7
There is Ground Fighting in Shaolin Kungfu -- Part 8
There is Ground Fighting in Shaolin Kungfu -- Part 9
Take Down and Pin Down in Shaolin Kungfu -- Part 1
 Take Down and Pin Down in Shaolin Kungfu -- Part 2
Take Down and Pin Down in Shaolin Kungfu -- Part 3
Take Down and Pin Down in Shaolin Kungfu -- Part 4
Take Down and Pin Down in Shaolin Kungfu -- Part 5
Take Down and Pin Down in Shaolin Kungfu -- Part 6
Take Down and Pin Down in Shaolin Kungfu -- Part 7
Take Down and Pin Down in Shaolin Kungfu -- Part 8
Take Down and Pin Down in Shaolin Kungfu -- Part 9
Take Down and Pin Down in Shaolin Kungfu -- Part 10
Overturning Pin-Downs even when Opponents are
Bigger-Sized -- Part 1
Overturning Pin-Downs even when Opponents are Bigger-Sized -- Part 2
Overturning Pin-Downs even when Opponents are Bigger-Sized -- Part 3
Overturning Pin-Downs even when Opponents are Bigger-Sized -- Part 4
Overturning Pin-Downs even when Opponents are Bigger-Sized -- Part 5
Overturning Pin-Downs even when Opponents are Bigger-Sized -- Part 6
Overturning Pin-Downs even when Opponents are Bigger-Sized -- Part 7
Overturning Pin-Downs even when Opponents are Bigger-Sized -- Part 8
Overturning Pin-Downs even when Opponents are Bigger-Sized -- Part 9
Countering while being Taken Down -- Part 1
Countering while being Taken Down -- Part 2
Countering while being Taken Down -- Part 3
Countering while being Taken Down -- Part 4
Countering while being Taken Down -- Part 5
Countering while being Taken Down -- Part 6
Countering while being Taken Down -- Part 7
Countering while being Taken Down -- Part 8
Countering while being Taken Down -- Part 9
Countering the Shoot at the Initial State -- Part 1
Countering the Shoot at the Initial State -- Part 2
Countering the Shoot at the Initial State -- Part 3
 Countering the Shoot at the Initial State -- Part 4
Countering the Shoot at the Initial State -- Part 5
Countering the Shoot at the Initial State -- Part 6
Countering the Shoot at the Initial State -- Part 7
Countering the Shoot at the Initial State -- Part 8
Countering the Shoot at the Initial State -- Part 9
Countering the Shoot at the Initial State -- Part 10
Countering the Shoot at the Initial State -- Part 11
Countering the Shoot at the Initial State -- Part 12
Countering the Shoot at the Initial State -- Part 13
Countering Taekwondo Kicks at Finishing Stage -- Part 1
Countering Taekwondo Kicks at Finishing Stage -- Part 2
Countering Taekwondo Kicks at Finishing Stage -- Part 3
Countering Taekwondo Kicks at Finishing Stage -- Part 4
Countering Taekwondo Kicks at Finishing Stage -- Part 5
Countering Taekwondo Kicks at Finishing Stage -- Part 6
Countering Taekwondo Kicks at Finishing Stage -- Part 7
Countering Taekwondo Kicks at Finishing Stage -- Part 8
Countering Taekwondo Kicks at Finishing Stage -- Part 9
Countering Taekwondo Kicks at Intermediate Stage -- Part 1
Countering Taekwondo Kicks at Intermediate Stage -- Part 2
Countering Taekwondo Kicks at Intermediate Stage -- P art 3
Countering Taekwondo Kicks at Intermediate Stage -- Part 4
Countering Taekwondo Kicks at Intermediate Stage -- Part 5
Countering Taekwondo Kicks at Intermediate Stage -- Part 6
Countering Taekwondo Kicks at Intermediate Stage -- Part 7
Countering Taekwondo Kicks at Intermediate Stage -- Part 8
Countering Taekwondo Kicks at Intermediate Stage -- Part 9
It's Easy to Counter Kicks, If you Know How -- Part 1
It's Easy to Counter Kicks, If you Know How -- Part 2
 It's Easy to Counter Kicks, If you Know How -- Part 3
It's Easy to Counter Kicks, If you Know How -- Part 4
It's Easy to Counter Kicks, If you Know How -- Part 5
It's Easy to Counter Kicks, If you Know How -- Part 6
It's Easy to Counter Kicks, If you Know How -- Part 7
It's Easy to Counter Kicks, If you Know How -- Part 8
It's Easy to Counter Kicks, If you Know How -- Part 9
Countering Taekwondo Kicks at the Initial Stage -- Part 1
Countering Taekwondo Kicks at the Initial Stage -- Part 2
Countering Taekwondo Kicks at the Initial Stage -- Part 3
Countering Taekwondo Kicks at the Initial Stage -- Part 4
Countering Taekwondo Kicks at the Initial Stage -- Part 5
Countering Taekwondo Kicks at the Initial Stage -- Part 6
Countering Taekwondo Kicks at the Initial Stage -- Part 7
Countering Taekwondo Kicks at the Initial Stage -- Part 8
Countering Taekwondo Kicks at the Initial Stage -- Part 9
Countering Taekwondo Kicks at the Initial Stage -- Part 10
Countering Taekwondo Kicks at the Initial Stage -- Part 11
Countering Taekwondo Kicks at the Initial Stage -- Part 12
The Mechanics of Planting Willow -- Part 1
12 The Mechanics of Planting Willow -- Part 2
The Mechanics of Planting Willow -- Part 3
The Mechanics of Planting Willow -- Part 4
The Mechanics of Planting Willow -- Part 5
The Mechanics of Planting Willow -- Part 6
The Mechanics of Planting Willow -- Part 7
The Mechanics of Planting Willow -- Part 8
The Mechanics of Planting Willow -- Part 9
The Mechanics of Planting Willow -- Part 10
The Mechanics of Planting Willow -- Part 11
 The Mechanics of Planting Willow -- Part 12
Planting Willow and Catching Crab -- Part 1
Planting Willow and Catching Crab -- Part 2
Planting Willow and Catching Crab -- Part 3
Planting Willow and Catching Crab -- Part 4
Planting Willow and Catching Crab -- Part 5
Planting Willow and Catching Crab -- Part 6
Planting Willow and Catching Crab -- Part 7
Planting Willow and Catching Crab -- Part 8
Planting Willow and Catching Crab -- Part 9
From Countering at Various Points to Initiating an Attack -- Part 1
From Countering at Various Points to Initiating an Attack -- Part 2
From Countering at Various Points to Initiating an Attack -- Part 3
From Countering at Various Points to Initiating an Attack -- Part 4
From Countering at Various Points to Initiating an Attack -- Part 5
From Countering at Various Points to Initiating an Attack -- Part 6
From Countering at Various Points to Initiating an Attack -- Part 7
From Countering at Various Points to Initiating an Attack -- Part 8
Free Sparring is Injury-Free and Full of Fun -- Part 1
Free Sparring is Injury-Free and Full of Fun -- Part 2
Free Sparring is Injury-Free and Full of Fun -- Part 3
Free Sparring is Injury-Free and Full of Fun -- Part 4
Free Sparring is Injury-Free and Full of Fun -- Part 5
Free Sparring is Injury-Free and Full of Fun -- Part 6
Free Sparring is Injury-Free and Full of Fun -- Part 7
Free Sparring is Injury-Free and Full of Fun -- Part 8
Free Sparring is Injury-Free and Full of Fun -- Part 9
Free Sparring is Injury-Free and Full of Fun -- Part 10
Free Sparring is Injury-Free and Full of Fun -- Part 11
Free Sparring is Injury-Free and Full of Fun -- Part 12
 Free Sparring is Injury-Free and Full of Fun -- Part 13
Free Sparring is Injury-Free and Full of Fun -- Part 14
There is Ground Fighting in Shaolin Kungfu -- Overview
Take Down and Pin Down in Shaolin Kungfu -- Overview
Overturning Pin-Downs even when Opponents are
Bigger-Sized -- Overview
Countering while being Taken Down -- Overview
Countering the Shoot at the Initial State -- Overview
Countering Taekwondo Kicks at Finishing Stage -- Overview
Countering Taekwondo Kicks at Intermediate Stage
-- Overview
It's Easy to Counter Kicks, If you Know How -- Overview
Countering Taekwondo Kicks at the Initial Stage -- Overview
The Mechanics of Planting Willow -- Overview
Planting Willow and Catching Crab -- Overview
From Countering at Various Points to Initiating an Attack -- Overview
Free Sparring is Injury-Free and Full of Fun -- Overview
Shaolin Kungfu against Karate
Shaolin Kungfu against
Shaolin Kungfu against Kick-Boxing and Taekwondo
Shaolin Kungfu against Other Martial Arts -- Overview
Shaolin Kungfu against Wrestling
Shaolin in Portugal 2010 -- Abridged Videos Videos of Shaolin Kungfu against Boxing -- Abridged Version
Shaolin Kungfu against Boxing: Abridged Version -- Part 1
Shaolin Kungfu against Boxing: Abridged Version -- Part 2
Shaolin Kungfu against Boxing: Abridged Version -- Part 3
Shaolin Kungfu against Boxing: Abridged Version -- Part 4
Shaolin Kungfu against Boxing: Abridged Version -- Part 5
Shaolin Kungfu against Boxing: Abridged Version -- Part 6
Shaolin Kungfu against Karate -- Abridged Version
Shaolin Kungfu against Kick-Boxing and Taekwondo-- Abridged Version
Shaolin Kungfu against Wrestling -- Abridged Version
Videos of Shaolin Kungfu against Other Martial Arts: Abridged Verrsion -- Overview
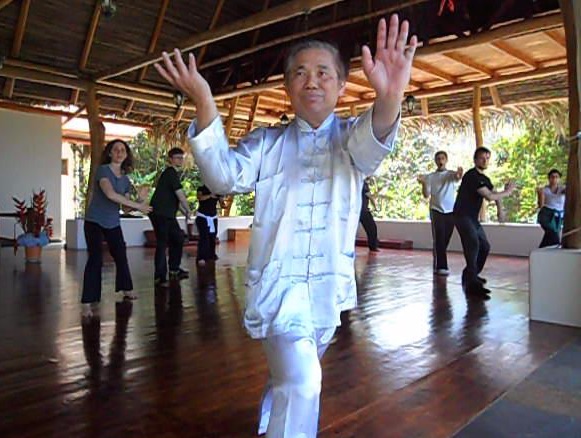
 Taijiquan in Portugal 2010
Importance of Waist Rotation in Taijiquan Movements
Taijiquan in Portugal 2010
Importance of Waist Rotation in Taijiquan MovementsUsing Taijiquan Mechanic to Overcome Bigger,
Stronger Opponents
Movement Comes from the Waist
:Principles of Back Leg and Sinking Hips
Movement and Force from Leg through Waist to Hand
Lifting Water and Internal Force
Using Guard-Hand against a Boxer's Jabs and Crosses
Overcoming Boxer's Speed by Using Body-Movement
Taijiquan Principle of Flowing with a Opponent's Momentum
Having Reached and an Element of Threat in Combat
Outside-In or Inside-Out Approach in Combat
Being Save from Boxer's Jabs and Crosses
Applying Taijiquan to Deal with Boxers Bouncing Around
Taijiquan Tactic of Cover and Strike
Covering and Striking with Leopard Fist
Progressing from Point 3 to Point 2 in Pre-Arranged Sparring
From Pre-Arranged to Conditional Free Sparring against Jabs and Crosses
Beware of a Boxer's Hooks
Effective Use of Body-Movement
Countering Hooks and Continuous Attacks
Giving Boxers a Fair Chance
Lockimng a Boxer's Both Arms
Chasing after a Boxer
Stepping on a Boxer or Felling him onto the Ground
White Monkey against Boxer's Undercuts
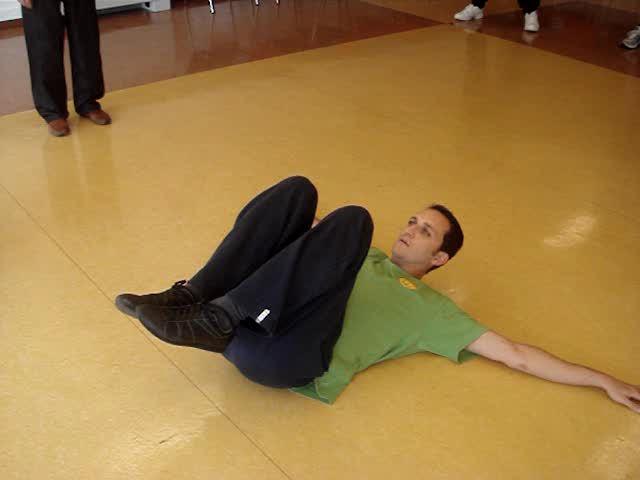
How to Fall Safely
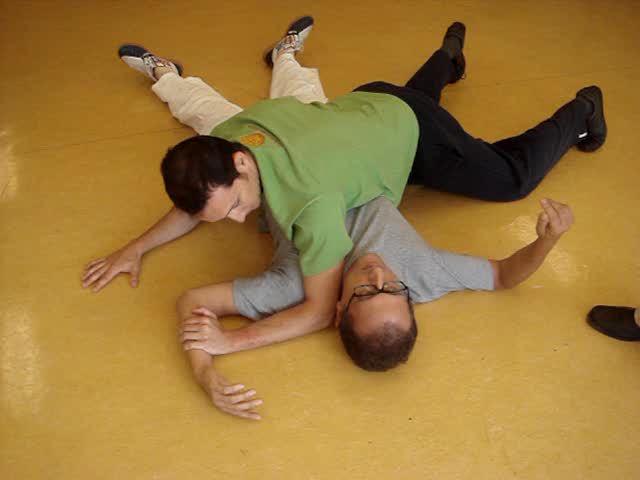
Don't Expose your Groin while Boxer is on the Ground
Basic Techniques of Shoot and Pin-Down
Having Fun with Shoots and Pin-Downs
Countering during the Process of a Shoot
 Counter-Striking an Opponent as he Shoots
Exploiting the Vulnerable Position of a Shoot
Turning a Kick-Boxer's Strong Point into a Weakness
Countering at Various Points in a Series of Attacks
Using Taijiquan to Counter at Three Points of an Attack
Taijiquan Techniques and Tactics against Karate
Using Taijiquan to Neutralize the Strong Point of
a Karate Opponent
Using Taijiquan to Counter-Strike Karate Opponent
at Various Points of Time
Using Taijiqjuan to Counter a Karate Opponent as
Soon as he Attacks
Stylizing Karate Attacks for Systematic Training in Taijiquan
Applying Taijiuan Chin-Na on Karate Oponents
A Taijiquan Pattern against all Taekwondo Kicks
Applying Taijiquan to Avoid Kicks and Fell Opponents
Avoid Kicks, Fell Opponents and Strike Decisively with Taijiquan
Stylizing Typical Muay Thai Attacks into a Sequence
Taijiquan Counter against the Formidable Knee Jabs
Countering at Various Points and Free Sparring
Basic Taijiqua Counters against Boxing
Videos of Wahnam Taijiquan against Other Martial Arts: Full
Version -- Overview
Taijiquan in Portugal 2010 -- Taijiquan 01 Wahnam Taijiquan against Other Martial Arts: Abridged Version -- Overview
Wahnam Taijiquan against Boxing
Wahnam Taijiquan against Karate
Wahnam Taijiquan against Kick-Boxing
Wahnam Taijiquan against MuayThai
Wahnam Taijiquan against Taekwondo
Wahnam Taijiquan against Wrestling
The Mechanics of Taijiquan in Overcoming Bigger, Stronger Opponents
Wahnam Taijiquan against Other Martial Arts: Full Version -- Overview
Wahnam Taijiquan against Other Martial Arts: Full Version and
Abridged Version -- Overview
 Importance of Waist Rotation in
Taijiquan Movements -- Part 1
Importance of Waist Rotation in
Taijiquan Movements -- Part 2
Importance of Waist Rotation in
Taijiquan Movements -- Part 3
Importance of Waist Rotation in
Taijiquan Movements -- Part 4
Importance of Waist Rotation in
Taijiquan Movements -- Part 5
Importance of Waist Rotation in
Taijiquan Movements -- Part 6
Importance of Waist Rotation in Taijiquan Movements -- Part 7
Importance of Waist Rotation in Taijiquan Movements -- Part 8
Importance of Waist Rotation in Taijiquan Movements -- Part 9
Using Taijiquan Mechancis to Overcome Bigger, Stronger Opponents -- Part 1
Using Taijiquan Mechancis to Overcome Bigger, Stronger Opponents -- Part 2
Using Taijiquan Mechancis to Overcome Bigger, Stronger Opponents -- Part 3
Using Taijiquan Mechancis to Overcome Bigger, Stronger Opponents -- Part 4
Using Taijiquan Mechancis to Overcome Bigger, Stronger Opponents -- Part 5
Using Taijiquan Mechancis to Overcome Bigger, Stronger Opponents -- Part 6
Using Taijiquan Mechancis to Overcome Bigger, Stronger Opponents -- Part 7
Using Taijiquan Mechancis to Overcome Bigger, Stronger Opponents -- Part 8
Using Taijiquan Mechancis to Overcome Bigger, Stronger Opponents -- Part 9
Movement Comes from the Waist -- Part 1
Movement Comes from the Waist -- Part 2
Movement Comes from the Waist -- Part 3
Movement Comes from the Waist -- Part 4
Movement Comes from the Waist -- Part 5
Movement Comes from the Waist -- Part 6
Movement Comes from the Waist -- Part 7
Movement Comes from the Waist -- Part 8
Principles of Back Leg and Sinking Hips -- Part 1
Principles of Back Leg and Sinking Hips -- Part 2
Principles of Back Leg and Sinking Hips -- Part 3
Principles of Back Leg and Sinking Hips -- Part 4
 Principles of Back Leg and Sinking Hips -- Part 5
Principles of Back Leg and Sinking Hips -- Part 6
Principles of Back Leg and Sinking Hips -- Part 7
Principles of Back Leg and Sinking Hips -- Part 8
From Leg through Waist to Hand -- Part 1
From Leg through Waist to Hand -- Part 2
From Leg through Waist to Hand -- Part 3
From Leg through Waist to Hand -- Part 4
From Leg through Waist to Hand -- Part 5
From Leg through Waist to Hand -- Part 6
From Leg through Waist to Hand -- Part 7
From Leg through Waist to Hand -- Part 8
From Leg through Waist to Hand -- Part 9
Immortal Waves Sleeves
Using Minimum Force magainst Maximum Strength
Importance of Waist Rotation in Taijiquan Movements -- Overview
Using Taijiquan Mechancis to Overcome Bigger, Stronger Opponents -- Overview
Movement Comes from the Waist -- Overview
The Principles of Back Leg and Sinking Hips -- Overview
From Leg through Waist to Hand -- Overview
 Taijiquan in Portugal 2010 -- Taijiquan 02
Lifting Water and Internal Force -- Part 1
Taijiquan in Portugal 2010 -- Taijiquan 02
Lifting Water and Internal Force -- Part 1Lifting Water and Internal Force -- Part 2
Lifting Water and Internal Force -- Part 3
Lifting Water and Internal Force -- Part 4
Lifting Water and Internal Force -- Part 5
Lifting Water and Internal Force -- Part 6
Using Guard-Hand against a Boxer's Jabs and Crosses -- Part 1
Using Guard-Hand against a Boxer's Jabs and Crosses -- Part 2
Using Guard-Hand against a Boxer's Jabs and Crosses -- Part 3
Using Guard-Hand against a Boxer's Jabs and Crosses -- Part 4
Using Guard-Hand against a Boxer's Jabs and Crosses -- Part 5
Using Guard-Hand against a Boxer's Jabs and Crosses -- Part 6
Using Guard-Hand against a Boxer's Jabs and Crosses -- Part 7
Using Guard-Hand against a Boxer's Jabs and Crosses -- Part 8
Overcoming a Boxer's Speed by Using Body-Movement -- Part 1
Overcoming a Boxer's Speed by Using Body-Movement -- Part 2
Overcoming a Boxer's Speed by Using Body-Movement -- Part 3
Overcoming a Boxer's Speed by Using Body-Movement -- Part 4
Overcoming a Boxer's Speed by Using Body-Movement -- Part 5
Overcoming a Boxer's Speed by Using Body-Movement -- Part 6
Overcoming a Boxer's Speed by Using Body-Movement -- Part 7
Overcoming a Boxer's Speed by Using Body-Movement -- Part 8
Flowing with Opponent's Momentum -- Part 1
Flowing with Opponent's Momentum -- Part 2
Flowing with Opponent's Momentum -- Part 3
Flowing with Opponent's Momentum -- Part 4
Flowing with Opponent's Momentum -- Part 5
Flowing with Opponent's Momentum -- Part 6
Flowing with Opponent's Momentum -- Part 7
Flowing with Opponent's Momentum -- Part 8
 Flowing with Opponent's Momentum -- Part 9
Flowing with Opponent's Momentum -- Part 10
Having Reach and Element of Threat in Attacks -- Part 1
Having Reach and Element of Threat in Attacks -- Part 2
Having Reach and Element of Threat in Attacks -- Part 3
Having Reach and Element of Threat in Attacks -- Part 4
Having Reach and Element of Threat in Attacks -- Part 5
Having Reach and Element of Threat in Attacks -- Part 6
Having Reach and Element of Threat in Attacks -- Part 7
Having Reach and Element of Threat in Attacks -- Part 8
Having Reach and Element of Threat in Attacks -- Part 9
Outside-In and Inside-Out Approach -- Part 1
Outside-In and Inside-Out Approach -- Part 2
Outside-In and Inside-Out Approach -- Part 3
Outside-In and Inside-Out Approach -- Part 4
Outside-In and Inside-Out Approach -- Part 5
Outside-In and Inside-Out Approach -- Part 6
Outside-In and Inside-Out Approach -- Part 7
Outside-In and Inside-Out Approach -- Part 8
Outside-In and Inside-Out Approach -- Part 9
Outside-In and Inside-Out Approach -- Part 10
Being Safe from Boxers' Jabs and Crosses -- Part 1
Being Safe from Boxers' Jabs and Crosses -- Part 2
Being Safe from Boxers' Jabs and Crosses -- Part 3
Being Safe from Boxers' Jabs and Crosses -- Part 4
Being Safe from Boxers' Jabs and Crosses -- Part 5
Being Safe from Boxers' Jabs and Crosses -- Part 6
Being Safe from Boxers' Jabs and Crosses -- Part 7
Being Safe from Boxers' Jabs and Crosses -- Part 8
Being Safe from Boxers' Jabs and Crosses -- Part 9
 How to Deal with a Boxer Bouncing Around -- Part 1
How to Deal with a Boxer Bouncing Around -- Part 2
How to Deal with a Boxer Bouncing Around -- Part 3
How to Deal with a Boxer Bouncing Around -- Part 4
How to Deal with a Boxer Bouncing Around -- Part 5
How to Deal with a Boxer Bouncing Around -- Part 6
How to Deal with a Boxer Bouncing Around -- Part 7
How to Deal with a Boxer Bouncing Around -- Part 8
How to Deal with a Boxer Bouncing Around -- Part 9
How to Deal with a Boxer Bouncing Around -- Part 10
How to Deal with a Boxer Bouncing Around -- Part 11
The Tactic of Cover and Strike -- Part 1
The Tactic of Cover and Strike -- Part 2
The Tactic of Cover and Strike -- Part 3
The Tactic of Cover and Strike -- Part 4
The Tactic of Cover and Strike -- Part 5
The Tactic of Cover and Strike -- Part 6
The Tactic of Cover and Strike -- Part 7
The Tactic of Cover and Strike -- Part 8
The Tactic of Cover and Strike -- Part 9
The Tactic of Cover and Strike -- Part 10
The Tactic of Cover and Strike -- Part 11
Covering and Striking with Leopard Fist -- Part 1
Covering and Striking with Leopard Fist -- Part 2
Covering and Striking with Leopard Fist -- Part 3
Covering and Striking with Leopard Fist -- Part 4
Covering and Striking with Leopard Fist -- Part 5
Covering and Striking with Leopard Fist -- Part 6
Covering and Striking with Leopard Fist -- Part 7
Covering and Striking with Leopard Fist -- Part 8
 Covering and Striking with Leopard Fist -- Part 9
Covering and Striking with Leopard Fist -- Part 10
Covering and Striking with Leopard Fist -- Part 11
Covering and Striking with Leopard Fist -- Part 12
Progressing from Point 3 to Point 2 in
Pre-Arranged Sparring -- Part 1
Progressing from Point 3 to Point 2 in
Pre-Arranged Sparring -- Part 2
Progressing from Point 3 to Point 2 in
Pre-Arranged Sparring -- Part 3
Progressing from Point 3 to Point 2 in
Pre-Arranged Sparring -- Part 4
Progressing from Point 3 to Point 2 in Pre-Arranged Sparring -- Part 5
Progressing from Point 3 to Point 2 in Pre-Arranged Sparring -- Part 6
Progressing from Point 3 to Point 2 in Pre-Arranged Sparring -- Part 7
Progressing from Point 3 to Point 2 in Pre-Arranged Sparring -- Part 8
Progressing from Point 3 to Point 2 in Pre-Arranged Sparring -- Part 9
Progressing from Point 3 to Point 2 in Pre-Arranged Sparring -- Part 10
Progressing from Point 3 to Point 2 in Pre-Arranged Sparring -- Part 11
From Pre-Arranged to Conditional Free Sparring using Jabs and Crosses -- Part 1
From Pre-Arranged to Conditional Free Sparring using Jabs and Crosses -- Part 2
From Pre-Arranged to Conditional Free Sparring using Jabs and Crosses -- Part 3
From Pre-Arranged to Conditional Free Sparring using Jabs and Crosses -- Part 4
From Pre-Arranged to Conditional Free Sparring using Jabs and Crosses -- Part 5
From Pre-Arranged to Conditional Free Sparring using Jabs and Crosses -- Part 6
From Pre-Arranged to Conditional Free Sparring using Jabs and Crosses -- Part 7
From Pre-Arranged to Conditional Free Sparring using Jabs and Crosses -- Part 8
From Pre-Arranged to Conditional Free Sparring using Jabs and Crosses -- Part 9
From Pre-Arranged to Conditional Free Sparring using Jabs and Crosses -- Part 10
From Pre-Arranged to Conditional Free Sparring using Jabs and Crosses -- Part 11
 Lifting Water and Internal Force -- Overview
Using Guard-Hand against a Boxer's Jabs and
Crosses -- Overview
Overcoming a Boxer's Speed by Using
Body-Movement -- Overview
Flowing with an Opponent's Momentum -- Overview
Having Reach and Element of Threat in Attacks
-- Overview
Outside-In or Inside-Out Approach -- Overview
Being Safe from Boxers' Jabs and Crosses -- Overview
How to Deal with a Boxer Bouncing Around -- Overview
The Tactic of Cover and Strike -- Overview
Covering and Striking with Leopard Fist -- Overview
Progressing from Point 3 to Point 2 in Pre-Arranged Sparring -- Overview
From Pre-Arranged to Conditional Free Sparring using Jabs and Crosses -- Overview
Taijiquan in Portugal 2010 -- Taijiquan 03 Beware of a Boxer's Hooks -- Part 1
Beware of a Boxer's Hooks -- Part 2
Beware of a Boxer's Hooks -- Part 3
Beware of a Boxer's Hooks -- Part 4
Beware of a Boxer's Hooks -- Part 5
Beware of a Boxer's Hooks -- Part 6
Beware of a Boxer's Hooks -- Part 7
Beware of a Boxer's Hooks -- Part 8
Beware of a Boxer's Hooks -- Part 9
Effective Use of Body-Movement -- Part 1
Effective Use of Body-Movement -- Part 2
Effective Use of Body-Movement -- Part 3
Effective Use of Body-Movement -- Part 4
Effective Use of Body-Movement -- Part 5
Effective Use of Body-Movement -- Part 6
Effective Use of Body-Movement -- Part 7
Effective Use of Body-Movement -- Part 8
Countering Hooks and Continuous Strikes -- Part 1
Countering Hooks and Continuous Strikes -- Part 2
Countering Hooks and Continuous Strikes -- Part 3
 Countering Hooks and Continuous Strikes -- Part 4
Countering Hooks and Continuous Strikes -- Part 5
Countering Hooks and Continuous Strikes -- Part 6
Countering Hooks and Continuous Strikes -- Part 7
Countering Hooks and Continuous Strikes -- Part 8
Giving Boxers a Fair Chance -- Part 1
Giving Boxers a Fair Chance -- Part 2
Giving Boxers a Fair Chance -- Part 3
Giving Boxers a Fair Chance -- Part 4
Giving Boxers a Fair Chance -- Part 5
Giving Boxers a Fair Chance -- Part 6
Giving Boxers a Fair Chance -- Part 7
Giving Boxers a Fair Chance -- Part 8
Locking a Boxer's Both Arms -- Part 1
Locking a Boxer's Both Arms -- Part 2
Locking a Boxer's Both Arms -- Part 3
Locking a Boxer's Both Arms -- Part 4
Locking a Boxer's Both Arms -- Part 5
Locking a Boxer's Both Arms -- Part 6
Locking a Boxer's Both Arms -- Part 7
Locking a Boxer's Both Arms -- Part 8
Chasing after a Boxer -- Part 1
Chasing after a Boxer -- Part 2
Chasing after a Boxer -- Part 3
Chasing after a Boxer -- Part 4
Chasing after a Boxer -- Part 5
Chasing after a Boxer -- Part 6
Chasing after a Boxer -- Part 7
Chasing after a Boxer -- Part 8
Stepping on a Boxer or Felling him onto the Ground -- Part 1
 Stepping on a Boxer or Felling him onto the Ground -- Part 2
Stepping on a Boxer or Felling him onto the Ground -- Part 3
Stepping on a Boxer or Felling him onto the Ground -- Part 4
Stepping on a Boxer or Felling him onto the Ground -- Part 5
Stepping on a Boxer or Felling him onto the Ground -- Part 6
Stepping on a Boxer or Felling him onto the Ground -- Part 7
Stepping on a Boxer or Felling him onto the Ground -- Part 8
Stepping on a Boxer or Felling him onto the Ground -- Part 9
Stepping on a Boxer or Felling him onto the Ground -- Part 10
Stepping on a Boxer or Felling him onto the Ground -- Part 11
Stepping on a Boxer or Felling him onto the Ground -- Part 12
Stepping on a Boxer or Felling him onto the Ground -- Part 13
White Monkey against Boxer's Undercuts -- Part 1
White Monkey against Boxer's Undercuts -- Part 2
White Monkey against Boxer's Undercuts -- Part 3
White Monkey against Boxer's Undercuts -- Part 4
White Monkey against Boxer's Undercuts -- Part 5
White Monkey against Boxer's Undercuts -- Part 6
White Monkey against Boxer's Undercuts -- Part 7
White Monkey against Boxer's Undercuts -- Part 8
White Monkey against Boxer's Undercuts -- Part 9
White Monkey against Boxer's Undercuts -- Part 10
How to Fall Safely -- Part 1
How to Fall Safely -- Part 2
How to Fall Safely -- Part 3
How to Fall Safely -- Part 4
How to Fall Safely -- Part 5
How to Fall Safely -- Part 6
How to Fall Safely -- Part 7
How to Fall Safely -- Part 8
 How to Fall Safely -- Part 9
Don't Expose Groin with Opponent on Ground -- Part 1
Don't Expose Groin with Opponent on Ground -- Part 2
Don't Expose Groin with Opponent on Ground -- Part 3
Don't Expose Groin with Opponent on Ground -- Part 4
Don't Expose Groin with Opponent on Ground -- Part 5
Don't Expose Groin with Opponent on Ground -- Part 6
Don't Expose Groin with Opponent on Ground -- Part 7
Don't Expose Groin with Opponent on Ground -- Part 8
Beware of a Boxer's Hooks -- Overview
Effective Use of Body-Movement -- Overview
Countering Hooks and Continuous Strikes -- Overview
Giving Boxers a Fair Chance -- Overview
Locking a Boxer's Both Arms -- Overview
Chasing after a Boxer -- Overview
Stepping on a Boxer or Felling him onto the Ground -- Overview
White Monkey against Boxer's Undercuts -- Overview
How to Fall Safely -- Overview
Don't Expose Groin with Opponent on Ground -- Overview
Taijiquan in Portugal 2010 -- Taijiquan 02
Lifting Water and Internal Force -- Part 1Lifting Water and Internal Force -- Part 2
Lifting Water and Internal Force -- Part 3
Lifting Water and Internal Force -- Part 4
Lifting Water and Internal Force -- Part 5
Lifting Water and Internal Force -- Part 6
Using Guard-Hand against a Boxer's Jabs and Crosses -- Part 1
Using Guard-Hand against a Boxer's Jabs and Crosses -- Part 2
Using Guard-Hand against a Boxer's Jabs and Crosses -- Part 3
Using Guard-Hand against a Boxer's Jabs and Crosses -- Part 4
Using Guard-Hand against a Boxer's Jabs and Crosses -- Part 5
Using Guard-Hand against a Boxer's Jabs and Crosses -- Part 6
Using Guard-Hand against a Boxer's Jabs and Crosses -- Part 7
Using Guard-Hand against a Boxer's Jabs and Crosses -- Part 8
Overcoming a Boxer's Speed by Using Body-Movement -- Part 1
Overcoming a Boxer's Speed by Using Body-Movement -- Part 2
Overcoming a Boxer's Speed by Using Body-Movement -- Part 3
Overcoming a Boxer's Speed by Using Body-Movement -- Part 4
Overcoming a Boxer's Speed by Using Body-Movement -- Part 5
Overcoming a Boxer's Speed by Using Body-Movement -- Part 6
Overcoming a Boxer's Speed by Using Body-Movement -- Part 7
Overcoming a Boxer's Speed by Using Body-Movement -- Part 8
Flowing with Opponent's Momentum -- Part 1
Flowing with Opponent's Momentum -- Part 2
Flowing with Opponent's Momentum -- Part 3
Flowing with Opponent's Momentum -- Part 4
Flowing with Opponent's Momentum -- Part 5
Flowing with Opponent's Momentum -- Part 6
Flowing with Opponent's Momentum -- Part 7
Flowing with Opponent's Momentum -- Part 8
Flowing with Opponent's Momentum -- Part 9Flowing with Opponent's Momentum -- Part 10
Having Reach and Element of Threat in Attacks -- Part 1
Having Reach and Element of Threat in Attacks -- Part 2
Having Reach and Element of Threat in Attacks -- Part 3
Having Reach and Element of Threat in Attacks -- Part 4
Having Reach and Element of Threat in Attacks -- Part 5
Having Reach and Element of Threat in Attacks -- Part 6
Having Reach and Element of Threat in Attacks -- Part 7
Having Reach and Element of Threat in Attacks -- Part 8
Having Reach and Element of Threat in Attacks -- Part 9
Outside-In and Inside-Out Approach -- Part 1
Outside-In and Inside-Out Approach -- Part 2
Outside-In and Inside-Out Approach -- Part 3
Outside-In and Inside-Out Approach -- Part 4
Outside-In and Inside-Out Approach -- Part 5
Outside-In and Inside-Out Approach -- Part 6
Outside-In and Inside-Out Approach -- Part 7
Outside-In and Inside-Out Approach -- Part 8
Outside-In and Inside-Out Approach -- Part 9
Outside-In and Inside-Out Approach -- Part 10
Being Safe from Boxers' Jabs and Crosses -- Part 1
Being Safe from Boxers' Jabs and Crosses -- Part 2
Being Safe from Boxers' Jabs and Crosses -- Part 3
Being Safe from Boxers' Jabs and Crosses -- Part 4
Being Safe from Boxers' Jabs and Crosses -- Part 5
Being Safe from Boxers' Jabs and Crosses -- Part 6
Being Safe from Boxers' Jabs and Crosses -- Part 7
Being Safe from Boxers' Jabs and Crosses -- Part 8
Being Safe from Boxers' Jabs and Crosses -- Part 9
How to Deal with a Boxer Bouncing Around -- Part 1How to Deal with a Boxer Bouncing Around -- Part 2
How to Deal with a Boxer Bouncing Around -- Part 3
How to Deal with a Boxer Bouncing Around -- Part 4
How to Deal with a Boxer Bouncing Around -- Part 5
How to Deal with a Boxer Bouncing Around -- Part 6
How to Deal with a Boxer Bouncing Around -- Part 7
How to Deal with a Boxer Bouncing Around -- Part 8
How to Deal with a Boxer Bouncing Around -- Part 9
How to Deal with a Boxer Bouncing Around -- Part 10
How to Deal with a Boxer Bouncing Around -- Part 11
The Tactic of Cover and Strike -- Part 1
The Tactic of Cover and Strike -- Part 2
The Tactic of Cover and Strike -- Part 3
The Tactic of Cover and Strike -- Part 4
The Tactic of Cover and Strike -- Part 5
The Tactic of Cover and Strike -- Part 6
The Tactic of Cover and Strike -- Part 7
The Tactic of Cover and Strike -- Part 8
The Tactic of Cover and Strike -- Part 9
The Tactic of Cover and Strike -- Part 10
The Tactic of Cover and Strike -- Part 11
Covering and Striking with Leopard Fist -- Part 1
Covering and Striking with Leopard Fist -- Part 2
Covering and Striking with Leopard Fist -- Part 3
Covering and Striking with Leopard Fist -- Part 4
Covering and Striking with Leopard Fist -- Part 5
Covering and Striking with Leopard Fist -- Part 6
Covering and Striking with Leopard Fist -- Part 7
Covering and Striking with Leopard Fist -- Part 8
Covering and Striking with Leopard Fist -- Part 9Covering and Striking with Leopard Fist -- Part 10
Covering and Striking with Leopard Fist -- Part 11
Covering and Striking with Leopard Fist -- Part 12
Progressing from Point 3 to Point 2 in
Pre-Arranged Sparring -- Part 1
Progressing from Point 3 to Point 2 in
Pre-Arranged Sparring -- Part 2
Progressing from Point 3 to Point 2 in
Pre-Arranged Sparring -- Part 3
Progressing from Point 3 to Point 2 in
Pre-Arranged Sparring -- Part 4
Progressing from Point 3 to Point 2 in Pre-Arranged Sparring -- Part 5
Progressing from Point 3 to Point 2 in Pre-Arranged Sparring -- Part 6
Progressing from Point 3 to Point 2 in Pre-Arranged Sparring -- Part 7
Progressing from Point 3 to Point 2 in Pre-Arranged Sparring -- Part 8
Progressing from Point 3 to Point 2 in Pre-Arranged Sparring -- Part 9
Progressing from Point 3 to Point 2 in Pre-Arranged Sparring -- Part 10
Progressing from Point 3 to Point 2 in Pre-Arranged Sparring -- Part 11
From Pre-Arranged to Conditional Free Sparring using Jabs and Crosses -- Part 1
From Pre-Arranged to Conditional Free Sparring using Jabs and Crosses -- Part 2
From Pre-Arranged to Conditional Free Sparring using Jabs and Crosses -- Part 3
From Pre-Arranged to Conditional Free Sparring using Jabs and Crosses -- Part 4
From Pre-Arranged to Conditional Free Sparring using Jabs and Crosses -- Part 5
From Pre-Arranged to Conditional Free Sparring using Jabs and Crosses -- Part 6
From Pre-Arranged to Conditional Free Sparring using Jabs and Crosses -- Part 7
From Pre-Arranged to Conditional Free Sparring using Jabs and Crosses -- Part 8
From Pre-Arranged to Conditional Free Sparring using Jabs and Crosses -- Part 9
From Pre-Arranged to Conditional Free Sparring using Jabs and Crosses -- Part 10
From Pre-Arranged to Conditional Free Sparring using Jabs and Crosses -- Part 11
Lifting Water and Internal Force -- OverviewUsing Guard-Hand against a Boxer's Jabs and
Crosses -- Overview
Overcoming a Boxer's Speed by Using
Body-Movement -- Overview
Flowing with an Opponent's Momentum -- Overview
Having Reach and Element of Threat in Attacks
-- Overview
Outside-In or Inside-Out Approach -- Overview
Being Safe from Boxers' Jabs and Crosses -- Overview
How to Deal with a Boxer Bouncing Around -- Overview
The Tactic of Cover and Strike -- Overview
Covering and Striking with Leopard Fist -- Overview
Progressing from Point 3 to Point 2 in Pre-Arranged Sparring -- Overview
From Pre-Arranged to Conditional Free Sparring using Jabs and Crosses -- Overview
Taijiquan in Portugal 2010 -- Taijiquan 03 Beware of a Boxer's Hooks -- Part 1
Beware of a Boxer's Hooks -- Part 2
Beware of a Boxer's Hooks -- Part 3
Beware of a Boxer's Hooks -- Part 4
Beware of a Boxer's Hooks -- Part 5
Beware of a Boxer's Hooks -- Part 6
Beware of a Boxer's Hooks -- Part 7
Beware of a Boxer's Hooks -- Part 8
Beware of a Boxer's Hooks -- Part 9
Effective Use of Body-Movement -- Part 1
Effective Use of Body-Movement -- Part 2
Effective Use of Body-Movement -- Part 3
Effective Use of Body-Movement -- Part 4
Effective Use of Body-Movement -- Part 5
Effective Use of Body-Movement -- Part 6
Effective Use of Body-Movement -- Part 7
Effective Use of Body-Movement -- Part 8
Countering Hooks and Continuous Strikes -- Part 1
Countering Hooks and Continuous Strikes -- Part 2
Countering Hooks and Continuous Strikes -- Part 3
Countering Hooks and Continuous Strikes -- Part 4Countering Hooks and Continuous Strikes -- Part 5
Countering Hooks and Continuous Strikes -- Part 6
Countering Hooks and Continuous Strikes -- Part 7
Countering Hooks and Continuous Strikes -- Part 8
Giving Boxers a Fair Chance -- Part 1
Giving Boxers a Fair Chance -- Part 2
Giving Boxers a Fair Chance -- Part 3
Giving Boxers a Fair Chance -- Part 4
Giving Boxers a Fair Chance -- Part 5
Giving Boxers a Fair Chance -- Part 6
Giving Boxers a Fair Chance -- Part 7
Giving Boxers a Fair Chance -- Part 8
Locking a Boxer's Both Arms -- Part 1
Locking a Boxer's Both Arms -- Part 2
Locking a Boxer's Both Arms -- Part 3
Locking a Boxer's Both Arms -- Part 4
Locking a Boxer's Both Arms -- Part 5
Locking a Boxer's Both Arms -- Part 6
Locking a Boxer's Both Arms -- Part 7
Locking a Boxer's Both Arms -- Part 8
Chasing after a Boxer -- Part 1
Chasing after a Boxer -- Part 2
Chasing after a Boxer -- Part 3
Chasing after a Boxer -- Part 4
Chasing after a Boxer -- Part 5
Chasing after a Boxer -- Part 6
Chasing after a Boxer -- Part 7
Chasing after a Boxer -- Part 8
Stepping on a Boxer or Felling him onto the Ground -- Part 1
Stepping on a Boxer or Felling him onto the Ground -- Part 2Stepping on a Boxer or Felling him onto the Ground -- Part 3
Stepping on a Boxer or Felling him onto the Ground -- Part 4
Stepping on a Boxer or Felling him onto the Ground -- Part 5
Stepping on a Boxer or Felling him onto the Ground -- Part 6
Stepping on a Boxer or Felling him onto the Ground -- Part 7
Stepping on a Boxer or Felling him onto the Ground -- Part 8
Stepping on a Boxer or Felling him onto the Ground -- Part 9
Stepping on a Boxer or Felling him onto the Ground -- Part 10
Stepping on a Boxer or Felling him onto the Ground -- Part 11
Stepping on a Boxer or Felling him onto the Ground -- Part 12
Stepping on a Boxer or Felling him onto the Ground -- Part 13
White Monkey against Boxer's Undercuts -- Part 1
White Monkey against Boxer's Undercuts -- Part 2
White Monkey against Boxer's Undercuts -- Part 3
White Monkey against Boxer's Undercuts -- Part 4
White Monkey against Boxer's Undercuts -- Part 5
White Monkey against Boxer's Undercuts -- Part 6
White Monkey against Boxer's Undercuts -- Part 7
White Monkey against Boxer's Undercuts -- Part 8
White Monkey against Boxer's Undercuts -- Part 9
White Monkey against Boxer's Undercuts -- Part 10
How to Fall Safely -- Part 1
How to Fall Safely -- Part 2
How to Fall Safely -- Part 3
How to Fall Safely -- Part 4
How to Fall Safely -- Part 5
How to Fall Safely -- Part 6
How to Fall Safely -- Part 7
How to Fall Safely -- Part 8
How to Fall Safely -- Part 9Don't Expose Groin with Opponent on Ground -- Part 1
Don't Expose Groin with Opponent on Ground -- Part 2
Don't Expose Groin with Opponent on Ground -- Part 3
Don't Expose Groin with Opponent on Ground -- Part 4
Don't Expose Groin with Opponent on Ground -- Part 5
Don't Expose Groin with Opponent on Ground -- Part 6
Don't Expose Groin with Opponent on Ground -- Part 7
Don't Expose Groin with Opponent on Ground -- Part 8
Beware of a Boxer's Hooks -- Overview
Effective Use of Body-Movement -- Overview
Countering Hooks and Continuous Strikes -- Overview
Giving Boxers a Fair Chance -- Overview
Locking a Boxer's Both Arms -- Overview
Chasing after a Boxer -- Overview
Stepping on a Boxer or Felling him onto the Ground -- Overview
White Monkey against Boxer's Undercuts -- Overview
How to Fall Safely -- Overview
Don't Expose Groin with Opponent on Ground -- Overview
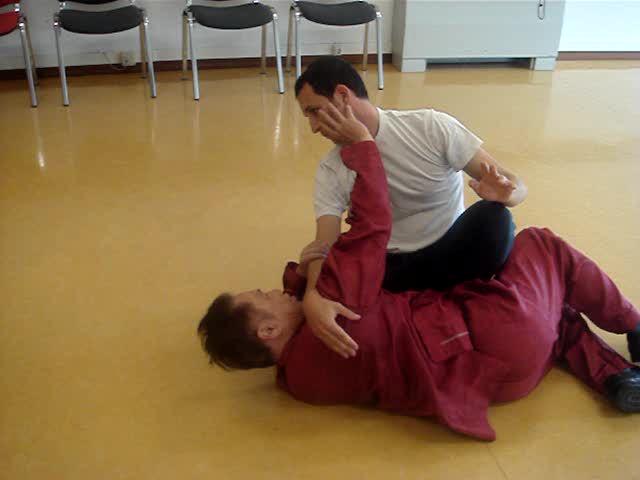 Taijiquan in Portugal 2019 -- Taijiquan 04
Basic Techniques of Shoots and Pin-Downs -- Part 1
Taijiquan in Portugal 2019 -- Taijiquan 04
Basic Techniques of Shoots and Pin-Downs -- Part 1Basic Techniques of Shoots and Pin-Downs -- Part 2
Basic Techniques of Shoots and Pin-Downs -- Part 3
Basic Techniques of Shoots and Pin-Downs -- Part 4
Basic Techniques of Shoots and Pin-Downs -- Part 5
Basic Techniques of Shoots and Pin-Downs -- Part 6
Basic Techniques of Shoots and Pin-Downs -- Part 7
Basic Techniques of Shoots and Pin-Downs -- Part 8
Basic Techniques of Shoots and Pin-Downs -- Part 9
Basic Techniques of Shoots and Pin-Downs -- Part 10
Basic Techniques of Shoots and Pin-Downs -- Part 11
Basic Techniques of Shoots and Pin-Downs -- Part 12
Having Fun with Shoots and Pin-Downs -- Part 1
Having Fun with Shoots and Pin-Downs -- Part 2
Having Fun with Shoots and Pin-Downs -- Part 3
Having Fun with Shoots and Pin-Downs -- Part 4
Having Fun with Shoots and Pin-Downs -- Part 5
Having Fun with Shoots and Pin-Downs -- Part 6
Having Fun with Shoots and Pin-Downs -- Part 7
Having Fun with Shoots and Pin-Downs -- Part 8
Having Fun with Shoots and Pin-Downs -- Part 9
Having Fun with Shoots and Pin-Downs -- Part 10
Having Fun with Shoots and Pin-Downs -- Part 11
Countering during the Porocess of the Shoot -- Part 1
Countering during the Porocess of the Shoot -- Part 2
Countering during the Porocess of the Shoot -- Part 3
Countering during the Porocess of the Shoot -- Part 4
Countering during the Porocess of the Shoot -- Part 5
Countering during the Porocess of the Shoot -- Part 6
Countering during the Porocess of the Shoot -- Part 7
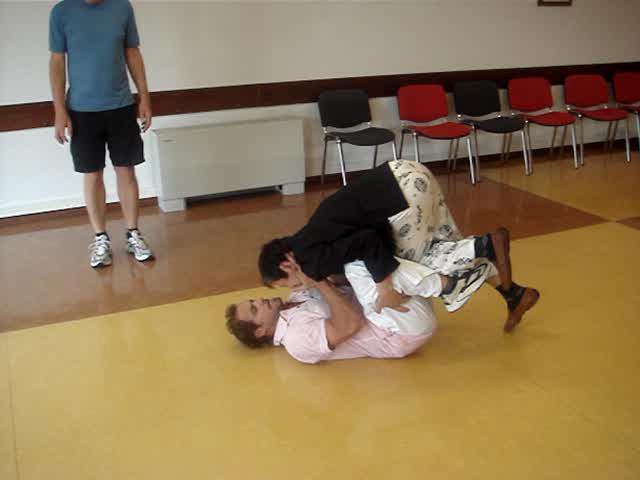 Counter-Striking an Opponent as he Shoots -- Part 1
Counter-Striking an Opponent as he Shoots -- Part 2
Counter-Striking an Opponent as he Shoots -- Part 3
Counter-Striking an Opponent as he Shoots -- Part 4
Counter-Striking an Opponent as he Shoots -- Part 5
Counter-Striking an Opponent as he Shoots -- Part 6
Counter-Striking an Opponent as he Shoots -- Part 7
Exploiting thje Vulnerable Pisition of the Shoot -- Part 1
Exploiting thje Vulnerable Pisition of the Shoot -- Part 2
Exploiting thje Vulnerable Pisition of the Shoot -- Part 3
Exploiting thje Vulnerable Pisition of the Shoot -- Part 4
Exploiting thje Vulnerable Pisition of the Shoot -- Part 5
Exploiting thje Vulnerable Pisition of the Shoot -- Part 6
Exploiting thje Vulnerable Pisition of the Shoot -- Part 7
Turning a Kick-Boxer's Strong Point into a Weakness -- Part 1
Turning a Kick-Boxer's Strong Point into a Weakness -- Part 2
Turning a Kick-Boxer's Strong Point into a Weakness -- Part 3
Turning a Kick-Boxer's Strong Point into a Weakness -- Part 4
Turning a Kick-Boxer's Strong Point into a Weakness -- Part 5
Turning a Kick-Boxer's Strong Point into a Weakness -- Part 6
Turning a Kick-Boxer's Strong Point into a Weakness -- Part 7
Turning a Kick-Boxer's Strong Point into a Weakness -- Part 8
Turning a Kick-Boxer's Strong Point into a Weakness -- Part 9
Turning a Kick-Boxer's Strong Point into a Weakness -- Part 10
Turning a Kick-Boxer's Strong Point into a Weakness -- Part 11
Countering at Various Points of a Series of Attacks -- Part 1
Countering at Various Points of a Series of Attacks -- Part 2
Countering at Various Points of a Series of Attacks -- Part 3
Countering at Various Points of a Series of Attacks -- Part 4
Countering at Various Points of a Series of Attacks -- Part 5
 Countering at Various Points of a Series of Attacks -- Part 6
Countering at Various Points of a Series of Attacks -- Part 7
Countering at Various Points of a Series of Attacks -- Part 8
Countering at Three Points of an Attack -- Part 1
Countering at Three Points of an Attack -- Part 2
Countering at Three Points of an Attack -- Part 3
Countering at Three Points of an Attack -- Part 4
Countering at Three Points of an Attack -- Part 5
Countering at Three Points of an Attack -- Part 6
Countering at Three Points of an Attack -- Part 7
Basic Techniques of Shoots and Pin-Downs -- Overview
Having Fun with Shoots and Pin-Downs -- Overview
Countering during the Porocess of a Shoot -- Overview
Counter-Striking an Opponent as he Shoots -- Overview
Exploiting the Vulnerable Position of the Shoot -- Overview
Turning a Kick-Boxer's Strong Point into a Weakness -- Overview
Countering at Various Points of a Series of Attacks -- Overview
Countering at Three Points of an Attack -- Overview
Taijiquan in Portugal 2019 -- Taijiquan 05 Taijiquan Techniques and Tactics against Karate -- Part 1
Taijiquan Techniques and Tactics against Karate -- Part 2
Taijiquan Techniques and Tactics against Karate -- Part 3
Taijiquan Techniques and Tactics against Karate -- Part 4
Taijiquan Techniques and Tactics against Karate -- Part 5
Taijiquan Techniques and Tactics against Karate -- Part 6
Taijiquan Techniques and Tactics against Karate -- Part 7
Taijiquan Techniques and Tactics against Karate -- Part 8
Taijiquan Techniques and Tactics against Karate -- Part 9
Neutralizing the Strong Point of a Karate Exponent -- Part 1
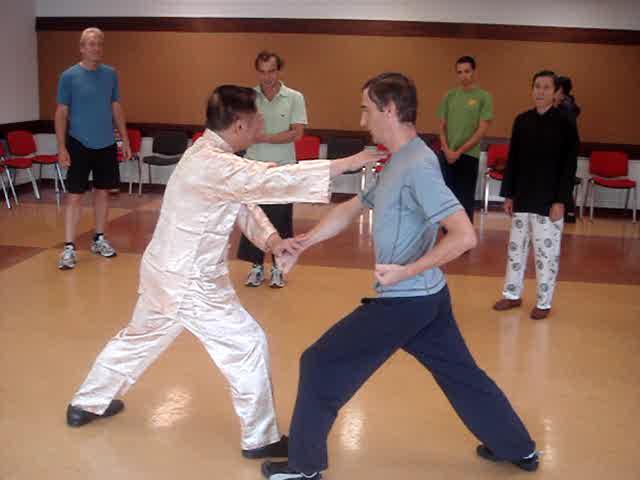 Neutralizing the Strong Point of a Karate Exponent -- Part 2
Neutralizing the Strong Point of a Karate Exponent -- Part 3
Neutralizing the Strong Point of a Karate Exponent -- Part 4
Neutralizing the Strong Point of a Karate Exponent -- Part 5
Neutralizing the Strong Point of a Karate Exponent -- Part 6
Neutralizing the Strong Point of a Karate Exponent -- Part 7
Neutralizing the Strong Point of a Karate Exponent -- Part 8
Neutralizing the Strong Point of a Karate Exponent -- Part 9
Counter-Striking Karate Opponents at Different Points of Time -- Part 1
Counter-Striking Karate Opponents at Different Points of Time -- Part 2
Counter-Striking Karate Opponents at Different Points of Time -- Part 3
Counter-Striking Karate Opponents at Different Points of Time -- Part 4
Counter-Striking Karate Opponents at Different Points of Time -- Part 5
Counter-Striking Karate Opponents at Different Points of Time -- Part 6
Counter-Striking Karate Opponents at Different Points of Time -- Part 7
Counter-Striking Karate Opponents at Different Points of Time -- Part 8
Counter-Striking Karate Opponents at Different Points of Time -- Part 9
Countering a Karate Exponent as Soon as he Attacks -- Part 1
Countering a Karate Exponent as Soon as he Attacks -- Part 2
Countering a Karate Exponent as Soon as he Attacks -- Part 3
Countering a Karate Exponent as Soon as he Attacks -- Part 4
Countering a Karate Exponent as Soon as he Attacks -- Part 5
Countering a Karate Exponent as Soon as he Attacks -- Part 6
Countering a Karate Exponent as Soon as he Attacks -- Part 7
Countering a Karate Exponent as Soon as he Attacks -- Part 8
Stylizing Karate Attacks for Systematic Training -- Part 1
Stylizing Karate Attacks for Systematic Training -- Part 2
Stylizing Karate Attacks for Systematic Training -- Part 3
Stylizing Karate Attacks for Systematic Training -- Part 4
Stylizing Karate Attacks for Systematic Training -- Part 5
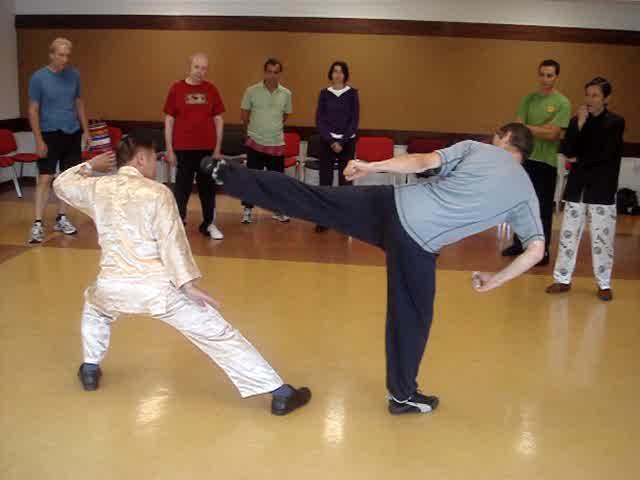 Stylizing Karate Attacks for Systematic Training -- Part 6
Stylizing Karate Attacks for Systematic Training -- Part 7
Stylizing Karate Attacks for Systematic Training -- Part 8
Stylizing Karate Attacks for Systematic Training -- Part 9
Stylizing Karate Attacks for Systematic Training -- Part 10
Stylizing Karate Attacks for Systematic Training -- Part 11
Stylizing Karate Attacks for Systematic Training -- Part 12
Appying Chin-Na on Karate Opponents -- Part 1
Appying Chin-Na on Karate Opponents -- Part 2
Appying Chin-Na on Karate Opponents -- Part 3
Appying Chin-Na on Karate Opponents -- Part 4
Appying Chin-Na on Karate Opponents -- Part 5
Appying Chin-Na on Karate Opponents -- Part 6
Appying Chin-Na on Karate Opponents -- Part 7
A Taijiquan Pattern to Defend against All Taekwondo Kicks -- Part 1
A Taijiquan Pattern to Defend against All Taekwondo Kicks -- Part 2
A Taijiquan Pattern to Defend against All Taekwondo Kicks -- Part 3
A Taijiquan Pattern to Defend against All Taekwondo Kicks -- Part 4
A Taijiquan Pattern to Defend against All Taekwondo Kicks -- Part 5
A Taijiquan Pattern to Defend against All Taekwondo Kicks -- Part 6
A Taijiquan Pattern to Defend against All Taekwondo Kicks -- Part 7
A Taijiquan Pattern to Defend against All Taekwondo Kicks -- Part 8
A Taijiquan Pattern to Defend against All Taekwondo Kicks -- Part 9
Avoiding Kicks and Felling Opponents -- Part 1
Avoiding Kicks and Felling Opponents -- Part 2
Avoiding Kicks and Felling Opponents -- Part 3
Avoiding Kicks and Felling Opponents -- Part 4
Avooiding Kicks and Felling Opponents -- Part 5
Avoiding Kicks and Felling Opponents -- Part 6
Avoiding Kicks and Felling Opponents -- Part 7
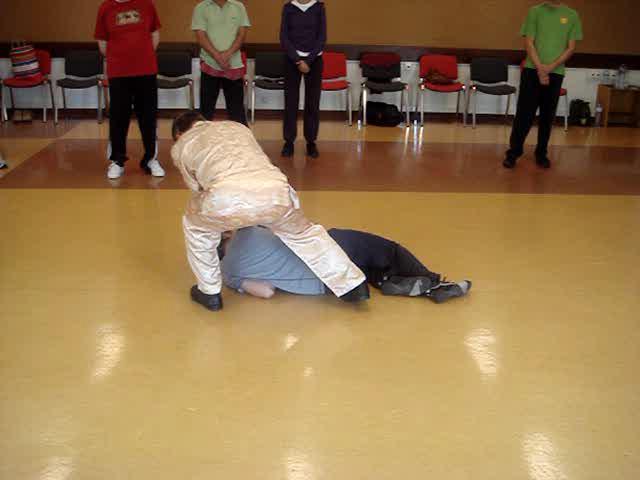 Avoiding Kicks and Felling Opponents -- Part 8
Avoiding Kicks and Felling Opponents -- Part 9
Avoid Kick, Fell Opponent. and Decisive Strike -- Part 1
Avoid Kick, Fell Opponent. and Decisive Strike -- Part 2
Avoid Kick, Fell Opponent. and Decisive Strike -- Part 3
Avoid Kick, Fell Opponent. and Decisive Strike -- Part 4
Avoid Kick, Fell Opponent. and Decisive Strike -- Part 5
Avoid Kick, Fell Opponent. and Decisive Strike -- Part 6
Avoid Kick, Fell Opponent. and Decisive Strike -- Part 7
Avoid Kick, Fell Opponent. and Decisive Strike -- Part 8
Stylizing Typical Muay Thai Attacks into a Sequence -- Part 1
Stylizing Typical Muay Thai Attacks into a Sequence -- Part 2
Stylizing Typical Muay Thai Attacks into a Sequence -- Part 3
Stylizing Typical Muay Thai Attacks into a Sequence -- Part 4
Stylizing Typical Muay Thai Attacks into a Sequence -- Part 5
Stylizing Typical Muay Thai Attacks into a Sequence -- Part 6
Stylizing Typical Muay Thai Attacks into a Sequence -- Part 7
Stylizing Typical Muay Thai Attacks into a Sequence -- Part 8
Stylizing Typical Muay Thai Attacks into a Sequence -- Part 9
Counter against the Formidable Knee Jabs -- Part 1
Counter against the Formidable Knee Jabs -- Part 2
Counter against the Formidable Knee Jabs -- Part 3
Counter against the Formidable Knee Jabs -- Part 4
Counter against the Formidable Knee Jabs -- Part 5
Counter against the Formidable Knee Jabs -- Part 6
Counter against the Formidable Knee Jabs -- Part 7
Counter against the Formidable Knee Jabs -- Part 8
Counter against the Formidable Knee Jabs -- Part 9
Countring at Various Points and Free Sparring -- Part 1
Countring at Various Points and Free Sparring -- Part 2
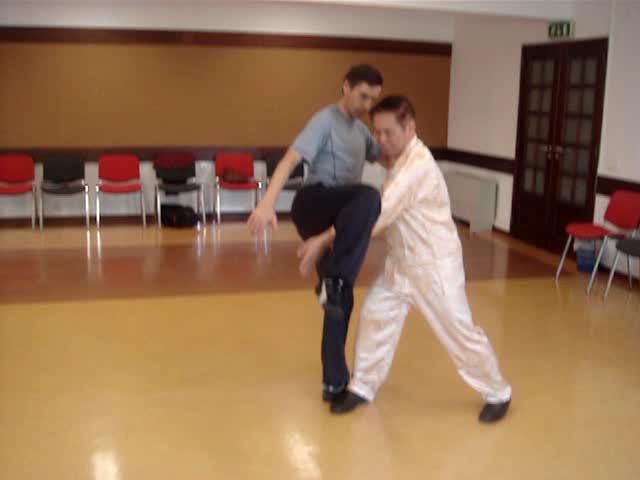 Countring at Various Points and Free Sparring -- Part 3
Countring at Various Points and Free Sparring -- Part 4
Countring at Various Points and Free Sparring -- Part 5
Countring at Various Points and Free Sparring -- Part 6
Countring at Various Points and Free Sparring -- Part 7
Countring at Various Points and Free Sparring -- Part 8
Countring at Various Points and Free Sparring -- Part 9
Countring at Various Points and Free Sparring -- Part 10
Countring at Various Points and Free Sparring -- Part 11
Countring at Various Points and Free Sparring -- Part 12
Taijiquan Techniques and Tactics against Karate -- Overview
Neutralizing the Strong Point of a Karate Exponent -- Overview
Counter-Striking Karate Opponents at Different Points of Time -- Overview
Countering a Karate Exponent as Soon as he Attacks -- Overview
Stylizing Karate Attacks for Systematic Training -- Overview
Appying Chin-Na on Karate Opponents -- Overview
A Taijiquan Pattern to Defend against All Taekwondo Kicks -- Overview
Avoiding Kicks and Felling Opponents -- Overview
Avoid Kick, Fell Opponent. and Decisive Strike -- Overview
Stylizing Typical Muay Thai Attacks into a Sequence -- Overview
Counter against the Formidable Knee Jabs -- Overview
Countring at Various Points and Free Sparring -- Overview
 Taijiquan in Portugal 2019 -- Abridged Videos
Videos of Shaolin Wahnam against Boxing -- Old
Taijiquan in Portugal 2019 -- Abridged Videos
Videos of Shaolin Wahnam against Boxing -- OldShaolin Wahnam against Boxing
Shaolin Wahnam against Boxing: Abridged Version -- Part 1
Shaolin Wahnam against Boxing: Abridged Version -- Part 2
Shaolin Wahnam against Boxing: Abridged Version -- Part 3
Shaolin Wahnam against Karate
Shaolin Wahnam against Kick-Boxing
Shaolin Wahnam against Muay Thai
Shaolin Wahnam against Taekwondo
Shaolin Wahnam against Wrestling
Videos of Wahnam Taijiquan against Other Martial Arts:
Abridged Version -- Overview
 Praying Mantis Kungfu
Reviewing the Form of Eighteen-Collection Set
Praying Mantis Kungfu
Reviewing the Form of Eighteen-Collection SetEughteen-Lohan Art and the Flow Method
Strike from Bosom against the Shoot
Combat Applications of Eighteen-Collection Set
Cotton Palm, Bosom Fist and Mantis Hook
Cotton Palm and the Distract-Trick
Converting Flow into Force in the Flow Method
Generating Energy Flow from Picture-Perfect Form
Gripping Techniques in Double Fists
Excellent Techniques against Kick-Boxing and Taekwondo Exponents
Praying Mantis Kungfu is Famous for Kicks
Counters against Typical Muay Thai Attacks
Just One Praying Mantis Pattern agaimnst any Boxers' Attacks
Which Praying Mantis Pattern can be used against any Kick
Pressing Attacks in Praying Mantis Kungfu
Functions and Evolution of the Seven-Star Step
Short Strike in Seven-Star Turn Cart
Counters against Sweep[ing and Charging Attacks
Excellent Tactic against any Kick
Teachings of Past Masters
Formidable Techniques of Past Masters
Famous Techniques and Tactics from the Past
The Best Techniques of the Time Eighteen-Collection of Praying
Mantis Kungfu -- Overview
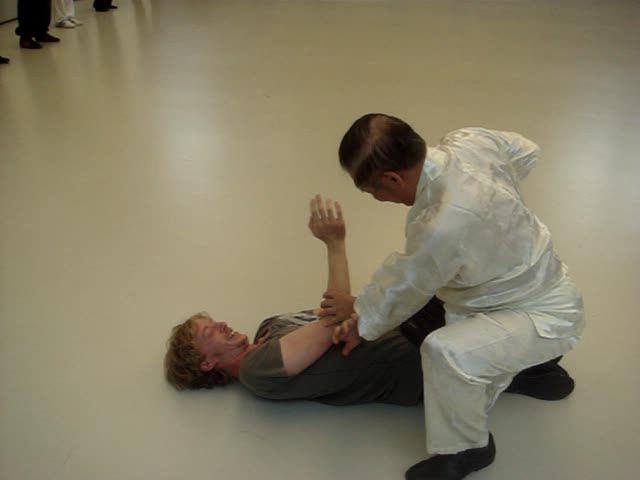 Praying Mantis Kungfu -- Praying Mantis 01
Eighteen Lohan Art and the Flow Method
Praying Mantis Kungfu -- Praying Mantis 01
Eighteen Lohan Art and the Flow Method-- Overview (Previous)
Eighteen Lohan Art and the Flow Method -- Overview
Review the Form the Form of the Eighteen-Collection
Set -- Overview (Previous)
Review the Form the Form of the Eighteen-Collection
Set -- Overview
Generating Energy Flow from Picture-Perfect
Form -- Overview (Previous)
Generating Energy Flow from Picture-Perfect
Form -- Overview
Converting Flow into Force in the Flow Method -- Overview (Previous)
Converting Flow into Force in the Flow Method -- Overview
Combat Applications of the Eiughteen-Collection Set -- Overview (Previous)
Combat Applications of the Eiughteen-Collection Set -- Overview
Formidable Techniques of Past Masters -- Overview (Previous)
Formidable Techniques of Past Masters -- Overview
Pressing Attacks in Praying Mantis Kungfu -- Overview (Previous)
Pressing Attacks in Praying Mantis Kungfu -- Overview
Teachings of Past Masters -- Overview (Previous)
Teachings of Past Masters -- Overview
Eighteen-Collection of Praying Mantis Kungfu -- Overview
Review the Form of the Eighteen-Collection Set -- Part 1
Review the Form of the Eighteen-Collection Set -- Part 2
Review the Form of the Eighteen-Collection Set -- Part 3
Review the Form of the Eighteen-Collection Set -- Part 4
Review the Form of the Eighteen-Collection Set -- Part 5
Review the Form of the Eighteen-Collection Set -- Part 6
Review the Form of the Eighteen-Collection Set -- Part 7
Review the Form of the Eighteen-Collection Set -- Part 8
Generating Energy Flow from Picture-Perfect Form -- Part 1
Generating Energy Flow from Picture-Perfect Form -- Part 2
Generating Energy Flow from Picture-Perfect Form -- Part 3
Generating Energy Flow from Picture-Perfect Form -- Part 4
Generating Energy Flow from Picture-Perfect Form -- Part 5
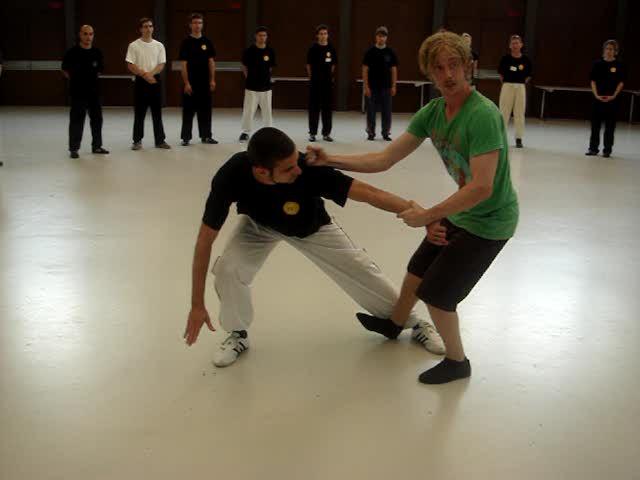 Generating Energy Flow from Picture-Perfect Form -- Part 6
Generating Energy Flow from Picture-Perfect Form -- Part 7
Generating Energy Flow from Picture-Perfect Form -- Part 8
Converting Flow into Force in the Flow Method -- Part 1
Converting Flow into Force in the Flow Method -- Part 2
Converting Flow into Force in the Flow Method -- Part 3
Converting Flow into Force in the Flow Method -- Part 4
Converting Flow into Force in the Flow Method -- Part 5
Converting Flow into Force in the Flow Method -- Part 6
Converting Flow into Force in the Flow Method -- Part 7
Converting Flow into Force in the Flow Method -- Part 8
Combat Applications of the Eighteen-Collection Set -- Part 1
Combat Applications of the Eighteen-Collection Set -- Part 2
Combat Applications of the Eighteen-Collection Set -- Part 3
Combat Applications of the Eighteen-Collection Set -- Part 4
Combat Applications of the Eighteen-Collection Set -- Part 5
Combat Applications of the Eighteen-Collection Set -- Part 6
Combat Applications of the Eighteen-Collection Set -- Part 7
Combat Applications of the Eighteen-Collection Set -- Part 8
Formidable Techniquesnof Past Masters -- Part 1
Formidable Techniquesnof Past Masters -- Part 2
Formidable Techniquesnof Past Masters -- Part 3
Formidable Techniquesnof Past Masters -- Part 4
Formidable Techniquesnof Past Masters -- Part 5
Formidable Techniquesnof Past Masters -- Part 6
Formidable Techniquesnof Past Masters -- Part 7
Formidable Techniquesnof Past Masters -- Part 8
Formidable Techniquesnof Past Masters -- Part 9
Formidable Techniquesnof Past Masters -- Part 10
Pressing Attacks in Praying Mantis Kungfu -- Part 1
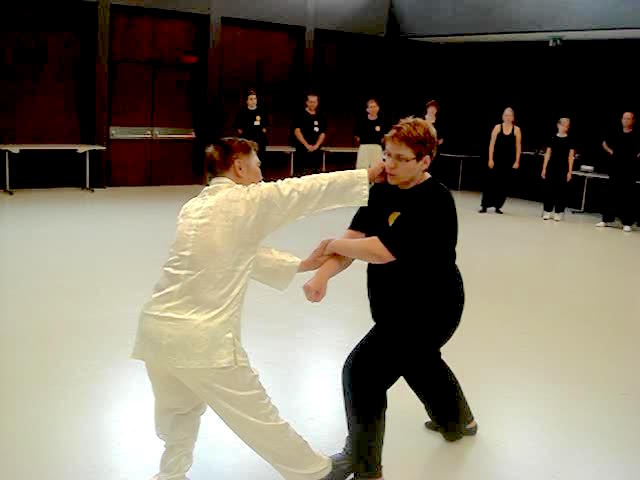 Pressing Attacks in Praying Mantis Kungfu -- Part 2
Pressing Attacks in Praying Mantis Kungfu -- Part 3
Pressing Attacks in Praying Mantis Kungfu -- Part 4
Pressing Attacks in Praying Mantis Kungfu -- Part 5
Pressing Attacks in Praying Mantis Kungfu -- Part 6
Pressing Attacks in Praying Mantis Kungfu -- Part 7
Pressing Attacks in Praying Mantis Kungfu -- Part 8
Pressing Attacks in Praying Mantis Kungfu -- Part 9
Teachings of Past Masters -- Part 1
Teachings of Past Masters -- Part 2
Teachings of Past Masters -- Part 3
Teachings of Past Masters -- Part 4
Teachings of Past Masters -- Part 5
Teachings of Past Masters -- Part 6
Teachings of Past Masters -- Part 7
Teachings of Past Masters -- Part 8
Teachings of Past Masters -- Part 9
18-Lohan Art and the Flow Method -- Part 1
18-Lohan Art and the Flow Method -- Part 2
18-Lohan Art and the Flow Method -- Part 3
18-Lohan Art and the Flow Method -- Part 4
18-Lohan Art and the Flow Method -- Part 5
18-Lohan Art and the Flow Method -- Part 6
18-Lohan Art and the Flow Method -- Part 7
18-Lohan Art and the Flow Method -- Part 8
18-Lohan Art and the Flow Method -- Part 9
Praying Mantis Kungfu
Reviewing the Form of Eighteen-Collection SetEughteen-Lohan Art and the Flow Method
Strike from Bosom against the Shoot
Combat Applications of Eighteen-Collection Set
Cotton Palm, Bosom Fist and Mantis Hook
Cotton Palm and the Distract-Trick
Converting Flow into Force in the Flow Method
Generating Energy Flow from Picture-Perfect Form
Gripping Techniques in Double Fists
Excellent Techniques against Kick-Boxing and Taekwondo Exponents
Praying Mantis Kungfu is Famous for Kicks
Counters against Typical Muay Thai Attacks
Just One Praying Mantis Pattern agaimnst any Boxers' Attacks
Which Praying Mantis Pattern can be used against any Kick
Pressing Attacks in Praying Mantis Kungfu
Functions and Evolution of the Seven-Star Step
Short Strike in Seven-Star Turn Cart
Counters against Sweep[ing and Charging Attacks
Excellent Tactic against any Kick
Teachings of Past Masters
Formidable Techniques of Past Masters
Famous Techniques and Tactics from the Past
The Best Techniques of the Time Eighteen-Collection of Praying
Mantis Kungfu -- Overview
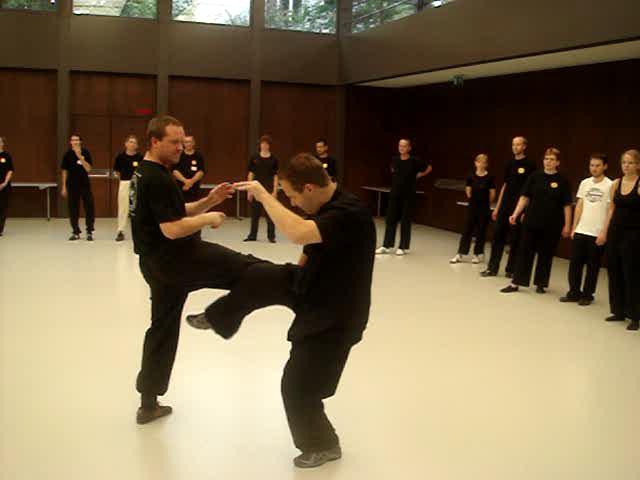 Praying Mantis Kungfu -- Praying Mantis 02
Praying Mantis Kungfu is Famous for Kicks -- Overview
Praying Mantis Kungfu -- Praying Mantis 02
Praying Mantis Kungfu is Famous for Kicks -- OverviewGripping Techniques in Double Fists -- Overview
Short Strike in Seven-Star Turn Cart -- Overview
Famous Techniques and Tactics from the Past -- Overview
Counters against Sweeping Kicks and Charging
Attacks -- Overview
Functions and Evolution of Seven-Star Step -- Overview
Cotton Palm and /distract Trick -- Overview
Cotton Palm, Bosom Fist and Mantis Hook -- Overview
Praying Mantis Kungfu is Famous for Kicks -- Part 1
Praying Mantis Kungfu is Famous for Kicks -- Part 2
Praying Mantis Kungfu is Famous for Kicks -- Part 3
Praying Mantis Kungfu is Famous for Kicks -- Part 4
Praying Mantis Kungfu is Famous for Kicks -- Part 5
Praying Mantis Kungfu is Famous for Kicks -- Part 6
Praying Mantis Kungfu is Famous for Kicks -- Part 7
Praying Mantis Kungfu is Famous for Kicks -- Part 8
Gripping Techniques in Double Fists -- Part 1
Gripping Techniques in Double Fists -- Part 2
Gripping Techniques in Double Fists -- Part 3
Gripping Techniques in Double Fists -- Part 4
Gripping Techniques in Double Fists -- Part 5
Gripping Techniques in Double Fists -- Part 6
Gripping Techniques in Double Fists -- Part 7
Gripping Techniques in Double Fists -- Part 8
Gripping Techniques in Double Fists -- Part 9
Gripping Techniques in Double Fists -- Part 10
Gripping Techniques in Double Fists -- Part 11
Short Strike in Seven-Star Turn Cart -- Part 1
Short Strike in Seven-Star Turn Cart -- Part 2
Short Strike in Seven-Star Turn Cart -- Part 3
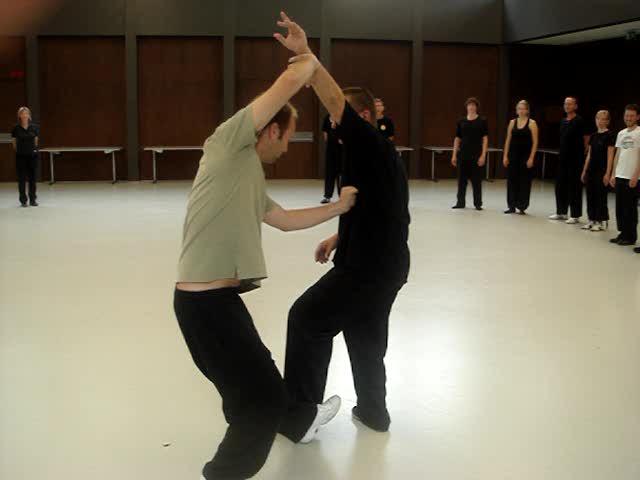 Short Strike in Seven-Star Turn Cart -- Part 4
Short Strike in Seven-Star Turn Cart -- Part 5
Short Strike in Seven-Star Turn Cart -- Part 6
Short Strike in Seven-Star Turn Cart -- Part 7
Short Strike in Seven-Star Turn Cart -- Part 8
Short Strike in Seven-Star Turn Cart -- Part 9
Famous Techniques and Tactics from the Past -- Part 1
Famous Techniques and Tactics from the Past -- Part 2
Famous Techniques and Tactics from the Past -- Part 3
Famous Techniques and Tactics from the Past -- Part 4
Famous Techniques and Tactics from the Past -- Part 5
Famous Techniques and Tactics from the Past -- Part 6
Famous Techniques and Tactics from the Past -- Part 7
Famous Techniques and Tactics from the Past -- Part 8
Counters against Sweeping Kicks and Charging Attacks -- Part 1
Counters against Sweeping Kicks and Charging Attacks -- Part 2
Counters against Sweeping Kicks and Charging Attacks -- Part 3
Counters against Sweeping Kicks and Charging Attacks -- Part 4
Counters against Sweeping Kicks and Charging Attacks -- Part 5
Counters against Sweeping Kicks and Charging Attacks -- Part 6
Counters against Sweeping Kicks and Charging Attacks -- Part 7
Counters against Sweeping Kicks and Charging Attacks -- Part 8
Counters against Sweeping Kicks and Charging Attacks -- Part 9
Functions and Evolution of Seven-Star Step -- Part 1
Functions and Evolution of Seven-Star Step -- Part 2
Functions and Evolution of Seven-Star Step -- Part 3
Functions and Evolution of Seven-Star Step -- Part 4
Functions and Evolution of Seven-Star Step -- Part 5
Functions and Evolution of Seven-Star Step -- Part 6
Functions and Evolution of Seven-Star Step -- Part 7
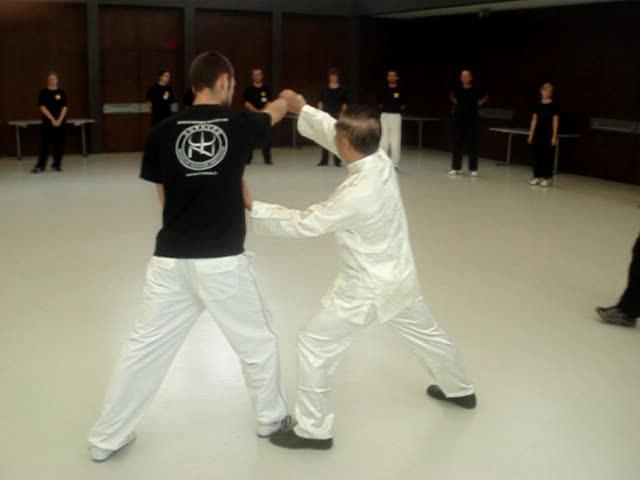 Functions and Evolution of Seven-Star Step -- Part 8
Functions and Evolution of Seven-Star Step -- Part 9
Functions and Evolution of Seven-Star Step -- Part 10
Cotton Palm and /distract Trick -- Part 1
Cotton Palm and /distract Trick -- Part 2
Cotton Palm and /distract Trick -- Part 3
Cotton Palm and /distract Trick -- Part 4
Cotton Palm and /distract Trick -- Part 5
Cotton Palm and /distract Trick -- Part 6
Cotton Palm and /distract Trick -- Part 7
Cotton Palm and /distract Trick -- Part 8
Cotton Palm and /distract Trick -- Part 9
Cotton Palm, Bosom Fist and Mantis Hook -- Part 1
Cotton Palm, Bosom Fist and Mantis Hook -- Part 2
Cotton Palm, Bosom Fist and Mantis Hook -- Part 3
Cotton Palm, Bosom Fist and Mantis Hook -- Part 4
Cotton Palm, Bosom Fist and Mantis Hook -- Part 5
Cotton Palm, Bosom Fist and Mantis Hook -- Part 6
Cotton Palm, Bosom Fist and Mantis Hook -- Part 7
Cotton Palm, Bosom Fist and Mantis Hook -- Part 8
Cotton Palm, Bosom Fist and Mantis Hook -- Part 9
Cotton Palm, Bosom Fist and Mantis Hook -- Part 10
Cotton Palm, Bosom Fist and Mantis Hook -- Part 11
Cotton Palm, Bosom Fist and Mantis Hook -- Part 12
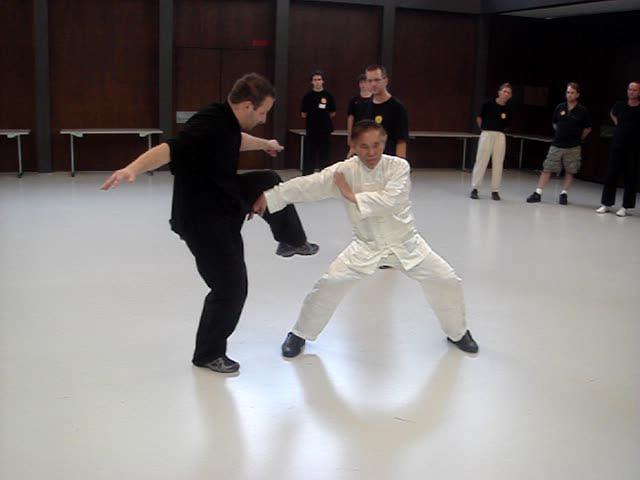 Praying Mantis Kungfu -- Praying Mantis 03
Which Pattern can be Used against any Kicks? -- Overview
Praying Mantis Kungfu -- Praying Mantis 03
Which Pattern can be Used against any Kicks? -- OverviewJust One Pattern against any Boxcers' Attacks! -- Overview
Excellent Tactics against any Kicks -- Overview
Excellent Techniques against Kick-Boxers and
Taekwondo Exponents-- Overview
Counters against Typical Muay Thai Attacks -- Overview
Strike from Bosom against the Shoot -- Overview
Which Pattern can be Used against any Kicks? -- Part 1
Which Pattern can be Used against any Kicks? -- Part 2
Which Pattern can be Used against any Kicks? -- Part 3
Which Pattern can be Used against any Kicks? -- Part 4
Which Pattern can be Used against any Kicks? -- Part 5
Which Pattern can be Used against any Kicks? -- Part 6
Which Pattern can be Used against any Kicks? -- Part 7
Which Pattern can be Used against any Kicks? -- Part 8
Which Pattern can be Used against any Kicks? -- Part 9
Which Pattern can be Used against any Kicks? -- Part 10
Which Pattern can be Used against any Kicks? -- Part 11
Which Pattern can be Used against any Kicks? -- Part 12
Just One Pattern against any Boxcers' Attacks -- Part 1
Just One Pattern against any Boxcers' Attacks -- Part 2
Just One Pattern against any Boxcers' Attacks -- Part 3
Just One Pattern against any Boxcers' Attacks -- Part 4
Just One Pattern against any Boxcers' Attacks -- Part 5
Just One Pattern against any Boxcers' Attacks -- Part 6
Just One Pattern against any Boxcers' Attacks -- Part 7
Just One Pattern against any Boxcers' Attacks -- Part 8
Just One Pattern against any Boxcers' Attacks -- Part 9
Just One Pattern against any Boxcers' Attacks -- Part 10
Just One Pattern against any Boxcers' Attacks -- Part 11
Just One Pattern against any Boxcers' Attacks -- Part 12
 Just One Pattern against any Boxcers' Attacks -- Part 13
Excellent Tactics against any Kicks -- Part 1
Excellent Tactics against any Kicks -- Part 2
Excellent Tactics against any Kicks -- Part 3
Excellent Tactics against any Kicks -- Part 4
Excellent Tactics against any Kicks -- Part 5
Excellent Tactics against any Kicks -- Part 6
Excellent Tactics against any Kicks -- Part 7
Excellent Tactics against any Kicks -- Part 8
Excellent Tactics against any Kicks -- Part 9
Excellent Techniques against Kick-Boxers and Taekwondo Exponents -- Part 1
Excellent Techniques against Kick-Boxers and Taekwondo Exponents -- Part 2
Excellent Techniques against Kick-Boxers and Taekwondo Exponents -- Part 3
Excellent Techniques against Kick-Boxers and Taekwondo Exponents -- Part 4
Excellent Techniques against Kick-Boxers and Taekwondo Exponents -- Part 5
Excellent Techniques against Kick-Boxers and Taekwondo Exponents -- Part 6
Excellent Techniques against Kick-Boxers and Taekwondo Exponents -- Part 7
Excellent Techniques against Kick-Boxers and Taekwondo Exponents -- Part 8
Excellent Techniques against Kick-Boxers and Taekwondo Exponents -- Part 9
Counters against Typical Muay Thai Attacks -- Part 1
Counters against Typical Muay Thai Attacks -- Part 2
Counters against Typical Muay Thai Attacks -- Part 3
Counters against Typical Muay Thai Attacks -- Part 4
Counters against Typical Muay Thai Attacks -- Part 5
Counters against Typical Muay Thai Attacks -- Part 6
Counters against Typical Muay Thai Attacks -- Part 7
Counters against Typical Muay Thai Attacks -- Part 8
Counters against Typical Muay Thai Attacks -- Part 9
Counters against Typical Muay Thai Attacks -- Part 10
Strike from Bosom against the Shoot -- Part 1
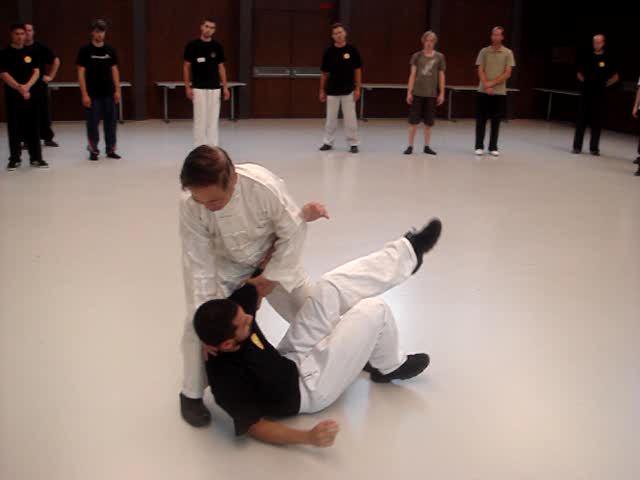 Strike from Bosom against the Shoot -- Part 2
Strike from Bosom against the Shoot -- Part 3
Strike from Bosom against the Shoot -- Part 4
Strike from Bosom against the Shoot -- Part 5
Strike from Bosom against the Shoot -- Part 6
Strike from Bosom against the Shoot -- Part 7
Strike from Bosom against the Shoot -- Part 8
Strike from Bosom against the Shoot -- Part 9