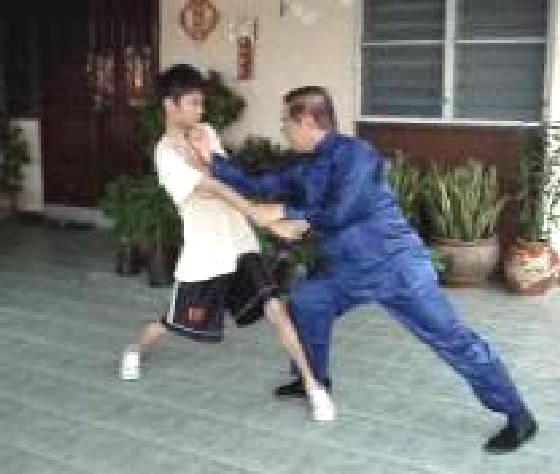
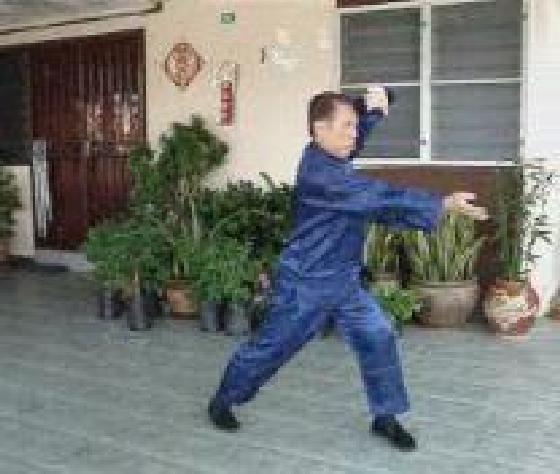
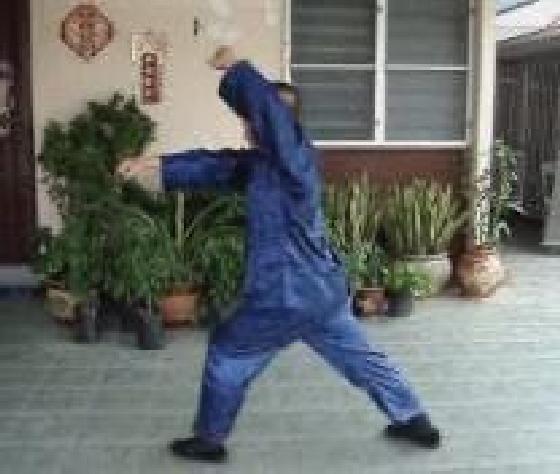
VIDEO-CLIPS-4: TITLES
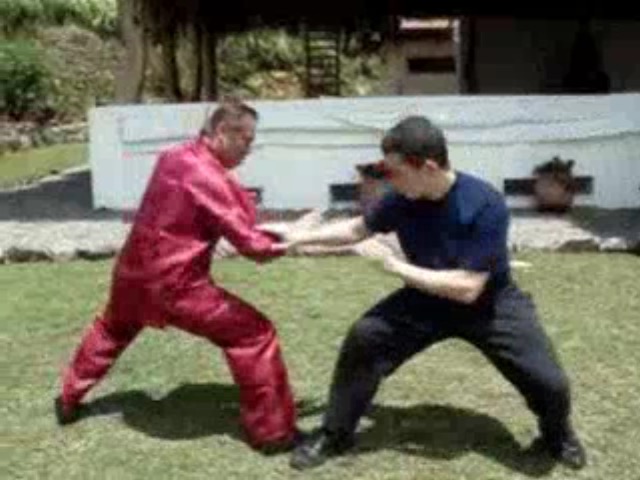
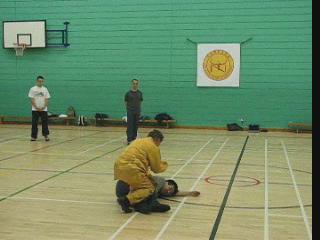
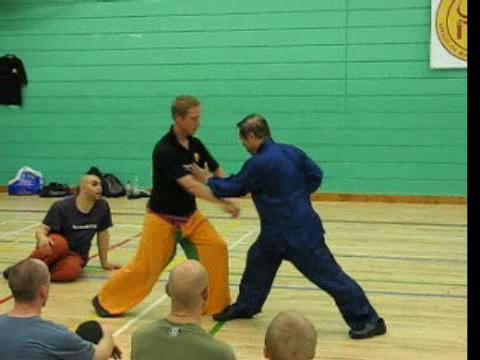
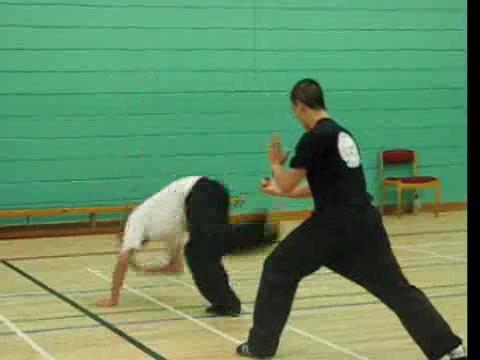
 Black Tiger Steals Heart
Black Tiger Steals Heart in the Early 2000s
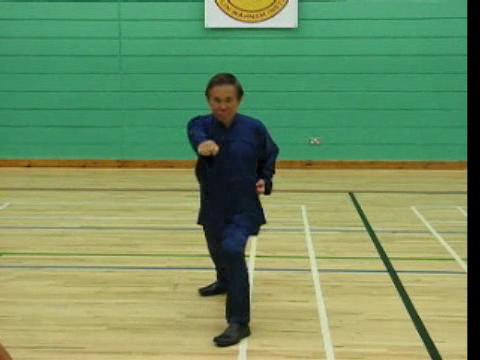
Breaking Bricks with Internal Force
Breaking Bricks with Internal Force
Chi Flow and Zen
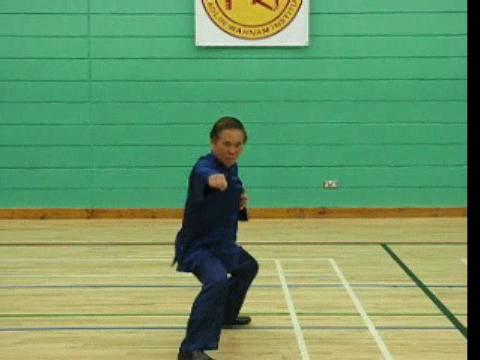
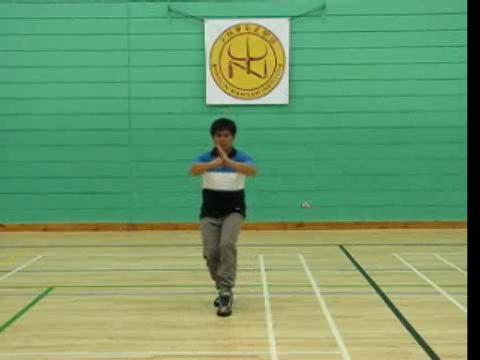
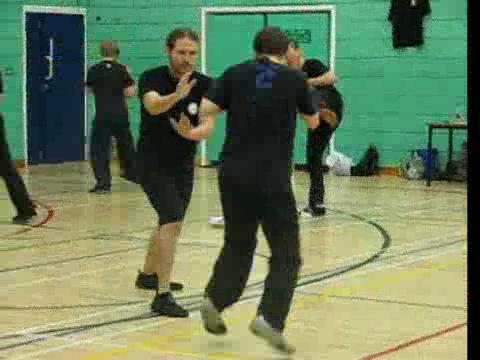
Footwork Training
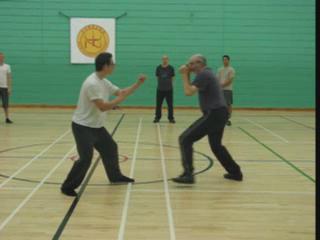
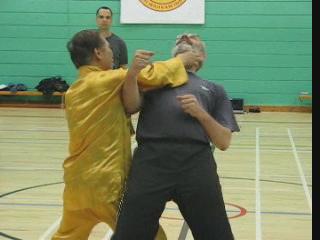
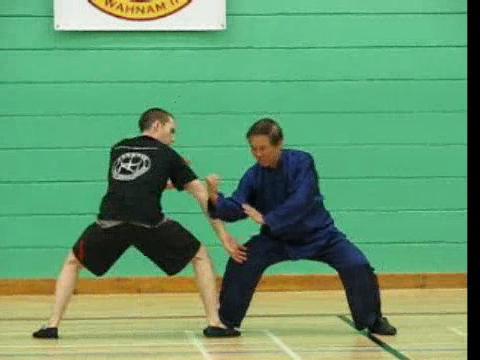
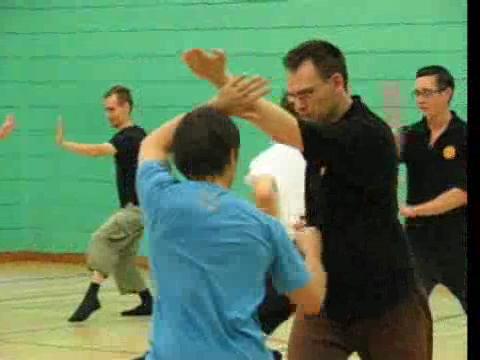
Free Sparring between Eugene and Anthony
Free Sparring between Eugene and Anthony -- Series 1
Free Sparring between Eugene and Anthony -- Series 2
Free Sparring between Eugene and Anthony -- Series 3
Pattern Practice -- the Four Fundamental Hand Attacks and Defences
Pattern Practice -- Happy Bird Hops up Branch
Pattern Practice -- Four Fundamental Kicks
Lohan Asks the Way
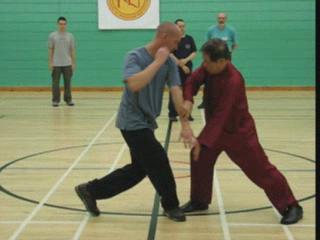
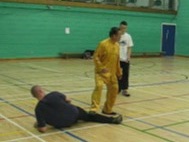
Free Sparring witn Partner of Another Style -- Series 1
Free Sparring witn Partner of Another Style -- Series 2
Pattern Practice -- Breeze Sways Lotus Leaves
Fkierce Tiger Speeds through Valley
Video-chips-4: Titles
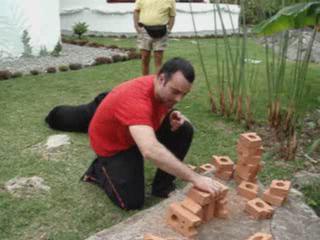
Brick-Breaking
Brick-Breaking Fun -- Overview
Brick-Breaking Fun -- Part 1
Brick-Breaking Fun -- Part 2
Brick-Breaking Fun -- Part 3
Brick-Breaking Fun -- Part 4
Brick-Breaking Fun -- Part 5
Brick-Breaking Fun -- Part 6
 Chun Nga Wedding
Cultural Meanings of Sifu Wong Chun Nga's
Chun Nga Wedding
Cultural Meanings of Sifu Wong Chun Nga's
Wedding Ceremonies -- Overview
Cultural Meanings of Sifu Wong Chun Nga's
Wedding Ceremonies
Cultural Meanings of Sifu Wong Chun Nga's
Wedding Ceremonies
Cultural Meanings of Sifu Wong Chun Nga's
Wedding Ceremonies
Cultural Meanings of Sifu Wong Chun Nga's
Wedding Ceremonies
Cultural Meanings of Sifu Wong Chun Nga's
Wedding Ceremonies
Cultural Meanings of Sifu Wong Chun Nga's Wedding Ceremonies
Cultural Meanings of Sifu Wong Chun Nga's Wedding Ceremonies
Cultural Meanings of Sifu Wong Chun Nga's Wedding Ceremonies
Cultural Meanings of Sifu Wong Chun Nga's Wedding Ceremonies
Cultural Meanings of Sifu Wong Chun Nga's Wedding Ceremonies
Cultural Meanings of Sifu Wong Chun Nga's Wedding Ceremonies
Cultural Meanings of Sifu Wong Chun Nga's Wedding Ceremonies
Cultural Meanings of Sifu Wong Chun Nga's Wedding Ceremonies
Cultural Meanings of Sifu Wong Chun Nga's Wedding Ceremonies
Cultural Meanings of Sifu Wong Chun Nga's Wedding Ceremonies
Cultural Meanings of Sifu Wong Chun Nga's Wedding Ceremonies
Cultural Meanings of Sifu Wong Chun Nga's Wedding Ceremonies
Cultural Meanings of Sifu Wong Chun Nga's Wedding Ceremonies
Cultural Meanings of Sifu Wong Chun Nga's Wedding Ceremonies
Cultural Meanings of Sifu Wong Chun Nga's Wedding Ceremonies
Cultural Meanings of Sifu Wong Chun Nga's Wedding Ceremonies
Cultural Meanings of Sifu Wong Chun Nga's Wedding Ceremonies
Cultural Meanings of Sifu Wong Chun Nga's Wedding Ceremonies
Cultural Meanings of Sifu Wong Chun Nga's Wedding Ceremonies
Cultural Meanings of Sifu Wong Chun Nga's Wedding Ceremonies
Cultural Meanings of Sifu Wong Chun Nga's Wedding Ceremonies
Cultural Meanings of Sifu Wong Chun Nga's Wedding Ceremonies
Cultural Meanings of Sifu Wong Chun Nga's Wedding Ceremonies
Cultural Meanings of Sifu Wong Chun Nga's
Wedding Ceremonies
 Cultural Meanings of Sifu Wong Chun Nga's
Wedding Ceremonies
Cultural Meanings of Sifu Wong Chun Nga's
Wedding Ceremonies
Cultural Meanings of Sifu Wong Chun Nga's
Wedding Ceremonies
Cultural Meanings of Sifu Wong Chun Nga's
Wedding Ceremonies
Cultural Meanings of Sifu Wong Chun Nga's
Wedding Ceremonies
Cultural Meanings of Sifu Wong Chun Nga's
Wedding Ceremonies
Cultural Meanings of Sifu Wong Chun Nga's
Wedding Ceremonies
Cultural Meanings of Sifu Wong Chun Nga's Wedding Ceremonies
Cultural Meanings of Sifu Wong Chun Nga's Wedding Ceremonies
Cultural Meanings of Sifu Wong Chun Nga's Wedding Ceremonies
Cultural Meanings of Sifu Wong Chun Nga's Wedding Ceremonies
Cultural Meanings of Sifu Wong Chun Nga's Wedding Ceremonies
Cultural Meanings of Sifu Wong Chun Nga's Wedding Ceremonies
Cultural Meanings of Sifu Wong Chun Nga's Wedding Ceremonies
Cultural Meanings of Sifu Wong Chun Nga's Wedding Ceremonies
Cultural Meanings of Sifu Wong Chun Nga's Wedding Ceremonies
Cultural Meanings of Sifu Wong Chun Nga's Wedding Ceremonies
Cultural Meanings of Sifu Wong Chun Nga's Wedding Ceremonies
Cultural Meanings of Sifu Wong Chun Nga's Wedding Ceremonies
Cultural Meanings of Sifu Wong Chun Nga's Wedding Ceremonies
Cultural Meanings of Sifu Wong Chun Nga's Wedding Ceremonies
Cultural Meanings of Sifu Wong Chun Nga's Wedding Ceremonies
Cultural Meanings of Sifu Wong Chun Nga's Wedding Ceremonies
Cultural Meanings of Sifu Wong Chun Nga's Wedding Ceremonies
Cultural Meanings of Sifu Wong Chun Nga's Wedding Ceremonies
Cultural Meanings of Sifu Wong Chun Nga's Wedding Ceremonies
Cultural Meanings of Sifu Wong Chun Nga's Wedding Ceremonies
Cultural Meanings of Sifu Wong Chun Nga's Wedding Ceremonies
Cultural Meanings of Sifu Wong Chun Nga's Wedding Ceremonies
Cultural Meanings of Sifu Wong Chun Nga's Wedding Ceremonies
 Cultural Meanings of Sifu Wong Chun Nga's
Wedding Ceremonies
Cultural Meanings of Sifu Wong Chun Nga's
Wedding Ceremonies
Cultural Meanings of Sifu Wong Chun Nga's
Wedding Ceremonies
Cultural Meanings of Sifu Wong Chun Nga's
Wedding Ceremonies
Cultural Meanings of Sifu Wong Chun Nga's
Wedding Ceremonies
Cultural Meanings of Sifu Wong Chun Nga's
Wedding Ceremonies
Cultural Meanings of Sifu Wong Chun Nga's Wedding Ceremonies
Cultural Meanings of Sifu Wong Chun Nga's Wedding Ceremonies
Cultural Meanings of Sifu Wong Chun Nga's Wedding Ceremonies
Cultural Meanings of Sifu Wong Chun Nga's Wedding Ceremonies
Cultural Meanings of Sifu Wong Chun Nga's Wedding Ceremonies
Cultural Meanings of Sifu Wong Chun Nga's Wedding Ceremonies
Cultural Meanings of Sifu Wong Chun Nga's Wedding Ceremonies
Cultural Meanings of Sifu Wong Chun Nga's Wedding Ceremonies
Cultural Meanings of Sifu Wong Chun Nga's Wedding Ceremonies
Cultural Meanings of Sifu Wong Chun Nga's Wedding Ceremonies
Cultural Meanings of Sifu Wong Chun Nga's Wedding Ceremonies
Cultural Meanings of Sifu Wong Chun Nga's Wedding Ceremonies
Cultural Meanings of Sifu Wong Chun Nga's Wedding Ceremonies
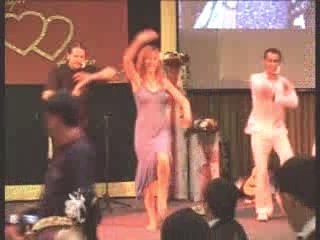
Chun Nga Wedding -- Show
The Shaolin Wahnam International Show at Sifu Wong Chun Nga's Wedding Ceremonies
The Shaolin Wahnam International Show at Sifu Wong Chun Nga's Wedding Ceremonies
The Shaolin Wahnam International Show at Sifu Wong Chun Nga's Wedding Ceremonies
The Shaolin Wahnam International Show at Sifu Wong Chun Nga's Wedding Ceremonies
The Shaolin Wahnam International Show at Sifu Wong Chun Nga's Wedding Ceremonies
The Shaolin Wahnam International Show at Sifu Wong Chun Nga's Wedding Ceremonies
The Shaolin Wahnam International Show at Sifu Wong Chun Nga's Wedding Ceremonies
The Shaolin Wahnam International Show at Sifu Wong Chun Nga's Wedding Ceremonies
The Shaolin Wahnam International Show at Sifu Wong Chun Nga's Wedding Ceremonies
The Shaolin Wahnam International Show at Sifu Wong Chun Nga's Wedding Ceremonies
The Shaolin Wahnam International Show at Sifu
Wong Chun Nga's Wedding Ceremonies
The Shaolin Wahnam International Show at Sifu
Wong Chun Nga's Wedding Ceremonies
The Shaolin Wahnam International Show at Sifu
Wong Chun Nga's Wedding Ceremonies
The Shaolin Wahnam International Show at Sifu
Wong Chun Nga's Wedding Ceremonies
The Shaolin Wahnam International Show at Sifu
Wong Chun Nga's Wedding Ceremonies
The Shaolin Wahnam International Show at Sifu
Wong Chun Nga's Wedding Ceremonies
The Shaolin Wahnam International Show at Sifu Wong Chun Nga's Wedding Ceremonies
The Shaolin Wahnam International Show at Sifu Wong Chun Nga's Wedding Ceremonies
The Shaolin Wahnam International Show at Sifu Wong Chun Nga's Wedding Ceremonies
The Shaolin Wahnam International Show at Sifu Wong Chun Nga's Wedding Ceremonies
The Shaolin Wahnam International Show at Sifu Wong Chun Nga's Wedding Ceremonies
The Shaolin Wahnam International Show at Sifu Wong Chun Nga's Wedding Ceremonies
The Shaolin Wahnam International Show at Sifu Wong Chun Nga's Wedding Ceremonies
The Shaolin Wahnam International Show at Sifu Wong Chun Nga's Wedding Ceremonies
The Shaolin Wahnam International Show at Sifu Wong Chun Nga's Wedding Ceremonies
The Shaolin Wahnam International Show at Sifu Wong Chun Nga's Wedding Ceremonies
The Shaolin Wahnam International Show at Sifu Wong Chun Nga's Wedding Ceremonies
The Shaolin Wahnam International Show at Sifu Wong Chun Nga's Wedding Ceremonies
The Shaolin Wahnam International Show at Sifu Wong Chun Nga's Wedding Ceremonies
The Shaolin Wahnam International Show at Sifu Wong Chun Nga's Wedding Ceremonies
The Shaolin Wahnam International Show at Sifu Wong Chun Nga's Wedding Ceremonies
The Shaolin Wahnam International Show at Sifu Wong Chun Nga's Wedding Ceremonies
The Shaolin Wahnam International Show at Sifu Wong Chun Nga's Wedding Ceremonies
The Shaolin Wahnam International Show at Sifu Wong Chun Nga's Wedding Ceremonies
The Shaolin Wahnam International Show at Sifu Wong Chun Nga's Wedding Ceremonies
The Shaolin Wahnam International Show at Sifu Wong Chun Nga's Wedding Ceremonies
The Shaolin Wahnam International Show at Sifu Wong Chun Nga's Wedding Ceremonies
The Shaolin Wahnam International Show at Sifu Wong Chun Nga's Wedding Ceremonies
The Shaolin Wahnam International Show at Sifu Wong Chun Nga's Wedding Ceremonies
The Shaolin Wahnam International Show at Sifu Wong Chun Nga's Wedding Ceremonies
 The Shaolin Wahnam International Show at Sifu
Wong Chun Nga's Wedding Ceremonies
The Shaolin Wahnam International Show at Sifu
Wong Chun Nga's Wedding Ceremonies
The Shaolin Wahnam International Show at Sifu
Wong Chun Nga's Wedding Ceremonies
The Shaolin Wahnam International Show at Sifu
Wong Chun Nga's Wedding Ceremonies
The Shaolin Wahnam International Show at Sifu
Wong Chun Nga's Wedding Ceremonies
The Shaolin Wahnam International Show at Sifu
Wong Chun Nga's Wedding Ceremonies
The Shaolin Wahnam International Show at Sifu Wong Chun Nga's Wedding Ceremonies
The Shaolin Wahnam International Show at Sifu Wong Chun Nga's Wedding Ceremonies
The Shaolin Wahnam International Show at Sifu Wong Chun Nga's Wedding Ceremonies
The Shaolin Wahnam International Show at Sifu Wong Chun Nga's Wedding Ceremonies
The Shaolin Wahnam International Show at Sifu Wong Chun Nga's Wedding Ceremonies
The Shaolin Wahnam International Show at Sifu Wong Chun Nga's Wedding Ceremonies
The Shaolin Wahnam International Show at Sifu Wong Chun Nga's Wedding Ceremonies
The Shaolin Wahnam International Show at Sifu Wong Chun Nga's Wedding Ceremonies
The Shaolin Wahnam International Show at Sifu Wong Chun Nga's Wedding Ceremonies
The Shaolin Wahnam International Show at Sifu Wong Chun Nga's Wedding Ceremonies
The Shaolin Wahnam International Show at Sifu Wong Chun Nga's Wedding Ceremonies
The Shaolin Wahnam International Show at Sifu Wong Chun Nga's Wedding Ceremonies
The Shaolin Wahnam International Show at Sifu Wong Chun Nga's Wedding Ceremonies
The Shaolin Wahnam International Show at Sifu Wong Chun Nga's Wedding Ceremonies
The Shaolin Wahnam International Show at Sifu Wong Chun Nga's Wedding Ceremonies
The Shaolin Wahnam International Show at Sifu Wong Chun Nga's Wedding Ceremonies
The Shaolin Wahnam International Show at Sifu Wong Chun Nga's Wedding Ceremonies
The Shaolin Wahnam International Show at Sifu Wong Chun Nga's Wedding Ceremonies
The Shaolin Wahnam International Show at Sifu Wong Chun Nga's Wedding Ceremonies
The Shaolin Wahnam International Show at Sifu Wong Chun Nga's Wedding Ceremonies
The Shaolin Wahnam International Show at Sifu Wong Chun Nga's Wedding Ceremonies
The Shaolin Wahnam International Show at Sifu Wong Chun Nga's Wedding Ceremonies
The Shaolin Wahnam International Show at Sifu Wong Chun Nga's Wedding Ceremonies
The Shaolin Wahnam International Show at Sifu Wong Chun Nga's Wedding Ceremonies
 The Shaolin Wahnam International Show at Sifu
Wong Chun Nga's Wedding Ceremonies
The Shaolin Wahnam International Show at Sifu
Wong Chun Nga's Wedding Ceremonies
The Shaolin Wahnam International Show at Sifu
Wong Chun Nga's Wedding Ceremonies
The Shaolin Wahnam International Show at Sifu
Wong Chun Nga's Wedding Ceremonies
The Shaolin Wahnam International Show at Sifu
Wong Chun Nga's Wedding Ceremonies
The Shaolin Wahnam International Show at Sifu
Wong Chun Nga's Wedding Ceremonies
The Shaolin Wahnam International Show at Sifu Wong Chun Nga's Wedding Ceremonies
The Shaolin Wahnam International Show at Sifu Wong Chun Nga's Wedding Ceremonies
The Shaolin Wahnam International Show at Sifu Wong Chun Nga's Wedding Ceremonies
The Shaolin Wahnam International Show at Sifu Wong Chun Nga's Wedding Ceremonies
The Shaolin Wahnam International Show at Sifu Wong Chun Nga's Wedding Ceremonies
The Shaolin Wahnam International Show at Sifu Wong Chun Nga's Wedding Ceremonies
The Shaolin Wahnam International Show at Sifu Wong Chun Nga's Wedding Ceremonies
The Shaolin Wahnam International Show at Sifu Wong Chun Nga's Wedding Ceremonies
The Shaolin Wahnam International Show at Sifu Wong Chun Nga's Wedding Ceremonies
The Shaolin Wahnam International Show at Sifu Wong Chun Nga's Wedding Ceremonies
The Shaolin Wahnam International Show at Sifu Wong Chun Nga's Wedding Ceremonies
The Shaolin Wahnam International Show at Sifu Wong Chun Nga's Wedding Ceremonies
The Shaolin Wahnam International Show at Sifu Wong Chun Nga's Wedding Ceremonies
The Shaolin Wahnam International Show at Sifu Wong Chun Nga's Wedding Ceremonies
The Shaolin Wahnam International Show at Sifu Wong Chun Nga's Wedding Ceremonies
Chun Nga Wedding -- Show -- Videos
The Shaolin Wahnam International Show at Sifu Wong Chun Nga's
Wedding Ceremonies -- Overview
Ringing Bells of Joy from Switzerland
Love Song from France
Shaolin Kungfu and Wahnam Taijiquan from Spain
Music and Songs from Australia
Malay and Singing from the Netherlands
Kilts and Highland Dance from Scotland
Humorous Play from the United States (1)
Humorous Play from the United States (2)
Horse Race from Germany
 Lovely Dance with Colorful Costumes from Japan
Enchanting Love Songs from Indonesia
Music and Dance from Ireland
Music, Songs and Dance from Colorful Sabah
Drama and Songs from Italy
Lovely Songs from the United Kingdom
The Happy, Worldwide Shaolin Wahnam Family
Chun Nga Wedding -- Videos
Videos on Cultural Meanings of Sifu Wong Chun Nga's Wedding Ceremonies -- Overview
The Night before the Wedding at Bridegroom's Home
The Night before the Wedding at Bride's Home
Going to the Bride's Home
Asking for the Bride
Getting the Bride
The Happy Couple
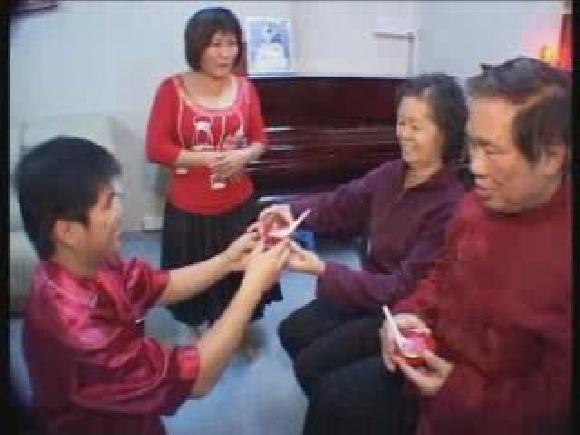
The Tea Ceremony
The Shaolin Wahnam Family
At the Bride's Home
At the Newly Wed's Home
Eagle Claw
Combat Application of Eagle Claw Sequence 2 -- Part 1
Combat Application of Eagle Claw Sequence 2 -- Part 2
Combat Application of Eagle Claw Sequence 2 -- Part 3
Combat Application of Eagle Claw Sequence 2 -- Part 4
Combat Application of Eagle Claw Sequence 2 -- Part 5
Combat Application of Eagle Claw Sequence 2 -- Part 6
Combat Application of Eagle Claw Sequence 2 -- Part 7
Combat Application of Eagle Claw Sequence 2 -- Part 8
Combat Application of Eagle Claw Sequence 3 -- Part 1
Combat Application of Eagle Claw Sequence 3 -- Part 2
 Combat Application of Eagle Claw Sequence 3 -- Part 3
Combat Application of Eagle Claw Sequence 3 -- Part 4
Combat Application of Eagle Claw Sequence 4 -- Part 1
Combat Application of Eagle Claw Sequence 4 -- Part 2
Combat Application of Eagle Claw Sequence 4 -- Part 3
Combat Application of Eagle Claw Sequence 4 -- Part 4
Combat Application of Eagle Claw Sequence 5 -- Part 1
Combat Application of Eagle Claw Sequence 5 -- Part 2
Combat Application of Eagle Claw Sequence 5 -- Part 3
Combat Application of Eagle Claw Sequence 5 -- Part 4
Fifty Sequences of Eagle Claw -- Overview
Combat Applications of Eagle Claw: Sequences 1 to 5 -- Overview
Combat Application of Eagle Clwa Sequence 1 -- Part 1
Combat Application of Eagle Clwa Sequence 1 -- Part 2
Combat Application of Eagle Clwa Sequence 1 -- Part 3
Combat Application of Eagle Clwa Sequence 1 -- Part 4
Combat Application of Eagle Clwa Sequence 1 -- Part 5
Combat Application of Eagle Clwa Sequence 1 -- Part 6
Combat Application of Eagle Clwa Sequence 1 -- Part 7
Combat Application of Eagle Clwa Sequence 1 -- Part 8
Some Combat Applications from Eagle Claw -- Sequences 1 and 2
Some Combat Applications from Eagle Claw -- Sequences 3, 4 and 5
Eagle Claw Combat Sequences -- Part 1
Eagle Claw Combat Sequences -- Part 2
Eagle Claw Combat Sequences -- Part 3
Eagle Claw Combat Sequences -- Part 4
Eagle Claw Combat Sequences -- Part 5
Eagle Claw Combat Sequences -- Part 6
Eagle Claw Combat Sequences -- Part 7
Eagle Claw Combat Sequences -- Part 8
 Eagle Claw Sequences 1 - 10
Eagle Claw Sequences 11 - 20
Eagle Claw Sequences 21 - 30
Eagle Claw Sequences 31 - 40
Eagle Claw Sequences 41 - 50
Eagle Claw Sequences -- Old Videos
50 Sequences of Eagle Claw Kungfu -- Overview
Eagle Claw Kungfu -- Private Page
Selection of Eangle Claw Combat Sequences -- Overview
Press Strike -- Sequence 1
Press Strike -- Sequence 1 (Slow Motion)
Lift Strike -- Sequence 2
Lift Strike -- Sequence 2 (Slow Motion)
Side Punch -- Sequence 3
Side Punch -- Sequence 3 (Slow Motion)
Draw Lift -- Sequence 4
Draw Lift -- Sequence 4 (Slow Motion)
Flant Horse Three Fists -- Sequence 5
Flant Horse Three Fists -- Sequence 5 (Slow Motion)
Hanging Fist -- Sequence 6
Hanging Fist -- Sequence 6 (Slow Motion)
Chop Waist Palm -- Sequence 7
Chop Waist Palm -- Sequence 7 (Slow Motion)
Side Step -- Sequence 8
Side Step -- Sequence 8 (Slow Motion)
Turn Return Palms -- Sequence 9
Turn Return Palms -- Sequence 9 (Slow Motion)
Press Elbow Continuous Strike -- Sequence 10
Press Elbow Continuous Strike -- Sequence 10 (Slow Motion)
High Lift Low Press -- Sequence 11
 High Lift Low Press -- Sequence 11 (Slow Motion)
Follow through Punches -- Sequence 12
Follow through Punches -- Sequence 12 (Slow Motion)
Retreat Step Continuous Strike -- Sequence 13
Retreat Step Continuous Strike -- Sequence 13 (Slow Motion)
Strike Elbow Continuous Strikes -- Sequence 14
Strike Elbow Continuous Strikes -- Sequence 14 (Slow Motion)
Turn Sleeves -- Sequence 15
Turn Sleeves -- Sequence 15 (Slow Motion)
Slip Fist -- Sequence 16
Slip Fist -- Sequence 16 (Slow Motion)
Whirlwind Sweeps Leaves -- Sequence 17
Whirlwind Sweeps Leaves -- Sequence 17 (Slow Motion)
Hook Hand Seek Organ -- Sequence 18
Hook Hand Seek Organ -- Sequence 18 (Slow Motion)
Continuous Strikes -- Sequence 19
Continuous Strikes -- Sequence 19 (Slow Motion)
Horizontal Strike -- Sequence 20
Horizontal Strike -- Sequence 20 (Slow Motion)
Hook Hand Dodge Step Strike -- Sequence 21
Hook Hand Dodge Step Strike -- Sequence 21 (Slow Motion)
Grasp Wrist -- Sequence 22
Grasp Wrist -- Sequence 22 (Slow Motion)
Lift Elbow -- Sequence 23
Lift Elbow -- Sequence 23 (Slow Motion)
Seize Technique Pointed Fist -- Sequence 24
Seize Technique Pointed Fist -- Sequence 24 (Slow Motion)
Hook Hand Reverse Fist -- Sequence 25
Hook Hand Reverse Fist -- Sequence 25 (Slow Motion)
Protect Elbow Thrust Palm -- Sequence 26
 Protect Elbow Thrust Palm -- Sequence 26 (Slow Motion)
Stroke Eye-Brow -- Sequence 27
Stroke Eye-Brow -- Sequence 27 (Slow Motion)
Carry Moon in Bosom -- Sequence 28
Carry Moon in Bosom -- Sequence 28 (Slow Motion)
Outward Grip -- Sequence 29
Outward Grip -- Sequence 29 (Slow Motion)
Spiral Fist -- Sequence 30
Spiral Fist -- Sequence 30 (Slow Motion)
Top Contain Hand -- Sequence 31
Top Contain Hand -- Sequence 31 (Slow Motion)
Bottom Contain Hand -- Sequence 32
Bottom Contain Hand -- Sequence 32 (Slow Motion)
Top Capture Hand -- Sequence 33
Top Capture Hand -- Sequence 33 (Slow Motion)
Bottom Capture Hand -- Sequence 34
Bottom Capture Hand -- Sequence 34 (Slow Motion)
Hook Strike -- Sequence 35
Hook Strike -- Sequence 35 (Slow Motion)
Sandwiched Strike -- Sequence 36
Sandwiched Strike -- Sequence 36 (Slow Motion)
Eight Turn Fist -- Sequence 37
Eight Turn Fist -- Sequence 37 (Slow Motion)
Horse-Riding Punch -- Sequence 38
Horse-Riding Punch -- Sequence 38 (Slow Motion)
Grasp Strike -- Sequence 39
Grasp Strike -- Sequence 39 (Slow Motion)
Eagle Claw Strength Grip Technique -- Sequence 40
Eagle Claw Strength Grip Technique -- Sequence 40 (Slow Motion)
Moving Forward Hook Technique -- Sequence 41
 Moving Forward Hook Technique -- Sequence
41 (Slow Motion)
Dodge Spread -- Sequence 42
Dodge Spread -- Sequence 42 (Slow Motion)
Close Body Support Strike -- Sequence 43
Close Body Support Strike -- Sequence 43 (Slow Motion)
Fell Body Technique -- Sequence 44
Fell Body Technique -- Sequence 44 (Slow Motion)
Immortal Changes Shadow -- Sequence 45
Immortal Changes Shadow -- Sequence 45 (Slow Motion)
Hide Flower in Leaves -- Sequence 46
Hide Flower in Leaves -- Sequence 46 (Slow Motion)
Front Thrust Leg -- Sequence 47
Front Thrust Leg -- Sequence 47 (Slow Motion)
Back Thrust Leg -- Sequence 48
Back Thrust Leg -- Sequence 48 (Slow Motion)
Forward Together -- Sequence 49
Forward Together -- Sequence 49 (Slow Motion)
Front Back Jumping Leg -- Sequence 50
Front Back Jumping Leg -- Sequence 50 (Slow Motion)
Eagle Claw -- Videos
50 Sequences of Eagle Claw Kungfu -- Overview
50 Solo and Combat Sequences of Eagle Claw -- Overview
Sequence 1 -- Press Strike
Sequence 2 -- Lift Strike
Sequence 3 -- Side Fist
Sequence 4 -- Draw Lift
Sequence 5 -- Slant Horse Three Fists
Sequence 6 -- Hanging Fost
Sequence 7 -- Chop-Waist Palm
Sequence 8 -- Side-Step Move
 Sequence 9 -- Turn-Return Palm
Sequence 10 -- Press Elbow Continuous Strikes
Sequence 11 -- High Lift Low Press
Sequence 12 -- Follow-Through Punches
Sequence 13 -- Retreat Step Continuous Strikes
Sequence 14 -- Strike Elbow
Sequence 15 -- Turn Sleeves
Sequence 16 -- Slip Fist
Sequence 17 -- Whirlwind Sweep Leaves
Sequence 18 -- Hook-Hand Seeks Organ
Sequence 19 -- Continuous Strikes
Sequence 20 -- Horizontal Strike
Sequence 21 -- Hook-Hand Dodge-Step Strike
Sequence 22 -- Grasp Wrist
Sequence 23 -- Lift Elbow
Sequence 24 -- Seiae-Technique Pointed Fist
Sequence 25 -- Hook-Hand Reverse Fist
Sequence 26 -- Protect Elbow Thrust Palm
Sequence 27 -- Stroke Eye-Brow
Sequence 28 -- Carry Moon in Bosom
Sequence 29 -- Outward Grip
Sequence 30 -- Spiral Fist
Sequence 31 -- Top Contain Hand
Sequence 32 -- Bottom Contain Hand
Sequence 33 -- Top Capture Hand
Sequence 34 -- Bottom Capture Hand
Sequence 35 -- Hook Strike
Sequence 36 -- Sandwiched Strike
Sequence 37 -- Eight Turn Fist
Sequence 38 -- Lift Punch
Sequence 39 -- Grasp Strike
Sequence 40 -- Eagle-Claw Strong Grip Technique
Sequence 41 -- Moving Forward Hook Technique
Sequence 42 -- Dodge Spread
Sequence 43 -- Close-Body Anchor Strike
Sequence 44 -- Fell-Body Technique
Sequence 45 -- Immortal Changes Shadow
Sequence 46 -- Hide Flowers in Leaves
Sequence 47 -- Front Plant Leg
Sequence 48 -- Back Plant Leg
 Sequence 49 -- Move Forward Together
Sequence 50 -- Front-Back Jumping Leg
Eagle Claw -- YouTube Videos
50 Combat Sequences of Eagle Claw -- Overview
Eagle Claw Combat Sequence 1 to 5
Eagle Claw Combat Sequence 6 to 10
Eagle Claw Combat Sequence 11 to 15
Eagle Claw Combat Sequence 16 to 20
Eagle Claw Combat Sequence 21 to 25
Eagle Claw Combat Sequence 26 to 30
Eagle Claw Combat Sequence 31 to 35
Eagle Claw Combat Sequence 36 to 40
Eagle Claw Combat Sequence 41 to 45
Eagle Claw Combat Sequence 46 to 50
50 Solo Sequences of Eagle Claw -- Overview
Eagle Claw Sequences 1 to 5
Eagle Claw Sequences 6 to 10
Eagle Claw Sequences 11 to 15
Eagle Claw Sequences 16 to 20
Eagle Claw Sequences 21 to 25
Eagle Claw Sequences 26 to 30
Eagle Claw Sequences 31 to 35
Eagle Claw Sequences 36 to 40
Eagle Claw Sequences 41 to 45
Eagle Claw Sequences 46 to 50
 Eagle Claw England -- Eagle Claw 01
Where are the Eagle Claws? -- Overview
Eagle Claw England -- Eagle Claw 01
Where are the Eagle Claws? -- Overview
Lift-Hand and Side-Fist -- Overview
Linking Combat Sequences into Sets -- Overview
Internal Force Training ane Some Solo Sequences -- Overview
Simple in Forms but Sohisticated in Appications
Formidable Attacks that may Appear Flowery -- Overview
A Formidiable Chin-Na Technique and its
Counters -- Overview
Breaking Elbows and Releasing Double Grips
Excellent Chin-Na Techniques for Felling and Controlling
Opponents -- Overview
Where are the Eagle Claws? -- Part 1
Where are the Eagle Claws? -- Part 2
Where are the Eagle Claws? -- Part 3
Where are the Eagle Claws? -- Part 4
Where are the Eagle Claws? -- Part 5
Where are the Eagle Claws? -- Part 6
Where are the Eagle Claws? -- Part 7
Where are the Eagle Claws? -- Part 8
Where are the Eagle Claws? -- Part 9
Where are the Eagle Claws? -- Part 10
Where are the Eagle Claws? -- Part 11
Left-Hand and Side-Fist -- Part 1
Left-Hand and Side-Fist -- Part 2
Left-Hand and Side-Fist -- Part 3
Left-Hand and Side-Fist -- Part 4
Left-Hand and Side-Fist -- Part 5
Left-Hand and Side-Fist -- Part 6
Left-Hand and Side-Fist -- Part 7
Left-Hand and Side-Fist -- Part 8
Left-Hand and Side-Fist -- Part 9
Linking Combat Sequences into Sets -- Part 1
 Linking Combat Sequences into Sets -- Part 2
Linking Combat Sequences into Sets -- Part 3
Linking Combat Sequences into Sets -- Part 4
Linking Combat Sequences into Sets -- Part 5
Linking Combat Sequences into Sets -- Part 6
Linking Combat Sequences into Sets -- Part 7
Linking Combat Sequences into Sets -- Part 8
Linking Combat Sequences into Sets -- Part 9
Internal Force Training and Some Solo Sequences -- Part 1
Internal Force Training and Some Solo Sequences -- Part 2
Internal Force Training and Some Solo Sequences -- Part 3
Internal Force Training and Some Solo Sequences -- Part 4
Internal Force Training and Some Solo Sequences -- Part 5
Internal Force Training and Some Solo Sequences -- Part 6
Internal Force Training and Some Solo Sequences -- Part 7
Internal Force Training and Some Solo Sequences -- Part 8
Internal Force Training and Some Solo Sequences -- Part 9
Simple in Forms but Sophisticated in Applications -- Part 1
Simple in Forms but Sophisticated in Applications -- Part 2
Simple in Forms but Sophisticated in Applications -- Part 3
Simple in Forms but Sophisticated in Applications -- Part 4
Simple in Forms but Sophisticated in Applications -- Part 5
Simple in Forms but Sophisticated in Applications -- Part 6
Simple in Forms but Sophisticated in Applications -- Part 7
Simple in Forms but Sophisticated in Applications -- Part 8
Simple in Forms but Sophisticated in Applications -- Part 9
Simple in Forms but Sophisticated in Applications -- Part 10
Formidable Attacks that may Appear Flowery -- Part 1
Formidable Attacks that may Appear Flowery -- Part
Formidable Attacks that may Appear Flowery -- Part 3
 Formidable Attacks that may Appear Flowery -- Part 4
Formidable Attacks that may Appear Flowery -- Part 5
Formidable Attacks that may Appear Flowery -- Part 6
Formidable Attacks that may Appear Flowery -- Part 7
Formidable Attacks that may Appear Flowery -- Part 8
Formidable Attacks that may Appear Flowery -- Part 9
A Formidabke Chin-Na Technique and its Counters -- Part 1
A Formidabke Chin-Na Technique and its Counters -- Part 2
A Formidabke Chin-Na Technique and its Counters -- Part 3
A Formidabke Chin-Na Technique and its Counters -- Part 4
A Formidabke Chin-Na Technique and its Counters -- Part 5
A Formidabke Chin-Na Technique and its Counters -- Part 6
A Formidabke Chin-Na Technique and its Counters -- Part 7
A Formidabke Chin-Na Technique and its Counters -- Part 8
A Formidabke Chin-Na Technique and its Counters -- Part 9
Breaking Elbows and Releasing Double Grips -- Part 1
Breaking Elbows and Releasing Double Grips -- Part 2
Breaking Elbows and Releasing Double Grips -- Part 3
Breaking Elbows and Releasing Double Grips -- Part 4
Breaking Elbows and Releasing Double Grips -- Part 5
Breaking Elbows and Releasing Double Grips -- Part 6
Breaking Elbows and Releasing Double Grips -- Part 7
Breaking Elbows and Releasing Double Grips -- Part 8
Excellent Chin-Na Techniques for Felling and Controlling Opponents -- Part 1
Excellent Chin-Na Techniques for Felling and Controlling Opponents -- Part 2
Excellent Chin-Na Techniques for Felling and Controlling Opponents -- Part 3
Excellent Chin-Na Techniques for Felling and Controlling Opponents -- Part 4
Excellent Chin-Na Techniques for Felling and Controlling Opponents -- Part 5
Excellent Chin-Na Techniques for Felling and Controlling Opponents -- Part 6
Excellent Chin-Na Techniques for Felling and Controlling Opponents -- Part 7
Excellent Chin-Na Techniques for Felling and Controlling
Opponents -- Part 8
Sellection from Eagle Claw Kungfu Course, Brighton
2009 -- Overview
Eagle Claw England -- Eagle Claw 02
 Hiding Eagle Claws and their Applications in the
Open -- Overview
Intricate Applications ofEagle Claw Techniques -- Overview
Felling an Opponent even when Both your Arms are
Locked by Him -- Overview
Hooking, Sandwiching, Grasping and Various Other Eagle
Claw Techniques -- Overview
Supportive and Primary Attacks of Eagle Claws -- Overview
Odd-Sounding or Poetic, but Effective for Combat -- Overview
Eagle Claw Kungfu is a Beautiful, Complete Martial Art
Hiding Eagle Claws and their Applications in the Open -- Part 1
Hiding Eagle Claws and their Applications in the Open -- Part 2
Hiding Eagle Claws and their Applications in the Open -- Part 3
Hiding Eagle Claws and their Applications in the Open -- Part 4
Hiding Eagle Claws and their Applications in the Open -- Part 5
Hiding Eagle Claws and their Applications in the Open -- Part 6
Hiding Eagle Claws and their Applications in the Open -- Part 7
Hiding Eagle Claws and their Applications in the Open -- Part 8
Hiding Eagle Claws and their Applications in the Open -- Part 9
Intricate Applications of Eagle Claw Techniques -- Part 1
Intricate Applications of Eagle Claw Techniques -- Part 2
Intricate Applications of Eagle Claw Techniques -- Part 3
Intricate Applications of Eagle Claw Techniques -- Part 4
 Intricate Applications of Eagle Claw Techniques -- Part 5
Intricate Applications of Eagle Claw Techniques -- Part 6
Intricate Applications of Eagle Claw Techniques -- Part 7
Intricate Applications of Eagle Claw Techniques -- Part 8
Intricate Applications of Eagle Claw Techniques -- Part 9
Intricate Applications of Eagle Claw Techniques -- Part 10
Intricate Applications of Eagle Claw Techniques -- Part 11
Felling an Opponent even when Both your Arms are Locked by Him -- Part 1
Felling an Opponent even when Both your Arms are Locked by Him -- Part 2
Felling an Opponent even when Both your Arms are Locked by Him -- Part 3
Felling an Opponent even when Both your Arms are Locked by Him -- Part 4
Felling an Opponent even when Both your Arms are Locked by Him -- Part 5
Felling an Opponent even when Both your Arms are Locked by Him -- Part 6
Felling an Opponent even when Both your Arms are Locked by Him -- Part 7
Felling an Opponent even when Both your Arms are Locked by Him -- Part 8
Felling an Opponent even when Both your Arms are Locked by Him -- Part 9
Hooking, Sandwiching, Grasping and Various Other Eagle Claw Techniques -- Part 1
Hooking, Sandwiching, Grasping and Various Other Eagle Claw Techniques -- Part 2
Hooking, Sandwiching, Grasping and Various Other Eagle Claw Techniques -- Part 3
Hooking, Sandwiching, Grasping and Various Other Eagle Claw Techniques -- Part 4
Hooking, Sandwiching, Grasping and Various Other Eagle Claw Techniques -- Part 5
Hooking, Sandwiching, Grasping and Various Other Eagle Claw Techniques -- Part 6
Hooking, Sandwiching, Grasping and Various Other Eagle Claw Techniques -- Part 7
Hooking, Sandwiching, Grasping and Various Other Eagle Claw Techniques -- Part 8
Hooking, Sandwiching, Grasping and Various Other Eagle Claw Techniques -- Part 9
Hooking, Sandwiching, Grasping and Various Other Eagle Claw Techniques -- Part 10
Hooking, Sandwiching, Grasping and Various Other Eagle Claw Techniques -- Part 11
Supportive and Primary Attacks of Eagle Claws -- Part 1
Supportive and Primary Attacks of Eagle Claws -- Part 2
Supportive and Primary Attacks of Eagle Claws -- Part 3
 Supportive and Primary Attacks of Eagle Claws -- Part 4
Supportive and Primary Attacks of Eagle Claws -- Part 5
Supportive and Primary Attacks of Eagle Claws -- Part 6
Supportive and Primary Attacks of Eagle Claws -- Part 7
Supportive and Primary Attacks of Eagle Claws -- Part 8
Supportive and Primary Attacks of Eagle Claws -- Part 9
Odd-Sounding or Poetic, but Effective for Combat -- Part 1
Odd-Sounding or Poetic, but Effective for Combat -- Part 2
Odd-Sounding or Poetic, but Effective for Combat -- Part 3
Odd-Sounding or Poetic, but Effective for Combat -- Part 4
Odd-Sounding or Poetic, but Effective for Combat -- Part 5
Odd-Sounding or Poetic, but Effective for Combat -- Part 6
Odd-Sounding or Poetic, but Effective for Combat -- Part 7
Odd-Sounding or Poetic, but Effective for Combat -- Part 8
Odd-Sounding or Poetic, but Effective for Combat -- Part 9
Eagle Claw Kungfu is a Beautiful, Complete Martial Art -- Part 1
Eagle Claw Kungfu is a Beautiful, Complete Martial Art -- Part 2
Eagle Claw Kungfu is a Beautiful, Complete Martial Art -- Part 3
Eagle Claw Kungfu is a Beautiful, Complete Martial Art -- Part 4
Eagle Claw Kungfu is a Beautiful, Complete Martial Art -- Part 5
Eagle Claw Kungfu is a Beautiful, Complete Martial Art -- Part 6
Eagle Claw Kungfu is a Beautiful, Complete Martial Art -- Part 7
Eagle Claw Kungfu is a Beautiful, Complete Martial Art -- Part 8
Eagle Claw Kungfu is a Beautiful, Complete Martial Art -- Part 9
Eagle Claw England -- Eagle Claw 03
Where are the Eagle Features in this Style? -- Overview
Applying Eagle Claw Techniques against a Boxer -- Overview
Handling a Boxer's Fast Jabs and Crosses -- Overview
Do Not hand your Defeat to your Opponent -- Overview
Covering an Opponent Adequantely and Closing the Gap if he Tries to Escape -- Overview
Handling a Boxer's Hooks -- Overview
Closing or Intercepting a Boxer's Hooks -- Overview
Handling a Boxer's Undercuts -- Overview
Using Techniques for which a Boxer has No Counters -- Overview
Griping Elbow along with Flow -- Overview
 Applying Strong Grip Techniques in Free Sparring -- Overview
Effectve Tactics and Techniques against Boexers -- Overview
Where are the Eagle Features in this Style? -- Part 1
Where are the Eagle Features in this Style? -- Part 2
Where are the Eagle Features in this Style? -- Part 3
Where are the Eagle Features in this Style? -- Part 4
Where are the Eagle Features in this Style? -- Part 5
Where are the Eagle Features in this Style? -- Part 6
Where are the Eagle Features in this Style? -- Part 7
Where are the Eagle Features in this Style? -- Part 8
Where are the Eagle Features in this Style? -- Part 9
Where are the Eagle Features in this Style? -- Part 10
Where are the Eagle Features in this Style? -- Part 11
Applying Eagle Claw Techniques against a Boxer -- Part 1
Applying Eagle Claw Techniques against a Boxer -- Part 2
Applying Eagle Claw Techniques against a Boxer -- Part 3
Applying Eagle Claw Techniques against a Boxer -- Part 4
Applying Eagle Claw Techniques against a Boxer -- Part 5
Applying Eagle Claw Techniques against a Boxer -- Part 6
Applying Eagle Claw Techniques against a Boxer -- Part 7
Handling a Boxer's Fast Jabs and Crosses -- Part 1
Handling a Boxer's Fast Jabs and Crosses -- Part 2
Handling a Boxer's Fast Jabs and Crosses -- Part 3
Handling a Boxer's Fast Jabs and Crosses -- Part 4
Handling a Boxer's Fast Jabs and Crosses -- Part 5
Handling a Boxer's Fast Jabs and Crosses -- Part 6
Handling a Boxer's Fast Jabs and Crosses -- Part 7
Handling a Boxer's Fast Jabs and Crosses -- Part 8
Handling a Boxer's Fast Jabs and Crosses -- Part 9
Handling a Boxer's Fast Jabs and Crosses -- Part 10
 Do Not Hand your Defeat to our Opponent -- Part 1
Do Not Hand your Defeat to our Opponent -- Part 2
Do Not Hand your Defeat to our Opponent -- Part 3
Do Not Hand your Defeat to our Opponent -- Part 4
Do Not Hand your Defeat to our Opponent -- Part 5
Do Not Hand your Defeat to our Opponent -- Part 6
Do Not Hand your Defeat to our Opponent -- Part 7
Do Not Hand your Defeat to our Opponent -- Part 8
Do Not Hand your Defeat to our Opponent -- Part 9
Closing an Opponent Adequantely and Closing the Gap
if he Tries to Escape -- Part 1
Closing an Opponent Adequantely and Closing the Gap
if he Tries to Escape -- Part 2
Closing an Opponent Adequantely and Closing the Gap
if he Tries to Escape -- Part 3
Closing an Opponent Adequantely and Closing the Gap
if he Tries to Escape -- Part 4
Closing an Opponent Adequantely and Closing the Gap
if he Tries to Escape -- Part 5
Closing an Opponent Adequantely and Closing the Gap
if he Tries to Escape -- Part 6
Closing an Opponent Adequantely and Closing the Gap
if he Tries to Escape -- Part 7
Closing an Opponent Adequantely and Closing the Gap
if he Tries to Escape -- Part 8
Closing an Opponent Adequantely and Closing the Gap
if he Tries to Escape -- Part 9
Handling a Boxer's Hooks -- Part 1
Handling a Boxer's Hooks -- Part 2
Handling a Boxer's Hooks -- Part 3
Handling a Boxer's Hooks -- Part 4
Handling a Boxer's Hooks -- Part 5
Handling a Boxer's Hooks -- Part 6
Handling a Boxer's Hooks -- Part 7
Handling a Boxer's Hooks -- Part 8
Closing or Intercepting a Boxer's Hooks -- Part 1
Closing or Intercepting a Boxer's Hooks -- Part 2
Closing or Intercepting a Boxer's Hooks -- Part 3
Closing or Intercepting a Boxer's Hooks -- Part 4
 Closing or Intercepting a Boxer's Hooks -- Part 5
Closing or Intercepting a Boxer's Hooks -- Part 6
Closing or Intercepting a Boxer's Hooks -- Part 7
Closing or Intercepting a Boxer's Hooks -- Part 8
Handling a Boxer's Undercuts -- Part 1
Handling a Boxer's Undercuts -- Part 2
Handling a Boxer's Undercuts -- Part 3
Handling a Boxer's Undercuts -- Part 4
Handling a Boxer's Undercuts -- Part 5
Handling a Boxer's Undercuts -- Part 6
Handling a Boxer's Undercuts -- Part 7
Handling a Boxer's Undercuts -- Part 8
Handling a Boxer's Undercuts -- Part 9
Using Techniques for which a Boxer has No Counters -- Part 1
Using Techniques for which a Boxer has No Counters -- Part 2
Using Techniques for which a Boxer has No Counters -- Part 3
Using Techniques for which a Boxer has No Counters -- Part 4
Using Techniques for which a Boxer has No Counters -- Part 5
Using Techniques for which a Boxer has No Counters -- Part 6
Using Techniques for which a Boxer has No Counters -- Part 7
Using Techniques for which a Boxer has No Counters -- Part 8
Using Techniques for which a Boxer has No Counters -- Part 9
Griping Elbow along with Flow -- Part 1
Griping Elbow along with Flow -- Part 2
Griping Elbow along with Flow -- Part 3
Griping Elbow along with Flow -- Part 4
Griping Elbow along with Flow -- Part 5
Griping Elbow along with Flow -- Part 6
Griping Elbow along with Flow -- Part 7
Griping Elbow along with Flow -- Part 8
Griping Elbow along with Flow -- Part 9
Griping Elbow along with Flow -- Part 10
Applying Strong Grip Techniques in Free Sparring -- Part 1
Applying Strong Grip Techniques in Free Sparring -- Part 2
Applying Strong Grip Techniques in Free Sparring -- Part 3
Applying Strong Grip Techniques in Free Sparring -- Part 4
Applying Strong Grip Techniques in Free Sparring -- Part 5
Applying Strong Grip Techniques in Free Sparring -- Part 6
Applying Strong Grip Techniques in Free Sparring -- Part 7
Applying Strong Grip Techniques in Free Sparring -- Part 8
 Applying Strong Grip Techniques in Free Sparring -- Part 9
Effectve Tactics and Techniques against Boexers -- Part 1
Effectve Tactics and Techniques against Boexers -- Part 2
Effectve Tactics and Techniques against Boexers -- Part 3
Effectve Tactics and Techniques against Boexers -- Part 4
Effectve Tactics and Techniques against Boexers -- Part 5
Effectve Tactics and Techniques against Boexers -- Part 6
Effectve Tactics and Techniques against Boexers -- Part 7
Effectve Tactics and Techniques against Boexers -- Part 8
Effectve Tactics and Techniques against Boexers -- Part 9
Effectve Tactics and Techniques against Boexers -- Part 10
Effectve Tactics and Techniques against Boexers -- Part 11
Effectve Tactics and Techniques against Boexers -- Part 12
Effectve Tactics and Techniques against Boexers -- Part 13
Eagle Claw England -- Eagle Claw 04
It is Technically Easier to Defeat Kick-Boxers -- Overview
Two Effective Tactics against Kick-Boxers -- Overview
How to Fell Kick-Boxers Effectively -- Overview
How to Handle an Attacker who Keeps Kicking You -- Overview
Revealing Secrets in Handling Taekwondo Exponents -- Overview
Applying Chin-Na and Felling Techniques on Karate Exponents -- Overview
Understanding Opponents is a very Important Aspect of Combat -- Overview
Deflecting Elbow and Knee Strikes of Muay Thai Fighters -- Overview
Counters against Wrestling Shoots and Lifts -- Overview
It is Technically Easier to Defeat Kick-Boxers -- Part 1
 It is Technically Easier to Defeat Kick-Boxers -- Part 2
It is Technically Easier to Defeat Kick-Boxers -- Part 3
It is Technically Easier to Defeat Kick-Boxers -- Part 4
It is Technically Easier to Defeat Kick-Boxers -- Part 5
It is Technically Easier to Defeat Kick-Boxers -- Part 6
It is Technically Easier to Defeat Kick-Boxers -- Part 7
It is Technically Easier to Defeat Kick-Boxers -- Part 8
Two Effective Tactics against Kick-Boxers -- Part 1
Two Effective Tactics against Kick-Boxers -- Part 2
Two Effective Tactics against Kick-Boxers -- Part 3
Two Effective Tactics against Kick-Boxers -- Part 4
Two Effective Tactics against Kick-Boxers -- Part 5
Two Effective Tactics against Kick-Boxers -- Part 6
Two Effective Tactics against Kick-Boxers -- Part 7
How to Fell Kick-Boxers Effectively -- Part 1
How to Fell Kick-Boxers Effectively -- Part 2
How to Fell Kick-Boxers Effectively -- Part 3
How to Fell Kick-Boxers Effectively -- Part 4
How to Fell Kick-Boxers Effectively -- Part 5
How to Fell Kick-Boxers Effectively -- Part 6
How to Fell Kick-Boxers Effectively -- Part 7
How to Fell Kick-Boxers Effectively -- Part 8
How to Handle an Attacker who Keeps Kicking You -- Part 1
How to Handle an Attacker who Keeps Kicking You -- Part 2
How to Handle an Attacker who Keeps Kicking You -- Part 3
How to Handle an Attacker who Keeps Kicking You -- Part 4
How to Handle an Attacker who Keeps Kicking You -- Part 5
How to Handle an Attacker who Keeps Kicking You -- Part 6
How to Handle an Attacker who Keeps Kicking You -- Part 7
How to Handle an Attacker who Keeps Kicking You -- Part 8
 How to Handle an Attacker who Keeps Kicking You -- Part 9
How to Handle an Attacker who Keeps Kicking You -- Part 10
How to Handle an Attacker who Keeps Kicking You -- Part 11
Revealing Secrets in Handling Taekwondo Exponents -- Part 1
Revealing Secrets in Handling Taekwondo Exponents -- Part 2
Revealing Secrets in Handling Taekwondo Exponents -- Part 3
Revealing Secrets in Handling Taekwondo Exponents -- Part 4
Revealing Secrets in Handling Taekwondo Exponents -- Part 5
Revealing Secrets in Handling Taekwondo Exponents -- Part 6
Revealing Secrets in Handling Taekwondo Exponents -- Part 7
Revealing Secrets in Handling Taekwondo Exponents -- Part 8
Applying Chin-Na and Felling Techniques on Karate Exponents -- Part 1
Applying Chin-Na and Felling Techniques on Karate Exponents -- Part 2
Applying Chin-Na and Felling Techniques on Karate Exponents -- Part 3
Applying Chin-Na and Felling Techniques on Karate Exponents -- Part 4
Applying Chin-Na and Felling Techniques on Karate Exponents -- Part 5
Applying Chin-Na and Felling Techniques on Karate Exponents -- Part 6
Applying Chin-Na and Felling Techniques on Karate Exponents -- Part 7
Applying Chin-Na and Felling Techniques on Karate Exponents -- Part 8
Applying Chin-Na and Felling Techniques on Karate Exponents -- Part 9
Applying Chin-Na and Felling Techniques on Karate Exponents -- Part 10
Understanding Opponents is a very Important Aspect of Combat -- Part 1
Understanding Opponents is a very Important Aspect of Combat -- Part 2
Understanding Opponents is a very Important Aspect of Combat -- Part 3
Understanding Opponents is a very Important Aspect of Combat -- Part 4
Understanding Opponents is a very Important Aspect of Combat -- Part 5
Understanding Opponents is a very Important Aspect of Combat -- Part 6
Understanding Opponents is a very Important Aspect of Combat -- Part 7
Understanding Opponents is a very Important Aspect of Combat -- Part 8
Deflecting Elbow and Knee Strikes of Muay Thai Fighters -- Part 1
 Deflecting Elbow and Knee Strikes of Muay Thai
Fighters -- Part 2
Deflecting Elbow and Knee Strikes of Muay Thai
Fighters -- Part 3
Deflecting Elbow and Knee Strikes of Muay Thai
Fighters -- Part 4
Deflecting Elbow and Knee Strikes of Muay Thai
Fighters -- Part 5
Deflecting Elbow and Knee Strikes of Muay Thai
Fighters -- Part 6
Deflecting Elbow and Knee Strikes of Muay Thai Fighters -- Part 7
Counters against Wrestling Shoots and Lifts -- Part 1
Counters against Wrestling Shoots and Lifts -- Part 2
Counters against Wrestling Shoots and Lifts -- Part 3
Counters against Wrestling Shoots and Lifts -- Part 4
Counters against Wrestling Shoots and Lifts -- Part 5
Counters against Wrestling Shoots and Lifts -- Part 6
Counters against Wrestling Shoots and Lifts -- Part 7
Counters against Wrestling Shoots and Lifts -- Part 8
Eagle Claw England -- Videos
Where are the Eagle Claw?
Lift-Hand and Side-Fist of Eagle Claw Kungfu
Linking Combat Sequences into Sets in Eagle Claw Kungfu
Internal Force Training and Solo Sequences
Simple in Form but Sophisticated in Application
Formidable Attacks that may Appear Flowery
Formidable Chin-Na Technique and Counters
Breaking Elbow and Releasing Double Grips
Excellent Chin-Na Techniques for Felling and Controlling Opponents
Hiding Eagle Claws and their Applications in the Open
 Intricate Applications of Eagle Claw Techniques
Felling Opponents even When Arms are Locked
Hooking, Grasping and Other Eagle Claw Techniques
Supportive and Primary Attacks inEagle Claw Kungfu
Odd-Sounding or Poetic but Combat Effective
Eagle Claw Kungfu is a Beautiful, Complete Martial Art
Where are the Eagle Features of this Kungfu Style?
Applying Eagle Claw Techniques against a Boxer
Handling a Boxer's Fast Jabs and Crosses
Do Not Hand your Defeat to your Opponent
Covering your Opponent Adequately and Closing Gap if he Tries to Escape
Handling aBoxer's Hooks
Closing or Intercepting a Boxer's Hooks
Handling a Boxer's Undercuts
Using Techniques for which a Boxer has No Counters
Gripping Elbow Along with Flow
Applying Strong Grip Techniques in Free Sparring
Effective Tactices and Techniques against Boxers
It is Technically Easier to Defeat Kick-boxers
Two Effective Tactics agaisnt Kick-Boexerrs
Felling Kick-Boxers Effortlessly
How to Handle Opponents who Keep Kicking You?
Revealing Grandmaster Wong's Secrets in Handling Taekwondo Exponents
Applying Chin-Na and Felling Techniques on Karate Exponents
Understaning Opponents is a very Important Aspect in Combat
Deflecting Elbow and Knee Strikes of Muay Thai Fighters
Counters against Wrrestling Shoots and Lifts
Videos of Eagle Claw at UK Summer Camp 2009 -- Overview
 Four Gates -- Four Gates 01
Important
Foundation and Signature Greetings -- Part 1
Four Gates -- Four Gates 01
Important
Foundation and Signature Greetings -- Part 1
Important
Foundation and Signature Greetings -- Part 2
Important
Foundation and Signature Greetings -- Part 3
Important
Foundation and Signature Greetings -- Part 4
Important
Foundation and Signature Greetings -- Part 5
Important
Foundation and Signature Greetings -- Part 6
Important
Foundation and Signature Greetings -- Part 7
Important
Foundation and Signature Greetings -- Part 8
Important
Foundation and Signature Greetings -- Part 9
Important
Foundation and Signature Greetings -- part 10
Learning Four Gates in an Hour -- Part 1
Learning Four Gates in an Hour -- Part 2
Learning Four Gates in an Hour -- Part 3
Learning Four Gates in an Hour -- Part 4
Learning Four Gates in an Hour -- Part 5
Learning Four Gates in an Hour -- Part 6
Learning Four Gates in an Hour -- Part 7
Learning Four Gates in an Hour -- Part 8
Some Interesting Questions from Four Gates -- Part 1
Some Interesting Questions from Four Gates -- Part 2
Learning Four Gates in an Hour -- Part 9
Learning Four Gates in an Hour -- Part 10
Learning Four Gates in an Hour -- Part 11
Learning Four Gates in an Hour -- Part 12
Learning Four Gates in an Hour -- Part 13
Learning Four Gates in an Hour -- Part 14
Learning Four Gates in an Hour -- Part 15
Some Interesting Questions from Four Gates -- Part 3
Some Interesting Questions from Four Gates -- Part 4
Some Interesting Questions from Four Gates -- Part 5
 Some Interesting Questions from Four Gates -- Part 6
Some Interesting Questions from Four Gates -- Part 7
Performance of Four Gates with Jing, Qi and Shen -- Part 1
Performance of Four Gates with Jing, Qi and Shen -- Part 2
Performance of Four Gates with Jing, Qi and Shen -- Part 3
Performance of Four Gates with Jing, Qi and Shen -- Part 4
Performance of Four Gates with Jing, Qi and Shen -- Part 5
Some Interesting Questions from Four Gates -- Part 8
Some Interesting Questions from Four Gates -- Part 9
The Magic of Form, Force and Flow -- Part 1
The Magic of Form, Force and Flow -- Part 2
The Magic of Form, Force and Flow -- Part 3
The Magic of Form, Force and Flow -- Part 4
The Magic of Form, Force and Flow -- Part 5
The Magic of Form, Force and Flow -- Part 6
The Magic of Form, Force and Flow -- Part 7
The Magic of Form, Force and Flow -- Part 8
The Magic of Form, Force and Flow -- Part 9
Some Interesting Questions from Four Gates -- Part 10
Some Interesting Questions from Four Gates -- Part 11
Important
Foundation and Signature Greetings -- Overview
Learning Four Gates in an Hour -- Overview
Some Interesting Questions from Four Gates -- Overview
The Magic of Form, Force and Flow -- Overview
Performance of Four Gates with Jing, Qi and Shen -- Overview
Four Gates at the UK Summer Camp of July 2008 -- Overview
 Four Gates -- Four Gates 02
Cross-Roads at Four Gates Set -- Part 1
Four Gates -- Four Gates 02
Cross-Roads at Four Gates Set -- Part 1
Cross-Roads at Four Gates Set -- Part 2
Cross-Roads at Four Gates Set -- Part 3
Cross-Roads at Four Gates Set -- Part 4
Cross-Roads at Four Gates Set -- Part 5
Cross-Roads at Four Gates Set -- Part 6
How to Tell a Master from Ordinary Practitioners -- Part 1
How to Tell a Master from Ordinary Practitioners -- Part 2
How to Tell a Master from Ordinary Practitioners -- Part 3
How to Tell a Master from Ordinary Practitioners -- Part 4
How to Tell a Master from Ordinary Practitioners -- Part 5
How to Tell a Master from Ordinary Practitioners -- Part 6
How to Tell a Master from Ordinary Practitioners -- Part 7
How to Tell a Master from Ordinary Practitioners -- Part 8
How to Tell a Master from Ordinary Practitioners -- Part 9
How to Tell a Master from Ordinary Practitioners -- Part 10
How to Tell a Master from Ordinary Practitioners -- Part 11
How to Tell a Master from Ordinary Practitioners -- Part 12
Some Fine Points in Sequence One -- Part 1
Some Fine Points in Sequence One -- Part 2
Some Fine Points in Sequence One -- Part 3
Some Fine Points in Sequence One -- Part 4
Some Fine Points in Sequence One -- Part 5
Some Fine Points in Sequence One -- Part 6
Some Fine Points in Sequence One -- Part 7
Some Fine Points in Sequence One -- Part 8
Some Fine Points in Sequence One -- Part 9
Some Fine Points in Sequence One -- Part 10
One Hand to Spar, One Hand to Drink Tea -- Part 1
One Hand to Spar, One Hand to Drink Tea -- Part 2
 One Hand to Spar, One Hand to Drink Tea -- Part 3
One Hand to Spar, One Hand to Drink Tea -- Part 4
One Hand to Spar, One Hand to Drink Tea -- Part 5
One Hand to Spar, One Hand to Drink Tea -- Part 6
One Hand to Spar, One Hand to Drink Tea -- Part 7
One Hand to Spar, One Hand to Drink Tea -- Part 8
One Hand to Spar, One Hand to Drink Tea -- Part 9
One Hand to Spar, One Hand to Drink Tea -- Part 10
Some Details on How to Use Just One Hand in Combat -- Part 1
Some Details on How to Use Just One Hand in Combat -- Part 2
Some Details on How to Use Just One Hand in Combat -- Part 3
Some Details on How to Use Just One Hand in Combat -- Part 4
Some Details on How to Use Just One Hand in Combat -- Part 5
Some Details on How to Use Just One Hand in Combat -- Part 6
Some Details on How to Use Just One Hand in Combat -- Part 7
Some Details on How to Use Just One Hand in Combat -- Part 8
Some Details on How to Use Just One Hand in Combat -- Part 9
Some Details on How to Use Just One Hand in Combat -- Part 10
Usiing Just One Hand to Defend against All Forms of Attacks -- Part 1
Usiing Just One Hand to Defend against All Forms of Attacks -- Part 2
Usiing Just One Hand to Defend against All Forms of Attacks -- Part 3
Usiing Just One Hand to Defend against All Forms of Attacks -- Part 4
Usiing Just One Hand to Defend against All Forms of Attacks -- Part 5
Usiing Just One Hand to Defend against All Forms of Attacks -- Part 6
Usiing Just One Hand to Defend against All Forms of Attacks -- Part 7
Usiing Just One Hand to Defend against All Forms of Attacks -- Part 8
Usiing Just One Hand to Defend against All Forms of Attacks -- Part 9
Usiing Just One Hand to Defend against All Forms of Attacks -- Part 10
Usiing Just One Hand to Defend against All Forms of Attacks -- Part 11
Usiing Just One Hand to Defend against All Forms of Attacks -- Part 12
 Cross-Roads at Four Gates Set -- Overview
How to Tell a Master from Ordinary Practitioners -- Overview
Some Fine Points in Sequence One -- Overview
One Hand to Spar, One Hand to Drink Tea -- Overview
Some Details on How to Use Just One Hand in Combat -- Overview
Usiing Just One Hand to Defend against All Forms of Attacks -- Overview
Four Gates -- Four Gates 03
Substituting a Planned Attack and Countering a Whirlwind Kick -- Part 1
Substituting a Planned Attack and Countering a Whirlwind Kick -- Part 2
Substituting a Planned Attack and Countering a Whirlwind Kick -- Part 3
Substituting a Planned Attack and Countering a Whirlwind Kick -- Part 4
Substituting a Planned Attack and Countering a Whirlwind Kick -- Part 5
Substituting a Planned Attack and Countering a Whirlwind Kick -- Part 6
Substituting a Planned Attack and Countering a Whirlwind Kick -- Part 7
Substituting a Planned Attack and Countering a Whirlwind Kick -- Part 8
Substituting a Planned Attack and Countering a Whirlwind Kick -- Part 9
Substituting a Planned Attack and Countering a Whirlwind Kick -- Part 10
Substituting a Planned Attack and Countering a Whirlwind Kick -- Part 11
Substituting a Planned Attack and Countering a Whirlwind Kick -- Part 12
Sophisticated Techniques using the Tactic of No Defence Direct Counter -- Part 1
Sophisticated Techniques using the Tactic of No Defence Direct Counter -- Part 2
Sophisticated Techniques using the Tactic of No Defence Direct Counter -- Part 3
Sophisticated Techniques using the Tactic of No Defence Direct Counter -- Part 4
Sophisticated Techniques using the Tactic of No Defence Direct Counter -- Part 5
Sophisticated Techniques using the Tactic of No Defence Direct Counter -- Part 6
Sophisticated Techniques using the Tactic of No Defence Direct Counter -- Part 7
Sophisticated Techniques using the Tactic of No Defence Direct Counter -- Part 8
 Sophisticated Techniques using the Tactic of No
Defence Direct Counter -- Part 9
Sophisticated Techniques using the Tactic of No
Defence Direct Counter -- Part 10
Sophisticated Techniques using the Tactic of No
Defence Direct Counter -- Part 11
Sophisticated Techniques using the Tactic of No
Defence Direct Counter -- Part 12
How to be Fast and Forceful, but Without Panting
or Feeling Rired -- Part 1
How to be Fast and Forceful, but Without Panting
or Feeling Rired -- Part 2
How to be Fast and Forceful, but Without Panting or Feeling Rired -- Part 3
How to be Fast and Forceful, but Without Panting or Feeling Rired -- Part 4
How to be Fast and Forceful, but Without Panting or Feeling Rired -- Part 5
How to be Fast and Forceful, but Without Panting or Feeling Rired -- Part 6
How to be Fast and Forceful, but Without Panting or Feeling Rired -- Part 7
How to be Fast and Forceful, but Without Panting or Feeling Rired -- Part 8
How to be Fast and Forceful, but Without Panting or Feeling Rired -- Part 9
Pressing Attacks, Chin-Na and Taming Hands -- Part 1
Pressing Attacks, Chin-Na and Taming Hands -- Part 2
Pressing Attacks, Chin-Na and Taming Hands -- Part 3
Pressing Attacks, Chin-Na and Taming Hands -- Part 4
Pressing Attacks, Chin-Na and Taming Hands -- Part 5
Pressing Attacks, Chin-Na and Taming Hands -- Part 6
Pressing Attacks, Chin-Na and Taming Hands -- Part 7
Pressing Attacks, Chin-Na and Taming Hands -- Part 8
Pressing Attacks, Chin-Na and Taming Hands -- Part 9
Chin-Na and Tiger-Claw -- Part 1
Chin-Na and Tiger-Claw -- Part 2
Chin-Na and Tiger-Claw -- Part 3
Chin-Na and Tiger-Claw -- Part 4
Chin-Na and Tiger-Claw -- Part 5
Chin-Na and Tiger-Claw -- Part 6
Chin-Na and Tiger-Claw -- Part 7
Chin-Na and Tiger-Claw -- Part 8
 Chin-Na and Tiger-Claw -- Part 9
Chin-Na and Tiger-Claw -- Part 10
Chin-Na and Tiger-Claw -- Part 11
Chin-Na and Tiger-Claw -- Part 12
Chin-Na and Tiger-Claw -- Part 13
Unicorn Step and Poisonous Snake Basking in Mist -- Part 1
Unicorn Step and Poisonous Snake Basking in Mist -- Part 2
Unicorn Step and Poisonous Snake Basking in Mist -- Part 3
Unicorn Step and Poisonous Snake Basking in Mist -- Part 4
Unicorn Step and Poisonous Snake Basking in Mist -- Part 5
Unicorn Step and Poisonous Snake Basking in Mist -- Part 6
Unicorn Step and Poisonous Snake Basking in Mist -- Part 7
Unicorn Step and Poisonous Snake Basking in Mist -- Part 8
Unicorn Step and Poisonous Snake Basking in Mist -- Part 9
Unicorn Step and Poisonous Snake Basking in Mist -- Part 10
Unicorn Step and Poisonous Snake Basking in Mist -- Part 11
Unicorn Step and Poisonous Snake Basking in Mist -- Part 12
You may Choose to Apply the Same Techniques at an Elementary
or an Advanced Level in the Same Combat Situations -- Part 1
You may Choose to Apply the Same Techniques at an Elementary
or an Advanced Level in the Same Combat Situations -- Part 2
You may Choose to Apply the Same Techniques at an Elementary
or an Advanced Level in the Same Combat Situations -- Part 3
You may Choose to Apply the Same Techniques at an Elementary
or an Advanced Level in the Same Combat Situations -- Part 4
You may Choose to Apply the Same Techniques at an Elementary
or an Advanced Level in the Same Combat Situations -- Part 5
You may Choose to Apply the Same Techniques at an Elementary
or an Advanced Level in the Same Combat Situations -- Part 6
You may Choose to Apply the Same Techniques at an Elementary
or an Advanced Level in the Same Combat Situations -- Part 7
You may Choose to Apply the Same Techniques at an Elementary
or an Advanced Level in the Same Combat Situations -- Part 8
You may Choose to Apply the Same Techniques at an Elementary
or an Advanced Level in the Same Combat Situations -- Part
You 9may Choose to Apply the Same Techniques at an Elementary
or an Advanced Level in the Same Combat Situations -- Part 10
Amazing Leg Techniques for Defence and Counters -- Part 1
Amazing Leg Techniques for Defence and Counters -- Part 2
Amazing Leg Techniques for Defence and Counters -- Part 3
 Amazing Leg Techniques for Defence and Counters -- Part 4
Amazing Leg Techniques for Defence and Counters -- Part 5
Amazing Leg Techniques for Defence and Counters -- Part 6
Amazing Leg Techniques for Defence and Counters -- Part 7
Amazing Leg Techniques for Defence and Counters -- Part 8
Amazing Leg Techniques for Defence and Counters -- Part 9
Amazing Leg Techniques for Defence and Counters -- Part 10
The Marvels of Catching Tiger in the Mountain -- Part 1
The Marvels of Catching Tiger in the Mountain -- Part 2
The Marvels of Catching Tiger in the Mountain -- Part 3
The Marvels of Catching Tiger in the Mountain -- Part 4
The Marvels of Catching Tiger in the Mountain -- Part 5
The Marvels of Catching Tiger in the Mountain -- Part 6
The Marvels of Catching Tiger in the Mountain -- Part 7
The Marvels of Catching Tiger in the Mountain -- Part 8
The Marvels of Catching Tiger in the Mountain -- Part 9
The Marvels of Catching Tiger in the Mountain -- Part 10
The Marvels of Catching Tiger in the Mountain -- Part 11
Practicing Combat Sequences for Free Sparring and Real Fighting -- Part 1
Practicing Combat Sequences for Free Sparring and Real Fighting -- Part 2
Practicing Combat Sequences for Free Sparring and Real Fighting -- Part 3
Practicing Combat Sequences for Free Sparring and Real Fighting -- Part 4
Practicing Combat Sequences for Free Sparring and Real Fighting -- Part 5
Practicing Combat Sequences for Free Sparring and Real Fighting -- Part 6
Practicing Combat Sequences for Free Sparring and Real Fighting -- Part 7
Practicing Combat Sequences for Free Sparring and Real Fighting -- Part 8
Practicing Combat Sequences for Free Sparring and Real Fighting -- Part 9
Some Amazing Leg Techniques and Ground Fighting -- Part 1
Some Amazing Leg Techniques and Ground Fighting -- Part 2
Some Amazing Leg Techniques and Ground Fighting -- Part 3
 Some Amazing Leg Techniques and Ground Fighting -- Part 4
Some Amazing Leg Techniques and Ground Fighting -- Part 5
Some Amazing Leg Techniques and Ground Fighting -- Part 6
Some Amazing Leg Techniques and Ground Fighting -- Part 7
Some Amazing Leg Techniques and Ground Fighting -- Part 8
Yellow Bird, Rising Dragon and Galloping Tiger -- Part 1
Yellow Bird, Rising Dragon and Galloping Tiger -- Part 2
Yellow Bird, Rising Dragon and Galloping Tiger -- Part 3
Yellow Bird, Rising Dragon and Galloping Tiger -- Part 4
Yellow Bird, Rising Dragon and Galloping Tiger -- Part 5
Yellow Bird, Rising Dragon and Galloping Tiger -- Part 6
Yellow Bird, Rising Dragon and Galloping Tiger -- Part 7
Yellow Bird, Rising Dragon and Galloping Tiger -- Part 8
Yellow Bird, Rising Dragon and Galloping Tiger -- Part 9
Yellow Bird, Rising Dragon and Galloping Tiger -- Part 10
Yellow Bird, Rising Dragon and Galloping Tiger -- Part 11
Kungfu Patterns are as Beautiful to Watch as they are Effective for Combat -- Part 1
Kungfu Patterns are as Beautiful to Watch as they are Effective for Combat -- Part 2
Kungfu Patterns are as Beautiful to Watch as they are Effective for Combat -- Part 3
Kungfu Patterns are as Beautiful to Watch as they are Effective for Combat -- Part 4
Kungfu Patterns are as Beautiful to Watch as they are Effective for Combat -- Part 5
Kungfu Patterns are as Beautiful to Watch as they are Effective for Combat -- Part 6
Kungfu Patterns are as Beautiful to Watch as they are Effective for Combat -- Part 7
Kungfu Patterns are as Beautiful to Watch as they are Effective for Combat -- Part 8
Kungfu Patterns are as Beautiful to Watch as they are Effective for Combat -- Part 9
Kungfu Patterns are as Beautiful to Watch as they are Effective for Combat -- Part 10
Kungfu Patterns are as Beautiful to Watch as they are Effective for Combat -- Part 11
Kungfu Patterns are as Beautiful to Watch as they are Effective for Combat -- Part 12
Skills and Techniques in Effective Combat -- Part 1
Skills and Techniques in Effective Combat -- Part 2
 Skills and Techniques in Effective Combat -- Part 3
Skills and Techniques in Effective Combat -- Part 4
Skills and Techniques in Effective Combat -- Part 5
Skills and Techniques in Effective Combat -- Part 6
Skills and Techniques in Effective Combat -- Part 7
Skills and Techniques in Effective Combat -- Part 8
Skills and Techniques in Effective Combat -- Part 9
Skills and Techniques in Effective Combat -- Part 10
Skills and Techniques in Effective Combat -- Part 11
Substituting a Planned Attack and Countering a
Whirlwind Kick -- Overview
Sophisticated Techniques using the Tactic of No Defence
Direct Counter -- Overview
How to be Fast and Forceful, but Without Panting or Feeling
Rired -- Overview
Pressing Attacks, Chin-Na and Taming Hands -- Overview
Chin-Na and Tiger-Claw -- Overview
Unicorn Step and Poisonous Snake Basking in Mist -- Overview
You may Choose to Apply the Same Techniques at an Elementary
or an Advanced Level in the Same Combat Situations -- Overview
Amazing Leg Techniques for Defence and Counters -- Overview
The Marvels of Catching Tiger in the Mountain -- Overview
Practicing Combat Sequences for Free Sparring and Real Fighting
-- Overview
Some Amazing Leg Techniques and Ground Fighting -- Overview
Yellow Bird, Rising Dragon and Galloping Tiger -- Overview
Kungfu Patterns are as Beautiful to Watch as they are Effective
for Combat -- Overview
Skills and Techniques in Effective Combat -- Overview
 Four Gates -- Four Gates 04
Linking Combat Sequences into a Combination Set -- Part 1
Four Gates -- Four Gates 04
Linking Combat Sequences into a Combination Set -- Part 1
Linking Combat Sequences into a Combination Set -- Part 2
Linking Combat Sequences into a Combination Set -- Part 3
Linking Combat Sequences into a Combination Set -- Part 4
Linking Combat Sequences into a Combination Set -- Part 5
Linking Combat Sequences into a Combination Set -- Part 6
Linking Combat Sequences into a Combination Set -- Part 7
Linking Combat Sequences into a Combination Set -- Part 8
Linking Combat Sequences into a Combination Set -- Part 9
Linking Combat Sequences into a Combination Set -- Part 10
Linking Combat Sequences into a Combination Set -- Part 11
Linking Combat Sequences into a Combination Set -- Part 12
The Secret of Subtraction and Addition in Combat Training -- Part 1
The Secret of Subtraction and Addition in Combat Training -- Part 2
The Secret of Subtraction and Addition in Combat Training -- Part 3
The Secret of Subtraction and Addition in Combat Training -- Part 4
The Secret of Subtraction and Addition in Combat Training -- Part 5
The Secret of Subtraction and Addition in Combat Training -- Part 6
The Secret of Subtraction and Addition in Combat Training -- Part 7
The Secret of Subtraction and Addition in Combat Training -- Part 8
Shaolin Movements are Technically Faster Than Boxing Movements -- Part 1
Shaolin Movements are Technically Faster Than Boxing Movements -- Part 2
Shaolin Movements are Technically Faster Than Boxing Movements -- Part 3
Shaolin Movements are Technically Faster Than Boxing Movements -- Part 4
Shaolin Movements are Technically Faster Than Boxing Movements -- Part 5
Shaolin Movements are Technically Faster Than Boxing Movements -- Part 6
Shaolin Movements are Technically Faster Than Boxing Movements -- Part 7
Shaolin Movements are Technically Faster Than Boxing Movements -- Part 8
Shaolin Movements are Technically Faster Than Boxing Movements -- Part 9
Using Body-Movement and Interception to Counter a Boxer -- Part 1
 Using Body-Movement and Interception to Counter
a Boxer -- Part 2
Using Body-Movement and Interception to Counter
a Boxer -- Part 3
Using Body-Movement and Interception to Counter
a Boxer -- Part 4
Using Body-Movement and Interception to Counter
a Boxer -- Part 5
Using Body-Movement and Interception to Counter
a Boxer -- Part 6
Using Body-Movement and Interception to Counter
a Boxer -- Part 7
Using Body-Movement and Interception to Counter a Boxer -- Part 8
Using Body-Movement and Interception to Counter a Boxer -- Part 9
Using Body-Movement and Interception to Counter a Boxer -- Part 10
Counters against the Formidable Knee Strike and the Common Shoot -- Part 1
Counters against the Formidable Knee Strike and the Common Shoot -- Part 2
Counters against the Formidable Knee Strike and the Common Shoot -- Part 3
Counters against the Formidable Knee Strike and the Common Shoot -- Part 4
Counters against the Formidable Knee Strike and the Common Shoot -- Part 5
Counters against the Formidable Knee Strike and the Common Shoot -- Part 6
Counters against the Formidable Knee Strike and the Common Shoot -- Part 7
Counters against the Formidable Knee Strike and the Common Shoot -- Part 8
Counters against the Formidable Knee Strike and the Common Shoot -- Part 9
Counters against the Formidable Knee Strike and the Common Shoot -- Part 10
Counters against the Formidable Knee Strike and the Common Shoot -- Part 11
Linking Combat Sequences into a Combination Set -- Overview
The Secret of Subtraction and Addition in Combat Training -- Overview
Shaolin Movements are Technically Faster Than Boxing Movements -- Overview
Using Body-Movement and Interception to Counter a Boxer -- Overview
Counters against the Formidable Knee Strike and the Common Shoot -- Overview
 Four Gates -- Four Gates Old
Four Gates 1980s
Four Gates -- Four Gates Old
Four Gates 1980s
Four Gates: Solo -- Part 1
Four Gates: Solo -- Part 2
Four Gates: Solo -- Part 3
Four Gates: Solo -- Part 4
Four Gates: Sparring -- Part 1
Four Gates: Sparring -- Part 2
Four Gates: Sparring -- Part 3
Four Gates: Sparring -- Part 4
Four Gates -- Videos
Four Gates Combination Set 2008 -- Part 1
Four Gates Combination Set 2008 -- Part 2
Important Foundation and Signature Greetings
Learning Four Gates in an Hour!
Some Interesting Questions from Four Gates
Magic of Form, Force and Flow
Performance of Four Gates with Jing, Qi and Shen
The Cross-Roads at Four Gates Set
How to Tell a Master from Ordinary Practioners
Some Fine Points in Sequence 1
One Hand to Spar, One Hand to Drink Tea
Some Details on How to Use Just One Hand in Combat
Using Just One Hand to Defend against All Forms of Attack
Substitue a Planned Attack and Countering a Whirlwind Kick
Sophisticated Techniques using Tactic of No Defence Direct Counter
How to be Fast and Forceful Without Panting and Feeling Tired
Pressing Attacks, Chin-Na and Taming Hands
Chin-Na and Tiger-Claw in Four Gates
Unicorn Step and Poisonous Snake Basking in Mist
Applying the Same Technique at Elementary or Advaced Level in Same Combat Situations
 Amazing Leg Techniques for Attacks and Counters
Marvels of Catching Tiger in Mountain
Practicing Combat Sequences for Free Sparring
and Real Fighting
Some Amazing Techniques and Ground Fighting
Yellow Bird, Rising Dragon and Galloping Tiger
Kungfu Patterns are as Beautiful to Watch as
they are Effective for Combat
Skills and Techniques for Combat
Linking Combat Sequences into a Combination Set
Secrets of Subtraction and Addition in Combat
Sequence Training
Shaolin Movements are Technically Faster than Boxing Movements
Using Body-Movement and Interception to Counter a Boxer
Counters against the Formidable Knee Strikes and the Common Shoot
Four Gates at UK Summer Camp 2008 -- Overview
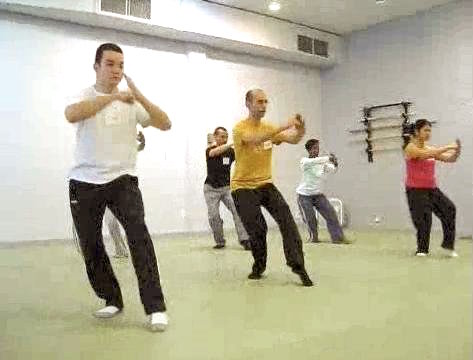 Four Sequence Sets
4 Shaolin Abridged Combat Sequences
Four Sequence Sets
4 Shaolin Abridged Combat Sequences
Four Abridged Shaolin Combat Sequences
Four Abridged Shaolin Combat Sequences -- Part 1
Four Abridged Shaolin Combat Sequences -- Part 2
Four Abridged Shaolin Combat Sequences -- Part 3
Four Abridged Shaolin Combat Sequences -- Part 4
Four Abridged Shaolin Combat Sequences -- Part 5
Four Abridged Shaolin Combat Sequences -- Part 6
Four Abridged Shaolin Combat Sequences -- Part 7
Four Abridged Shaolin Combat Sequences -- Part 8
Lohan Tames Tiger 2008 in Pictures
Lohan Tames Tiger Set
Four Abridged Shaolin Combat Sequences -- Part 9
Four Abridged Shaolin Combat Sequences -- Part 10
Four Abridged Shaolin Combat Sequences -- Part 11
Four Abridged Shaolin Combat Sequences -- Part 12
Four Abridged Shaolin Combat Sequences -- Overview
Germany 2008
How you can Apply Shaolin Kungfu against Boxing
Applying Shaolin Kungfu against Other Martial Arts -- Part 1
Applying Shaolin Kungfu against Other Martial Arts -- Part 2
Applying Shaolin Kungfu against Other Martial Arts -- Part 3
Applying Shaolin Kungfu against Other Martial Arts -- Part 4
Applying Shaolin Kungfu against Other Martial Arts -- Part 5
Applying Shaolin Kungfu against Other Martial Arts -- Part 6
Applying Shaolin Kungfu against Other Martial Arts -- Part 7
Applying Shaolin Kungfu against Other Martial Arts -- Part 8
Applying Shaolin Kungfu against Other Martial Arts -- Part 9
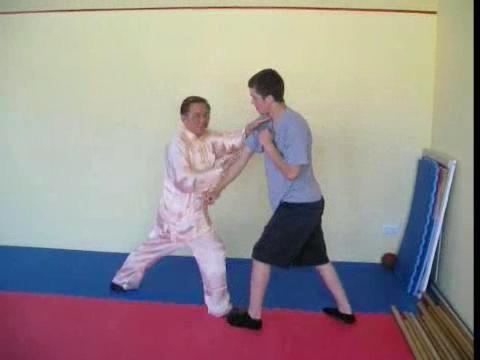 Applying the Tactic of Chase, Cover and Strike against
Boxers -- Part 1
Applying the Tactic of Chase, Cover and Strike against
Boxers -- Part 2
Applying the Tactic of Chase, Cover and Strike against
Boxers -- Part 3
Applying the Tactic of Chase, Cover and Strike against
Boxers -- Part 4
Applying the Tactic of Chase, Cover and Strike against
Boxers -- Part 5
Applying the Tactic of Chase, Cover and Strike against
Boxers -- Part 6
Applying the Tactic of Chase, Cover and Strike against Boxers -- Part 7
Applying the Tactic of Chase, Cover and Strike against Boxers -- Part 8
Applying the Tactic of Chase, Cover and Strike against Boxers -- Part 9
Effective Shaolin Techniques and Tactics against Kick-Boxing -- Part 1
Effective Shaolin Techniques and Tactics against Kick-Boxing -- Part 2
Effective Shaolin Techniques and Tactics against Kick-Boxing -- Part 3
Effective Shaolin Techniques and Tactics against Kick-Boxing -- Part 4
Effective Shaolin Techniques and Tactics against Kick-Boxing -- Part 5
Effective Shaolin Techniques and Tactics against Kick-Boxing -- Part 6
Effective Shaolin Techniques and Tactics against Kick-Boxing -- Part 7
Effective Shaolin Techniques and Tactics against Kick-Boxing -- Part 8
Effective Shaolin Techniques and Tactics against Kick-Boxing -- Part 9
Effective Shaolin Techniques and Tactics against Kick-Boxing -- Part 10
Intercepting Fast Punches and Striking Kicking Leg -- Part 1
Intercepting Fast Punches and Striking Kicking Leg -- Part 2
Intercepting Fast Punches and Striking Kicking Leg -- Part 3
Intercepting Fast Punches and Striking Kicking Leg -- Part 4
Intercepting Fast Punches and Striking Kicking Legg -- Part 5
Intercepting Fast Punches and Striking Kicking Leg -- Part 6
Intercepting Fast Punches and Striking Kicking Leg -- Part 7
Intercepting Fast Punches and Striking Kicking Leg -- Part 8
Shaolin Counters against Sweeping Kicks and Knee Jabs -- Part 1
Shaolin Counters against Sweeping Kicks and Knee Jabs -- Part 2
Shaolin Counters against Sweeping Kicks and Knee Jabs -- Part 3
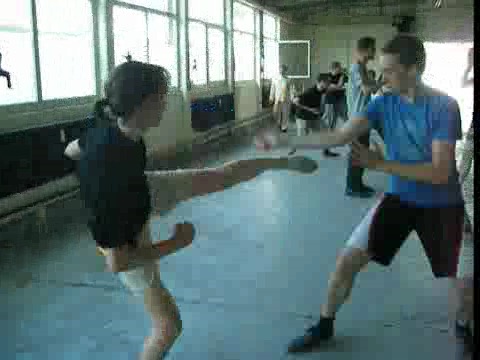 Shaolin Counters against Sweeping Kicks and Knee
Jabs -- Part 4
Shaolin Counters against Sweeping Kicks and Knee
Jabs -- Part 5
Shaolin Counters against Sweeping Kicks and Knee
Jabs -- Part 6
Shaolin Counters against Sweeping Kicks and Knee
Jabs -- Part 7
Shaolin Counters against Sweeping Kicks and Knee
Jabs -- Part 8
Shaolin Counters against Sweeping Kicks and Knee
Jabs -- Part 9
Handling Kick-Boxers and Muay Thai Fighter -- Part 1
Handling Kick-Boxers and Muay Thai Fighter -- Part 2
Handling Kick-Boxers and Muay Thai Fighter -- Part 3
Handling Kick-Boxers and Muay Thai Fighter -- Part 4
Handling Kick-Boxers and Muay Thai Fighter -- Part 5
Handling Kick-Boxers and Muay Thai Fighter -- Part 6
Handling Kick-Boxers and Muay Thai Fighter -- Part 7
Handling Kick-Boxers and Muay Thai Fighter -- Part 8
Handling Kick-Boxers and Muay Thai Fighter -- Part 9
Counters against Knee Strikes,
Elbow Strikes and Elbow Dislocations -- Part 1
Counters against Knee Strikes,
Elbow Strikes and Elbow Dislocations -- Part 2
Counters against Knee Strikes,
Elbow Strikes and Elbow Dislocations -- Part 3
Counters against Knee Strikes,
Elbow Strikes and Elbow Dislocations -- Part 4
Counters against Knee Strikes,
Elbow Strikes and Elbow Dislocations -- Part 5
Counters against Knee Strikes,
Elbow Strikes and Elbow Dislocations -- Part 6
Counters against Knee Strikes,
Elbow Strikes and Elbow Dislocations -- Part 7
Counters against Knee Strikes,
Elbow Strikes and Elbow Dislocations -- Part 9
Counters against Knee Strikes,
Elbow Strikes and Elbow Dislocations -- Part 10
Counters against Knee Strikes,
Elbow Strikes and Elbow Dislocations -- Part 11
Effective Wqys to Handle Boxers -- Part 1
Effective Wqys to Handle Boxers -- Part 2
Effective Wqys to Handle Boxers -- Part 3
Effective Wqys to Handle Boxers -- Part 4
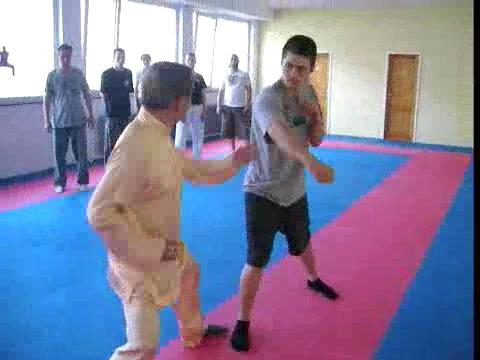 Effective Wqys to Handle Boxers -- Part 5
Effective Wqys to Handle Boxers -- Part 6
Effective Wqys to Handle Boxers -- Part 7
Effective Wqys to Handle Boxers -- Part 8
Effective Wqys to Handle Boxers -- Part 9
Effective Wqys to Handle Boxers -- Part 10
Effective Wqys to Handle Boxers -- Part 11
Counters against Kick-Boxing and Wrestling Attacks -- Part 1
Counters against Kick-Boxing and Wrestling Attacks -- Part 2
Counters against Kick-Boxing and Wrestling Attacks -- Part 3
Counters against Kick-Boxing and Wrestling Attacks -- Part 4
Counters against Kick-Boxing and Wrestling Attacks -- Part 5
Counters against Kick-Boxing and Wrestling Attacks -- Part 6
Counters against Kick-Boxing and Wrestling Attacks -- Part 7
Counters against Kick-Boxing and Wrestling Attacks -- Part 8
The Eight Distilled Combat Sequences -- Part 1
The Eight Distilled Combat Sequences -- Part 2
The Eight Distilled Combat Sequences -- Part 3
The Eight Distilled Combat Sequences -- Part 4
The Eight Distilled Combat Sequences -- Part 5
The Eight Distilled Combat Sequences -- Part 6
The Eight Distilled Combat Sequences -- Part 7
The Eight Distilled Combat Sequences -- Part 8
The Eight Distilled Combat Sequences -- Part 9
Applying Shaolin Kungfu against Other Martial Arts -- Overview
Applying the Tactic of Chase, Cover and Strike against Boxers -- Overview
Effective Shaolin Techniques and Tactics against Kick-Boxing -- Overview
Intercepting Fast Punches and Striking Kicking Leg -- Overview
Shaolin Counters against Sweeping Kicks and Knee Jabs -- Overview
Handling Kick-Boxers and Muay Thai Fighter -- Overview
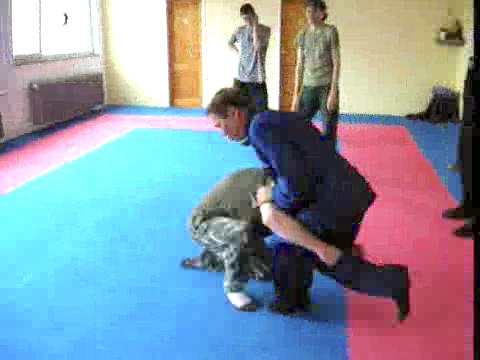 Counters against Knee Strikes, Elbow
Strikes and Elbow Dislocations -- Overview
Effective Wqys to Handle Boxers -- Overview
Counters against Kick-Boxing and Wrestling
Attacks -- Overview
The Eight Distilled Combat Sequences -- Overview
How you can Apply Shaolin Kungfu against
Kick-Boxing -- Overview
Without Titles -- Overview
Selection from Intensive Shaolin Kungfu Course in
Frankfurt -- Overview
Germany 2008 -- Videos
Applying Shaolin Kungfu against Other Martial Arts
Applying the
Tactic of Chase, Cover and Strike agaimnst Boxers
Effective Shaolin Techniques and Tactics against Kick-Boxing
Intercepting Fast Punches and Striking Striking Kicking Legs
Shaolin Counters against Sweeping Kicks and Knee Jabs
Handling Kick-Boxers and Muay Thai Fighters
Counters against Knee Strikes, Elbow Strikes and Elbow Dislocations
Effective Ways to Handle Boxers
Counters against Kick-Boxing and Wrestling Attacks
The Eight Distilled Combat Sequences of Shaolin Kungfu
Videos on Conunters against Muay Thai Attacks -- Old
Videos on Conunters against Muay Thai Attacks -- Overview
 Portugal Lion Dance
Impromptu Deonstration by Grandmaster Wong -- Part 1
Portugal Lion Dance
Impromptu Deonstration by Grandmaster Wong -- Part 1
Impromptu Deonstration by Grandmaster Wong -- Part 2
Lion Dance by Shaolin Wahnam Portugal, March
2008 -- Overview
Lion Dance by Shaolin Wahnam Portugal, March
2008 -- Part 1
Lion Dance by Shaolin Wahnam Portugal, March
2008 -- Part 2
Lion Dance by Shaolin Wahnam Portugal, March
2008 -- Part 3
Lion Dance by Shaolin Wahnam Portugal, March 2008 -- Part 4
Lion Dance by Shaolin Wahnam Portugal, March 2008 -- Part 5
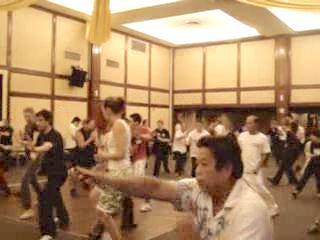 Shaolin Review -- Shaolin 01
Shaolin Kungfu Review Course 2008 -- Overview
Shaolin Review -- Shaolin 01
Shaolin Kungfu Review Course 2008 -- Overview
Cultivation of Jing, Qi and Shen or the Physical, Energy
and Mind -- Overview
Some Finer Points regarding the Bow-Arrow and the
Horse-Riding Stance -- Overview
How to Move Correctly and Speedily in Stances -- Overview
Cultivation of Jing, Qi and Shen or the Physical, Energy
and Mind -- Part 1
Cultivation of Jing, Qi and Shen or the Physical, Energy
and Mind -- Part 2
Cultivation of Jing, Qi and Shen or the Physical, Energy and Mind -- Part 3
Cultivation of Jing, Qi and Shen or the Physical, Energy and Mind -- Part 4
Cultivation of Jing, Qi and Shen or the Physical, Energy and Mind -- Part 5
Cultivation of Jing, Qi and Shen or the Physical, Energy and Mind -- Part 6
Cultivation of Jing, Qi and Shen or the Physical, Energy and Mind -- Part 7
Cultivation of Jing, Qi and Shen or the Physical, Energy and Mind -- Part 8
Cultivation of Jing, Qi and Shen or the Physical, Energy and Mind -- Part 9
Cultivation of Jing, Qi and Shen or the Physical, Energy and Mind -- Part 10
Cultivation of Jing, Qi and Shen or the Physical, Energy and Mind -- Part 11
Cultivation of Jing, Qi and Shen or the Physical, Energy and Mind -- Part 12
Some Finer Points regarding the Bow-Arrow and the Horse-Riding Stance -- Part 1
Some Finer Points regarding the Bow-Arrow and the Horse-Riding Stance -- Part 2
Some Finer Points regarding the Bow-Arrow and the Horse-Riding Stance -- Part 3
Some Finer Points regarding the Bow-Arrow and the Horse-Riding Stance -- Part 4
Some Finer Points regarding the Bow-Arrow and the Horse-Riding Stance -- Part 5
Some Finer Points regarding the Bow-Arrow and the Horse-Riding Stance -- Part 6
Some Finer Points regarding the Bow-Arrow and the Horse-Riding Stance -- Part 7
Some Finer Points regarding the Bow-Arrow and the Horse-Riding Stance -- Part 8
Some Finer Points regarding the Bow-Arrow and the Horse-Riding Stance -- Part 9
Some Finer Points regarding the Bow-Arrow and the Horse-Riding Stance -- Part 10
Some Finer Points regarding the Bow-Arrow and the Horse-Riding Stance -- Part 11
Some Finer Points regarding the Bow-Arrow and the Horse-Riding Stance -- Part 12
Some Finer Points regarding the Bow-Arrow and the Horse-Riding Stance -- Part 13
Some Finer Points regarding the Bow-Arrow and the Horse-Riding Stance -- Part 14
 Some Finer Points regarding the Bow-Arrow and the
Horse-Riding Stance -- Part 15
How to Move Correctly and Speedily in Stances -- Part 1
How to Move Correctly and Speedily in Stances -- Part 2
How to Move Correctly and Speedily in Stances -- Part 3
How to Move Correctly and Speedily in Stances -- Part 4
How to Move Correctly and Speedily in Stances -- Part 5
How to Move Correctly and Speedily in Stances -- Part 6
How to Move Correctly and Speedily in Stances -- Part 7
How to Move Correctly and Speedily in Stances -- Part 8
How to Move Correctly and Speedily in Stances -- Part 9
How to Move Correctly and Speedily in Stances -- Part 10
How to Move Correctly and Speedily in Stances -- Part 11
How to Move Correctly and Speedily in Stances -- Part 12
How to Move Correctly and Speedily in Stances -- Part 13
How to Move Correctly and Speedily in Stances -- Part 14
How to Move Correctly and Speedily in Stances -- Part 15
How to Move Correctly and Speedily in Stances -- Part 16
Shaolin Review -- Shaolin 02
The Mechanics of Exploding Force -- Overview
Exploding Force with Various Patterns -- Overview
Linking Patterns to Form Combat Sequences
-- Overview
Pre-Arranged Sparring to Develop Combat Skills
-- Overview
Important Skills in Combat Sequences 3 and 4 -- Overview
Applying Continuation of Sequence in Sparring
Practice -- Overview
Skilful Manipulation of Combat Sequences
for Sparring -- Overview
The Mechanics of Exploding Force -- Part 1
The Mechanics of Exploding Force -- Part 2
The Mechanics of Exploding Force -- Part 3
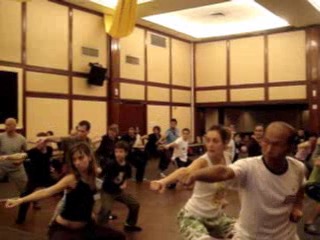 The Mechanics of Exploding Force -- Part 4
The Mechanics of Exploding Force -- Part 5
The Mechanics of Exploding Force -- Part 6
The Mechanics of Exploding Force -- Part 7
The Mechanics of Exploding Force -- Part 8
Exploding Force with Various Patterns -- Part 1
Exploding Force with Various Patterns -- Part 2
Exploding Force with Various Patterns -- Part 3
Exploding Force with Various Patterns -- Part 4
Exploding Force with Various Patterns -- Part 5
Exploding Force with Various Patterns -- Part 6
Exploding Force with Various Patterns -- Part 7
Exploding Force with Various Patterns -- Part 8
Linking Patterns to Form Combat Sequences -- Part 1
Linking Patterns to Form Combat Sequences -- Part 2
Linking Patterns to Form Combat Sequences -- Part 3
Linking Patterns to Form Combat Sequences -- Part 4
Linking Patterns to Form Combat Sequences -- Part 5
Linking Patterns to Form Combat Sequences -- Part 6
Linking Patterns to Form Combat Sequences -- Part 7
Pre-Arranged Sparring to Develop Combat Skills -- Part 1
Pre-Arranged Sparring to Develop Combat Skills -- Part 2
Pre-Arranged Sparring to Develop Combat Skills -- Part 3
Pre-Arranged Sparring to Develop Combat Skills -- Part 4
Pre-Arranged Sparring to Develop Combat Skills -- Part 5
Pre-Arranged Sparring to Develop Combat Skills -- Part 6
Pre-Arranged Sparring to Develop Combat Skills -- Part 7
Pre-Arranged Sparring to Develop Combat Skills -- Part 8
Pre-Arranged Sparring to Develop Combat Skills -- Part 9
Pre-Arranged Sparring to Develop Combat Skills -- Part 10
 Important Skills in Combat Sequences 3 and 4 -- Part 1
Important Skills in Combat Sequences 3 and 4 -- Part 2
Important Skills in Combat Sequences 3 and 4 -- Part 3
Important Skills in Combat Sequences 3 and 4 -- Part 4
Important Skills in Combat Sequences 3 and 4 -- Part 5
Important Skills in Combat Sequences 3 and 4 -- Part 6
Important Skills in Combat Sequences 3 and 4 -- Part 7
Important Skills in Combat Sequences 3 and 4 -- Part 8
Important Skills in Combat Sequences 3 and 4 -- Part 9
Applying Continuation of Sequence in Sparring
Practice -- Part 1
Applying Continuation of Sequence in Sparring Practice -- Part 2
Applying Continuation of Sequence in Sparring Practice -- Part 3
Applying Continuation of Sequence in Sparring Practice -- Part 4
Applying Continuation of Sequence in Sparring Practice -- Part 5
Applying Continuation of Sequence in Sparring Practice -- Part 6
Applying Continuation of Sequence in Sparring Practice -- Part 7
Applying Continuation of Sequence in Sparring Practice -- Part 8
Applying Continuation of Sequence in Sparring Practice -- Part 9
Applying Continuation of Sequence in Sparring Practice -- Part 10
Applying Continuation of Sequence in Sparring Practice -- Part 11
Applying Continuation of Sequence in Sparring Practice -- Part 12
Skilful Manipulation of Combat Sequences for Sparring -- Part 1
Skilful Manipulation of Combat Sequences for Sparring -- Part 2
Skilful Manipulation of Combat Sequences for Sparring -- Part 3
Skilful Manipulation of Combat Sequences for Sparring -- Part 4
Skilful Manipulation of Combat Sequences for Sparring -- Part 5
Skilful Manipulation of Combat Sequences for Sparring -- Part 6
Skilful Manipulation of Combat Sequences for Sparring -- Part 7
Skilful Manipulation of Combat Sequences for Sparring -- Part 8
Skilful Manipulation of Combat Sequences for Sparring -- Part 9
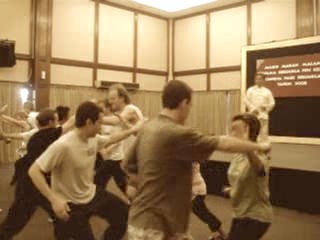 Skilful Manipulation of Combat Sequences for
Sparring -- Part 10
Skilful Manipulation of Combat Sequences for
Sparring -- Part 11
Skilful Manipulation of Combat Sequences for
Sparring -- Part 12
Shaolin Review -- Shaolin 03
Combat Sequence 5: Fierce Tiger Speeds through
Valley -- Overview
Combat Sequence 6: Dark Dragon Draws Water -- Overview
Combat Sequence 7: Chop the Hua Mountain -- Overview
Combat Sequence 8: Horizontally Sweep a Thousand Armies -- Overview
Enjoyjng Chi Flow and Sparring -- Overview
Combat Sequence 5: Fierce Tiger Speeds through Valley -- Part 1
Combat Sequence 5: Fierce Tiger Speeds through Valley -- Part 2
Combat Sequence 5: Fierce Tiger Speeds through Valley -- Part 3
Combat Sequence 5: Fierce Tiger Speeds through Valley -- Part 4
Combat Sequence 5: Fierce Tiger Speeds through Valley -- Part 5
Combat Sequence 5: Fierce Tiger Speeds through Valley -- Part 6
Combat Sequence 5: Fierce Tiger Speeds through Valley -- Part 7
Combat Sequence 6: Dark Dragon Draws Water -- Part 1
Combat Sequence 6: Dark Dragon Draws Water -- Part 2
Combat Sequence 6: Dark Dragon Draws Water -- Part 3
Combat Sequence 6: Dark Dragon Draws Water -- Part 4
Combat Sequence 6: Dark Dragon Draws Water -- Part 5
Combat Sequence 6: Dark Dragon Draws Water -- Part 6
Combat Sequence 6: Dark Dragon Draws Water -- Part 7
Combat Sequence 6: Dark Dragon Draws Water -- Part 8
Combat Sequence 6: Dark Dragon Draws Water -- Part 9
Combat Sequence 6: Dark Dragon Draws Water -- Part 10
Combat Sequence 6: Dark Dragon Draws Water -- Part 11
Combat Sequence 6: Dark Dragon Draws Water -- Part 12
Combat Sequence 6: Dark Dragon Draws Water -- Part 13
Combat Sequence 6: Dark Dragon Draws Water -- Part 14
Combat Sequence 7: Chop the Hua Mountain -- Part 1
Combat Sequence 7: Chop the Hua Mountain -- Part 2
Combat Sequence 7: Chop the Hua Mountain -- Part 3
Combat Sequence 7: Chop the Hua Mountain -- Part 4
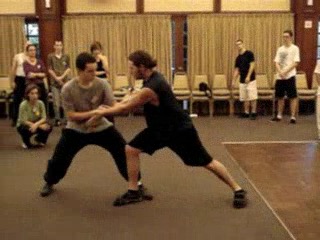 Combat Sequence 7: Chop the Hua Mountain -- Part 5
Combat Sequence 7: Chop the Hua Mountain -- Part 6
Combat Sequence 7: Chop the Hua Mountain -- Part 7
Combat Sequence 7: Chop the Hua Mountain -- Part 8
Combat Sequence 7: Chop the Hua Mountain -- Part 9
Combat Sequence 7: Chop the Hua Mountain -- Part 10
Combat Sequence 7: Chop the Hua Mountain -- Part 11
Combat Sequence 8: Horizontally Sweep a Thousand
Armies -- Part 1
Combat Sequence 8: Horizontally Sweep a Thousand
Armies -- Part 2
Combat Sequence 8: Horizontally Sweep a Thousand Armies -- Part 3
Combat Sequence 8: Horizontally Sweep a Thousand Armies -- Part 4
Combat Sequence 8: Horizontally Sweep a Thousand Armies -- Part 5
Combat Sequence 8: Horizontally Sweep a Thousand Armies -- Part 6
Combat Sequence 8: Horizontally Sweep a Thousand Armies -- Part 7
Combat Sequence 8: Horizontally Sweep a Thousand Armies -- Part 8
Combat Sequence 8: Horizontally Sweep a Thousand Armies -- Part 9
Combat Sequence 8: Horizontally Sweep a Thousand Armies -- Part 10
Combat Sequence 8: Horizontally Sweep a Thousand Armies -- Part 11
Enjoyjng Chi Flow and Sparring -- Part 1
Enjoyjng Chi Flow and Sparring -- Part 2
Enjoyjng Chi Flow and Sparring -- Part 3
Enjoyjng Chi Flow and Sparring -- Part 4
Enjoyjng Chi Flow and Sparring -- Part 5
Enjoyjng Chi Flow and Sparring -- Part 6
Enjoyjng Chi Flow and Sparring -- Part 7
Enjoyjng Chi Flow and Sparring -- Part 8
 Shaolin Review -- Shaolin 04
Overcoming Two Big Problems in Free Sparring and Real
Shaolin Review -- Shaolin 04
Overcoming Two Big Problems in Free Sparring and Real
Fighting -- Overview
Using Modifications when Applying Combat Sequences
-- Overview
Countering Surprised Kicks and Throws while Applying Combat Sequences -- Overview
Combat Sequence 9: the Side-Body Tiger Tail Kick -- Overview
Combat Sequence 10: Heart-Piercing Thrust Kick -- Overview
Intercepting and Countering Ferocious Pressing
Attacks -- Overview
The Important Skills of Coverage and Interception -- Overview
Combat Sequence 11: Deadly Organ-Seeking Kick -- Overview
Combat Sequence 12: Formidable Whirlwind Kick -- Overview
Overcoming Two Big Probklems in Frree Sparring and Real Fighting -- Part 1
Overcoming Two Big Probklems in Frree Sparring and Real Fighting -- Part 2
Overcoming Two Big Probklems in Frree Sparring and Real Fighting -- Part 3
Overcoming Two Big Probklems in Frree Sparring and Real Fighting -- Part 4
Overcoming Two Big Probklems in Frree Sparring and Real Fighting -- Part 5
Overcoming Two Big Probklems in Frree Sparring and Real Fighting -- Part 6
Overcoming Two Big Probklems in Frree Sparring and Real Fighting -- Part 7
Overcoming Two Big Probklems in Frree Sparring and Real Fighting -- Part 8
Overcoming Two Big Probklems in Frree Sparring and Real Fighting -- Part 9
Using Modifications when Applying Combat Sequences -- Part 1
Using Modifications when Applying Combat Sequences -- Part 2
Using Modifications when Applying Combat Sequences -- Part 3
Using Modifications when Applying Combat Sequences -- Part 4
Using Modifications when Applying Combat Sequences -- Part 5
Using Modifications when Applying Combat Sequences -- Part 6
Using Modifications when Applying Combat Sequences -- Part 7
Using Modifications when Applying Combat Sequences -- Part 8
Using Modifications when Applying Combat Sequences -- Part 9
Using Modifications when Applying Combat Sequences -- Part 10
Using Modifications when Applying Combat Sequences -- Part 11
Using Modifications when Applying Combat Sequences -- Part 12
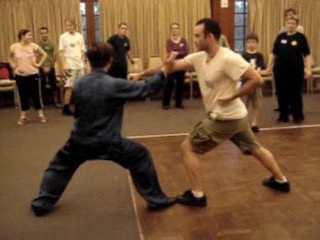 Countering Surprised Kicks and Throws while
Applying Combat Sequences -- Part 1
Countering Surprised Kicks and Throws while
Applying Combat Sequences -- Part 2
Countering Surprised Kicks and Throws while
Applying Combat Sequences -- Part 3
Countering Surprised Kicks and Throws while
Applying Combat Sequences -- Part 4
Countering Surprised Kicks and Throws while
Applying Combat Sequences -- Part 5
Countering Surprised Kicks and Throws while
Applying Combat Sequences -- Part 6
Countering Surprised Kicks and Throws while Applying Combat Sequences -- Part 7
Countering Surprised Kicks and Throws while Applying Combat Sequences -- Part 8
Countering Surprised Kicks and Throws while Applying Combat Sequences -- Part 9
Combat Sequence 9: the Side-Body Tiger Tail Kick -- Part 1
Combat Sequence 9: the Side-Body Tiger Tail Kick -- Part 2
Combat Sequence 9: the Side-Body Tiger Tail Kick -- Part 3
Combat Sequence 9: the Side-Body Tiger Tail Kick -- Part 4
Combat Sequence 9: the Side-Body Tiger Tail Kick -- Part 5
Combat Sequence 9: the Side-Body Tiger Tail Kick -- Part 6
Combat Sequence 9: the Side-Body Tiger Tail Kick -- Part 7
Combat Sequence 9: the Side-Body Tiger Tail Kick -- Part 8
Combat Sequence 9: the Side-Body Tiger Tail Kick -- Part 9
Combat Sequence 10: Heart-Piercing Thrust Kick -- Part 1
Combat Sequence 10: Heart-Piercing Thrust Kick -- Part 2
Combat Sequence 10: Heart-Piercing Thrust Kick -- Part 3
Combat Sequence 10: Heart-Piercing Thrust Kick -- Part 4
Combat Sequence 10: Heart-Piercing Thrust Kick -- Part 5
Combat Sequence 10: Heart-Piercing Thrust Kick -- Part 6
Combat Sequence 10: Heart-Piercing Thrust Kick -- Part 7
Combat Sequence 10: Heart-Piercing Thrust Kick -- Part 8
Combat Sequence 10: Heart-Piercing Thrust Kick -- Part 9
Intercepting and Countering Ferocious Pressing Attacks -- Part 1
Intercepting and Countering Ferocious Pressing Attacks -- Part 2
Intercepting and Countering Ferocious Pressing Attacks -- Part 3
 Intercepting and Countering Ferocious Pressing
Attacks -- Part 4
Intercepting and Countering Ferocious Pressing
Attacks -- Part 5
Intercepting and Countering Ferocious Pressing
Attacks -- Part 6
Intercepting and Countering Ferocious Pressing
Attacks -- Part 7
Intercepting and Countering Ferocious Pressing
Attacks -- Part 8
Intercepting and Countering Ferocious Pressing
Attacks -- Part 9
Intercepting and Countering Ferocious Pressing Attacks -- Part 10
Intercepting and Countering Ferocious Pressing Attacks -- Part 11
Intercepting and Countering Ferocious Pressing Attacks -- Part 12
The Important Skills of Coverage and Interception -- Part 1
The Important Skills of Coverage and Interception -- Part 2
The Important Skills of Coverage and Interception -- Part 3
The Important Skills of Coverage and Interception -- Part 4
The Important Skills of Coverage and Interception -- Part 5
The Important Skills of Coverage and Interception -- Part 6
The Important Skills of Coverage and Interception -- Part 7
The Important Skills of Coverage and Interception -- Part 8
The Important Skills of Coverage and Interception -- Part 9
The Important Skills of Coverage and Interception -- Part 10
The Important Skills of Coverage and Interception -- Part 11
The Important Skills of Coverage and Interception -- Part 12
Combat Sequence 11: Deadly Organ-Seeking Kick -- Part 1
Combat Sequence 11: Deadly Organ-Seeking Kick -- Part 2
Combat Sequence 11: Deadly Organ-Seeking Kick -- Part 3
Combat Sequence 11: Deadly Organ-Seeking Kick -- Part 4
Combat Sequence 11: Deadly Organ-Seeking Kick -- Part 5
Combat Sequence 11: Deadly Organ-Seeking Kick -- Part 6
Combat Sequence 11: Deadly Organ-Seeking Kick -- Part 7
Combat Sequence 11: Deadly Organ-Seeking Kick -- Part 8
Combat Sequence 11: Deadly Organ-Seeking Kick -- Part 9
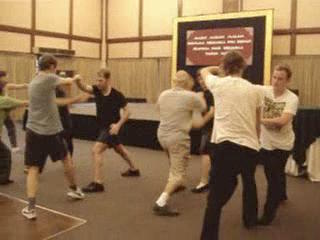 Combat Sequence 11: Deadly Organ-Seeking Kick -- Part 10
Combat Sequence 12: Formidable Whirlwind Kick -- Part 1
Combat Sequence 12: Formidable Whirlwind Kick -- Part 2
Combat Sequence 12: Formidable Whirlwind Kick -- Part 3
Combat Sequence 12: Formidable Whirlwind Kick -- Part 4
Combat Sequence 12: Formidable Whirlwind Kick -- Part 5
Combat Sequence 12: Formidable Whirlwind Kick -- Part 6
Combat Sequence 12: Formidable Whirlwind Kick -- Part 7
Combat Sequence 12: Formidable Whirlwind Kick -- Part 8
Combat Sequence 12: Formidable Whirlwind Kick -- Part 9
Combat Sequence 12: Formidable Whirlwind Kick -- Part 10
Combat Sequence 12: Formidable Whirlwind Kick -- Part 11
Shaolin Review -- Shaolin 05
Combat Sequence 13: Fell Tree with Roots -- Overview
Combat Sequence 14: Lead Horse Backto Stable -- Overview
Combat Sequences 15 and 16: Hoe Field and Push Mountain -- Overview
Many Effective Techniques against Boxers -- Overview
Changing a Boxer's Strength into his Weakness -- Overview
Felling Boxers and Kick-Boxers -- Overview
Plant Willow to Counter Formidable Muay Thai Knee Jabs -- Overview
Combat Sequence 13: Fell Tree with Roots -- Part 1
Combat Sequence 13: Fell Tree with Roots -- Part 2
Combat Sequence 13: Fell Tree with Roots -- Part 3
Combat Sequence 13: Fell Tree with Roots -- Part 4
Combat Sequence 13: Fell Tree with Roots -- Part 5
Combat Sequence 13: Fell Tree with Roots -- Part 6
Combat Sequence 13: Fell Tree with Roots -- Part 7
Combat Sequence 13: Fell Tree with Roots -- Part 8
Combat Sequence 13: Fell Tree with Roots -- Part 9
Combat Sequence 13: Fell Tree with Roots -- Part 10
Combat Sequence 13: Fell Tree with Roots -- Part 11
Combat Sequence 14: Lead Horse Backto Stable -- Part 1
Combat Sequence 14: Lead Horse Backto Stable -- Part 2
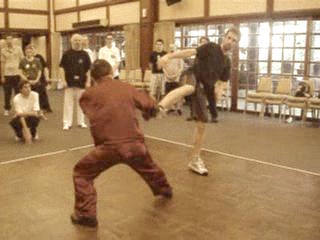 Combat Sequence 14: Lead Horse Backto Stable -- Part 3
Combat Sequence 14: Lead Horse Backto Stable -- Part 4
Combat Sequence 14: Lead Horse Backto Stable -- Part 5
Combat Sequence 14: Lead Horse Backto Stable -- Part 6
Combat Sequence 14: Lead Horse Backto Stable -- Part 7
Combat Sequence 14: Lead Horse Backto Stable -- Part 8
Combat Sequences 15 and 16: Hoe Field and Push Mountain
-- Part 1
Combat Sequences 15 and 16: Hoe Field and Push Mountain
-- Part 2
Combat Sequences 15 and 16: Hoe Field and Push Mountain
-- Part 3
Combat Sequences 15 and 16: Hoe Field and Push Mountain -- Part 4
Combat Sequences 15 and 16: Hoe Field and Push Mountain -- Part 5
Combat Sequences 15 and 16: Hoe Field and Push Mountain -- Part 6
Combat Sequences 15 and 16: Hoe Field and Push Mountain -- Part 7
Combat Sequences 15 and 16: Hoe Field and Push Mountain -- Part 8
Combat Sequences 15 and 16: Hoe Field and Push Mountain -- Part 9
Combat Sequences 15 and 16: Hoe Field and Push Mountain -- Part 10
Many Effective Techniques against Boxers -- Part 1
Many Effective Techniques against Boxers -- Part 2
Many Effective Techniques against Boxers -- Part 3
Many Effective Techniques against Boxers -- Part 4
Many Effective Techniques against Boxers -- Part 5
Many Effective Techniques against Boxers -- Part 6
Many Effective Techniques against Boxers -- Part 7
Many Effective Techniques against Boxers -- Part 8
Many Effective Techniques against Boxers -- Part 9
Many Effective Techniques against Boxers -- Part 10
Many Effective Techniques against Boxers -- Part 11
Many Effective Techniques against Boxers -- Part 12
Many Effective Techniques against Boxers -- Part 13
Changing a Boxer's Strength into his Weakness -- Part 1
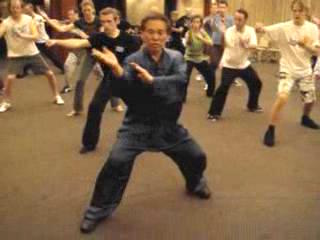 Changing a Boxer's Strength into his Weakness -- Part 2
Changing a Boxer's Strength into his Weakness -- Part 3
Changing a Boxer's Strength into his Weakness -- Part 4
Changing a Boxer's Strength into his Weakness -- Part 5
Changing a Boxer's Strength into his Weakness -- Part 6
Changing a Boxer's Strength into his Weakness -- Part 7
Changing a Boxer's Strength into his Weakness -- Part 8
Changing a Boxer's Strength into his Weakness -- Part 9
Changing a Boxer's Strength into his Weakness -- Part 10
Changing a Boxer's Strength into his Weakness -- Part 11
Felling Boxers and Kick-Boxers -- Part 1
Felling Boxers and Kick-Boxers -- Part 2
Felling Boxers and Kick-Boxers -- Part 3
Felling Boxers and Kick-Boxers -- Part 4
Felling Boxers and Kick-Boxers -- Part 5
Felling Boxers and Kick-Boxers -- Part 6
Felling Boxers and Kick-Boxers -- Part 7
Felling Boxers and Kick-Boxers -- Part 8
Felling Boxers and Kick-Boxers -- Part 9
Felling Boxers and Kick-Boxers -- Part 10
Planting Willow to Counter Formidable Muay Thai Knee Jabs -- Part 1
Planting Willow to Counter Formidable Muay Thai Knee Jabs -- Part 2
Planting Willow to Counter Formidable Muay Thai Knee Jabs -- Part 3
Planting Willow to Counter Formidable Muay Thai Knee Jabs -- Part 4
Planting Willow to Counter Formidable Muay Thai Knee Jabs -- Part 5
Planting Willow to Counter Formidable Muay Thai Knee Jabs -- Part 6
Planting Willow to Counter Formidable Muay Thai Knee Jabs -- Part 7
Planting Willow to Counter Formidable Muay Thai Knee Jabs -- Part 8
Planting Willow to Counter Formidable Muay Thai Knee Jabs -- Part 9
Planting Willow to Counter Formidable Muay Thai Knee Jabs -- Part 10
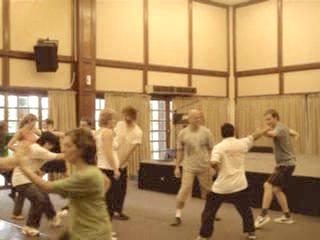 Planting Willow to Counter Formidable Muay Thai
Knee Jabs -- Part 11
Planting Willow to Counter Formidable Muay Thai
Knee Jabs -- Part 12
Shaolin Review -- Videos
Videos of Shaolin Kungfu Review Course -- Overview
Cultivation of Jing, Qi and Shen, or the Physical, Energy
and Mind
Some Finer Points regarding the Bow-Arrrow Stance and
the Horse-Riding Stance
How to Move Correctly and Speedily in Stances
Mechanics of Exploding Force
Exploding Force with Various Patterns
Linking Patterns to Form Combat Sequences
Pre-Arranged Sparring to Develop Combat Skills
Important Skills in Sequences 3 and 4
Applying Continuation of Sequences in Sparring Practice
Skilful Manipulation of Combat Sequences for Sparring
Applying Continuation of Sequences in Sparring Practice
Combat Sequence 6 -- Dark Drragon Draws Water
Combat Sequence 7 -- Chop the Hua Mountain
Combat Sequence 8 -- Horizontally Sweep a Thousand Armies
Enjoying Chi Flow and Sparring and Real Fighting
Overcoming Two Big Problems in Free
Using Modifications when Applying Combat Sequences
Countering Surprised Kicks and Throws while Applying Combat Sequences
Combat Sequence 9 -- Side-Body Tiger Tail Kick
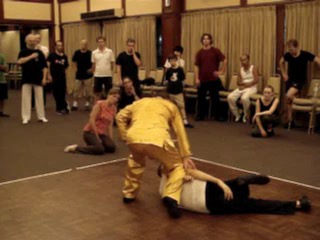 Combat Sequence 10 -- Heart-Piercing Thrust Kick
Intercepting and Countering Ferocious Pressing Attacks
Skills of Coverage and Interception
Combat Sequence 11 -- Deadly Organ-Seeking Kick
Combat Sequence 12 -- Formidable Whirlwind Kick
Combat Sequence 13 -- Fell Tree with Roots
Combat Sequence 14 -- Lead Horse Back to Stable
Combat Sequences 15 and 16 -- Hoe Field and Push Mountain
Many Effective Techniques against Boxers
Changing a Boexer's Strength into his Weakness
Felling Boxers and Kick-Boxers
Planting Willow to Counter Foridable Muay Thai Knee Jabs
 Shaolin 2009 -- Shaolin 01
The Basics -- Part 1
Shaolin 2009 -- Shaolin 01
The Basics -- Part 1
The Basics -- Part 2
The Basics -- Part 3
The Basics -- Part 4
The Basics -- Part 5
The Basics -- Part 6
The Basics -- Part 7
The Basics -- Part 8
The Basics -- Part 9
The Basics -- Part 10
The Basics -- Part 11
Selection from Intensive Shaolin Kungfu Course 2009 -- Overview
The Basics -- Part 12
The Basics -- Part 13
The Basics -- Part 14
The Basics -- Part 15
The Basics -- Part 16
The Basics -- Part 17
The Basics -- Overview
Shaolin 2009 -- Shaolin 02
Important Skills and Techniques -- Part 1
Important Skills and Techniques -- Part 2
Important Skills and Techniques -- Part 3
Important Skills and Techniques -- Part 4
Important Skills and Techniques -- Part 5
Important Skills and Techniques -- Part 6
Important Skills and Techniques -- Part 7
Important Skills and Techniques -- Part 8
Important Skills and Techniques -- Part 9
Important Skills and Techniques -- Part 10
 Important Skills and Techniques -- Part 11
New Skills to Enhance Combat Efficiency -- Part 1
New Skills to Enhance Combat Efficiency -- Part 2
New Skills to Enhance Combat Efficiency -- Part 3
New Skills to Enhance Combat Efficiency -- Part 4
New Skills to Enhance Combat Efficiency -- Part 5
New Skills to Enhance Combat Efficiency -- Part 6
New Skills to Enhance Combat Efficiency -- Part 7
New Skills to Enhance Combat Efficiency -- Part 8
New Skills to Enhance Combat Efficiency -- Part 9
New Skills to Enhance Combat Efficiency -- Part 10
New Skills to Enhance Combat Efficiency -- Part 11
New Skills to Enhance Combat Efficiency -- Part 12
New Skills to Enhance Combat Efficiency -- Part 13
New Skills to Enhance Combat Efficiency -- Part 14
What Make a Master Different from a Novice -- Part
What Make a Master Different from a Novice -- Part 2
What Make a Master Different from a Novice -- Part 3
What Make a Master Different from a Novice -- Part 4
What Make a Master Different from a Novice -- Part 5
What Make a Master Different from a Novice -- Part 6
What Make a Master Different from a Novice -- Part 7
What Make a Master Different from a Novice -- Part 8
What Make a Master Different from a Novice -- Part 9
Pressing Attacks and their Counters -- Part 1
Pressing Attacks and their Counters -- Part 2
Pressing Attacks and their Counters -- Part 3
Pressing Attacks and their Counters -- Part 4
Pressing Attacks and their Counters -- Part 5
Pressing Attacks and their Counters -- Part 6
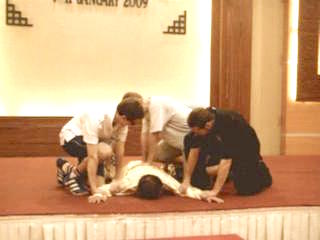 Pressing Attacks and their Counters -- Part 7
Pressing Attacks and their Counters -- Part 8
Pressing Attacks and their Counters -- Part 9
Some Important Considerations when Applying Pressing Attacks -- Part 1
Some Important Considerations when Applying Pressing Attacks -- Part 2
Some Important Considerations when Applying Pressing Attacks -- Part 3
Some Important Considerations when Applying Pressing Attacks -- Part 4
Some Important Considerations when Applying Pressing Attacks -- Part 5
Some Important Considerations when Applying Pressing Attacks -- Part 6
Some Important Considerations when Applying Pressing Attacks -- Part 7
Some Important Considerations when Applying Pressing Attacks -- Part 8
Some Important Considerations when Applying Pressing Attacks -- Part 9
Some Important Considerations when Applying Pressing Attacks -- Part 10
Some Important Considerations when Applying Pressing Attacks -- Part 11
Marvelous Techniquens Beget Marvelous Techniques -- Part 1
Marvelous Techniquens Beget Marvelous Techniques -- Part 2
Marvelous Techniquens Beget Marvelous Techniques -- Part 3
Marvelous Techniquens Beget Marvelous Techniques -- Part 4
Marvelous Techniquens Beget Marvelous Techniques -- Part 5
Marvelous Techniquens Beget Marvelous Techniques -- Part 6
Marvelous Techniquens Beget Marvelous Techniques -- Part 7
Marvelous Techniquens Beget Marvelous Techniques -- Part 8
9
Marvelous Techniquens Beget Marvelous Techniques -- Part
Marvelous Techniquens Beget Marvelous Techniques -- Part 10
Marvelous Techniquens Beget Marvelous Techniques -- Part 11
Marvelous Techniquens Beget Marvelous Techniques -- Part 12
Marvelous Techniquens Beget Marvelous Techniques -- Part 13
Marvelous Techniquens Beget Marvelous Techniques -- Part 14
Marvelous Techniquens Beget Marvelous Techniques -- Part 15
Revealing Secrets Hidden in the Open -- Part 1
 Revealing Secrets Hidden in the Open -- Part 2
Revealing Secrets Hidden in the Open -- Part 4
Revealing Secrets Hidden in the Open -- Part 4
Revealing Secrets Hidden in the Open -- Part 5
Revealing Secrets Hidden in the Open -- Part 6
Revealing Secrets Hidden in the Open -- Part 7
Revealing Secrets Hidden in the Open -- Part 8
Revealing Secrets Hidden in the Open -- Part 9
Revealing Secrets Hidden in the Open -- Part 10
Revealing Secrets Hidden in the Open -- Part 11
Revealing Secrets Hidden in the Open -- Part 12
Revealing Secrets Hidden in the Open -- Part 13
Revealing Secrets Hidden in the Open -- Part 14
Revealing Secrets Hidden in the Open -- Part 15
The Tactic of No Defence Direct Counter -- Part 1
The Tactic of No Defence Direct Counter -- Part 2
The Tactic of No Defence Direct Counter -- Part 3
The Tactic of No Defence Direct Counter -- Part 4
The Tactic of No Defence Direct Counter -- Part 5
The Tactic of No Defence Direct Counter -- Part 6
The Tactic of No Defence Direct Counter -- Part 7
The Tactic of No Defence Direct Counter -- Part 8
The Tactic of No Defence Direct Counter -- Part 9
The Tactic of No Defence Direct Counter -- Part 10
The Tactic of No Defence Direct Counter -- Part 11
The Legacy of Uncle Righteousness -- Part 1
The Legacy of Uncle Righteousness -- Part 2
The Legacy of Uncle Righteousness -- Part 3
The Legacy of Uncle Righteousness -- Part 4
The Legacy of Uncle Righteousness -- Part 5
 The Legacy of Uncle Righteousness -- Part 6
The Legacy of Uncle Righteousness -- Part 7
The Legacy of Uncle Righteousness -- Part 8
The Legacy of Uncle Righteousness -- Part 9
The Legacy of Uncle Righteousness -- Part 10
The Legacy of Uncle Righteousness -- Part 11
The Legacy of Uncle Righteousness -- Part 12
Important Skills and Techniques in Covering Opponents
and Bridging Gaps -- Overview
New Skills to Enhance Combat Efficiency -- Overview
What Make a Master Different from a Novice? -- Overview
Pressing Attacks and their Counters -- Overview
Some Important Considerations when Applying Pressing
Attacks-- Overview
Marvelous Techniques Beget Marvelous Techniques -- Overview
Revealing Secrets Hidden in the Open -- Overview
The Tactic of No Defence Direct Counter -- Overview
A Legacy of Uncle Righteousness -- Overview
Shaolin 2009 -- Shaolin 03
Anticipating Opponent's Response and Tricking him to React
the Way you Want -- Part 1
Anticipating Opponent's Response and Tricking him to React
the Way you Want -- Part 2
Anticipating Opponent's Response and Tricking him to React
the Way you Want -- Part 3
Anticipating Opponent's Response and Tricking him to React
the Way you Want -- Part 4
Anticipating Opponent's Response and Tricking him to React
the Way you Want -- Part 5
Anticipating Opponent's Response and Tricking him to React
the Way you Want -- Part 6
Anticipating Opponent's Response and Tricking him to React
the Way you Want -- Part 7
Anticipating Opponent's Response and Tricking him to Reac
t the Way you Want -- Part 8
Anticipating Opponent's Response and Tricking him to React
the Way you Want -- Part 9
Anticipating Opponent's Response and Tricking him to React
the Way you Want -- Part 10
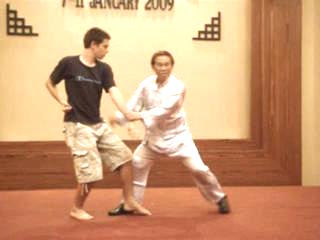 Anticipating Opponent's Response and Tricking him to React
the Way you Want -- Part 11
Anticipating Opponent's Response and Tricking him to React
the Way you Want -- Part 12
Excellent Sequence for Pressing Attack or as Follow-Through
when Opponent Hesitates -- Part 1
Excellent Sequence for Pressing Attack or as Follow-Through
when Opponent Hesitates -- Part 2
Excellent Sequence for Pressing Attack or as Follow-Through
when Opponent Hesitates -- Part 3
Excellent Sequence for Pressing Attack or as Follow-Through
when Opponent Hesitates -- Part 4
Excellent Sequence for Pressing Attack or as Follow-Through
when Opponent Hesitates -- Part 5
Excellent Sequence for Pressing Attack or as Follow-Through
when Opponent Hesitates -- Part 6
Excellent Sequence for Pressing Attack or as Follow-Through
when Opponent Hesitates -- Part 7
Excellent Sequence for Pressing Attack or as Follow-Through
when Opponent Hesitates -- Part 8
Excellent Sequence for Pressing Attack or as Follow-Through
when Opponent Hesitates -- Part 9
Applying Pressing Attack and Responding with Interception -- Part 1
Applying Pressing Attack and Responding with Interception -- Part 2
Applying Pressing Attack and Responding with Interception -- Part 3
Applying Pressing Attack and Responding with Interception -- Part 4
Applying Pressing Attack and Responding with Interception -- Part 5
Applying Pressing Attack and Responding with Interception -- Part 6
Applying Pressing Attack and Responding with Interception -- Part 7
Applying Pressing Attack and Responding with Interception -- Part 8
Applying Pressing Attack and Responding with Interception -- Part 9
Avoiding Defeat and Clinching Victory in Pressing Attack -- Part 1
Avoiding Defeat and Clinching Victory in Pressing Attack -- Part 2
Avoiding Defeat and Clinching Victory in Pressing Attack -- Part 3
Avoiding Defeat and Clinching Victory in Pressing Attack -- Part 4
Avoiding Defeat and Clinching Victory in Pressing Attack -- Part 5
Avoiding Defeat and Clinching Victory in Pressing Attack -- Part 6
Avoiding Defeat and Clinching Victory in Pressing Attack -- Part 7
Avoiding Defeat and Clinching Victory in Pressing Attack -- Part 8
Avoiding Defeat and Clinching Victory in Pressing Attack -- Part 9
Avoiding Defeat and Clinching Victory in Pressing Attack -- Part 10
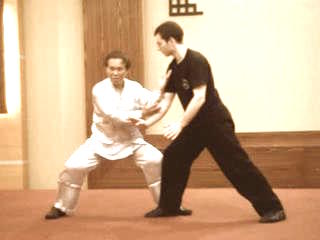 Avoiding Defeat and Clinching Victory in Pressing Attack -- Part 11
Two Deadly Kicks: Organ-Seeking and Wnhirlwind -- Part 1
Avoiding Defeat and Clinching Victory in Pressing Attack -- Part 12
Two Deadly Kicks: Organ-Seeking and Wnhirlwind -- Part 2
Two Deadly Kicks: Organ-Seeking and Wnhirlwind -- Part 3
Two Deadly Kicks: Organ-Seeking and Wnhirlwind -- Part 4
Two Deadly Kicks: Organ-Seeking and Wnhirlwind -- Part 5
Two Deadly Kicks: Organ-Seeking and Wnhirlwind -- Part 6
Two Deadly Kicks: Organ-Seeking and Wnhirlwind -- Part 7
Two Deadly Kicks: Organ-Seeking and Wnhirlwind -- Part 8
Two Deadly Kicks: Organ-Seeking and Wnhirlwind -- Part 9
Two Deadly Kicks: Organ-Seeking and Wnhirlwind -- Part 10
Anticipating Opponent's Response and Tricking him to React the
Way you Want -- Overview
Excellent Sequence for Pressing Attack or as Follow-Through
when Opponent Hesitates -- Overview
Applying Pressing Attack and Responding with Interception -- Overview
Avoiding Defeat and Clinching Victory in Pressing Attack -- Overview
Two Deadly Kicks: Organ-Seeking and Wnhirlwind -- Overview
Shaolin 2009 -- Shaolin 04
Shaolin Kungfu is Rich is Rich in Felling Techniques -- Part 1
Shaolin Kungfu is Rich is Rich in Felling Techniques -- Part 2
Shaolin Kungfu is Rich is Rich in Felling Techniques -- Part 3
Shaolin Kungfu is Rich is Rich in Felling Techniques -- Part 4
Shaolin Kungfu is Rich is Rich in Felling Techniques -- Part 5
Shaolin Kungfu is Rich is Rich in Felling Techniques -- Part 6
Fun in Breaking Falls -- Part 1
Fun in Breaking Falls -- Part 2
Fun in Breaking Falls -- Part 3
Fun in Breaking Falls -- Part 4
 Fun in Breaking Falls -- Part 5
Fun in Breaking Falls -- Part 6
Fun in Breaking Falls -- Part 7
Fun in Breaking Falls -- Part 8
It is Fun Seeing Dainty Ladies Throwing Hugh-Sized Men -- Part 1
It is Fun Seeing Dainty Ladies Throwing Hugh-Sized Men -- Part 2
It is Fun Seeing Dainty Ladies Throwing Hugh-Sized Men -- Part 3
It is Fun Seeing Dainty Ladies Throwing Hugh-Sized Men -- Part 4
It is Fun Seeing Dainty Ladies Throwing Hugh-Sized Men -- Part 5
It is Fun Seeing Dainty Ladies Throwing Hugh-Sized Men -- Part 6
It is Fun Seeing Dainty Ladies Throwing Hugh-Sized Men -- Part 7
It is Fun Seeing Dainty Ladies Throwing Hugh-Sized Men -- Part 8
It is Fun Seeing Dainty Ladies Throwing Hugh-Sized Men -- Part 9
It is Fun Seeing Dainty Ladies Throwing Hugh-Sized Men -- Part 10
It is Fun Seeing Dainty Ladies Throwing Hugh-Sized Men -- Part 11
It is Fun Seeing Dainty Ladies Throwing Hugh-Sized Men -- Part 12
It is Fun Seeing Dainty Ladies Throwing Hugh-Sized Men -- Part 13
It is Fun Seeing Dainty Ladies Throwing Hugh-Sized Men -- Part 14
An Effective and Multi-Directional Felling Technique -- Part 1
An Effective and Multi-Directional Felling Technique -- Part 2
An Effective and Multi-Directional Felling Technique -- Part 3
An Effective and Multi-Directional Felling Technique -- Part 4
An Effective and Multi-Directional Felling Technique -- Part 5
An Effective and Multi-Directional Felling Technique -- Part 6
An Effective and Multi-Directional Felling Technique -- Part 7
An Effective and Multi-Directional Felling Technique -- Part 8
An Effective and Multi-Directional Felling Technique -- Part 9
Good Footwork and Body-Movement while Hiding Flowers in Sleeves -- Part 1
Good Footwork and Body-Movement while Hiding Flowers in Sleeves -- Part 2
Good Footwork and Body-Movement while Hiding Flowers in Sleeves -- Part 3
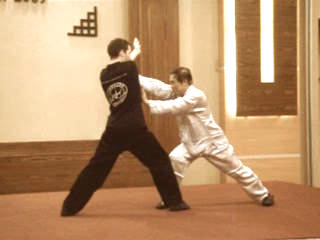 Good Footwork and Body-Movement while Hiding Flowers in Sleeves -- Part 4
Good Footwork and Body-Movement while Hiding Flowers in Sleeves -- Part 5
Good Footwork and Body-Movement while Hiding Flowers in Sleeves -- Part 6
Over-the-Shoulder Throw in Farmer Hoeing Field -- Part 1
Over-the-Shoulder Throw in Farmer Hoeing Field -- Part 2
Over-the-Shoulder Throw in Farmer Hoeing Field -- Part 3
Over-the-Shoulder Throw in Farmer Hoeing Field -- Part 4
Over-the-Shoulder Throw in Farmer Hoeing Field -- Part 5
Over-the-Shoulder Throw in Farmer Hoeing Field -- Part 6
Over-the-Shoulder Throw in Farmer Hoeing Field -- Part 7
Over-the-Shoulder Throw in Farmer Hoeing Field -- Part 8
A Compassionate Attack in Pushing instead of Striking -- Part 1
A Compassionate Attack in Pushing instead of Striking -- Part 2
A Compassionate Attack in Pushing instead of Striking -- Part 3
A Compassionate Attack in Pushing instead of Striking -- Part 4
A Compassionate Attack in Pushing instead of Striking -- Part 5
A Compassionate Attack in Pushing instead of Striking -- Part 6
A Compassionate Attack in Pushing instead of Striking -- Part 7
A Compassionate Attack in Pushing instead of Striking -- Part 8
A Compassionate Attack in Pushing instead of Striking -- Part 9
Three External Harmonies of Footwork, Body-Movement and Hand Techniques -- Part 1
Three External Harmonies of Footwork, Body-Movement and Hand Techniques -- Part 2
Three External Harmonies of Footwork, Body-Movement and Hand Techniques -- Part 3
Three External Harmonies of Footwork, Body-Movement and Hand Techniques -- Part 4
Three External Harmonies of Footwork, Body-Movement and Hand Techniques -- Part 5
Three External Harmonies of Footwork, Body-Movement and Hand Techniques -- Part 6
Three External Harmonies of Footwork, Body-Movement and Hand Techniques -- Part 7
Three External Harmonies of Footwork, Body-Movement and Hand Techniques -- Part 8
Four Combat Sequences to Develop Combat Skills -- Part 1
Four Combat Sequences to Develop Combat Skills -- Part 2
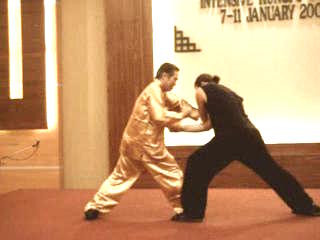 Four Combat Sequences to Develop Combat Skills -- Part 3
Four Combat Sequences to Develop Combat Skills -- Part 4
Four Combat Sequences to Develop Combat Skills -- Part 5
Four Combat Sequences to Develop Combat Skills -- Part 6
Four Combat Sequences to Develop Combat Skills -- Part 7
Four Combat Sequences to Develop Combat Skills -- Part 8
Four Combat Sequences to Develop Combat Skills -- Part 9
Four Combat Sequences to Develop Combat Skills -- Part 10
Four Sequences of Black Tiger Steals Heart -- Part 1
Four Sequences of Black Tiger Steals Heart -- Part 2
Four Sequences of Black Tiger Steals Heart -- Part 3
Four Sequences of Black Tiger Steals Heart -- Part 4
Four Sequences of Black Tiger Steals Heart -- Part 5
Four Sequences of Black Tiger Steals Heart -- Part 6
Four Sequences of Black Tiger Steals Heart -- Part 7
Combat-Sequence Set of Four Main Kicks -- Part 1
Combat-Sequence Set of Four Main Kicks -- Part 2
Combat-Sequence Set of Four Main Kicks -- Part 3
Combat-Sequence Set of Four Main Kicks -- Part 4
Combat-Sequence Set of Four Main Kicks -- Part 5
Combat-Sequence Set of Four Main Kicks -- Part 6
Four Felling Technique in Fell Tree with Roots -- Part 1
Four Felling Technique in Fell Tree with Roots -- Part 2
Four Felling Technique in Fell Tree with Roots -- Part 3
Four Felling Technique in Fell Tree with Roots -- Part 4
Four Felling Technique in Fell Tree with Roots -- Part 5
Four Felling Technique in Fell Tree with Roots -- Part 6
Four Felling Technique in Fell Tree with Roots -- Part 7
Four Felling Technique in Fell Tree with Roots -- Part 8
Four Felling Technique in Fell Tree with Roots -- Part 9
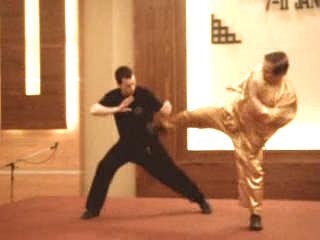 Four Felling Technique in Fell Tree with Roots -- Part 10
Four Felling Technique in Fell Tree with Roots -- Part 11
Four Felling Technique in Fell Tree with Roots -- Part 12
Four Felling Technique in Fell Tree with Roots -- Part 13
Four Felling Technique in Fell Tree with Roots -- Part 14
Four Felling Technique in Fell Tree with Roots -- Part 15
Good Footwork in Overcoming all Four Categories of Attack -- Part 1
Good Footwork in Overcoming all Four Categories of Attack -- Part 2
Good Footwork in Overcoming all Four Categories of Attack -- Part 3
Good Footwork in Overcoming all Four Categories of Attack -- Part 4
Good Footwork in Overcoming all Four Categories of Attack -- Part 5
Good Footwork in Overcoming all Four Categories of Attack -- Part 6
Good Footwork in Overcoming all Four Categories of Attack -- Part 7
Making Modifications to Planned Sequences -- Part 1
Making Modifications to Planned Sequences -- Part 2
Making Modifications to Planned Sequences -- Part 3
Making Modifications to Planned Sequences -- Part 4
Making Modifications to Planned Sequences -- Part 5
Making Modifications to Planned Sequences -- Part 6
Making Modifications to Planned Sequences -- Part 7
The Advantages of Planned Sequences over Isolated Attacks -- Part 1
The Advantages of Planned Sequences over Isolated Attacks -- Part 2
The Advantages of Planned Sequences over Isolated Attacks -- Part 3
The Advantages of Planned Sequences over Isolated Attacks -- Part 4
The Advantages of Planned Sequences over Isolated Attacks -- Part 5
The Advantages of Planned Sequences over Isolated Attacks -- Part 6
The Advantages of Planned Sequences over Isolated Attacks -- Part 7
Shaolin Kungfu is Rich in Felling Techniques -- Overview
Fun in Breaking Falls -- Overview
It is Fun Seeing Dainty Ladies Throwing Hugh-Sized Men -- Overview
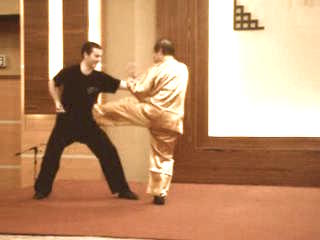 An Effective and Multi-Directional Felling Tecnhnique -- Overview
Good Footwork and Body-Movement while Hiding Flowers
in Sleeves -- Overview
Over-the-Shoulder Throw in Farmer Hoeing Field -- Overview
A Compassionate Attack in Pushing instead of Striking -- Overview
The Three External Harmonies of Footwork, Body-Movement
and Hand Techniques -- Overview
Four Combat Sequences to Develop Combat Skills -- Overview
The Four Sequences of Black Tiger Steals Heart -- Overview
Combat-Sequence Set of Four Main Kicks -- Overview
Four Felling Techniques in Fell Tree with Roots -- Overview
Good Footwork in Overcoming all Four Categories of Attack -- Overview
Making Modifications to Planned Sequences -- Overview
The Advantages of Planned Sequences over Isolated Attacks -- Overview
Shaolin 2009 -- Shaolin 05
Neutralizing the Speed of a Boxer -- Part 1
Neutralizing the Speed of a Boxer -- Part 2
Neutralizing the Speed of a Boxer -- Part 3
Neutralizing the Speed of a Boxer -- Part 5
Neutralizing the Speed of a Boxer -- Part 6
Neutralizing the Speed of a Boxer -- Part 7
Neutralizing the Speed of a Boxer -- Part 8
Neutralizing the Speed of a Boxer -- Part 9
Neutralizing the Speed of a Boxer -- Part 10
Neutralizing the Speed of a Boxer -- Part 11
Neutralizing the Speed of a Boxer -- Part 12
The Tactic of Cover, Chase and Strike -- Part 1
The Tactic of Cover, Chase and Strike -- Part 2
The Tactic of Cover, Chase and Strike -- Part 3
The Tactic of Cover, Chase and Strike -- Part 4
The Tactic of Cover, Chase and Strike -- Part 5
The Tactic of Cover, Chase and Strike -- Part 6
The Tactic of Cover, Chase and Strike -- Part 7
The Tactic of Cover, Chase and Strike -- Part 8
 The Tactic of Cover, Chase and Strike -- Part 9
Against Hooks, Undercuts and Surprised Kicks -- Part 1
Against Hooks, Undercuts and Surprised Kicks -- Part 2
Against Hooks, Undercuts and Surprised Kicks -- Part 3
Against Hooks, Undercuts and Surprised Kicks -- Part 4
Against Hooks, Undercuts and Surprised Kicks -- Part 5
Against Hooks, Undercuts and Surprised Kicks -- Part 6
Against Hooks, Undercuts and Surprised Kicks -- Part 7
Against Hooks, Undercuts and Surprised Kicks -- Part 8
Against Hooks, Undercuts and Surprised Kicks -- Part 9
Against Hooks, Undercuts and Surprised Kicks -- Part 10
Against Hooks, Undercuts and Surprised Kicks -- Part 11
Against Hooks, Undercuts and Surprised Kicks -- Part 12
A Kick-Boxer Hands you his Defeat -- Part 1
A Kick-Boxer Hands you his Defeat -- Part 2
A Kick-Boxer Hands you his Defeat -- Part 3
A Kick-Boxer Hands you his Defeat -- Part 4
A Kick-Boxer Hands you his Defeat -- Part 5
A Kick-Boxer Hands you his Defeat -- Part 6
A Kick-Boxer Hands you his Defeat -- Part 7
A Kick-Boxer Hands you his Defeat -- Part 8
A Kick-Boxer Hands you his Defeat -- Part 9
Countering at Different Points of Opponent's Attacks -- Part 1
Countering at Different Points of Opponent's Attacks -- Part 2
Countering at Different Points of Opponent's Attacks -- Part 3
Countering at Different Points of Opponent's Attacks -- Part 4
Countering at Different Points of Opponent's Attacks -- Part 5
Countering at Different Points of Opponent's Attacks -- Part 6
Countering at Different Points of Opponent's Attacks -- Part 7
Countering at Different Points of Opponent's Attacks -- Part 8
 Countering at Different Points of Opponent's Attacks -- Part 9
Countering at Different Points of Opponent's Attacks -- Part 10
Countering at the Completion, Middle, Initial and Pre-Start Points
of an Opponent's Attacks -- Part 1
Countering at the Completion, Middle, Initial and Pre-Start Points
of an Opponent's Attacks -- Part 2
Countering at the Completion, Middle, Initial and Pre-Start Points
of an Opponent's Attacks -- Part 3
Countering at the Completion, Middle, Initial and Pre-Start Points
of an Opponent's Attacks -- Part 4
Countering at the Completion, Middle, Initial and Pre-Start Points
of an Opponent's Attacks -- Part 5
Countering at the Completion, Middle, Initial and Pre-Start Points
of an Opponent's Attacks -- Part 6
Countering at the Completion, Middle, Initial and Pre-Start Points
of an Opponent's Attacks -- Part 7
Countering at the Completion, Middle, Initial and Pre-Start Points
of an Opponent's Attacks -- Part 8
Countering at the Completion, Middle, Initial and Pre-Start Points
of an Opponent's Attacks -- Part 9
Countering at the Completion, Middle, Initial and Pre-Start Points
of an Opponent's Attacks -- Part 10
Countering at the Completion, Middle, Initial and Pre-Start Points
of an Opponent's Attacks -- Part 11
Countering at the Completion, Middle, Initial and Pre-Start Points
of an Opponent's Attacks -- Part 12
Defeat is What you Hand to your Opponent -- Part 1
Defeat is What you Hand to your Opponent -- Part 2
Defeat is What you Hand to your Opponent -- Part 3
Defeat is What you Hand to your Opponent -- Part 4
Defeat is What you Hand to your Opponent -- Part 5
Defeat is What you Hand to your Opponent -- Part 6
Defeat is What you Hand to your Opponent -- Part 7
Defeat is What you Hand to your Opponent -- Part 8
Defeat is What you Hand to your Opponent -- Part 9
Marvelous Techniques of Shaolin Ground Fighting -- Part 1
Marvelous Techniques of Shaolin Ground Fighting -- Part 2
Marvelous Techniques of Shaolin Ground Fighting -- Part 3
Marvelous Techniques of Shaolin Ground Fighting -- Part 4
Marvelous Techniques of Shaolin Ground Fighting -- Part 5
Marvelous Techniques of Shaolin Ground Fighting -- Part 6
Marvelous Techniques of Shaolin Ground Fighting -- Part 7
 Marvelous Techniques of Shaolin Ground Fighting -- Part 8
Marvelous Techniques of Shaolin Ground Fighting -- Part 9
Neutralizing the Speed of a Boxer -- Overview
The Tactic of Cover, Chase and Strike -- Overview
Against Hooks, Undercuts and Surprised Kicks -- Overview
A Kick-Boxer Hands you his Defeat -- Overview
Countering at Different Points of Opponent's Attacks -- Overview
Countering at the Completion, Middle, Initial and Pre-Start Points
of an Opponent's Attacks -- Overview
Defeat is What you Hand to your Opponent -- Overview
Marvelous Techniques of Shaolin Ground Fighting -- Overview
Shaolin 2009 -- Shaolin 06
How to Win a Hundred Battles out of a Hundred -- Part 1
How to Win a Hundred Battles out of a Hundred -- Part 2
How to Win a Hundred Battles out of a Hundred -- Part 3
How to Win a Hundred Battles out of a Hundred -- Part 4
How to Win a Hundred Battles out of a Hundred -- Part 5
How to Win a Hundred Battles out of a Hundred -- Part 6
How to Win a Hundred Battles out of a Hundred -- Part 7
How to Win a Hundred Battles out of a Hundred -- Part 8
How to Win a Hundred Battles out of a Hundred -- Part 9
Series of Attacks in Muay Thai Fighting -- Part 1
Series of Attacks in Muay Thai Fighting -- Part 2
Series of Attacks in Muay Thai Fighting -- Part 3
Series of Attacks in Muay Thai Fighting -- Part 4
Series of Attacks in Muay Thai Fighting -- Part 5
Series of Attacks in Muay Thai Fighting -- Part 6
Series of Attacks in Muay Thai Fighting -- Part 7
Series of Attacks in Muay Thai Fighting -- Part 8
Using Minimum Force to Follow Momentum of Muay Thai Fighters -- Part 1
Using Minimum Force to Follow Momentum of Muay Thai Fighters -- Part 2
Using Minimum Force to Follow Momentum of Muay Thai Fighters -- Part 3
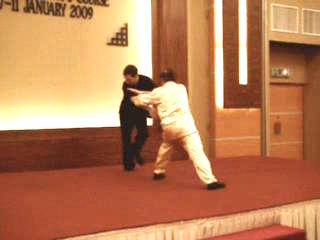 Using Minimum Force to Follow Momentum of Muay Thai Fighters -- Part 4
Using Minimum Force to Follow Momentum of Muay Thai Fighters -- Part 5
Using Minimum Force to Follow Momentum of Muay Thai Fighters -- Part 6
Using Minimum Force to Follow Momentum of Muay Thai Fighters -- Part 7
Using Minimum Force to Follow Momentum of Muay Thai Fighters -- Part 8
Using Minimum Force to Follow Momentum of Muay Thai Fighters -- Part 9
How would You Counter Formidable Knee Jabs? -- Part 1
How would You Counter Formidable Knee Jabs? -- Part 2
How would You Counter Formidable Knee Jabs? -- Part 3
How would You Counter Formidable Knee Jabs? -- Part 4
How would You Counter Formidable Knee Jabs? -- Part 5
How would You Counter Formidable Knee Jabs? -- Part 6
How would You Counter Formidable Knee Jabs? -- Part 7
How would You Counter Formidable Knee Jabs? -- Part 8
How would You Counter Formidable Knee Jabs? -- Part 9
Scholar Exchanges Greetings to Release Neck Grips -- Part 1
Scholar Exchanges Greetings to Release Neck Grips -- Part 2
Scholar Exchanges Greetings to Release Neck Grips -- Part 3
Scholar Exchanges Greetings to Release Neck Grips -- Part 4
Scholar Exchanges Greetings to Release Neck Grips -- Part 5
Scholar Exchanges Greetings to Release Neck Grips -- Part 6
Scholar Exchanges Greetings to Release Neck Grips -- Part 7
Scholar Exchanges Greetings to Release Neck Grips -- Part 8
Scholar Exchanges Greetings to Release Neck Grips -- Part 9
Legacy of Patriach Ho Fatt Nam -- Part 1
Legacy of Patriach Ho Fatt Nam -- Part 2
Legacy of Patriach Ho Fatt Nam -- Part 3
Legacy of Patriach Ho Fatt Nam -- Part 4
Legacy of Patriach Ho Fatt Nam -- Part 5
Legacy of Patriach Ho Fatt Nam -- Part 6
 Legacy of Patriach Ho Fatt Nam -- Part 7
Legacy of Patriach Ho Fatt Nam -- Part 8
Legacy of Patriach Ho Fatt Nam -- Part 9
Countering a Series of Muay Thai Attacks at Various Points -- Part 1
Countering a Series of Muay Thai Attacks at Various Points -- Part 2
Countering a Series of Muay Thai Attacks at Various Points -- Part 3
Countering a Series of Muay Thai Attacks at Various Points -- Part 4
Countering a Series of Muay Thai Attacks at Various Points -- Part 5
Countering a Series of Muay Thai Attacks at Various Points -- Part 6
Countering a Series of Muay Thai Attacks at Various Points -- Part 7
Countering a Series of Muay Thai Attacks at Various Points -- Part 8
Countering a Series of Muay Thai Attacks at Various Points -- Part 9
Countering a Series of Muay Thai Attacks at Various Points -- Part 10
How to Win a Hundred Battles out of a Hundred -- Overview
Series of Attacks in Muay Thai Fighting -- Overview
Using Minimum Force to Follow Momentum of Muay Thai Fighters -- Overview
How would You Counter Formidable Knee Jabs? -- Overview
Scholar Exchanges Greetings to Release Neck Grips -- Overview
Legacy of Patriach Ho Fatt Nam -- Overview
Countering a Series of Muay Thai Attacks at Various Points -- Overview
Shaolin 2009 -- Shaolin 07
The Shoot and the Lift in Wrestling -- Part 1
The Shoot and the Lift in Wrestling -- Part 2
The Shoot and the Lift in Wrestling -- Part 3
The Shoot and the Lift in Wrestling -- Part 4
The Shoot and the Lift in Wrestling -- Part 5
The Shoot and the Lift in Wrestling -- Part 6
The Shoot and the Lift in Wrestling -- Part 7
The Shoot and the Lift in Wrestling -- Part 8
The Shoot and the Lift in Wrestling -- Part 9
Counters against the Shoot at the Initial, Medial and Final Stages of Attack -- Part 1
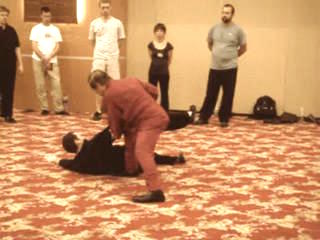 Counters against the Shoot at the Initial, Medial and Final Stages of Attack -- Part 2
Counters against the Shoot at the Initial, Medial and Final Stages of Attack -- Part 3
Counters against the Shoot at the Initial, Medial and Final Stages of Attack -- Part 4
Counters against the Shoot at the Initial, Medial and Final Stages of Attack -- Part 5
Counters against the Shoot at the Initial, Medial and Final Stages of Attack -- Part 6
Counters against the Shoot at the Initial, Medial and Final Stages of Attack -- Part 7
Counters against the Shoot at the Initial, Medial and Final Stages of Attack -- Part 8
Counters against the Lift at the Initial, Medial and Final Stages of Attack -- Part 1
Counters against the Lift at the Initial, Medial and Final Stages of Attack -- Part 2
Counters against the Lift at the Initial, Medial and Final Stages of Attack -- Part 3
Counters against the Lift at the Initial, Medial and Final Stages of Attack -- Part 4
Counters against the Lift at the Initial, Medial and Final Stages of Attack -- Part 5
Counters against the Lift at the Initial, Medial and Final Stages of Attack -- Part 6
Counters against the Lift at the Initial, Medial and Final Stages of Attack -- Part 7
Who Says there is No Ground Fighting in Shaolin Kungfu? -- Part 1
Who Says there is No Ground Fighting in Shaolin Kungfu? -- Part 2
Who Says there is No Ground Fighting in Shaolin Kungfu? -- Part 3
Who Says there is No Ground Fighting in Shaolin Kungfu? -- Part 4
Who Says there is No Ground Fighting in Shaolin Kungfu? -- Part 5
Who Says there is No Ground Fighting in Shaolin Kungfu? -- Part 6
Who Says there is No Ground Fighting in Shaolin Kungfu? -- Part 7
Who Says there is No Ground Fighting in Shaolin Kungfu? -- Part 8
Who Says there is No Ground Fighting in Shaolin Kungfu? -- Part 9
Shaolin Counters against Wrestling Pin-Downs -- Part 1
Shaolin Counters against Wrestling Pin-Downs -- Part 2
Shaolin Counters against Wrestling Pin-Downs -- Part 3
Shaolin Counters against Wrestling Pin-Downs -- Part 4
Shaolin Counters against Wrestling Pin-Downs -- Part 5
Shaolin Counters against Wrestling Pin-Downs -- Part 6
Shaolin Counters against Wrestling Pin-Downs -- Part 7
 Shaolin Counters against Wrestling Pin-Downs -- Part 8
Shaolin Counters against Wrestling Pin-Downs -- Part 9
Counters against Pin-
Downs are Full of Surprises -- Part 1
Counters against Pin-
Downs are Full of Surprises -- Part 2
Counters against Pin-
Downs are Full of Surprises -- Part 3
Counters against Pin-
Downs are Full of Surprises -- Part 4
Counters against Pin-
Downs are Full of Surprises -- Part 5
Counters against Pin-
Downs are Full of Surprises -- Part 6
Counters against Pin-
Downs are Full of Surprises -- Part 7
Counters against Pin-
Downs are Full of Surprises -- Part 8
Counters against Pin-
Downs are Full of Surprises -- Part 9
Counters against Pin-
Downs are Full of Surprises -- Part 10
Counters against Dagger Attacks -- Part 1
Counters against Dagger Attacks -- Part 2
Counters against Dagger Attacks -- Part 3
Counters against Dagger Attacks -- Part 4
Counters against Dagger Attacks -- Part 5
Counters against Dagger Attacks -- Part 6
Counters against Dagger Attacks -- Part 7
Counters against Dagger Attacks -- Part 9
Counter against Dagger Attacks -- Part 9
Shaolin Counters against Taekwondo Kicks -- Part 1
Shaolin Counters against Taekwondo Kicks -- Part 2
Shaolin Counters against Taekwondo Kicks -- Part 3
Shaolin Counters against Taekwondo Kicks -- Part 4
Shaolin Counters against Taekwondo Kicks -- Part 5
Shaolin Counters against Taekwondo Kicks -- Part 6
Shaolin Counters against Taekwondo Kicks -- Part 7
Shaolin Counters against Taekwondo Kicks -- Part 8
Shaolin Counters against Taekwondo Kicks -- Part 9
 Principles and Techniques against Kicking Attacts -- Part 1
Principles and Techniques against Kicking Attacts -- Part 2
Principles and Techniques against Kicking Attacts -- Part 3
Principles and Techniques against Kicking Attacts -- Part 4
Principles and Techniques against Kicking Attacts -- Part 5
Principles and Techniques against Kicking Attacts -- Part 6
An Excellent Pattern against All Kicks -- Part 1
An Excellent Pattern against All Kicks -- Part 2
An Excellent Pattern against All Kicks -- Part 3
An Excellent Pattern against All Kicks -- Part 4
An Excellent Pattern against All Kicks -- Part 5
An Excellent Pattern against All Kicks -- Part 6
An Excellent Pattern against All Kicks -- Part 7
The Shoot and the Lift in Wrestling -- Overview
Counters against the Shoot at the Initial, Medial and Final Stages of Attack -- Overview
Counters against the Lift at the Initial, Medial and Final Stages of Attack -- Overview
Who Says there is No Ground Fighting in Shaolin Kungfu? -- Overview
Shaolin Counters against Wrestling Pin-Downs -- Overview
Counters against Pin-Downs are Full of Surprises -- Overview
Counters against Dagger Attacks -- Overview
Shaolin Counters against Taekwondo Kicks -- Overview
Principles and Techniques against Kicking Attacks -- Overview
An Excellnet Pattern against All Kicks-- Overview
Shaolin 2009 -- Shaolin 08
Counters against Karate -- Part 1
Counters against Karate -- Part 2
Counters against Karate -- Part 3
Counters against Karate -- Part 4
Counters against Karate -- Part 5
Counters against Karate -- Part 6
Counters against Judo and Aikido -- Part 1
Counters against Judo and Aikido -- Part 2
Counters against Judo and Aikido -- Part 3
Counters against Judo and Aikido -- Part 4
 Counters against Judo and Aikido -- Part 5
Counters against Judo and Aikido -- Part 6
Counters against Judo and Aikido -- Part 7
Counters against Judo and Aikido -- Part 8
Counters against Judo and Aikido -- Part 9
Shaolin Kungfu is their inevitabke Choice in Free Sparring -- Part 1
Shaolin Kungfu is their inevitabke Choice in Free Sparring -- Part 2
Shaolin Kungfu is their inevitabke Choice in Free Sparring -- Part 3
Shaolin Kungfu is their inevitabke Choice in Free Sparring -- Part 4
Shaolin Kungfu is their inevitabke Choice in Free Sparring -- Part 5
Shaolin Kungfu is their inevitabke Choice in Free Sparring -- Part 6
Shaolin Kungfu is their inevitabke Choice in Free Sparring -- Part 7
Shaolin Kungfu is their inevitabke Choice in Free Sparring -- Part 8
Shaolin Kungfu is their inevitabke Choice in Free Sparring -- Part 9
Shaolin Kungfu is their inevitabke Choice in Free Sparring -- Part 10
Shaolin Kungfu is their inevitabke Choice in Free Sparring -- Part 11
Shaolin Kungfu is their inevitabke Choice in Free Sparring -- Part 12
Counters against Karate -- Overview
Counters against Judo and Aikido -- Overview
Shaolin Kungfu is their inevitabke Choice in Free Sparring -- Overview
Shaolin 2009 -- Youtube
Videos of Intensive Shaolin Kungfu Course, January 2009 -- Overview
The Basics
Important Skills and Techniques to Cover Opponents and to Bridge Gaps
New Skills to Enhandce Combat Efficiency
What Makes a Master Different from a Novice
Pressing Attacks and their Counters
Some Important Considerations when Applying Pressing Attacks
Marvelous Techniques Beget Marvelous Techniques
Revealing Secrets Hidden in the Open
Tactic of Defence Direct Counter
 Legacy of Uncle Righteousness
Anticipating opponent's Response and Tricking to React the Way we Want
Excellnet Sequence for Pressing Attack oras Follow-Through when Opponent Hestitates
Applying Pressing Attacks and Responding with Interceptions
Avoiding Defeat and Clinching Victory in Prressing Attacks
Two Deadly Kicks== Organ-Seeking and Whirlwind
Shaolin Kungfu is Rich in Felling Techniques
Fun in Breaking Fall
It is Fun Seeing Dainty Ladies Throwing Hefty Men Around
An Effective and Multi-Directional Felling Technique
Good Footwork and Body-Movement while Hiding Flowers in the Sleeves
Over-the-Shoulder Throw in Farmer Hoes Rice Field
Compassionate Attack in Pushing Instead of Striking
Three External Harmonies lof Footwork, Body-Movement and Hand Techniques
Four Combat Sequences to Develop Combat Skills
Four Sequences of Boack Tiger Steals Heart
Combat Sequences of Four Main Kicks
Felling Techniques in Fell Tree with Roots
Good Footwork in Overcoming all Four Categories of Attack
Making Modifications in Planned Sequence
Advantages of Planned Sequences over Isolated Attacks
Neutralizing the Speed of a Boxer
Tactic of Cover, Chase and Strike
Shaolin Techniques against Hooks, Undercuts and Surprised Kicks
A Kick-Boxer Hands you his Defeat
Using Shaolin Kungfu to Counter at Different Points of Attack
Countering at Completion, Middle and Initial Stages of Opponent's Attack
Defeat is What you Hand to your Opponent
Marvelous Techniques of Shaolin Ground Fighting
How to Win a Hundrred Battles out of a Hundred
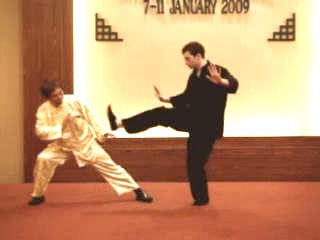 Series of Attacks in Muay Tahi Fighting
Using Minumum Force to Follow Momentum of Muay Thai Fighters
How would You Counter Formidable Muay Thai Knee Jabs?
Scholar Exchanges Greetings to Release Neck Grips
Legacy of Patriarch Ho Fatt Nam
Countering a Series of Muay Thai Attacks at Various Points
Against the Shoot and the Lift in Wrestling
Shaolin Counters against the Shoot at the Initial, Medial and Final Stages of Attack
Shaolin Counters against the Lift at the Initial, Medial and Final Stages of Attack
Who Says there's No Ground Fighting in Shaolin Kungfu
Shaolin Counters against Wrestling Pin-Downs
Shaolin Counters against Pin-Downs are Full of Surprises
Shaolin Counters against Dagger Attacks
Shaolin Counters against Taekwondo Kicks
Shaolin Principles and Techniques against Kicking Attacks
An Excellent Shaolin Pattern against All Kicks!
Shalin Counters against Karate
Shaolin Counters against Judo and Aikido
Shaolin Kungfu is their Inevitable Choice in Free Sparring
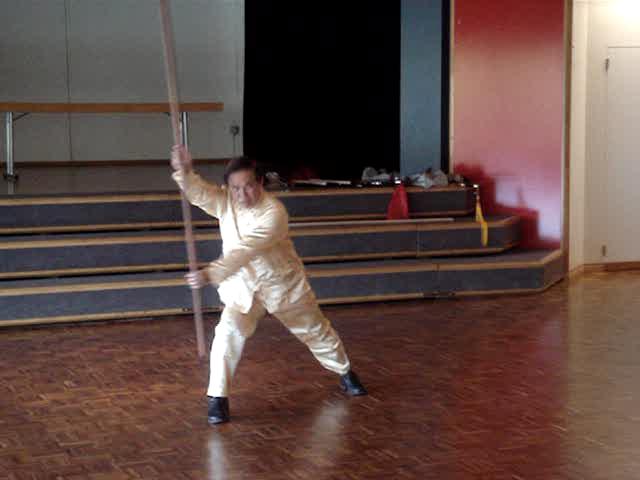 Taiji Sabre
Pattern Names of Taiji Sabre -- Overview
Taiji Sabre
Pattern Names of Taiji Sabre -- Overview
Combat Application of Taiji Sabre
Taiji Sabre
Taiji Staff
Pattern Names of Taiji Staff -- Overview
Combat Application of Taiji Staff
Taiji Staff
Taijiquan Blue Mountain -- Taijiquan 01
Taijiquan on the Blue Mountain 2009 -- Overview
Taiji Originates from Wuji and Returns to Wuji -- Overview
Philosophy and Methodology of Stance Training -- Overview
Experiencing the Subtle Joys of the Three-Circle Stance -- Overview
The Horse-Riding, the Bow-Arrow and the False-Leg -- Overview
The Four-Six, the Unicorn and the Single-Leg -- Overview
Flexibility Exercises that also Enhance your Internal Force -- Overview
Taiji Originates from Wuji and Returns to Wuji -- Part 1
Taiji Originates from Wuji and Returns to Wuji -- Part 2
Taiji Originates from Wuji and Returns to Wuji -- Part 3
Taiji Originates from Wuji and Returns to Wuji -- Part 4
Taiji Originates from Wuji and Returns to Wuji -- Part 5
Taiji Originates from Wuji and Returns to Wuji -- Part 6
Taiji Originates from Wuji and Returns to Wuji -- Part 7
Taiji Originates from Wuji and Returns to Wuji -- Part 8
Philosophy and Methodology of Stance Training -- Part 1
Philosophy and Methodology of Stance Training -- Part 2
Philosophy and Methodology of Stance Training -- Part 3
Philosophy and Methodology of Stance Training -- Part 4
Philosophy and Methodology of Stance Training -- Part 5
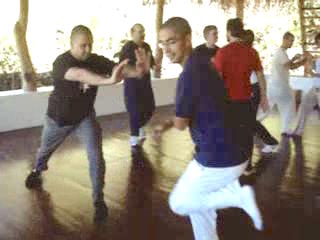 Philosophy and Methodology of Stance Training -- Part 6
Philosophy and Methodology of Stance Training -- Part 7
Philosophy and Methodology of Stance Training -- Part 8
Experiencing the Subtle Joys of the Three-Circle
Stance -- Part 1
Experiencing the Subtle Joys of the Three-Circle
Stance -- Part 2
Experiencing the Subtle Joys of the Three-Circle
Stance -- Part 3
Experiencing the Subtle Joys of the Three-Circle
Stance -- Part 4
Experiencing the Subtle Joys of the Three-Circle Stance -- Part 5
Experiencing the Subtle Joys of the Three-Circle Stance -- Part 6
Experiencing the Subtle Joys of the Three-Circle Stance -- Part 7
Experiencing the Subtle Joys of the Three-Circle Stance -- Part 8
Experiencing the Subtle Joys of the Three-Circle Stance -- Part 9
The Horse-Riding, the Bow-Arrow and the False-Leg -- Part 1
The Horse-Riding, the Bow-Arrow and the False-Leg -- Part 2
The Horse-Riding, the Bow-Arrow and the False-Leg -- Part 3
The Horse-Riding, the Bow-Arrow and the False-Leg -- Part 4
The Horse-Riding, the Bow-Arrow and the False-Leg -- Part 5
The Horse-Riding, the Bow-Arrow and the False-Leg -- Part 6
The Horse-Riding, the Bow-Arrow and the False-Leg -- Part 7
The Horse-Riding, the Bow-Arrow and the False-Leg -- Part 8
The Horse-Riding, the Bow-Arrow and the False-Leg -- Part 9
The Horse-Riding, the Bow-Arrow and the False-Leg -- Part 10
The Horse-Riding, the Bow-Arrow and the False-Leg -- Part 11
The Horse-Riding, the Bow-Arrow and the False-Leg -- Part 12
The Horse-Riding, the Bow-Arrow and the False-Leg -- Part 13
The Horse-Riding, the Bow-Arrow and the False-Leg -- Part 14
The Four-Six, the Unicorn and the Single-Leg -- Part 1
The Four-Six, the Unicorn and the Single-Leg -- Part 2
The Four-Six, the Unicorn and the Single-Leg -- Part 3
The Four-Six, the Unicorn and the Single-Leg -- Part 4
 The Four-Six, the Unicorn and the Single-Leg -- Part 5
The Four-Six, the Unicorn and the Single-Leg -- Part 6
The Four-Six, the Unicorn and the Single-Leg -- Part 7
The Four-Six, the Unicorn and the Single-Leg -- Part 8
The Four-Six, the Unicorn and the Single-Leg -- Part 9
The Four-Six, the Unicorn and the Single-Leg -- Part 10
Flexibility Exercises that also Enhance your Internal
Force -- Part 1
Flexibility Exercises that also Enhance your Internal
Force -- Part 2
Flexibility Exercises that also Enhance your Internal
Force -- Part 3
Flexibility Exercises that also Enhance your Internal Force -- Part 4
Flexibility Exercises that also Enhance your Internal Force -- Part 5
Flexibility Exercises that also Enhance your Internal Force -- Part 6
Flexibility Exercises that also Enhance your Internal Force -- Part 7
Taijiquan Blue Mountain -- Taijiquan 02
Importance of Body-Movement and Footwork -- Overview
Three Harmoines in Immortal Waves Sleeves -- Overview
Chin-Na Patterns in Double Dragons and Pushing Boat -- Overview
Grasping Sparrow's Tail -- Overview
Short and Medium Range in Stationary Pushing Hands -- Overview
The Frontal Push in Mobile Pushing Hands -- Overview
Importance of Body-Movement and Footwork -- Part 1
Importance of Body-Movement and Footwork -- Part 2
Importance of Body-Movement and Footwork -- Part 3
Importance of Body-Movement and Footwork -- Part 4
Importance of Body-Movement and Footwork -- Part 5
Importance of Body-Movement and Footwork -- Part 6
Importance of Body-Movement and Footwork -- Part 7
Importance of Body-Movement and Footwork -- Part 8
Importance of Body-Movement and Footwork -- Part 9
Importance of Body-Movement and Footwork -- Part 10
Importance of Body-Movement and Footwork -- Part 11
Importance of Body-Movement and Footwork -- Part 12
Importance of Body-Movement and Footwork -- Part 13
Three Harmonies in Immortal Waves Sleeves -- Part 1
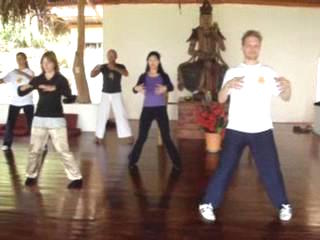 Three Harmonies in Immortal Waves Sleeves -- Part 2
Three Harmonies in Immortal Waves Sleeves -- Part 3
Three Harmonies in Immortal Waves Sleeves -- Part 4
Three Harmonies in Immortal Waves Sleeves -- Part 5
Three Harmonies in Immortal Waves Sleeves -- Part 6
Three Harmonies in Immortal Waves Sleeves -- Part 7
Three Harmonies in Immortal Waves Sleeves -- Part 8
Three Harmonies in Immortal Waves Sleeves -- Part 9
Three Harmonies in Immortal Waves Sleeves -- Part 10
Chin-Na Patterns in Double Dragons and
Pushing Boat -- Part 1
Chin-Na Patterns in Double Dragons and Pushing Boat -- Part 2
Chin-Na Patterns in Double Dragons and Pushing Boat -- Part 3
Chin-Na Patterns in Double Dragons and Pushing Boat -- Part 4
Chin-Na Patterns in Double Dragons and Pushing Boat -- Part 5
Chin-Na Patterns in Double Dragons and Pushing Boat -- Part 6
Chin-Na Patterns in Double Dragons and Pushing Boat -- Part 7
Chin-Na Patterns in Double Dragons and Pushing Boat -- Part 8
Chin-Na Patterns in Double Dragons and Pushing Boat -- Part 9
Chin-Na Patterns in Double Dragons and Pushing Boat -- Part 10
Chin-Na Patterns in Double Dragons and Pushing Boat -- Part 11
Chin-Na Patterns in Double Dragons and Pushing Boat -- Part 12
Chin-Na Patterns in Double Dragons and Pushing Boat -- Part 13
Chin-Na Patterns in Double Dragons and Pushing Boat -- Part 14
Grasping Sparrow's Tail -- Part 1
Grasping Sparrow's Tail -- Part 2
Grasping Sparrow's Tail -- Part 3
Grasping Sparrow's Tail -- Part 4
Grasping Sparrow's Tail -- Part 5
Grasping Sparrow's Tail -- Part 6
Grasping Sparrow's Tail -- Part 7
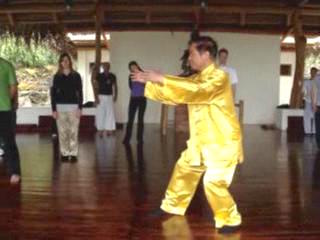 Grasping Sparrow's Tail -- Part 8
Grasping Sparrow's Tail -- Part 9
Grasping Sparrow's Tail -- Part 10
Grasping Sparrow's Tail -- Part 12
Grasping Sparrow's Tail -- Part 12
Grasping Sparrow's Tail -- Part 13
Short and Medium Range in Stationary Pushing
Hands -- Part 1
Short and Medium Range in Stationary Pushing
Hands -- Part 2
Short and Medium Range in Stationary Pushing
Hands -- Part 3
Short and Medium Range in Stationary Pushing
Hands -- Part 4
Short and Medium Range in Stationary Pushing Hands -- Part 5
Short and Medium Range in Stationary Pushing Hands -- Part 6
Short and Medium Range in Stationary Pushing Hands -- Part 7
Short and Medium Range in Stationary Pushing Hands -- Part 8
Short and Medium Range in Stationary Pushing Hands -- Part 9
The Frontal Push in Mobile Pushing Hands -- Part 1
The Frontal Push in Mobile Pushing Hands -- Part 2
The Frontal Push in Mobile Pushing Hands -- Part 3
The Frontal Push in Mobile Pushing Hands -- Part 4
The Frontal Push in Mobile Pushing Hands -- Part 5
The Frontal Push in Mobile Pushing Hands -- Part 6
The Frontal Push in Mobile Pushing Hands -- Part 7
The Frontal Push in Mobile Pushing Hands -- Part 8
The Frontal Push in Mobile Pushing Hands -- Part 9
The Frontal Push in Mobile Pushing Hands -- Part 10
The Frontal Push in Mobile Pushing Hands -- Part 11
The Frontal Push in Mobile Pushing Hands -- Part 12
 Taijiquan Blue Mountain -- Taijiquan 03
Rolling and Stepping Forward and Backward -- Overview
Taijiquan Blue Mountain -- Taijiquan 03
Rolling and Stepping Forward and Backward -- Overview
Technical and Tactical Advantages -- Overview
Neutralizing, Exploiting and Creating Advantages -- Overview
Side Push from Left and from Right -- Overview
Skills and Techniques in Pushing Hands -- Overview
Picture-Perfect Form and Sophisticated Skills -- Overview
Moving to an Opponent's Back -- Overview
Taijiquan Chin-Na Techniques and their Counters -- Overview
Taijiquan Chin-Na Techniques and their Counters -- Part 1
Taijiquan Chin-Na Techniques and their Counters -- Part 2
Taijiquan Chin-Na Techniques and their Counters -- Part 3
Rolling and Stepping Forward and Backward -- Part 1
Rolling and Stepping Forward and Backward -- Part 2
Rolling and Stepping Forward and Backward -- Part 3
Rolling and Stepping Forward and Backward -- Part 4
Rolling and Stepping Forward and Backward -- Part 5
Rolling and Stepping Forward and Backward -- Part 6
Rolling and Stepping Forward and Backward -- Part 7
Rolling and Stepping Forward and Backward -- Part 8
Rolling and Stepping Forward and Backward -- Part 9
Technical and Tactical Advantages -- Part 1
Technical and Tactical Advantages -- Part 2
Technical and Tactical Advantages -- Part 3
Technical and Tactical Advantages -- Part 4
Technical and Tactical Advantages -- Part 5
Technical and Tactical Advantages -- Part 6
Technical and Tactical Advantages -- Part 7
Technical and Tactical Advantages -- Part 8
Technical and Tactical Advantages -- Part 9
Taijiquan Chin-Na Techniques and their Counters -- Part 4
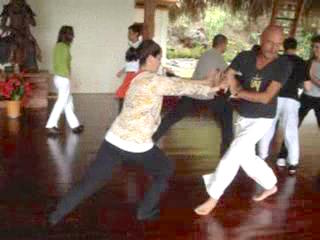 Technical and Tactical Advantages -- Part 10
Technical and Tactical Advantages -- Part 11
Neutralizing, Exploiting and Creating Advantages -- Part 1
Neutralizing, Exploiting and Creating Advantages -- Part 2
Neutralizing, Exploiting and Creating Advantages -- Part 3
Neutralizing, Exploiting and Creating Advantages -- Part 4
Neutralizing, Exploiting and Creating Advantages -- Part 5
Neutralizing, Exploiting and Creating Advantages -- Part 6
Neutralizing, Exploiting and Creating Advantages -- Part 7
Neutralizing, Exploiting and Creating Advantages -- Part 8
Neutralizing, Exploiting and Creating Advantages -- Part 9
Side Push from Left and from Right -- Part 1
Side Push from Left and from Right -- Part 2
Side Push from Left and from Right -- Part 3
Side Push from Left and from Right -- Part 4
Side Push from Left and from Right -- Part 5
Side Push from Left and from Right -- Part 7
Side Push from Left and from Right -- Part 8
Side Push from Left and from Right -- Part 9
Skills and Techniques in Pushing Hands -- Part 1
Taijiquan Chin-Na Techniques and their Counters -- Part 5
Taijiquan Chin-Na Techniques and their Counters -- Part 6
Taijiquan Chin-Na Techniques and their Counters -- Part 7
Skills and Techniques in Pushing Hands -- Part 2
Skills and Techniques in Pushing Hands -- Part 3
Skills and Techniques in Pushing Hands -- Part 4
Skill6s and Techniques in Pushing Hands -- Part 5
Skills and Techniques in Pushing Hands -- Part 6
Skills and Techniques in Pushing Hands -- Part 7
Skills and Techniques in Pushing Hands -- Part 8
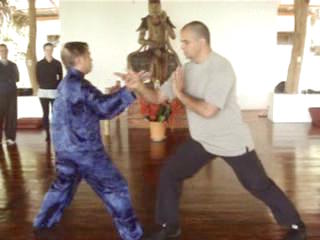 Skills and Techniques in Pushing Hands -- Part 9
Skills and Techniques in Pushing Hands -- Part 10
Skills and Techniques in Pushing Hands -- Part 11
Skills and Techniques in Pushing Hands -- Part 12
Picture-Perfect Form and Sophisticated Skills -- Part 1
Picture-Perfect Form and Sophisticated Skills -- Part 2
Picture-Perfect Form and Sophisticated Skills -- Part 3
Picture-Perfect Form and Sophisticated Skills -- Part 4
Picture-Perfect Form and Sophisticated Skills -- Part 5
Picture-Perfect Form and Sophisticated Skills -- Part 6
Picture-Perfect Form and Sophisticated Skills -- Part 7
Picture-Perfect Form and Sophisticated Skills -- Part 8
Picture-Perfect Form and Sophisticated Skills -- Part 9
Picture-Perfect Form and Sophisticated Skills -- Part 10
Picture-Perfect Form and Sophisticated Skills -- Part 11
Taijiquan Chin-Na Techniques and their Counters -- Part 8
Taijiquan Chin-Na Techniques and their Counters -- Part 9
Taijiquan Chin-Na Techniques and their Counters -- Part 10
Taijiquan Chin-Na Techniques and their Counters -- Part 11
Moving to an Opponent's Back -- Part 1
Moving to an Opponent's Back -- Part 2
Moving to an Opponent's Back -- Part 3
Moving to an Opponent's Back -- Part 4
Moving to an Opponent's Back -- Part 5
Moving to an Opponent's Back -- Part 6
Moving to an Opponent's Back -- Part 7
Moving to an Opponent's Back -- Part 8
Moving to an Opponent's Back -- Part 9
Moving to an Opponent's Back -- Part 10
Moving to an Opponent's Back -- Part 11
Moving to an Opponent's Back -- Part 12
Moving to an Opponent's Back -- Part 13
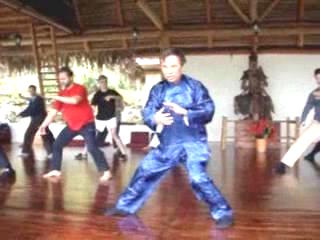 Taijiquan Blue Mountain -- Taijiquan 04
Progressing to Da Shou or Striking Hands -- Overview
Taijiquan Blue Mountain -- Taijiquan 04
Progressing to Da Shou or Striking Hands -- Overview
White Snake Shoots Venom and its Various
Counters -- Overview
Striking the Opponent's Top, Middle or Bottom
Level -- Overview
Why do We Use Poise Patterns at the Start of
Combat?-- Overview
The Three Arrivals and the Four Preparations -- Overview
Important Lessons in Initiating an Attack and in
Responding to an Initiate Attack -- Overview
Third Class, Second Class and First Class Response -- Overview
Using Genuine Taijiquan Techniques in Attack and Defence -- Overview
Abridged Combat Sequence 1: Striking -- Overview
Progressing to Da Shou or Striking Hands -- Part 1
Progressing to Da Shou or Striking Hands -- Part 2
Progressing to Da Shou or Striking Hands -- Part 3
Progressing to Da Shou or Striking Hands -- Part 4
Progressing to Da Shou or Striking Hands -- Part 5
Progressing to Da Shou or Striking Hands -- Part 6
Progressing to Da Shou or Striking Hands -- Part 7
Progressing to Da Shou or Striking Hands -- Part 8
Progressing to Da Shou or Striking Hands -- Part 9
White Snake Shoots Venom and its Various Counters -- Part 2
White Snake Shoots Venom and its Various Counters -- Part 3
White Snake Shoots Venom and its Various Counters -- Part 4
White Snake Shoots Venom and its Various Counters -- Part 5
White Snake Shoots Venom and its Various Counters -- Part 6
White Snake Shoots Venom and its Various Counters -- Part 7
White Snake Shoots Venom and its Various Counters -- Part 8
White Snake Shoots Venom and its Various Counters -- Part 9
White Snake Shoots Venom and its Various Counters -- Part 10
Striking the Opponent's Top, Middle or Bottom Level -- Part 1
Striking the Opponent's Top, Middle or Bottom Level -- Part 2
Striking the Opponent's Top, Middle or Bottom Level -- Part 3
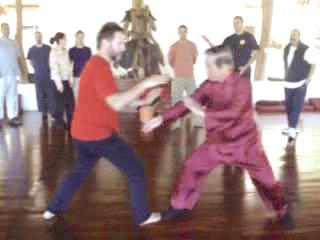 Striking the Opponent's Top, Middle or Bottom Level -- Part 4
Striking the Opponent's Top, Middle or Bottom Level -- Part 5
Striking the Opponent's Top, Middle or Bottom Level -- Part 6
Striking the Opponent's Top, Middle or Bottom Level -- Part 7
Why do We Use Poise Patterns at the Start of Combat?-- Part 1
Why do We Use Poise Patterns at the Start of Combat?-- Part 2
Why do We Use Poise Patterns at the Start of Combat?-- Part 3
Why do We Use Poise Patterns at the Start of Combat?-- Part 4
Why do We Use Poise Patterns at the Start of Combat?-- Part 5
Why do We Use Poise Patterns at the Start of Combat?-- Part 6
Why do We Use Poise Patterns at the Start of Combat?-- Part 7
Why do We Use Poise Patterns at the Start of Combat?-- Part 8
The Three Arrivals and the Four Preparations -- Part 1
The Three Arrivals and the Four Preparations -- Part 2
The Three Arrivals and the Four Preparations -- Part 3
The Three Arrivals and the Four Preparations -- Part 4
The Three Arrivals and the Four Preparations -- Part 5
The Three Arrivals and the Four Preparations -- Part 6
The Three Arrivals and the Four Preparations -- Part 7
The Three Arrivals and the Four Preparations -- Part 8
The Three Arrivals and the Four Preparations -- Part 9
The Three Arrivals and the Four Preparations -- Part 10
The Three Arrivals and the Four Preparations -- Part 11
The Three Arrivals and the Four Preparations -- Part 12
The Three Arrivals and the Four Preparations -- Part 13
The Three Arrivals and the Four Preparations -- Part 14
The Three Arrivals and the Four Preparations -- Part 15
Important Lessons in Initiating an Attack and in Responding to an Innitiate Attack -- Part 1
Important Lessons in Initiating an Attack and in Responding to an Innitiate Attack -- Part 2
Important Lessons in Initiating an Attack and in Responding to an Innitiate Attack -- Part 3
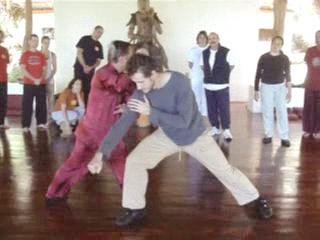 Important Lessons in Initiating an Attack and in
Responding to an Innitiate Attack -- Part 4
Important Lessons in Initiating an Attack and in
Responding to an Innitiate Attack -- Part 5
Important Lessons in Initiating an Attack and in
Responding to an Innitiate Attack -- Part 6
Important Lessons in Initiating an Attack and in
Responding to an Innitiate Attack -- Part 7
Important Lessons in Initiating an Attack and in
Responding to an Innitiate Attack -- Part 8
Important Lessons in Initiating an Attack and in
Responding to an Innitiate Attack -- Part 9
Important Lessons in Initiating an Attack and in Responding to an Innitiate Attack -- Part 10
Important Lessons in Initiating an Attack and in Responding to an Innitiate Attack -- Part 11
Third Class, Second Class and First Class Response -- Part 1
Third Class, Second Class and First Class Response -- Part 2
Third Class, Second Class and First Class Response -- Part 3
Third Class, Second Class and First Class Response -- Part 4
Third Class, Second Class and First Class Response -- Part 5
Third Class, Second Class and First Class Response -- Part 6
Third Class, Second Class and First Class Response -- Part 7
Third Class, Second Class and First Class Response -- Part 8
Third Class, Second Class and First Class Response -- Part 9
Using Genuine Taijiquan Techniques in Attack and Defence -- Part 1
Using Genuine Taijiquan Techniques in Attack and Defence -- Part 2
Using Genuine Taijiquan Techniques in Attack and Defence -- Part 3
Using Genuine Taijiquan Techniques in Attack and Defence -- Part 4
Using Genuine Taijiquan Techniques in Attack and Defence -- Part 5
Using Genuine Taijiquan Techniques in Attack and Defence -- Part 6
Using Genuine Taijiquan Techniques in Attack and Defence -- Part 7
Using Genuine Taijiquan Techniques in Attack and Defence -- Part 8
Using Genuine Taijiquan Techniques in Attack and Defence -- Part 9
Abridged Combat Sequence 1: Striking -- Part 1
Abridged Combat Sequence 1: Striking -- Part 2
Abridged Combat Sequence 1: Striking -- Part 3
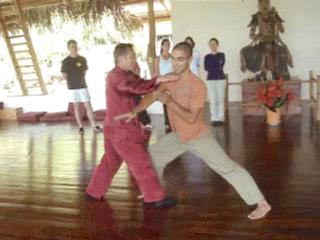 Abridged Combat Sequence 1: Striking -- Part 4
Abridged Combat Sequence 1: Striking -- Part 5
Abridged Combat Sequence 1: Striking -- Part 6
Abridged Combat Sequence 1: Striking -- Part 7
Abridged Combat Sequence 1: Striking -- Part 8
Abridged Combat Sequence 1: Striking -- Part 9
Taijiquan Blue Mountain -- Taijiquan 05
Old Eagle Catches Snake in Pictures -- Overview
Old Eagle Catches Snake 2009 in Videos -- Overview
Old Eagle Catches Snake -- Portugal Verson Sequence 1
Old Eagle Catches Snake -- Portugal Verson Sequence 2
Old Eagle Catches Snake -- Portugal Verson Sequence 3
Old Eagle Catches Snake -- Portugal Verson Sequence 4
Themes for the Combat Sequences -- Overview
Abridged Combat Sequence 2: Kicking -- Overview
Continuation of One Sequence to Another Sequence -- Overview
Chasing after a Retreating Opponent -- Overview
Carry Tiger Back to Mountain -- Overview
Naughty Monkey Kicks at Tree -- Overview
Abridged Combat Sequence 3: Felling -- Overview
Eagle Claw in Taijiquan! -- Overview
Hiding Flower in the Sleeves -- Overview
Abridged Combat Sequence 4: Chin-Na -- Overview
The Four Attacks: Striking, Kicking, Felling and Chin-Na -- Overview
Old Eagle Catches Snake in Remembrance of Zhang San Feng -- Overview
From Combat Sequences to Free Sparring -- Overview
Themes for the Combat Sequences -- Part 1
Themes for the Combat Sequences -- Part 2
4 Abridged Sequences in Solo Performance -- Sequence 1 Initiator
Themes for the Combat Sequences -- Part 3
4 Abridged Sequences in Solo Performance -- Sequence 1 Responder
Themes for the Combat Sequences -- Part 4
Themes for the Combat Sequences -- Part 5
Themes for the Combat Sequences -- Part 6
Themes for the Combat Sequences -- Part 7
Themes for the Combat Sequences -- Part 8
Themes for the Combat Sequences -- Part 9
 Abridged Combat Sequence 2: Kicking -- Part 1
Abridged Combat Sequence 2: Kicking -- Part 2
Abridged Combat Sequence 2: Kicking -- Part 3
Abridged Combat Sequence 2: Kicking -- Part 4
Abridged Combat Sequence 2: Kicking -- Part 5
Abridged Combat Sequence 2: Kicking -- Part 6
Abridged Combat Sequence 2: Kicking -- Part 7
Abridged Combat Sequence 2: Kicking -- Part 8
Abridged Combat Sequence 2: Kicking -- Part 9
Abridged Combat Sequence 2: Kicking -- Part 10
Abridged Combat Sequence 2: Kicking -- Part 11
4 Abridged Sequences in Solo Performance -- Sequence 2 Initiator
Continuation of One Sequence to Another Sequence -- Part 1
4 Abridged Sequences in Solo Performance -- Sequence 2 Responder
Continuation of One Sequence to Another Sequence -- Part 2
Continuation of One Sequence to Another Sequence -- Part 3
Continuation of One Sequence to Another Sequence -- Part 4
Continuation of One Sequence to Another Sequence -- Part 5
Continuation of One Sequence to Another Sequence -- Part 6
Continuation of One Sequence to Another Sequence -- Part 7
Continuation of One Sequence to Another Sequence -- Part 8
Continuation of One Sequence to Another Sequence -- Part 9
Continuation of One Sequence to Another Sequence -- Part 10
Continuation of One Sequence to Another Sequence -- Part 11
Continuation of One Sequence to Another Sequence -- Part 12
Chasing after a Retreating Opponent -- Part 1
Chasing after a Retreating Opponent -- Part 2
Chasing after a Retreating Opponent -- Part 3
Chasing after a Retreating Opponent -- Part 4
Chasing after a Retreating Opponent -- Part 5
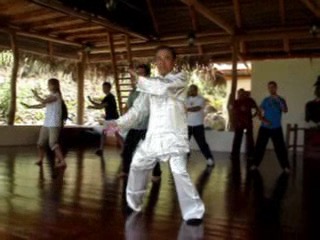 Chasing after a Retreating Opponent -- Part 6
Chasing after a Retreating Opponent -- Part 7
Chasing after a Retreating Opponent -- Part 8
Chasing after a Retreating Opponent -- Part 9
Carry Tiger Back to Mountain -- Part 1
Carry Tiger Back to Mountain -- Part 2
Carry Tiger Back to Mountain -- Part 3
Carry Tiger Back to Mountain -- Part 4
Carry Tiger Back to Mountain -- Part 5
Carry Tiger Back to Mountain -- Part 6
Carry Tiger Back to Mountain -- Part 7
Carry Tiger Back to Mountain -- Part 8
Carry Tiger Back to Mountain -- Part 9
Carry Tiger Back to Mountain -- Part 10
Carry Tiger Back to Mountain -- Part 11
Naughty Monkey Kicks at Tree -- Part 1
Naughty Monkey Kicks at Tree -- Part 2
Naughty Monkey Kicks at Tree -- Part 3
Naughty Monkey Kicks at Tree -- Part 4
Naughty Monkey Kicks at Tree -- Part 5
Naughty Monkey Kicks at Tree -- Part 6
Naughty Monkey Kicks at Tree -- Part 7
Naughty Monkey Kicks at Tree -- Part 8
Naughty Monkey Kicks at Tree -- Part 9
Naughty Monkey Kicks at Tree -- Part 10
Naughty Monkey Kicks at Tree -- Part 11
Abridged Combat Sequence 3: Felling -- Part 1
Abridged Combat Sequence 3: Felling -- Part 2
4 Abridged Sequences in Solo Performance
-- Sequence 3 Initiator
Abridged Combat Sequence 3: Felling -- Part 3
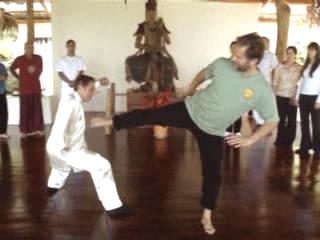 4 Abridged Sequences in Solo Performance
-- Sequence 3 Responder
Abridged Combat Sequence 3: Felling -- Part 4
Abridged Combat Sequence 3: Felling -- Part 5
Abridged Combat Sequence 3: Felling -- Part 6
Abridged Combat Sequence 3: Felling -- Part 7
Abridged Combat Sequence 3: Felling -- Part 8
Eagle Claw in Taijiquan! -- Part 1
Eagle Claw in Taijiquan! -- Part 2
Eagle Claw in Taijiquan! -- Part 3
Eagle Claw in Taijiquan! -- Part 4
Eagle Claw in Taijiquan! -- Part 5
Eagle Claw in Taijiquan! -- Part 6
Eagle Claw in Taijiquan! -- Part 7
Eagle Claw in Taijiquan! -- Part 8
Eagle Claw in Taijiquan! -- Part 9
Hiding Flower in the Sleeves -- Part 1
Hiding Flower in the Sleeves -- Part 2
Hiding Flower in the Sleeves -- Part 3
Hiding Flower in the Sleeves -- Part 4
Hiding Flower in the Sleeves -- Part 5
Hiding Flower in the Sleeves -- Part 6
Hiding Flower in the Sleeves -- Part 7
Hiding Flower in the Sleeves -- Part 8
Hiding Flower in the Sleeves -- Part 9
Abridged Combat Sequence 4: Chin-Na -- Part 1
Abridged Combat Sequence 4: Chin-Na -- Part 2
4 Abridged Seqences in Solo Performance -- Sequence 4 Initiator
Abridged Combat Sequence 4: Chin-Na -- Part 3
4 Abridged Seqences in Solo Performance -- Sequence 4 Responder
Abridged Combat Sequence 4: Chin-Na -- Part 4
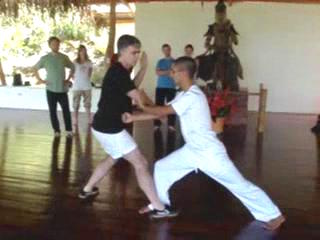 Abridged Combat Sequence 4: Chin-Na -- Part 5
Abridged Combat Sequence 4: Chin-Na -- Part 6
Abridged Combat Sequence 4: Chin-Na -- Part 7
Abridged Combat Sequence 4: Chin-Na -- Part 8
The Four Attacks: Striking, Kicking, Felling and
Chin-Na -- Part 1
The Four Attacks: Striking, Kicking, Felling and
Chin-Na -- Part 2
The Four Attacks: Striking, Kicking, Felling and
Chin-Na -- Part 3
The Four Attacks: Striking, Kicking, Felling and
Chin-Na -- Part 4
The Four Attacks: Striking, Kicking, Felling and Chin-Na -- Part 5
The Four Attacks: Striking, Kicking, Felling and Chin-Na -- Part 6
The Four Attacks: Striking, Kicking, Felling and Chin-Na -- Part 7
The Four Attacks: Striking, Kicking, Felling and Chin-Na -- Part 8
The Four Attacks: Striking, Kicking, Felling and Chin-Na -- Part 9
Old Eagle Catches Snake in Remembrance of Zhang San Feng -- Part 1
Old Eagle Catches Snake in Remembrance of Zhang San Feng -- Part 2
Old Eagle Catches Snake in Remembrance of Zhang San Feng -- Part 3
Old Eagle Catches Snake in Remembrance of Zhang San Feng -- Part 4
Old Eagle Catches Snake in Remembrance of Zhang San Feng -- Part 5
Old Eagle Catches Snake -- Sequence 1
Old Eagle Catches Snake in Remembrance of Zhang San Feng -- Part 6
Old Eagle Catches Snake -- Sequence 2
Old Eagle Catches Snake in Remembrance of Zhang San Feng -- Part 7
Old Eagle Catches Snake -- Sequence 3
Old Eagle Catches Snake in Remembrance of Zhang San Feng -- Part 8
Old Eagle Catches Snake -- Sequence 4
Old Eagle Catches Snake in Remembrance of Zhang San Feng -- Part 9
From Combat Seqjences to Free Sparring< -- Part 1
From Combat Seqjences to Free Sparring< -- Part 2
From Combat Seqjences to Free Sparring< -- Part 3
From Combat Seqjences to Free Sparring< -- Part 4
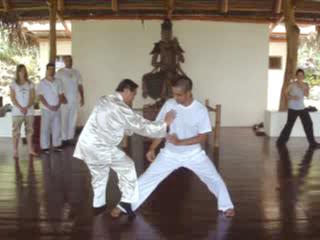 From Combat Seqjences to Free Sparring< -- Part 5
From Combat Seqjences to Free Sparring< -- Part 6
From Combat Seqjences to Free Sparring< -- Part 7
From Combat Seqjences to Free Sparring< -- Part 8
From Combat Seqjences to Free Sparring< -- Part 9
From Combat Seqjences to Free Sparring< -- Part 10
Taijiquan Blue Mountain -- Youtube
Taijiquan for Health, Combat and Spiritua
l Cultivation -- Overview
Taiji Originates from Wuji and Returns to Wuji
Philosophy and Methodology of Stance Training
Subtle Joys of Three-Circle Stance
Kungfu Stances -- Horse-Riding, Bow-Arrow and False-Leg
Kungfu Stances -- Four-Six, Unicorn and Single-Leg/a>
Flexibility Exercises that also Enhance Internal Force
Importance of Body-movement and Footwork
Three Harmonies in Immortal Waves Sleeves
Chin-Na Techniques in Double Dragons and Push Boat
Grasping Sparrow's Tail
Short and Medium Range in Stationary Pushing Hands
Frontal Push in Mobile Pushing Hands
Rolling and Stepping Forward and Backward
Technical and Tactical Advantages
Neutralizing, Exploiting and Creating Advantages
Side Push from Left and from Right
Skills and Techniques in Pushing Hands
Picture-Perfect From and Sophisticated Skills
Moving to an Opponent's Back
Taijiquan Chin-Na Techniques and Counters
Progressing to Da Shou or Striking Hands
White Snake Shoots Venom and Various Counters
Striking Opponent's Top, Middle and Bottom Level
Why do We Use Poise Patterns at Start of Combat
Three Arrivals and Four Preparations
Important Lessons in Initiating an Attack and
in Responding to an Initial Attack
Third Class, Second Class and First Class Response
Using Genuine Taijiquan Techniques in Attack and Defence
Abridged Combat Sequence 1 -- Striking
 Themes for Combat Sequences
Abridged Combat Sequence 2 -- Kicking
Continuation from One Sequence to Another Sequence
Chasing after a Retreating Opponent
Carry Tiger Back to Mountain
Naughty Monkey Kicks at Tree
Abridged Combat Sequence 3 -- Felling
Eagle Claw in Taijiquan
Hiding Flowers in Sleeves
Abridged Combat Sequence 4 -- Chin-Na
The Four Attacks -- Striking, Kicking, Felling and Chin-Na
Old Eagle Catches Snake in Remembrance of Zhang San Feng
From Combat Sequences to Free Sparring
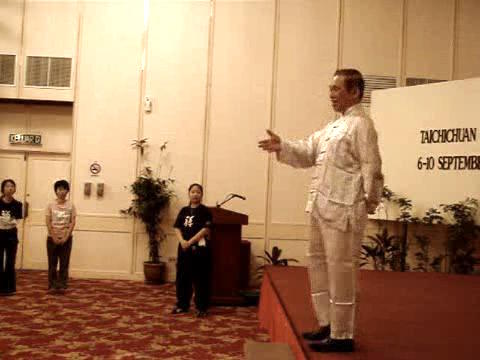 Taijiquan 2008 -- Taijiquan 04
Progressing to Striking Hands where Techniques are
Taijiquan 2008 -- Taijiquan 04
Progressing to Striking Hands where Techniques are
Applied for Combat -- Overview
Our Classes are Full of Fun and Laughter -- Overview
The Signature Taijiquan Tactic of Defence
cum Counter -- Overview
Useful Tactics for Taijiquan and for Daily Life
-- Overview
Opening, Closing or Deflecting an Opponent's
Attack when Countering -- Overview
Top, Middle and Low Strikes and their
Defences -- Overview
Progressing to Striking Hands where Techniques are Applied for Combat -- Part 2
Progressing to Striking Hands where Techniques are Applied for Combat -- Part 3
Progressing to Striking Hands where Techniques are Applied for Combat -- Part 4
Progressing to Striking Hands where Techniques are Applied for Combat -- Part 5
Progressing to Striking Hands where Techniques are Applied for Combat -- Part 6
Our Classes are Full of Fun and Laughter -- Part 1
Our Classes are Full of Fun and Laughter -- Part 2
Our Classes are Full of Fun and Laughter -- Part 3
Our Classes are Full of Fun and Laughter -- Part 4
Our Classes are Full of Fun and Laughter -- Part 5
Our Classes are Full of Fun and Laughter -- Part 6
The Signature Taijiquan Tactic of Defence cum Counter -- Part 1
The Signature Taijiquan Tactic of Defence cum Counter -- Part 2
The Signature Taijiquan Tactic of Defence cum Counter -- Part 3
The Signature Taijiquan Tactic of Defence cum Counter -- Part 4
The Signature Taijiquan Tactic of Defence cum Counter -- Part 5
The Signature Taijiquan Tactic of Defence cum Counter -- Part 6
The Signature Taijiquan Tactic of Defence cum Counter -- Part 7
Useful Tactics for Taijiquan and for Daily Life -- Part 1
Useful Tactics for Taijiquan and for Daily Life -- Part 2
Useful Tactics for Taijiquan and for Daily Life -- Part 3
Useful Tactics for Taijiquan and for Daily Life -- Part 4
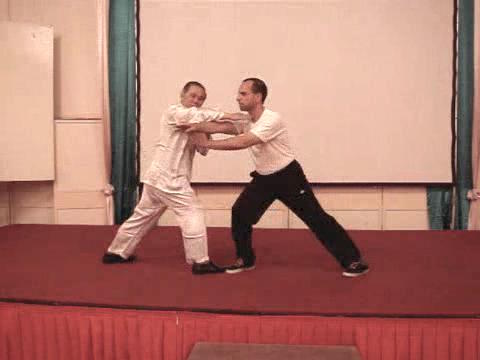 Useful Tactics for Taijiquan and for Daily Life -- Part 5
Useful Tactics for Taijiquan and for Daily Life -- Part 6
Useful Tactics for Taijiquan and for Daily Life -- Part 7
Useful Tactics for Taijiquan and for Daily Life -- Part 8
Opening, Closing or Deflecting an Opponent's Attack
when Countering -- Part 1
Opening, Closing or Deflecting an Opponent's Attack
when Countering -- Part 2
Opening, Closing or Deflecting an Opponent's Attack
when Countering -- Part 3
Opening, Closing or Deflecting an Opponent's Attack
when Countering -- Part 4
Opening, Closing or Deflecting an Opponent's Attack when Countering -- Part 5
Opening, Closing or Deflecting an Opponent's Attack when Countering -- Part 6
Opening, Closing or Deflecting an Opponent's Attack when Countering -- Part 7
Opening, Closing or Deflecting an Opponent's Attack when Countering -- Part 8
Opening, Closing or Deflecting an Opponent's Attack when Countering -- Part 9
Opening, Closing or Deflecting an Opponent's Attack when Countering -- Part 10
Top, Middle and Low Strikes and their Defences -- Part 1
Opening, Closing or Deflecting an Opponent's Attack when Countering -- Part 11
Top, Middle and Low Strikes and their Defences -- Part 2
Opening, Closing or Deflecting an Opponent's Attack when Countering -- Part 12
Top, Middle and Low Strikes and their Defences -- Part 3
Top, Middle and Low Strikes and their Defences -- Part 4
Top, Middle and Low Strikes and their Defences -- Part 5
Top, Middle and Low Strikes and their Defences -- Part 6
Top, Middle and Low Strikes and their Defences -- Part 7
Top, Middle and Low Strikes and their Defences -- Part 8
Top, Middle and Low Strikes and their Defences -- Part 9
Top, Middle and Low Strikes and their Defences -- Part 10
Top, Middle and Low Strikes and their Defences -- Part 11
Top, Middle and Low Strikes and their Defences -- Part 12
Correct Spacing and Adequate Cllosing in Yellow Bee -- Part 1
Correct Spacing and Adequate Cllosing in Yellow Bee -- Part 2
Correct Spacing and Adequate Cllosing in Yellow Bee -- Part 3
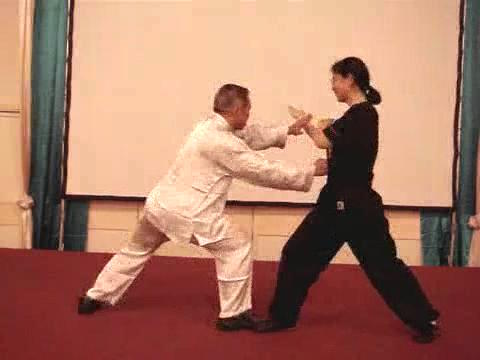 Correct Spacing and Adequate Cllosing in Yellow Bee -- Part 4
Correct Spacing and Adequate Cllosing in Yellow Bee -- Part 5
Correct Spacing and Adequate Cllosing in Yellow Bee -- Part 6
Jade Girl is as Beautiful to Watch as it is for Combat -- Part 1
Jade Girl is as Beautiful to Watch as it is for Combat -- Part 2
Progressing to Striking Hands where Techniques are
Applied for Combat -- Part 2
Jade Girl is as Beautiful to Watch as it is for Combat -- Part 3
Jade Girl is as Beautiful to Watch as it is for Combat -- Part 4
Jade Girl is as Beautiful to Watch as it is for Combat -- Part 5
Jade Girl is as Beautiful to Watch as it is for Combat -- Part 6
Jade Girl is as Beautiful to Watch as it is for Combat -- Part 7
Jade Girl is as Beautiful to Watch as it is for Combat -- Part 8
Jade Girl is as Beautiful to Watch as it is for Combat -- Part 9
Jade Girl is as Beautiful to Watch as it is for Combat -- Part 10
Jade Girl is as Beautiful to Watch as it is for Combat -- Part 11
Jade Girl is as Beautiful to Watch as it is for Combat -- Part 12
Applying the Four Basic Hand Strikes and Counters to Play with a Boxer -- Part 1
Applying the Four Basic Hand Strikes and Counters to Play with a Boxer -- Part 2
Applying the Four Basic Hand Strikes and Counters to Play with a Boxer -- Part 3
Applying the Four Basic Hand Strikes and Counters to Play with a Boxer -- Part 4
Applying the Four Basic Hand Strikes and Counters to Play with a Boxer -- Part 5
Applying the Four Basic Hand Strikes and Counters to Play with a Boxer -- Part 6
Taijiquan 2008 -- Taijiquan 05
An Excellnet Taijiquan Pattern Against Kicks -- Part 1
An Excellnet Taijiquan Pattern Against Kicks -- Part 2
An Excellnet Taijiquan Pattern Against Kicks -- Part 3
An Excellnet Taijiquan Pattern Against Kicks -- Part 4
An Excellnet Taijiquan Pattern Against Kicks -- Part 5
An Excellnet Taijiquan Pattern Against Kicks -- Part 6
An Excellnet Taijiquan Pattern Against Kicks -- Part 7
An Excellnet Taijiquan Pattern Against Kicks -- Part 8
An Excellnet Taijiquan Pattern Against Kicks -- Part 9
Spacing, Timing, Body-Movement in Strikikng Tiger Poise -- Part 1
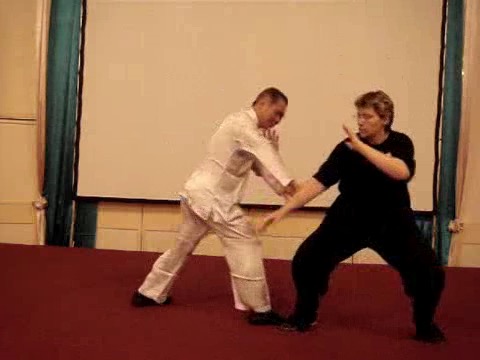 Spacing, Timing, Body-Movement in Striking Tiger
Poise -- Part 2
Spacing, Timing, Body-Movement in Striking Tiger
Poise -- Part 3
Spacing, Timing, Body-Movement in Striking Tiger
Poise -- Part 4
Spacing, Timing, Body-Movement in Striking Tiger
Poise -- Part 5
Spacing, Timing, Body-Movement in Striking Tiger
Poise -- Part 6
Spacing, Timing, Body-Movement in Striking Tiger
Poise -- Part 7
Spacing, Timing, Body-Movement in Striking Tiger Poise -- Part 8
Striking Tiger Poise against any Kicks -- Part 1
Striking Tiger Poise against any Kicks -- Part 2
Striking Tiger Poise against any Kicks -- Part 3
Striking Tiger Poise against any Kicks -- Part 4
Striking Tiger Poise against any Kicks -- Part 5
Striking an Opponent before he has Recovered from his Previous Movement -- Part 1
Striking an Opponent before he has Recovered from his Previous Movement -- Part 2
Striking an Opponent before he has Recovered from his Previous Movement -- Part 3
Striking an Opponent before he has Recovered from his Previous Movement -- Part 4
Striking an Opponent before he has Recovered from his Previous Movement -- Part 5
Striking an Opponent before he has Recovered from his Previous Movement -- Part 6
Striking an Opponent before he has Recovered from his Previous Movement -- Part 7
Striking an Opponent before he has Recovered from his Previous Movement -- Part 8
Striking an Opponent before he has Recovered from his Previous Movement -- Part 9
Important Principles in Executing Kicks and in Countering Them -- Part 1
Important Principles in Executing Kicks and in Countering Them -- Part 2
Important Principles in Executing Kicks and in Countering Them -- Part 3
Important Principles in Executing Kicks and in Countering Them -- Part 4
Important Principles in Executing Kicks and in Countering Them -- Part 5
Important Principles in Executing Kicks and in Countering Them -- Part 6
Important Principles in Executing Kicks and in Countering Them -- Part 7
Important Principles in Executing Kicks and in Countering Them -- Part 8
Learning How to Fell an Opponent as well as How to Fall Safely -- Part 1
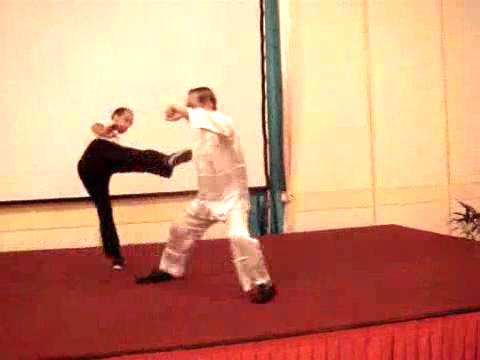 Learning How to Fell an Opponent as well as How
to Fall Safely -- Part 2
Learning How to Fell an Opponent as well as How
to Fall Safely -- Part 3
Learning How to Fell an Opponent as well as How
to Fall Safely -- Part 4
Learning How to Fell an Opponent as well as How
to Fall Safely -- Part 5
Learning How to Fell an Opponent as well as How
to Fall Safely -- Part 6
Learning How to Fell an Opponent as well as How
to Fall Safely -- Part 7
Learning How to Fell an Opponent as well as How
to Fall Safely -- Part 8
Learning How to Fell an Opponent as well as How to Fall Safely -- Part 9
It is Delightful to See Danty Ladies Throwing Hefty Men -- Part 1
It is Delightful to See Danty Ladies Throwing Hefty Men -- Part 2
It is Delightful to See Danty Ladies Throwing Hefty Men -- Part 3
It is Delightful to See Danty Ladies Throwing Hefty Men -- Part 4
It is Delightful to See Danty Ladies Throwing Hefty Men -- Part 5
It is Delightful to See Danty Ladies Throwing Hefty Men -- Part 6
It is Delightful to See Danty Ladies Throwing Hefty Men -- Part 7
It is Delightful to See Danty Ladies Throwing Hefty Men -- Part 8
It is Delightful to See Danty Ladies Throwing Hefty Men -- Part 9
It is Delightful to See Danty Ladies Throwing Hefty Men -- Part 10
It is Delightful to See Danty Ladies Throwing Hefty Men -- Part 11
A Technique to Counter any Throws, and a Technique to Counter any Kicks-- Part 1
A Technique to Counter any Throws, and a Technique to Counter any Kicks-- Part 2
A Technique to Counter any Throws, and a Technique to Counter any Kicks-- Part 3
A Technique to Counter any Throws, and a Technique to Counter any Kicks -- Part 4
A Technique to Counter any Throws, and a Technique to Counter any Kicks-- Part 5
A Technique to Counter any Throws, and a Technique to Counter any Kicks-- Part 6
A Technique to Counter any Throws, and a Technique to Counter any Kicks-- Part 7
A Technique to Counter any Throws, and a Technique to Counter any Kicks-- Part 8
A Technique to Counter any Throws, and a Technique to Counter any Kicks-- Part 9
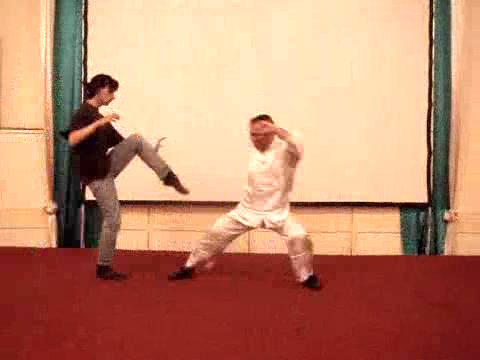 An Excellnet Taijiquan Pattern Against Kicks -- Overview
Spacing, Timing, Body-Movement in Strikikng Tiger
Poise -- Overview
Striking Tiger Poise against any Kicks -- Overview
Striking an Opponent before he has Recovered
from his Previous Movement -- Overview
Important Principles in Executing Kicks and in
Countering Them -- Overview
Learning How to Fell an Opponent as well as How
to Fall Safely -- Overview
It is Delightful to See Danty Ladies Throwing Hefty
Men -- Overview
A Technique to Counter any Throws, and a Technique to Counter any Kicks -- Overview
Taijiquan 2008 -- Taijiquan 06
A Formidable Chin-Na Attack and its Defence -- Part 1
A Formidable Chin-Na Attack and its Defence -- Part 2
A Formidable Chin-Na Attack and its Defence -- Part 3
A Formidable Chin-Na Attack and its Defence -- Part 4
A Formidable Chin-Na Attack and its Defence -- Part 5
A Formidable Chin-Na Attack and its Defence -- Part 6
Single-Hand Grips and Double-Hand Grips in Chin-Na Attacks -- Part 1
Single-Hand Grips and Double-Hand Grips in Chin-Na Attacks -- Part 2
Single-Hand Grips and Double-Hand Grips in Chin-Na Attacks -- Part 3
Single-Hand Grips and Double-Hand Grips in Chin-Na Attacks -- Part 4
Single-Hand Grips and Double-Hand Grips in Chin-Na Attacks -- Part 5
The Marvels of Lifting's Tail Water and Grasping Sparrow's Tail -- Part 1
The Marvels of Lifting's Tail Water and Grasping Sparrow's Tail -- Part 2
The Marvels of Lifting's Tail Water and Grasping Sparrow's Tail -- Part 3
The Marvels of Lifting's Tail Water and Grasping Sparrow's Tail -- Part 4
The Marvels of Lifting's Tail Water and Grasping Sparrow's Tail -- Part 5
The Marvels of Lifting's Tail Water and Grasping Sparrow's Tail -- Part 6
The Marvels of Lifting's Tail Water and Grasping Sparrow's Tail -- Part 7
The Marvels of Lifting's Tail Water and Grasping Sparrow's Tail -- Part 8
The Marvels of Lifting's Tail Water and Grasping Sparrow's Tail -- Part 9
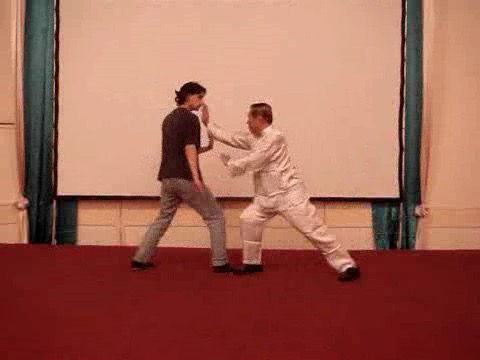 The Mechanics of Fa-Jing using Single Whip -- Part 1
The Mechanics of Fa-Jing using Single Whip -- Part 2
The Mechanics of Fa-Jing using Single Whip -- Part 3
The Mechanics of Fa-Jing using Single Whip -- Part 4
The Mechanics of Fa-Jing using Single Whip -- Part 5
The Mechanics of Fa-Jing using Single Whip -- Part 6
The Mechanics of Fa-Jing using Single Whip -- Part 7
The Mechanics of Fa-Jing using Single Whip -- Part 8
The Mechanics of Fa-Jing using Single Whip -- Part 9
What Functions does the Hook Hand Serve? -- Part 1
What Functions does the Hook Hand Serve? -- Part 2
What Functions does the Hook Hand Serve? -- Part 3
What Functions does the Hook Hand Serve? -- Part 4
What Functions does the Hook Hand Serve? -- Part 5
What Functions does the Hook Hand Serve? -- Part 6
Acting as Anchrage and Striking Vital Points -- Part 1
Acting as Anchrage and Striking Vital Points -- Part 2
Acting as Anchrage and Striking Vital Points -- Part 3
Acting as Anchrage and Striking Vital Points -- Part 4
Acting as Anchrage and Striking Vital Points -- Part 5
Grasping Sparrow's Tail and Diferent Types of Force -- Part 1
Grasping Sparrow's Tail and Diferent Types of Force -- Part 2
Grasping Sparrow's Tail and Diferent Types of Force -- Part 3
Grasping Sparrow's Tail and Diferent Types of Force -- Part 4
Grasping Sparrow's Tail and Diferent Types of Force -- Part 5
Grasping Sparrow's Tail and Diferent Types of Force -- Part 6
Grasping Sparrow's Tail and Diferent Types of Force -- Part 7
Black Bear to Fell Opponents as ell as to Counter all Throws -- Part 1
Black Bear to Fell Opponents as ell as to Counter all Throws -- Part 2
Black Bear to Fell Opponents as ell as to Counter all Throws -- Part 3
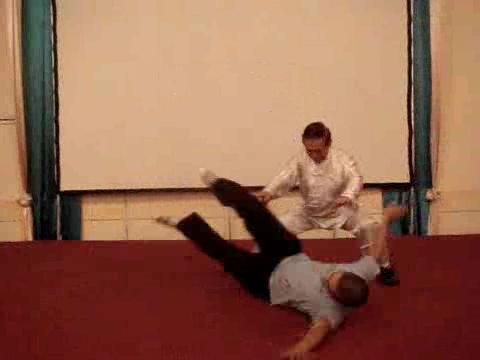 Black Bear to Fell Opponents as well as to Counter all
Throws -- Part 4
Black Bear to Fell Opponents as well as to Counter all
Throws -- Part 5
From One-Step Sparring to Sequence Sparring to
Free Sparring -- Part 1
From One-Step Sparring to Sequence Sparring to
Free Sparring -- Part 2
From One-Step Sparring to Sequence Sparring to
Free Sparring -- Part 3
From One-Step Sparring to Sequence Sparring to
Free Sparring -- Part 4
From One-Step Sparring to Sequence Sparring to Free Sparring -- Part 5
From One-Step Sparring to Sequence Sparring to Free Sparring -- Part 6
Free Sparring but Hits are Controlled -- Part 1
Free Sparring but Hits are Controlled -- Part 2
Free Sparring but Hits are Controlled -- Part 3
Free Sparring but Hits are Controlled -- Part 4
Free Sparring but Hits are Controlled -- Part 5
Free Sparring but Hits are Controlled -- Part 6
Free Sparring but Hits are Controlled -- Part 7
Applying Taijiquan against Street Fighters -- Part 1
Applying Taijiquan against Street Fighters -- Part 2
Applying Taijiquan against Street Fighters -- Part 3
Applying Taijiquan against Street Fighters -- Part 4
Applying Taijiquan against Street Fighters -- Part 5
Applying Taijiquan against Street Fighters -- Part 6
Applying Taijiquan against Street Fighters -- Part 7
Handling the Charges and Kicks of Street Fighters -- Part 1
Handling the Charges and Kicks of Street Fighters -- Part 2
Handling the Charges and Kicks of Street Fighters -- Part 3
Handling the Charges and Kicks of Street Fighters -- Part 4
Handling the Charges and Kicks of Street Fighters -- Part 5
Handling the Charges and Kicks of Street Fighters -- Part 6
Handling the Charges and Kicks of Street Fighters -- Part 7
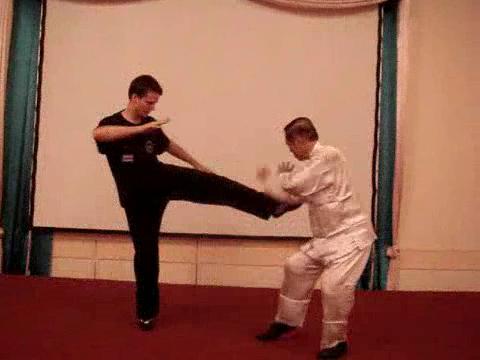 A Formidable Chin-Na Attack and its Defence -- Overview
Single-Hand Grips and Double-Hand Grips in Chin-Na
Attacks -- Overview
The Marvels of Lifting's Tail Water and Grasping
Sparrow's Tail -- Overview
The Mechanics of Fa-Jing using Single Whip -- Overview
What Functions does the Hook Hand Serve? -- Overview
Acting as Anchrage and Striking Vital Points -- Overview
Grasping Sparrow's Tail and Diferent Types of
Force -- Overview
Black Bear to Fell Opponents as ell as to Counter
all Throws -- Overview
From One-Step Sparring to Sequence Sparring to Free Sparring -- Overview
Free Sparring but Hits are Controlled -- Overview
Applying Taijiquan against Street Fighters -- Overview
Handling the Charges and Kicks of Street Fighters -- Overview
 Taijiquan 2008 -- Taijiquan 07
Poise Patterns and Four Modes of Prepatation -- Part 1
Taijiquan 2008 -- Taijiquan 07
Poise Patterns and Four Modes of Prepatation -- Part 1
Poise Patterns and Four Modes of Prepatation -- Part 2
Poise Patterns and Four Modes of Prepatation -- Part 3
Poise Patterns and Four Modes of Prepatation -- Part 4
Poise Patterns and Four Modes of Prepatation -- Part 5
Poise Patterns and Four Modes of Prepatation -- Part 6
Poise Patterns and Four Modes of Prepatation -- Part 7
Poise Patterns and Four Modes of Prepatation -- Part 8
Poise Patterns and Four Modes of Prepatation -- Part 9
Asking the
Way and Three Arrivals -- Part 1
Asking the
Way and Three Arrivals -- Part 2
Asking the
Way and Three Arrivals -- Part 3
Asking the
Way and Three Arrivals -- Part 4
Asking the
Way and Three Arrivals -- Part 5
Asking the
Way and Three Arrivals -- Part 6
Asking the
Way and Three Arrivals -- Part 7
Asking the
Way and Three Arrivals -- Part 8
White Snake in Continuous Attacks -- Part 1
White Snake in Continuous Attacks -- Part 2
White Snake in Continuous Attacks -- Part 3
White Snake in Continuous Attacks -- Part 4
White Snake in Continuous Attacks -- Part 5
White Snake in Continuous Attacks -- Part 6
White Snake in Continuous Attacks -- Part 7
White Snake in Continuous Attacks -- Part 8
Defence-cum-Counter and Other Tactics -- Part 1
Defence-cum-Counter and Other Tactics -- Part 2
Defence-cum-Counter and Other Tactics -- Part 3
Defence-cum-Counter and Other Tactics -- Part 4
Defence-cum-Counter and Other Tactics -- Part 5
 Defence-cum-Counter and Other Tactics -- Part 6
Defence-cum-Counter and Other Tactics -- Part 7
Defence-cum-Counter and Other Tactics -- Part 8
Do you Know Why Taijiquan is Often Performed
Slowly? -- Part 1
Do you Know Why Taijiquan is Often Performed
Slowly? -- Part 2
Do you Know Why Taijiquan is Often Performed
Slowly? -- Part 3
Do you Know Why Taijiquan is Often Performed
Slowly? -- Part 4
Do you Know Why Taijiquan is Often Performed Slowly? -- Part 5
Do you Know Why Taijiquan is Often Performed Slowly? -- Part 6
Do you Know Why Taijiquan is Often Performed Slowly? -- Part 7
Do you Know Why Taijiquan is Often Performed Slowly? -- Part 8
Do you Know Why Taijiquan is Often Performed Slowly? -- Part 9
What should You do when your Opponent Hesitates -- Part 1
What should You do when your Opponent Hesitates -- Part 2
What should You do when your Opponent Hesitates -- Part 3
What should You do when your Opponent Hesitates -- Part 4
What should You do when your Opponent Hesitates -- Part 5
What should You do when your Opponent Hesitates -- Part 6
What should You do when your Opponent Hesitates -- Part 7
What should You do when your Opponent Hesitates -- Part 8
Immortal
Waves Sleeves in Three Different Speeds -- Part 1
Immortal
Waves Sleeves in Three Different Speeds -- Part 2
Immortal
Waves Sleeves in Three Different Speeds -- Part 3
Immortal
Waves Sleeves in Three Different Speeds -- Part 4
Immortal
Waves Sleeves in Three Different Speeds -- Part 5
Immortal
Waves Sleeves in Three Different Speeds -- Part 6
Immortal
Waves Sleeves in Three Different Speeds -- Part 7
Immortal
Waves Sleeves in Three Different Speeds -- Part 8
 Poise Patterns and Four Modes of Prepatation -- Overview
Asking the
Way and Three Arrivals -- Overview
White Snake in Continuous Attacks -- Overview
Defence-cum-Counter and Other Tactics -- Overview
Do you Know Why Taijiquan is Often Performed Slowly?
-- Overview
What should You do when your Opponent Hesitates
-- Overview
Immortal
Waves Sleeves in Three Different Speeds
-- Overview
Taijiquan 2008 -- Taijiquan 08
Some Important Lessons in Combat Sewuence 2 -- Part 1
Some Important Lessons in Combat Sewuence 2 -- Part 2
Some Important Lessons in Combat Sewuence 2 -- Part 3
Some Important Lessons in Combat Sewuence 2 -- Part 4
Some Important Lessons in Combat Sewuence 2 -- Part 5
Some Important Lessons in Combat Sewuence 2 -- Part 6
Some Important Lessons in Combat Sewuence 2 -- Part 7
Some Important Lessons in Combat Sewuence 2 -- Part 8
Some Important Lessons in Combat Sewuence 2 -- Part 9
Some Important Lessons in Combat Sewuence 2 -- Part 10
Fundamental Movement of Cloud Hands -- Part 1
Fundamental Movement of Cloud Hands -- Part 2
Fundamental Movement of Cloud Hands -- Part 3
Fundamental Movement of Cloud Hands -- Part 4
Fundamental Movement of Cloud Hands -- Part 5
Fundamental Movement of Cloud Hands -- Part 6
Fundamental Movement of Cloud Hands -- Part 7
Fundamental Movement of Cloud Hands -- Part 8
Fundamental Movement of Cloud Hands -- Part 9
Fundamental Movement of Cloud Hands -- Part 10
Fundamental Movement of Cloud Hands -- Part 11
Fundamental Movement of Cloud Hands -- Part 12
Fundamental Movement of Cloud Hands -- Part 13
From Cloud Hands to Using Mind to Direct Form -- Part 1
From Cloud Hands to Using Mind to Direct Form -- Part 2
From Cloud Hands to Using Mind to Direct Form -- Part 3
From Cloud Hands to Using Mind to Direct Form -- Part 4
From Cloud Hands to Using Mind to Direct Form -- Part 5
From Cloud Hands to Using Mind to Direct Form -- Part 6
From Cloud Hands to Using Mind to Direct Form -- Part 7
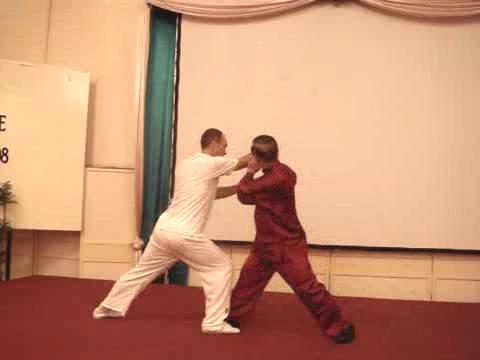 Addition and Subtraction in Sparring Methodology -- Part 1
Addition and Subtraction in Sparring Methodology -- Part 2
Addition and Subtraction in Sparring Methodology -- Part 3
Addition and Subtraction in Sparring Methodology -- Part 4
Addition and Subtraction in Sparring Methodology -- Part 5
Addition and Subtraction in Sparring Methodology -- Part 6
Addition and Subtraction in Sparring Methodology -- Part 7
Addition and Subtraction in Sparring Methodology -- Part 8
Addition and Subtraction in Sparring Methodology -- Part 9
Addition and Subtraction in Sparring Methodology -- Part 10
Addition and Subtraction in Sparring Methodology -- Part 11
Addition and Subtraction in Sparring Methodology -- Part 12
White Snake Shoots Venom as a Pattern, a Sequence and a Set -- Part 1
White Snake Shoots Venom as a Pattern, a Sequence and a Set -- Part 2
White Snake Shoots Venom as a Pattern, a Sequence and a Set -- Part 3
White Snake Shoots Venom as a Pattern, a Sequence and a Set -- Part 4
White Snake Shoots Venom as a Pattern, a Sequence and a Set -- Part 5
White Snake Shoots Venom as a Pattern, a Sequence and a Set -- Part 6
White Snake Shoots Venom as a Pattern, a Sequence and a Set -- Part 7
White Snake Shoots Venom as a Pattern, a Sequence and a Set -- Part 8
White Snake Shoots Venom as a Pattern, a Sequence and a Set -- Part 9
White Snake Shoots Venom as a Pattern, a Sequence and a Set -- Part 10
White Snake Shoots Venom as a Pattern, a Sequence and a Set -- Part 11
White Snake Shoots Venom as a Pattern, a Sequence and a Set -- Part 12
From Patterns to Sequences to Sets -- Part 1
From Patterns to Sequences to Sets -- Part 2
From Patterns to Sequences to Sets -- Part 3
From Patterns to Sequences to Sets -- Part 4
From Patterns to Sequences to Sets -- Part 5
From Patterns to Sequences to Sets -- Part 6
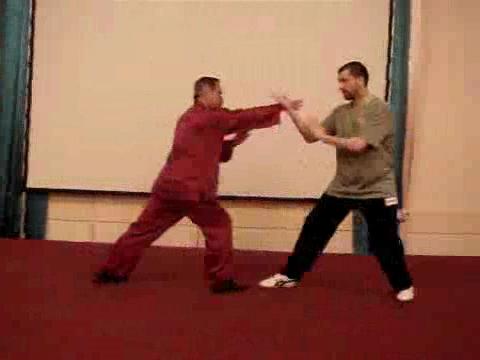 What would You Do if You were Pressed to the Edge
of a Cliff? -- Part 1
What would You Do if You were Pressed to the Edge
of a Cliff? -- Part 2
What would You Do if You were Pressed to the Edge of a Cliff? -- Part 3
What would You Do if You were Pressed to the Edge
of a Cliff? -- Part 4
What would You Do if You were Pressed to the Edge
of a Cliff? -- Part 5
What would You Do if You were Pressed to the Edge
of a Cliff? -- Part 6
What would You Do if You were Pressed to the Edge of a Cliff? -- Part 7
What would You Do if You were Pressed to the Edge of a Cliff? -- Part 8
What would You Do if You were Pressed to the Edge of a Cliff? -- Part 9
What would You Do if You were Pressed to the Edge of a Cliff? -- Part 10
What would You Do if You were Pressed to the Edge of a Cliff? -- Part 11
What would You Do if You were Pressed to the Edge of a Cliff? -- Part 12
Combat Sequence 5: White Crane Flaps Wings -- Part 1
Combat Sequence 5: White Crane Flaps Wings -- Part 2
Combat Sequence 5: White Crane Flaps Wings -- Part 3
Combat Sequence 5: White Crane Flaps Wings -- Part 4
Combat Sequence 5: White Crane Flaps Wings -- Part 5
Combat Sequence 5: White Crane Flaps Wings -- Part 6
Combat Sequence 5: White Crane Flaps Wings -- Part 7
Combat Sequence 5: White Crane Flaps Wings -- Part 8
Combat Sequence 5: White Crane Flaps Wings -- Part 9
Progression of Sequences in Combat Application -- Part 1
Progression of Sequences in Combat Application -- Part 2
Progression of Sequences in Combat Application -- Part 3
Progression of Sequences in Combat Application -- Part 4
Progression of Sequences in Combat Application -- Part 5
Progression of Sequences in Combat Application -- Part 6
Progression of Sequences in Combat Application -- Part 7
Making Good Use of our Technical Advantages -- Part 1
Making Good Use of our Technical Advantages -- Part 2
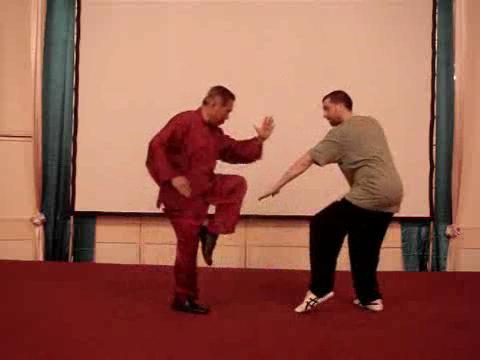 Making Good Use of our Technical Advantages -- Part 3
Making Good Use of our Technical Advantages -- Part 4
Making Good Use of our Technical Advantages -- Part 5
Making Good Use of our Technical Advantages -- Part 6
Making Good Use of our Technical Advantages -- Part 7
Making Good Use of our Technical Advantages -- Part 8
Making Good Use of our Technical Advantages -- Part 9
Side-Step and Counter against Pressing Attack -- Part 1
Side-Step and Counter against Pressing Attack -- Part 2
Side-Step and Counter against Pressing Attack -- Part 3
Side-Step and Counter against Pressing Attack -- Part 4
Side-Step and Counter against Pressing Attack -- Part 5
Side-Step and Counter against Pressing Attack -- Part 6
Side-Step and Counter against Pressing Attack -- Part 7
Side-Step and Counter against Pressing Attack -- Part 8
Side-Step and Counter against Pressing Attack -- Part 9
Side-Step and Counter against Pressing Attack -- Part 10
Side-Step and Counter against Pressing Attack -- Part 11
Side-Step and Counter against Pressing Attack -- Part 12
An Effective Response against any Kicks -- Part 1
An Effective Response against any Kicks -- Part 2
An Effective Response against any Kicks -- Part 3
An Effective Response against any Kicks -- Part 4
An Effective Response against any Kicks -- Part 5
An Effective Response against any Kicks -- Part 6
An Effective Response against any Kicks -- Part 7
An Effective Response against any Kicks -- Part 8
An Effective Response against any Kicks -- Part 9
An Effective Response against any Kicks -- Part 10
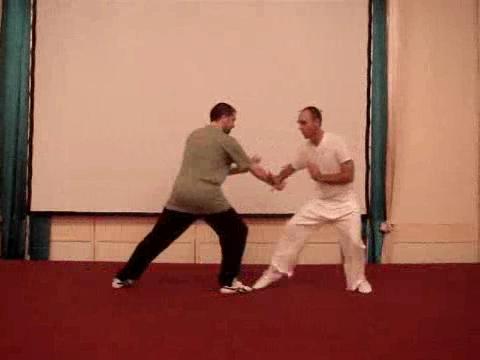 Some Important Lessons in Combat Sewuence 2
-- Overview
Fundamental Movement of Cloud Hands -- Overview
From Cloud Hands to Using Mind to Direct Form
-- Overview
Addition and Subtraction in Sparring Methodology
-- Overview
White Snake Shoots Venom as a Pattern, a Sequence
and a Set -- Overview
From Patterns to Sequences to Sets -- Overview
What would You Do if You were Pressed to the Edge
of a Cliff? -- Overview
Combat Sequence 5: White Crane Flaps Wings -- Overview
Progression of Sequences in Combat Application -- Overview
Making Good Use of our Technical Advantages -- Overview
Side-Step and Counter against Pressing Attack -- Overview
An Effective Response against any Kicks -- Overview
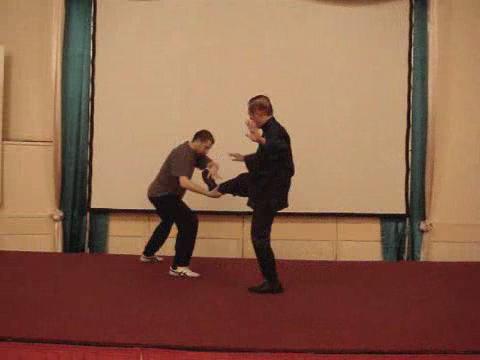 Taijiquan 2008 -- Taijiquan 09
Combat Application Set 2: Green Dragon Shoots
Taijiquan 2008 -- Taijiquan 09
Combat Application Set 2: Green Dragon Shoots
Pearl -- Part 1
Combat Application Set 2: Green Dragon Shoots
Pearl -- Part 2
Combat Application Set 2: Green Dragon Shoots
Pearl -- Part 3
Combat Application Set 2: Green Dragon Shoots
Pearl -- Part 4
Combat Application Set 2: Green Dragon Shoots
Pearl -- Part 5
Combat Application Set 2: Green Dragon Shoots Pearl -- Part 6
What would You Do if your Kicking Leg is Held? -- Part 1
What would You Do if your Kicking Leg is Held? -- Part 2
What would You Do if your Kicking Leg is Held? -- Part 3
What would You Do if your Kicking Leg is Held? -- Part 4
What would You Do if your Kicking Leg is Held? -- Part 5
What would You Do if your Kicking Leg is Held? -- Part 6
What would You Do if your Kicking Leg is Held? -- Part 7
What would You Do if your Kicking Leg is Held? -- Part 8
What would You Do if your Kicking Leg is Held? -- Part 9
What would You Do if your Kicking Leg is Held? -- Part 10
Effective Kicking Attacks and their Defences -- Part 1
Effective Kicking Attacks and their Defences -- Part 2
Effective Kicking Attacks and their Defences -- Part 3
Effective Kicking Attacks and their Defences -- Part 4
Effective Kicking Attacks and their Defences -- Part 5
Effective Kicking Attacks and their Defences -- Part 6
Effective Kicking Attacks and their Defences -- Part 7
Effective Kicking Attacks and their Defences -- Part 8
Effective Kicking Attacks and their Defences -- Part 9
Effective Kicking Attacks and their Defences -- Part 10
The Simplicity and Profundity of Black Bear Sinks Hips -- Part 1
The Simplicity and Profundity of Black Bear Sinks Hips -- Part 2
The Simplicity and Profundity of Black Bear Sinks Hips -- Part 3
The Simplicity and Profundity of Black Bear Sinks Hips -- Part 4
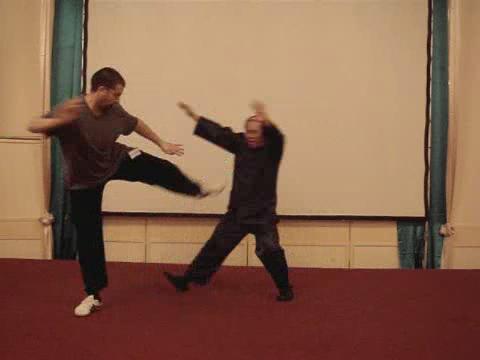 The Simplicity and Profundity of Black Bear Sinks
Hips -- Part 5
The Simplicity and Profundity of Black Bear Sinks
Hips -- Part 6
The Simplicity and Profundity of Black Bear Sinks
Hips -- Part 7
The Simplicity and Profundity of Black Bear Sinks
Hips -- Part 8
The Simplicity and Profundity of Black Bear Sinks
Hips -- Part 9
The Simplicity and Profundity of Black Bear Sinks
Hips -- Part 10
The Simplicity and Profundity of Black Bear Sinks
Hips -- Part 11
Counters against Muay Thai Knee Jabs -- Part 1
Counters against Muay Thai Knee Jabs -- Part 2
Counters against Muay Thai Knee Jabs -- Part 3
Counters against Muay Thai Knee Jabs -- Part 4
Counters against Muay Thai Knee Jabs -- Part 5
Counters against Muay Thai Knee Jabs -- Part 6
Counters against Muay Thai Knee Jabs -- Part 7
Counters against Muay Thai Knee Jabs -- Part 8
Overwheming your Opponents with Prressing Attacks -- Part 1
Overwheming your Opponents with Prressing Attacks -- Part 2
Overwheming your Opponents with Prressing Attacks -- Part 3
Overwheming your Opponents with Prressing Attacks -- Part 4
Overwheming your Opponents with Prressing Attacks -- Part 5
Overwheming your Opponents with Prressing Attacks -- Part 6
Overwheming your Opponents with Prressing Attacks -- Part 7
Counters against Pressing Attacks -- Part 1
Counters against Pressing Attacks -- Part 3
Counters against Pressing Attacks -- Part 4
Counters against Pressing Attacks -- Part
Counters against Pressing Attacks -- Part 6
Counters against Pressing Attacks -- Part 2
Counters against Pressing Attacks -- Part 7
Counters against Pressing Attacks -- Part 8
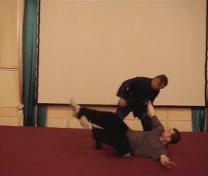 The Mechanics of the Shoulder Strike -- Part 1
The Mechanics of the Shoulder Strike -- Part 2
The Mechanics of the Shoulder Strike -- Part 3
The Mechanics of the Shoulder Strike -- Part 4
The Mechanics of the Shoulder Strike -- Part 5
The Mechanics of the Shoulder Strike -- Part 6
The Mechanics of the Shoulder Strike -- Part 7
The Mechanics of the Shoulder Strike -- Part 8
The Mechanics of the Shoulder Strike -- Part 9
The Mechanics of the Shoulder Strike -- Part 10
The Mechanics of the Shoulder Strike -- Part 11
Starting Later but Arriving Earlier -- Part 1
Starting Later but Arriving Earlier -- Part 2
Starting Later but Arriving Earlier -- Part 3
Starting Later but Arriving Earlier -- Part 4
Starting Later but Arriving Earlier -- Part 5
Starting Later but Arriving Earlier -- Part 6
Starting Later but Arriving Earlier -- Part 7
Starting Later but Arriving Earlier -- Part 8
Starting Later but Arriving Earlier -- Part 9
Combat Sequence 11: Cloud Hands -- Part 1
Combat Sequence 11: Cloud Hands -- Part 2
Combat Sequence 11: Cloud Hands -- Part 3
Combat Sequence 11: Cloud Hands -- Part 4
Combat Sequence 11: Cloud Hands -- Part 5
Combat Sequence 11: Cloud Hands -- Part 6
Combat Sequence 11: Cloud Hands -- Part 7
Combat Sequence 11: Cloud Hands -- Part 8
Combat Sequence 11: Cloud Hands -- Part 9
Combat Sequence 11: Cloud Hands -- Part 10
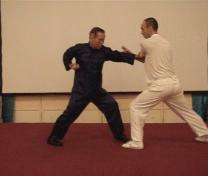 Making Kungfu Alive with Fierce Dragon -- Part 1
Making Kungfu Alive with Fierce Dragon -- Part 2
Making Kungfu Alive with Fierce Dragon -- Part 3
Making Kungfu Alive with Fierce Dragon -- Part 4
Making Kungfu Alive with Fierce Dragon -- Part 5
Making Kungfu Alive with Fierce Dragon -- Part 6
Making Kungfu Alive with Fierce Dragon -- Part 7
Making Kungfu Alive with Fierce Dragon -- Part 8
Making Kungfu Alive with Fierce Dragon -- Part 9
Combat Sequence 12: Carry Tiger Back to Mountain -- Part 1
Combat Sequence 12: Carry Tiger Back to Mountain -- Part 2
Combat Sequence 12: Carry Tiger Back to Mountain -- Part 3
Combat Sequence 12: Carry Tiger Back to Mountain -- Part 4
Combat Sequence 12: Carry Tiger Back to Mountain -- Part 5
Combat Sequence 12: Carry Tiger Back to Mountain -- Part 6
Combat Sequence 12: Carry Tiger Back to Mountain -- Part 7
Linking Sequences to Form a Set -- Part 1
Linking Sequences to Form a Set -- Part 2
Linking Sequences to Form a Set -- Part 3
Linking Sequences to Form a Set -- Part 4
Linking Sequences to Form a Set -- Part 5
Linking Sequences to Form a Set -- Part 6
Linking Sequences to Form a Set -- Part 7
What would You Do if your Kicking Leg is being Held? -- Overview
Effective Kicking Attacks and their Defences -- Overview
The Simplicity and Profundity of Black Bear Sinks Hips -- Overview
Counters against Muay Thai Knee Jabs -- Overview
Overwheming your Opponents with Prressing Attacks -- Overview
Counters against Pressing Attacks -- Overview
The Mechanics of the Shoulder Strike -- Overview
Starting Later but Arriving Earlier -- Overview
Combat Sequence 11: Cloud Hands -- Overview
Making Kungfu Alive with Fierce Dragon -- Overview
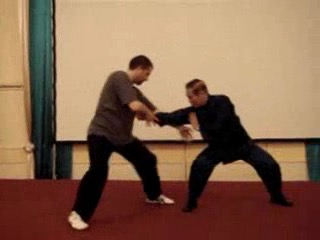 Combat Sequence 12: Carry Tiger Back to
Mountain -- Overview
Linking Sequences to Form a Set -- Overview
Taijiquan 2008 -- Taijiquan 10
Learning a Set in just One Day -- Part 1
Learning a Set in just One Day -- Part 2
Learning a Set in just One Day -- Part 3
Learning a Set in just One Day -- Part 4
Learning a Set in just One Day -- Part 5
Learning a Set in just One Day -- Part 6
Applying Combat Sequences in Sparring -- Part 1
Applying Combat Sequences in Sparring -- Part 2
Applying Combat Sequences in Sparring -- Part 3
Applying Combat Sequences in Sparring -- Part 4
Applying Combat Sequences in Sparring -- Part 5
Applying Combat Sequences in Sparring -- Part 6
Applying Combat Sequences in Sparring -- Part 7
Applying Combat Sequences in Sparring -- Part 8
Applying Combat Sequences in Sparring -- Part 9
Applying Kicks and Responding to them in Taijiquan Sparring -- Part 1
Applying Kicks and Responding to them in Taijiquan Sparring -- Part 2
Applying Kicks and Responding to them in Taijiquan Sparring -- Part 3
Applying Kicks and Responding to them in Taijiquan Sparring -- Part 4
Applying Kicks and Responding to them in Taijiquan Sparring -- Part 5
Applying Kicks and Responding to them in Taijiquan Sparring -- Part 6
Applying Kicks and Responding to them in Taijiquan Sparring -- Part 7
Applying Kicks and Responding to them in Taijiquan Sparring -- Part 8
Applying Kicks and Responding to them in Taijiquan Sparring -- Part 9
Taijiquan as an Internal Martial Art -- Part 1
Taijiquan as an Internal Martial Art -- Part 2
Taijiquan as an Internal Martial Art -- Part 3
Taijiquan as an Internal Martial Art -- Part 4
Taijiquan as an Internal Martial Art -- Part 5
Taijiquan as an Internal Martial Art -- Part 6
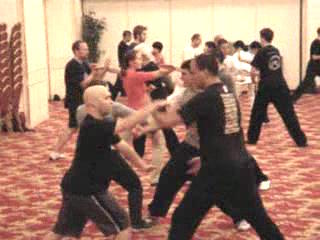 Taijiquan as an Internal Martial Art -- Part 7
Taijiquan as an Internal Martial Art -- Part 8
Taijiquan as an Internal Martial Art -- Part 9
Continuous Attacks and their Counters -- Part 1
Continuous Attacks and their Counters -- Part 2
Continuous Attacks and their Counters -- Part 3
Continuous Attacks and their Counters -- Part 4
Continuous Attacks and their Counters -- Part 5
Continuous Attacks and their Counters -- Part 6
Continuous Attacks and their Counters -- Part 7
Continuous Attacks and their Counters -- Part 8
Continuous Attacks and their Counters -- Part 9
Countering Opponents' Attacks at Various Points -- Part 1
Countering Opponents' Attacks at Various Points -- Part 2
Countering Opponents' Attacks at Various Points -- Part 3
Countering Opponents' Attacks at Various Points -- Part 4
Countering Opponents' Attacks at Various Points -- Part 5
Countering Opponents' Attacks at Various Points -- Part 6
Countering Opponents' Attacks at Various Points -- Part 7
Countering Opponents' Attacks at Various Points -- Part 8
Countering Opponents' Attacks at Various Points -- Part 9
Kicking Attacks and their Counters -- Part 1
Kicking Attacks and their Counters -- Part 2
Kicking Attacks and their Counters -- Part 3
Kicking Attacks and their Counters -- Part 4
Kicking Attacks and their Counters -- Part 5
Kicking Attacks and their Counters -- Part 1
Kicking Attacks and their Counters -- Part 2
Combat Application Set 3: Black Bear Sinks Hips -- Part 3
Combat Application Set 3: Black Bear Sinks Hips -- Part 4
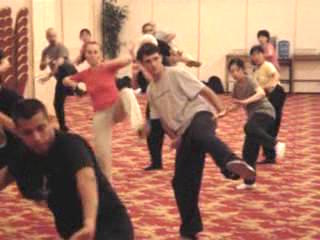 Combat Application Set 3: Black Bear Sinks Hips -- Part 5
Combat Application Set 3: Black Bear Sinks Hips -- Part 6
Combat Application Set 4: Carry Tiger Back to
Mountain -- Part 1
Combat Application Set 4: Carry Tiger Back to
Mountain -- Part 2
Combat Application Set 4: Carry Tiger Back to
Mountain -- Part 3
Combat Application Set 4: Carry Tiger Back to
Mountain -- Part 4
Combat Application Set 4: Carry Tiger Back to
Mountain -- Part 5
Combat Application Set 4: Carry Tiger Back to Mountain -- Part 6
Combat Application Set 4: Carry Tiger Back to Mountain -- Part 7
How to Handle Boxers Competently -- Part 1
How to Handle Boxers Competently -- Part 2
How to Handle Boxers Competently -- Part 3
How to Handle Boxers Competently -- Part 4
How to Handle Boxers Competently -- Part 5
How to Handle Boxers Competently -- Part 6
How to Handle Boxers Competently -- Part 7
The Important Roles of Footwork and Guard Hand -- Part 1
The Important Roles of Footwork and Guard Hand -- Part 2
The Important Roles of Footwork and Guard Hand -- Part 3
The Important Roles of Footwork and Guard Hand -- Part 4
The Important Roles of Footwork and Guard Hand -- Part 5
The Important Roles of Footwork and Guard Hand -- Part 6
The Important Roles of Footwork and Guard Hand -- Part 7
The Effective Tactic of Close and Strike against Boxers -- Part 1
The Effective Tactic of Close and Strike against Boxers -- Part 2
The Effective Tactic of Close and Strike against Boxers -- Part 3
The Effective Tactic of Close and Strike against Boxers -- Part 4
The Effective Tactic of Close and Strike against Boxers -- Part 5
The Effective Tactic of Close and Strike against Boxers -- Part 6
The Effective Tactic of Close and Strike against Boxers -- Part 7
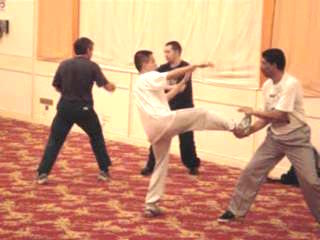 The Effective Tactic of Close and Strike against
Boxers -- Part 8
The Effective Tactic of Close and Strike against
Boxers -- Part 9
Opening an Opponent wth Jade Girl Threads
Shuttle -- Part 1
Opening an Opponent wth Jade Girl Threads
Shuttle -- Part 2
Opening an Opponent wth Jade Girl Threads
Shuttle -- Part 3
Opening an Opponent wth Jade Girl Threads
Shuttle -- Part 4
Opening an Opponent wth Jade Girl Threads
Shuttle -- Part 5
Opening an Opponent wth Jade Girl Threads Shuttle -- Part 6
Countering Undercuts with White Monkey Bends Branch -- Part 1
Countering Undercuts with White Monkey Bends Branch -- Part 2
Countering Undercuts with White Monkey Bends Branch -- Part 3
Countering Undercuts with White Monkey Bends Branch -- Part 4
Countering Undercuts with White Monkey Bends Branch -- Part 5
Countering Undercuts with White Monkey Bends Branch -- Part 6
Countering Undercuts with White Monkey Bends Branch -- Part 7
How to Handle a Boxer Bouncing around You -- Part 1
How to Handle a Boxer Bouncing around You -- Part 2
How to Handle a Boxer Bouncing around You -- Part 3
How to Handle a Boxer Bouncing around You -- Part 4
How to Handle a Boxer Bouncing around You -- Part 5
How to Handle a Boxer Bouncing around You -- Part 6
How to Handle a Boxer Bouncing around You -- Part 7
How to Handle a Boxer Bouncing around You -- Part 8
How to Handle a Boxer Bouncing around You -- Part 9
How to Handle a Boxer Bouncing around You -- Part 10
Effective Taijiquan Techniques against Boxing -- Part 1
Effective Taijiquan Techniques against Boxing -- Part 2
Effective Taijiquan Techniques against Boxing -- Part 3
Effective Taijiquan Techniques against Boxing -- Part 4
Effective Taijiquan Techniques against Boxing -- Part 5
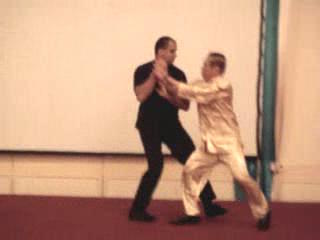 Effective Taijiquan Techniques against Boxing -- Part 6
Effective Taijiquan Techniques against Boxing -- Part 7
Effective Taijiquan Techniques against Boxing -- Part 8
Effective Taijiquan Techniques against Boxing -- Part 9
Limitation of Boxing Techniques for Real Fighting -- Part 2
Limitation of Boxing Techniques for Real Fighting -- Part 2
Limitation of Boxing Techniques for Real Fighting -- Part 2
Limitation of Boxing Techniques for Real Fighting -- Part 4
Limitation of Boxing Techniques for Real Fighting -- Part 5
Limitation of Boxing Techniques for Real Fighting -- Part 6
Limitation of Boxing Techniques for Real Fighting -- Part 7
Limitation of Boxing Techniques for Real Fighting -- Part 8
Taijiquan Techniques against Kick-Boxing -- Part 1
Taijiquan Techniques against Kick-Boxing -- Part 2
Taijiquan Techniques against Kick-Boxing -- Part 3
Taijiquan Techniques against Kick-Boxing -- Part 4
Taijiquan Techniques against Kick-Boxing -- Part 5
Taijiquan Techniques against Kick-Boxing -- Part 6
Taijiquan Techniques against Kick-Boxing -- Part 7
Taijiquan Techniques against Kick-Boxing -- Part 8
Taijiquan Techniques against Kick-Boxing -- Part 9
Taijiquan Techniques against Kick-Boxing -- Part 10
Taijiquan Techniques against Muay Thai -- Part 1
Taijiquan Techniques against Muay Thai -- Part 2
Taijiquan Techniques against Muay Thai -- Part 3
Taijiquan Techniques against Muay Thai -- Part 4
Taijiquan Techniques against Muay Thai -- Part 5
Taijiquan Techniques against Muay Thai -- Part 6
Taijiquan Techniques against Muay Thai -- Part 7
Taijiquan Techniques against Muay Thai -- Part 8
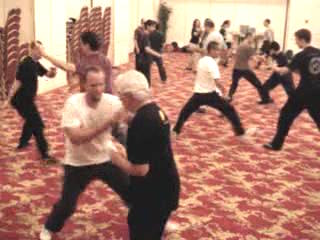 Taijiquan Techniques against Muay Thai -- Part 9
Muay Thai Techniques in Taijiquan -- Part 1
Muay Thai Techniques in Taijiquan -- Part 2
Muay Thai Techniques in Taijiquan -- Part 3
Muay Thai Techniques in Taijiquan -- Part 4
Muay Thai Techniques in Taijiquan -- Part 5
Muay Thai Techniques in Taijiquan -- Part 6
Muay Thai Techniques in Taijiquan -- Part 7
Covering the Shoot and Enjoying Free Sparring -- Part 1
Covering the Shoot and Enjoying Free Sparring -- Part 2
Covering the Shoot and Enjoying Free Sparring -- Part 3
Covering the Shoot and Enjoying Free Sparring -- Part 4
Covering the Shoot and Enjoying Free Sparring -- Part 5
Covering the Shoot and Enjoying Free Sparring -- Part 6
Covering the Shoot and Enjoying Free Sparring -- Part 7
Covering the Shoot and Enjoying Free Sparring -- Part 8
Covering the Shoot and Enjoying Free Sparring -- Part 9
Learning a Set in just One Day -- Overview
Applying Combat Sequences in Sparring -- Overview
Applying Kicks and Responding to them in Taijiquan Sparring -- Overview
Taijiquan as an Internal Martial Art -- Overview
Continuous Attacks and their Counters -- Overview
Countering Opponents' Attacks at Various Points -- Overview
Kicking Attacks and their Counters -- Overview
Combat Application Set 3: Black Bear Sinks Hips -- Overview
Combat Application Set 4: Carry Tiger Back to Mountain -- Overview
How to Handle Boxers Competently -- Overview
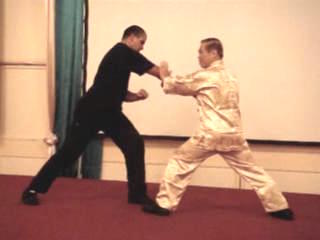 The Important Roles of Footwork and Guard
Hand -- Overview
The Effective Tactic of Close and Strike
against Boxers -- Overview
Opening an Opponent wth Jade Girl Threads
Shuttle -- Overview
Countering Undercuts with White Monkey Bends
Branch -- Overview
How to Handle a Boxer Bouncing around You -- Overview
Effective Taijiquan Techniques against Boxing -- Overview
Limitation of Boxing Techniques for Real
Fighting -- Overview
Taijiquan Techniques against Kick-Boxing -- Overview
Taijiquan Techniques against Muay Thai -- Overview
Muay Thai Techniques in Taijiquan -- Overview
Countering the Shoot and Enjoying Free Sparring -- Overview
![Wahb]nam Taijiquan](/video-clips-4/taijiquan2008/videos/taiji062.jpg) Taijiquan -- Videos
Secrets of the Internal Force Masters 2009 -- Overview
Taijiquan -- Videos
Secrets of the Internal Force Masters 2009 -- Overview
The Most Important Lessons in Wahnam Taijiquan
The Art of Flexibility in Wahnam Taijiquan
Reliving Taijiquan Footwork Principles of Past Masters
From Moving Slowly and Gracefully to Moving Fast and Spontaneously
There is More in Channbging Directions than what Most People Think
Importance of Waist Rotation in Taijiquan
Applying Waist Rotation to Realize using Miminum Force against Maximum Strength
From Tao io Cloud Hands to Grasping Sparrow's Tail
Solo Form Practice is Not is Not to Please Spectators
Developing Skills in Stationary Pushing Hands
Six Harmonies of Hands, Body, Feet, Essence, Energy and Spirit
Basic Principles and Safety Precautions in Pushing Hands
How to Have Leverage Advantage in Pushing Hands
Standard Mode and Advanced Mode in Rolling Back
Age, Size and Gender are Not Decisive Factors in Pushing Hands
Safety First when Pushing or Excuting any Attack
Gaining Tactical Advantage by Maneuvering Opponent to an Unfavorable Hand or Leg Mode
Gaining Tactical Advantage by Pusing or Attacking Opponent from a Side
Enjoy Pushing or Being Pushed Around Irrespective of Age, Size and Gender
Defence against the Left and Right Push
How to Get to Opponent's Back and How to Neurtralize It
Proactive Tactics of Continuous and Confusing Attacks
Reactive Tactics of Immediate Counter and Interception
Pushing Hands Brings Many Benefits and a Lot of Fun
Progressing to Striking Hands where Techniques are Applied for Combat
Our Classes are Full of Fun and Laughter
Signature Taijiquan Tactic of Defence cum Counter
JUsing Tactics for Taijiquan and for Daily Life
Opening, Closingg or Deflecting Opponen's Attack while Countering
![Wahb]nam Taijiquan](/video-clips-4/taijiquan2008/taijiquan-10/taiji973.jpg) Top, Middle and Low /?Strikes, and their Defences
Top, Middle and Low /?Strikes, and their Defences
Correct Spacing and Adequate Closing in Yellow Bee
Jade Girl is Beautiful to Watch as it is for Combat
Applying the Four Basic Hand Strikes and their Counters to Play with Boxer
Excellent Taijiquan Pattern against Kicks
Spacing, Timing and Body-Movement in Striking Tiger Poise
Striking Tiger Poise against any Kicks
Striking Opponent before he has Recovered from Previous Movement
Important Principles in Executing Kicks and in Countering Them
Learning How to Fell Opponents as well as How to Fall Safely
It is Delighful to see Dainly Ladies Throwing Hefty Men!
A Technique to Counter any Throws, and a Technique to Counter any Kicks!
A Formidable Chin-Na Attack and its Defence
Single-Hand Grips and Double-Hand Grips in Chin-Na Attacks
Marvels of Lifting Water and Grasping Sparrow's Tail
Mechanics of Fa-Jing using Single Whip
What Function does the Hook-Hand in Single Whip Serve?
Acting as Anchorage and Striking Vital Points
Grasping Sparrow's Tail and Different Types of Force
Black Bear to Fell Opponents and to Counter all Throws
Form One-Step Sparring to Sequence Sparring to Free Sparring
Free Sparring but Hits are Controlled
Applying Taijiquan against Street Fighters
Handling the Charges and Kicks of Street Fighters
Poise Patterns and Four Modes of Preparation
Asking the Way and Three Arrivals
White Snake in Continuous Attacks
Defence cum Counter and Other Tactics
Do you Know Why Taijiquan is often Performed Slowly?
What should You Do when your Opponent Hesitates
![Wahb]nam Taijiquan](/video-clips-4/taijiquan2008/taijiquan-10/taiji961.jpg) Immortal Waves Sleeves in Three Different Speeds
Immortal Waves Sleeves in Three Different Speeds
Some Important Lessons inCombat Sequence 2
Fundamental Movements of Cloud Hands
Frm Cloud Hands to using Mind to Direct Form
Addition and Subtraction in Sparring Methodology
White Snake Shoots Venim as a Pattern, a Sequence and a Set
From Patterns to Sequences to Sets
What would You Do if you were Pressed to the Edge of a Cliff?
Combat Sequences 5 -- White Crane Flaps Wing
Progression of Combat Sequences in Combat Application
Making Good Use of Technical Advantages
Side-Step and Counter against Pressing Attack
An Effective Response against any Kick!
Combat Application Set 2 -- Green Dragon Shoots Pearl
What would You Do if your Kicking Leg is being Held?
Effective Kicking Attacks and their Defences
Simplicity and Profundity of Black Bear Sinks Hips
Counters against Muay Tahi Knee Jabs
Overwhelming Opponents with Pressing Attacks
Counters against Pressing Attacks
Mechanics of Shoulder Strikes
Starting Later Arriving Earlier
Combat Sequence 11 -- Cloud Hands
Making Kungfu Alive with Fierce Dragon
Combat Sequence 12 -- Carry Tiger Back to Mountain
Linking Sequences to Form a Set
Learning a Set in just One Day
Applying Combat Sequences in Sparring
Applying Kicks and Responding to them in Taijiquan Sparring
Taijiquan as an Internal Martial Art
![Wahb]nam Taijiquan](/video-clips-4/taijiquan2008/taijiquan-10/taiji1014.jpg) Continuous Attacks and ther Counters
Continuous Attacks and ther Counters
Countering Opponents' Attacks at Various Points
Kicking Attacks and their Counters
Combat-Application Set 3 -- Black Bear Sinks Hips
Combat-Application Set 4 -- Carry Tiger Back to Mountain
How to Handle Boxers Competently
Important Roles of Footwork and Guarrd Hand
Effective Tactic of Close and Strike against Boxers
Opening Opponent with Jade Girl Threads Shottle
Countering Undercuts with White Monkey Bends Branch
How to Handle a Boxer Bouncing around You
Effective Taijiquan Techniques against Boxing
Limitation of Boxing Techniques for Real Fighting
Taijiquan Taechniques against Kick-Boxing
Taijiquan Techniques against Muay Thai
Muay Thai Techniques in Taijiquan
Countering the Shoot and Enjoying Free Sparring
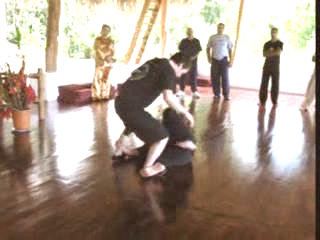 Warrior Project Cossta Rica
Lohan Walks in the Garden of Timelessness
Warrior Project Cossta Rica
Lohan Walks in the Garden of Timelessness
Warrior Project Cossta Rica -- Project 01
Felling Techniques on Ground and Counters against
Pin-Downs -- Part 1
Felling Techniques on Ground and Counters against
Pin-Downs -- Part 2
Felling Techniques on Ground and Counters against
Pin-Downs -- Part 3
Felling Techniques on Ground and Counters against Pin-Downs -- Part 4
Felling Techniques on Ground and Counters against Pin-Downs -- Part 5
Felling Techniques on Ground and Counters against Pin-Downs -- Part 6
Having Fun with Thorws, Pin-Downs and Counters -- Part 1
Having Fun with Thorws, Pin-Downs and Counters -- Part 2
Having Fun with Thorws, Pin-Downs and Counters -- Part 3
Having Fun with Thorws, Pin-Downs and Counters -- Part 4
Having Fun with Thorws, Pin-Downs and Counters -- Part 5
Having Fun with Thorws, Pin-Downs and Counters -- Part 6
Breaking Fall Can be a Lot of Fun -- Part 1
Breaking Fall Can be a Lot of Fun -- Part 2
Breaking Fall Can be a Lot of Fun -- Part 3
Breaking Fall Can be a Lot of Fun -- Part 4
Breaking Fall Can be a Lot of Fun -- Part 5
Breaking Fall Can be a Lot of Fun -- Part 6
Breaking Fall Can be a Lot of Fun -- Part 7
From Riding Dragon to Pushing Cart -- Part 1
From Riding Dragon to Pushing Cart -- Part 2
From Riding Dragon to Pushing Cart -- Part 3
From Riding Dragon to Pushing Cart -- Part 4
From Riding Dragon to Pushing Cart -- Part 5
From Riding Dragon to Pushing Cart -- Part 6
From Riding Dragon to Pushing Cart -- Part 7
Counters against the Punches from a Mounted Opponent -- Part 1
Counters against the Punches from a Mounted Opponent -- Part 2
Counters against the Punches from a Mounted Opponent -- Part 3
Counters against the Punches from a Mounted Opponent -- Part 4
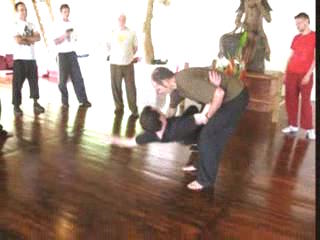 Counters against the Punches from a Mounted
Opponent -- Part 5
Counters against the Punches from a Mounted
Opponent -- Part 6
Wiping Face and Turning Shuttle -- Part 1
Wiping Face and Turning Shuttle -- Part 2
Wiping Face and Turning Shuttle -- Part 3
Wiping Face and Turning Shuttle -- Part 4
Wiping Face and Turning Shuttle -- Part 5
Wiping Face and Turning Shuttle -- Part 6
Wrestling Techniques in Shaolin Kungfu -- Part 1
Wrestling Techniques in Shaolin Kungfu -- Part 2
Wrestling Techniques in Shaolin Kungfu -- Part 3
Wrestling Techniques in Shaolin Kungfu -- Part 4
Wrestling Techniques in Shaolin Kungfu -- Part 5
Wrestling Techniques in Shaolin Kungfu -- Part 6
Wrestling Techniques in Shaolin Kungfu -- Part 7
Wrestling Techniques in Shaolin Kungfu -- Part 8
Felling Opponents while still on the Ground -- Part 1
Felling Opponents while still on the Ground -- Part 2
Felling Opponents while still on the Ground -- Part 3
Felling Opponents while still on the Ground -- Part 4
Felling Opponents while still on the Ground -- Part 5
Felling Opponents while still on the Ground -- Part 6
Felling Opponents while still on the Ground -- Part 7
Felling Opponents while still on the Ground -- Part 8
All Fundamental Throws can be Found in Shaolin Kungfu -- Part 1
All Fundamental Throws can be Found in Shaolin Kungfu -- Part 2
All Fundamental Throws can be Found in Shaolin Kungfu -- Part 3
All Fundamental Throws can be Found in Shaolin Kungfu -- Part 4
All Fundamental Throws can be Found in Shaolin Kungfu -- Part 5
All Fundamental Throws can be Found in Shaolin Kungfu -- Part 6
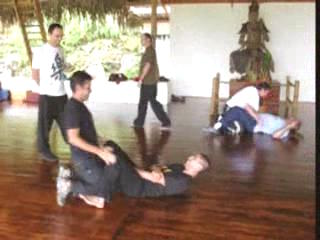 All Fundamental Throws can be Found in Shaolin
Kungfu -- Part 7
All Fundamental Throws can be Found in Shaolin
Kungfu -- Part 8
All Fundamental Throws can be Found in Shaolin
Kungfu -- Part 9
Some Interesting Ways to Fell Opponents -- Part 1
Some Interesting Ways to Fell Opponents -- Part 2
Some Interesting Ways to Fell Opponents -- Part 3
Some Interesting Ways to Fell Opponents -- Part 4
Some Interesting Ways to Fell Opponents -- Part 5
Some Interesting Ways to Fell Opponents -- Part 6
Some Interesting Ways to Fell Opponents -- Part 7
Throwing an Opponent when he Tries to Throw You -- Part 1
Throwing an Opponent when he Tries to Throw You -- Part 2
Throwing an Opponent when he Tries to Throw You -- Part 3
Throwing an Opponent when he Tries to Throw You -- Part 4
Throwing an Opponent when he Tries to Throw You -- Part 5
Throwing an Opponent when he Tries to Throw You -- Part 6
Covering your Opponents before Throwing Them -- Part 1
Covering your Opponents before Throwing Them -- Part 2
Covering your Opponents before Throwing Them -- Part 3
Covering your Opponents before Throwing Them -- Part 4
Covering your Opponents before Throwing Them -- Part 5
Covering your Opponents before Throwing Them -- Part 6
Tame Tiger while Listening to Wind -- Part 1
Tame Tiger while Listening to Wind -- Part 3
Tame Tiger while Listening to Wind -- Part 3
Tame Tiger while Listening to Wind -- Part 4
Tame Tiger while Listening to Wind -- Part 5
Tame Tiger while Listening to Wind -- Part 6
Tame Tiger while Listening to Wind -- Part 7
Applying Throws in Combat: Irrespective of Age, Size and Gender -- Part 1
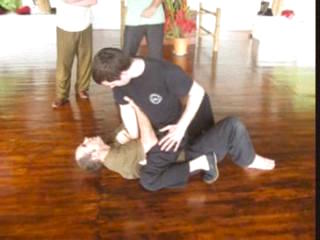 Applying Throws in Combat: Irrespective of Age, Size
and Gender -- Part 2
Applying Throws in Combat: Irrespective of Age, Size
and Gender -- Part 3
Applying Throws in Combat: Irrespective of Age, Size
and Gender -- Part 4
Applying Throws in Combat: Irrespective of Age, Size
and Gender -- Part 5
Applying Throws in Combat: Irrespective of Age, Size
and Gender -- Part 6
Applying Throws in Combat: Irrespective of Age, Size
and Gender -- Part 7
Applying Throws in Combat: Irrespective of Age, Size and Gender -- Part 8
White Ape and Farmer in Forward Throws -- Part 1
White Ape and Farmer in Forward Throws -- Part 2
White Ape and Farmer in Forward Throws -- Part 3
White Ape and Farmer in Forward Throws -- Part 4
White Ape and Farmer in Forward Throws -- Part 5
White Ape and Farmer in Forward Throws -- Part 6
White Ape and Farmer in Forward Throws -- Part 7
Warrior Project on the Blue Mountain -- Overview
Felling Techniques on Ground and Counters against Pin-Downs -- Overview
Having Fun with Thorws, Pin-Downs and Counters -- Overview
Break Fall Can be a Lot of Fun-- Overview
From Riding Dragon to Pushing Cart -- Overview
Counters against the Punches from a Mounted Opponent -- Overview
Wiping Face and Turning Shuttle -- Overview
Wrestling Techniques in Shaolin Kungfu -- Overview
Felling Opponents while still on the Ground -- Overview
All Fundamental Throws can be Found in Shaolin Kungfu -- Overview
Some Interesting Ways to Fell Opponents -- Overview
Throwing an Opponent when he Tries to Throw You -- Overview
Covering your Opponents before Throwing Them -- Overview
Tame Tiger while Listening to Wind -- Overview
Applying Throws in Combat: Irrespective of Age, Size and Gender -- Overview
White Ape and Farmer in Forward Throws -- Overview
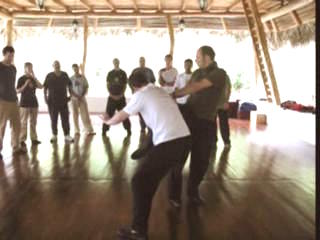 Warrior Project Cossta Rica -- Project 02
Marvelous Techniques Beget Marvelous Techniques -- Part 1
Warrior Project Cossta Rica -- Project 02
Marvelous Techniques Beget Marvelous Techniques -- Part 1
Marvelous Techniques Beget Marvelous Techniques -- Part 2
Marvelous Techniques Beget Marvelous Techniques -- Part 3
Marvelous Techniques Beget Marvelous Techniques -- Part 4
Marvelous Techniques Beget Marvelous Techniques -- Part 5
Marvelous Techniques Beget Marvelous Techniques -- Part 6
Marvelous Techniques Beget Marvelous Techniques -- Part 7
Marvelous Techniques Beget Marvelous Techniques -- Part 8
Marvelous Techniques Beget Marvelous Techniques -- Part 9
Different Types of Throws and their Counters -- Part 1
Different Types of Throws and their Counters -- Part 2
Different Types of Throws and their Counters -- Part 3
Different Types of Throws and their Counters -- Part 4
Different Types of Throws and their Counters -- Part 5
Different Types of Throws and their Counters -- Part 6
Different Types of Throws and their Counters -- Part 7
Different Types of Throws and their Counters -- Part 8
Different Types of Throws and their Counters -- Part 9
Throwing the Thrower even when your Hands are Locked -- Part 1
Throwing the Thrower even when your Hands are Locked -- Part 2
Throwing the Thrower even when your Hands are Locked -- Part 3
Throwing the Thrower even when your Hands are Locked -- Part 4
Throwing the Thrower even when your Hands are Locked -- Part 5
Throwing the Thrower even when your Hands are Locked -- Part 6
Throwing the Thrower even when your Hands are Locked -- Part 7
Throwing the Thrower even when your Hands are Locked -- Part 8
Throwing the Thrower even when your Hands are Locked -- Part 9
Throwing the Thrower even when your Hands are Locked -- Part 10
Size is Immaterial even in Throws and when your Hands are Locked -- Part 1
Size is Immaterial even in Throws and when your Hands are Locked -- Part 2
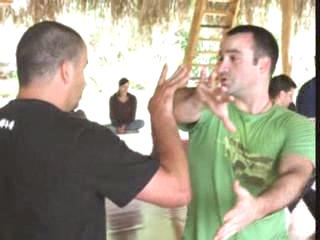 Size is Immaterial even in Throws and when your Hands
are Locked -- Part 3
Size is Immaterial even in Throws and when your Hands
are Locked -- Part 4
Size is Immaterial even in Throws and when your Hands
are Locked -- Part 5
Size is Immaterial even in Throws and when your Hands
are Locked -- Part 6
Size is Immaterial even in Throws and when your Hands
are Locked -- Part 7
It is often Kicks that Decides Combat -- Part 1
It is often Kicks that Decides Combat -- Part 2
It is often Kicks that Decides Combat -- Part 3
It is often Kicks that Decides Combat -- Part 4
It is often Kicks that Decides Combat -- Part 5
It is often Kicks that Decides Combat -- Part 6
Brushing off Boxers' Attacks and Counter-Striking Them -- Part 1
Brushing off Boxers' Attacks and Counter-Striking Them -- Part 2
Brushing off Boxers' Attacks and Counter-Striking Them -- Part 3
Brushing off Boxers' Attacks and Counter-Striking Them -- Part 4
Brushing off Boxers' Attacks and Counter-Striking Them -- Part 5
Brushing off Boxers' Attacks and Counter-Striking Them -- Part 6
Brushing off Boxers' Attacks and Counter-Striking Them -- Part 7
Brushing off Boxers' Attacks and Counter-Striking Them -- Part 8
Brushing off Boxers' Attacks and Counter-Striking Them -- Part 9
Brushing off Boxers' Attacks and Counter-Striking Them -- Part 10
Double Bows and Surprised Kicks against Boxers -- Part 1
Brushing off Boxers' Attacks and Counter-Striking Them -- Part 11
Double Bows and Surprised Kicks against Boxers -- Part 2
Brushing off Boxers' Attacks and Counter-Striking Them -- Part 12
Double Bows and Surprised Kicks against Boxers -- Part 3
Double Bows and Surprised Kicks against Boxers -- Part 4
Double Bows and Surprised Kicks against Boxers -- Part 5
Double Bows and Surprised Kicks against Boxers -- Part 6
Double Bows and Surprised Kicks against Boxers -- Part 7
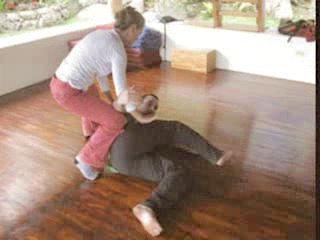 Double Bows and Surprised Kicks against Boxers -- Part 8
Double Bows and Surprised Kicks against Boxers -- Part 9
Using Tactical Speed to Defeat Fast Boxers -- Part 1
Using Tactical Speed to Defeat Fast Boxers -- Part 2
Using Tactical Speed to Defeat Fast Boxers -- Part 3
Using Tactical Speed to Defeat Fast Boxers -- Part 4
Using Tactical Speed to Defeat Fast Boxers -- Part 5
Using Tactical Speed to Defeat Fast Boxers -- Part 6
Using Tactical Speed to Defeat Fast Boxers -- Part 7
How are these Odd Patterns used in Combat -- Part 1
How are these Odd Patterns used in Combat -- Part 2
How are these Odd Patterns used in Combat -- Part 3
How are these Odd Patterns used in Combat -- Part 4
How are these Odd Patterns used in Combat -- Part 5
How are these Odd Patterns used in Combat -- Part 6
How are these Odd Patterns used in Combat -- Part 7
How are these Odd Patterns used in Combat -- Part 8
How are these Odd Patterns used in Combat -- Part 9
How are these Odd Patterns used in Combat -- Part 10
How are these Odd Patterns used in Combat -- Part 11
How are these Odd Patterns used in Combat -- Part 12
How are these Odd Patterns used in Combat -- Part 13
How are these Odd Patterns used in Combat -- Part 14
Marvelous Techniques Beget Marvelous Techniques -- Overview
Different Types of Throws and their Counters -- Overview
Throwing the Thrower even when your Hands are Locked -- Overview
Size is Immaterial even in Throws and when your Hands are Locked -- Overview
It is often Kicks that Decides Combat -- Overview
Brushing off Boxers' Attacks and Counter-Striking Them -- Overview
Double Bows and Surprised Kicks against Boxers -- Overview
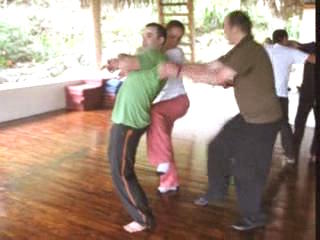 Using Tactical Speed to Defeat Fast Boxers -- Overview
How are these Odd Patterns used in Combat (New)
How are these Odd Patterns used in Combat -- Overview
Warrior Project Cossta Rica -- Youtube
Video of Warrior Project on the Blue Mountain -- Overview
Ground Felling Techniques and Counters against Pin-Downs
Having Funwith Throws, Pin-Downs and Counters
Brreaking Fall can be a Lot of Fun
From Riding Dragon to Pushing Cart
Punches against Punches from Mounted Opponent
Wiping Face and Turning Shuttle
Wrestling Techniques in Shaolin Kungfu
Felling Opponents while still on Ground
All Fundamental Throws can be Found in Shaolin Kungfu
Some Interesting Ways to Fell Opponents
Throw Opponent when he Tries to Throw You
Covering Opponents before Throwing Them
Tame Tiger while Listening to Wind
Applying Throws in Combat Irrespective of Age, Size and Gender
White Ape and Farmer in Forward Throws
Marvelous Techniques Beget Marvelous Techniques
Different Types of Throws and their Counters
Throwing the Thrower even when your Hands are Locked!
Size is Immaterial in Throws
It is often Kicks that Decide Combat
Brushing of Boxers' Attacks and Counter-Striking Them
Double Bows and Surprised Kicks against Boxers
Usimng Tactical Speed to Defeat Fast Boxers
How are these Odd Patterns used in Combat
Lohan Walks in the Garden of Timelessness
Counters against Wrestling Pin-Downs
 Wudang Sword