VIDEO-CLIPS-5
All Titles in Video-Clips 5
 Main
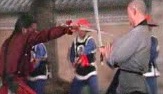
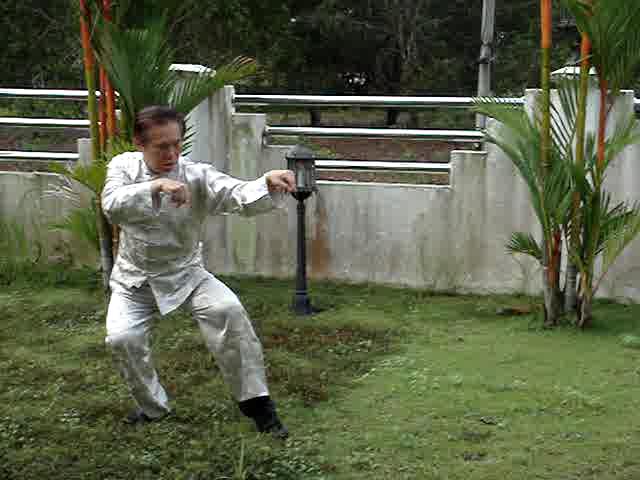
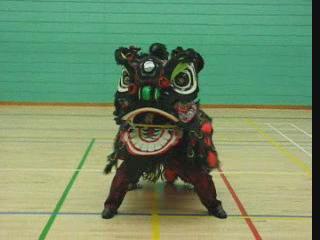
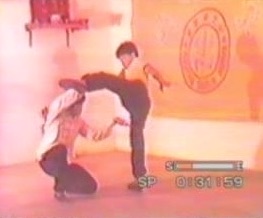
Burning of the Shaolin Temple
Main
Burning of the Shaolin TempleBail Moon from Sea Bottom of Sabre
Application of Single Knife against Spear
Shaolin Plum Flower Single Knife
Applications of Spear against Single Knife
Water Flows from High Mountain of the Spear
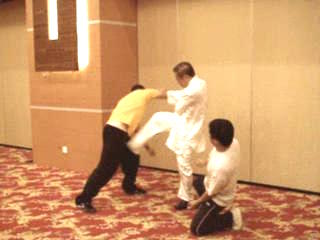
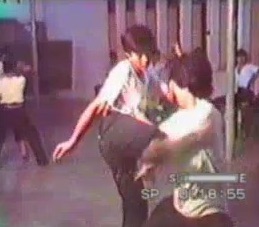
Shaolin Combat of Hoong Hei Khoon in Movies
Power of Tiger Claws
Video-Clips-5: Titles
Combined Courses 2009 Glimpses of Advanced-Combined Shaolin-Taijiquan Course 2009 -- Overview
Combined Courses 2009 -- Disarming Weapons Capturing an Opponent's Dagger (1 and 2)
Capturing an Opponent's Dagger (3 and 4)
Capturing an Opponent's Dagger (5, 6 and 7)
Capturing an Opponent's Dagger (8 and 9)
Fundamental Attacks of a Sabre
Capturing an Opponent's Dagger -- Part 1
Capturing an Opponent's Dagger -- Part 2
Capturing an Opponent's Dagger -- Part 3
Capturing an Opponent's Dagger -- Part 4
Capturing an Opponent's Dagger -- Part 5
Capturing an Opponent's Dagger -- Part 6
Capturing an Opponent's Dagger -- Part 7
Capturing an Opponent's Dagger -- Part 8
Capturing an Opponent's Dagger -- Part 9
How to Capture an Opponent's Weapon
Fundamental Attacks of a Sabre
Capturing an Opponent's Sabre -- Part 1
Capturing an Opponent's Sabre -- Part 2
Capturing an Opponent's Sabre -- Part 3
Capturing an Opponent's Sabre (1, 2 and 3)
 Capturing an Opponent's Spear (1 and 2)
Capturing an Opponent's Spear -- Part 1
Capturing an Opponent's Spear -- Part 2
Fundamental Attacks of a Kuan Tou
Fundamental Attacks of a Kuan Tou
Capturing an Opponent's Kuan Tou (1 and 2)
Capturing an Opponent's Kuan Tou -- Part 1
Capturing an Opponent's Kuan Tou -- Part 2
Finer Points of the Kuan Tou (1 and 2)
Finer Points of the Kuan Tou -- Part 1
Finer Points of the Kuan Tou -- Part 2
Marvelous Techniques Beget Marvelous Techniques in the Kuan Tou (1)
Marvelous Techniques Beget Marvelous Techniques in the Kuan Tou (2)
Marvelous Techniques Beget Marvelous Techniques in the Kuan Tou -- Part 1
Marvelous Techniques Beget Marvelous Techniques in the Kuan Tou -- Part 2
Marvelous Techniques Beget Marvelous Techniques in the Kuan Tou -- Part 3
Marvelous Techniques Beget Marvelous Techniques in the Kuan Tou -- Part 4
Marvelous Techniques Beget Marvelous Techniques in the Kuan Tou -- Part 5
Marvelous Techniques Beget Marvelous Techniques in the Kuan Tou -- Part 6
Combined Courses 2009 -- Glimpses Application of Flowing Water Staff -- Sequence 1
Application of Flowing Water Staff -- Sequence 2
Application of Flowing Water Staff -- Sequence 3
Application of Flowing Water Staff -- Sequence 4
Application of Sabre against a Spear (1) -- Part 1
Application of Sabre against a Spear (1) -- Part 2
Application of Sabre against a Spear (2) -- Part 3
Application of Sabre against a Spear (2) -- Part 4
Application of Sabre against a Spear (3) -- Part 5
Application of Sabre against a Spear (3) -- Part 6
 Application of Sabre against a Spear (4) -- Part 7
Application of Sabre against a Spear (4) -- Part 8
Application of Sabre against a Spear (5) -- Part 9
Application of Sabre against a Spear (5) -- Part 10
Application of Sabre against a Kuan Tou (6) -- Part 11
Application of Sabre against a Kuan Tou (6) -- Part 12
Application of Sabre against a Kuan Tou (7) -- Part 13
Application of Sabre against a Kuan Tou (7) -- Part 14
Application of Sabre against a Kuan Tou (8) -- Part 15
Application of Sabre against a Kuan Tou (8) -- Part 16
Application of the Sword against the Spear (1)
Application of the Sword against the Spear (1)
Application of the Sword against the Spear (2)
Application of the Sword against the Spear (2)
Application of the Sword against the Spear (3)
Application of the Sword against the Spear (3)
Application of the Sword against the Spear (4)
Application of the Sword against the Spear (4)
Application of the Sword against the Spear (4)
Application of the Sword against the Kuan Tou (1)
Application of the Sword against the Kuan Tou (1)
Application of the Sword against the Kuan Tou (2)
Application of the Sword against the Kuan Tou (2)
Application of the Sword against the Kuan Tou (3)
Application of the Sword against the Kuan Tou (3)
Application of the Sword against the Kuan Tou (3)
Application of a Sabre against a Spear (1)
Application of a Sabre against a Spear (2)
Application of a Sabre against a Spear (3)
Applications of a Sabre against a Kuan Tou (1)
 Applications of a Sabre against a Kuan Tou (2)
Applications of a Sabre against a Kuan Tou (3)
Applications of a Sabre against a Kuan Tou (4)
Applications of a Sabre against a Kuan Tou (5)
Applicaion of the Plum Flower Sabre
Applications of Flowing Water Staff (1)
Applications of Flowing Water Staff (2)
Applications of Flowing Water Staff (1 and 2)
Applications of the Sword against the Spear (1)
Applications of the Sword against the Spear (2)
Applications of the Sword against the Spear (3)
Applications of the Sword against the Spear (4)
Applications of the Sword against the Kuan Tou (1)
Applications of the Sword against the Kuan Tou (2)
Applications of a Sword against a Kuan Tou (3)
Applications of Wudang Sword
Combined Courses 2009 -- Multiple Armed Counters against Opponents armed with Two Sabres (1 and 2)
Counters against Opponents armed with Two Sabres (1 and 2)
Counters against Opponents armed with Two Sabres (3, 4 and 5)
Counters against Opponents armed with Two Sabres (3, 4 and 5)
Counters against Opponents armed with Two Sabres (3, 4 and 5)
Counters against Opponents armed with Spears (1 and 2)
Counters against Opponents armed with Spears (1 and 2)
Counters against Two Opponents armed with Spears (3 and 4)
Counters against Two Opponents armed with Spears (3 and 4)
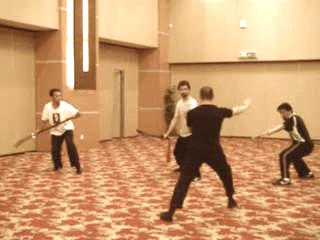
How to Fight against Multiple Armed Attackers
 Counters against Three Opponents armed with
Various Weapons (1 and 2)
Counters against Three Opponents armed with
Various Weapons (1 and 2)
Counters against Three Opponents armed with
Various Weapons (3 and 4)
Counters against Three Opponents armed with
Various Weapons (3 and 4)
Counters against Three Opponents armed with
Various Weapons (5 and 6)
Counters against Three Opponents armed with
Various Weapons (5 and 6)
Marvelous Teachniques of the Trident (1 and 2)
Marvelous Teachniques of the Trident (1 and 2)
Countering the Sophisticated Techniques of the Trident (1 and 2)
Countering the Sophisticated Techniques of the Trident (1 and 2)
Marvelous Techniques beget Marvelous Techniques (1 and 2)
Marvelous Techniques beget Marvelous Techniques (1 and 2)
Counters against Opponents armed with Two Sabres (1 and 2)
Counters against Opponents armed with Two Sabres (3, 4 and 5)
Counters against Two Opponents armed with Spears (1 and 2)
Counters against Two Opponents armed with Spears (3 and 4)
Counters against Three Opponents armed with Various Weapons (1 and 2)
Counters against Three Opponents armed with Various Weapons (3 and 4)
Counters against Three Opponents armed with Various Weapons (5 and 6)
Marvelous Teachniques of the Trident (1 and 2)
Countering the Sophisticated Techniques of the Trident (1 and 2)
Marvelous Techniques beget Marvelous Techniques (1 and 2)
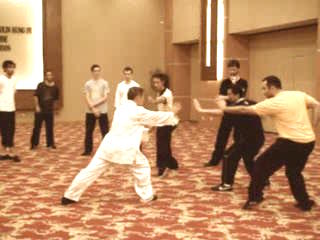
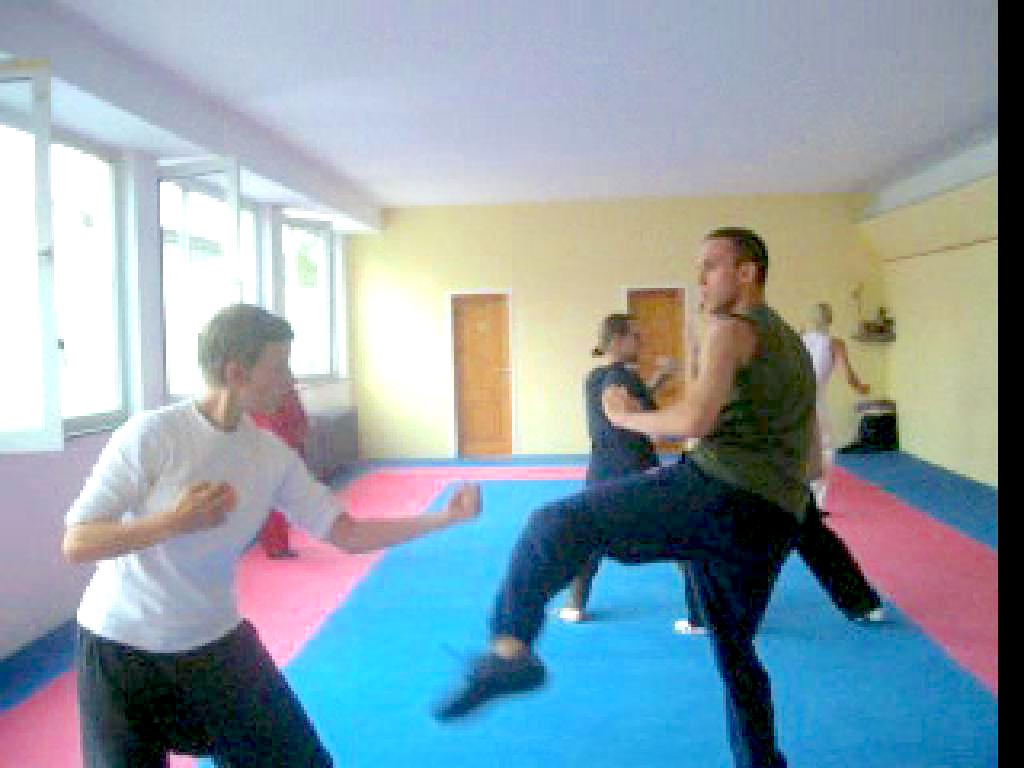
Combined Courses 2009 -- Multiple Unarmed Two Fists are No Match against Four Hands
Two Fists are No Match against Four Hands
Effective Counters against Two Simultaneous Opponents (1 and 2)
Effective Counters against Two Simultaneous Opponents (1 and 2)
An Important Principle concerning Striking in Multiple Attacks
Countering Three Simultaneous Attackers
When an Attacker Grips your Leg in Multiple Attacks
Sealing the Escape Route
Sealing the Escape Route
The Principles of Shield and of Entanglement
 The Principles of Shield and of Entanglement
With Fort Behind or in Herd of Sheep
With Fort Behind or in Herd of Sheep
With Fort Behind or in Herd of Sheep
Overcoming Multiple Attacks
Overcoming Multiple Attacks
Difference between Three and Four Simultaneous Attackers
Using Multiple Shields
Difference between Three and Four Simultaneous Attackers
Overcoming Five Trained Simultaneous Attackers (1 and 2)
Overcoming Five Trained Simultaneous Attackers (1 and 2)
Strategies in Countering Multiple Attacks
Strategies in Countering Multiple Attacks
Principles and Application to Counter Multiple Attacks
Principles and Application to Counter Multiple Attacks
Principles and Application to Counter Multiple Attacks
Two Fists are No Match against Four Hands
Effective Counters against Two Simultaneous Opponents (1 and 2)
An Important Principle concerning Striking in Multiple Attacks
Countering Three Simultaneous Attackers
When an Attacker Grips your Leg in Multiple Attacks
Sealing the Escape Route
The Principles of Shield and of Entanglement
With Fort Behind or in Herd of Sheep
Overcoming Multiple Attacks
Difference between Three and Four Simultaneous Attackers
 Using Multiple Shields
Overcoming Five Trained Simultaneous Attackers (1 and 2)
Strategies in Countering Multiple Attacks
Principles and Application to Counter Multiple Attacks
Combined Courses 2009 -- Youtube How to Fight Multiple Armed Opponents -- Part 1
How to Fight Multiple Armed Opponents -- Part 2
How to Capture an Oponent's WEapon -- Part 1
How to Capture an Oponent's WEapon -- Part 2
Advanced Shaolin-Taijiquan Course 2009 -- Overview
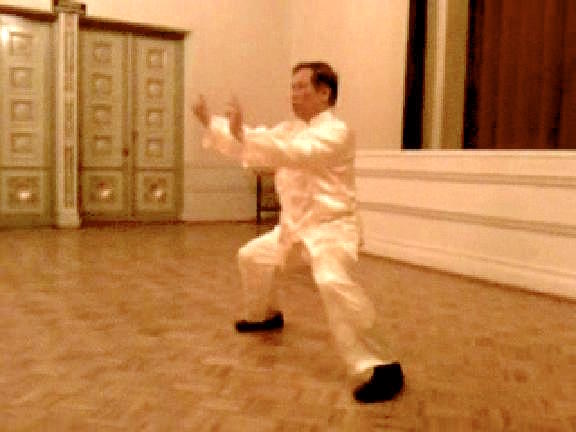
Application of Plum Flower Sabre
Application of Flowing Water Staff
Application of Wudang word
Single Unarmed against Multiple Umarmed -- Part 1
Single Unarmed against Multiple Umarmed -- Part 2
 Eighteen Collection -- Eighteen Collection 01
Praying Mantis Eighteen Collection Set -- Part 1
Eighteen Collection -- Eighteen Collection 01
Praying Mantis Eighteen Collection Set -- Part 1Praying Mantis Eighteen Collection Set -- Part 2
Praying Mantis Eighteen Collection Set -- Part 3
Praying Mantis Eighteen Collection Set -- Part 4
Praying Mantis Eighteen Collection Set -- Part 5
Eighteen Best Techniques of the Time
Praying Mantis Eighteen Collection Set -- Pictures
Praying Mantis Eighteen Collection Set -- Videos
Eighteen Collection -- Eighteen Collection 02 Praying Mantis Eighteen Collection Set -- Part 1a
Praying Mantis Eighteen Collection Set -- Part 2a
Praying Mantis Eighteen Collection Set -- Part 3a
Praying Mantis Eighteen Collection Set -- Part 4a
Praying Mantis Eighteen Collection Set -- Part 5a
Eighteen Features of Praying Mantis Kungfu
Praying Mantis Eighteen Collection Set -- Pictures
Praying Mantis Eighteen Collection Set -- Videos
Eighteen Collection -- Eighteen Collection 03 Selection from Eighteen-Lohan Art -- Private
Eighteen Collection -- Eighteen Lohan Art Eighteen Lohan Art
Eighteen Lohan Art -- Part 1
Eighteen Lohan Art -- Part 2
Eighteen Lohan Art -- Part 3
Eighteen Lohan Art -- Part 4
Eighteen Lohan Art -- Part 5
Eighteen Lohan Art -- Part 6
Eighteen Lohan Art -- Part 7
Eighteen Lohan Art -- Part 8
Eighteen Lohan Art -- Part 9
 Eighteen Lohan Art -- Part 10
Eighteen Lohan Art -- Part 11
Eighteen Lohan Art -- Part 12
Eighteen Lohan Art -- Part 13
Eighteen Lohan Art -- Part 14
Eighteen Lohan Art -- Part 15
Eighteen Lohan Art -- Part 16
Eighteen Lohan Art -- Part 17
Eighteen Lohan Art -- Part 18
The Eighteen-Lohan Art
Frankfurt Sabre Some Applications of the Plum Flower Sabre -- Part 1
Some Applications of the Plum Flower Sabre -- Part 2
Some Applications of the Plum Flower Sabre -- Part 3
Some Applications of the Plum Flower Sabre -- Part 4
Some Applications of the Plum Flower Sabre -- Part 5
Some Applications of the Plum Flower Sabre -- Part 6
Some Applications of the Plum Flower Sabre -- Part 7
Some Applications of the Plum Flower Sabre -- Part 8
Some Applications of the Plum Flower Sabre -- Part 9
Some Applications of the Plum Flower Sabre -- Part 10
Some Applications of the Plum Flower Sabre -- Part 11
Some Applications of the Plum Flower Sabre -- Part 12
Some Applications of the Plum Flower Sabre -- Part 13
Some Applications of the Plum Flower Sabre -- Part 14
Some A1919pplications of the Plum Flower Sabre -- Part 15
Some Applications of the Plum Flower Sabre -- Part 16
Some Applications of the Plum Flower Sabre -- Part 17
Some Applications of the Plum Flower Sabre -- Part 18
Some Applications of the Plum Flower Sabre -- Part 19
Some Applications of the Plum Flower Sabre -- Part 20
 Some Applications of the Plum Flower Sabre -- Part 21
Some Applications of the Plum Flower Sabre -- Overview
Frankfurt Single Single Tiger, Flowing Water and Plum Flower -- Overview
Single Tiger Emerges from Cave -- Overview
Single Tiger Emerges from Cave -- Part 2
Single Tiger Emerges from Cave -- Part 3
Single Tiger Emerges from Cave -- Part 1
Single Tiger Emerges from Cave -- Part 4
Single Tiger Emerges from Cave -- Part 5
Single Tiger Emerges from Cave -- Part 6
Single Tiger Emerges from Cave -- Part 7
Single Tiger Emerges from Cave -- Part 8
Single Tiger Emerges from Cave -- Part 9
Frankfurt Single -- Youtube Frankfurt Shaolin Kungfu Course 2009 -- Overview
Combat Application of Shaolin Plum Flower Sabre
Single Tiger Emerges from Cave
Combat Application of Shaolin Flowing Water Staff
 Iron Wire
Shaolin Iron Wire Set
Iron Wire
Shaolin Iron Wire SetGlimpses of Iron Wire and Taming-Tiger Course,
Helksinki -- Overview
Shaolin Iron Wire Set -- Part 1
Shaolin Iron Wire Set -- Part 2
Shaolin Iron Wire Set -- Part 3
Shaolin Iron Wire Set -- Part 4
Shaolin Iron Wire Set -- Part 5
Shaolin Iron Wire Set -- Part 6
Shaolin Iron Wire Set -- Part 7
Shaolin Iron Wire Set -- Part 8
Shaolin Iron Wire Set -- Part 9
Shaolin Iron Wire Set -- Part 10
Iron Wire -- Videos Videos of Iron Wire and Taming-Tiger Course -- Overview
Videos of the Shaolin Iron-Wire Set 2010
Glimpse of the Taming-Tiger Combat Applications 2010
Videos of the Shaolin Taming-Tiger Set 2010
Videos of the Taming-Tiger Combination Set 2010
Videos on Taming-Tiger against Other Martial Arts 2010
Iron Wire -- Youtube Shaolin Iron Wire Set
Videos of Iron Wire and Taming-Tiger Course -- Overview
Application of Taming Tiger
Shaolin Taming Tiger Combination Set
Shaolin Taming Tiger against Other Martial Arts
Shaolin Taming Tiger Set
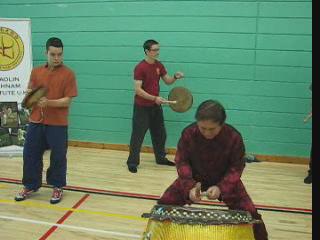
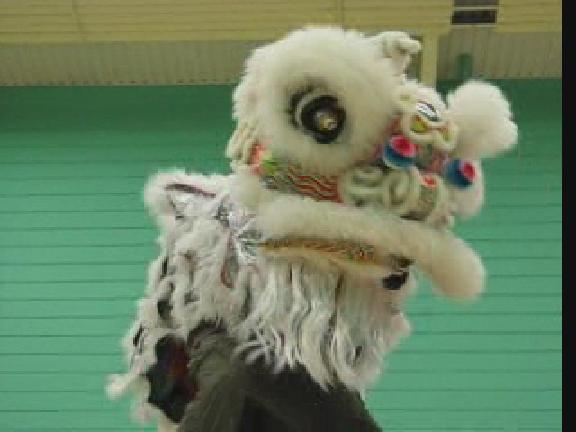
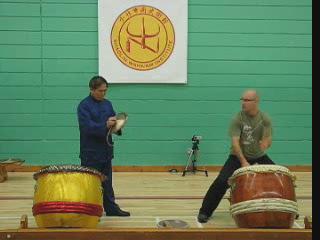
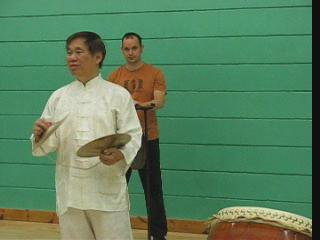
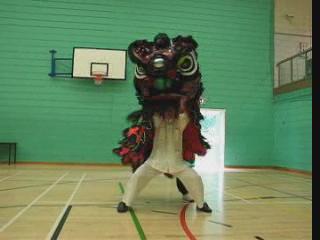
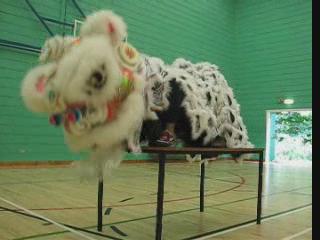
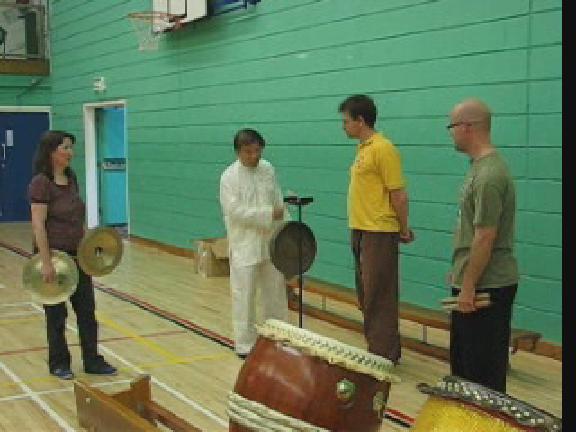
Lion Dance -- Lion 01 Percusion Music of the Lion Dance -- Part 1
Percusion Music of the Lion Dance -- Part 2
Percusion Music of the Lion Dance -- Part 3
Percusion Music of the Lion Dance -- Part 4
Percusion Music of the Lion Dance -- Part 5
Percusion Music of the Lion Dance -- Part 6
Patterns of Gong, Symbals and Drum -- Part 1
Patterns of Gong, Symbals and Drum -- Part 2
Patterns of Gong, Symbals and Drum -- Part 3
Patterns of Gong, Symbals and Drum -- Part 4
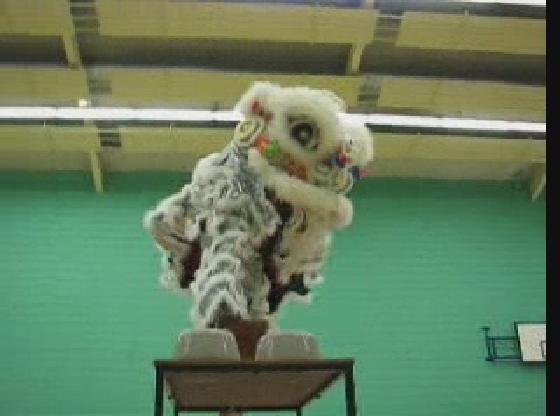
 Hand Movements, Footwork and Lion Leap -- Part 1
Hand Movements, Footwork and Lion Leap -- Part 2
Hand Movements, Footwork and Lion Leap -- Part 3
Hand Movements, Footwork and Lion Leap -- Part 4
Hand Movements, Footwork and Lion Leap -- Part 5
Hand Movements, Footwork and Lion Leap -- Part 6
Hand Movements, Footwork and Lion Leap -- Part 7
Hand Movements, Footwork and Lion Leap -- Part 8
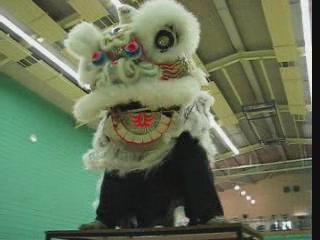
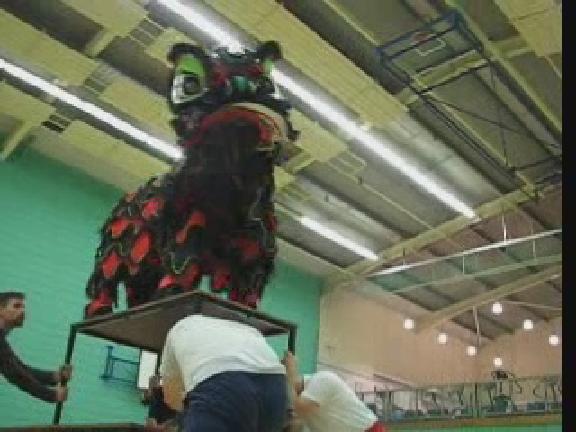
Majestic Lion Dancing to Joyful Percussion Music -- Part 1
Majestic Lion Dancing to Joyful Percussion Music -- Part 2
Majestic Lion Dancing to Joyful Percussion Music -- Part 3
Majestic Lion Dancing to Joyful Percussion Music -- Part 4
Majestic Lion Dancing to Joyful Percussion Music -- Part 5
Majestic Lion Dancing to Joyful Percussion Music -- Part 6
Bringing out the Emotions of a Lion -- Part 1
Bringing out the Emotions of a Lion -- Part 2
Bringing out the Emotions of a Lion -- Part 3
Bringing out the Emotions of a Lion -- Part 4
Bringing out the Emotions of a Lion -- Part 5
Bringing out the Emotions of a Lion -- Part 6
Bringing out the Emotions of a Lion -- Part 7
Bringing out the Emotions of a Lion -- Part 8
Bringing out the Emotions of a Lion -- Part 9
Leaping Lion with Variety of Percussion Music -- Part 1
Leaping Lion with Variety of Percussion Music -- Part 2
Leaping Lion with Variety of Percussion Music -- Part 3
Leaping Lion with Variety of Percussion Music -- Part 4
Leaping Lion with Variety of Percussion Music -- Part 5
Leaping Lion with Variety of Percussion Music -- Part 6
Leaping Lion with Variety of Percussion Music -- Part 7
 Leaping Lion with Variety of Percussion Music -- Part 8
Leaping Lion with Variety of Percussion Music -- Part 9
Fundamental Features of a Lion Dance-Drama -- Part 1
Fundamental Features of a Lion Dance-Drama -- Part 2
Fundamental Features of a Lion Dance-Drama -- Part 3
Fundamental Features of a Lion Dance-Drama -- Part 4
Fundamental Features of a Lion Dance-Drama -- Part 5
Fundamental Features of a Lion Dance-Drama -- Part 6
Fundamental Features of a Lion Dance-Drama -- Part 7
Fundamental Features of a Lion Dance-Drama -- Part 8
Fundamental Features of a Lion Dance-Drama -- Part 9
Bringing Life and Excitement to the Dance -- Part 1
Bringing Life and Excitement to the Dance -- Part 2
Bringing Life and Excitement to the Dance -- Part 3
Bringing Life and Excitement to the Dance -- Part 4
Bringing Life and Excitement to the Dance -- Part 5
Bringing Life and Excitement to the Dance -- Part 6
Creating Excitement with Fast Beats -- Part 1
Creating Excitement with Fast Beats -- Part 2
Creating Excitement with Fast Beats -- Part 3
Creating Excitement with Fast Beats -- Part 4
Creating Excitement with Fast Beats -- Part 5
Creating Excitement with Fast Beats -- Part 6
Creating Excitement with Fast Beats -- Part 7
Selection from Lion Dance at UK Summer Camp 2009 -- Overview
Patterns of Gong, Symbals and Drum -- Part 5
Patterns of Gong, Symbals and Drum -- Part 6
Patterns of Gong, Symbals and Drum -- Part 7
Patterns of Gong, Symbals and Drum -- Part 8
Some Fundamental Lion Dance Patterns -- Part 1
Some Fundamental Lion Dance Patterns -- Part 2
Some Fundamental Lion Dance Patterns -- Part 3
Some Fundamental Lion Dance Patterns -- Part 4
Some Fundamental Lion Dance Patterns -- Part 5
Some Fundamental Lion Dance Patterns -- Part 6
 Patterns of Gong, Symbals and Drum -- Part 5
Patterns of Gong, Symbals and Drum -- Part 6
Patterns of Gong, Symbals and Drum -- Part 7
Patterns of Gong, Symbals and Drum -- Part 8
Some Fundamental Lion Dance Patterns -- Part 1
Some Fundamental Lion Dance Patterns -- Part 2
Some Fundamental Lion Dance Patterns -- Part 3
Some Fundamental Lion Dance Patterns -- Part 4
Some Fundamental Lion Dance Patterns -- Part 5
Some Fundamental Lion Dance Patterns -- Part 6
Percusion Music of the Lion Dance -- Overview
Patterns of Gong, Symbals and Drum -- Overview
Some Fundamental Lion Dance Patterns -- Overview
Hand Movements, Footwork and Lion Leap -- Overview
Majestic Lion Dancing to Joyful Percussion Music -- Overview
Bringing out the Emotions of a Lion -- Overview
Leaping Lion with Variety of Percussion Music -- Overview
Fundamental Features of a Lion Dance-Drama -- Overview
Bringing Life and Excitement to the Dance -- Overview
Creating Excitement with Fast Beats -- Overview
Lion Dance -- Lion 02 Showing Majesty and Leisure Walking -- Part 1
Showing Majesty and Leisure Walking -- Part 2
Showing Majesty and Leisure Walking -- Part 3
Showing Majesty and Leisure Walking -- Part 4
Showing Majesty and Leisure Walking -- Part 5
Showing Majesty and Leisure Walking -- Part 6
Showing Majesty and Leisure Walking -- Part 7
Showing Majesty and Leisure Walking -- Part 8
Two-Five, Five-Seven, and Seven-Seven-Seven -- Part 1
Two-Five, Five-Seven, and Seven-Seven-Seven -- Part 2
 Two-Five, Five-Seven, and Seven-Seven-Seven -- Part 3
Two-Five, Five-Seven, and Seven-Seven-Seven -- Part 4
Two-Five, Five-Seven, and Seven-Seven-Seven -- Part 5
Two-Five, Five-Seven, and Seven-Seven-Seven -- Part 6
Two-Five, Five-Seven, and Seven-Seven-Seven -- Part 7
Two-Five, Five-Seven, and Seven-Seven-Seven -- Part 8
Rhythm and Melody of Lion Dance Music -- Part 1
Rhythm and Melody of Lion Dance Music -- Part 2
Rhythm and Melody of Lion Dance Music -- Part 3
Rhythm and Melody of Lion Dance Music -- Part 4
Rhythm and Melody of Lion Dance Music -- Part 5
Rhythm and Melody of Lion Dance Music -- Part 6
Rhythm and Melody of Lion Dance Music -- Part 7
Developing Desirable Qualities for Kungfu and Daily Living -- Part 1
Developing Desirable Qualities for Kungfu and Daily Living -- Part 2
Developing Desirable Qualities for Kungfu and Daily Living -- Part 3
Developing Desirable Qualities for Kungfu and Daily Living -- Part 4
Developing Desirable Qualities for Kungfu and Daily Living -- Part 5
Developing Desirable Qualities for Kungfu and Daily Living -- Part 6
Developing Desirable Qualities for Kungfu and Daily Living -- Part 7
Developing Desirable Qualities for Kungfu and Daily Living -- Part 8
Developing Desirable Qualities for Kungfu and Daily Living -- Part 9
From Patterns to Sequences to Drama -- Part 1
From Patterns to Sequences to Drama -- Part 2
From Patterns to Sequences to Drama -- Part 3
From Patterns to Sequences to Drama -- Part 4
From Patterns to Sequences to Drama -- Part 5
From Patterns to Sequences to Drama -- Part 6
An Expression of Joy and Excitement -- Part 1
From Patterns to Sequences to Drama -- Part 7
 From Patterns to Sequences to Drama -- Part 8
An Expression of Joy and Excitement -- Part 2
An Expression of Joy and Excitement -- Part 3
An Expression of Joy and Excitement -- Part 4
An Expression of Joy and Excitement -- Part 5
An Expression of Joy and Excitement -- Part 6
An Expression of Joy and Excitement -- Part 7
An Expression of Joy and Excitement -- Part 8
Safety Precautions in Exciting Adventures -- Part 1
Safety Precautions in Exciting Adventures -- Part 2
Safety Precautions in Exciting Adventures -- Part 3
Safety Precautions in Exciting Adventures -- Part 4
Safety Precautions in Exciting Adventures -- Part 5
Safety Precautions in Exciting Adventures -- Part 6
Safety Precautions in Exciting Adventures -- Part 7
Safety Precautions in Exciting Adventures -- Part 8
Safety Precautions in Exciting Adventures -- Part 9
Capturing Green and Sharing Prosperty -- Part 1
Capturing Green and Sharing Prosperty -- Part 2
Capturing Green and Sharing Prosperty -- Part 3
Capturing Green and Sharing Prosperty -- Part 4
Capturing Green and Sharing Prosperty -- Part 5
Capturing Green and Sharing Prosperty -- Part 6
Capturing Green and Sharing Prosperty -- Part 7
Capturing Green and Sharing Prosperty -- Part 8
Capturing Green and Sharing Prosperty -- Part 9
 Showing Majesty and Leisure Walking -- Overview
Two-Five, Five-Seven, and Seven-Seven-Seven -- Overview
Rhythm and Melody of Lion Dance Music -- Overview
Developing Desirable Qualities for Kungfu and Daily
Living -- Overview
From Patterns to Sequences to Drama -- Overview
An Expression of Joy and Excitement -- Overview
Safety Precautions in Exciting Adventures -- Overview
Capturing Green and Sharing Prosperty -- Overview
Lion Dance -- Lion 03 Southern Lion Performed like Northern Lion -- Part 1
Southern Lion Performed like Northern Lion -- Part 2
Southern Lion Performed like Northern Lion -- Part 3>
Southern Lion Performed like Northern Lion -- Part 4
Southern Lion Performed like Northern Lion -- Part 5
Southern Lion Performed like Northern Lion -- Part 6
Southern Lion Performed like Northern Lion -- Part 7
Southern Lion Performed like Northern Lion -- Part 8
Bringing Life and Excitement with Appropriate Music -- Part 1
Bringing Life and Excitement with Appropriate Music -- Part 2
Bringing Life and Excitement with Appropriate Music -- Part 3
Bringing Life and Excitement with Appropriate Music -- Part 4
Bringing Life and Excitement with Appropriate Music -- Part 5
Bringing Life and Excitement with Appropriate Music -- Part 6
Bringing Life and Excitement with Appropriate Music -- Part 7
Co-Ordination between the Lion and the Accompanying Music -- Part 1
Co-Ordination between the Lion and the Accompanying Music -- Part 2
Co-Ordination between the Lion and the Accompanying Music -- Part 3
Co-Ordination between the Lion and the Accompanying Music -- Part 4
Co-Ordination between the Lion and the Accompanying Music -- Part 5
 Co-Ordination between the Lion and the Accompanying
Music -- Part 6
Co-Ordination between the Lion and the Accompanying
Music -- Part 7
Co-Ordination between the Lion and the Accompanying
Music -- Part 8
Co-Ordination between the Lion and the Accompanying
Music -- Part 9
Percussion Music for Kungfu and Laughing Buddha -- Part 1
Percussion Music for Kungfu and Laughing Buddha -- Part 2
Percussion Music for Kungfu and Laughing Buddha -- Part 3
Percussion Music for Kungfu and Laughing Buddha -- Part 4
Percussion Music for Kungfu and Laughing Buddha -- Part 5
Percussion Music for Kungfu and Laughing Buddha -- Part 6
Percussion Music for Kungfu and Laughing Buddha -- Part 7
Percussion Music for Kungfu and Laughing Buddha -- Part 8
Percussion Music for Kungfu and Laughing Buddha -- Part 9
Signature Greeting and Signature Pattern -- Part 1
Signature Greeting and Signature Pattern -- Part 2
Signature Greeting and Signature Pattern -- Part 3
Signature Greeting and Signature Pattern -- Part 4
Signature Greeting and Signature Pattern -- Part 5
Signature Greeting and Signature Pattern -- Part 6
Signature Greeting and Signature Pattern -- Part 7
Signature Greeting and Signature Pattern -- Part 8
Exhibiting Courage and Carefulness in Performance and in Daily Life -- Part 1
Exhibiting Courage and Carefulness in Performance and in Daily Life -- Part 2
Exhibiting Courage and Carefulness in Performance and in Daily Life -- Part 3
Exhibiting Courage and Carefulness in Performance and in Daily Life -- Part 4
Exhibiting Courage and Carefulness in Performance and in Daily Life -- Part 5
Exhibiting Courage and Carefulness in Performance and in Daily Life -- Part 6
Exhibiting Courage and Carefulness in Performance and in Daily Life -- Part 7
Exhibiting Courage and Carefulness in Performance and in Daily Life -- Part 8
Exhibiting Courage and Carefulness in Performance and in Daily Life -- Part 9
 Exhibiting Courage and Carefulness in Performance
and in Daily Life -- Part 10
Showing Majesty and Drinking from Mountain
Stream -- Part 1
Showing Majesty and Drinking from Mountain
Stream -- Part 2
Showing Majesty and Drinking from Mountain
Stream -- Part 3
Showing Majesty and Drinking from Mountain
Stream -- Part 4
Showing Majesty and Drinking from Mountain
Stream -- Part 5
Showing Majesty and Drinking from Mountain Stream -- Part 6
Climax of Lion Damce Drama -- Part 1
Climax of Lion Damce Drama -- Part 2
Climax of Lion Damce Drama -- Part 3
Climax of Lion Damce Drama -- Part 4
Climax of Lion Damce Drama -- Part 5
Climax of Lion Damce Drama -- Part 6
Climax of Lion Damce Drama -- Part 7
Southern Lion Performed like Northern Lion -- Overview
Bringing Life and Excitement with Appropriate Music -- Overview
Co-Ordination between the Lion and the Accompanying Music -- Overview
Percussion Music for Kungfu and Laughing Buddha -- Overview
Signature Greeting and Signature Pattern -- Overview
Exhibiting Courage and Carefulness in Performance and in Daily Life -- Overview
Showing Majesty and Drinking from Mountain Stream -- Overview
Climax of Lion Damce Drama -- Overview
 Lion Dance -- Lion 04
Capturing Mountain Peaches at a Mountain Cliff -- Part 1
Lion Dance -- Lion 04
Capturing Mountain Peaches at a Mountain Cliff -- Part 1Capturing Mountain Peaches at a Mountain Cliff -- Part 2
Capturing Mountain Peaches at a Mountain Cliff -- Part 3
Capturing Mountain Peaches at a Mountain Cliff -- Part 4
Capturing Mountain Peaches at a Mountain Cliff -- Part 5
Capturing Mountain Peaches at a Mountain Cliff -- Part 6
Capturing Mountain Peaches at a Mountain Cliff -- Part 7
Capturing Mountain Peaches at a Mountain Cliff -- Part 8
Capturing Mountain Peaches at a Mountain Cliff -- Part 9
Capturing Mountain Peaches at a Mountain Cliff -- Part 10
Capturing Mountain Peaches at a Mountain Cliff -- Part 11
High-Level Performance by Fresh Beginners in Lion Dance -- Part 1
High-Level Performance by Fresh Beginners in Lion Dance -- Part 2
High-Level Performance by Fresh Beginners in Lion Dance -- Part 3
High-Level Performance by Fresh Beginners in Lion Dance -- Part 4
High-Level Performance by Fresh Beginners in Lion Dance -- Part 5
High-Level Performance by Fresh Beginners in Lion Dance -- Part 6
High-Level Performance by Fresh Beginners in Lion Dance -- Part 7
High-Level Performance by Fresh Beginners in Lion Dance -- Part 8
High-Level Performance by Fresh Beginners in Lion Dance -- Part 9
High-Level Performance by Fresh Beginners in Lion Dance -- Part 10
High-Level Performance by Fresh Beginners in Lion Dance -- Part 11
High-Level Performance by Fresh Beginners in Lion Dance -- Part 12
High-Level Performance by Fresh Beginners in Lion Dance -- Part 13
High-Level Performance by Fresh Beginners in Lion Dance -- Part 14
Patterns and Sequences in Lion Dance Music -- Part 1
Patterns and Sequences in Lion Dance Music -- Part 2
Patterns and Sequences in Lion Dance Music -- Part 3
Patterns and Sequences in Lion Dance Music -- Part 4
Patterns and Sequences in Lion Dance Music -- Part 5
 Patterns and Sequences in Lion Dance Music -- Part 6
Patterns and Sequences in Lion Dance Music -- Part 7
Patterns and Sequences in Lion Dance Music -- Part 8
Patterns and Sequences in Lion Dance Music -- Part 9
Why We can Gain Much in Short Time -- Part 1
Why We can Gain Much in Short Time -- Part 2
Why We can Gain Much in Short Time -- Part 3
Why We can Gain Much in Short Time -- Part 4
5 Why We can Gain Much in Short Time -- Part
Why We can Gain Much in Short Time -- Part 6
Why We can Gain Much in Short Time -- Part 7
Why We can Gain Much in Short Time -- Part 8
Why We can Gain Much in Short Time -- Part 9
Why We can Gain Much in Short Time -- Part 10
Why We can Gain Much in Short Time -- Part 11
Why We can Gain Much in Short Time -- Part 12
Learning and Prracticing in All Aspects of Lion Dance -- Part 1
Learning and Prracticing in All Aspects of Lion Dance -- Part 2
Learning and Prracticing in All Aspects of Lion Dance -- Part 3
Learning and Prracticing in All Aspects of Lion Dance -- Part 4
Learning and Prracticing in All Aspects of Lion Dance -- Part 5
Learning and Prracticing in All Aspects of Lion Dance -- Part 6
Learning and Prracticing in All Aspects of Lion Dance -- Part 7
Learning and Prracticing in All Aspects of Lion Dance -- Part 8
Learning and Prracticing in All Aspects of Lion Dance -- Part 9
Learning and Prracticing in All Aspects of Lion Dance -- Part 10
Shaolin Wahnam England Lion Dance Team -- Part 1
Shaolin Wahnam England Lion Dance Team -- Part 2
Shaolin Wahnam England Lion Dance Team -- Part 3
Shaolin Wahnam England Lion Dance Team -- Part 4
 Shaolin Wahnam England Lion Dance Team -- Part 5
Shaolin Wahnam England Lion Dance Team -- Part 6
Shaolin Wahnam England Lion Dance Team -- Part 7
Shaolin Wahnam England Lion Dance Team -- Part 8
Shaolin Wahnam England Lion Dance Team -- Part 9
Shaolin Wahnam England Lion Dance Team -- Part 10
Shaolin Wahnam England Lion Dance Team -- Part 11
Shaolin Wahnam North America Lion Dance Team -- Part 1
Shaolin Wahnam North America Lion Dance Team -- Part 2
Shaolin Wahnam North America Lion Dance Team -- Part 3
Shaolin Wahnam North America Lion Dance Team -- Part 4
Shaolin Wahnam North America Lion Dance Team -- Part 5
Shaolin Wahnam North America Lion Dance Team -- Part 6
Shaolin Wahnam North America Lion Dance Team -- Part 7
Shaolin Wahnam North America Lion Dance Team -- Part 8
Shaolin Wahnam North America Lion Dance Team -- Part 9
Shaolin Wahnam North America Lion Dance Team -- Part 10
Shaolin Wahnam North America Lion Dance Team -- Part 11
Shaolin Wahnam North America Lion Dance Team -- Part 12
Shaolin Wahnam North America Lion Dance Team -- Part 13
Finer Points of Lion Dance Music -- Part 1
Finer Points of Lion Dance Music -- Part 2
Finer Points of Lion Dance Music -- Part 3
Finer Points of Lion Dance Music -- Part 4
Finer Points of Lion Dance Music -- Part 5
Finer Points of Lion Dance Music -- Part 6
Finer Points of Lion Dance Music -- Part 7
Finer Points of Lion Dance Music -- Part 8
Finer Points of Lion Dance Music -- Part 9
Finer Points of Lion Dance Music -- Part 10
 High-Level Performance by Fresh Beginners in Lion
Dance -- Overview
Patterns and Sequences in Lion Dance Music -- Overview
Why We can Gain Much in Short Time -- Overview
Learning and Prracticing in All Aspects of Lion
Dance -- Overview
Shaolin Wahnam England Lion Dance Team -- Overview
Shaolin Wahnam North America Lion Dance
Team -- Overview
Finer Points of Lion Dance Music -- Overview
Lion Dance -- Lion 05 Majestic Lion Rides Drragon -- Part 1
Majestic Lion Rides Drragon -- Part 2
Majestic Lion Rides Drragon -- Part 3
Majestic Lion Rides Drragon -- Part 4
Going Beyond Mountain to Search for Gold -- Part 1
Going Beyond Mountain to Search for Gold -- Part 2
Going Beyond Mountain to Search for Gold -- Part 3
Going Beyond Mountain to Search for Gold -- Part 4
Going Beyond Mountain to Search for Gold -- Part 5
Going Beyond Mountain to Search for Gold -- Part 6
Going Beyond Mountain to Search for Gold -- Part 7
Going Beyond Mountain to Search for Gold -- Part 8
Going Across Golden Bridge to Capture Treasure -- Part 1
Going Across Golden Bridge to Capture Treasure -- Part 2
Going Across Golden Bridge to Capture Treasure -- Part 3
Going Across Golden Bridge to Capture Treasure -- Part 4
Going Across Golden Bridge to Capture Treasure -- Part 5
Going Across Golden Bridge to Capture Treasure -- Part 6
Going Across Golden Bridge to Capture Treasure -- Part 7
Going Across Golden Bridge to Capture Treasure -- Part 8
 Going Across Golden Bridge to Capture Treasure -- Part 9
Going Across Golden Bridge to Capture Treasure -- Part 10
Going Across Golden Bridge to Capture Treasure -- Part 11
Going Across Golden Bridge to Capture Treasure -- Part 12
Finding Three Treasures at Mountain Top -- Part 2
Finding Three Treasures at Mountain Top -- Part 3
Finding Three Treasures at Mountain Top -- Part 4
Finding Three Treasures at Mountain Top -- Part 5
Finding Three Treasures at Mountain Top -- Part 6
Finding Three Treasures at Mountain Top -- Part 7
Finding Three Treasures at Mountain Top -- Part 8
Finding Three Treasures at Mountain Top -- Part 9
Finding Three Treasures at Mountain Top -- Part 10
Finding Three Treasures at Mountain Top -- Part 11
Finding Three Treasures at Mountain Top -- Part 12
Finding Three Treasures at Mountain Top -- Part 13
Majestic Lion Rides Dragon -- Overview
Going Beyond Mountain to Search for Gold -- Overview<
Going Across Golden Bridge to Capture Treasure -- Overview<
Finding Three Treasures at Mountain Top -- Overview<
Lion Dance -- Videos Pewrcussion Music of Lion Dance
Rhythms and Patterns of Gong, Cymbals and Drum
Some Fundmental Lion Dance Patterns
Hand Movement, Footwork and Lion Leap
Majestic Lion Dancing to Joyful Percussion
Bringing out the Enmotions of a Lion
Leaping Lion with Variety of Percussion Music
Fundamental Features of a Lion Dance Drama
Bringing Life and Excitement of Lion Dance
Crreating Excitement with Fast Beats
 Showing Majesty and Leisure Walking
Two-Five, Five-Seven, Seve-Seven-Seven
The Basic, the Rhythm and the Melody in Lion Dance Music
Developing Desirable Qualities for Kungfu and Daily Living
From Patterns to Sequences to Drama
Expression of Joy and Excitement
Safety Precautions in Exciting Adventures
Capturing Green and Sharing Prosperity
Southern Lion Performed like Northern Lion
Bringing Life and Excitement with Appropriate Music
Co-Ordination between Lion and Accompanying Music
Percussion Music for Kungfu and Laughing Buddha
Signature /Greeting and Signature Pattern
Exhibiting Courage and Carefulness in Performance and Daily Life
Showing Majesty and Drinking from Mountain Stream
Climax of Lion Dance Drama
Capturing Heavenly Peaches at Mountain Cliff
High-Level Performance by Fresh Beginners
Patterns and Sequences in Lion Dance Music
Why We Can Much in Short Time
Learning and Participating in All Aspects of Lion Dance
Shaolin Wahnam England Lion Dance Performance
Shaolin Wahnam North America Lion Dance Performance
Finer Points of Lion Dance Music
Majestic Lion Rides Dragon
Going beyond Mountain to Search for Gold
Going Aross Golden Bridge to Capture Treasure
Finding Three Treasures at Mountain Top
Videos of Lion Dance at UK Summer Camp 2009 -- Overview
 Old Videos
Shaolin Thirty Six Specific Techniques -- Overview
Old Videos
Shaolin Thirty Six Specific Techniques -- OverviewShaolin Chi Kung in the 1980s -- Cosmos Palm
From Specific Techniques to Free Sparring
Shaolin Wahnam in the 1980s -- Overview
First Shaolin Wahnam Standardized Test 1983 -- Part 1
First Shaolin Wahnam Standardized Test 1983 -- Part 2
First Shaolin Wahnam Standardized Test 1983 -- Part 3
First Shaolin Wahnam Standardized Test 1983 -- Part 4
First Shaolin Wahnam Standardized Test 1983 -- Part 5
First Shaolin Wahnam Standardized Test 1983 -- Part 6
First Shaolin Wahnam Standardized Test 1983 -- Part 7
First Shaolin Wahnam Standardized Test 1983 -- Part 8
Shaolin Thristy Six Specific Techniques -- Part 1
Shaolin Thristy Six Specific Techniques -- Part 2
Shaolin Thristy Six Specific Techniques -- Part 3
Shaolin Thristy Six Specific Techniques -- Part 4
Shaolin Thristy Six Specific Techniques -- Part 5
Shaolin Thristy Six Specific Techniques -- Part 6
Shaolin Thristy Six Specific Techniques -- Part 7
Shaolin Thristy Six Specific Techniques -- Part 8
Shaolin Thristy Six Specific Techniques -- Part 9
Shaolin Thristy Six Specific Techniques -- Part 10
Shaolin Thristy Six Specific Techniques -- Part 11
Shaolin Thristy Six Specific Techniques -- Part 12
Shaolin Thristy Six Specific Techniques -- Part 13
Shaolin Thristy Six Specific Techniques -- Part 14
Shaolin Thristy Six Specific Techniques -- Part 15
Shaolin Thristy Six Specific Techniques -- Part 16
From Specific Techniques to Free Sparring -- Part 1
From Specific Techniques to Free Sparring -- Part 2
 From Specific Techniques to Free Sparring -- Part 3
From Specific Techniques to Free Sparring -- Part 4
From Specific Techniques to Free Sparring -- Part 5
From Specific Techniques to Free Sparring -- Part 6
From Specific Techniques to Free Sparring -- Part 7
From Specific Techniques to Free Sparring -- Part 8
From Specific Techniques to Free Sparring -- Part 9
First Shaolin Wahnam Standardized Test 1983,
Sungai Petani -- Overview
Taming the Tiger -- Overview
Taming the Tiger 1980s -- Part 1
Taming the Tiger 1980s -- Part 2
Taming the Tiger 1980s -- Part 3
Taming the Tiger 1980s -- Part 4
Taming the Tiger 1980s -- Part 5
Taming the Tiger 1980s -- Part 6
Old Videos -- Sequences Early Shaolin Commbat Sequences in the 1980s -- Overview
Early Shaolin Commbat Sequences in the 1980s -- Part 1
Early Shaolin Commbat Sequences in the 1980s -- Part 2
Early Shaolin Commbat Sequences in the 1980s -- Part 3
Early Shaolin Commbat Sequences in the 1980s -- Part 4
Early Shaolin Commbat Sequences in the 1980s -- Part 5
Early Shaolin Commbat Sequences in the 1980s -- Part 6
Early Shaolin Commbat Sequences in the 1980s -- Part 7
Early Shaolin Commbat Sequences in the 1980s -- Part 8
Early Shaolin Commbat Sequences in the 1980s -- Part 9
 Early Shaolin Commbat Sequences in the 1980s -- Part 10
Early Shaolin Commbat Sequences in the 1980s -- Part 11
Early Shaolin Commbat Sequences in the 1980s -- Part 12
Early Shaolin Commbat Sequences in the 1980s -- Part 13
Early Shaolin Commbat Sequences in the 1980s -- Part 14
Early Shaolin Commbat Sequences in the 1980s -- Part 15
Early Shaolin Commbat Sequences in the 1980s -- Part 16
Early Shaolin Commbat Sequences in the 1980s -- Part 17
Early Shaolin Commbat Sequences in the 1980s -- Part 18
Early Shaolin Commbat Sequences in the 1980s -- Part 19
Early Shaolin Commbat Sequences in the 1980s -- Part 20
Early Shaolin Commbat Sequences in the 1980s -- Part 21
Early Shaolin Commbat Sequences in the 1980s -- Part 22
Early Shaolin Commbat Sequences in the 1980s -- Part 23
Early Shaolin Commbat Sequences in the 1980s -- Part 24
Old Videos -- Taiji Our First Taijiquan Combat Sequences in the 1980s -- Overview
Our First Taijiquan Combat Sequences in the 1980s -- Part 1
Our First Taijiquan Combat Sequences in the 1980s -- Part 2
Our First Taijiquan Combat Sequences in the 1980s -- Part 3
Our First Taijiquan Combat Sequences in the 1980s -- Part 4
Our First Taijiquan Combat Sequences in the 1980s -- Part 5
Our First Taijiquan Combat Sequences in the 1980s -- Part 6
Our First Taijiquan Combat Sequences in the 1980s -- Part 7
Our First Taijiquan Combat Sequences in the 1980s -- Part 8
Our First Taijiquan Combat Sequences in the 1980s -- Part 9
 Our First Taijiquan Combat Sequences in the 1980s -- Part 10
Our First Taijiquan Combat Sequences in the 1980s -- Part 11
Our First Taijiquan Combat Sequences in the 1980s -- Part 12
Old Videos -- Weapons Green Drragon Crescent Moon Guan Dao
-- Overview in Videos
Green Drragon Crescent Moon Guan Dao
-- Overview in Videos
Green Drragon Crescent Moon Guan Dao -- Part 1
Green Drragon Crescent Moon Guan Dao -- Part 2
Green Drragon Crescent Moon Guan Dao -- Part 3
Green Drragon Crescent Moon Guan Dao -- Part 4
Green Drragon Crescent Moon Guan Dao -- Part 5
Lu Bu Crescent-Moon Spear 1980s -- Overview
Lu Bu Crescent-Moon Spear 1980s -- Part 1
Lu Bu Crescent-Moon Spear 1980s -- Part 2
Lu Bu Crescent-Moon Spear 1980s -- Part 3
Lu Bu Crescent-Moon Spear 1980s -- Part 4
Lu Bu Crescent-Moon Spear 1980s -- Part 5
Shaolin Plum Flower Sabre 1980s -- Overview in Pictures
Shaolin Plum Flower Sabre 1980s -- Overview in Videos
Shaolin Plum Flower Sabre 1980s -- Part 1
Shaolin Plum Flower Sabre 1980s -- Part 2
Shaolin Plum Flower Sabre 1980s -- Part 3
Shaolin Plum Flower Sabre 1980s -- Part 4
Damo Subduing-Monsters Crescent-Moon Spade -- Overview
Damo Subduing-Monsters Crescent-Moon Spade -- Part 1
Damo Subduing-Monsters Crescent-Moon Spade -- Part 2
 Sabah Chi Kung 2010 -- Chi Kung 01
Entering into Chi Kung State of Mind -- Overview
Sabah Chi Kung 2010 -- Chi Kung 01
Entering into Chi Kung State of Mind -- OverviewGenerating Energy Flow -- Overview
Difference between Techniques and Skills -- Overview
Making Women Young and Beautiful -- Overview
Enjoying Cosmic Shower -- Overview
Developing Internal Force -- Overview
Entering into Chi Kung State of Mind -- Part 1
Entering into Chi Kung State of Mind -- Part 2
Entering into Chi Kung State of Mind -- Part 3
Entering into Chi Kung State of Mind -- Part 4
Entering into Chi Kung State of Mind -- Part 5
Entering into Chi Kung State of Mind -- Part 6
Entering into Chi Kung State of Mind -- Part 7
Entering into Chi Kung State of Mind -- Part 8
Generating Energy Flow -- Part 1
Generating Energy Flow -- Part 2
Generating Energy Flow -- Part 4
Generating Energy Flow -- Part 8
Generating Energy Flow -- Part 9
Generating Energy Flow -- Part 3
Generating Energy Flow -- Part 5
Generating Energy Flow -- Part 6
Generating Energy Flow -- Part 7
Difference between Techniques and Skills -- Part 1
Difference between Techniques and Skills -- Part 2
Difference between Techniques and Skills -- Part 3
Difference between Techniques and Skills -- Part 4
Difference between Techniques and Skills -- Part 5
Difference between Techniques and Skills -- Part 6
Difference between Techniques and Skills -- Part 7
 Making Women Young and Beautiful -- Part 1
Making Women Young and Beautiful -- Part 2
Making Women Young and Beautiful -- Part 3
Making Women Young and Beautiful -- Part 4
Making Women Young and Beautiful -- Part 5
Making Women Young and Beautiful -- Part 6
Making Women Young and Beautiful -- Part 7
Making Women Young and Beautiful -- Part 8
Making Women Young and Beautiful -- Part 9
Making Women Young and Beautiful -- Part 10
Enjoying Cosmic Showerr -- Part 1
Enjoying Cosmic Showerr -- Part 2
Enjoying Cosmic Showerr -- Part 3
Enjoying Cosmic Showerr -- Part 4
Enjoying Cosmic Showerr -- Part 5
Enjoying Cosmic Showerr -- Part 6
Enjoying Cosmic Showerr -- Part 7
Enjoying Cosmic Showerr -- Part 8
Enjoying Cosmic Showerr -- Part 9
Enjoying Cosmic Showerr -- Part 10
Enjoying Cosmic Showerr -- Part 11
Enjoying Cosmic Showerr -- Part 12
Developing Internal Force -- Part 1
Developing Internal Force -- Part 2
Developing Internal Force -- Part 3
Developing Internal Force -- Part 4
Developing Internal Force -- Part 5
Developing Internal Force -- Part 6
Developing Internal Force -- Part 7
Developing Internal Force -- Part 8
 Developing Internal Force -- Part 9
Developing Internal Force -- Part 10
Sabah Intensive Chi Kung Course -- Overview
Sabah Chi Kung 2010 -- Chi Kung 02 Stronger Physically, Emotionally, Mentally and
Spiritually -- Overview
Expanding into the Cosmos! -- Overview
A Life-Changing Experience: the Physcally Body is
Realizing Zen or Returning to God -- Overview
Coming Back to the Pheonomenal World -- Overview
Stronger Physically, Emotionally, Mentally and Spiritually -- Part 1
Stronger Physically, Emotionally, Mentally and Spiritually -- Part 2
Stronger Physically, Emotionally, Mentally and Spiritually -- Part 3
Stronger Physically, Emotionally, Mentally and Spiritually -- Part 4
Stronger Physically, Emotionally, Mentally and Spiritually -- Part 5
Stronger Physically, Emotionally, Mentally and Spiritually -- Part 6
Stronger Physically, Emotionally, Mentally and Spiritually -- Part 7
Expanding into the Cosmos! -- Part 1
Expanding into the Cosmos! -- Part 2
Expanding into the Cosmos! -- Part 3
Expanding into the Cosmos! -- Part 4
Expanding into the Cosmos! -- Part 5
Expanding into the Cosmos! -- Part 6
Expanding into the Cosmos! -- Part 7
Expanding into the Cosmos! -- Part 8
A Life-Changing Experrience: the Physical Body is an Illustion -- Part 1
A Life-Changing Experrience: the Physical Body is an Illustion -- Part 2
A Life-Changing Experrience: the Physical Body is an Illustion -- Part 3
A Life-Changing Experrience: the Physical Body is an Illustion -- Part 4
A Life-Changing Experrience: the Physical Body is an Illustion -- Part 5
A Life-Changing Experrience: the Physical Body is an Illustion -- Part 6
A Life-Changing Experrience: the Physical Body is an Illustion -- Part 7
A Life-Changing Experrience: the Physical Body is an Illustion -- Part 8
A Life-Changing Experrience: the Physical Body is an Illustion -- Part 9
Realizing Zen or Returning to God -- Part 1
 Realizing Zen or Returning to God -- Part 2
Realizing Zen or Returning to God -- Part 3
Realizing Zen or Returning to God -- Part 4
Realizing Zen or Returning to God -- Part 5
Realizing Zen or Returning to God -- Part 6
Realizing Zen or Returning to God -- Part 7
Realizing Zen or Returning to God -- Part 8
Coming Back to the Pheonomenal World -- Part 1
Coming Back to the Pheonomenal World -- Part 2
Coming Back to the Pheonomenal World -- Part 3
Coming Back to the Pheonomenal World -- Part 4
Coming Back to the Pheonomenal World -- Part 5
Coming Back to the Pheonomenal World -- Part 6
Coming Back to the Pheonomenal World -- Part 7
Coming Back to the Pheonomenal World -- Part 8
Sabah Chi Kung 2010 -- Videos Video of Sabah Intensive Chi Kung Course 2010 -- Overview
Entering into Chi Kung State of Mind
Generating Energy Flow
Difference between Techniques and Skills
Making Women Young and Beautiful
Enjoying Cosmic Shower
Develo[ing Internal Force
Stronger Physically, Emotionally, Mentally and Spiritually
Expanding into the Cosmos
Life-Changing Experience -- Physical Body is an Illusion
Attaining Zen or Returning to God
Coming Back to the Phenomenal World
 Sabah Kungfu 2009 -- Sabah 01
Lessons from Intensive Shaolin Kungfu
Sabah Kungfu 2009 -- Sabah 01
Lessons from Intensive Shaolin KungfuCourse, 2009 -- Overview
Horse-Riding Stance -- Part 1
Horse-Riding Stance -- Part 2
Horse-Riding Stance -- Part 3
Horse-Riding Stance -- Part 4
Horse-Riding Stance -- Part 5
Horse-Riding Stance -- Part 6
Horse-Riding Stance -- Part 7
Horse-Riding Stance -- Part 8
Horse-Riding Stance -- Part 9
Bow-Arrow and False-Leg -- Part 1
Bow-Arrow and False-Leg -- Part 2
Bow-Arrow and False-Leg -- Part 3
Bow-Arrow and False-Leg -- Part 4
Bow-Arrow and False-Leg -- Part 5
Bow-Arrow and False-Leg -- Part 6
Bow-Arrow and False-Leg -- Part 7
Bow-Arrow and False-Leg -- Part 8
Bow-Arrow and False-Leg -- Part 9
Bow-Arrow and False-Leg -- Part 10
Unicorn, Goat, Four-Six and Single-Leg -- Part 1
Unicorn, Goat, Four-Six and Single-Leg -- Part 2
Unicorn, Goat, Four-Six and Single-Leg -- Part 3
Unicorn, Goat, Four-Six and Single-Leg -- Part 4
Unicorn, Goat, Four-Six and Single-Leg -- Part 5
Unicorn, Goat, Four-Six and Single-Leg -- Part 6
Unicorn, Goat, Four-Six and Single-Leg -- Part 7
Unicorn, Goat, Four-Six and Single-Leg -- Part 8
Unicorn, Goat, Four-Six and Single-Leg -- Part 9
Unicorn, Goat, Four-Six and Single-Leg -- Part 10
 Art of Flexibile Legs -- Part 1
Art of Flexibile Legs -- Part 2
Art of Flexibile Legs -- Part 3
Art of Flexibile Legs -- Part 4
Art of Flexibile Legs -- Part 5
Footwork -- Part 1
Footwork -- Part 2
Footwork -- Part 3
Footwork -- Part 4
Footwork -- Part 5
Footwork -- Part 6
Footwork -- Part 7
Footwork -- Part 8
Footwork -- Part 9
Footwork -- Part 10
Foundation of Kungfu: Horse-Riding Stance -- Overview
Foundation of Kungfu: Bow-Arrow and False-Leg -- Overview
Foundation of Kungfu: Unicorn, Goat, Four-Six and Single-Leg -- Overview
Foundation of Kungfu: Art of Flexibile Legs -- Overview
Foundation of Kungfu: Footwork -- Overview
Sabah Kungfu 2009 -- Sabah 02 Mechanics of Fa-Jing or Exploding Force -- Part 1
Mechanics of Fa-Jing or Exploding Force -- Part 2
Mechanics of Fa-Jing or Exploding Force -- Part 3
Mechanics of Fa-Jing or Exploding Force -- Part 4
Mechanics of Fa-Jing or Exploding Force -- Part 5
Mechanics of Fa-Jing or Exploding Force -- Part
Mechanics of Fa-Jing or Exploding Force -- Part 7
6 Mechanics of Fa-Jing or Exploding Force -- Part 8
Mechanics of Fa-Jing or Exploding Force -- Part 9
The Eight Basic Hand Patterns -- Part 1
 The Eight Basic Hand Patterns -- Part 2
The Eight Basic Hand Patterns -- Part 3
The Eight Basic Hand Patterns -- Part 4
The Eight Basic Hand Patterns -- Part 5
The Eight Basic Hand Patterns -- Part 6
The Eight Basic Hand Patterns -- Part 7
The Eight Basic Hand Patterns -- Part 8
The Eight Basic Hand Patterns -- Part 9
The Eight Basic Hand Patterns -- Part 10
The Eight Basic Hand Patterns -- Part 11
The Eight Basic Hand Patterns -- Part 12
Linking Patterns and Right Spacing -- Part 1
Linking Patterns and Right Spacing -- Part 2
Linking Patterns and Right Spacing -- Part 3
Linking Patterns and Right Sopcing -- Part 5
Linking Patterns and Right Spacing -- Part 6
Linking Patterns and Right Spacing -- Part 7
Linking Patterns and Right Spacing -- Part 8
Linking Patterns and Right Spacing -- Part 9
Linking Patterns and Right Spacing -- Part 10
Linking Patterns and Right Spacing -- Part 11
Right Spacing and Right Timing -- Part 1
Right Spacing and Right Timing -- Part 2
Right Spacing and Right Timing -- Part 3
Right Spacing and Right Timing -- Part 4
Right Spacing and Right Timing -- Part 5
Right Spacing and Right Timing -- Part 6
Right Spacing and Right Timing -- Part 7
Right Spacing and Right Timing -- Part 8
 Right Spacing and Right Timing -- Part 9
Opening, Closing and Covering -- Part 1
Opening, Closing and Covering -- Part 2
Opening, Closing and Covering -- Part 3
Opening, Closing and Covering -- Part
Opening, Closing and Covering -- Part 5
Opening, Closing and Covering -- Part 6
4 Opening, Closing and Covering -- Part 7
Opening, Closing and Covering -- Part 8
Opening, Closing and Covering -- Part 9
Opening, Closing and Covering -- Part 10
Some Techniques and Skills for Combat Efficiency -- Part 1
Some Techniques and Skills for Combat Efficiency -- Part 2
Some Techniques and Skills for Combat Efficiency -- Part 3
Some Techniques and Skills for Combat Efficiency -- Part 4
Some Techniques and Skills for Combat Efficiency -- Part 5
Some Techniques and Skills for Combat Efficiency -- Part 6
Some Techniques and Skills for Combat Efficiency -- Part 7
Some Techniques and Skills for Combat Efficiency -- Part 8
Some Techniques and Skills for Combat Efficiency -- Part 9
Some Techniques and Skills for Combat Efficiency -- Part 10
Some Techniques and Skills for Combat Efficiency -- Part 11
Some Techniques and Skills for Combat Efficiency -- Part 12
Some Techniques and Skills for Combat Efficiency -- Part 13
No Defence Direct Counter -- Part 1
No Defence Direct Counter -- Part 2
No Defence Direct Counter -- Part 3
No Defence Direct Counter -- Part 4
No Defence Direct Counter -- Part 5
No Defence Direct Counter -- Part 6
 No Defence Direct Counter -- Part 7
No Defence Direct Counter -- Part 8
Subtle Footwork and Feign Moves -- Part 1
Subtle Footwork and Feign Moves -- Part 2
Subtle Footwork and Feign Moves -- Part 3
Subtle Footwork and Feign Moves -- Part 4
Subtle Footwork and Feign Moves -- Part 5
Subtle Footwork and Feign Moves -- Part 6
Subtle Footwork and Feign Moves -- Part 7
Subtle Footwork and Feign Moves -- Part 8
Moving in to Initiate an Attack -- Part 1
Moving in to Initiate an Attack -- Part 2
Moving in to Initiate an Attack -- Part 3
Moving in to Initiate an Attack -- Part 4
Moving in to Initiate an Attack -- Part 5
Moving in to Initiate an Attack -- Part 6
Moving in to Initiate an Attack -- Part 7
Moving in to Initiate an Attack -- Part 8
Moving in to Initiate an Attack -- Part 9
Moving in to Initiate an Attack -- Part 10
Performing a Set with Force and Speed and without Panting -- Part 1
Performing a Set with Force and Speed and without Panting -- Part 2
Performing a Set with Force and Speed and without Panting -- Part 3
Performing a Set with Force and Speed and without Panting -- Part 4
Performing a Set with Force and Speed and without Panting -- Part 5
Performing a Set with Force and Speed and without Panting -- Part 6
Performing a Set with Force and Speed and without Panting -- Part 7
Performing a Set with Force and Speed and without Panting -- Part 8
The Mechanics of Fa-Jing or Exploding Force -- Overview
the Eight Basic Hand Patterns -- Overview
 Linking Patterns and Right Spacing -- Overview
Right Spacing and Right Timing -- Overview
Opening, Closing and Covering -- Overview
Some Techniques and Skills for Combat EfficiencyShaolin Kungfu -- Overview
No Defence Direct Counter -- Overview
Subtle Footwork and Feign Moves -- Overview
Moving in to Initiate an Attack -- Overview
Performing a Set with Force and Speed and without
Panting -- Overview
Sabah Kungfu 2009 -- Sabah 03 Combat Sequences 1 and 2, and Flower Hands -- Part 1
Combat Sequences 1 and 2, and Flower Hands -- Part 2
Combat Sequences 1 and 2, and Flower Hands -- Part 3
Combat Sequences 1 and 2, and Flower Hands -- Part 4
Combat Sequences 1 and 2, and Flower Hands -- Part 5
Combat Sequences 1 and 2, and Flower Hands -- Part 6
Combat Sequences 1 and 2, and Flower Hands -- Part 7
Combat Sequences 1 and 2, and Flower Hands -- Part 8
Combat Sequences 1 and 2, and Flower Hands -- Part 9
Combat Sequences 3 and 4, Free Offers and Bridging Gaps -- Part 1
Combat Sequences 3 and 4, Free Offers and Bridging Gaps -- Part 2
Combat Sequences 3 and 4, Free Offers and Bridging Gaps -- Part 3
Combat Sequences 3 and 4, Free Offers and Bridging Gaps -- Part 4
Combat Sequences 3 and 4, Free Offers and Bridging Gaps -- Part 5
Combat Sequences 3 and 4, Free Offers and Bridging Gaps -- Part 6
Combat Sequences 3 and 4, Free Offers and Bridging Gaps -- Part 7
Combat Sequences 3 and 4, Free Offers and Bridging Gaps -- Part 8
Combat Sequences 3 and 4, Free Offers and Bridging Gaps -- Part 9
Moving to Free Choice -- Part 1
Moving to Free Choice -- Part 2
 Moving to Free Choice -- Part 3
Moving to Free Choice -- Part 4
Moving to Free Choice -- Part 5
Moving to Free Choice -- Part 6
Moving to Free Choice -- Part 7
Continuing from First to Second Sequence -- Part 1
Continuing from First to Second Sequence -- Part 2
Continuing from First to Second Sequence -- Part 3
Continuing from First to Second Sequence -- Part 4
Continuing from First to Second Sequence -- Part 5
Continuing from First to Second Sequence -- Part 6
Continuing from First to Second Sequence -- Part 7
Continuing from First to Second Sequence -- Part 8
Continuing from First to Second Sequence -- Part 9
Combat Sequences 1 and 2 and Flower Hands -- Overview
Combat Sequences 3 and 4, Free Offers and Bridging Gaps -- Overview
Moving to Free Choice -- Overview
Continuing from First to Second Sequence -- Overview
Sabah Kungfu 2009 -- Sabah 04 The Invisible Strike -- Part 1
The Invisible Strike -- Part 2
The Invisible Strike -- Part 3
The Invisible Strike -- Part 4
The Invisible Strike -- Part 5
The Invisible Strike -- Part 6
The Invisible Strike -- Part 7
The Invisible Strike -- Part 8
Mastering Basic Skills -- Part 1
Mastering Basic Skills -- Part 2
 Mastering Basic Skills -- Part 3
Mastering Basic Skills -- Part 4
Mastering Basic Skills -- Part 5
Mastering Basic Skills -- Part 6
Mastering Basic Skills -- Part 7
Mastering Basic Skills -- Part 8
Mastering Basic Skills -- Part 9
Flowery Hands, False and Real, and Feign Moves -- Part 1
Flowery Hands, False and Real, and Feign Moves -- Part 2
Flowery Hands, False and Real, and Feign Moves -- Part 3
Flowery Hands, False and Real, and Feign Moves -- Part 4
Flowery Hands, False and Real, and Feign Moves -- Part 5
Flowery Hands, False and Real, and Feign Moves -- Part 6
Training of Jing, Qi and Shen -- Part 1
Training of Jing, Qi and Shen -- Part 2
Training of Jing, Qi and Shen -- Part 3
Training of Jing, Qi and Shen -- Part 4
Training of Jing, Qi and Shen -- Part 5
Training of Jing, Qi and Shen -- Part 6
Training of Jing, Qi and Shen -- Part 7
Applying Shaolin Kungfu on Boxing -- Part 1
Applying Shaolin Kungfu on Boxing -- Part 2
Applying Shaolin Kungfu on Boxing -- Part 3
Applying Shaolin Kungfu on Boxing -- Part 4
Applying Shaolin Kungfu on Boxing -- Part 5
Applying Shaolin Kungfu on Boxing -- Part 6
Exploiting the Technical Advantages Shaolin has over Boxing -- Part 1
Exploiting the Technical Advantages Shaolin has over Boxing -- Part 2
Exploiting the Technical Advantages Shaolin has over Boxing -- Part 3
Exploiting the Technical Advantages Shaolin has over Boxing -- Part 4
 Exploiting the Technical Advantages Shaolin has
over Boxing -- Part 5
Exploiting the Technical Advantages Shaolin has
over Boxing -- Part 6
Exploiting the Technical Advantages Shaolin has
over Boxing -- Part 7
Accomplished in One Breath -- Part 1
Accomplished in One Breath -- Part 2
Accomplished in One Breath -- Part 3
Accomplished in One Breath -- Part 4
Accomplished in One Breath -- Part 5
Accomplished in One Breath -- Part 6
Modifying Hand Forms and Stances t Derive Variations -- Part 1
Modifying Hand Forms and Stances t Derive Variations -- Part 2
Continuation and Exploding Force with Left Palm -- Part 1
Continuation and Exploding Force with Left Palm -- Part 2
Continuation and Exploding Force with Left Palm -- Part 3
Continuation and Exploding Force with Left Palm -- Part 4
Modifying Hand Forms and Stances t Derive Variations -- Part 3
Modifying Hand Forms and Stances t Derive Variations -- Part 4
Modifying Hand Forms and Stances t Derive Variations -- Part 5
Modifying Hand Forms and Stances t Derive Variations -- Part 6
Modifying Hand Forms and Stances t Derive Variations -- Part 7
Modifying Hand Forms and Stances t Derive Variations -- Part 8
Continuation and Exploding Force with Left Palm -- Part 5
Continuation and Exploding Force with Left Palm -- Part 6
Continuation and Exploding Force with Left Palm -- Part 7
Continuation and Exploding Force with Left Palm -- Part 8
Continuation and Exploding Force with Left Palm -- Part 9
Continuation and Exploding Force with Left Palm -- Part 10
Marvelous Techniques beget Marvelous Techniques -- Part 1
Marvelous Techniques beget Marvelous Techniques -- Part 2
Marvelous Techniques beget Marvelous Techniques -- Part 3
 Marvelous Techniques beget Marvelous Techniques -- Part 4
Marvelous Techniques beget Marvelous Techniques -- Part 5
Marvelous Techniques beget Marvelous Techniques -- Part 6
Marvelous Techniques beget Marvelous Techniques -- Part 7
Marvelous Techniques beget Marvelous Techniques -- Part 8
From Three Steps to One Step in Defence-cum-Counter
-- Part 1
From Three Steps to One Step in Defence-cum-Counter
-- Part 2
From Three Steps to One Step in Defence-cum-Counter
-- Part 3
From Three Steps to One Step in Defence-cum-Counter -- Part 4
From Three Steps to One Step in Defence-cum-Counter -- Part 5
From Three Steps to One Step in Defence-cum-Counter -- Part 6
From Three Steps to One Step in Defence-cum-Counter -- Part 7
From Three Steps to One Step in Defence-cum-Counter -- Part 8
From Three Steps to One Step in Defence-cum-Counter -- Part 9
Just Move a Step Back to Neutralize a Seemingly Helpless Situation -- Part 1
Just Move a Step Back to Neutralize a Seemingly Helpless Situation -- Part 2
Just Move a Step Back to Neutralize a Seemingly Helpless Situation -- Part 3
Just Move a Step Back to Neutralize a Seemingly Helpless Situation -- Part 4
Just Move a Step Back to Neutralize a Seemingly Helpless Situation -- Part 5
Just Move a Step Back to Neutralize a Seemingly Helpless Situation -- Part 6
Just Move a Step Back to Neutralize a Seemingly Helpless Situation -- Part 7
Just Move a Step Back to Neutralize a Seemingly Helpless Situation -- Part 8
Just Move a Step Back to Neutralize a Seemingly Helpless Situation -- Part 9
The Tactic of No Defence Direct Counter -- Part 1
The Tactic of No Defence Direct Counter -- Part 2
The Tactic of No Defence Direct Counter -- Part 3
The Tactic of No Defence Direct Counter -- Part 4
The Tactic of No Defence Direct Counter -- Part 5
The Tactic of No Defence Direct Counter -- Part 6
The Tactic of No Defence Direct Counter -- Part 7
 The Tactic of No Defence Direct Counter -- Part 8
The Tactic of No Defence Direct Counter -- Part 9
The Tactic of Flow or Leak -- Part 1
The Tactic of Flow or Leak -- Part 2
The Tactic of Flow or Leak -- Part 3
The Tactic of Flow or Leak -- Part 4
The Tactic of Flow or Leak -- Part 5
The Tactic of Flow or Leak -- Part 6
The Tactic of Flow or Leak -- Part 7
The Tactic of Flow or Leak -- Part 8
The Tactic of Presing Attacks -- Part 1
The Tactic of Presing Attacks -- Part 2
The Tactic of Presing Attacks -- Part 3
The Tactic of Presing Attacks -- Part 4
The Tactic of Presing Attacks -- Part 5
The Tactic of Presing Attacks -- Part 6
The Tactic of Presing Attacks -- Part 7
The Tactic of Presing Attacks -- Part 8
Pressing Attacks with Variations of Planned Sequence -- Part 1
Pressing Attacks with Variations of Planned Sequence -- Part 2
Pressing Attacks with Variations of Planned Sequence -- Part 3
Pressing Attacks with Variations of Planned Sequence -- Part 4
Pressing Attacks with Variations of Planned Sequence -- Part 5
Pressing Attacks with Variations of Planned Sequence -- Part 6
Pressing Attacks with Variations of Planned Sequence -- Part 7
Pressing Attacks with Variations of Planned Sequence -- Part 8
Pressing Attacks with Variations of Planned Sequence -- Part 9
Review of Combat Sequences 5 to 8 -- Part 1
Review of Combat Sequences 5 to 8 -- Part 2
Review of Combat Sequences 5 to 8 -- Part 3
 Review of Combat Sequences 5 to 8 -- Part 4
Review of Combat Sequences 5 to 8 -- Part 5
Review of Combat Sequences 5 to 8 -- Part 6
Review of Combat Sequences 5 to 8 -- Part 7
Review of Combat Sequences 5 to 8 -- Part 8
Review of Combat Sequences 5 to 8 -- Part 9
The Tactic and Skill of Follow Through -- Part 1
The Tactic and Skill of Follow Through -- Part 2
The Tactic and Skill of Follow Through -- Part 3
The Tactic and Skill of Follow Through -- Part 4
The Tactic and Skill of Follow Through -- Part 5
The Tactic and Skill of Follow Through -- Part 6
The Tactic and Skill of Follow Through -- Part 7
The Tactic and Skill of Follow Through -- Part 8
The Tactic and Skill of Follow Through -- Part 9
The Invisible Strike -- Overview
Mastering Basic Skills -- Overview
Flowery Hands, False and Real, and Feign Moves -- Overview
Training of Jing, Qi and Shen -- Overview
Applying Shaolin Kungfu on Boxing -- Overview
Exploiting the Technical Advantages Shaolin has over Boxing -- Overview
Accomplished in One Breath -- Overview
Modifying Hand Forms and Stances t Derive Variations -- Overview
Continuation and Exploding Force with Left Palm -- Overview
Marvelous Techniques beget Marvelous Techniques -- Overview
From Three Steps to One Step in Defence-cum-Counter -- Overview
Just Move a Step Back to Neutralize a Seemingly Helpless Situation -- Overview
The Tactic of No Defence Direct Counter -- Overview
The Tactic of Flow or Leak -- Overview
The Tactic of Presing Attacks -- Overview
 Pressing Attacks with Variations of Planned
Sequence -- Overview
Review of Combat Sequences 5 to 8 -- Overview
The Tactic and Skill of Follow Through -- Overview
Sabah Kungfu 2009 -- Sabah 05 Adding Hand-Forms to Stances in Force Training -- Part 1
Adding Hand-Forms to Stances in Force Training -- Part 2
Adding Hand-Forms to Stances in Force Training -- Part 3
Adding Hand-Forms to Stances in Force Training -- Part 4
Adding Hand-Forms to Stances in Force Training -- Part 5
Adding Hand-Forms to Stances in Force Training -- Part 6
Adding Hand-Forms to Stances in Force Training -- Part 7
Adding Hand-Forms to Stances in Force Training -- Part 8
Stance Training in Taijiquan, Shaolin, Hsing Yi and Baguazhang -- Part 1
Stance Training in Taijiquan, Shaolin, Hsing Yi and Baguazhang -- Part 2
Stance Training in Taijiquan, Shaolin, Hsing Yi and Baguazhang -- Part 3
Stance Training in Taijiquan, Shaolin, Hsing Yi and Baguazhang -- Part 4
Stance Training in Taijiquan, Shaolin, Hsing Yi and Baguazhang -- Part 5
Stance Training in Taijiquan, Shaolin, Hsing Yi and Baguazhang -- Part 6
From Slow and Graceful to Fast and Agile -- Part 1
From Slow and Graceful to Fast and Agile -- Part 2
From Slow and Graceful to Fast and Agile -- Part 3
From Slow and Graceful to Fast and Agile -- Part 4>
From Slow and Graceful to Fast and Agile -- Part 5
From Slow and Graceful to Fast and Agile -- Part 6
From Slow and Graceful to Fast and Agile -- Part 7
From Slow and Graceful to Fast and Agile -- Part 8
From Slow and Graceful to Fast and Agile -- Part 9
From Slow and Graceful to Fast and Agile -- Part 10
Kungfu Movements with Force, Speed and Elegance -- Part 1
Kungfu Movements with Force, Speed and Elegance -- Part 2
Kungfu Movements with Force, Speed and Elegance -- Part 3
Kungfu Movements with Force, Speed and Elegance -- Part 4
Kungfu Movements with Force, Speed and Elegance -- Part 5
Kungfu Movements with Force, Speed and Elegance -- Part 6
 Kungfu Movements with Force, Speed and Elegance -- Part 7
Kungfu Movements with Force, Speed and Elegance -- Part 8
Kungfu Movements with Force, Speed and Elegance -- Part 9
Kungfu Movements with Force, Speed and Elegance -- Part 10
One-Finger Shooting Zen at Standing Uprigt Position -- Part 1
One-Finger Shooting Zen at Standing Uprigt Position -- Part 2
One-Finger Shooting Zen at Standing Uprigt Position -- Part 3
One-Finger Shooting Zen at Standing Uprigt Position -- Part 4
One-Finger Shooting Zen at Standing Uprigt Position -- Part 5
One-Finger Shooting Zen at Standing Uprigt Position -- Part 6
One-Finger Shooting Zen at Standing Uprigt Position -- Part 7
One-Finger Shooting Zen at Standing Uprigt Position -- Part 8
One-Finger Shooting Zen at Standing Uprigt Position -- Part 9
One-Finger Shooting Zen at Standing Uprigt Position -- Part 10
A Treasure for Training Energy and Mind -- Part 1
A Treasure for Training Energy and Mind -- Part 2
A Treasure for Training Energy and Mind -- Part 3
A Treasure for Training Energy and Mind -- Part 4
A Treasure for Training Energy and Mind -- Part 5
A Treasure for Training Energy and Mind -- Part 6
Adding Hand-Forms to Stances in Force Training -- Overview
Stance Training in Taijiquan, Shaolin, Hsing Yi and Baguazhang -- Overview
From Slow and Graceful to Fast and Agile -- Overview
Kungfu Movements with Force, Speed and Elegance -- Overview
One-Finger Shooting Zen at Standing Uprigt Position -- Overview
A Treasure for Training Energy and Mind -- Overview
 Sabah Kungfu 2009 -- Sabah 06
Combat Sequence 9: Happy Bird Hop up Branch -- Part 1
Sabah Kungfu 2009 -- Sabah 06
Combat Sequence 9: Happy Bird Hop up Branch -- Part 1Combat Sequence 9: Happy Bird Hop up Branch -- Part 2
Combat Sequence 9: Happy Bird Hop up Branch -- Part 3
Combat Sequence 9: Happy Bird Hop up Branch -- Part 4
Combat Sequence 9: Happy Bird Hop up Branch -- Part 5
Combat Sequence 9: Happy Bird Hop up Branch -- Part 6
Combat Sequence 9: Happy Bird Hop up Branch -- Part 7
Combat Sequence 9: Happy Bird Hop up Branch -- Part 8
Combat Sequence 9: Happy Bird Hop up Branch -- Part 9
Combat Sequence 9: Happy Bird Hop up Branch -- Part 10
Pressing Attacks and Interceptions -- Part 1
Pressing Attacks and Interceptions -- Part 2
Pressing Attacks and Interceptions -- Part 3
Pressing Attacks and Interceptions -- Part 4
Pressing Attacks and Interceptions -- Part 5
Pressing Attacks and Interceptions -- Part 6
Combat Sequence 10: White Horse Present Hoof -- Part 1
Combat Sequence 10: White Horse Present Hoof -- Part 2
Combat Sequence 10: White Horse Present Hoof -- Part 3
Combat Sequence 10: White Horse Present Hoof -- Part 4
Combat Sequence 10: White Horse Present Hoof -- Part 5
Combat Sequence 10: White Horse Present Hoof -- Part 6
Combat Sequence 10: White Horse Present Hoof -- Part 7
Combat Sequence 10: White Horse Present Hoof -- Part 8
Combat Sequence 10: White Horse Present Hoof -- Part 9
Techniques, Speed and Skills -- Part 1
Techniques, Speed and Skills -- Part 2
Techniques, Speed and Skills -- Part 3
Techniques, Speed and Skills -- Part 4
Techniques, Speed and Skills -- Part 5
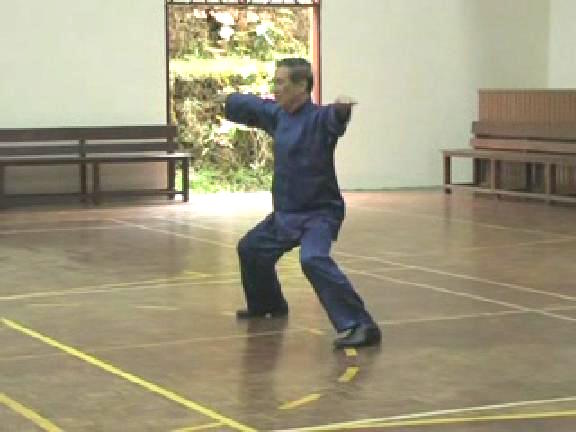 Techniques, Speed and Skills -- Part 6
Techniques, Speed and Skills -- Part 7
Techniques, Speed and Skills -- Part 8
Techniques, Speed and Skills -- Part 9
Combat Sequence 11: Yellow Oriole Drinks Water -- Part 1
Combat Sequence 11: Yellow Oriole Drinks Water -- Part 2
Combat Sequence 11: Yellow Oriole Drinks Water -- Part 3
Combat Sequence 11: Yellow Oriole Drinks Water -- Part 4
Combat Sequence 11: Yellow Oriole Drinks Water -- Part 5
Combat Sequence 11: Yellow Oriole Drinks Water -- Part 6
Some Effective Techniques and their Counters -- Part 7
Some Effective Techniques and their Counters -- Part 8
Some Effective Techniques and their Counters -- Part 9
Some Effective Techniques and their Counters -- Part 1
Some Effective Techniques and their Counters -- Part 2
Some Effective Techniques and their Counters -- Part 3
Some Effective Techniques and their Counters -- Part 4
Some Effective Techniques and their Counters -- Part 5
Some Effective Techniques and their Counters -- Part 6
Some Effective Techniques and their Counters -- Part 7
Some Effective Techniques and their Counters -- Part 8
Combat Sequence 12:Naughty Monkey Kicks at Tree -- Part 1
Combat Sequence 12:Naughty Monkey Kicks at Tree -- Part 2
Combat Sequence 12:Naughty Monkey Kicks at Tree -- Part 3
Combat Sequence 12:Naughty Monkey Kicks at Tree -- Part 4
Combat Sequence 12:Naughty Monkey Kicks at Tree -- Part 5
Combat Sequence 12:Naughty Monkey Kicks at Tree -- Part 6
Combat Sequence 12:Naughty Monkey Kicks at Tree -- Part 7
Combat Sequence 12:Naughty Monkey Kicks at Tree -- Part 8
Hard and Soft Counters against Sweeping Kicks -- Part 1
 Hard and Soft Counters against Sweeping Kicks -- Part 2
Hard and Soft Counters against Sweeping Kicks -- Part 3
Hard and Soft Counters against Sweeping Kicks -- Part 4
Hard and Soft Counters against Sweeping Kicks -- Part 5
Hard and Soft Counters against Sweeping Kicks -- Part 6
Hard and Soft Counters against Sweeping Kicks -- Part 7
Hard and Soft Counters against Sweeping Kicks -- Part 8
Hard and Soft Counters against Sweeping Kicks -- Part 9
Linking Combat Sequences to Form Sets -- Part 1
Linking Combat Sequences to Form Sets -- Part 2
Linking Combat Sequences to Form Sets -- Part 3
Linking Combat Sequences to Form Sets -- Part 4
Linking Combat Sequences to Form Sets -- Part 5
Linking Combat Sequences to Form Sets -- Part 6
Linking Combat Sequences to Form Sets -- Part 7
Linking Combat Sequences to Form Sets -- Part 8
Five Basic Kicks of Shaolin Kungfu -- Part 1
Five Basic Kicks of Shaolin Kungfu -- Part 2
Five Basic Kicks of Shaolin Kungfu -- Part 3
Five Basic Kicks of Shaolin Kungfu -- Part 4
Five Basic Kicks of Shaolin Kungfu -- Part 5
Five Basic Kicks of Shaolin Kungfu -- Part 6
Five Basic Kicks of Shaolin Kungfu -- Part 7
Five Basic Kicks of Shaolin Kungfu -- Part 8
Five Basic Kicks of Shaolin Kungfu -- Overview
Combat Sequence 9: Happy Bird Hop up Branch -- Overview
Pressing Attacks and Interceptions -- Overview
Combat Sequence 10: White Horse Present Hoof -- Overview
Techniques, Speed and Skills -- Overview
Combat Sequence 11: Yellow Oriole Drinks Water -- Overview
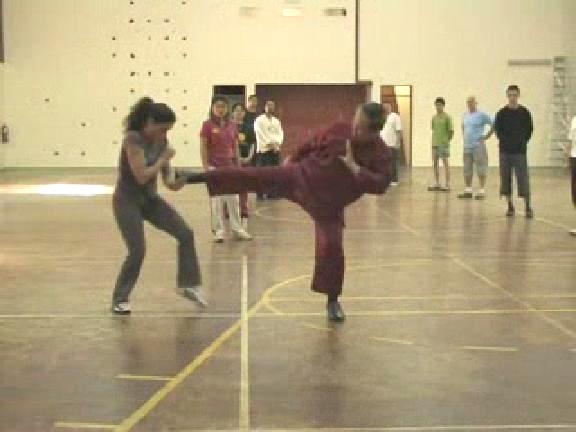 Some Effective Techniques and their Counters -- Overview
Combat Sequence 12:Naughty Monkey Kicks at
Tree -- Overview
Hard and Soft Counters against Sweeping Kicks -- Overview
Linking Combat Sequences to Form Sets -- Overview
Sabah Kungfu 2009 -- Sabah 07 Shaolin Felling Techniques are unlike those of Judo and Wrestling -- Part 1
Shaolin Felling Techniques are unlike those of Judo and Wrestling -- Part 2
Shaolin Felling Techniques are unlike those of Judo and Wrestling -- Part 3
Shaolin Felling Techniques are unlike those of Judo and Wrestling -- Part 4
Shaolin Felling Techniques are unlike those of Judo and Wrestling -- Part 5
Shaolin Felling Techniques are unlike those of Judo and Wrestling -- Part 6
Shaolin Felling Techniques are unlike those of Judo and Wrestling -- Part 7
Shaolin Felling Techniques are unlike those of Judo and Wrestling -- Part 8
Shaolin Felling Techniques are unlike those of Judo and Wrestling -- Part 9
Shaolin Felling Techniques are unlike those of Judo and Wrestling -- Part 10
Combat Sequence 13: Fell Tree with Roots -- Part 1
Combat Sequence 13: Fell Tree with Roots -- Part 2
Combat Sequence 13: Fell Tree with Roots -- Part 3
Combat Sequence 13: Fell Tree with Roots -- Part 4
Combat Sequence 13: Fell Tree with Roots -- Part 5
Combat Sequence 13: Fell Tree with Roots -- Part 6
Combat Sequence 13: Fell Tree with Roots -- Part 7
Combat Sequence 13: Fell Tree with Roots -- Part 8
Combat Sequence 13: Fell Tree with Roots -- Part 9
Combat Sequence 13: Fell Tree with Roots -- Part 10
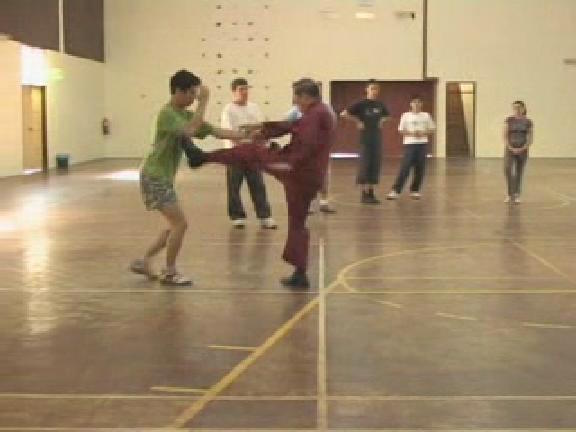 A Technique to Fell an Opponent Forward, Backward
or Sideways -- Part 1
A Technique to Fell an Opponent Forward, Backward
or Sideways -- Part 2
A Technique to Fell an Opponent Forward, Backward
or Sideways -- Part 3
A Technique to Fell an Opponent Forward, Backward
or Sideways -- Part 4
A Technique to Fell an Opponent Forward, Backward
or Sideways -- Part 5
A Technique to Fell an Opponent Forward, Backward
or Sideways -- Part 6
A Technique to Fell an Opponent Forward, Backward or Sideways -- Part 7
Combat Sequence 14: Lead Horse Back to Stable -- Part 1
Combat Sequence 14: Lead Horse Back to Stable -- Part 2
Combat Sequence 14: Lead Horse Back to Stable -- Part 3
Combat Sequence 14: Lead Horse Back to Stable -- Part 4
Combat Sequence 14: Lead Horse Back to Stable -- Part 5
Combat Sequence 14: Lead Horse Back to Stable -- Part 6
Changing Shoulder Throw to Waist Throw for Compassion -- Part 1
Changing Shoulder Throw to Waist Throw for Compassion -- Part 2
Changing Shoulder Throw to Waist Throw for Compassion -- Part 3
Changing Shoulder Throw to Waist Throw for Compassion -- Part 4
Changing Shoulder Throw to Waist Throw for Compassion -- Part 5
Changing Shoulder Throw to Waist Throw for Compassion -- Part 6
Combat Sequence 15: Farmer Hoes Rice Field -- Part 1
Combat Sequence 15: Farmer Hoes Rice Field -- Part 2
Combat Sequence 15: Farmer Hoes Rice Field -- Part 3
Combat Sequence 15: Farmer Hoes Rice Field -- Part 4
Combat Sequence 15: Farmer Hoes Rice Field -- Part 5
Combat Sequence 15: Farmer Hoes Rice Field -- Part 6
Combat Sequence 15: Farmer Hoes Rice Field -- Part 7
Combat Sequence 16: Fierce Tiger Pushes Mountain -- Part 1
Combat Sequence 16: Fierce Tiger Pushes Mountain -- Part 2
Combat Sequence 16: Fierce Tiger Pushes Mountain -- Part 3
Combat Sequence 16: Fierce Tiger Pushes Mountain -- Part 4
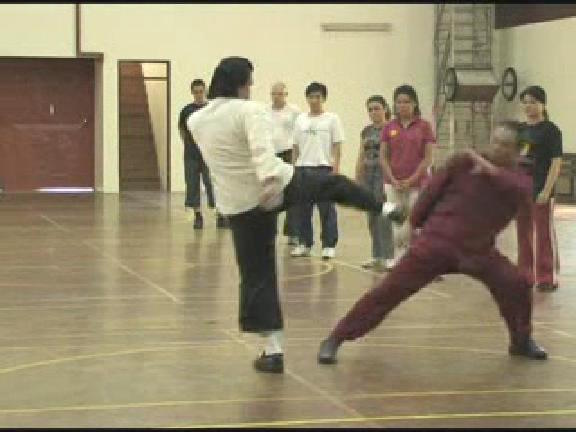 Combat Sequence 16: Fierce Tiger Pushes Mountain -- Part 5
Combat Sequence 16: Fierce Tiger Pushes Mountain -- Part 6
Combat Sequence 16: Fierce Tiger Pushes Mountain -- Part 7
Shaolin Felling Techniques are unlike those of Judo
and Wrestling -- Overview
Combat Sequence 13: Fell Tree with Roots -- Overview
A Technique to Fell an Opponent Forward, Backward
or Sideways -- Overview
Combat Sequence 14: Lead Horse Back to Stable -- Overview
Changing Shoulder Throw to Waist Throw for Compassion
-- Overview
Combat Sequence 15: Farmer Hoes Rice Field -- Overview
Combat Sequence 16: Fierce Tiger Pushes Mountain -- Overview
Sabah Kungfu 2009 -- Sabah 08 Deflecting Strikes and Employing Body-Movement -- Part 1
Deflecting Strikes and Employing Body-Movement -- Part 2
Deflecting Strikes and Employing Body-Movement -- Part 3
Deflecting Strikes and Employing Body-Movement -- Part 4
Deflecting Strikes and Employing Body-Movement -- Part 5
Deflecting Strikes and Employing Body-Movement -- Part 6
Deflecting Strikes and Employing Body-Movement -- Part 7
Deflecting Strikes and Employing Body-Movement -- Part 8
Deflecting Strikes and Employing Body-Movement -- Part 9
Deflecting Strikes and Employing Body-Movement -- Part 10
Deflecting Strikes and Employing Body-Movement -- Part 11
Covering an Opponent and Releasing his Grip -- Part 1
Covering an Opponent and Releasing his Grip -- Part 2
Covering an Opponent and Releasing his Grip -- Part 3
Covering an Opponent and Releasing his Grip -- Part
Covering an Opponent and Releasing his Grip -- Part 5
Covering an Opponent and Releasing his Grip -- Part 6
Covering an Opponent and Releasing his Grip -- Part 7
Covering an Opponent and Releasing his Grip -- Part 8
Covering an Opponent and Releasing his Grip -- Part 9
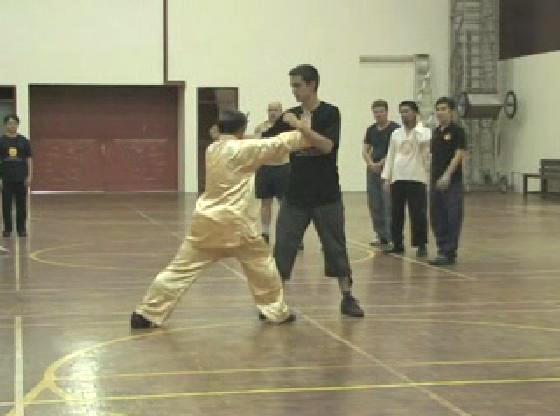 Releasing Grips, Adjusting Positions, Intercepting and
Felling -- Part 1
Releasing Grips, Adjusting Positions, Intercepting and
Felling -- Part 2
Releasing Grips, Adjusting Positions, Intercepting and
Felling -- Part 3
Releasing Grips, Adjusting Positions, Intercepting and
Felling -- Part 4
Releasing Grips, Adjusting Positions, Intercepting and
Felling -- Part 5
Releasing Grips, Adjusting Positions, Intercepting and
Felling -- Part 6
Releasing Grips, Adjusting Positions, Intercepting and Felling -- Part 7
Releasing Grips, Adjusting Positions, Intercepting and Felling -- Part 8
Releasing Grips, Adjusting Positions, Intercepting and Felling -- Part 9
Body-Movement and Other Techniques -- Part 1
Body-Movement and Other Techniques -- Part 2
Body-Movement and Other Techniques -- Part 3
Body-Movement and Other Techniques -- Part 4
Body-Movement and Other Techniques -- Part 5
Body-Movement and Other Techniques -- Part 6
Body-Movement and Other Techniques -- Part 7
Body-Movement and Other Techniques -- Part 8
Monkey Fells Tree against Undercuts -- Part 1
Monkey Fells Tree against Undercuts -- Part 2
Monkey Fells Tree against Undercuts -- Part 3
Monkey Fells Tree against Undercuts -- Part 4
Monkey Fells Tree against Undercuts -- Part 5
Monkey Fells Tree against Undercuts -- Part 6
Monkey Fells Tree against Undercuts -- Part 7
Monkey Fells Tree against Undercuts -- Part 8
Monkey Fells Tree against Undercuts -- Part 9
Monkey Fells Tree against Undercuts -- Part 10
Moving in to Attack without being Hit -- Part 1
Moving in to Attack without being Hit -- Part 2
Moving in to Attack without being Hit -- Part 3
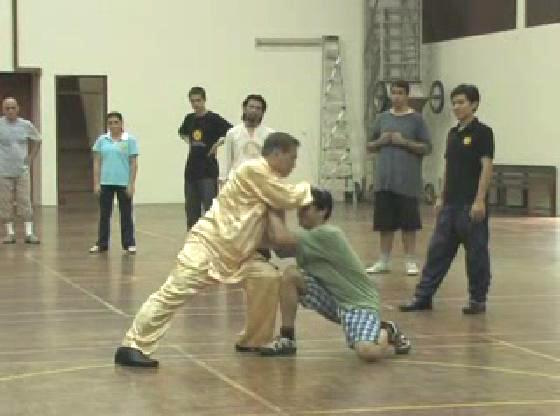 Moving in to Attack without being Hit -- Part 4
Moving in to Attack without being Hit -- Part 5
Moving in to Attack without being Hit -- Part 6
Moving in to Attack without being Hit -- Part 7
Moving in to Attack without being Hit -- Part 8
Moving in to Attack without being Hit -- Part 9
Good Footwork for Attack and Defence -- Part 1
Good Footwork for Attack and Defence -- Part 2
Good Footwork for Attack and Defence -- Part 3
Good Footwork for Attack and Defence -- Part 4
Good Footwork for Attack and Defence -- Part 5
Good Footwork for Attack and Defence -- Part 6
Good Footwork for Attack and Defence -- Part 7
Good Footwork for Attack and Defence -- Part 8
Good Footwork for Attack and Defence -- Part 9
The Tactic of Glide, Thread and Strike -- Part 1
The Tactic of Glide, Thread and Strike -- Part 2
The Tactic of Glide, Thread and Strike -- Part 3
The Tactic of Glide, Thread and Strike -- Part 4
The Tactic of Glide, Thread and Strike -- Part 5
The Tactic of Glide, Thread and Strike -- Part 6
The Tactic of Glide, Thread and Strike -- Part 7
The Tactic of Glide, Thread and Strike -- Part 8
Deflecting Strikes and Employing Body-Movement -- Overview
Covering an Opponent and Releasing his Grip -- Overview
Releasing Grips, Adjusting Positions, Intercepting and Felling -- Overview
Body-Movement and Other Techniques -- Overview
Monkey Fells Tree against Undercuts -- Overview
Moving in to Attack without being Hit -- Overview
Good Footwork for Attack and Defence -- Overview
The Tactic of Glide, Thread and Strike -- Overview
 Sabah Kungfu 2009 -- Sabah 09
Effective Strategy against Kick-boxers and
Sabah Kungfu 2009 -- Sabah 09
Effective Strategy against Kick-boxers andTaekwondo Exponents -- Part 1
Effective Strategy against Kick-boxers and
Taekwondo Exponents -- Part 2
Effective Strategy against Kick-boxers and
Taekwondo Exponents -- Part 3
Effective Strategy against Kick-boxers and
Taekwondo Exponents -- Part 4
Effective Strategy against Kick-boxers and
Taekwondo Exponents -- Part 5
Effective Strategy against Kick-boxers and Taekwondo Exponents -- Part 6
Effective Strategy against Kick-boxers and Taekwondo Exponents -- Part 7
Effective Strategy against Kick-boxers and Taekwondo Exponents -- Part 8
Effective Strategy against Kick-boxers and Taekwondo Exponents -- Part 9
Effective Strategy against Kick-boxers and Taekwondo Exponents -- Part 10
Using Stances and Body-Movement to Counter Attacks -- Part 1
Using Stances and Body-Movement to Counter Attacks -- Part 2
Using Stances and Body-Movement to Counter Attacks -- Part 3
Using Stances and Body-Movement to Counter Attacks -- Part 4
Using Stances and Body-Movement to Counter Attacks -- Part 5
Using Stances and Body-Movement to Counter Attacks -- Part 6
Using Stances and Body-Movement to Counter Attacks -- Part 7
Combat-Sequence Set for Felling Techniques -- Part 1
Combat-Sequence Set for Felling Techniques -- Part 2
Combat-Sequence Set for Felling Techniques -- Part 3
Combat-Sequence Set for Felling Techniques -- Part 4
Combat-Sequence Set for Felling Techniques -- Part 5
Combat-Sequence Set for Felling Techniques -- Part 6
Combat-Sequence Set for Felling Techniques -- Part 7
Combat-Sequence Set for Felling Techniques -- Part 8
Intercepting or Closing and Other Strategies against Random Fighting -- Part 1
Intercepting or Closing and Other Strategies against Random Fighting -- Part 2
Intercepting or Closing and Other Strategies against Random Fighting -- Part 3
Intercepting or Closing and Other Strategies against Random Fighting -- Part 4
Intercepting or Closing and Other Strategies against Random Fighting -- Part 5
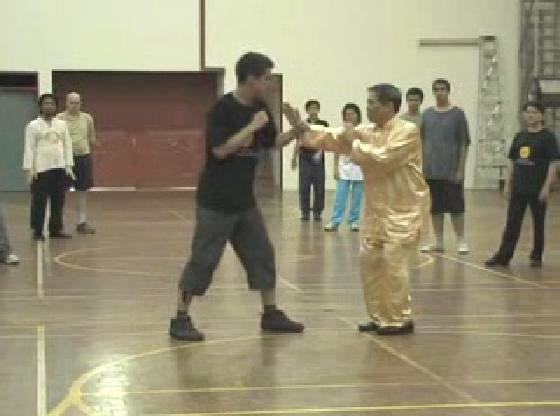 Intercepting or Closing and Other Strategies
against Random Fighting -- Part 6
Intercepting or Closing and Other Strategies
against Random Fighting -- Part 7
Intercepting or Closing and Other Strategies
against Random Fighting -- Part 8
Intercepting or Closing and Other Strategies
against Random Fighting -- Part 9
Intercepting or Closing and Other Strategies
against Random Fighting -- Part 10
Understanding Forrmidable Muay Thai Fighters -- Part 1
Understanding Forrmidable Muay Thai Fighters -- Part 2
Understanding Forrmidable Muay Thai Fighters -- Part 3
Understanding Forrmidable Muay Thai Fighters -- Part 4
Understanding Forrmidable Muay Thai Fighters -- Part 5
Understanding Forrmidable Muay Thai Fighters -- Part 6
Understanding Forrmidable Muay Thai Fighters -- Part 7
Understanding Forrmidable Muay Thai Fighters -- Part 8
Understanding Forrmidable Muay Thai Fighters -- Part 9
Understanding Forrmidable Muay Thai Fighters -- Part 10
Understanding Forrmidable Muay Thai Fighters -- Part 11
Counters against Muay Thai Attacks -- Part 1
Counters against Muay Thai Attacks -- Part 2
Counters against Muay Thai Attacks -- Part 3
Counters against Muay Thai Attacks -- Part 4
Counters against Muay Thai Attacks -- Part 5
Counters against Muay Thai Attacks -- Part 6
Counters against Muay Thai Attacks -- Part 7
Counters against Muay Thai Attacks -- Part 8
Counters against Muay Thai Attacks -- Part 9
Counters against Muay Thai Attacks -- Part 10
Counters against Muay Thai Attacks -- Part 11
How would You Countr when your Head is Locked? -- Part 1
How would You Countr when your Head is Locked? -- Part 2
How would You Countr when your Head is Locked? -- Part 3
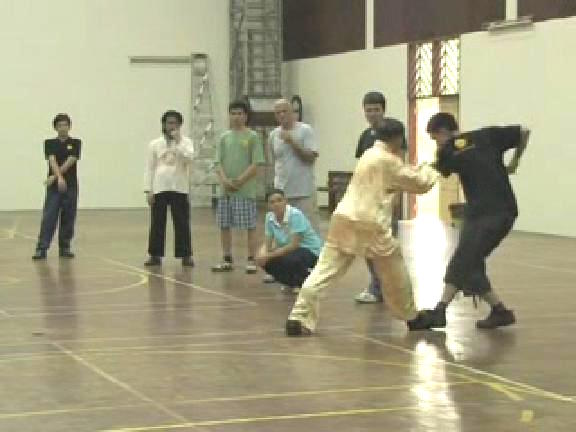 How would You Countr when your Head is Locked? -- Part 4
How would You Countr when your Head is Locked? -- Part 5
How would You Countr when your Head is Locked? -- Part 6
Effective Counters against he Shoot -- Part 1
Effective Counters against he Shoot -- Part 2
Effective Counters against he Shoot -- Part 3
Effective Counters against he Shoot -- Part 4
Effective Counters against he Shoot -- Part 5
Effective Counters against he Shoot -- Part 6
Effective Counters against he Shoot -- Part 7
Effective Strategy against Kick-boxers and Taekwondo Exponents -- Overview
Using Stances and Body-Movement to Counter Attacks -- Overview
Combat-Sequence Set for Felling Techniques -- Overview
Intercepting or Closing and Other Strategies against Random Fighting -- Overview
Understanding Forrmidable Muay Thai Fighters -- Overview
Counters against Muay Thai Attacks -- Overview
How would You Countr when your Head is Locked? -- Overview
Effective Counters against he Shoot -- Overview
Sabah Kungfu 2009 -- Videos Videos from Intensive Shaolin Kungfu Course 2009 -- Overview
Horse-Riding Stance
Bow-Arrrow and False-Leg Stance
Shaolin Stances: Unicorn, Goat, Four-Six and Single-Leg
Art of Flexibile Legs
Foundation of Shaolin Kungfu -- Footwork
Mechanics of Fa-Jing orr Exploding Force
Eight Basic Hand Patterns
Linking Pattern and RRight Spacing
Right Spacing and Right Timing in Shaolin Kungfu
 Opening, Closing and Covering in Shaolin Kungfu
Some Techniques and Skills for Combat Efficiency
Tactic of No Defence Direct Counter
Subtle Flootwork and Feign Movements
Moving in to Initiate an Attack in Shaolin Kungfu
Performing aKungfu Set with Force and Speed, and Without Panting
Combat Sequences 1 and 2, and Flower Hand
Combat Sequences 3 and 4, Free Offers and Bridging Gaps
Moving to Free Choice in Shaolin Combat Training
Continuing frrom First to Second Sequence in Shaolin Combat Training
The Invisible Strike
Mastering Basic Skills in Shaolin Kungfu
Flower hand, Fake and Real, and Feign Moves
Training of Jing, Qi andd Shen or Form, Energy and Mind
Applying Shaolin Kungfu on Boxing
Exploiting the Technical Advantages Shaolin has over Boxing
Acomplihed in One Breath
Modifiying Hand-Forms and Stances to Derive Variations
Continuation, and Exploiting Force with Left Palm
Marvelous Techniques beget Marvelous Techniques
From Three Steps to one Step in Defence-cum-Counter
Just Move a Step Back to Neutralize a Seemingly Helpless Situation
The Tactic of Defence-cum-Counter
The Tactic of Flow or Leak
The Tactic of Pressing Attacks
Prressing Attack with Variations from Planned Sequence
Review of Combat Sequences 5 to 8
Tactic and Skills of Follow Through
Adding Hand-Forms to Stance in Force Training
Stance Training in Shaolin, Taijiquan, Xiungyiquan and Baguazhang
 From Slow and Graceful to Fast and Agile
Kungfu Movements with Force, Speed and Elegance
One-Finger Shooting Zen in Standing Upright Position
A Treasure in Training of Energy and Mind
Five Basic Kicks in Shaolin Kungfu
Combat Sequence 9 -- Happy Bird Hops up Branch
Pressing Attacks and Interceptions
Combat Sequence 10 -- White Horse Presents Hoof
Techniques, Speed and Skills in Shaolin Kungfu
Combat Sequence 11 -- Yellow Oriocle Drrinks Water
Some Effective Techniques and their Counters
Combat Sequence 12 -- Naughty Momkey Kicks at Tree
Hard and Soft Counters against Sweeping Kicks
Linking Combat Sequences to Form Kungfu Sets
Shaolin Felling Techniques are Similar to but unlike Judo and Wrestling
Combat Sequence 13 -- Fell Tree with Roots
A Technique to Fell an Opponent Forward, Backward or Sideways
Combat Sequence 14 -- Lead Horse Back to Stable
Changing Shoulder Throw to Waist Throw for Compassion
Combat Sequence 15 -- Farmer Hoes Rice Field
Combat Sequence 16 -- Fierce Tiger Pushes Mountain
Deflecting Strikes and Employing Body-Movement
Covering an Opponent and Releasing his Grip
Releasing Grips, Adjusting Position, Intercepting and Felling
Body-Movement and Other Techniques
Monkey Fells Tree against Undercuts
Moving in to Attack without being Hit
Good Footwork in Attack and Defence
The Tactic of Glide, Thread and Strike
Effective Strategy against Kick-Boxers and Taekwondo Exponents
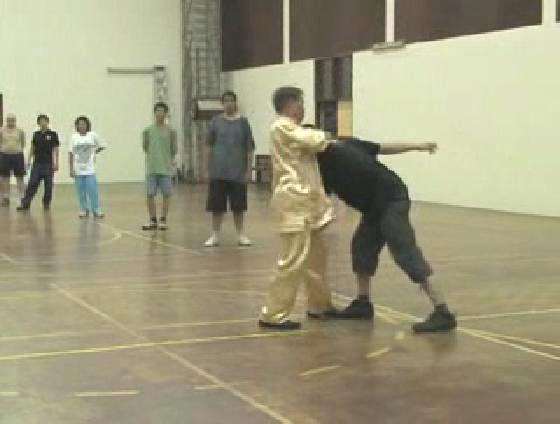 Using Stances and Body Movement to Counter Attacks
Combat Sequence Set for Felling Techniques
Intercepting or Closing, and Other Strategies against
Random Fighting
Understanding Formidable Muay Thai Fighters
Shaolin Counters against Muay Thai Attacks
How would You Counter when yourr Head is Locked
Effective Shaolin Counters against the Shoot
2010 -- Overview
Chi Flow and Standing Zen -- Part 1
Chi Flow and Standing Zen -- Part 2
Chi Flow and Standing Zen -- Part 3
Chi Flow and Standing Zen -- Part 4
Chi Flow and Standing Zen -- Part 5
Chi Flow and Standing Zen -- Part 6
Chi Flow and Standing Zen -- Part 7
Chi Flow and Standing Zen -- Part 8
Chi Flow and Standing Zen -- Part 9
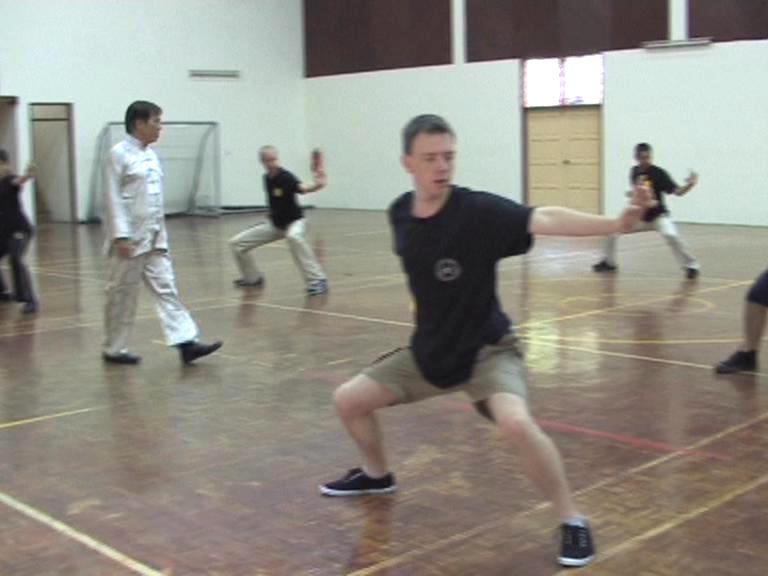 Chi Flow and Standing Zen -- Part 10
Developing Internal Force and Mental Clarity -- Part 1
Developing Internal Force and Mental Clarity -- Part 2
Developing Internal Force and Mental Clarity -- Part 3
Developing Internal Force and Mental Clarity -- Part 4
Developing Internal Force and Mental Clarity -- Part 5
Developing Internal Force and Mental Clarity -- Part 6
Developing Internal Force and Mental Clarity -- Part 7
Developing Internal Force and Mental Clarity -- Part 8
Two Crcuial Steps in Stance Training -- Part 1
Two Crcuial Steps in Stance Training -- Part 2
Two Crcuial Steps in Stance Training -- Part 3
Two Crcuial Steps in Stance Training -- Part 4
Two Crcuial Steps in Stance Training -- Part 5
Two Crcuial Steps in Stance Training -- Part 6
Two Crcuial Steps in Stance Training -- Part 7
Two Crcuial Steps in Stance Training -- Part 8
Two Crcuial Steps in Stance Training -- Part 9
Two Crcuial Steps in Stance Training -- Part 10
Two Crcuial Steps in Stance Training -- Part 11
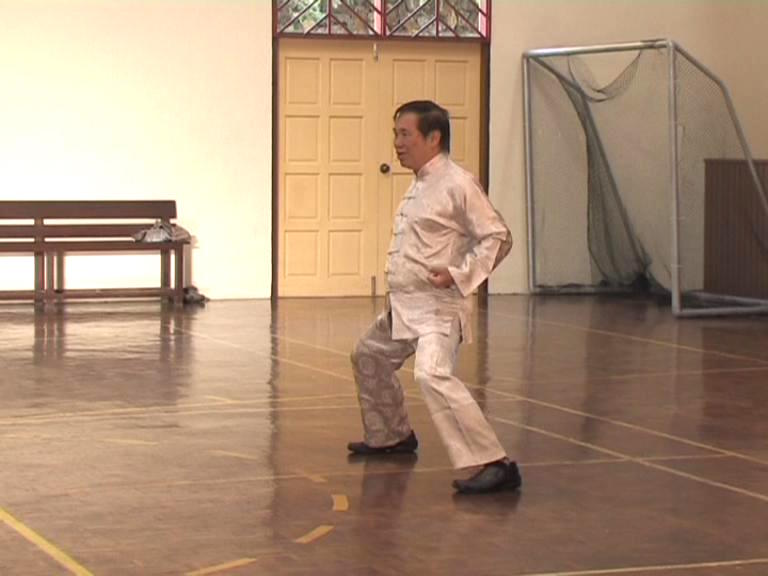 Two Crcuial Steps in Stance Training -- Part 12
The Art of Flexibility -- Part 1
The Art of Flexibility -- Part 2
The Art of Flexibility -- Part 3
The Art of Flexibility -- Part 4
The Art of Flexibility -- Part 5
The Art of Flexibility -- Part 6
The Art of Flexibility -- Part 7
The Art of Flexibility -- Part 8
Footwork is often More Important than Techniques -- Part 1
Footwork is often More Important than Techniques -- Part 2
Footwork is often More Important than Techniques -- Part 3
Footwork is often More Important than Techniques -- Part 4
Footwork is often More Important than Techniques -- Part 5
Footwork is often More Important than Techniques -- Part 6
Footwork is often More Important than Techniques -- Part 7
Footwork is often More Important than Techniques -- Part 8
Footwork is often More Important than Techniques -- Part 9
Footwork is often More Important than Techniques -- Part 10
Footwork is often More Important than Techniques -- Part 11
Stepping and Gliding Forward and Backward -- Part 1
Stepping and Gliding Forward and Backward -- Part 2
Stepping and Gliding Forward and Backward -- Part 3
Stepping and Gliding Forward and Backward -- Part 4
Stepping and Gliding Forward and Backward -- Part 5
Stepping and Gliding Forward and Backward -- Part 6
Stepping and Gliding Forward and Backward -- Part 7
Stepping and Gliding Forward and Backward -- Part 8
Stepping and Gliding Forward and Backward -- Part 9
Agile and Stable at the Same Time -- Part 1
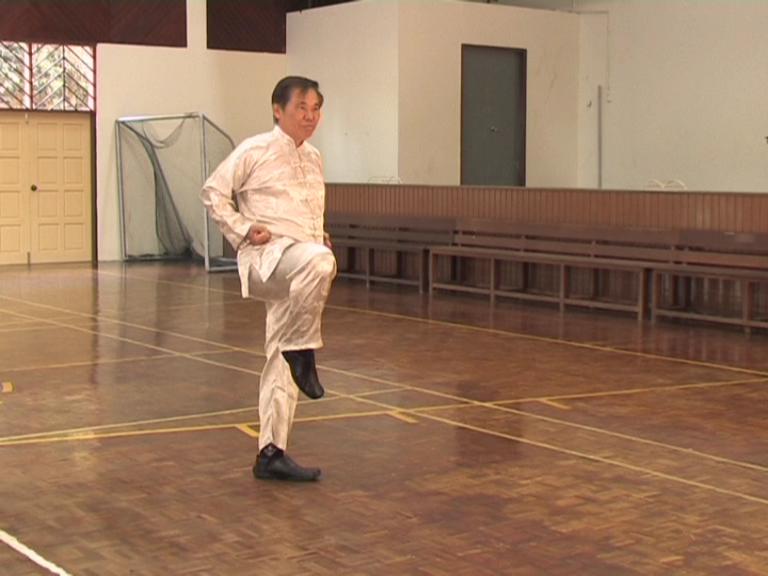 Agile and Stable at the Same Time -- Part 2
Agile and Stable at the Same Time -- Part 3
Agile and Stable at the Same Time -- Part 4
Agile and Stable at the Same Time -- Part 5
Agile and Stable at the Same Time -- Part 6
Agile and Stable at the Same Time -- Part 7
Agile and Stable at the Same Time -- Part 8
Being Fast without Consciously Attempting to be Fast -- Part 1
Being Fast without Consciously Attempting to be Fast -- Part 2
Being Fast without Consciously Attempting to be Fast -- Part 3
Being Fast without Consciously Attempting to be Fast -- Part 4
Being Fast without Consciously Attempting to be Fast -- Part 5
Being Fast without Consciously Attempting to be Fast -- Part 6
Turning to Different Directions in Numerous Ways -- Part 7
Being Fast without Consciously Attempting to be Fast -- Part 8
Being Fast without Consciously Attempting to be Fast -- Part 9
Being Fast without Consciously Attempting to be Fast -- Part 10
Being Fast without Consciously Attempting to be Fast -- Part 11
Turning to Different Directions in Numerous Ways -- Part 1
Turning to Different Directions in Numerous Ways -- Part 2
Turning to Different Directions in Numerous Ways -- Part 3
Turning to Different Directions in Numerous Ways -- Part 4
Turning to Different Directions in Numerous Ways -- Part 5
Turning to Different Directions in Numerous Ways -- Part 6
Turning to Different Directions in Numerous Ways -- Part 7
Turning to Different Directions in Numerous Ways -- Part 8
Turning to Different Directions in Numerous Ways -- Part 9
Turning to Different Directions in Numerous Ways -- Part 10
Turning to Different Directions in Numerous Ways -- Part 11
Chi Flow and Standing Zen -- Overview
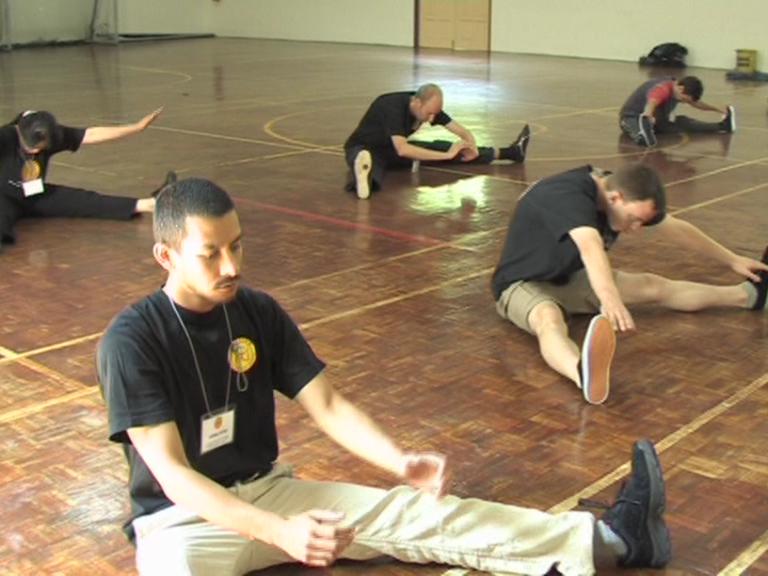 Developing Internal Force and Mental Clarity
-- Overview
Two Crcuial Steps in Stance Training -- Overview
The Art of Flexibility -- Overview
Footwork is often More Important than
Techniques -- Overview
Stepping and Gliding Forward and Backward
-- Overview
Agile and Stable at the Same Time -- Overview
Being Fast without Consciously Attempting
to be Fast -- Overview
Turning to Different Directions in Numerous
Ways -- Overview
Sabah Shaolin 2010 -- Shaolin 02 Shaolin Hand Forms -- Part 1
Shaolin Hand Forms -- Part 2
Shaolin Hand Forms -- Part 3
Shaolin Hand Forms -- Part 4
Shaolin Hand Forms -- Part 5
Shaolin Hand Forms -- Part 6
Shaolin Hand Forms -- Part 7
Shaolin Hand Forms -- Part 8
Shaolin Hand Forms -- Part 9
Shaolin Hand Forms -- Part 10
Shaolin Hand Forms -- Part 11
Shaolin Hand Forms -- Part 12
The External Harmonies of Feet, Body and Hands -- Part 1
The External Harmonies of Feet, Body and Hands -- Part 2
The External Harmonies of Feet, Body and Hands -- Part 3
The External Harmonies of Feet, Body and Hands -- Part 4
The External Harmonies of Feet, Body and Hands -- Part 5
The External Harmonies of Feet, Body and Hands -- Part 6
The External Harmonies of Feet, Body and Hands -- Part 7
The Three Internal Harmonies of Essence, Energy and Mind -- Part 1
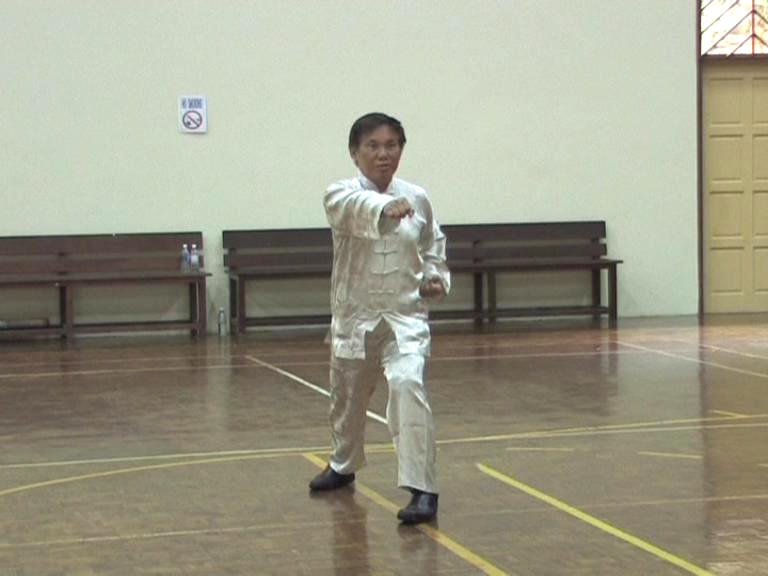 The Three Internal Harmonies of Essence, Energy
and Mind -- Part 2
The Three Internal Harmonies of Essence, Energy
and Mind -- Part 3
The Three Internal Harmonies of Essence, Energy
and Mind -- Part 4
The Three Internal Harmonies of Essence, Energy
and Mind -- Part 5
The Three Internal Harmonies of Essence, Energy
and Mind -- Part 6
The Three Internal Harmonies of Essence, Energy
and Mind -- Part 7
Fa-Jing, or Exploding Force -- Part 1
Fa-Jing, or Exploding Force -- Part 2
Fa-Jing, or Exploding Force -- Part 3
Fa-Jing, or Exploding Force -- Part 4
Fa-Jing, or Exploding Force -- Part 5
Fa-Jing, or Exploding Force -- Part 6
Fa-Jing, or Exploding Force -- Part 7
Fa-Jing, or Exploding Force -- Part 8
Minimum Force against Maximum Strength -- Part 1
Minimum Force against Maximum Strength -- Part 2
Minimum Force against Maximum Strength -- Part 3
Minimum Force against Maximum Strength -- Part 4
Minimum Force against Maximum Strength -- Part 5
Minimum Force against Maximum Strength -- Part 6
Minimum Force against Maximum Strength -- Part 7
Minimum Force against Maximum Strength -- Part 8
Minimum Force against Maximum Strength -- Part 9
Minimum Force against Maximum Strength -- Part 10
Minimum Force against Maximum Strength -- Part 11
Minimum Force against Maximum Strength -- Part 12
Minimum Force against Maximum Strength -- Part 13
Minimum Force against Maximum Strength -- Part 14
No Defence Direct Counter -- Part 1
No Defence Direct Counter -- Part 2
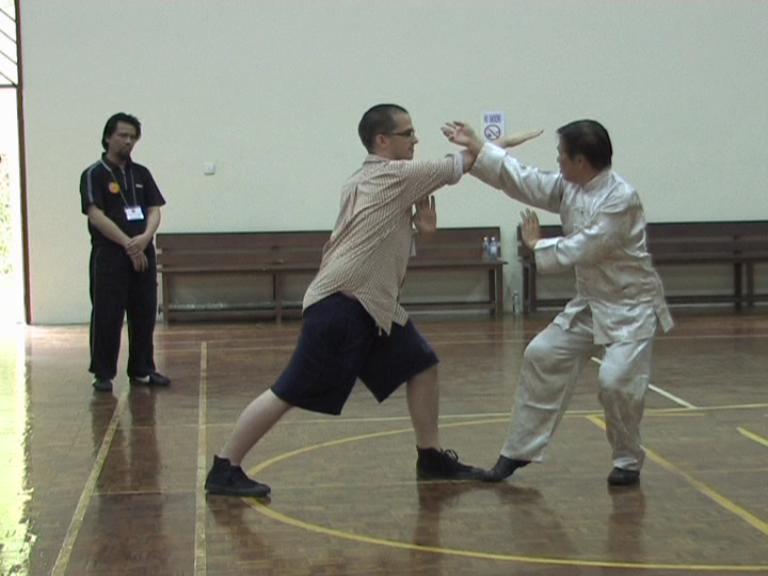 No Defence Direct Counter -- Part 3
No Defence Direct Counter -- Part 3
No Defence Direct Counter -- Part 5
No Defence Direct Counter -- Part 6
No Defence Direct Counter -- Part 7
No Defence Direct Counter -- Part 8
No Defence Direct Counter -- Part 9
No Defence Direct Counter -- Part 10
No Defence Direct Counter -- Part 11
No Defence Direct Counter -- Part 12
No Defence Direct Counter -- Part 13
No Defence Direct Counter -- Part 14
No Defence Direct Counter -- Part 15
Shaolin Hand Forms -- Overview
The Three External Harmonies of Feet, Body and Hands -- Overview
The Three Internal Harmonies of Essence, Energy and Mind -- Overview
Fa-Jing, or Exploding Force -- Overview
Minimum Force against Maximum Strength -- Overview
No Defence Direct Counter -- Overview
Sabah Shaolin 2010 -- Shaolin 03 Linking Patterns into a Set -- Part 1
Linking Patterns into a Set -- Part 2
Linking Patterns into a Set -- Part 3
Linking Patterns into a Set -- Part 4
Linking Patterns into a Set -- Part 5
Linking Patterns into a Set -- Part 6
Linking Patterns into a Set -- Part 7
Linking Patterns into a Set -- Part 8
Linking Patterns into a Set -- Part 9
Moving In and Right Spacing -- Part 1
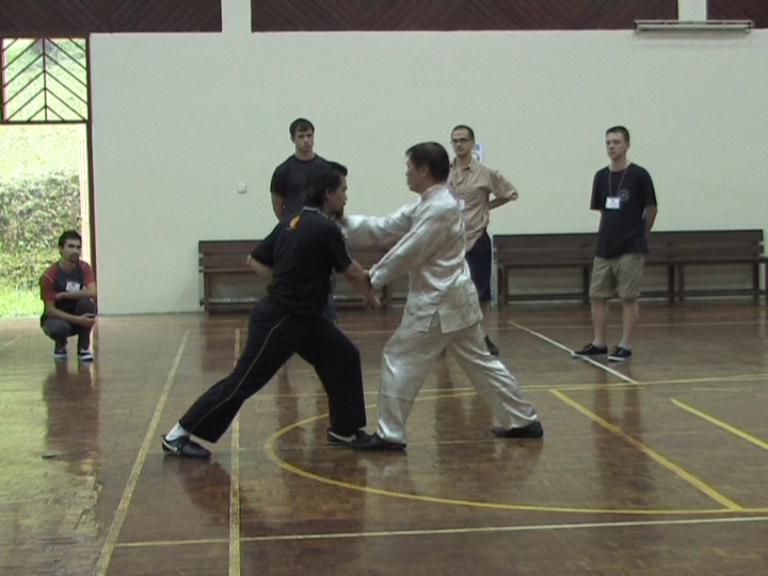 Moving In and Right Spacing -- Part 2
Moving In and Right Spacing -- Part 3
Moving In and Right Spacing -- Part 4
Moving In and Right Spacing -- Part 5
Moving In and Right Spacing -- Part 6
Moving In and Right Spacing -- Part 7
Moving In and Right Spacing -- Part 8
Developing the Skills of Counter-Striking
and of Judgment -- Part 1
Developing the Skills of Counter-Striking
and of Judgment -- Part 2
Developing the Skills of Counter-Striking
and of Judgment -- Part 3
Developing the Skills of Counter-Striking and of Judgment -- Part 4
Developing the Skills of Counter-Striking and of Judgment -- Part 5
Developing the Skills of Counter-Striking and of Judgment -- Part 6
Developing the Skills of Counter-Striking and of Judgment -- Part 7
Developing the Skills of Counter-Striking and of Judgment -- Part 8
Developing the Skills of Counter-Striking and of Judgment -- Part 9
Developing the Skills of Counter-Striking and of Judgment -- Part 10
The Secrets of Single Tiger Emerges from Cave -- Part 1
The Secrets of Single Tiger Emerges from Cave -- Part 2
The Secrets of Single Tiger Emerges from Cave -- Part 3
The Secrets of Single Tiger Emerges from Cave -- Part 4
The Secrets of Single Tiger Emerges from Cave -- Part 5
The Secrets of Single Tiger Emerges from Cave -- Part 6
The Secrets of Single Tiger Emerges from Cave -- Part 7
The Secrets of Single Tiger Emerges from Cave -- Part 8
The Secrets of Single Tiger Emerges from Cave -- Part 9
The Secrets of Single Tiger Emerges from Cave -- Part 10
The Secrets of Single Tiger Emerges from Cave -- Part 11
Different Responses for Attacks from Differnt Heights -- Part 1
Different Responses for Attacks from Differnt Heights -- Part 2
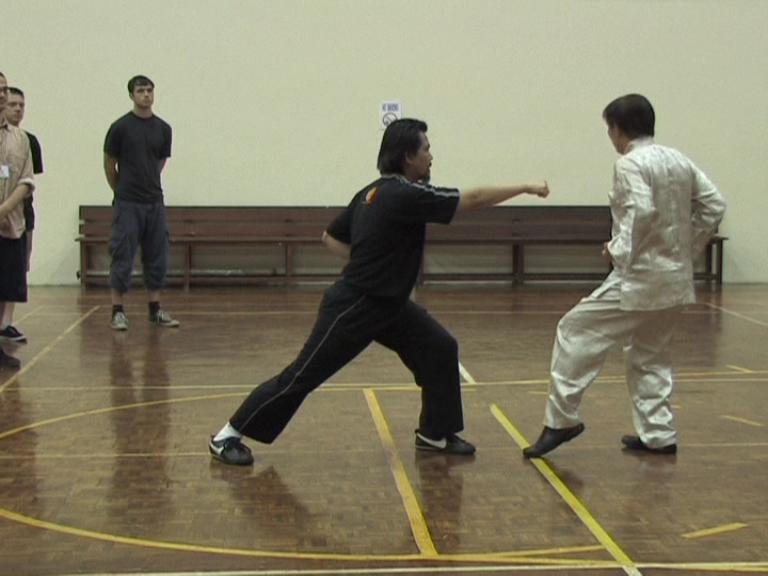 Different Responses for Attacks from Differnt
Heights -- Part 3
Different Responses for Attacks from Differnt
Heights -- Part 4
Different Responses for Attacks from Differnt
Heights -- Part 5
Different Responses for Attacks from Differnt
Heights -- Part 6
Different Responses for Attacks from Differnt
Heights -- Part 7
Different Responses for Attacks from Differnt
Heights -- Part 8
Different Responses for Attacks from Differnt Heights -- Part 9
The Tactic of No Defence Direct Counter -- Part 1
The Tactic of No Defence Direct Counter -- Part 2
The Tactic of No Defence Direct Counter -- Part 3
The Tactic of No Defence Direct Counter -- Part 4
The Tactic of No Defence Direct Counter -- Part 5
The Tactic of No Defence Direct Counter -- Part 6
The Tactic of No Defence Direct Counter -- Part 7
The Tactic of No Defence Direct Counter -- Part 8
The Tactic of No Defence Direct Counter -- Part 9
The Tactic of No Defence Direct Counter -- Part 10
The Tactic of No Defence Direct Counter -- Part 1
The Tactic of No Defence Direct Counter -- Part 2
The Tactic of No False-False, Real-Real -- Part 3
The Tactic of No False-False, Real-Real -- Part 4
The Tactic of No False-False, Real-Real -- Part 5
The Tactic of No False-False, Real-Real -- Part 6
The Tactic of No False-False, Real-Real -- Part 7
The Tactic of No False-False, Real-Real -- Part 8
The Tactic of No False-False, Real-Real -- Part 9
Linking Patterns into a Set -- Overview
Moving In and Right Spacing -- Overview
Developing the Skills of Counter-Striking and of Judgment
-- Overview
The Secrets of Single Tiger Emerges from Cave -- Overview
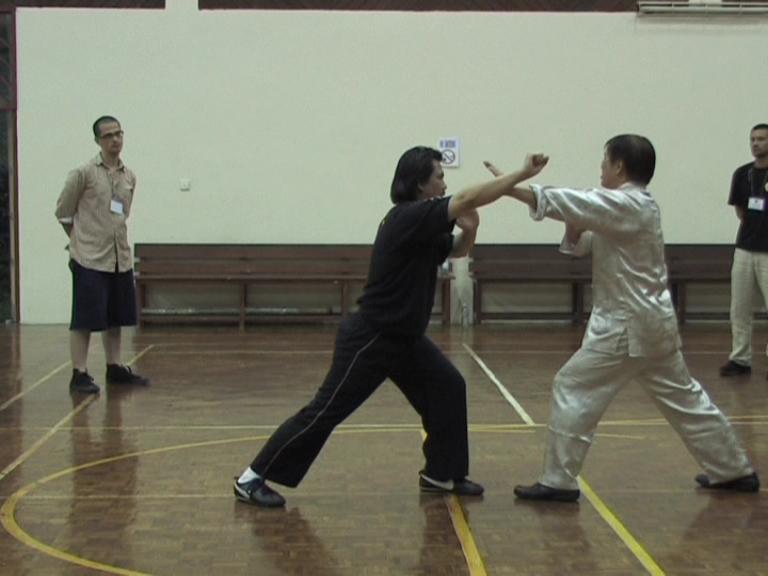 Different Responses for Attacks from Differnt
Heights -- Overview
The Tactic of No Defence Direct Counter -- Overview
The Tactic of No False-False, Real-Real -- Overview
Sabah Shaolin 2010 -- Shaolin 04 The Advantages of using a Poise Pattern -- Part 1
The Advantages of using a Poise Pattern -- Part 2
The Advantages of using a Poise Pattern -- Part 3
The Advantages of using a Poise Pattern -- Part 4
The Advantages of using a Poise Pattern -- Part 5
The Advantages of using a Poise Pattern -- Part 6
The Advantages of using a Poise Pattern -- Part 7
The Advantages of using a Poise Pattern -- Part 8
Asking the Way -- Part 1
Asking the Way -- Part 2
Asking the Way -- Part 3
Asking the Way -- Part 4
Asking the Way -- Part 5
Asking the Way -- Part 6
Asking the Way -- Part 7
Asking the Way -- Part 8
The Crucial Last Step in Moving In -- Part 1
The Crucial Last Step in Moving In -- Part 2
The Crucial Last Step in Moving In -- Part 3
The Crucial Last Step in Moving In -- Part 4
The Crucial Last Step in Moving In -- Part 5
The Crucial Last Step in Moving In -- Part 6
The Crucial Last Step in Moving In -- Part 7
The Crucial Last Step in Moving In -- Part 8
Making Footwork Adjustment -- Part 1
Making Footwork Adjustment -- Part 2
Making Footwork Adjustment -- Part 3
Making Footwork Adjustment -- Part 4
Making Footwork Adjustment -- Part 5
Making Footwork Adjustment -- Part 6
 Making Footwork Adjustment -- Part 7
Making Footwork Adjustment -- Part 8
Stance-Training Poises to Develop Internal Force -- Part 1
Stance-Training Poises to Develop Internal Force -- Part 2
Stance-Training Poises to Develop Internal Force -- Part 3
Stance-Training Poises to Develop Internal Force -- Part 4
Stance-Training Poises to Develop Internal Force -- Part 5
Stance-Training Poises to Develop Internal Force -- Part 6
Stance-Training Poises to Develop Internal Force -- Part 7
Stance-Training Poises to Develop Internal Force -- Part 8
Stance-Training Poises to Develop Internal Force -- Part 9
Stance-Training Poises to Develop Internal Force -- Part 10
Get the Form Correct and be Relaxed -- Part 1
Get the Form Correct and be Relaxed -- Part 2
Get the Form Correct and be Relaxed -- Part 3
Get the Form Correct and be Relaxed -- Part 4
Get the Form Correct and be Relaxed -- Part 5
Get the Form Correct and be Relaxed -- Part 6
Get the Form Correct and be Relaxed -- Part 7
Get the Form Correct and be Relaxed -- Part 8
Yin-Yang Harmony of Solidity and Agility -- Part 1
Yin-Yang Harmony of Solidity and Agility -- Part 2
Yin-Yang Harmony of Solidity and Agility -- Part 3
Yin-Yang Harmony of Solidity and Agility -- Part 4
Yin-Yang Harmony of Solidity and Agility -- Part 5
Yin-Yang Harmony of Solidity and Agility -- Part 6
Yin-Yang Harmony of Solidity and Agility -- Part 7
Yin-Yang Harmony of Solidity and Agility -- Part 8
Yin-Yang Harmony of Solidity and Agility -- Part 9
The Advantages of using a Poise Pattern -- Overview
Asking the Way -- Overview
The Crucial Last Step in Moving In -- Overview
Making Footwork Adjustment -- Overview
Stance-Training Poises to Develop Internal
Force -- Overview
Get the Form Correct and be Relaxed -- Overview
Yin-Yang Harmony of Solidity and Agility
-- Overview
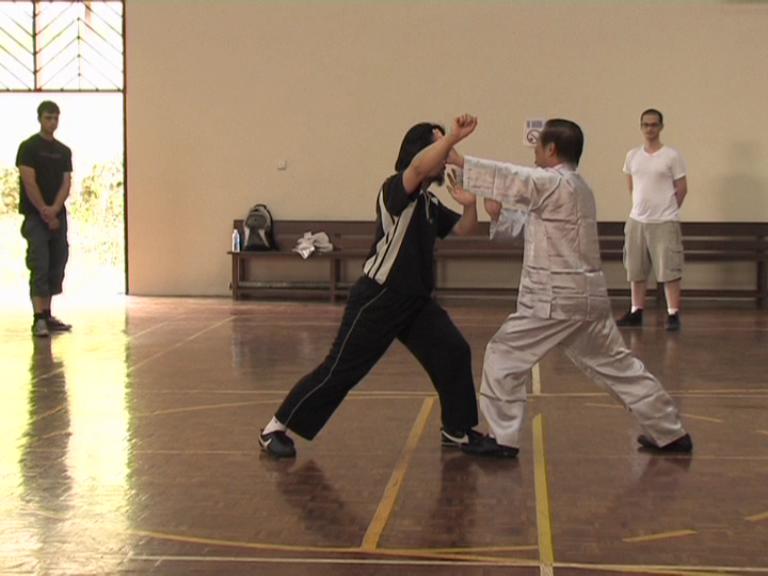 Sabah Shaolin 2010 -- Shaolin 05
Half a Step Back, and Half a Step Forward -- Part 1
Sabah Shaolin 2010 -- Shaolin 05
Half a Step Back, and Half a Step Forward -- Part 1Half a Step Back, and Half a Step Forward -- Part 2
Half a Step Back, and Half a Step Forward -- Part 3
Half a Step Back, and Half a Step Forward -- Part 4
Half a Step Back, and Half a Step Forward -- Part 5
Half a Step Back, and Half a Step Forward -- Part 6
Half a Step Back, and Half a Step Forward -- Part 7
Half a Step Back, and Half a Step Forward -- Part 8
Half a Step Back, and Half a Step Forward -- Part 9
Half a Step Back, and Half a Step Forward -- Part 10
Going Beyond the Surface of a Simple Attack -- Part 1
Going Beyond the Surface of a Simple Attack -- Part 2
Going Beyond the Surface of a Simple Attack -- Part 3
Going Beyond the Surface of a Simple Attack -- Part 4
Going Beyond the Surface of a Simple Attack -- Part 5
Going Beyond the Surface of a Simple Attack -- Part 6
Going Beyond the Surface of a Simple Attack -- Part 7
Going Beyond the Surface of a Simple Attack -- Part 8
Going Beyond the Surface of a Simple Attack -- Part 9
Tempting your Opponent to Break your Arm -- Part 1
Tempting your Opponent to Break your Arm -- Part 2
Tempting your Opponent to Break your Arm -- Part 3
Tempting your Opponent to Break your Arm -- Part 4
Tempting your Opponent to Break your Arm -- Part 5
Tempting your Opponent to Break your Arm -- Part 6
Tempting your Opponent to Break your Arm -- Part 7
Tempting your Opponent to Break your Arm -- Part 8
Tempting your Opponent to Break your Arm -- Part 9
Tempting your Opponent to Break your Arm -- Part 10
Seventy Percent of Victory Comes from the Legs -- Part 1
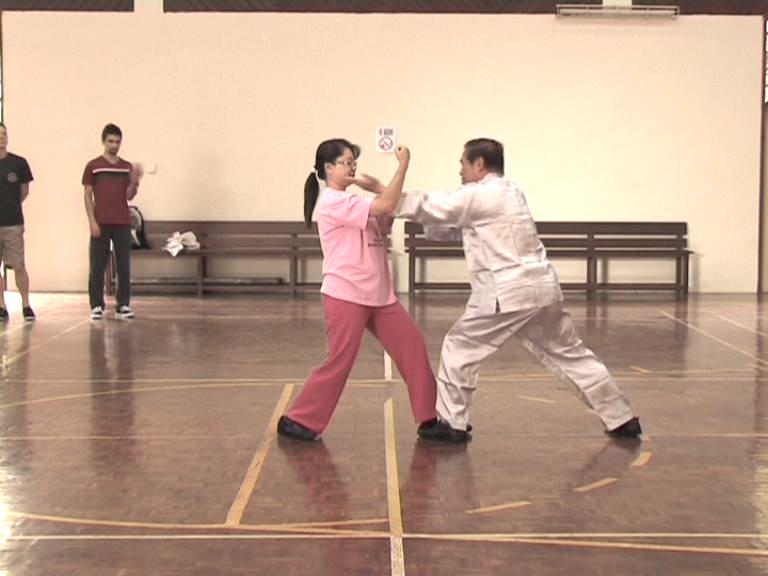 Seventy Percent of Victory Comes from the Legs -- Part 2
Seventy Percent of Victory Comes from the Legs -- Part 3
Seventy Percent of Victory Comes from the Legs -- Part 4
Seventy Percent of Victory Comes from the Legs -- Part 5
Seventy Percent of Victory Comes from the Legs -- Part 6
Seventy Percent of Victory Comes from the Legs -- Part 7
Seventy Percent of Victory Comes from the Legs -- Part 8
Seventy Percent of Victory Comes from the Legs -- Part 9
Subtle Hand Movements of Shaolin Kungfu -- Part 1
Subtle Hand Movements of Shaolin Kungfu -- Part 2
Subtle Hand Movements of Shaolin Kungfu -- Part 3
Subtle Hand Movements of Shaolin Kungfu -- Part 4
Subtle Hand Movements of Shaolin Kungfu -- Part 5
Subtle Hand Movements of Shaolin Kungfu -- Part 6
Subtle Hand Movements of Shaolin Kungfu -- Part 7
Subtle Hand Movements of Shaolin Kungfu -- Part 8
Don't Give Free Offers to your Opponents -- Part 1
Don't Give Free Offers to your Opponents -- Part 2
Don't Give Free Offers to your Opponents -- Part 3
Don't Give Free Offers to your Opponents -- Part 4
Don't Give Free Offers to your Opponents -- Part 5
Don't Give Free Offers to your Opponents -- Part 6
Don't Give Free Offers to your Opponents -- Part 7
Lohan Asks the Way -- Part 1
Lohan Asks the Way -- Part 2
Lohan Asks the Way -- Part 3
Lohan Asks the Way -- Part 4
Lohan Asks the Way -- Part 5
Lohan Asks the Way -- Part 6
Lohan Asks the Way -- Part 7
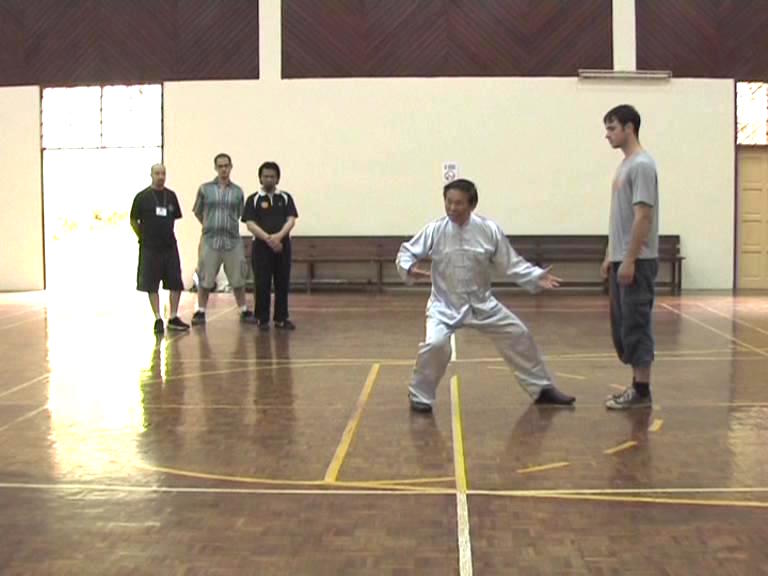 Lohan Asks the Way -- Part 8
Lohan Asks the Way -- Part 9
Lohan Asks the Way -- Part 10
The Magic Formula of Form-Flow-Force -- Part 1
The Magic Formula of Form-Flow-Force -- Part 2
The Magic Formula of Form-Flow-Force -- Part 3
The Magic Formula of Form-Flow-Force -- Part 4
The Magic Formula of Form-Flow-Force -- Part 5
The Magic Formula of Form-Flow-Force -- Part 6
The Magic Formula of Form-Flow-Force -- Part 7
The Importance of the Last Step when Moving In -- Part 1
The Importance of the Last Step when Moving In -- Part 2
The Importance of the Last Step when Moving In -- Part 3
The Importance of the Last Step when Moving In -- Part 4
The Importance of the Last Step when Moving In -- Part 5
The Importance of the Last Step when Moving In -- Part 6
The Importance of the Last Step when Moving In -- Part 7
The Importance of the Last Step when Moving In -- Part 8
Various Steps and Modes in Moving In -- Part 1
Various Steps and Modes in Moving In -- Part 2
Various Steps and Modes in Moving In -- Part 3
Various Steps and Modes in Moving In -- Part 4
Various Steps and Modes in Moving In -- Part 5
Various Steps and Modes in Moving In -- Part 6
Various Steps and Modes in Moving In -- Part 7
Various Steps and Modes in Moving In -- Part 8
Using Different Leg-Modes for Tactical Advantages -- Part 1
Using Different Leg-Modes for Tactical Advantages -- Part 2
Using Different Leg-Modes for Tactical Advantages -- Part 3
Using Different Leg-Modes for Tactical Advantages -- Part 4
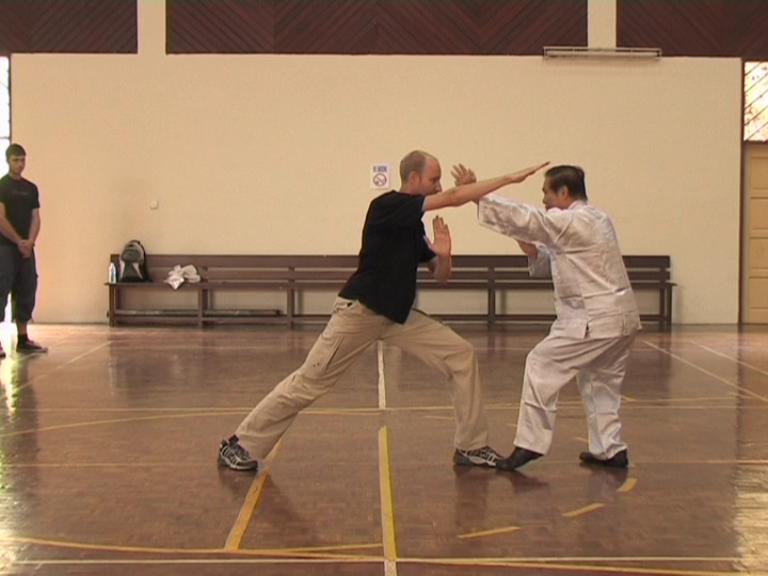 Using Different Leg-Modes for Tactical Advantages -- Part 5
Using Different Leg-Modes for Tactical Advantages -- Part 6
Using Different Leg-Modes for Tactical Advantages -- Part 7
Using Different Leg-Modes for Tactical Advantages -- Part 8
Using Different Leg-Modes for Tactical Advantages -- Part 9
Using Different Leg-Modes for Tactical Advantages -- Part 10
Half a Step Back, and Half a Step Forward -- Overview
Going Beyond the Surface of a Simple Attack -- Overview
Tempting your Opponent to Break your Arm -- Overview
Seventy Percent of Victory Comes from the Legs -- Overview
Subtle Hand Movements of Shaolin Kungfu -- Overview
Don't Give Free Offers to your Opponents -- Overview
Lohan Asks the Way -- Overview
The Magic Formula of Form-Flow-Force -- Overview
The Importance of the Last Step when Moving In -- Overview
Various Steps and Modes in Moving In -- Overview
Using Different Leg-Modes for Tactical Advantages -- Overview
Sabah Shaolin 2010 -- Shaolin 06 Combat Sequence 1: Black Tiger Steals Heart -- Part 1
Combat Sequence 1: Black Tiger Steals Heart -- Part 2
Combat Sequence 1: Black Tiger Steals Heart -- Part 3
Combat Sequence 1: Black Tiger Steals Heart -- Part 4
Combat Sequence 1: Black Tiger Steals Heart -- Part 5
Combat Sequence 1: Black Tiger Steals Heart -- Part 6
Combat Sequence 1: Black Tiger Steals Heart -- Part 7
Combat Sequence 1: Black Tiger Steals Heart -- Part 8
Footwork Accounts for 70% Victory -- Part 1
Footwork Accounts for 70% Victory -- Part 2
 Footwork Accounts for 70% Victory -- Part 3
Footwork Accounts for 70% Victory -- Part 4
Footwork Accounts for 70% Victory -- Part 5
Footwork Accounts for 70% Victory -- Part 6
Footwork Accounts for 70% Victory -- Part 7
Footwork Accounts for 70% Victory -- Part 8
Combat Sequences 2 and 3: Poisonous Snake
and Precious Duck -- Part 1
Combat Sequences 2 and 3: Poisonous Snake
and Precious Duck -- Part 2
Combat Sequences 2 and 3: Poisonous Snake
and Precious Duck -- Part 3
Combat Sequences 2 and 3: Poisonous Snake and Precious Duck -- Part 4
Combat Sequences 2 and 3: Poisonous Snake and Precious Duck -- Part 5
Combat Sequences 2 and 3: Poisonous Snake and Precious Duck -- Part 6
Combat Sequences 2 and 3: Poisonous Snake and Precious Duck -- Part 7
Combat Sequences 2 and 3: Poisonous Snake and Precious Duck -- Part 8
Combat Sequence 4: Hang a Golden Star -- Part 1
Combat Sequence 4: Hang a Golden Star -- Part 2
Combat Sequence 4: Hang a Golden Star -- Part 3
Combat Sequence 4: Hang a Golden Star -- Part 4
Combat Sequence 4: Hang a Golden Star -- Part 5
Combat Sequence 4: Hang a Golden Star -- Part 6
Combat Sequence 4: Hang a Golden Star -- Part 7
Combat Sequence 4: Hang a Golden Star -- Part 8
Combat Sequence 4: Hang a Golden Star -- Part 9
Continuing from One Sequence to Another -- Part 1
Continuing from One Sequence to Another -- Part 2
Continuing from One Sequence to Another -- Part 3
Continuing from One Sequence to Another -- Part 4
Continuing from One Sequence to Another -- Part 5
Continuing from One Sequence to Another -- Part 6
Continuing from One Sequence to Another -- Part 7
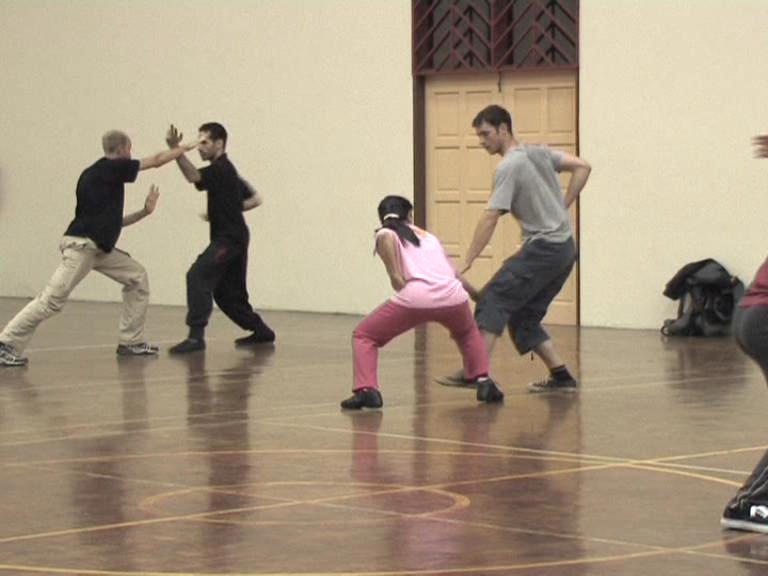 Continuing from One Sequence to Another -- Part 8
Continuing from One Sequence to Another -- Part 9
Continuing from One Sequence to Another -- Part 10
Continuing from One Sequence to Another -- Part 11
Our Shaolin Wahnam Treasure: One-Finger Shooting
Zen -- Part 1
Our Shaolin Wahnam Treasure: One-Finger Shooting
Zen -- Part 2
Our Shaolin Wahnam Treasure: One-Finger Shooting
Zen -- Part 3
Our Shaolin Wahnam Treasure: One-Finger Shooting
Zen -- Part 4
Our Shaolin Wahnam Treasure: One-Finger Shooting Zen -- Part 5
Our Shaolin Wahnam Treasure: One-Finger Shooting Zen -- Part 6
Our Shaolin Wahnam Treasure: One-Finger Shooting Zen -- Part 7
Employing Form-Flow-Force to Generate Internal Force -- Part 1
Employing Form-Flow-Force to Generate Internal Force -- Part 2
Employing Form-Flow-Force to Generate Internal Force -- Part 3
Employing Form-Flow-Force to Generate Internal Force -- Part 4
Employing Form-Flow-Force to Generate Internal Force -- Part 5
Employing Form-Flow-Force to Generate Internal Force -- Part 6
Employing Form-Flow-Force to Generate Internal Force -- Part 7
Employing Form-Flow-Force to Generate Internal Force -- Part 8
Generating Internal Force by Performing a Kungfu Set -- Part 1
Generating Internal Force by Performing a Kungfu Set -- Part 2
Generating Internal Force by Performing a Kungfu Set -- Part 3
Generating Internal Force by Performing a Kungfu Set -- Part 4
Generating Internal Force by Performing a Kungfu Set -- Part 5
Generating Internal Force by Performing a Kungfu Set -- Part 6
Generating Internal Force by Performing a Kungfu Set -- Part 7
Generating Internal Force by Performing a Kungfu Set -- Part 8
Combat Sequence 1: Black Tiger Steals Heart -- Overview
Footwork Accounts for 70% Victory -- Overview
Combat Sequences 2 and 3: Poisonous Snake and Precious
Duck -- Overview
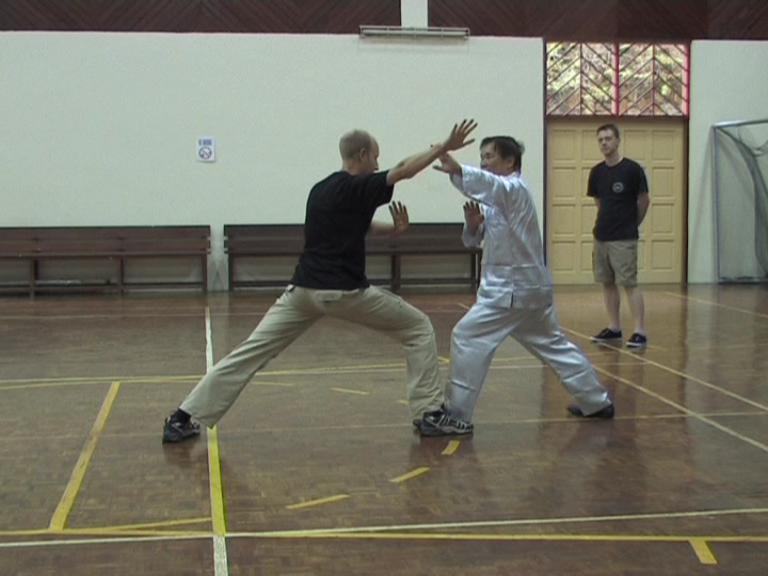 Combat Sequence 4: Hang a Golden Star -- Overview
Continuing from One Sequence to Another -- Overview
Our Shaolin Wahnam Treasure: One-Finger Shooting
Zen -- Overview
Employing Form-Flow-Force to Generate Internal
Force -- Overview
Generating Internal Force by Performing a Kungfu
Set -- Overview
Sabah Shaolin 2010 -- Shaolin 07 Combat Sequence 5: Fierce Tiger Speeds through Valley -- Part 1
Combat Sequence 5: Fierce Tiger Speeds through Valley -- Part 2
Combat Sequence 5: Fierce Tiger Speeds through Valley -- Part 3
Combat Sequence 5: Fierce Tiger Speeds through Valley -- Part 4
Combat Sequence 5: Fierce Tiger Speeds through Valley -- Part 5
Combat Sequence 5: Fierce Tiger Speeds through Valley -- Part 6
Combat Sequence 5: Fierce Tiger Speeds through Valley -- Part 7
Combat Sequence 5: Fierce Tiger Speeds through Valley -- Part 8
Combat Sequence 5: Fierce Tiger Speeds through Valley -- Part 9
The Secrets of Pressing Attacks -- Part 1
The Secrets of Pressing Attacks -- Part 2
The Secrets of Pressing Attacks -- Part 3
The Secrets of Pressing Attacks -- Part 4
The Secrets of Pressing Attacks -- Part 5
The Secrets of Pressing Attacks -- Part 6
The Secrets of Pressing Attacks -- Part 7
The Secrets of Pressing Attacks -- Part 8
The Secrets of Pressing Attacks -- Part 9
The Secrets of Pressing Attacks -- Part 10
Combat Sequence 6: Dark Dragon Draws Water -- Part 1
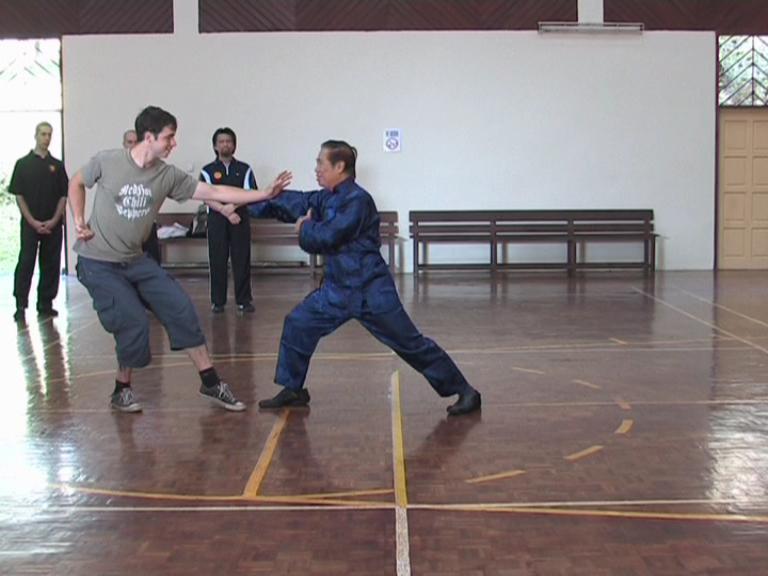 Combat Sequence 6: Dark Dragon Draws Water -- Part 2
Combat Sequence 6: Dark Dragon Draws Water -- Part 3
Combat Sequence 6: Dark Dragon Draws Water -- Part 4
Combat Sequence 6: Dark Dragon Draws Water -- Part 5
Combat Sequence 6: Dark Dragon Draws Water -- Part 6
Combat Sequence 6: Dark Dragon Draws Water -- Part 7
Combat Sequence 6: Dark Dragon Draws Water -- Part 8
Combat Sequence 6: Dark Dragon Draws Water -- Part 9
Beauty of Shaolin Combat Application -- Part 1
Beauty of Shaolin Combat Application -- Part 2
Beauty of Shaolin Combat Application -- Part 3
Beauty of Shaolin Combat Application -- Part 4
Beauty of Shaolin Combat Application -- Part 5
Beauty of Shaolin Combat Application -- Part 6
Beauty of Shaolin Combat Application -- Part 7
Beauty of Shaolin Combat Application -- Part 8
Do Not Use Strength! -- Part 1
Do Not Use Strength! -- Part 2
Do Not Use Strength! -- Part 3
Do Not Use Strength! -- Part 4
Do Not Use Strength! -- Part 5
Do Not Use Strength! -- Part 6
Do Not Use Strength! -- Part 7
Do Not Use Strength! -- Part 8
Do Not Use Strength! -- Part 9
Do Not Use Strength! -- Part 10
Five-Step Formula and Two-Step Formula -- Part 1
Five-Step Formula and Two-Step Formula -- Part 2
Five-Step Formula and Two-Step Formula -- Part 3
Five-Step Formula and Two-Step Formula -- Part 4
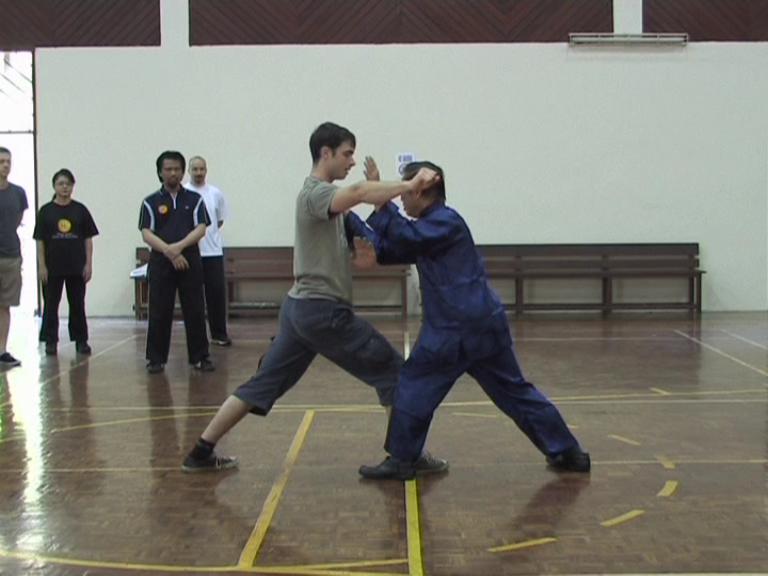 Five-Step Formula and Two-Step Formula -- Part 5
Five-Step Formula and Two-Step Formula -- Part 6
Five-Step Formula and Two-Step Formula -- Part 7
Combat Sequence 7: Chop the Hua Mountain -- Part 1
Combat Sequence 7: Chop the Hua Mountain -- Part 2
Combat Sequence 7: Chop the Hua Mountain -- Part 3
Combat Sequence 7: Chop the Hua Mountain -- Part 4
Combat Sequence 7: Chop the Hua Mountain -- Part 5
Combat Sequence 7: Chop the Hua Mountain -- Part 6
Combat Sequence 7: Chop the Hua Mountain -- Part 7
Combat Sequence 7: Chop the Hua Mountain -- Part 8
Combat Sequence 7: Chop the Hua Mountain -- Part 9
Combat Sequence 7: Chop the Hua Mountain -- Part 10
Combat Sequence 7: Chop the Hua Mountain -- Part 11
Combat Sequence 8: Horizontally Sweep a Thousand Armies -- Part 1
Combat Sequence 8: Horizontally Sweep a Thousand Armies -- Part 2
Combat Sequence 8: Horizontally Sweep a Thousand Armies -- Part 3
Combat Sequence 8: Horizontally Sweep a Thousand Armies -- Part 4
Combat Sequence 8: Horizontally Sweep a Thousand Armies -- Part 5
Combat Sequence 8: Horizontally Sweep a Thousand Armies -- Part 6
Combat Sequence 8: Horizontally Sweep a Thousand Armies -- Part 7
Combat Sequence 8: Horizontally Sweep a Thousand Armies -- Part 8
Combat Sequence 8: Horizontally Sweep a Thousand Armies -- Part 9
Combat Sequence 8: Horizontally Sweep a Thousand Armies -- Part 10
Combat Sequence 8: Horizontally Sweep a Thousand Armies -- Part 11
The Tactic of Pressing Attacks -- Part 1
The Tactic of Pressing Attacks -- Part 2
The Tactic of Pressing Attacks -- Part 3
The Tactic of Pressing Attacks -- Part 4
The Tactic of Pressing Attacks -- Part 5
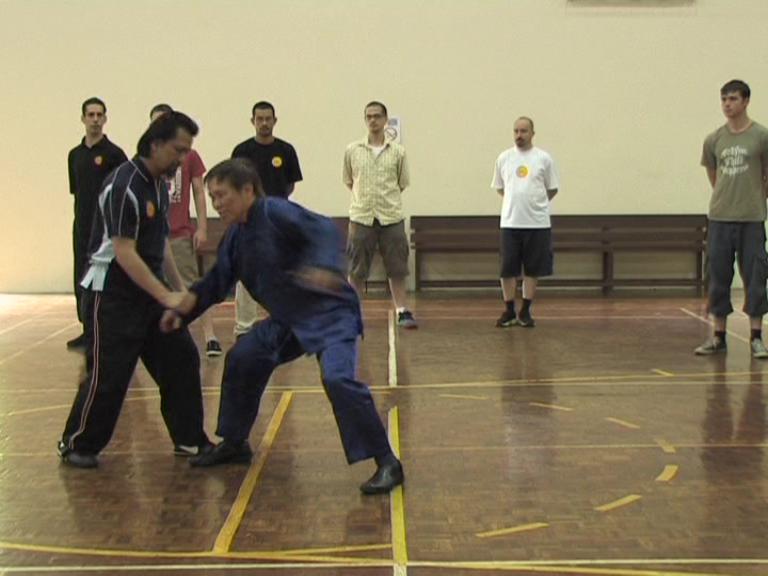 The Tactic of Pressing Attacks -- Part 6
The Tactic of Pressing Attacks -- Part 7
The Tactic of Pressing Attacks -- Part 8
The Tactic of Pressing Attacks -- Part 9
The Magic Formula of Addition and Subtraction -- Part 1
The Magic Formula of Addition and Subtraction -- Part 2
The Magic Formula of Addition and Subtraction -- Part 3
The Magic Formula of Addition and Subtraction -- Part 4
The Magic Formula of Addition and Subtraction -- Part 5
The Magic Formula of Addition and Subtraction -- Part 6
The Magic Formula of Addition and Subtraction -- Part 7
The Magic Formula of Addition and Subtraction -- Part 8
The Magic Formula of Addition and Subtraction -- Part 9
Changing Leg Modes and Bridging Gaps -- Part 1
Changing Leg Modes and Bridging Gaps -- Part 2
Changing Leg Modes and Bridging Gaps -- Part 3
Changing Leg Modes and Bridging Gaps -- Part 4
Changing Leg Modes and Bridging Gaps -- Part 5
Changing Leg Modes and Bridging Gaps -- Part 6
Changing Leg Modes and Bridging Gaps -- Part 7
Changing Leg Modes and Bridging Gaps -- Part 8
Combat Sequence 5: Fierce Tiger Speeds through Valley -- Overview
The Secrets of Pressing Attacks -- Overview
Combat Sequence 6: Dark Dragon Draws Water -- Overview
Beauty of Shaolin Combat Application -- Overview
Do Not Use Strength! -- Overview
Five-Step Formula and Two-Step Formula -- Overview
Combat Sequence 7: Chop the Hua Mountain -- Overview
Combat Sequence 8: Horizontally Sweep a Thousand Armies -- Overview
The Tactic of Pressing Attacks -- Overview
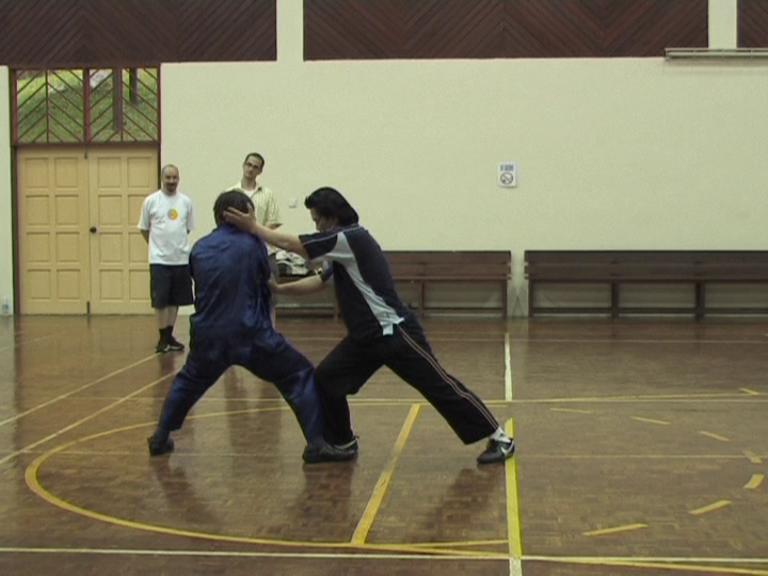 The Magic Formula of Addition and Subtraction -- Overview
Changing Leg Modes and Bridging Gaps -- Overview
Sabah Shaolin 2010 -- Shaolin 08 One-Finger Shooting and Bridging Gap -- Part 1
One-Finger Shooting and Bridging Gap -- Part 2
One-Finger Shooting and Bridging Gap -- Part 3
One-Finger Shooting and Bridging Gap -- Part 4
One-Finger Shooting and Bridging Gap -- Part 5
One-Finger Shooting and Bridging Gap -- Part 6
One-Finger Shooting and Bridging Gap -- Part 7
One-Finger Shooting and Bridging Gap -- Part 8
Changing Steps and Various Leg Modes -- Part 1
Changing Steps and Various Leg Modes -- Part 2
Changing Steps and Various Leg Modes -- Part 3
Changing Steps and Various Leg Modes -- Part 4
Changing Steps and Various Leg Modes -- Part 5
Changing Steps and Various Leg Modes -- Part 6
Changing Steps and Various Leg Modes -- Part 7
Changing Steps and Various Leg Modes -- Part 8
Changing Steps and Various Leg Modes -- Part 9
Various Combinationsof Combat Sequences -- Part 1
Various Combinationsof Combat Sequences -- Part 2
Various Combinationsof Combat Sequences -- Part 3
Various Combinations of Combat Sequences -- Part 4
Various Combinations of Combat Sequences -- Part 5
Various Combinations of Combat Sequences -- Part 6
Various Combinations of Combat Sequences -- Part 7
Various Combinations of Combat Sequences -- Part 8
Various Combinations of Combat Sequences -- Part 9
Adding and Subtracting Patterns to Confuse Opponents -- Part 1
Adding and Subtracting Patterns to Confuse Opponents -- Part 2
Adding and Subtracting Patterns to Confuse Opponents -- Part 3
Adding and Subtracting Patterns to Confuse Opponents -- Part 4
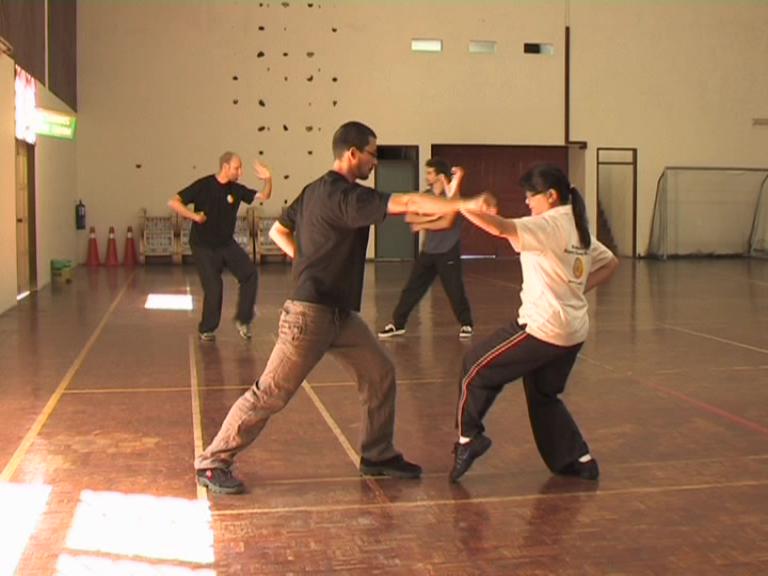 Adding and Subtracting Patterns to Confuse
Opponents -- Part 5
Adding and Subtracting Patterns to Confuse
Opponents -- Part 6
Adding and Subtracting Patterns to Confuse
Opponents -- Part 7
Adding and Subtracting Patterns to Confuse
Opponents -- Part 8
Adding and Subtracting Patterns to Confuse
Opponents -- Part 9
Adding and Subtracting Patterns to Confuse
Opponents -- Part 10
Conditional Free Sparring -- Part 1
Conditional Free Sparring -- Part 2
Conditional Free Sparring -- Part 3
Conditional Free Sparring -- Part 4
Conditional Free Sparring -- Part 5
Conditional Free Sparring -- Part 6
Conditional Free Sparring -- Part 7
Conditional Free Sparring -- Part 8
Following Through and Pressing Attacks -- Part 1
Following Through and Pressing Attacks -- Part 2
Following Through and Pressing Attacks -- Part 3
Following Through and Pressing Attacks -- Part 4
Following Through and Pressing Attacks -- Part 5
Following Through and Pressing Attacks -- Part 6
Following Through and Pressing Attacks -- Part 7
Following Through and Pressing Attacks -- Part 8
Following Through and Pressing Attacks -- Part 9
Overwhelming Oponents with Sequence Sparring -- Part 1
Overwhelming Oponents with Sequence Sparring -- Part 2
Overwhelming Oponents with Sequence Sparring -- Part 3
Overwhelming Oponents with Sequence Sparring -- Part 4
Overwhelming Oponents with Sequence Sparring -- Part 5
Overwhelming Oponents with Sequence Sparring -- Part 6
Overwhelming Oponents with Sequence Sparring -- Part 7
 Overwhelming Oponents with Sequence Sparring -- Part 8
Overwhelming Oponents with Sequence Sparring -- Part 9
Intercepting an Opponent's Attack -- Part 1
Intercepting an Opponent's Attack -- Part 2
Intercepting an Opponent's Attack -- Part 3
Intercepting an Opponent's Attack -- Part 4
Intercepting an Opponent's Attack -- Part 5
Intercepting an Opponent's Attack -- Part 6
Intercepting an Opponent's Attack -- Part 7
Intercepting an Opponent's Attack -- Part 8
Intercepting an Opponent's Attack -- Part 9
Intercepting an Opponent's Attack -- Part 10
The Secrets of Hiding Flower in the Moon -- Part 1
The Secrets of Hiding Flower in the Moon -- Part 2
The Secrets of Hiding Flower in the Moon -- Part 3
The Secrets of Hiding Flower in the Moon -- Part 4
The Secrets of Hiding Flower in the Moon -- Part 5
The Secrets of Hiding Flower in the Moon -- Part 6
The Secrets of Hiding Flower in the Moon -- Part 7
The Secrets of Hiding Flower in the Moon -- Part 8
The Secrets of Hiding Flower in the Moon -- Part 9
The Side-Way Tiger-Tail Kick -- Part 1
The Side-Way Tiger-Tail Kick -- Part 2
The Side-Way Tiger-Tail Kick -- Part 3
The Side-Way Tiger-Tail Kick -- Part 4
The Side-Way Tiger-Tail Kick -- Part 5
The Side-Way Tiger-Tail Kick -- Part 6
The Side-Way Tiger-Tail Kick -- Part 7
The Side-Way Tiger-Tail Kick -- Part 8
The Side-Way Tiger-Tail Kick -- Part 9
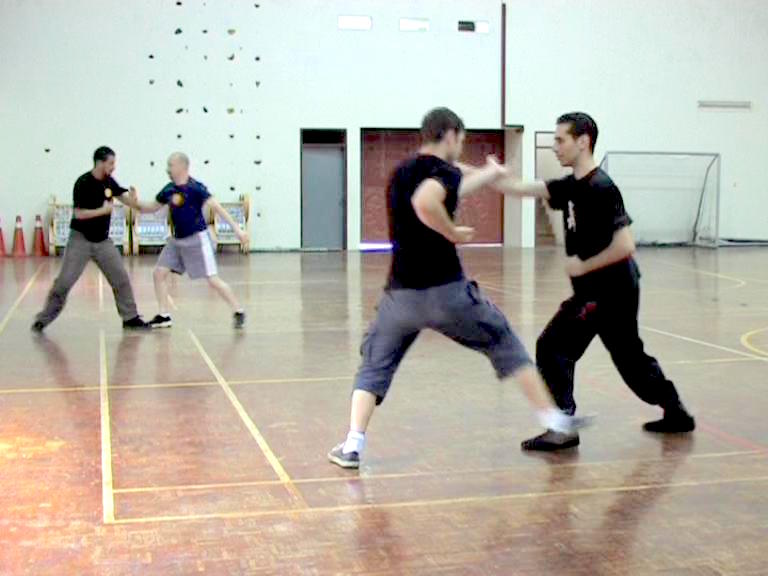 Combat Sequence 9: Happy Bird Hops up Branch -- Part 1
Combat Sequence 9: Happy Bird Hops up Branch -- Part 2
Combat Sequence 9: Happy Bird Hops up Branch -- Part 3
Combat Sequence 9: Happy Bird Hops up Branch -- Part 4
Combat Sequence 9: Happy Bird Hops up Branch -- Part 5
Combat Sequence 9: Happy Bird Hops up Branch -- Part 6
Combat Sequence 9: Happy Bird Hops up Branch -- Part 7
One-Finger Shooting and Bridging Gap -- Overview
Changing Steps and Various Leg Modes -- Overview
Various Combinations of Combat Sequences -- Overview
Adding and Subtracting Patterns to Confuse Opponents -- Overview
Conditional Free Sparring -- Overview
Following Through and Pressing Attacks -- Overview
Overwhelming Oponents with Sequence Sparring -- Overview
Intercepting an Opponent's Response -- Overview
The Secrets of Hiding Flower in the Moon -- Overview
The Side-Way Tiger-Tail Kick -- Overview
Combat Sequence 9: Happy Bird Hops up Branch -- Overview
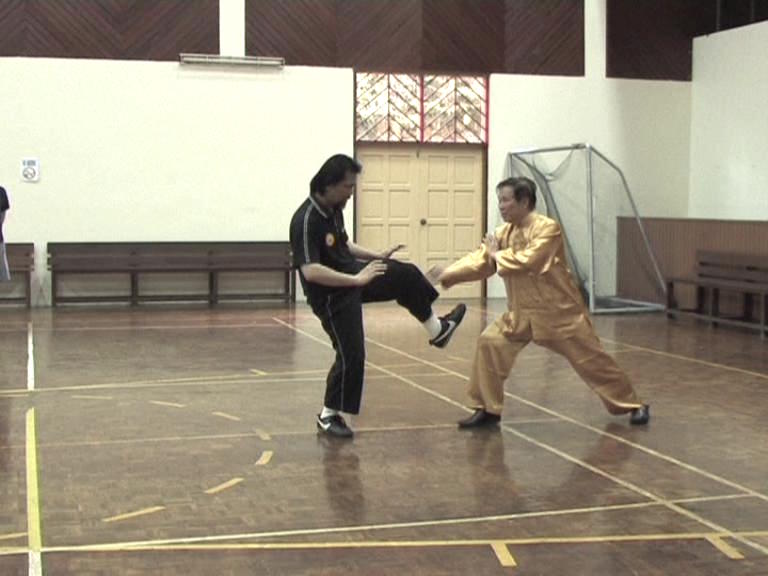 Sabah Shaolin 2010 -- Shaolin 09
Combat Sequence 10: White Horse Presents Hoof -- Part 1
Sabah Shaolin 2010 -- Shaolin 09
Combat Sequence 10: White Horse Presents Hoof -- Part 1Combat Sequence 10: White Horse Presents Hoof -- Part 2
Combat Sequence 10: White Horse Presents Hoof -- Part 3
Combat Sequence 10: White Horse Presents Hoof -- Part 4
Combat Sequence 10: White Horse Presents Hoof -- Part 5
Combat Sequence 10: White Horse Presents Hoof -- Part 7
Combat Sequence 10: White Horse Presents Hoof -- Part 7
Combat Sequence 10: White Horse Presents Hoof -- Part 8
Combat Sequence 10: White Horse Presents Hoof -- Part 9
How to Stop Pressing Attacks -- Part 1
How to Stop Pressing Attacks -- Part 2
How to Stop Pressing Attacks -- Part 3
How to Stop Pressing Attacks -- Part 4
How to Stop Pressing Attacks -- Part 5
How to Stop Pressing Attacks -- Part 6
How to Stop Pressing Attacks -- Part 7
How to Stop Pressing Attacks -- Part 8
How to Stop Pressing Attacks -- Part 9
Opening or Closing an Opponent -- Part 1
Opening or Closing an Opponent -- Part 2
Opening or Closing an Opponent -- Part 3
Opening or Closing an Opponent -- Part 4
Opening or Closing an Opponent -- Part 5
Opening or Closing an Opponent -- Part 6
Opening or Closing an Opponent -- Part 7
Combat Sequence 11: Yellow Bird Drinks Water -- Part 1
Combat Sequence 11: Yellow Bird Drinks Water -- Part 2
Combat Sequence 11: Yellow Bird Drinks Water -- Part 3
Combat Sequence 11: Yellow Bird Drinks Water -- Part 4
Combat Sequence 11: Yellow Bird Drinks Water -- Part 5
 Combat Sequence 11: Yellow Bird Drinks Water -- Part 6
Combat Sequence 11: Yellow Bird Drinks Water -- Part 7
Combat Sequence 11: Yellow Bird Drinks Water -- Part 8
Combat Sequence 12: Naughty Monkey kicks at Tree -- Part 1
Combat Sequence 12: Naughty Monkey kicks at Tree -- Part 2
Combat Sequence 12: Naughty Monkey kicks at Tree -- Part 3
Combat Sequence 12: Naughty Monkey kicks at Tree -- Part 4
Combat Sequence 12: Naughty Monkey kicks at Tree -- Part 5
Combat Sequence 12: Naughty Monkey kicks at Tree -- Part 6
Combat Sequence 12: Naughty Monkey kicks at Tree -- Part 7
Combat Sequence 12: Naughty Monkey kicks at Tree -- Part 8
One Pattern against All Kicks -- Part 1
One Pattern against All Kicks -- Part 2
One Pattern against All Kicks -- Part 3
One Pattern against All Kicks -- Part 4
One Pattern against All Kicks -- Part 5
One Pattern against All Kicks -- Part 6
One Pattern against All Kicks -- Part 7
One Pattern against All Kicks -- Part 8
One Pattern against All Kicks -- Part 9
One Pattern against All Kicks -- Part 10
Conditional Free Sparring using Sequences 1 to 12 -- Part 1
Conditional Free Sparring using Sequences 1 to 12 -- Part 2
Conditional Free Sparring using Sequences 1 to 12 -- Part 3
Conditional Free Sparring using Sequences 1 to 12 -- Part 4
Conditional Free Sparring using Sequences 1 to 12 -- Part 5
Conditional Free Sparring using Sequences 1 to 12 -- Part 6
Conditional Free Sparring using Sequences 1 to 12 -- Part 7
Conditional Free Sparring using Sequences 1 to 12 -- Part 8
Conditional Free Sparring using Sequences 1 to 12 -- Part 9
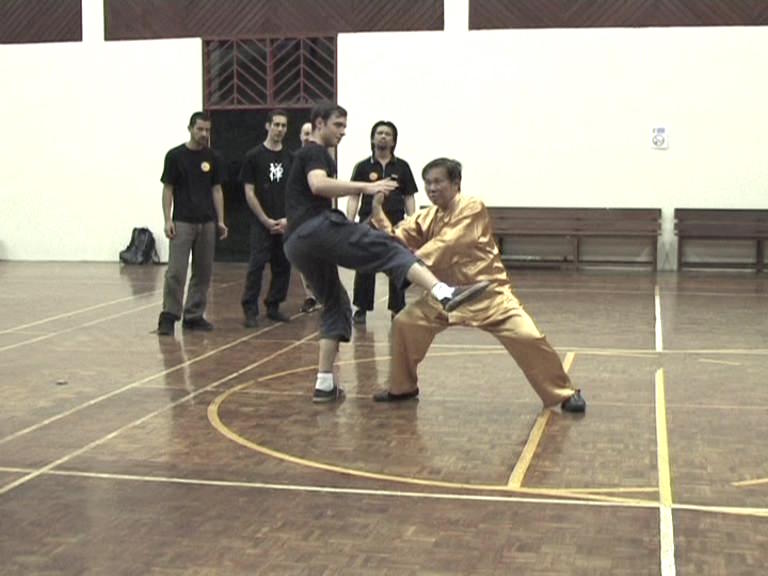 Combat Sequence 10: White Horse Presents Hoof
-- Overview
How to Stop Pressing Attacks -- Overview
Opening or Closing an Opponent -- Overview
Combat Sequence 11: Yellow Bird Drinks Water
-- Overview
Combat Sequence 12: Naughty Monkey Kicks
at Tree -- Overview
One Pattern against All Kicks -- Overview
Conditional Free Sparring using Sequences 1 to 12
-- Overview
Sabah Shaolin 2010 -- Shaolin 10 Combat-Sequence Set 2: Fierce Tiger Speeds through Valley -- Part 1
Combat-Sequence Set 2: Fierce Tiger Speeds through Valley -- Part 2
Combat-Sequence Set 2: Fierce Tiger Speeds through Valley -- Part 3
Combat-Sequence Set 2: Fierce Tiger Speeds through Valley -- Part 4
Combat-Sequence Set 2: Fierce Tiger Speeds through Valley -- Part 5
Combat-Sequence Set 2: Fierce Tiger Speeds through Valley -- Part 6
Combat-Sequence Set 2: Fierce Tiger Speeds through Valley -- Part 7
Combat-Sequence Set 2: Fierce Tiger Speeds through Valley -- Part 8
Combat Sequence Set 3: Happy Bird Hops up Branch -- Part 1
Combat Sequence Set 3: Happy Bird Hops up Branch -- Part 2
Combat Sequence Set 3: Happy Bird Hops up Branch -- Part 3
Combat Sequence Set 3: Happy Bird Hops up Branch -- Part 4
Combat Sequence Set 3: Happy Bird Hops up Branch -- Part 5
Combat Sequence Set 3: Happy Bird Hops up Branch -- Part 6
Combat Sequence Set 3: Happy Bird Hops up Branch -- Part 7
Combat Sequence Set 3: Happy Bird Hops up Branch -- Part 8
Combat Sequence 13: Fell Tree with Roots -- Part 1
Combat Sequence 13: Fell Tree with Roots -- Part 2
Combat Sequence 13: Fell Tree with Roots -- Part 3
Combat Sequence 13: Fell Tree with Roots -- Part 4
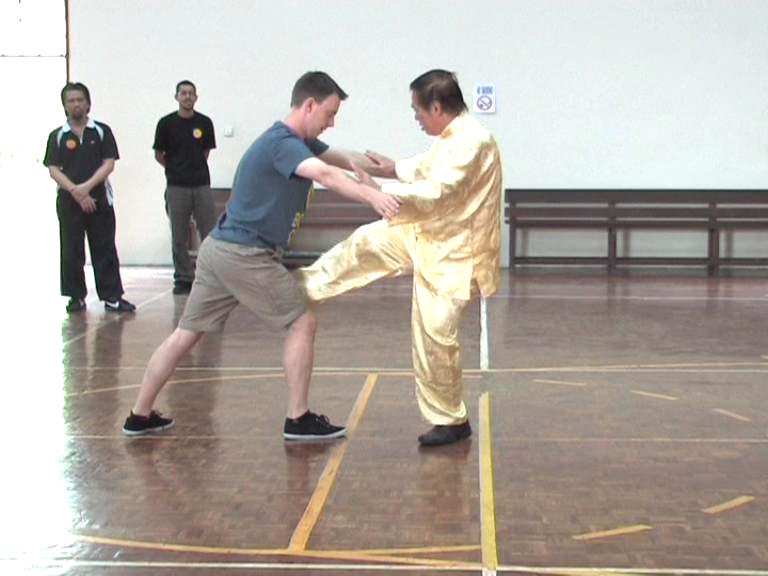 Combat Sequence 13: Fell Tree with Roots -- Part 5
Combat Sequence 13: Fell Tree with Roots -- Part 6
Combat Sequence 13: Fell Tree with Roots -- Part 7
The Deadly Organ-Seeking Kick -- Part 1
The Deadly Organ-Seeking Kick -- Part 2
The Deadly Organ-Seeking Kick -- Part 3
The Deadly Organ-Seeking Kick -- Part 4
The Deadly Organ-Seeking Kick -- Part 5
The Deadly Organ-Seeking Kick -- Part 6
Combat Sequence 16: Fierce Tiger Pushes Mountain -- Part 1
Combat Sequence 16: Fierce Tiger Pushes Mountain -- Part 2
Combat Sequence 16: Fierce Tiger Pushes Mountain -- Part 3
Combat Sequence 16: Fierce Tiger Pushes Mountain -- Part 4
Combat Sequence 16: Fierce Tiger Pushes Mountain -- Part 5
Combat Sequence 16: Fierce Tiger Pushes Mountain -- Part 6
Combat Sequence 16: Fierce Tiger Pushes Mountain -- Part 7
Combat Sequence 15: Farmer Hoes Rice Field -- Part 1
Combat Sequence 15: Farmer Hoes Rice Field -- Part 2
Combat Sequence 15: Farmer Hoes Rice Field -- Part 3
Combat Sequence 15: Farmer Hoes Rice Field -- Part 4
Combat Sequence 15: Farmer Hoes Rice Field -- Part 5
Combat Sequence 15: Farmer Hoes Rice Field -- Part 6
Combat Sequence 15: Farmer Hoes Rice Field -- Part 7
Combat Sequence 15: Farmer Hoes Rice Field -- Part 8
Combat Sequence 13: Lead Horse Back to Stable -- Part 1
Combat Sequence 13: Lead Horse Back to Stable -- Part 2
Combat Sequence 13: Lead Horse Back to Stable -- Part 3
Combat Sequence 13: Lead Horse Back to Stable -- Part 4
Combat Sequence 13: Lead Horse Back to Stable -- Part 5
Combat Sequence 13: Lead Horse Back to Stable -- Part 6
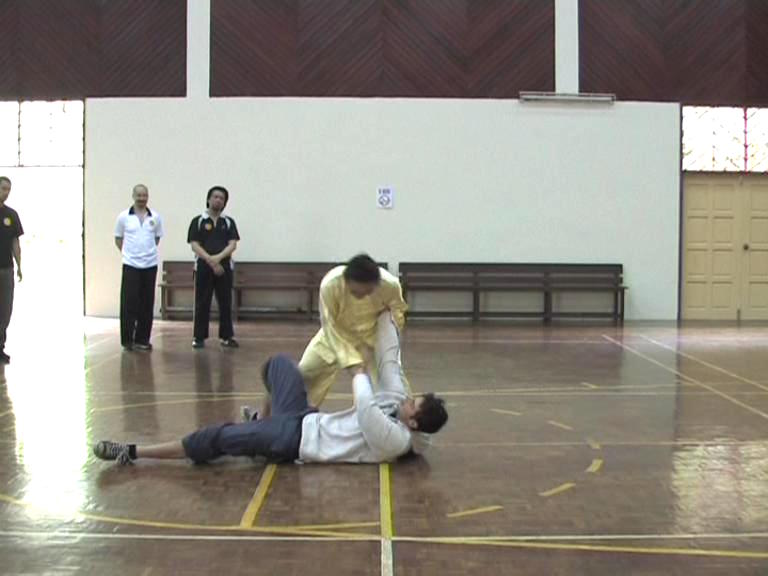 Combat Sequence 13: Lead Horse Back to Stable -- Part 7
Combat Sequence 13: Lead Horse Back to Stable -- Part 8
Combat Sequence 16: Fierce Tiger Pushes Mountain -- Part 8
Combat Sequence 16: Fierce Tiger Pushes Mountain -- Part 9
Combat Sequence 16: Fierce Tiger Pushes Mountain -- Part 10
Combat Sequence 16: Fierce Tiger Pushes Mountain -- Part 11
Combat-Sequence Set 2: Fierce Tiger Speeds through
Valley -- Overview
Combat Sequence Set 3: Happy Bird Hops up
Branch -- Overview
Combat Sequence 13: Fell Tree with Roots -- Overview
The Deadly Organ-Seeking Kick -- Overview
Combat Sequence 14: Lead Horse Back to Stable -- Overview
Combat Sequence 15: Farmer Hoes Rice Field -- Overview
Combat Sequence 16: Fierce Tiger Pushes Mountain -- Overview
Sabah Shaolin 2010 -- Shaolin 11 How to Cover a Boxer Adequately -- Part 1
How to Cover a Boxer Adequately -- Part 2
How to Cover a Boxer Adequately -- Part 3
How to Cover a Boxer Adequately -- Part 4
How to Cover a Boxer Adequately -- Part 5
How to Cover a Boxer Adequately -- Part 6
How to Cover a Boxer Adequately -- Part 7
How to Cover a Boxer Adequately -- Part 8
How to Cover a Boxer Adequately -- Part 9
Great Advantage of the Bow-Arrow Stance -- Part 1
Great Advantage of the Bow-Arrow Stance -- Part 2
Great Advantage of the Bow-Arrow Stance -- Part 3
Great Advantage of the Bow-Arrow Stance -- Part 4<
Great Advantage of the Bow-Arrow Stance -- Part 5
Great Advantage of the Bow-Arrow Stance -- Part 6
Great Advantage of the Bow-Arrow Stance -- Part 7
Great Advantage of the Bow-Arrow Stance -- Part 8
Great Advantage of the Bow-Arrow Stance -- Part 9
The Tactic of Close-Chase-Strike -- Part 1
The Tactic of Close-Chase-Strike -- Part 2
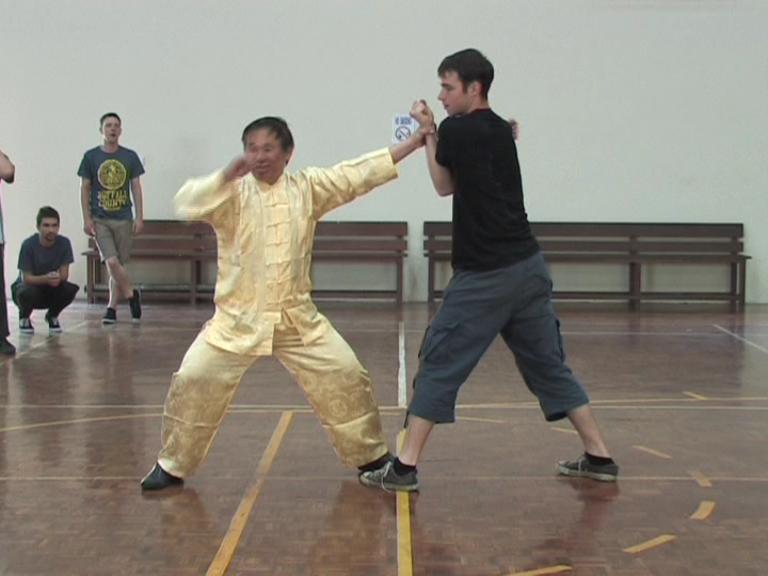 The Tactic of Close-Chase-Strike -- Part 3
The Tactic of Close-Chase-Strike -- Part 4
The Tactic of Close-Chase-Strike -- Part 5
The Tactic of Close-Chase-Strike -- Part 6
The Tactic of Close-Chase-Strike -- Part 7
The Tactic of Close-Chase-Strike -- Part 8
The Tactic of Close-Chase-Strike -- Part 9
The Tactic of Close-Chase-Strike -- Part 10
Locking Both Arms of the Opponent -- Part 1
Locking Both Arms of the Opponent -- Part 2
Locking Both Arms of the Opponent -- Part 3
Locking Both Arms of the Opponent -- Part 4
Locking Both Arms of the Opponent -- Part 5
Locking Both Arms of the Opponent -- Part 6
Locking Both Arms of the Opponent -- Part 7
Locking Both Arms of the Opponent -- Part 8
Locking Both Arms of the Opponent -- Part 9
Locking Both Arms of the Opponent -- Part 10
White Monkey Holds Brranch against Undercuts -- Part 1
White Monkey Holds Brranch against Undercuts -- Part 2
White Monkey Holds Brranch against Undercuts -- Part 3
White Monkey Holds Brranch against Undercuts -- Part 4
White Monkey Holds Brranch against Undercuts -- Part 5
White Monkey Holds Brranch against Undercuts -- Part 6
White Monkey Holds Brranch against Undercuts -- Part 7
White Monkey Holds Brranch against Undercuts -- Part 8
White Monkey Holds Brranch against Undercuts -- Part 9
White Monkey Holds Brranch against Undercuts -- Part 10
White Monkey Holds Brranch against Undercuts -- Part 11
Intercepting a Hook with Bouble Bows -- Part 1
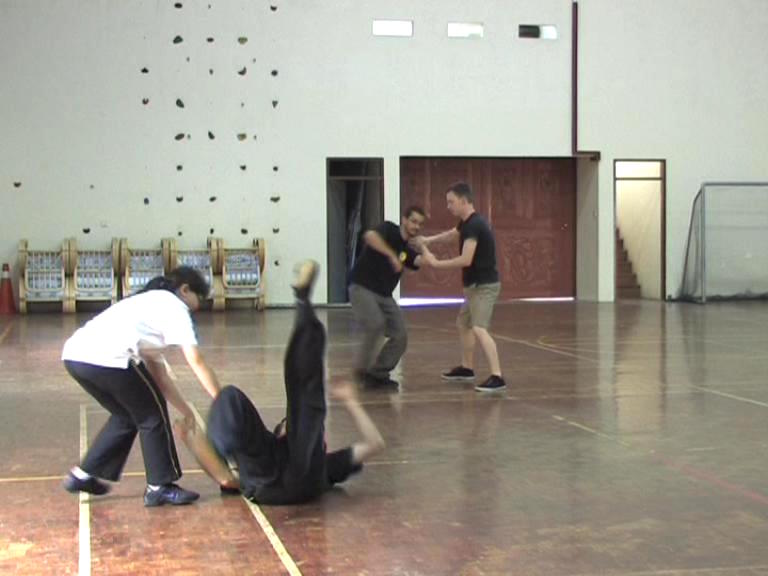 Intercepting a Hook with Bouble Bows -- Part 2
Intercepting a Hook with Bouble Bows -- Part 3
Intercepting a Hook with Bouble Bows -- Part 4
Intercepting a Hook with Bouble Bows -- Part 5
Intercepting a Hook with Bouble Bows -- Part 6
Intercepting a Hook with Bouble Bows -- Part 7
Intercepting a Hook with Bouble Bows -- Part 8
Intercepting a Hook with Bouble Bows -- Part 9
Avoid the Mistake of Conditioned but Uncessary
Moving Back -- Part 1
Avoid the Mistake of Conditioned but Uncessary
Moving Back -- Part 2
Avoid the Mistake of Conditioned but Uncessary Moving Back -- Part 3
Avoid the Mistake of Conditioned but Uncessary Moving Back -- Part 4
Avoid the Mistake of Conditioned but Uncessary Moving Back -- Part 5
Avoid the Mistake of Conditioned but Uncessary Moving Back -- Part 6
Avoid the Mistake of Conditioned but Uncessary Moving Back -- Part 7
Avoid the Mistake of Conditioned but Uncessary Moving Back -- Part 8
Avoid the Mistake of Conditioned but Uncessary Moving Back -- Part 9
How to Cover a Boxer Adequately -- Overview
Great Advantage of the Bow-Arrow Stance -- Overview
The Tactic of Close-Chase-Strike -- Overview
Locking Both Arms of the Opponent-- Overview
White Monkey Holds Brranch against Undercuts -- Overview
Intercepting a Hook with Bouble Bows -- Overview
Avoid the Mistake of Conditioned but Uncessary Moving Back -- Overview
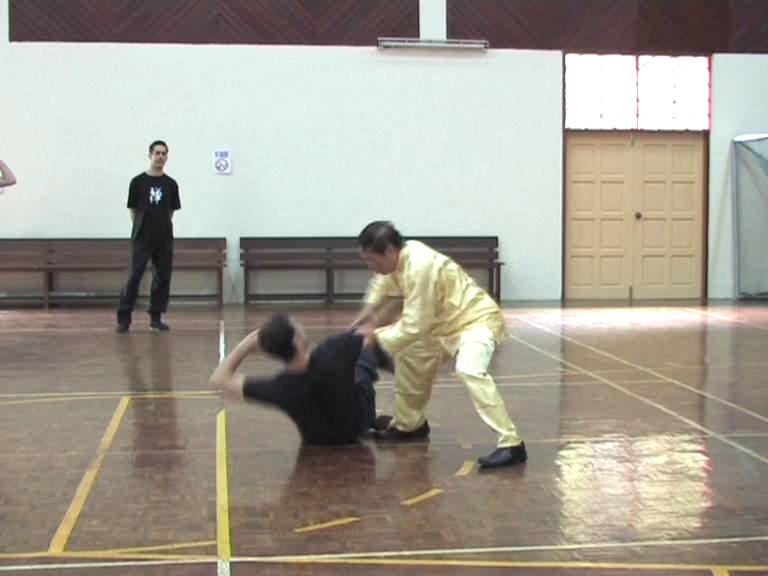 Sabah Shaolin 2010 -- Shaolin 12
Felling Kick-Boxers when they Kick -- Part 1
Sabah Shaolin 2010 -- Shaolin 12
Felling Kick-Boxers when they Kick -- Part 1Felling Kick-Boxers when they Kick -- Part 2
Felling Kick-Boxers when they Kick -- Part 3
Felling Kick-Boxers when they Kick -- Part 4
Felling Kick-Boxers when they Kick -- Part 5
Felling Kick-Boxers when they Kick -- Part 6
Felling Kick-Boxers when they Kick -- Part 7
Felling Kick-Boxers when they Kick -- Part 8
Felling Kick-Boxers when they Kick -- Part 9
The Tactic of Avoiding and Felling -- Part 1
The Tactic of Avoiding and Felling -- Part 2
The Tactic of Avoiding and Felling -- Part 3
The Tactic of Avoiding and Felling -- Part 4
The Tactic of Avoiding and Felling -- Part 5
The Tactic of Avoiding and Felling -- Part 6
The Tactic of Avoiding and Felling -- Part 7
The Tactic of Avoiding and Felling -- Part 8
Excellent Counter against Muay Thai Knee Jabs -- Part 1
Excellent Counter against Muay Thai Knee Jabs -- Part 2
Excellent Counter against Muay Thai Knee Jabs -- Part 3
Excellent Counter against Muay Thai Knee Jabs -- Part 4
Excellent Counter against Muay Thai Knee Jabs -- Part 5
Excellent Counter against Muay Thai Knee Jabs -- Part 6
Excellent Counter against Muay Thai Knee Jabs -- Part 7
Excellent Counter against Muay Thai Knee Jabs -- Part 8
Fascinating Application of Planting Willow in Front of Camp -- Part 1
Fascinating Application of Planting Willow in Front of Camp -- Part 2
Fascinating Application of Planting Willow in Front of Camp -- Part 3
Fascinating Application of Planting Willow in Front of Camp -- Part 4
Fascinating Application of Planting Willow in Front of Camp -- Part 5
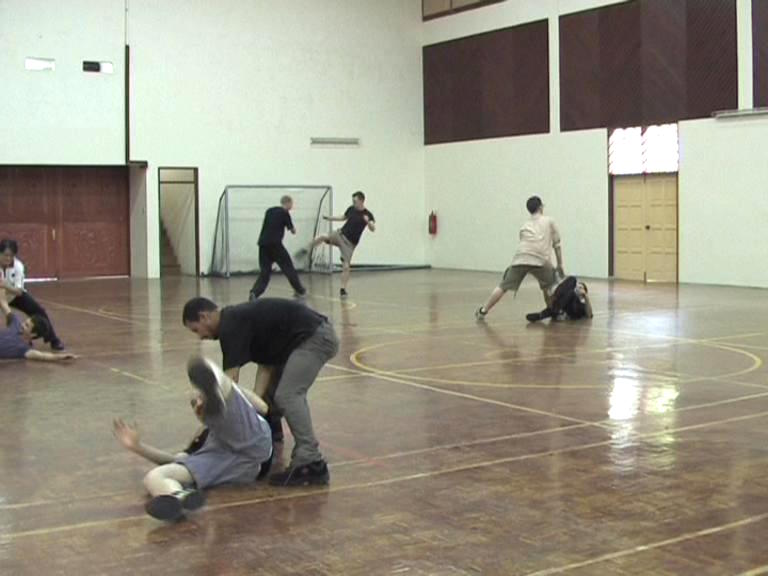 Fascinating Application of Planting Willow in
Front of Camp -- Part 6
Fascinating Application of Planting Willow in
Front of Camp -- Part 7
Fascinating Application of Planting Willow in
Front of Camp -- Part 8
Fascinating Application of Planting Willow in
Front of Camp -- Part 9
Countering Muay Thai Attacks Progressively -- Part 1
Countering Muay Thai Attacks Progressively -- Part 2
Countering Muay Thai Attacks Progressively -- Part 3
Countering Muay Thai Attacks Progressively -- Part 4
Countering Muay Thai Attacks Progressively -- Part 5
Countering Muay Thai Attacks Progressively -- Part 6
Countering Muay Thai Attacks Progressively -- Part 7
Ensure Adequate Coverage when Moving into Attack -- Part 1
Ensure Adequate Coverage when Moving into Attack -- Part 2
Ensure Adequate Coverage when Moving into Attack -- Part 3
Ensure Adequate Coverage when Moving into Attack -- Part 4
Ensure Adequate Coverage when Moving into Attack -- Part 5
Ensure Adequate Coverage when Moving into Attack -- Part 6
Ensure Adequate Coverage when Moving into Attack -- Part 7
Who Ways there's No Ground Fighting in Kungfu? -- Part 1
Who Ways there's No Ground Fighting in Kungfu? -- Part 2
Who Ways there's No Ground Fighting in Kungfu? -- Part 3
Who Ways there's No Ground Fighting in Kungfu? -- Part 4
Who Ways there's No Ground Fighting in Kungfu? -- Part 5
Who Ways there's No Ground Fighting in Kungfu? -- Part 6
Who Ways there's No Ground Fighting in Kungfu? -- Part 7
Counters against Various Pin-Downs -- Part 1
Counters against Various Pin-Downs -- Part 2
Counters against Various Pin-Downs -- Part 3
Counters against Various Pin-Downs -- Part 4
Counters against Various Pin-Downs -- Part 5
 Counters against Various Pin-Downs -- Part 6
Counters against Various Pin-Downs -- Part 7
Counters against Various Pin-Downs -- Part 8
Counters against Various Pin-Downs -- Part 9
Countring a Wrestler in the Progress of his Attack -- Part 1
Countring a Wrestler in the Progress of his Attack -- Part 2
Countring a Wrestler in the Progress of his Attack -- Part 3
Countring a Wrestler in the Progress of his Attack -- Part 4
Countring a Wrestler in the Progress of his Attack -- Part 5
Countring a Wrestler in the Progress of his Attack -- Part 6
Countring a Wrestler in the Progress of his Attack -- Part 7
Counters against the Shoot at the Initial Stage -- Part 1
Counters against the Shoot at the Initial Stage -- Part 2
Counters against the Shoot at the Initial Stage -- Part 3
Counters against the Shoot at the Initial Stage -- Part 4
Counters against the Shoot at the Initial Stage -- Part 5
Counters against the Shoot at the Initial Stage -- Part 6
Counters against the Shoot at the Initial Stage -- Part 7
Counters against the Shoot at the Initial Stage -- Part 8
Using Shaolin Kungfu in Free Sparrring -- Part 1
Using Shaolin Kungfu in Free Sparrring -- Part 2
Using Shaolin Kungfu in Free Sparrring -- Part 3
Using Shaolin Kungfu in Free Sparrring -- Part 4
Using Shaolin Kungfu in Free Sparrring -- Part 5
Using Shaolin Kungfu in Free Sparrring -- Part 6
Using Shaolin Kungfu in Free Sparrring -- Part 7
Using Shaolin Kungfu in Free Sparrring -- Part 8
Using Shaolin Kungfu in Free Sparrring -- Part 9
Using Shaolin Kungfu in Free Sparrring -- Part 10
Using Shaolin Kungfu in Free Sparrring -- Part 11
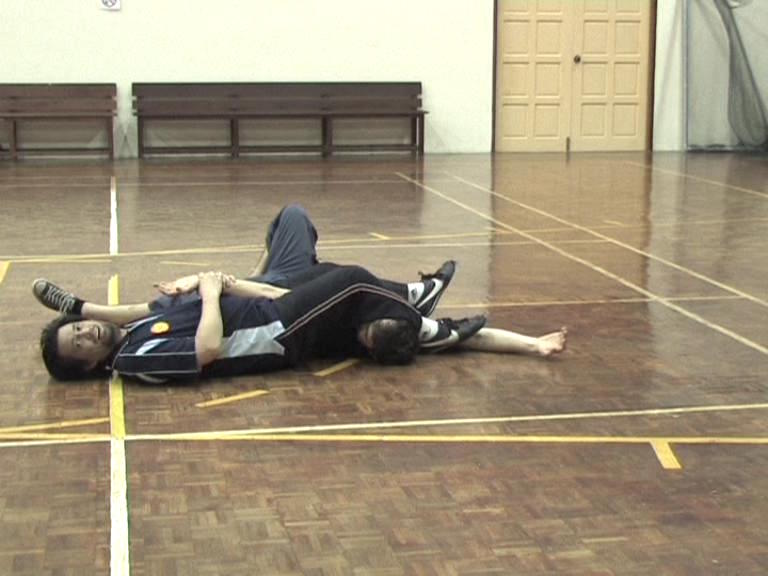 Felling Kick-Boxers when they Kick -- Overview
The Tactic of Avoiding and Felling -- Overview
Excellent Counter against Muay Thai Knee Jabs
-- Overview
Fascinating Application of Planting Willow in
Front of Camp -- Overview
Countering Muay Thai Attacks Progressively -- Overview
Ensure Adequate Coverage when Moving
into Attack -- Overview
Who Ways there's No Ground Fighting in Kungfu?
-- Overview
Counters against Various Pin-Downs -- Overview
Countering a Wrestler in the Progress of his Attack
-- Overview
Counters against the Shoot at the Initial Stage -- Overview
Using Shaolin Kungfu in Free Sparrring -- Overview
Sabah Shaolin 2010 -- Videos Sabah Intensive Shaolin Kungfu Course 2010 -- Overview
Chi Flow and Standing ZEn
Developing Internal Force and Mental Clarity
Two Crucial Stages in Stance Training
The Art nof Flexibility
Footwork is often More Important than Techniques
Stepping Forward and Goiding Forward
Agile and Stable at thje Same Time
Beig Fast without Consciously Attempting to be Fast
Turning to Diffferent Directions in Numerous Ways
Shaolin Hand Forms
The Three External Harmonies of Feet, Body and Hands
The Three Internal Harmonies of Essemce, Emnergy and Mind
Fa-Jing or Exploding Force
Minimum Force against Maximum Strength
Do Defence Direct Counter
Linking Patterrns into a Set
Moving In and Right Spacing
Developing the Skills of Counter-Striking and of Judgment
Secrets of Single Tiger Emerges from Cave
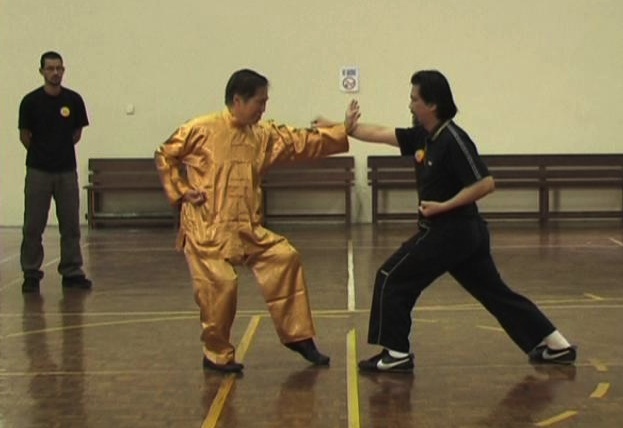 Different Responses for Attacks from different Height
The Tactic of No Defence Direct Counter
The Tactic of False-False, Real-Real
Advantage ofusing a Poise Pattern
Asking the Way
The Crucial Last Step in Moving In
Making Footwork Adjustment
Stance Training Poises to Develop Internal Force
Get the Form Correct and be Relaxed
Yin-Yang Harmony of Solidity and Agility
Half a Step back, Half a Step Forward
Going beyond the Surface of a Single Attack
Tempting Opponent to Break your Arrm!
Seventy Percent of Victory Comes from Legs
Subtle hand Movements of Shaolin Kungfu
Don't Give Free Offers to your Opponent
Lohan Asks the Way
Magic Formula of Form-Flow-Force
Importance of Last Step when Moving In
Various Modes and Steps in Moving In
Using Different Leg Modes for Tactical Advantage
Combat SEquence 1 -- Black Tiger Steals Heart
Footwork Constitutes 70% of Victory
Combat Sequences 2 and 3 -- Poisonous Snake and Precious Duck
Combat Sequence 4 -- Hang a Golden Star
Continuing from One Sequence to Another
Shaolin Wahnam Treasure -- One-Finger Shooting Zen
Employing Form-Flow-Force to Generate Internal Force
Generrating Internal Force by Performing a Kungfu Set
Combat Sequence 5 -- Fierce Tiger Speeds through Valley
 Secrets of Pressing Attacks
Combat Sequence 6 -- Dark Dragon Draws Water
Beauty of Shaolin Combat Application
Do Not Use Strength!
Five-Step Formula and Two-Step Formula
Combat Sequence 7 -- Chop the Hua Mountain
Combat Sequence 8 -- Horizontally Sweep Thousand Armies
Tactic of Pressing Attacks
Magical Formula of Addition and Subtraction
Changing Leg Modes and Bridging Gaps
One-Finger Shooting Zen and Bridging Gaps
Changing Steps and Various Leg Modes
Various Combinations of Combat Sequences
Adding and Subtracting Patterns to Confuse Opponents
Conditional Free Sparring
Following Through and Pressing Attacks
Overwhelming Opponents with Sequence Sparring
Intercepting an Opponent's Response
Secrets of Hiding Flower in the Moon
Side-Way Tiger-Tail Kick
Combat Sequence 9 -- Happy bird Hops up Branch
Combat Sequence 10 -- White Horse Prresents Hoof
How to Stop Pressing Attacks
Opening and Closing an Opponent
Combat Sequence 11 -- Yellow Bird Drinks Water
Combat Sequence 12 -- Naughty Monkey Kicks at Tree
One Pattern against All Kicks!
Conditional Free Sparring using Combat Sequences 1 to 12
Combat-Sequence Set 2 -- Fierce Tiger Speeds through Valley
Combat-Sequence Set 3 -- Happy Bird Hops up Branch
 Combat-Sequence 13 -- Fell Tree with Roots
The Deadly Organ-Seeking Kick
Combat Sequence 14 -- Lead Horse Back to Stable
Combat Sequence 15 -- Farmer Hoes Rice Field
Combat Sequence 16 -- Fierce Tiger Pushes Mountain
How to Cover a Boxer Adequately
Great Advantage of Bow-Arrrow Stance
Tactic of Close-Chase-Strike
Locking Both Arms of an Opponent
White Monkey Holds Branch against Undercuts
Intercepting Hooks with Double Bows
Avoid the Mistake of Conditioned but Unnecessary Moving Back
Felling Kick-Boxers as they Kick
Tactic of Avoiding and Felling
Excellent Counter against Muay Thai Knee Jabs
Fascinating Application of Planting Willow in Front of Camp
Countering Muay Thai Attacks Progressively
Ensure Adequate Coverage when Moving In to Attack
Who Says There is No Ground Fighting in Shaolin Kungfu?
Counters against Various Pin-Downs
Countering a Wrestler in the Process of his Attack
Counter against the Shoot at its Initial Stage
Using Shaolin Kungfu in Free Sparring
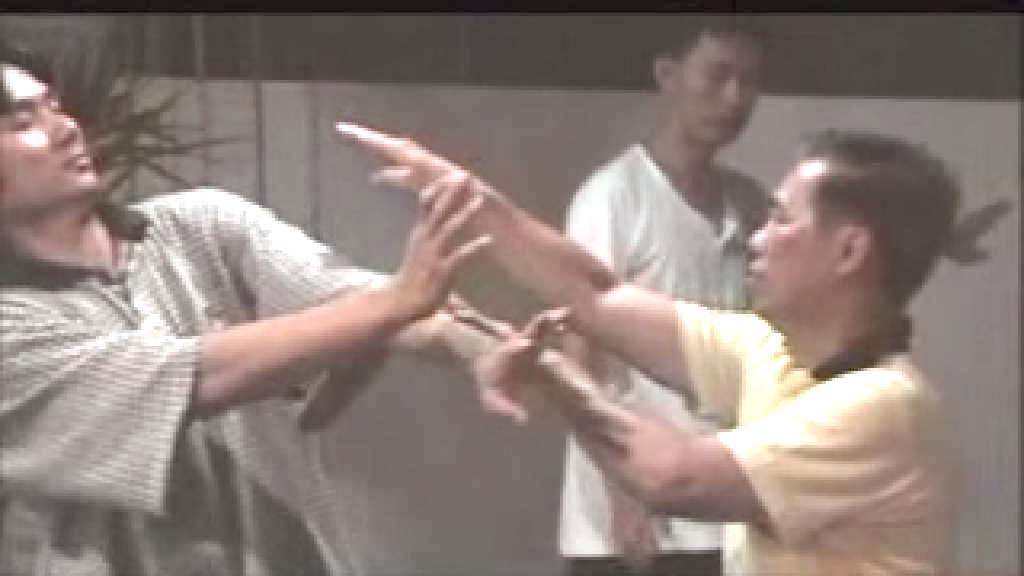 Sungai Petani Old
How did Shaolin Wahnam Practitioners Spar in
Sungai Petani Old
How did Shaolin Wahnam Practitioners Spar inthe Past? -- Part 1
How did Shaolin Wahnam Practitioners Spar in
the Past? -- Part 2
How did Shaolin Wahnam Practitioners Spar in
the Past? -- Part 3
How did Shaolin Wahnam Practitioners Spar in
the Past? -- Part 4
How did Shaolin Wahnam Practitioners Spar in the Past? -- Part 5
How did Shaolin Wahnam Practitioners Spar in the Past? -- Part 6
How did Shaolin Wahnam Practitioners Spar in the Past? -- Part 7
How did Shaolin Wahnam Practitioners Spar in the Past? -- Overview
Staff Marvelous Techniques of the Flowing Water Staff -- Part 1
Marvelous Techniques of the Flowing Water Staff -- Part 2
Marvelous Techniques of the Flowing Water Staff -- Part 3
Marvelous Techniques of the Flowing Water Staff -- Part 4
Marvelous Techniques of the Flowing Water Staff -- Part 5
Marvelous Techniques of the Flowing Water Staff -- Part 6
Marvelous Techniques of the Flowing Water Staff -- Part 7
Marvelous Techniques of the Flowing Water Staff -- Part 8
Marvelous Techniques of the Flowing Water Staff -- Part 9
Marvelous Techniques of the Flowing Water Staff -- Part 10
Marvelous Techniques of the Flowing Water Staff -- Overview
Sword in Switzerland -- Application Correct Spacing is of Utmost Importance -- Part 3
Correct Spacing is of Utmost Importance -- Part 4
Correct Spacing is of Utmost Importance -- Part 5
Correct Spacing is of Utmost Importance -- Part 6
Correct Spacing is of Utmost Importance -- Part 7
Correct Spacing is of Utmost Importance -- Part 8
Correct Spacing is of Utmost Importance -- Part 9
Correct Spacing is of Utmost Importance -- Part 10
The Deadly and the Merciful Aspects of Swordsmanship -- Part 1
The Deadly and the Merciful Aspects of Swordsmanship -- Part 2
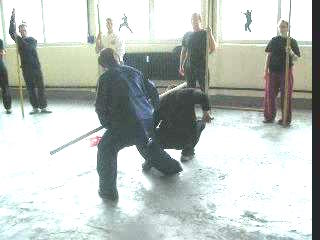 The Deadly and the Merciful Aspects of
Swordsmanship -- Part 3
The Deadly and the Merciful Aspects of
Swordsmanship -- Part 4
The Deadly and the Merciful Aspects of
Swordsmanship -- Part 5
The Deadly and the Merciful Aspects of
Swordsmanship -- Part 6
The Deadly and the Merciful Aspects of
Swordsmanship -- Part 7
The Deadly and the Merciful Aspects of Swordsmanship -- Part 8
The Deadly and the Merciful Aspects of Swordsmanship -- Part 9
The Deadly and the Merciful Aspects of Swordsmanship -- Part 10
Sword Patterns are as Combat Effective as they are Beautiful and Poetic -- Part 1
Sword Patterns are as Combat Effective as they are Beautiful and Poetic -- Part 2
Sword Patterns are as Combat Effective as they are Beautiful and Poetic -- Part 3
Sword Patterns are as Combat Effective as they are Beautiful and Poetic -- Part 4
Sword Patterns are as Combat Effective as they are Beautiful and Poetic -- Part 5
Sword Patterns are as Combat Effective as they are Beautiful and Poetic -- Part 6
Sword Patterns are as Combat Effective as they are Beautiful and Poetic -- Part 7
Sword Patterns are as Combat Effective as they are Beautiful and Poetic -- Part 8
Sword Patterns are as Combat Effective as they are Beautiful and Poetic -- Part 9
Subtleties of the Sword and the Spear -- Part 1
Subtleties of the Sword and the Spear -- Part 2
Subtleties of the Sword and the Spear -- Part 3
Subtleties of the Sword and the Spear -- Part 4
Subtleties of the Sword and the Spear -- Part 5
Subtleties of the Sword and the Spear -- Part 6
Subtleties of the Sword and the Spear -- Part 7
Subtleties of the Sword and the Spear -- Part 8
Subtleties of the Sword and the Spear -- Part 9
Kungfu, Armed or Unarmed, is Alive -- Part 1
Kungfu, Armed or Unarmed, is Alive -- Part 2
Kungfu, Armed or Unarmed, is Alive -- Part 3
Kungfu, Armed or Unarmed, is Alive -- Part 4
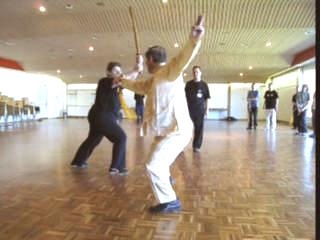 Kungfu, Armed or Unarmed, is Alive -- Part 5
Kungfu, Armed or Unarmed, is Alive -- Part 6
Kungfu, Armed or Unarmed, is Alive -- Part 7
Kungfu, Armed or Unarmed, is Alive -- Part 8
Kungfu, Armed or Unarmed, is Alive -- Part 9
Great Skills and Techniques are Needed in Using
a Sword -- Part 1
Great Skills and Techniques are Needed in Using
a Sword -- Part 2
Great Skills and Techniques are Needed in Using a Sword -- Part 3
Great Skills and Techniques are Needed in Using a Sword -- Part 4
Great Skills and Techniques are Needed in Using a Sword -- Part 5
Great Skills and Techniques are Needed in Using a Sword -- Part 6
Great Skills and Techniques are Needed in Using a Sword -- Part 7
Great Skills and Techniques are Needed in Using a Sword -- Part 8
Great Skills and Techniques are Needed in Using a Sword -- Part 9
Against Heavier as Well as Lighter Weapomn -- Part 1
Against Heavier as Well as Lighter Weapomn -- Part 2
Against Heavier as Well as Lighter Weapomn -- Part 3
Against Heavier as Well as Lighter Weapomn -- Part 4
Against Heavier as Well as Lighter Weapomn -- Part 5
Against Heavier as Well as Lighter Weapomn -- Part 6
Against Heavier as Well as Lighter Weapomn -- Part 7
Against Heavier as Well as Lighter Weapomn -- Part 8
Against Heavier as Well as Lighter Weapomn -- Part 9
The Sword was the Choice-Weapon of Kungfu-Knights -- Part 1
The Sword was the Choice-Weapon of Kungfu-Knights -- Part 2
The Sword was the Choice-Weapon of Kungfu-Knights -- Part 3
The Sword was the Choice-Weapon of Kungfu-Knights -- Part 4
The Sword was the Choice-Weapon of Kungfu-Knights -- Part 5
The Sword was the Choice-Weapon of Kungfu-Knights -- Part 6
The Sword was the Choice-Weapon of Kungfu-Knights -- Part 7
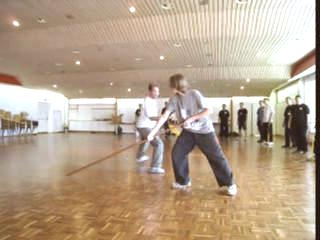 Combat Applications of Some Sophisticated Patterns -- Part 1
Combat Applications of Some Sophisticated Patterns -- Part 2
Combat Applications of Some Sophisticated Patterns -- Part 3
Combat Applications of Some Sophisticated Patterns -- Part 4
Combat Applications of Some Sophisticated Patterns -- Part 5
Combat Applications of Some Sophisticated Patterns -- Part 6
Combat Applications of Some Sophisticated Patterns -- Part 7
Combat Applications of Some Sophisticated Patterns -- Part 8
Combat Applications of Some Sophisticated Patterns -- Part 9
Combat Applications of Some Sophisticated Patterns -- Part 10
Combat Applications of Some Sophisticated Patterns -- Part 11
Combat Applications of Some Sophisticated Patterns -- Part 12
The Sword is as Beautiful to Watch as it is Combat Effctive -- Part 1
The Sword is as Beautiful to Watch as it is Combat Effctive -- Part 2
The Sword is as Beautiful to Watch as it is Combat Effctive -- Part 3
The Sword is as Beautiful to Watch as it is Combat Effctive -- Part 4
The Sword is as Beautiful to Watch as it is Combat Effctive -- Part 5
The Sword is as Beautiful to Watch as it is Combat Effctive -- Part 6
The Sword is as Beautiful to Watch as it is Combat Effctive -- Part 7
The Sword is as Beautiful to Watch as it is Combat Effctive -- Part 8
The Sword is as Beautiful to Watch as it is Combat Effctive -- Part 9
The Sword is as Beautiful to Watch as it is Combat Effctive -- Part 10
From Patterrn to Situation in Combat Application -- Part 1
From Patterrn to Situation in Combat Application -- Part 2
From Patterrn to Situation in Combat Application -- Part 3
From Patterrn to Situation in Combat Application -- Part 4
From Patterrn to Situation in Combat Application -- Part 5
From Patterrn to Situation in Combat Application -- Part 6
From Patterrn to Situation in Combat Application -- Part 7
From Patterrn to Situation in Combat Application -- Part 8
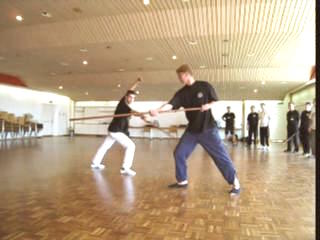 From Pattern to Situation in Combat Application
-- Part 9
Correct Spacing is of Utmost Impaortance -- Part 1
Correct Spacing is of Utmost Impaortance -- Part 2
From Pattern to Situation in Combat Application
-- Overview
Correct Spacing is of Utmost Impaortance
-- Overview
The Deadly and the Merciful Aspects of
Swordsmanship -- Overview
Sword Patterns are as Combat Effective as they
are Beautiful and Poetic -- Overview
Subtleties of the Sword and the Spear -- Overview
Kungfu, Armed or Unarmed, is Alive -- Overview
Great Skills and Techniques are Needed in Using a Sword -- Overview
Against Heavier as Well as Lighter Weapomn -- Overview
The Sword was the Choice-Weapon of Kungfu-Knights -- Overview
Combat Applications of Some Sophisticated Patterns -- Overview
The Sword is as Beautiful to Watch as it is Combat Effctive -- Overview
Sword in Switzerland -- Class Two Approaches in Learning Combat Application -- Part 1
Two Approaches in Learning Combat Application -- Part 2
Two Approaches in Learning Combat Application -- Part 3
Two Approaches in Learning Combat Application -- Part 4
Two Approaches in Learning Combat Application -- Part 5
Two Approaches in Learning Combat Application -- Part 6
Two Approaches in Learning Combat Application -- Part 7
Two Approaches in Learning Combat Application -- Part 8
Two Approaches in Learning Combat Application -- Part 9
Two Approaches in Learning Combat Application -- Part 10
 Two Approaches in Learning Combat Application
-- Overview
Working out Applications to meet Combat
Situations -- Overview
The Importance of Avoiding the Opponent's
Strength -- Overview
Against a Guan Dao and a Samurai Sword -- Overview
Agile Footwork and Picture-Perfect Form -- Overview
Flowing with the Opponent's Momentum -- Overview
Working out Applications to meet Combat Situations -- Part 1
Working out Applications to meet Combat Situations -- Part 2
Working out Applications to meet Combat Situations -- Part 3
Working out Applications to meet Combat Situations -- Part 4
Working out Applications to meet Combat Situations -- Part 5
Working out Applications to meet Combat Situations -- Part 6
Working out Applications to meet Combat Situations -- Part 7
Working out Applications to meet Combat Situations -- Part 8
Working out Applications to meet Combat Situations -- Part 9
Working out Applications to meet Combat Situations -- Part 10
The Importance of Avoiding the Opponent's Strength -- Part 1
The Importance of Avoiding the Opponent's Strength -- Part 2
The Importance of Avoiding the Opponent's Strength -- Part 3
The Importance of Avoiding the Opponent's Strength -- Part 4
The Importance of Avoiding the Opponent's Strength -- Part 5
The Importance of Avoiding the Opponent's Strength -- Part 6
The Importance of Avoiding the Opponent's Strength -- Part 7
The Importance of Avoiding the Opponent's Strength -- Part 8
Against a Guan Dao and a Samurai Sword -- Part 1
Against a Guan Dao and a Samurai Sword -- Part 2
Against a Guan Dao and a Samurai Sword -- Part 3
Against a Guan Dao and a Samurai Sword -- Part 4
Against a Guan Dao and a Samurai Sword -- Part 5
Against a Guan Dao and a Samurai Sword -- Part 6
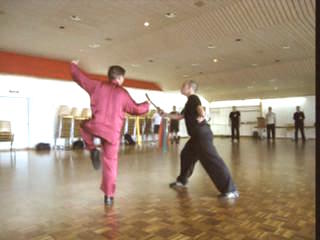 Against a Guan Dao and a Samurai Sword -- Part 7
Against a Guan Dao and a Samurai Sword -- Part 8
Against a Guan Dao and a Samurai Sword -- Part 9
Agile Footwork and Picture-Perfect Form -- Part 1
Agile Footwork and Picture-Perfect Form -- Part 2
Agile Footwork and Picture-Perfect Form -- Part 3
Agile Footwork and Picture-Perfect Form -- Part 4
Agile Footwork and Picture-Perfect Form -- Part 5
Agile Footwork and Picture-Perfect Form -- Part 6
Flowing with the Opponent Momentum -- Part 1
Flowing with the Opponent Momentum -- Part 2
Flowing with the Opponent Momentum -- Part 3
Flowing with the Opponent Momentum -- Part 4
Flowing with the Opponent Momentum -- Part 7
Flowing with the Opponent Momentum -- Part 5
Flowing with the Opponent Momentum -- Part 6
Sword in Switzerland -- Set Traveling Dragon Sword and its Application -- Overview
Learning the Traveling Dragon Sword Set: Sequences 1 to 5 -- Part 1
Learning the Traveling Dragon Sword Set: Sequences 1 to 5 -- Part 2
Learning the Traveling Dragon Sword Set: Sequences 1 to 5 -- Part 3
Learning the Traveling Dragon Sword Set: Sequences 1 to 5 -- Part 4
Learning the Traveling Dragon Sword Set: Sequences 1 to 5 -- Part 5
Learning the Traveling Dragon Sword Set: Sequences 1 to 5 -- Part 6
Learning the Traveling Dragon Sword Set: Sequences 5 to 8 -- Part 1
Learning the Traveling Dragon Sword Set: Sequences 5 to 8 -- Part 2
Learning the Traveling Dragon Sword Set: Sequences 5 to 8 -- Part 3
Learning the Traveling Dragon Sword Set: Sequences 5 to 8 -- Part 4
Learning the Traveling Dragon Sword Set: Sequences 5 to 8 -- Part 5
Learning the Traveling Dragon Sword Set: Sequences 9 to 12 -- Part 1
Learning the Traveling Dragon Sword Set: Sequences 9 to 12 -- Part 2
Learning the Traveling Dragon Sword Set: Sequences 9 to 12 -- Part 3
Learning the Traveling Dragon Sword Set: Sequences 9 to 12 -- Part 4
Learning the Traveling Dragon Sword Set: Sequences 9 to 12 -- Part 5
How to Execute the Signature Sword Technique Correctly -- Overview
Don't Use a Sword like a Sabre -- Overview
Learning the Traveling Dragon Sword Set: Sequences 1 to 5 -- Overview
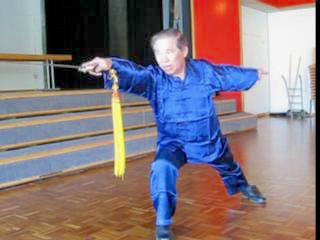 Learning the Traveling Dragon Sword Set: Sequences 5
to 8 -- Overview
Learning the Traveling Dragon Sword Set: Sequences 9
to 12 -- Overview
How to Execute the Signature Sword Technique
Correctly -- Part 1
How to Execute the Signature Sword Technique
Correctly -- Part 2
How to Execute the Signature Sword Technique
Correctly -- Part 3
How to Execute the Signature Sword Technique
Correctly -- Part 4
How to Execute the Signature Sword Technique Correctly -- Part 5
How to Execute the Signature Sword Technique Correctly -- Part 6
How to Execute the Signature Sword Technique Correctly -- Part 7
How to Execute the Signature Sword Technique Correctly -- Part 8
Don't Use a Sword like a Sabre -- Part 1
Don't Use a Sword like a Sabre -- Part 2
Don't Use a Sword like a Sabre -- Part 3
Don't Use a Sword like a Sabre -- Part 4
Don't Use a Sword like a Sabre -- Part 5
Don't Use a Sword like a Sabre -- Part 6
Sword in Switzerland -- Youtube Videos of Traveing Dragon Sword -- Overview
How to Execute the Signature Sword Technique Correctly
Don't Use a Sword like a Sabre
Learning the Traveling Dragon Sword -- Sequences 1 to 5
Learning the Traveling Dragon Sword -- Sequences 5 to 8
Learning the Traveling Dragon Sword -- Sequences 9 to 12
Two Approaches to Learning Combat Application
Working Out Applications to Meet Combat Situations
Importance of Avoiding Opponent's Strength
Against Guan Dao and Samurai Sword
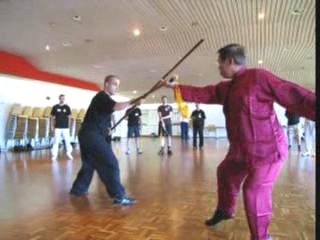 Agile Footwork and Picture-Perfect Form
Flowing with Opponent's Movement
From Pattern to Situation in Swords Combat
Correct Spacing is of Utmost Importance
The Deadly and the Merciful Aspects of Swordsmanship
Sword patterns are as Combat Effective as they are
Beautiful and Poetic
Subtlties of the Sword and the Spear
Kungfu, Arrmed or Unarmed, is Alive
Great Skills and Techniques are Required in Using a Sword
The Sword against Heavier as well as Light Weapons
The Sword was the Choice Weapon of Kungfu Knights
Combat Applications of Sophisticated Patterns
The sword is as Beautiful to Watch as it is Combat Effective
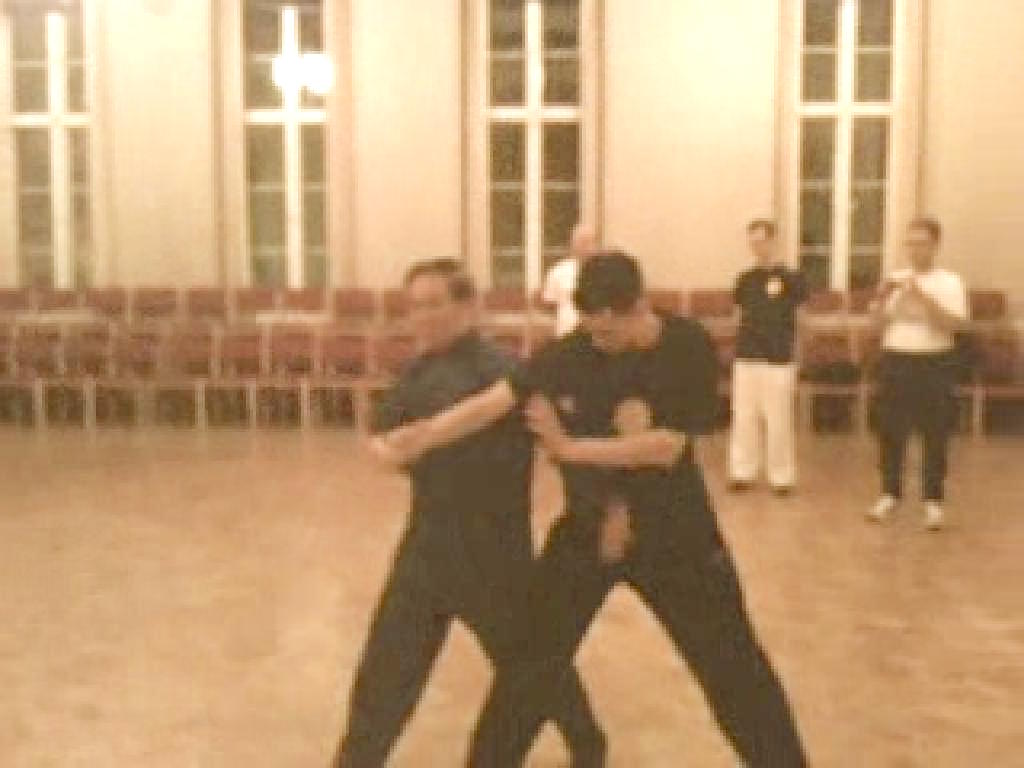 Taming-Tiger
Black Tiger Guards Door
Taming-Tiger
Black Tiger Guards DoorRotation of Waist
Breaking Elbow Gripping Groin
Continuous Cannons
Lift Pot Offer Wine
Top, Middle, Bottom
Reverse Hanging of Golden Lotus
Hang a Golden Star at a Corner
Glimpses of Combat Applications from
Taming-Tiger Set -- Overview
Taming-Tiger Combination Set
Taming-Tiger Combination Set -- Part 1
Taming-Tiger Combination Set -- Part 2
Taming-Tiger against Other Martial Arts -- Part 1
Taming-Tiger against Other Martial Arts -- Part 2
Taming-Tiger against Other Martial Arts -- Part 3
Taming-Tiger against Other Martial Arts -- Part 4
Taming-Tiger against Other Martial Arts -- Part 5
Taming-Tiger against Other Martial Arts -- Part 6
Taming-Tiger against Other Martial Arts -- Part 7
Taming-Tiger against Other Martial Arts -- Part 8
Taming-Tiger against Other Martial Arts -- Part 9
Taming-Tiger against Other Martial Arts -- Part 10
Taming-Tiger against Other Martial Arts -- Part 11
Taming-Tiger against Other Martial Arts -- Part 12
Taming-Tiger against Other Martial Arts -- Part 13
Taming-Tiger against Other Martial Arts -- Part 14
Taming-Tiger against Other Martial Arts -- Part 15
Taming-Tiger against Other Martial Arts -- Part 16
Taming-Tiger against Other Martial Arts -- Part 17
Taming-Tiger against Other Martial Arts -- Part 18
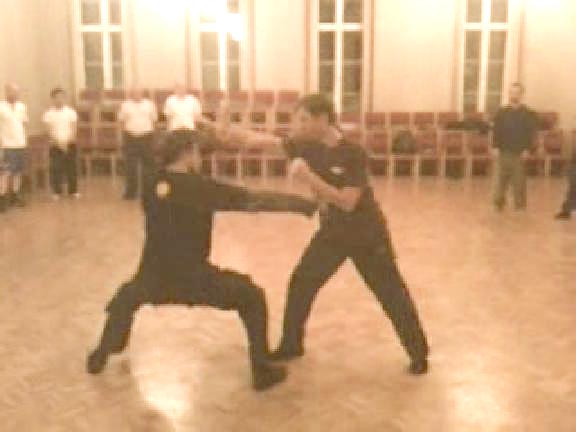 Taming-Tiger at First Winter Camp 2010 -- Overview
Shaolin Taming-Tiger Set -- Part 1
Shaolin Taming-Tiger Set -- Part 2
Shaolin Taming-Tiger Set -- Part 3
Shaolin Taming-Tiger Set -- Part 4
Shaolin Taming-Tiger Set -- Part 5
Shaolin Taming-Tiger Set -- Part 6
Shaolin Taming-Tiger Set -- Part 7
Shaolin Taming-Tiger Set -- Part 8
Shaolin Taming-Tiger Set -- Part 9
Shaolin Taming-Tiger Set -- Part 10
Shaolin Taming-Tiger Set -- Part 11
Shaolin Taming-Tiger Set -- Part 12
Triple Stretch -- Triple Stretch 01 Triple Stretch -- Overview
Triple-Stretch Private Page 1
Triple-Stretch Private Page 2
Hoong Ka Tripe Stretch Set in Videos
Triple-Stretch Set in the Woods -- Part 1
Triple-Stretch Set in the Woods -- Part 2
Triple-Stretch Set in the Woods -- Part 3
Triple-Stretch Set in the Woods -- Part 4
Triple-Stretch Set in the Woods -- Part 5
Triple-Stretch Set in the Woods -- Part 6
Triple Stretch -- Triple Stretch 02 Picture Series of Triple Stretch Set
Picture Series of Triple Stretch Set
 Triple Stretch -- Triple Stretch 03
Picture Series of Triple Stretch Set
Triple Stretch -- Triple Stretch 03
Picture Series of Triple Stretch SetHoong Ka Tripe Stretch Set in Videos
Triple-Stretch Set by the Fountain -- Part 1
Triple-Stretch Set by the Fountain -- Part 2
Triple-Stretch Set by the Fountain -- Part 3
Triple-Stretch Set by the Fountain -- Part 4
Triple-Stretch Set by the Fountain -- Part 5
Triple-Stretch Set by the Fountain -- Part 6
Shaolin Triple Stretch Set by Sifu Leo
Triple Stretch -- UK 01 Triple Stretch at UK Summer Camp 2010 -- Overview
Developing Internal Force with Triple Stretch -- Part 1
Developing Internal Force with Triple Stretch -- Part 2
Developing Internal Force with Triple Stretch -- Part 3
Developing Internal Force with Triple Stretch -- Part 4
Developing Internal Force with Triple Stretch -- Part 5
Developing Internal Force with Triple Stretch -- Part 6
Developing Internal Force with Triple Stretch -- Part 7
Developing Internal Force with Triple Stretch -- Part 8
Developing Internal Force with Triple Stretch -- Part 9
The Essence is in Chi Flow -- Part 1
The Essence is in Chi Flow -- Part 2
The Essence is in Chi Flow -- Part 3
The Essence is in Chi Flow -- Part 4
The Essence is in Chi Flow -- Part 5
The Essence is in Chi Flow -- Part 6
The Essence is in Chi Flow -- Part 7
The Essence is in Chi Flow -- Part 8
The Essence is in Chi Flow -- Part 9
The Essence is in Chi Flow -- Part 10
 The Essence is in Chi Flow -- Part 11
Converting Energy Flow into Internal Force -- Part 1
Converting Energy Flow into Internal Force -- Part 2
Converting Energy Flow into Internal Force -- Part 3
Converting Energy Flow into Internal Force -- Part 4
Converting Energy Flow into Internal Force -- Part 5
Converting Energy Flow into Internal Force -- Part 6
Converting Energy Flow into Internal Force -- Part 7
Converting Energy Flow into Internal Force -- Part 8
Converting Energy Flow into Internal Force -- Part 9
Converting Energy Flow into Internal Force -- Part 10
Converting Energy Flow into Internal Force -- Part 11
Converting Energy Flow into Internal Force -- Part 12
Converting Energy Flow into Internal Force -- Part 13
Discovering the Secret of the Past Masters -- Part 1
Discovering the Secret of the Past Masters -- Part 2
Discovering the Secret of the Past Masters -- Part 3
Discovering the Secret of the Past Masters -- Part 4
Discovering the Secret of the Past Masters -- Part 5
Discovering the Secret of the Past Masters -- Part 6
Discovering the Secret of the Past Masters -- Part 7
Discovering the Secret of the Past Masters -- Part 8
Discovering the Secret of the Past Masters -- Part 9
Discovering the Secret of the Past Masters -- Part 10
Discovering the Secret of the Past Masters -- Part 11
Discovering the Secret of the Past Masters -- Part 12
Discovering the Secret of the Past Masters -- Part 13
Transforming Qi to Jing -- Part 1
Transforming Qi to Jing -- Part 2
Transforming Qi to Jing -- Part 3
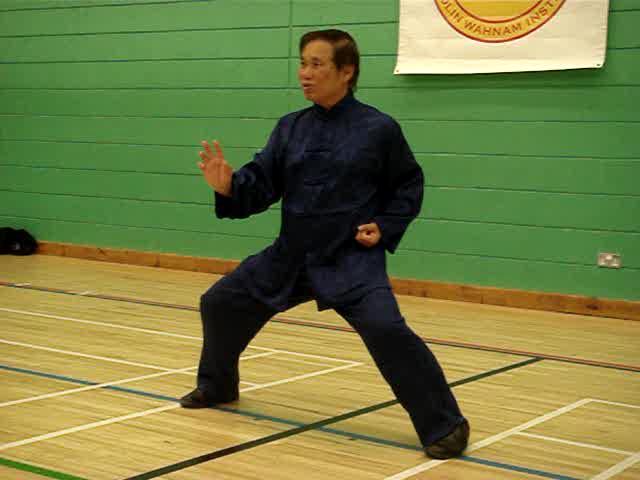 Transforming Qi to Jing -- Part 4
Transforming Qi to Jing -- Part 5
Transforming Qi to Jing -- Part 6
Transforming Qi to Jing -- Part 7
Transforming Qi to Jing -- Part 8
Transforming Qi to Jing -- Part 9
Transforming Qi to Jing -- Part 10
Transforming Qi to Jing -- Part 11
Transforming Qi to Jing -- Part 12
Transforming Qi to Jing -- Part 13
Transforming Qi to Jing -- Part 14
Pinnacle of Kungfu Set Development -- Part 1
Pinnacle of Kungfu Set Development -- Part 2
Pinnacle of Kungfu Set Development -- Part 3
Pinnacle of Kungfu Set Development -- Part 4
Pinnacle of Kungfu Set Development -- Part 5
Pinnacle of Kungfu Set Development -- Part 6
Pinnacle of Kungfu Set Development -- Part 7
Pinnacle of Kungfu Set Development -- Part 8
Pinnacle of Kungfu Set Development -- Part 9
Pinnacle of Kungfu Set Development -- Part 10
Pinnacle of Kungfu Set Development -- Part 11
Developing Internal Force with Triple Stretch -- Overview
The Essence is in Chi Flow -- Overview
Converting Energy Flow into Internal Force -- Overview
Discovering the Secret of the Past Masters -- Overview
Transforming Qi to Jing -- Overview
Pinnacle of Kungfu Set Developmen -- Overview
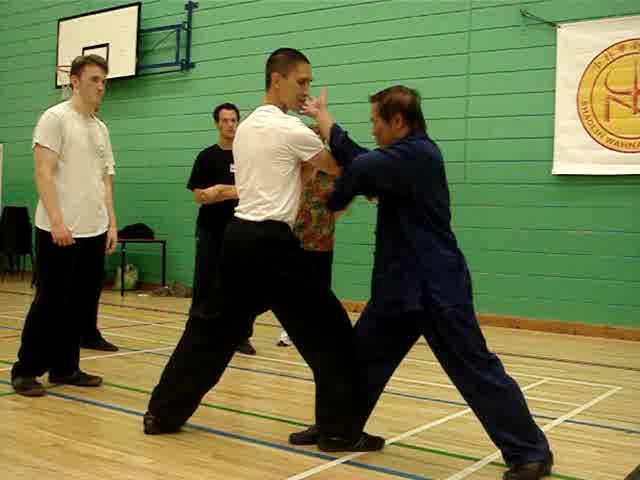 Triple Stretch -- UK 02
Ta Chong or Force Training on Stance -- Part 1
Triple Stretch -- UK 02
Ta Chong or Force Training on Stance -- Part 1Ta Chong or Force Training on Stance -- Part 2
Ta Chong or Force Training on Stance -- Part 3
Ta Chong or Force Training on Stance -- Part 4
Ta Chong or Force Training on Stance -- Part 5
Ta Chong or Force Training on Stance -- Part 6
Ta Chong or Force Training on Stance -- Part 7
Ta Chong or Force Training on Stance -- Part 8
Ta Chong or Force Training on Stance -- Part 9
Ta Chong or Force Training on Stance -- Part 10
Shaolin Kungfu is Not just Decorative -- Part 1
Shaolin Kungfu is Not just Decorative -- Part 2
Shaolin Kungfu is Not just Decorative -- Part 3
Shaolin Kungfu is Not just Decorative -- Part 4
Shaolin Kungfu is Not just Decorative -- Part 5
Shaolin Kungfu is Not just Decorative -- Part 6
Shaolin Kungfu is Not just Decorative -- Part 7
Shaolin Kungfu is Not just Decorative -- Part 8
More Sophisticated Combat Applications -- Part 1
More Sophisticated Combat Applications -- Part 2
More Sophisticated Combat Applications -- Part 3
More Sophisticated Combat Applications -- Part 4
More Sophisticated Combat Applications -- Part 5
More Sophisticated Combat Applications -- Part 6
More Sophisticated Combat Applications -- Part 7
Lin Chip or Connection -- Part 1
Lin Chip or Connection -- Part 2
Lin Chip or Connection -- Part 3
Lin Chip or Connection -- Part 4
Lin Chip or Connection -- Part 5
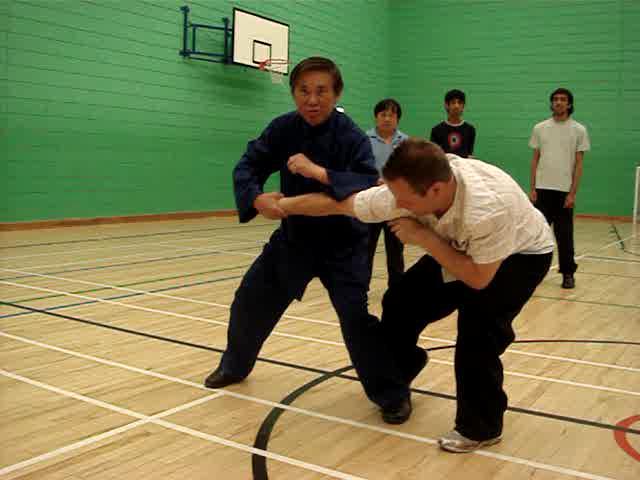 Lin Chip or Connection -- Part 6
Lin Chip or Connection -- Part 7
Lin Chip or Connection -- Part 8
Ta Sei Moon or Striking Four Gates -- Part 1
Ta Sei Moon or Striking Four Gates -- Part 2
Ta Sei Moon or Striking Four Gates -- Part 3
Ta Sei Moon or Striking Four Gates -- Part 4
Ta Sei Moon or Striking Four Gates -- Part 5
Ta Sei Moon or Striking Four Gates -- Part 6
Ta Sei Moon or Striking Four Gates -- Part 7
Ta Sei Moon or Striking Four Gates -- Part 8
Ta Sei Moon or Striking Four Gates -- Part 9
An Always-Winning Sequence -- Part 1
An Always-Winning Sequence -- Part 2
An Always-Winning Sequence -- Part 3
An Always-Winning Sequence -- Part 4
An Always-Winning Sequence -- Part 5
An Always-Winning Sequence -- Part 6
An Always-Winning Sequence -- Part 7
An Always-Winning Sequence -- Part 8
Uncle Righteousness' Winning Sequence -- Part 1
Uncle Righteousness' Winning Sequence -- Part 2
Uncle Righteousness' Winning Sequence -- Part 3
Uncle Righteousness' Winning Sequence -- Part 4
Uncle Righteousness' Winning Sequence -- Part 5
Uncle Righteousness' Winning Sequence -- Part 6
Uncle Righteousness' Winning Sequence -- Part 7
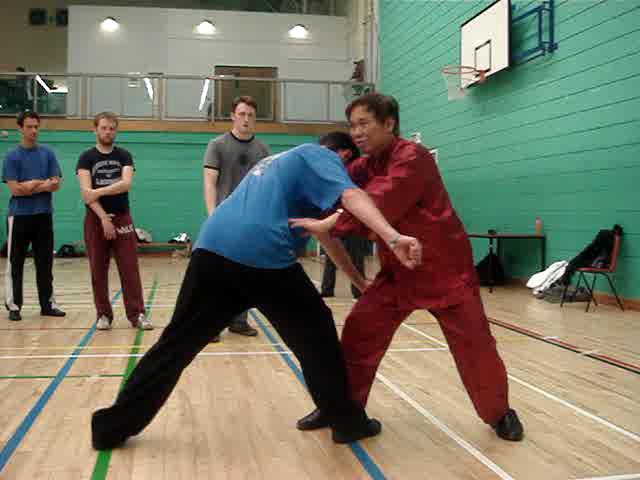 Ta Chong or Force Training on Stance -- Overview
Shaolin Kungfu is Not just Decorative -- Overview
More Sophisticated Combat Applications -- Overview
Lin Chip or Connection -- Overview
Ta Sei Moon or Striking Four Gates -- Overview
An Always-Winning Sequence -- Overview
Uncle Righteousness' Winning Sequence -- Overview
Triple Stretch -- UK 03 Force Training and Combat Sequences -- Part 4
Force Training and Combat Sequences -- Part 5
Force Training and Combat Sequences -- Part 6
Force Training and Combat Sequences -- Part 7
Force Training and Combat Sequences -- Part 8
Secrets of Striking Four Gates -- Part 1
Secrets of Striking Four Gates -- Part 2
Secrets of Striking Four Gates -- Part 3
Secrets of Striking Four Gates -- Part 4
Secrets of Striking Four Gates -- Part 5
Secrets of Striking Four Gates -- Part 6
Secrets of Striking Four Gates -- Part 7
Secrets of Striking Four Gates -- Part 8
Secrets of Striking Four Gates -- Part 9
Secrets of Striking Four Gates -- Part 10
Secrets of Striking Four Gates -- Part 11
Secrets of Striking Four Gates -- Part 12
Picture-Perfect Form and Smooth Flow -- Part 1
Picture-Perfect Form and Smooth Flow -- Part 2
Picture-Perfect Form and Smooth Flow -- Part 3
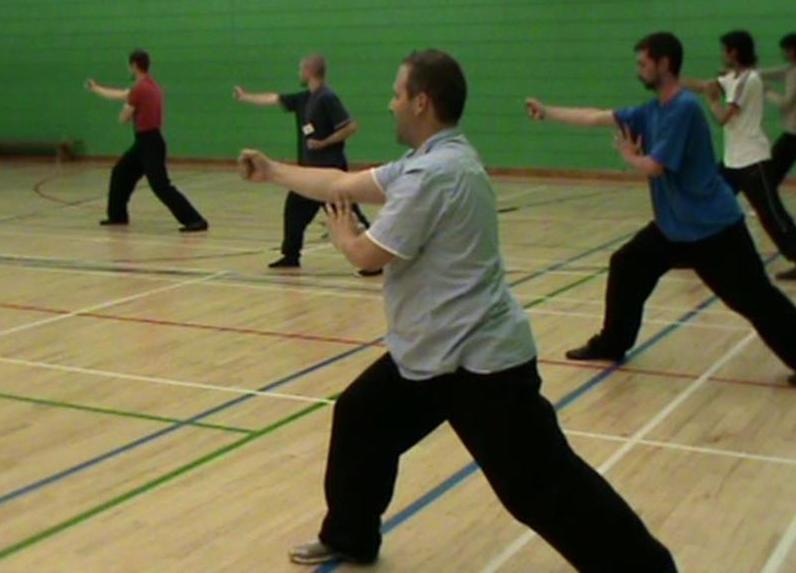 Picture-Perfect Form and Smooth Flow -- Part 4
Picture-Perfect Form and Smooth Flow -- Part 5
Picture-Perfect Form and Smooth Flow -- Part 6
Picture-Perfect Form and Smooth Flow -- Part 7
Picture-Perfect Form and Smooth Flow -- Part 8
Form-Force-Flow and Form-Flow-Force -- Part 1
Form-Force-Flow and Form-Flow-Force -- Part 2
Form-Force-Flow and Form-Flow-Force -- Part 3
Form-Force-Flow and Form-Flow-Force -- Part 4
Form-Force-Flow and Form-Flow-Force -- Part 5
Form-Force-Flow and Form-Flow-Force -- Part 6
Form-Force-Flow and Form-Flow-Force -- Part 7
Form-Force-Flow and Form-Flow-Force -- Part 8
Form-Force-Flow and Form-Flow-Force -- Part 9
Form-Force-Flow and Form-Flow-Force -- Part 10
Form-Force-Flow and Form-Flow-Force -- Part 11
Force Training and Combbat Sequences -- Part 1
Force Training and Combbat Sequences -- Part 2
Force Training and Combbat Sequences -- Part 3
Practicing the Triple-Stretch Set -- Part 1
Practicing the Triple-Stretch Set -- Part 2
Practicing the Triple-Stretch Set -- Part 3
Practicing the Triple-Stretch Set -- Part 4
Practicing the Triple-Stretch Set -- Part 5
Practicing the Triple-Stretch Set -- Part 6
Practicing the Triple-Stretch Set -- Part 7
Practicing the Triple-Stretch Set -- Part 8
Skyward Cannon Punch against Differnt Attacks -- Part 1
Skyward Cannon Punch against Differnt Attacks -- Part 2
Skyward Cannon Punch against Differnt Attacks -- Part 3
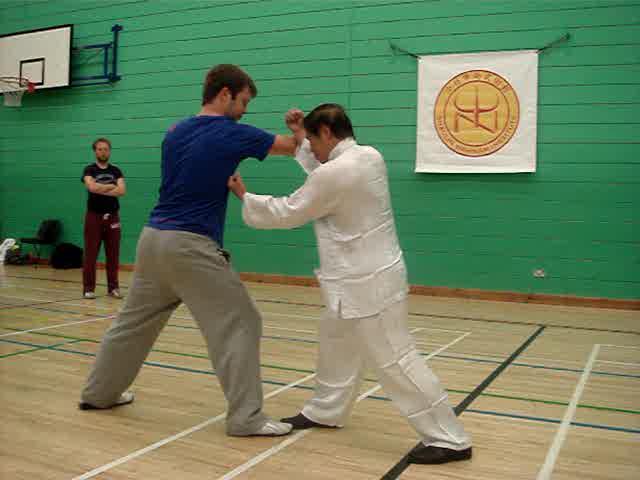 Skyward Cannon Punch against Differnt Attacks -- Part 4
Skyward Cannon Punch against Differnt Attacks -- Part 5
Skyward Cannon Punch against Differnt Attacks -- Part 6
Skyward Cannon Punch against Differnt Attacks -- Part 7
Skyward Cannon Punch against Differnt Attacks -- Part 8
Can Greeting-Pattern be Used for Combat? -- Part 1
Can Greeting-Pattern be Used for Combat? -- Part 2
Can Greeting-Pattern be Used for Combat? -- Part 3
Can Greeting-Pattern be Used for Combat? -- Part 4
Can Greeting-Pattern be Used for Combat? -- Part 5
Can Greeting-Pattern be Used for Combat? -- Part 6
Can Greeting-Pattern be Used for Combat? -- Part 7
Can Greeting-Pattern be Used for Combat? -- Part 8
Can Greeting-Pattern be Used for Combat? -- Part 9
Applications of Scholar Presents Greeting -- Part 1
Applications of Scholar Presents Greeting -- Part 2
Applications of Scholar Presents Greeting -- Part 3
Applications of Scholar Presents Greeting -- Part 4
Applications of Scholar Presents Greeting -- Part 5
Applications of Scholar Presents Greeting -- Part 6
Applications of Scholar Presents Greeting -- Part 7
Applications of Scholar Presents Greeting -- Part 8
Applications of Scholar Presents Greeting -- Part 9
Applications of Scholar Presents Greeting -- Part 10
Flaping Wings and Planting Flowers -- Part 1
Flaping Wings and Planting Flowers -- Part 2
Flaping Wings and Planting Flowers -- Part 3
Flaping Wings and Planting Flowers -- Part 4
Flaping Wings and Planting Flowers -- Part 5
Flaping Wings and Planting Flowers -- Part 6
 Flaping Wings and Planting Flowers -- Part 7
Flaping Wings and Planting Flowers -- Part 8
Flaping Wings and Planting Flowers -- Part 9
Flaping Wings and Planting Flowers -- Part 10
Some Chin-Na Attacks and Counters -- Part 1
Some Chin-Na Attacks and Counters -- Part 2
Some Chin-Na Attacks and Counters -- Part 3
Some Chin-Na Attacks and Counters -- Part 4
Some Chin-Na Attacks and Counters -- Part 5
Some Chin-Na Attacks and Counters -- Part 6
Some Chin-Na Attacks and Counters -- Part 7
Some Chin-Na Attacks and Counters -- Part 8
Secrets of Striking Four Gates -- Overview
Picture-Perfect Form and Smooth Flow -- Overview
Form-Force-Flow and Form-Flow-Force -- Overview
Force Training and Combat Sequences -- Overview
Practicing the Triple-Stretch Set -- Overview
Skyward Cannon Punch against Differnt Attacks -- Overview
Can Greeting-Pattern be Used for Combat? -- Overview
Applications of Scholar Presents Greeting -- Overview
Flaping Wings and Planting Flowers -- Overview
Some Chin-Na Attacks and Counters -- Overview
Triple Stretch -- UK 04 Planting Flowers for Internal Force and Combat -- Part 1
Planting Flowers for Internal Force and Combat -- Part 2
Planting Flowers for Internal Force and Combat -- Part 3
Planting Flowers for Internal Force and Combat -- Part 4
Planting Flowers for Internal Force and Combat -- Part 5
Planting Flowers for Internal Force and Combat -- Part 6
Planting Flowers for Internal Force and Combat -- Part 7
Planting Flowers for Internal Force and Combat -- Part 8
Planting Flowers for Internal Force and Combat -- Part 9
Effective Small Movements in Combat -- Part 1
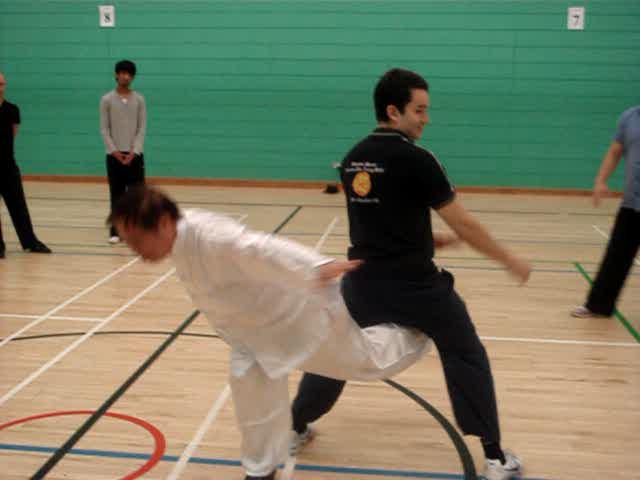 Effective Small Movements in Combat -- Part 2
Effective Small Movements in Combat -- Part 3
Effective Small Movements in Combat -- Part 4
Effective Small Movements in Combat -- Part 5
Effective Small Movements in Combat -- Part 6
Effective Small Movements in Combat -- Part 7
Effective Small Movements in Combat -- Part 8
Effective Small Movements in Combat -- Part 9
Innocent-Looking Patterns can be Deadly -- Part 1
Innocent-Looking Patterns can be Deadly -- Part 2
Innocent-Looking Patterns can be Deadly -- Part 3
Innocent-Looking Patterns can be Deadly -- Part 4
Innocent-Looking Patterns can be Deadly -- Part 5
Innocent-Looking Patterns can be Deadly -- Part 6
Innocent-Looking Patterns can be Deadly -- Part 7
Innocent-Looking Patterns can be Deadly -- Part 8
Innocent-Looking Patterns can be Deadly -- Part 9
Versatility of Monkey Pluck Fruit -- Part 1
Versatility of Monkey Pluck Fruit -- Part 2
Versatility of Monkey Pluck Fruit -- Part 3
Versatility of Monkey Pluck Fruit -- Part 4
Versatility of Monkey Pluck Fruit -- Part 5
Versatility of Monkey Pluck Fruit -- Part 6
Versatility of Monkey Pluck Fruit -- Part 7
Versatility of Monkey Pluck Fruit -- Part 8
Versatility of Monkey Pluck Fruit -- Part 9
Versatility of Monkey Pluck Fruit -- Part 10
Versatility of Monkey Pluck Fruit -- Part 11
Scissor-Hands in Iron Fan Shuts Door -- Part 1
Scissor-Hands in Iron Fan Shuts Door -- Part 2
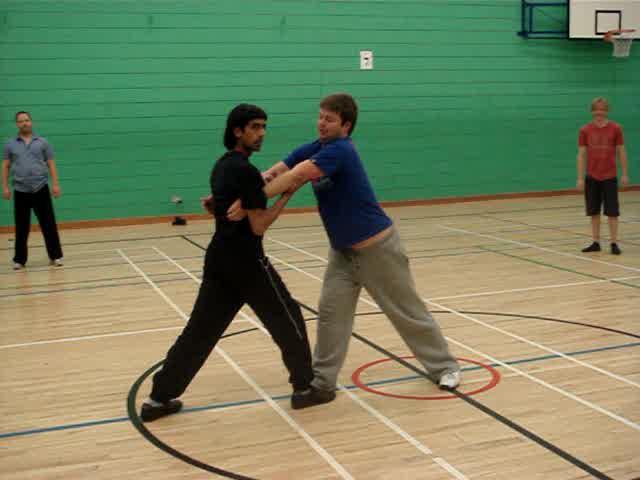 Scissor-Hands in Iron Fan Shuts Door -- Part 3
Scissor-Hands in Iron Fan Shuts Door -- Part 4
Scissor-Hands in Iron Fan Shuts Door -- Part 5
Scissor-Hands in Iron Fan Shuts Door -- Part 6
Scissor-Hands in Iron Fan Shuts Door -- Part 7
Scissor-Hands in Iron Fan Shuts Door -- Part 8
Tigers, Phoenix, Monkeys, Praying Mantis and
Dragonflies -- Part 1
Tigers, Phoenix, Monkeys, Praying Mantis and
Dragonflies -- Part 2
Tigers, Phoenix, Monkeys, Praying Mantis and
Dragonflies -- Part 3
Tigers, Phoenix, Monkeys, Praying Mantis and Dragonflies -- Part 4
Tigers, Phoenix, Monkeys, Praying Mantis and Dragonflies -- Part 5
Tigers, Phoenix, Monkeys, Praying Mantis and Dragonflies -- Part 6
Tigers, Phoenix, Monkeys, Praying Mantis and Dragonflies -- Part 7
Tigers, Phoenix, Monkeys, Praying Mantis and Dragonflies -- Part 8
Tigers, Phoenix, Monkeys, Praying Mantis and Dragonflies -- Part 9
Tigers, Phoenix, Monkeys, Praying Mantis and Dragonflies -- Part 10
Tigers, Phoenix, Monkeys, Praying Mantis and Dragonflies -- Part 11
Big Bird and Sophisticated Hand Techniques -- Part 1
Big Bird and Sophisticated Hand Techniques -- Part 2
Big Bird and Sophisticated Hand Techniques -- Part 3
Big Bird and Sophisticated Hand Techniques -- Part 4
Big Bird and Sophisticated Hand Techniques -- Part 5
Big Bird and Sophisticated Hand Techniques -- Part 6
Big Bird and Sophisticated Hand Techniques -- Part 7
Big Bird and Sophisticated Hand Techniques -- Part 8
Big Bird and Sophisticated Hand Techniques -- Part 9
Big Bird and Sophisticated Hand Techniques -- Part 10
Big Bird and Sophisticated Hand Techniques -- Part 11
Big Bird and Sophisticated Hand Techniques -- Part 12
Locking your Opponent to Strike Him -- Part 1
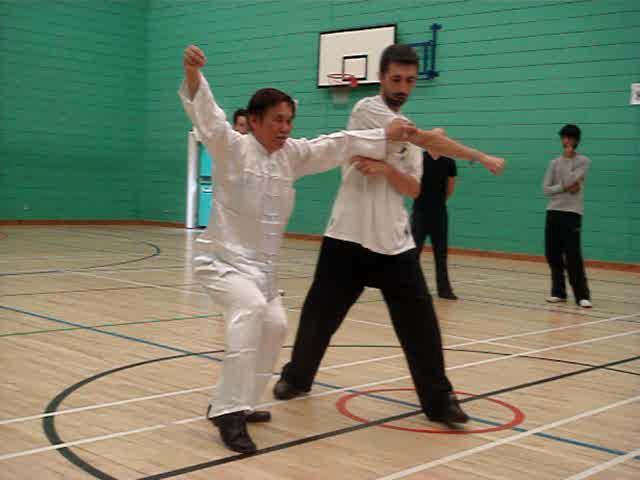 Locking your Opponent to Strike Him -- Part 2
Locking your Opponent to Strike Him -- Part 3
Planting Flowers and Playing with Tigers -- Part 1
Planting Flowers and Playing with Tigers -- Part 2
Locking your Opponent to Strike Him -- Part 4
Locking your Opponent to Strike Him -- Part 5
Locking your Opponent to Strike Him -- Part 6
Locking your Opponent to Strike Him -- Part 7
Locking your Opponent to Strike Him -- Part 8
Locking your Opponent to Strike Him -- Part 9
Planting Flowers and Playing with Tigers -- Part 3
Planting Flowers and Playing with Tigers -- Part 4
Planting Flowers and Playing with Tigers -- Part 5
Planting Flowers and Playing with Tigers -- Part 6
Planting Flowers and Playing with Tigers -- Part 7
Planting Flowers and Playing with Tigers -- Part 8
Planting Flowers and Playing with Tigers -- Part 9
Planting Flowers and Playing with Tigers -- Part 10
Planting Flowers and Playing with Tigers -- Part 11
Planting Flowers for Internal Force and Combat -- Overview
Effective Small Movements in Combat -- Overview
Innocent-Looking Patterns can be Deadly -- Overview
Versatility of Lazy Monkey Pluck Fruit -- Overview
Scissor-Hands in Iron Fan Shuts Door -- Overview
Tigers, Phoenix, Monkeys, Praying Mantis and Dragonflies -- Overview
Big Bird and Sophisticated Hand Techniques -- Overview
Locking your Opponent to Strike Him -- Overview
Planting Flowers and Playing with Tigers -- Overview
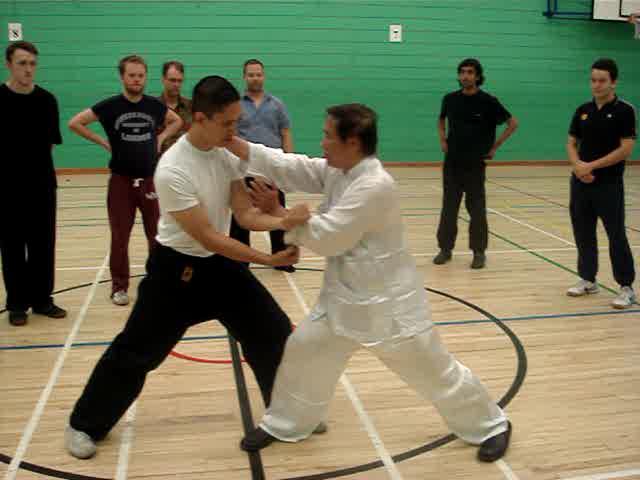 Triple Stretch -- UK 05
Pressing Attacks with Comet Chases Moon -- Part 1
Triple Stretch -- UK 05
Pressing Attacks with Comet Chases Moon -- Part 1Pressing Attacks with Comet Chases Moon -- Part 2
Pressing Attacks with Comet Chases Moon -- Part 3
Pressing Attacks with Comet Chases Moon -- Part 4
Pressing Attacks with Comet Chases Moon -- Part 5
Pressing Attacks with Comet Chases Moon -- Part 6
Pressing Attacks with Comet Chases Moon -- Part 7
How would You Stop Pressing Attacks? -- Part 1
How would You Stop Pressing Attacks? -- Part 2
How would You Stop Pressing Attacks? -- Part 3
How would You Stop Pressing Attacks? -- Part 4
How would You Stop Pressing Attacks? -- Part 5
How would You Stop Pressing Attacks? -- Part 6
How would You Stop Pressing Attacks? -- Part 7
Intricacies of Pressing Attacks -- Part 1
Intricacies of Pressing Attacks -- Part 2
Intricacies of Pressing Attacks -- Part 3
Intricacies of Pressing Attacks -- Part 4
Intricacies of Pressing Attacks -- Part 5
Intricacies of Pressing Attacks -- Part 6
Intricacies of Pressing Attacks -- Part 7
Intricacies of Pressing Attacks -- Part 8
Comet Chases Moon in Rolling Attacks -- Part 1
Comet Chases Moon in Rolling Attacks -- Part 2
Comet Chases Moon in Rolling Attacks -- Part 3
Comet Chases Moon in Rolling Attacks -- Part 4
Comet Chases Moon in Rolling Attacks -- Part 5
Comet Chases Moon in Rolling Attacks -- Part 6
Comet Chases Moon in Rolling Attacks -- Part 7
Forte of Shaolin against Weakness of Boxing -- Part 1
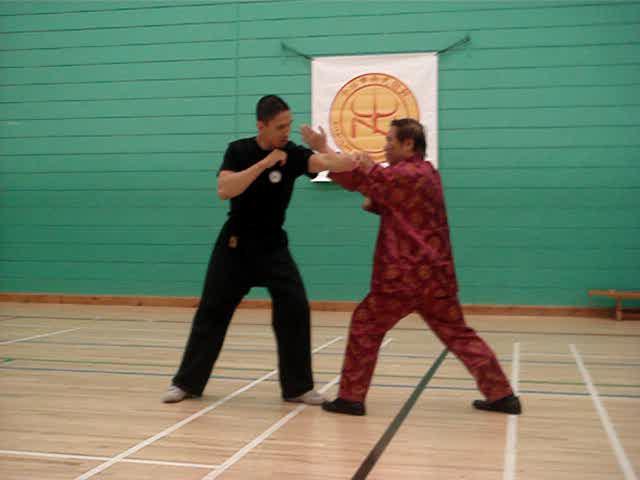 Forte of Shaolin against Weakness of Boxing -- Part 2
Forte of Shaolin against Weakness of Boxing -- Part 3
Forte of Shaolin against Weakness of Boxing -- Part 4
Forte of Shaolin against Weakness of Boxing -- Part 5
Forte of Shaolin against Weakness of Boxing -- Part 6
Forte of Shaolin against Weakness of Boxing -- Part 7
Forte of Shaolin against Weakness of Boxing -- Part 8
The Tactic of Deflect, Close and Strike -- Part 1
The Tactic of Deflect, Close and Strike -- Part 2
The Tactic of Deflect, Close and Strike -- Part 3
The Tactic of Deflect, Close and Strike -- Part 4
The Tactic of Deflect, Close and Strike -- Part 5
The Tactic of Deflect, Close and Strike -- Part 6
The Tactic of Deflect, Close and Strike -- Part 7
The Tactic of Deflect, Close and Strike -- Part 8
A Boxer has Limited Techniques -- Part 1
A Boxer has Limited Techniques -- Part 2
A Boxer has Limited Techniques -- Part 3
A Boxer has Limited Techniques -- Part 4
A Boxer has Limited Techniques -- Part 5
A Boxer has Limited Techniques -- Part 6
A Boxer has Limited Techniques -- Part 7
A Boxer has Limited Techniques -- Part 8
Stepping on Foot and Locking Both Arms -- Part 1
Stepping on Foot and Locking Both Arms -- Part 2
Stepping on Foot and Locking Both Arms -- Part 3
Stepping on Foot and Locking Both Arms -- Part 4
Stepping on Foot and Locking Both Arms -- Part 5
Stepping on Foot and Locking Both Arms -- Part 6
Stepping on Foot and Locking Both Arms -- Part 7
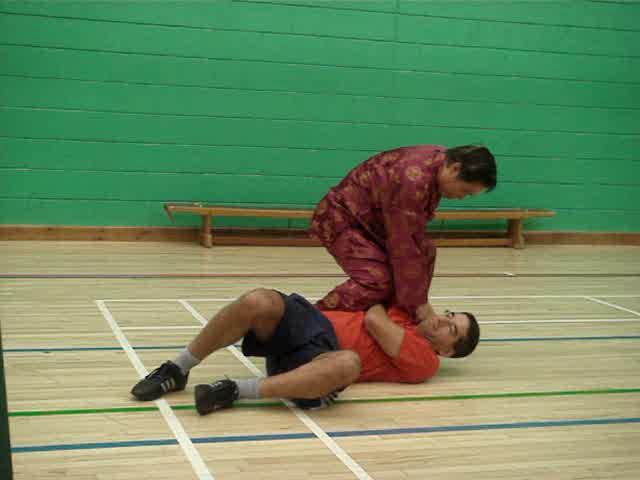 Stepping on Foot and Locking Both Arms -- Part 8
Stepping on Foot and Locking Both Arms -- Part 9
Various Ways to Control a Boxer -- Part 1
Various Ways to Control a Boxer -- Part 2
Various Ways to Control a Boxer -- Part 3
Various Ways to Control a Boxer -- Part 4
Various Ways to Control a Boxer -- Part 5
Various Ways to Control a Boxer -- Part 6
Various Ways to Control a Boxer -- Part 7
Various Ways to Control a Boxer -- Part 8
Countring Hooks and Executing Kicks -- Part 1
Countring Hooks and Executing Kicks -- Part 2
Countring Hooks and Executing Kicks -- Part 3
Countring Hooks and Executing Kicks -- Part 4
Countring Hooks and Executing Kicks -- Part 5
Countring Hooks and Executing Kicks -- Part 6
Countring Hooks and Executing Kicks -- Part 7
Countring Hooks and Executing Kicks -- Part 8
Countring Hooks and Executing Kicks -- Part 9
Giving Boxers Little nor No Chance against You -- Part 1
Giving Boxers Little nor No Chance against You -- Part 2
Giving Boxers Little nor No Chance against You -- Part 3
Giving Boxers Little nor No Chance against You -- Part 4
Giving Boxers Little nor No Chance against You -- Part 5
Giving Boxers Little nor No Chance against You -- Part 6
Giving Boxers Little nor No Chance against You -- Part 7
Giving Boxers Little nor No Chance against You -- Part 8
Giving Boxers Little nor No Chance against You -- Part 9
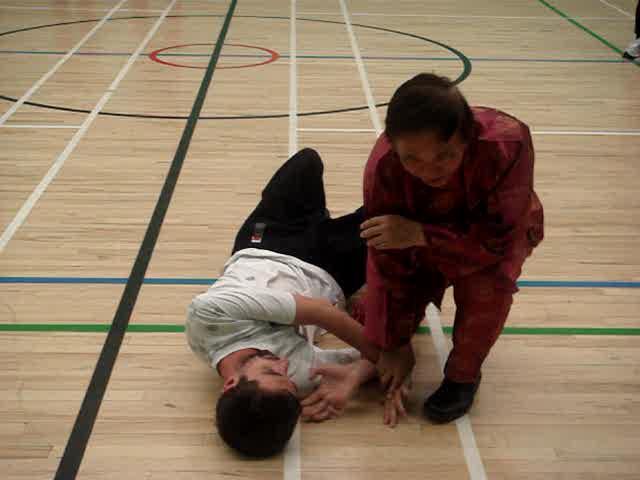 Pressing Attacks with Comet Chases Moon -- Overview
How would You Stop Pressing Attacks? -- Overview
Intricacies of Pressing Attacks -- Overview
Comet Chases Moon in Rolling Attacks -- Overview
Forte of Shaolin against Weakness of Boxing -- Overview
The Tactic of Deflect, Close and Strike -- Overview
A Boxer has Limited Techniques -- Overview
Stepping on Foot and Locking Both Arms -- Overview
Various Ways to Control a Boxer -- Overview
Countring Hooks and Executing Kicks -- Overview
Giving Boxers Little nor No Chance against You -- Overview
Triple Stretch -- UK 06 Strategy against Kick-Boxers and Taekwondo Exponents -- Part 1
Strategy against Kick-Boxers and Taekwondo Exponents -- Part 2
Strategy against Kick-Boxers and Taekwondo Exponents -- Part 3
Strategy against Kick-Boxers and Taekwondo Exponents -- Part 4
Strategy against Kick-Boxers and Taekwondo Exponents -- Part 5
Strategy against Kick-Boxers and Taekwondo Exponents -- Part 6
Strategy against Kick-Boxers and Taekwondo Exponents -- Part 7
Strategy against Kick-Boxers and Taekwondo Exponents -- Part 8
Strategy against Kick-Boxers and Taekwondo Exponents -- Part 9
Learning to Counter a Seriesof Attacks Progressively -- Part 1
Learning to Counter a Seriesof Attacks Progressively -- Part 2
Learning to Counter a Seriesof Attacks Progressively -- Part 3
Learning to Counter a Seriesof Attacks Progressively -- Part 4
Learning to Counter a Seriesof Attacks Progressively -- Part 5
Learning to Counter a Seriesof Attacks Progressively -- Part 6
Learning to Counter a Seriesof Attacks Progressively -- Part 7
Learning to Counter a Seriesof Attacks Progressively -- Part 8
Learning to Counter a Seriesof Attacks Progressively -- Part 9
It doesn't Matter what Kicks an Opponent may Use! -- Part 1
It doesn't Matter what Kicks an Opponent may Use! -- Part 2
 It doesn't Matter what Kicks an Opponent may Use! -- Part 3
It doesn't Matter what Kicks an Opponent may Use! -- Part 4
It doesn't Matter what Kicks an Opponent may Use! -- Part 5
It doesn't Matter what Kicks an Opponent may Use! -- Part 6
It doesn't Matter what Kicks an Opponent may Use! -- Part 7
It doesn't Matter what Kicks an Opponent may Use! -- Part 8
It doesn't Matter what Kicks an Opponent may Use! -- Part 9
It doesn't Matter what Kicks an Opponent may Use! -- Part 10
Excellent Counter against Muay Thai Knee Jabs -- Part 1
Excellent Counter against Muay Thai Knee Jabs -- Part 2
Excellent Counter against Muay Thai Knee Jabs -- Part 3
Excellent Counter against Muay Thai Knee Jabs -- Part 4
Excellent Counter against Muay Thai Knee Jabs -- Part 5
Excellent Counter against Muay Thai Knee Jabs -- Part 6
Excellent Counter against Muay Thai Knee Jabs -- Part 7
Excellent Counter against Muay Thai Knee Jabs -- Part 8
Excellent Counter against Muay Thai Knee Jabs -- Part 9
Planting Willow and Immortal Li's Clutch Kick -- Part 1
Planting Willow and Immortal Li's Clutch Kick -- Part 2
Planting Willow and Immortal Li's Clutch Kick -- Part 3
Planting Willow and Immortal Li's Clutch Kick -- Part 4
Planting Willow and Immortal Li's Clutch Kick -- Part 5
Planting Willow and Immortal Li's Clutch Kick -- Part 6
Planting Willow and Immortal Li's Clutch Kick -- Part 7
Planting Willow and Immortal Li's Clutch Kick -- Part 8
Planting Willow and Immortal Li's Clutch Kick -- Part 9
Subducing Opponents with Scholar Presents Greeting -- Part 1
Subducing Opponents with Scholar Presents Greeting -- Part 2
Subducing Opponents with Scholar Presents Greeting -- Part 3
Subducing Opponents with Scholar Presents Greeting -- Part 4
 Subducing Opponents with Scholar Presents
Greeting -- Part 5
Subducing Opponents with Scholar Presents
Greeting -- Part 6
Subducing Opponents with Scholar Presents
Greeting -- Part 7
Subducing Opponents with Scholar Presents
Greeting -- Part 8
Flowing with Muay Thai Attacks -- Part 1
Flowing with Muay Thai Attacks -- Part 2
Flowing with Muay Thai Attacks -- Part 3
Flowing with Muay Thai Attacks -- Part 4
Flowing with Muay Thai Attacks -- Part 5
Flowing with Muay Thai Attacks -- Part 6
Flowing with Muay Thai Attacks -- Part 7
Flowing with Muay Thai Attacks -- Part 8
Plucking Fruit and Catching Leg -- Part 1
Plucking Fruit and Catching Leg -- Part 2
Plucking Fruit and Catching Leg -- Part 3
Plucking Fruit and Catching Leg -- Part 4
Plucking Fruit and Catching Leg -- Part 5
Plucking Fruit and Catching Leg -- Part 6
Plucking Fruit and Catching Leg -- Part 7
Plucking Fruit and Catching Leg -- Part 8
Plucking Fruit and Catching Leg -- Part 9
Strategy against Kick-Boxers and Taekwondo Exponents -- Overview
Learning to Counter a Seriesof Attacks Progressively -- Overview
It doesn't Matter what Kicks an Opponent may Use! -- Overview
Excellent Counter against Muay Thai Knee Jabs -- Overview
Planting Willow and Immortal Li's Clutch Kick -- Overview
Subducing Opponents with Scholar Presents Grreeting -- Overview
Flowing with Muay Thai Attacks -- Overview
Plucking Fruit and Catching Leg -- Overview
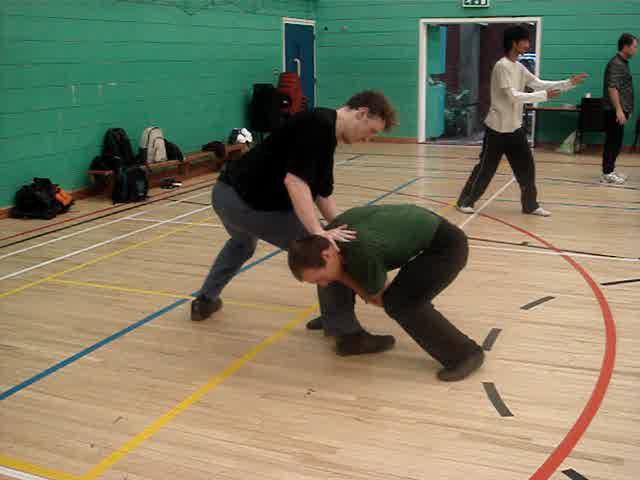 Triple Stretch -- UK 07
Wrestling Techniques arre Found in Shaolin
Triple Stretch -- UK 07
Wrestling Techniques arre Found in ShaolinKungfu Too -- Part 1
Wrestling Techniques arre Found in Shaolin
Kungfu Too -- Part 2
Wrestling Techniques arre Found in Shaolin
Kungfu Too -- Part 3
Wrestling Techniques arre Found in Shaolin
Kungfu Too -- Part 4
Wrestling Techniques arre Found in Shaolin
Kungfu Too -- Part 5
Wrestling Techniques arre Found in Shaolin Kungfu Too -- Part 6
Wrestling Techniques arre Found in Shaolin Kungfu Too -- Part 7
Wrestling Techniques arre Found in Shaolin Kungfu Too -- Part 8
Wrestling Techniques arre Found in Shaolin Kungfu Too -- Part 9
An Effective Counter against any Pin-Downs! -- Part 1
An Effective Counter against any Pin-Downs! -- Part 2
An Effective Counter against any Pin-Downs! -- Part 3
An Effective Counter against any Pin-Downs! -- Part 4
An Effective Counter against any Pin-Downs! -- Part 5
An Effective Counter against any Pin-Downs! -- Part 6
An Effective Counter against any Pin-Downs! -- Part 7
An Effective Counter against any Pin-Downs! -- Part 8
An Effective Counter against any Pin-Downs! -- Part 9
An Effective Counter against any Pin-Downs! -- Part 10
Having Fun in Take-Downs and Pin-Downs -- Part 1
Having Fun in Take-Downs and Pin-Downs -- Part 2
Having Fun in Take-Downs and Pin-Downs -- Part 3
Having Fun in Take-Downs and Pin-Downs -- Part 4
Having Fun in Take-Downs and Pin-Downs -- Part 5
Having Fun in Take-Downs and Pin-Downs -- Part 6
Having Fun in Take-Downs and Pin-Downs -- Part 7
Having Fun in Take-Downs and Pin-Downs -- Part 8
Having Fun in Take-Downs and Pin-Downs -- Part 9
Countering at the Intermediate Stage and the Final Stage -- Part 1
Countering at the Intermediate Stage and the Final Stage -- Part 2
 Countering at the Intermediate Stage and the
Final Stage -- Part 3
Countering at the Intermediate Stage and the
Final Stage -- Part 4
Countering at the Intermediate Stage and the
Final Stage -- Part 5
Countering at the Intermediate Stage and the
Final Stage -- Part 6
Countering at the Intermediate Stage and the
Final Stage -- Part 7
Countering at the Intermediate Stage and the
Final Stage -- Part 8
Countering at the Intermediate Stage and the Final Stage -- Part 9
Countering at the Intermediate Stage and the Final Stage -- Part 10
Great Risks in Applying the Shoot -- Part 1
Great Risks in Applying the Shoot -- Part 2
Great Risks in Applying the Shoot -- Part 3
Great Risks in Applying the Shoot -- Part 4
Great Risks in Applying the Shoot -- Part 5
Great Risks in Applying the Shoot -- Part 6
Great Risks in Applying the Shoot -- Part 7
Great Risks in Applying the Shoot -- Part 8
Great Risks in Applying the Shoot -- Part 9
Great Risks in Applying the Shoot -- Part 10
Crucial Differences between Shaolin Kungfu and Other Martial Arts -- Part 1
Crucial Differences between Shaolin Kungfu and Other Martial Arts -- Part 2
Crucial Differences between Shaolin Kungfu and Other Martial Arts -- Part 3
Crucial Differences between Shaolin Kungfu and Other Martial Arts -- Part 4
Crucial Differences between Shaolin Kungfu and Other Martial Arts -- Part 5
Crucial Differences between Shaolin Kungfu and Other Martial Arts -- Part 6
Crucial Differences between Shaolin Kungfu and Other Martial Arts -- Part 7
Crucial Differences between Shaolin Kungfu and Other Martial Arts -- Part 8
Crucial Differences between Shaolin Kungfu and Other Martial Arts -- Part 9
Crucial Differences between Shaolin Kungfu and Other Martial Arts -- Part 10
Applying Shaolin Kungfu Spontaneously in Free Sparring -- Part 1
Applying Shaolin Kungfu Spontaneously in Free Sparring -- Part 2
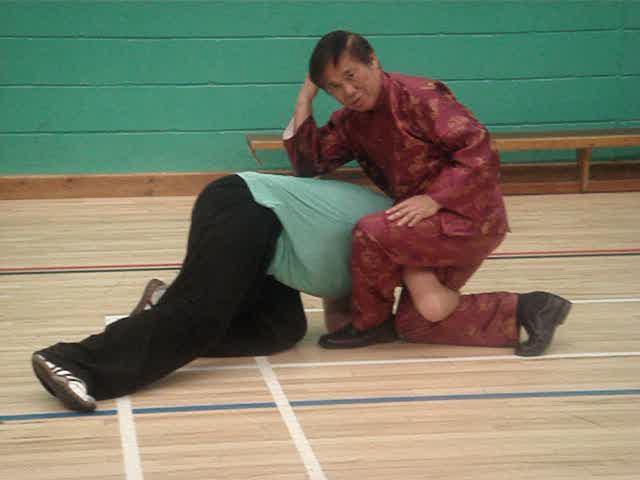 Applying Shaolin Kungfu Spontaneously in Free
Sparring -- Part 3
Applying Shaolin Kungfu Spontaneously in Free
Sparring -- Part 4
Applying Shaolin Kungfu Spontaneously in Free
Sparring -- Part 5
Applying Shaolin Kungfu Spontaneously in Free
Sparring -- Part 6
Applying Shaolin Kungfu Spontaneously in Free
Sparring -- Part 7
Applying Shaolin Kungfu Spontaneously in Free
Sparring -- Part 8
Applying Shaolin Kungfu Spontaneously in Free Sparring -- Part 9
Applying Shaolin Kungfu Spontaneously in Free Sparring -- Part 10
An Effective Counter against any Pin-Downs! -- Overview
Having Fun in Take-Downs and Pin-Downs -- Overview
Countering at the Intermediate Stage and the Final Stage -- Overview
Great Risks in Applying the Shoot -- Overview
Crucial Differences between Shaolin Kungfu and Other Martial Arts -- Overview
Applying Shaolin Kungfu Spontaneously in Free Sparring -- Overview
Triple Stretch -- Videos Videos of Triple Stretch at UK Summer Camp 2010 -- Overview
Triple Stretch Set (By a Fountain)
Triple Stretch Set (In a Woods)
Triple Stretch Set (In a Garden)
Developing Internal Florce with Triple Stretch
The Essence is in Chi Flow
Converting Energy Flow into Internal Force
Discovering the Secret of Past Masters
Transforming Qi to Jing in Internal Force Training
Pinnacle of Kungfu Set Development
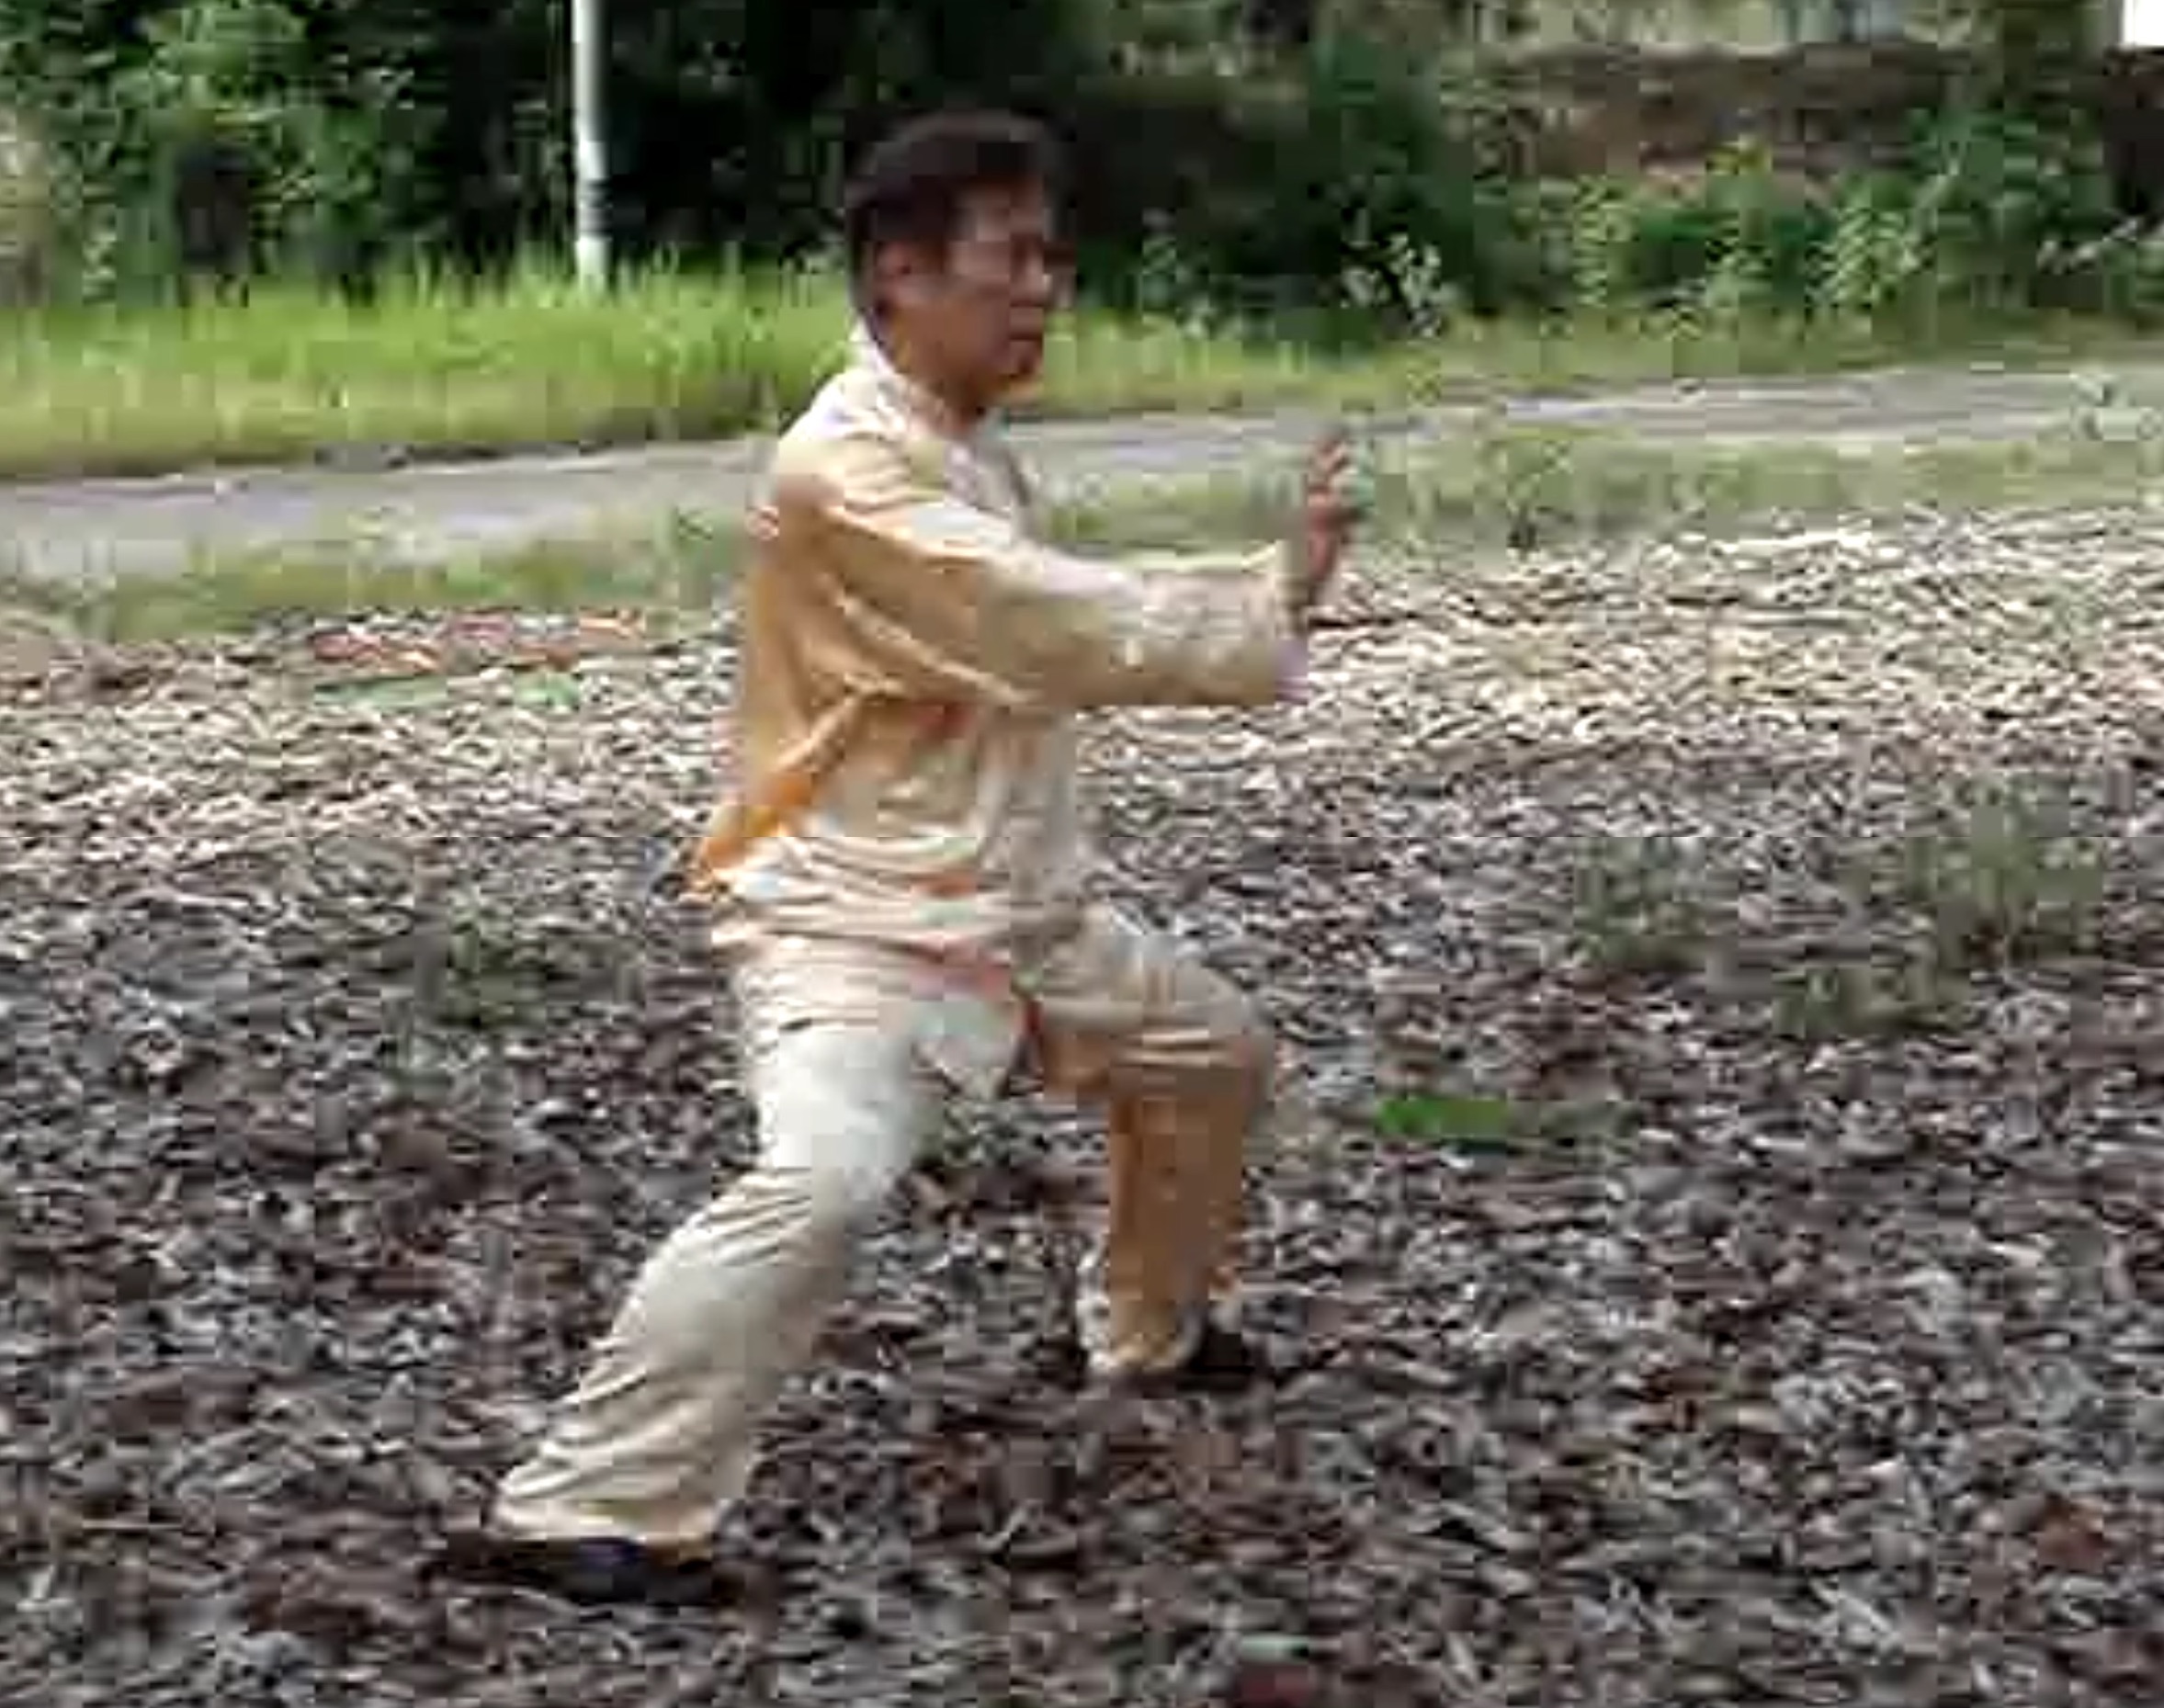 Ta Chong or Force Training on Stance
Shaolin Kungfu is Not Just Decorative
More Sophisticated Combat Applications of Triple Stretch
Lin Chip or Connection of Triple Stretch
Ta Sei Moon orStriking Four Gates
An Alway-Winning Sequence
Uncle Righteousness' Winning Sequence
Secrets of Striking Four Gates
Picture-Perfect Form and Smooth Flow
Form-Force-Flow and Form-Flow-Force
Force Training and Combat Sequences
Practicing the Shaolin Triple Stretch Set
Skyward Cannon Punch against Different Attacks
Can Greeting Patterns be Used for Combat?
Combat Application of Scholar Presents Greeting
Flapping Wings and Planting Flowers
Some Chin-Na Attacks and Counters
Planting Flowers for Internal Force and Combat
Effective Small Movements in Combat
Innocent-Looking Pattern can be Deadly
Verrsatility of Lazy Monkey Plucks Fruit
Scissor-Hands in Iron Fan Shuts Door
Tigerrs, Phonix, Monkey, Praying Mantis and Dragonfly
Big Bird and Sophisticated Hand Techniques
Locking your Opponent to Strike Him
Planting Flowers and Playing with Tigers
Pressing Attack with Comet Chases Moon
How would You Stop Pressing Attacks
Intricacies of Pressing Attacks
Comet Chases Moon in Rolling Attack
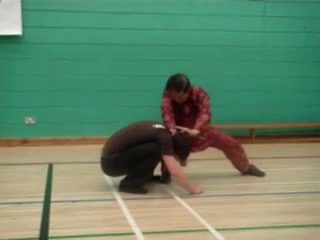 Forte of Shaolin Kungfu against Weakness of Boxing
The Tactic of Deflect, Close and Strike
A Boxer has Limited Techniques
Stepping on Foot and Locking Both Arms
Various Ways to Control a Boxer
Countering Hooks and Executing Kicks
Giving Boxers Little or No Chance
Strategies against Kick-Boxers and Taekwondo Exponents
Learning to Counter a Series of Attacks Progressively
It doesn't Matter what Kicks an Opponent may Use!
Excellent Counter against Muay Thai Knee Jabs
Planting Willows amd Immortal Li's Clutch Kick
Subducing Opponents with Schor Presents Greeting
Flowing with Muay Thai Attacks
Plucking Fruit and Catching Leg
Wrestling Techniques are Found in Shaolin Kungfu Too
An Effective Counter against any Pin-Down!
Having Fun with Take-Downs and Pin-Downs
Countering at the Intermediate Stage and the Final Stage
Great Risks in Applying the Shoot
Crucial Different between Shaolin Kungfu and Other Martial Arts
Applying Shaolin Kungfu Spontaneouslhy in Free Sparring
 Wing Choon Kungfu -- Videos
Videos of
Wing Choon Kungfu Course 2010 -- Overview
Wing Choon Kungfu -- Videos
Videos of
Wing Choon Kungfu Course 2010 -- OverviewDeveloping Internal Force using Siu Lin Tou
Learning the Form of Siu Lin Tou
Cham Kiew or Searching for Bridge
Phew Chee or Thrusting Fingers
Reviewing the Basic Stances
Form Level of Siu in Tou
Using Energy Flow to Move Form
Energy-Flow Level of Siu Lin Tou
Converting Energy-Flow to Internal Force
Internal Force Level of Siu Lin Tou
Hard amd Soft Internal Force
Introduction to Chi Sau
Importance of Waist Rotation
Phong Sau and Kham Sau againstMiddle Attacks
Low Attacks and their Defences
Chiet Sau or Cutting Hand against Side Attacks
Form Level of Cham Kiew
Using Energy to Move Form, and Converting Energy to Internal Force
Sequences of Attacks and Counters
Applying Wing Choon Patterns for Combat
Basic Hand Techniques of Wing Choon Chi Sau
Developing Thien Keng or Sensing Skill
Training of Energy and Mind
Use of Tactics in Wing Choon Kungfu
Sensing with Mind in Wing Choon Kungfu
Sap Luk Sau or Sixteen Hand Techniques of Wing Choon Kungfu
Practicing Sap Luk Sau of Wing Choon Kungfu Blind-Folded
Free Movement Chi Sau in Blind-Fold
Taming or Locking Opponent and Simutaneously Striking Him
 Excellent Counters Proposed by Course Participants
Exploiting Oppoanents' Weaknesses in Combat
When you are beig Locked and Pressed against a Wall
Moving from In-Gate to Out-Gate
Effective Counters against Holds and Grips
No-Defence-Direct-Counter against Formidable Bottom Attack
Horizonatal Chops and Crane Beaks in Side Attacks
Top and Middle Attacks and their Counters
Bottom and Side Attacks and their Counters
Learning the Form of Phew Chee
From Pattern Practice to Free Sparring
Thrust Kicks and their Counters
Smart Practice Makes Perfect
Understanding Wing Choon Principles and Practice
Practicing Chi Sau while being Blind-Folded
Effective Counters against Kicks
Cockerel Kicks against Whirlwind Kicks
Counters against Low Sweeping Kicks
Striking or Intercepting Opponents' Kicks
Sap Ye Theak or Twelve Kicks
How would You Escape from this Difficult Situation
Felling a Giant Almost Effortlessly
Turning a Weakness into a Strength
Butterfly Palms against Double-Grip Chin-Na Attcks
Do You Know the Combat Application of these Apparantly Useless Patterns?
Sophisticated Applications of Seemingly Harmless Patterns
Have Fun Deciphering Sophisticated Applications from Innocent-Looking Patterns
Big and Small Movements in Wing Choon Hand Techniques
The Course is Full of Interesting Surprises
Felling Techniques in Wing Choon Kungfu
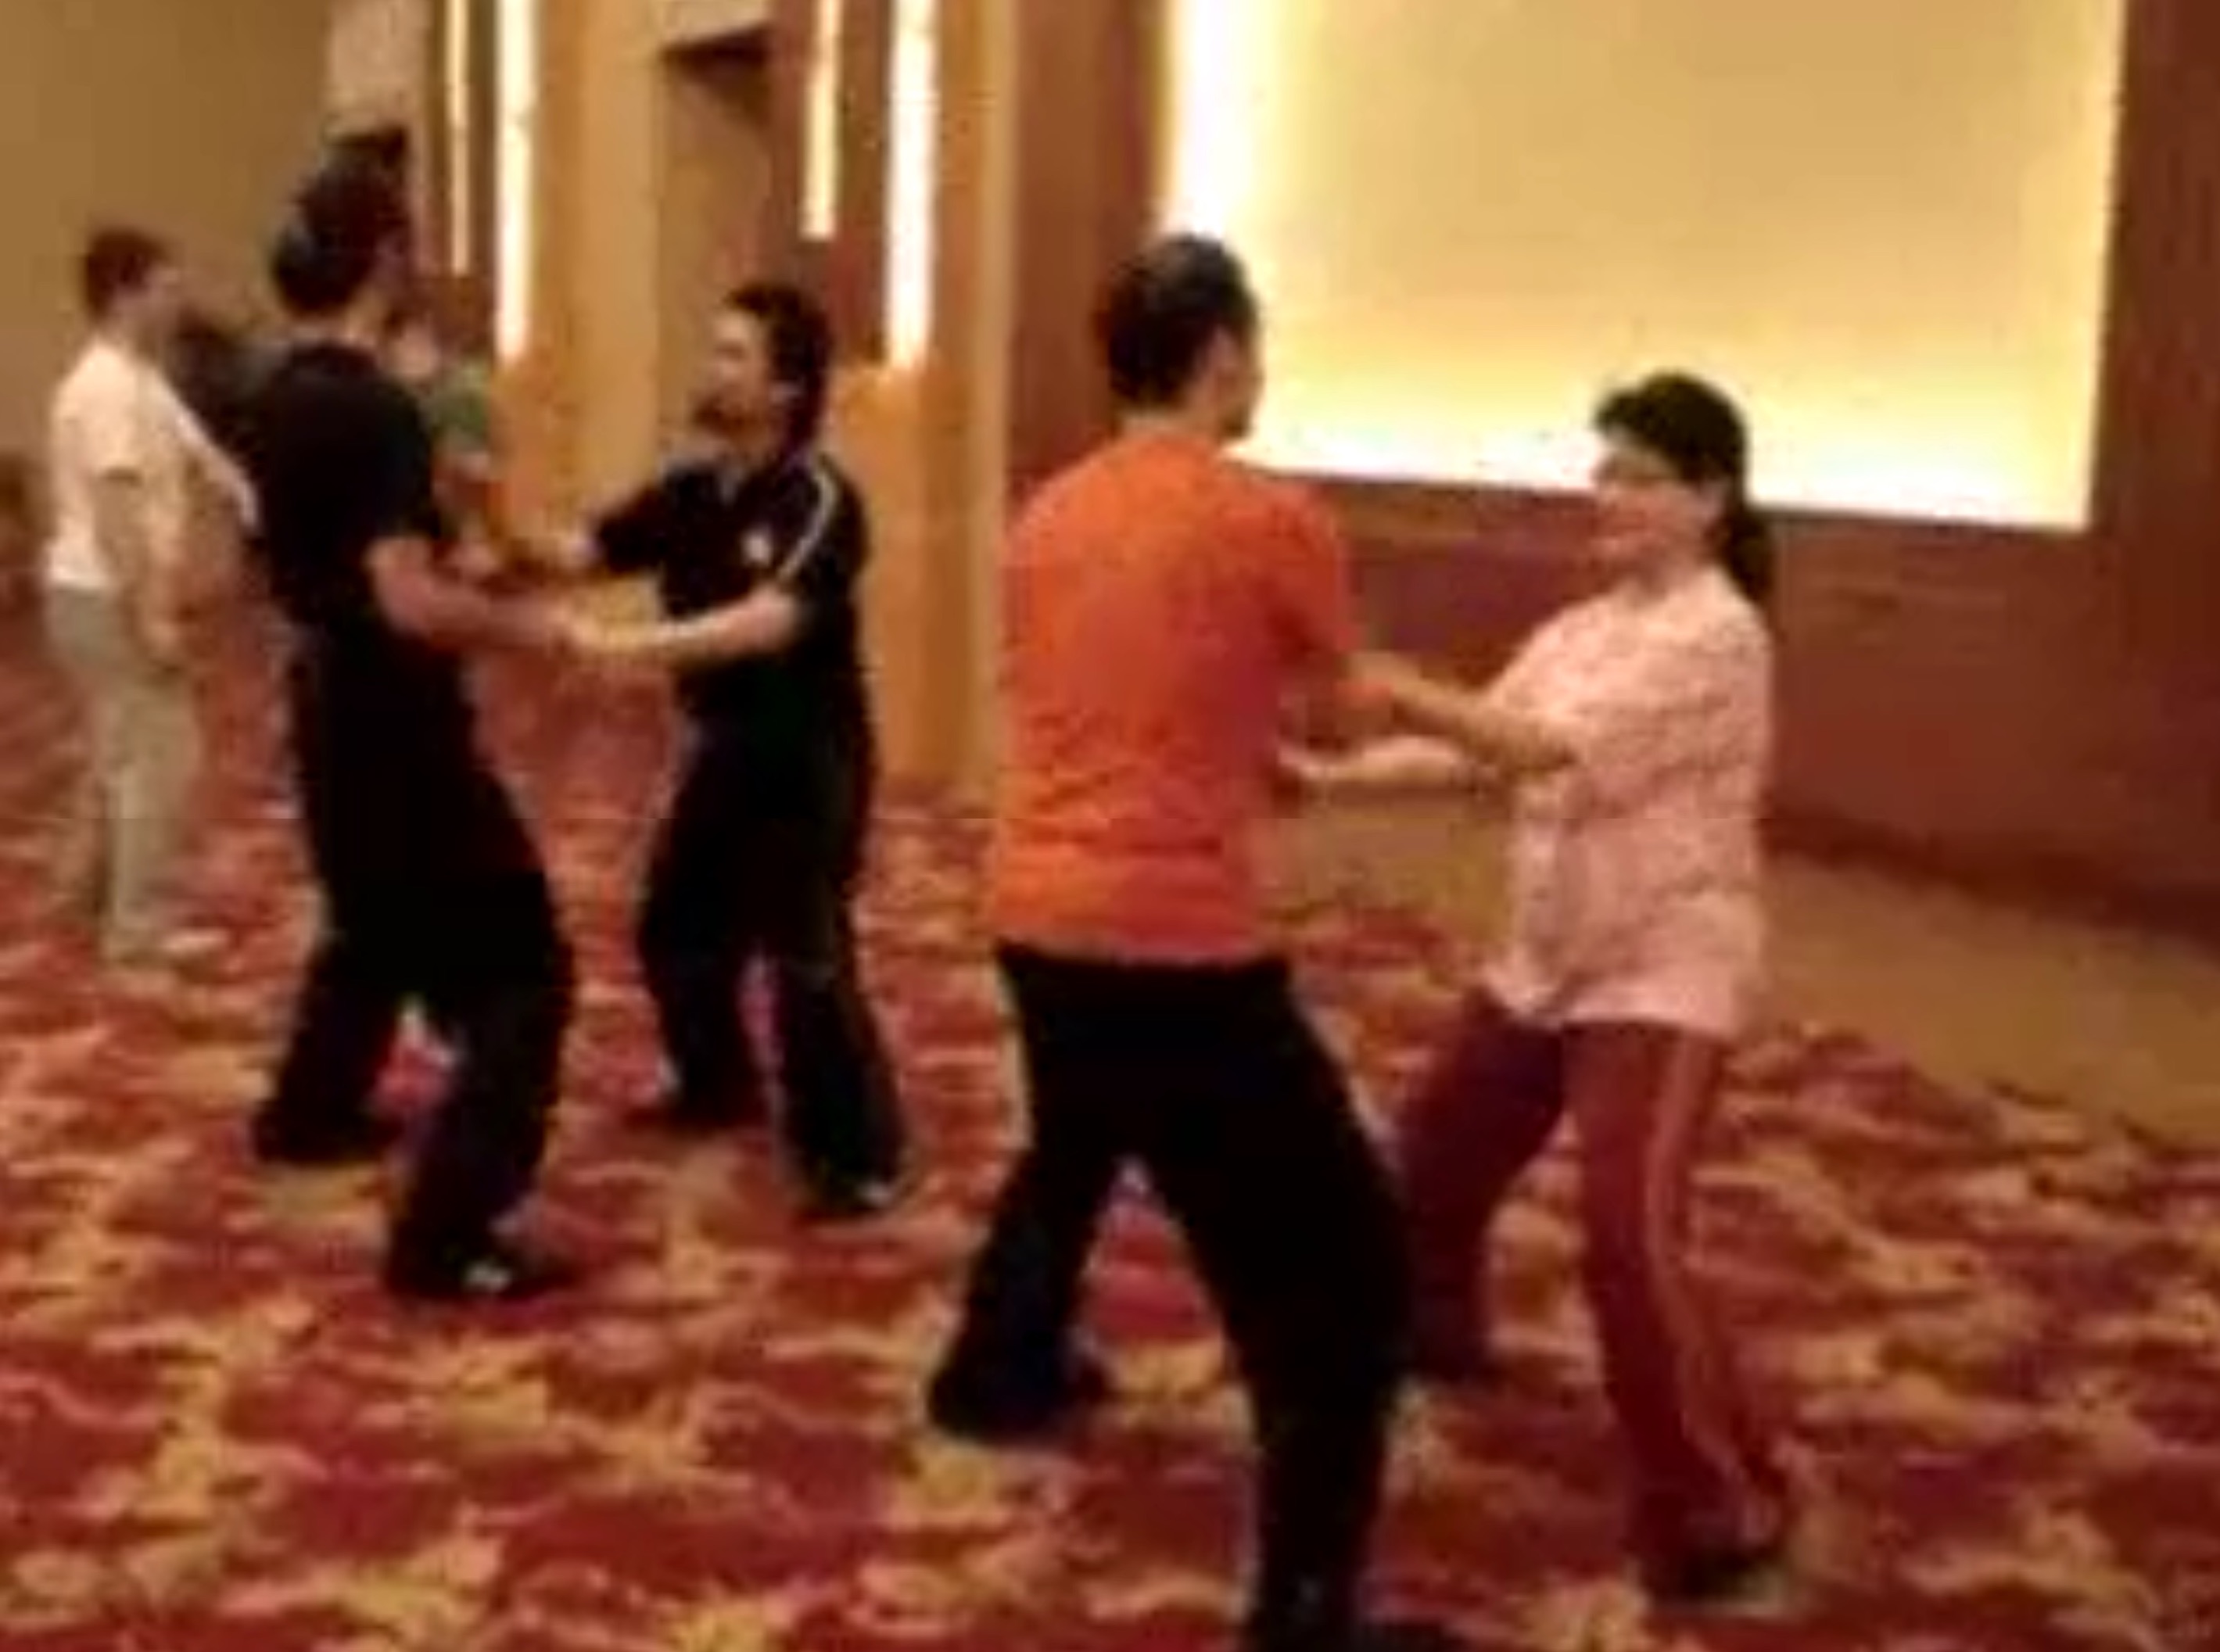 Neutralizing Opponents' Attacks with Legs
Wing Choon Chin-Na and Counters
Thiet-Cheit-Na or Felling-Kneeing-Gripping
How Elegant Ladies can Handle Muscular Brutes
Free Sparring while being Blind-Folded
Deflecting Attacks without Looking at Them
Moving from Technique-Level to Sequence-Level in Sparring
Small Difference in Movement Nig Difference in Result
Applying Planned Sequence in Sparring Irrespective of Response!
Don't Hand your Defeat to your Opponent
Marvelous Techniques beget Marvelous Techniques
Creating Opportunities to Defeat Opponents
Secrets of Crane Beak and Double Punch
Open Secrets and Close Secrets
Secrets of Sequence Sparring
Covering the Fast Strikes of a Boxer
Avoiding the Strong Pointsof a Boxer and Attacking his Weakness
Counters against Hooks and Undercuts
Handling Aggressive Attackers and Counters against Chain Punches
Attacking the Waekness of Kick-Boxers
Moving to Back of Opponent who Kicks
Effective Counters against Taekwondo Kicks
Counters against Muay Thai Attacks
When Leg Comes Counter with Leg
Shoots, Lifts and Pin-Downs
Lazy Man Smokes Pipe
Having Fun with Wrestling Attacks and Counters
How did Past Wing Choon Masters Deal with Wrestlers and Grapplers?
Free Movement Chi Sau while being Blind-Folded
Sap Luk Sau or Sixteen Hand Techniques
 Sap Ye Theak or Twelve Kicks
Thiet-Cheit-Na or Fell-Knee-Grip
Wing Choon Kungfu -- Wing Choon 01 The Form-Level of Siu Lin Tou
Reviewing the Basic Stances
Reviewing the Basic Stances -- Part 1
Reviewing the Basic Stances -- Part 2
Reviewing the Basic Stances -- Part 3
Reviewing the Basic Stances -- Part 4
Reviewing the Basic Stances -- Part 5
Reviewing the Basic Stances -- Part 6
Reviewing the Basic Stances -- Part 7
Reviewing the Basic Stances -- Part 8
Reviewing the Basic Stances -- Part 9
Internal Force Level of Sou Lin Tou
Hard and Soft Internal Force
Reviewing the Basic Stances -- Part 12
Form-Level of Siu Lin Tou -- Part 1
Form-Level of Siu Lin Tou -- Part 2
Form-Level of Siu Lin Tou -- Part 3
Form-Level of Siu Lin Tou -- Part 4
Form-Level of Siu Lin Tou -- Part 5
Form-Level of Siu Lin Tou -- Part 6
Using Energy Flow to Move Form -- Part 1
Using Energy Flow to Move Form -- Part 2
Using Energy Flow to Move Form -- Part 3
Using Energy Flow to Move Form -- Part 4
Using Energy Flow to Move Form -- Part 5
Using Energy Flow to Move Form -- Part 6
Using Energy Flow to Move Form -- Part 7
Using Energy Flow to Move Form -- Part 8
Using Energy Flow to Move Form -- Part 9
Using Energy Flow to Move Form -- Part 10
 Energy-Flow Level of Siu Lin Tou -- Part 1
Energy-Flow Level of Siu Lin Tou -- Part 2
Energy-Flow Level of Siu Lin Tou -- Part 3
Energy-Flow Level of Siu Lin Tou -- Part 4
Energy-Flow Level of Siu Lin Tou -- Part 5
Energy-Flow Level of Siu Lin Tou -- Part 6
Energy-Flow Level of Siu Lin Tou -- Part 7
Energy-Flow Level of Siu Lin Tou -- Part 8
Energy-Flow Level of Siu Lin Tou -- Part 9
Converting Energy Flow to Internal Force -- Part 1
Converting Energy Flow to Internal Force -- Part 2
Converting Energy Flow to Internal Force -- Part 3
Converting Energy Flow to Internal Force -- Part 4
Converting Energy Flow to Internal Force -- Part 5
Converting Energy Flow to Internal Force -- Part 6
Converting Energy Flow to Internal Force -- Part 7
Converting Energy Flow to Internal Force -- Part 8
Converting Energy Flow to Internal Force -- Part 9
Converting Energy Flow to Internal Force -- Part 10
Converting Energy Flow to Internal Force -- Part 11
Internal Force Level of Siu Lin Tou -- Part 1
Internal Force Level of Siu Lin Tou -- Part 2
Internal Force Level of Siu Lin Tou -- Part 3
Internal Force Level of Siu Lin Tou -- Part 4
Internal Force Level of Siu Lin Tou -- Part 5
Internal Force Level of Siu Lin Tou -- Part 6
Internal Force Level of Siu Lin Tou -- Part 7
Internal Force Level of Siu Lin Tou -- Part 8
Internal Force Level of Siu Lin Tou -- Part 9
Hard and Soft Internal Force -- Part 1
 Hard and Soft Internal Force -- Part 2
Hard and Soft Internal Force -- Part 3
Hard and Soft Internal Force -- Part 4
Hard and Soft Internal Force -- Part 5
Hard and Soft Internal Force -- Part 6
Hard and Soft Internal Force -- Part 7
Hard and Soft Internal Force -- Part 8
Hard and Soft Internal Force -- Part 9
Hard and Soft Internal Force -- Part 10
Hard and Soft Internal Force -- Part 11
Hard and Soft Internal Force -- Part 12
Using Energy Flow to Move Form -- Overview
Energy-Flow Level of Siu Lin Tou -- Overview
Converting Energy Flow to Internal Force -- Overview
Internal Force Level of Siu Lin Tou -- Overview
Hard and Soft Internal Force -- Overview
Wing Choon Kungfu -- Wing Choon 02 Introduction to Chi Sau -- Part 1
Introduction to Chi Sau -- Part 2
Introduction to Chi Sau -- Part 3
Introduction to Chi Sau -- Part 4
Introduction to Chi Sau -- Part 5
Introduction to Chi Sau -- Part 6
Introduction to Chi Sau -- Part 7
Introduction to Chi Sau -- Part 8
Introduction to Chi Sau -- Part 9
Introduction to Chi Sau -- Part 10
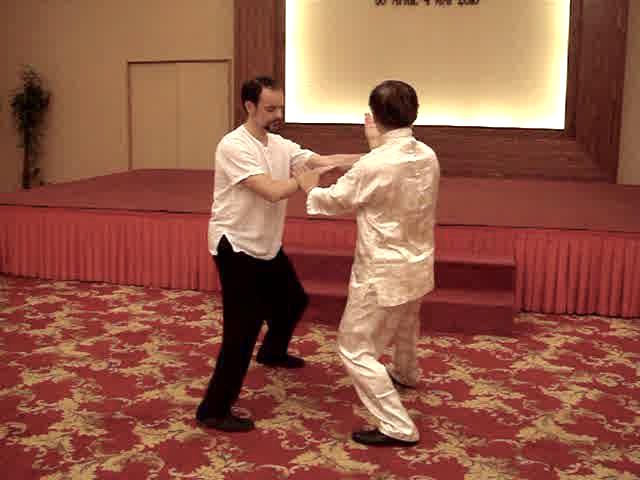 The Importance of Waist Rotation -- Part 1
The Importance of Waist Rotation -- Part 2
The Importance of Waist Rotation -- Part 3
The Importance of Waist Rotation -- Part 4
The Importance of Waist Rotation -- Part 5
The Importance of Waist Rotation -- Part 6
The Importance of Waist Rotation -- Part 7
The Importance of Waist Rotation -- Part 8
The Importance of Waist Rotation -- Part 9
The Importance of Waist Rotation -- Part 10
The Importance of Waist Rotation -- Part 11
Phong Sau and Kham Sau against Middle Attacks -- Part 1
Phong Sau and Kham Sau against Middle Attacks -- Part 2
Phong Sau and Kham Sau against Middle Attacks -- Part 3
Phong Sau and Kham Sau against Middle Attacks -- Part 4
Phong Sau and Kham Sau against Middle Attacks -- Part 5
Phong Sau and Kham Sau against Middle Attacks -- Part 6
Phong Sau and Kham Sau against Middle Attacks -- Part 7
Phong Sau and Kham Sau against Middle Attacks -- Part 8
Phong Sau and Kham Sau against Middle Attacks -- Part 9
Low Attacks and their Defences -- Part 1
Low Attacks and their Defences -- Part 2
Low Attacks and their Defences -- Part 3
Low Attacks and their Defences -- Part 4
Low Attacks and their Defences -- Part 5
Low Attacks and their Defences -- Part 6
Chiek Sau or Cutting Hand or Side Attacks -- Part 1
Chiek Sau or Cutting Hand or Side Attacks -- Part 2
Chiek Sau or Cutting Hand or Side Attacks -- Part 3
Chiek Sau or Cutting Hand or Side Attacks -- Part 4
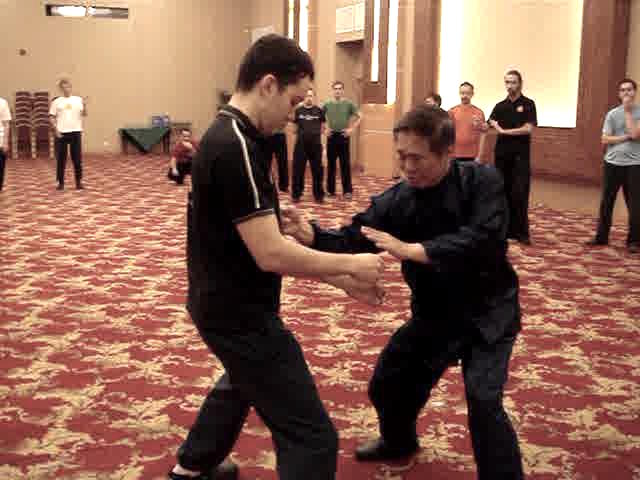 Chiek Sau or Cutting Hand or Side Attacks -- Part 5
Chiek Sau or Cutting Hand or Side Attacks -- Part 6
Chiek Sau or Cutting Hand or Side Attacks -- Part 7
Chiek Sau or Cutting Hand or Side Attacks -- Part 8
Chiek Sau or Cutting Hand or Side Attacks -- Part 9
The Form Level of Cham Kiew -- Part 1
The Form Level of Cham Kiew -- Part 2
The Form Level of Cham Kiew -- Part 3
The Form Level of Cham Kiew -- Part 4
The Form Level of Cham Kiew -- Part 5
The Form Level of Cham Kiew -- Part 6
The Form Level of Cham Kiew -- Part 7
The Form Level of Cham Kiew -- Part 8
The Form Level of Cham Kiew -- Part 9
The Form Level of Cham Kiew -- Part 10
The Form Level of Cham Kiew -- Part 11
Using Energy to Direct Form, and Converting Energy to Internal Force -- Part 1
Using Energy to Direct Form, and Converting Energy to Internal Force -- Part 2
Using Energy to Direct Form, and Converting Energy to Internal Force -- Part 3
Using Energy to Direct Form, and Converting Energy to Internal Force -- Part 4
Using Energy to Direct Form, and Converting Energy to Internal Force -- Part 5
Using Energy to Direct Form, and Converting Energy to Internal Force -- Part 6
Sequence of Attacks and Counters -- Part 1
Sequence of Attacks and Counters -- Part 2
Sequence of Attacks and Counters -- Part 3
Sequence of Attacks and Counters -- Part 4
Sequence of Attacks and Counters -- Part 5
Sequence of Attacks and Counters -- Part 6
Sequence of Attacks and Counters -- Part 7
Sequence of Attacks and Counters -- Part 8
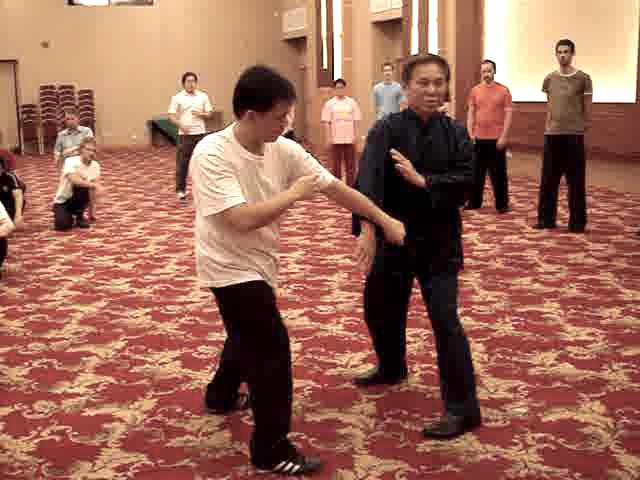 Sequence of Attacks and Counters -- Part 9
Applying Wing Choon Patterns for Combat -- Part 1
Applying Wing Choon Patterns for Combat -- Part 2
Applying Wing Choon Patterns for Combat -- Part 3
Applying Wing Choon Patterns for Combat -- Part 4
Applying Wing Choon Patterns for Combat -- Part 5
Applying Wing Choon Patterns for Combat -- Part 6
Applying Wing Choon Patterns for Combat -- Part 7
Applying Wing Choon Patterns for Combat -- Part 8
Applying Wing Choon Patterns for Combat -- Part 9
Applying Wing Choon Patterns for Combat -- Part 10
Applying Wing Choon Patterns for Combat -- Part 11
Applying Wing Choon Patterns for Combat -- Part 12
Applying Wing Choon Patterns for Combat -- Part 13
Applying Wing Choon Patterns for Combat -- Part 14
Applying Wing Choon Patterns for Combat -- Part 15
Introduction to Chi Sau -- Overview
The Importance of Waist Rotation -- Overview
Phong Sau and Kham Sau against Middle Attacks -- Overview
Low Attacks and their Defences -- Overview
Chiek Sau or Cutting Hand or Side Attacks -- Overview
The Form Level of Cham Kiew -- Overview
Using Energy to Direct Form, and Converting Energy to Internal Force -- Overview
Sequence of Attacks and Counters -- Overview
Applying Wing Choon Patterns for Combat -- Overview
Wing Choon Kungfu -- Wing Choon 03 Basic Hand Techniques of Stationary Chi Sau -- Part 1
Basic Hand Techniques of Stationary Chi Sau -- Part 2
Basic Hand Techniques of Stationary Chi Sau -- Part 3
Basic Hand Techniques of Stationary Chi Sau -- Part 4
Basic Hand Techniques of Stationary Chi Sau -- Part 5
Basic Hand Techniques of Stationary Chi Sau -- Part 6
Basic Hand Techniques of Stationary Chi Sau -- Part 7
Basic Hand Techniques of Stationary Chi Sau -- Part 8
Basic Hand Techniques of Stationary Chi Sau -- Part 9
Basic Hand Techniques of Stationary Chi Sau -- Part 10
Basic Hand Techniques of Stationary Chi Sau -- Part 11
Developing Thien Keng or sensing Skills -- Part 1
Developing Thien Keng or sensing Skills -- Part 2
Developing Thien Keng or sensing Skills -- Part 3
Developing Thien Keng or sensing Skills -- Part 4
Developing Thien Keng or sensing Skills -- Part 5
Developing Thien Keng or sensing Skills -- Part 6
Developing Thien Keng or sensing Skills -- Part 7
Developing Thien Keng or sensing Skills -- Part 8
Developing Thien Keng or sensing Skills -- Part 9
Training of Energy and Mind -- Part 1
Training of Energy and Mind -- Part 2
Training of Energy and Mind -- Part 3
Training of Energy and Mind -- Part 4
Training of Energy and Mind -- Part 5
Training of Energy and Mind -- Part 6
Training of Energy and Mind -- Part 7
Training of Energy and Mind -- Part 8
The Use of Tactics -- Part 1
The Use of Tactics -- Part 2
The Use of Tactics -- Part 3
The Use of Tactics -- Part 4
The Use of Tactics -- Part 5
The Use of Tactics -- Part 6
The Use of Tactics -- Part 7
The Use of Tactics -- Part 8
The Use of Tactics -- Part 9
The Use of Tactics -- Part 10
Sensing with the Mind -- Part 1
Sensing with the Mind -- Part 2
Sensing with the Mind -- Part 3
Sensing with the Mind -- Part 4
Sensing with the Mind -- Part 5
Sensing with the Mind -- Part 6
Sensing with the Mind -- Part 7
Sensing with the Mind -- Part 8
Sensing with the Mind -- Part 9
Sensing with the Mind -- Part 10
Sensing with the Mind -- Part 11
Sensing with the Mind -- Part 12
Sap Luk Sau or Sixteen Hand Techniques -- Part 1
Sap Luk Sau or Sixteen Hand Techniques -- Part 2
Sap Luk Sau or Sixteen Hand Techniques -- Part 3
Sap Luk Sau or Sixteen Hand Techniques -- Part 4
Sap Luk Sau or Sixteen Hand Techniques -- Part 5
Sap Luk Sau or Sixteen Hand Techniques -- Part 6
Sap Luk Sau or Sixteen Hand Techniques -- Part 7
Sap Luk Sau or Sixteen Hand Techniques -- Part 8
Sap Luk Sau or Sixteen Hand Techniques -- Part 1
Performing Sap Luk Sau Blind-Folded -- Part 2
Performing Sap Luk Sau Blind-Folded -- Part 3
Performing Sap Luk Sau Blind-Folded -- Part 4
Performing Sap Luk Sau Blind-Folded -- Part 5
Performing Sap Luk Sau Blind-Folded -- Part 6
Performing Sap Luk Sau Blind-Folded -- Part 7
Performing Sap Luk Sau Blind-Folded -- Part 8
Free Movement Chi Dau in Blind-Fold -- Part 1
Free Movement Chi Dau in Blind-Fold -- Part 2
Free Movement Chi Dau in Blind-Fold -- Part 3
Free Movement Chi Dau in Blind-Fold -- Part 4
Free Movement Chi Dau in Blind-Fold -- Part 5
Free Movement Chi Dau in Blind-Fold -- Part 6
Free Movement Chi Dau in Blind-Fold -- Part 7
Free Movement Chi Dau in Blind-Fold -- Part 8
Basic Hand Techniques of Stationary Chi Sau -- Overview
Developing Thien Keng or sensing Skills -- Overview
Training of Energy and Mind -- Overview
The Use of Tactics -- Overview
Sensing with the Mind -- Overview
Sap Luk Sau or Sixteen Hand Techniques -- Overview
Performing Sap Luk Sau Blind-Folded -- Overview
Free Movement Chi Dau in Blind-Fold -- Overview
Wing Choon Kungfu -- Videos
Videos of
Wing Choon Kungfu Course 2010 -- OverviewDeveloping Internal Force using Siu Lin Tou
Learning the Form of Siu Lin Tou
Cham Kiew or Searching for Bridge
Phew Chee or Thrusting Fingers
Reviewing the Basic Stances
Form Level of Siu in Tou
Using Energy Flow to Move Form
Energy-Flow Level of Siu Lin Tou
Converting Energy-Flow to Internal Force
Internal Force Level of Siu Lin Tou
Hard amd Soft Internal Force
Introduction to Chi Sau
Importance of Waist Rotation
Phong Sau and Kham Sau againstMiddle Attacks
Low Attacks and their Defences
Chiet Sau or Cutting Hand against Side Attacks
Form Level of Cham Kiew
Using Energy to Move Form, and Converting Energy to Internal Force
Sequences of Attacks and Counters
Applying Wing Choon Patterns for Combat
Basic Hand Techniques of Wing Choon Chi Sau
Developing Thien Keng or Sensing Skill
Training of Energy and Mind
Use of Tactics in Wing Choon Kungfu
Sensing with Mind in Wing Choon Kungfu
Sap Luk Sau or Sixteen Hand Techniques of Wing Choon Kungfu
Practicing Sap Luk Sau of Wing Choon Kungfu Blind-Folded
Free Movement Chi Sau in Blind-Fold
Taming or Locking Opponent and Simutaneously Striking Him
Excellent Counters Proposed by Course ParticipantsExploiting Oppoanents' Weaknesses in Combat
When you are beig Locked and Pressed against a Wall
Moving from In-Gate to Out-Gate
Effective Counters against Holds and Grips
No-Defence-Direct-Counter against Formidable Bottom Attack
Horizonatal Chops and Crane Beaks in Side Attacks
Top and Middle Attacks and their Counters
Bottom and Side Attacks and their Counters
Learning the Form of Phew Chee
From Pattern Practice to Free Sparring
Thrust Kicks and their Counters
Smart Practice Makes Perfect
Understanding Wing Choon Principles and Practice
Practicing Chi Sau while being Blind-Folded
Effective Counters against Kicks
Cockerel Kicks against Whirlwind Kicks
Counters against Low Sweeping Kicks
Striking or Intercepting Opponents' Kicks
Sap Ye Theak or Twelve Kicks
How would You Escape from this Difficult Situation
Felling a Giant Almost Effortlessly
Turning a Weakness into a Strength
Butterfly Palms against Double-Grip Chin-Na Attcks
Do You Know the Combat Application of these Apparantly Useless Patterns?
Sophisticated Applications of Seemingly Harmless Patterns
Have Fun Deciphering Sophisticated Applications from Innocent-Looking Patterns
Big and Small Movements in Wing Choon Hand Techniques
The Course is Full of Interesting Surprises
Felling Techniques in Wing Choon Kungfu
Neutralizing Opponents' Attacks with LegsWing Choon Chin-Na and Counters
Thiet-Cheit-Na or Felling-Kneeing-Gripping
How Elegant Ladies can Handle Muscular Brutes
Free Sparring while being Blind-Folded
Deflecting Attacks without Looking at Them
Moving from Technique-Level to Sequence-Level in Sparring
Small Difference in Movement Nig Difference in Result
Applying Planned Sequence in Sparring Irrespective of Response!
Don't Hand your Defeat to your Opponent
Marvelous Techniques beget Marvelous Techniques
Creating Opportunities to Defeat Opponents
Secrets of Crane Beak and Double Punch
Open Secrets and Close Secrets
Secrets of Sequence Sparring
Covering the Fast Strikes of a Boxer
Avoiding the Strong Pointsof a Boxer and Attacking his Weakness
Counters against Hooks and Undercuts
Handling Aggressive Attackers and Counters against Chain Punches
Attacking the Waekness of Kick-Boxers
Moving to Back of Opponent who Kicks
Effective Counters against Taekwondo Kicks
Counters against Muay Thai Attacks
When Leg Comes Counter with Leg
Shoots, Lifts and Pin-Downs
Lazy Man Smokes Pipe
Having Fun with Wrestling Attacks and Counters
How did Past Wing Choon Masters Deal with Wrestlers and Grapplers?
Free Movement Chi Sau while being Blind-Folded
Sap Luk Sau or Sixteen Hand Techniques
Sap Ye Theak or Twelve KicksThiet-Cheit-Na or Fell-Knee-Grip
Wing Choon Kungfu -- Wing Choon 01 The Form-Level of Siu Lin Tou
Reviewing the Basic Stances
Reviewing the Basic Stances -- Part 1
Reviewing the Basic Stances -- Part 2
Reviewing the Basic Stances -- Part 3
Reviewing the Basic Stances -- Part 4
Reviewing the Basic Stances -- Part 5
Reviewing the Basic Stances -- Part 6
Reviewing the Basic Stances -- Part 7
Reviewing the Basic Stances -- Part 8
Reviewing the Basic Stances -- Part 9
Internal Force Level of Sou Lin Tou
Hard and Soft Internal Force
Reviewing the Basic Stances -- Part 12
Form-Level of Siu Lin Tou -- Part 1
Form-Level of Siu Lin Tou -- Part 2
Form-Level of Siu Lin Tou -- Part 3
Form-Level of Siu Lin Tou -- Part 4
Form-Level of Siu Lin Tou -- Part 5
Form-Level of Siu Lin Tou -- Part 6
Using Energy Flow to Move Form -- Part 1
Using Energy Flow to Move Form -- Part 2
Using Energy Flow to Move Form -- Part 3
Using Energy Flow to Move Form -- Part 4
Using Energy Flow to Move Form -- Part 5
Using Energy Flow to Move Form -- Part 6
Using Energy Flow to Move Form -- Part 7
Using Energy Flow to Move Form -- Part 8
Using Energy Flow to Move Form -- Part 9
Using Energy Flow to Move Form -- Part 10
Energy-Flow Level of Siu Lin Tou -- Part 1Energy-Flow Level of Siu Lin Tou -- Part 2
Energy-Flow Level of Siu Lin Tou -- Part 3
Energy-Flow Level of Siu Lin Tou -- Part 4
Energy-Flow Level of Siu Lin Tou -- Part 5
Energy-Flow Level of Siu Lin Tou -- Part 6
Energy-Flow Level of Siu Lin Tou -- Part 7
Energy-Flow Level of Siu Lin Tou -- Part 8
Energy-Flow Level of Siu Lin Tou -- Part 9
Converting Energy Flow to Internal Force -- Part 1
Converting Energy Flow to Internal Force -- Part 2
Converting Energy Flow to Internal Force -- Part 3
Converting Energy Flow to Internal Force -- Part 4
Converting Energy Flow to Internal Force -- Part 5
Converting Energy Flow to Internal Force -- Part 6
Converting Energy Flow to Internal Force -- Part 7
Converting Energy Flow to Internal Force -- Part 8
Converting Energy Flow to Internal Force -- Part 9
Converting Energy Flow to Internal Force -- Part 10
Converting Energy Flow to Internal Force -- Part 11
Internal Force Level of Siu Lin Tou -- Part 1
Internal Force Level of Siu Lin Tou -- Part 2
Internal Force Level of Siu Lin Tou -- Part 3
Internal Force Level of Siu Lin Tou -- Part 4
Internal Force Level of Siu Lin Tou -- Part 5
Internal Force Level of Siu Lin Tou -- Part 6
Internal Force Level of Siu Lin Tou -- Part 7
Internal Force Level of Siu Lin Tou -- Part 8
Internal Force Level of Siu Lin Tou -- Part 9
Hard and Soft Internal Force -- Part 1
Hard and Soft Internal Force -- Part 2Hard and Soft Internal Force -- Part 3
Hard and Soft Internal Force -- Part 4
Hard and Soft Internal Force -- Part 5
Hard and Soft Internal Force -- Part 6
Hard and Soft Internal Force -- Part 7
Hard and Soft Internal Force -- Part 8
Hard and Soft Internal Force -- Part 9
Hard and Soft Internal Force -- Part 10
Hard and Soft Internal Force -- Part 11
Hard and Soft Internal Force -- Part 12
Using Energy Flow to Move Form -- Overview
Energy-Flow Level of Siu Lin Tou -- Overview
Converting Energy Flow to Internal Force -- Overview
Internal Force Level of Siu Lin Tou -- Overview
Hard and Soft Internal Force -- Overview
Wing Choon Kungfu -- Wing Choon 02 Introduction to Chi Sau -- Part 1
Introduction to Chi Sau -- Part 2
Introduction to Chi Sau -- Part 3
Introduction to Chi Sau -- Part 4
Introduction to Chi Sau -- Part 5
Introduction to Chi Sau -- Part 6
Introduction to Chi Sau -- Part 7
Introduction to Chi Sau -- Part 8
Introduction to Chi Sau -- Part 9
Introduction to Chi Sau -- Part 10
The Importance of Waist Rotation -- Part 1The Importance of Waist Rotation -- Part 2
The Importance of Waist Rotation -- Part 3
The Importance of Waist Rotation -- Part 4
The Importance of Waist Rotation -- Part 5
The Importance of Waist Rotation -- Part 6
The Importance of Waist Rotation -- Part 7
The Importance of Waist Rotation -- Part 8
The Importance of Waist Rotation -- Part 9
The Importance of Waist Rotation -- Part 10
The Importance of Waist Rotation -- Part 11
Phong Sau and Kham Sau against Middle Attacks -- Part 1
Phong Sau and Kham Sau against Middle Attacks -- Part 2
Phong Sau and Kham Sau against Middle Attacks -- Part 3
Phong Sau and Kham Sau against Middle Attacks -- Part 4
Phong Sau and Kham Sau against Middle Attacks -- Part 5
Phong Sau and Kham Sau against Middle Attacks -- Part 6
Phong Sau and Kham Sau against Middle Attacks -- Part 7
Phong Sau and Kham Sau against Middle Attacks -- Part 8
Phong Sau and Kham Sau against Middle Attacks -- Part 9
Low Attacks and their Defences -- Part 1
Low Attacks and their Defences -- Part 2
Low Attacks and their Defences -- Part 3
Low Attacks and their Defences -- Part 4
Low Attacks and their Defences -- Part 5
Low Attacks and their Defences -- Part 6
Chiek Sau or Cutting Hand or Side Attacks -- Part 1
Chiek Sau or Cutting Hand or Side Attacks -- Part 2
Chiek Sau or Cutting Hand or Side Attacks -- Part 3
Chiek Sau or Cutting Hand or Side Attacks -- Part 4
Chiek Sau or Cutting Hand or Side Attacks -- Part 5Chiek Sau or Cutting Hand or Side Attacks -- Part 6
Chiek Sau or Cutting Hand or Side Attacks -- Part 7
Chiek Sau or Cutting Hand or Side Attacks -- Part 8
Chiek Sau or Cutting Hand or Side Attacks -- Part 9
The Form Level of Cham Kiew -- Part 1
The Form Level of Cham Kiew -- Part 2
The Form Level of Cham Kiew -- Part 3
The Form Level of Cham Kiew -- Part 4
The Form Level of Cham Kiew -- Part 5
The Form Level of Cham Kiew -- Part 6
The Form Level of Cham Kiew -- Part 7
The Form Level of Cham Kiew -- Part 8
The Form Level of Cham Kiew -- Part 9
The Form Level of Cham Kiew -- Part 10
The Form Level of Cham Kiew -- Part 11
Using Energy to Direct Form, and Converting Energy to Internal Force -- Part 1
Using Energy to Direct Form, and Converting Energy to Internal Force -- Part 2
Using Energy to Direct Form, and Converting Energy to Internal Force -- Part 3
Using Energy to Direct Form, and Converting Energy to Internal Force -- Part 4
Using Energy to Direct Form, and Converting Energy to Internal Force -- Part 5
Using Energy to Direct Form, and Converting Energy to Internal Force -- Part 6
Sequence of Attacks and Counters -- Part 1
Sequence of Attacks and Counters -- Part 2
Sequence of Attacks and Counters -- Part 3
Sequence of Attacks and Counters -- Part 4
Sequence of Attacks and Counters -- Part 5
Sequence of Attacks and Counters -- Part 6
Sequence of Attacks and Counters -- Part 7
Sequence of Attacks and Counters -- Part 8
Sequence of Attacks and Counters -- Part 9Applying Wing Choon Patterns for Combat -- Part 1
Applying Wing Choon Patterns for Combat -- Part 2
Applying Wing Choon Patterns for Combat -- Part 3
Applying Wing Choon Patterns for Combat -- Part 4
Applying Wing Choon Patterns for Combat -- Part 5
Applying Wing Choon Patterns for Combat -- Part 6
Applying Wing Choon Patterns for Combat -- Part 7
Applying Wing Choon Patterns for Combat -- Part 8
Applying Wing Choon Patterns for Combat -- Part 9
Applying Wing Choon Patterns for Combat -- Part 10
Applying Wing Choon Patterns for Combat -- Part 11
Applying Wing Choon Patterns for Combat -- Part 12
Applying Wing Choon Patterns for Combat -- Part 13
Applying Wing Choon Patterns for Combat -- Part 14
Applying Wing Choon Patterns for Combat -- Part 15
Introduction to Chi Sau -- Overview
The Importance of Waist Rotation -- Overview
Phong Sau and Kham Sau against Middle Attacks -- Overview
Low Attacks and their Defences -- Overview
Chiek Sau or Cutting Hand or Side Attacks -- Overview
The Form Level of Cham Kiew -- Overview
Using Energy to Direct Form, and Converting Energy to Internal Force -- Overview
Sequence of Attacks and Counters -- Overview
Applying Wing Choon Patterns for Combat -- Overview
Wing Choon Kungfu -- Wing Choon 03 Basic Hand Techniques of Stationary Chi Sau -- Part 1
Basic Hand Techniques of Stationary Chi Sau -- Part 2
Basic Hand Techniques of Stationary Chi Sau -- Part 3
Basic Hand Techniques of Stationary Chi Sau -- Part 4
Basic Hand Techniques of Stationary Chi Sau -- Part 5
Basic Hand Techniques of Stationary Chi Sau -- Part 6
Basic Hand Techniques of Stationary Chi Sau -- Part 7
Basic Hand Techniques of Stationary Chi Sau -- Part 8
Basic Hand Techniques of Stationary Chi Sau -- Part 9
Basic Hand Techniques of Stationary Chi Sau -- Part 10
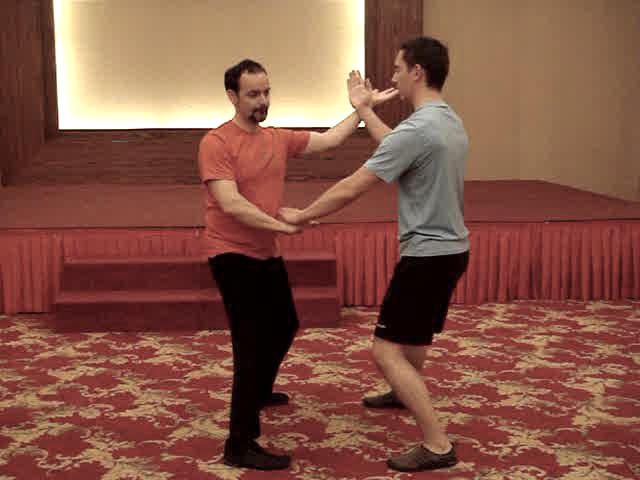 Basic Hand Techniques of Stationary Chi Sau -- Part 11
Developing Thien Keng or sensing Skills -- Part 1
Developing Thien Keng or sensing Skills -- Part 2
Developing Thien Keng or sensing Skills -- Part 3
Developing Thien Keng or sensing Skills -- Part 4
Developing Thien Keng or sensing Skills -- Part 5
Developing Thien Keng or sensing Skills -- Part 6
Developing Thien Keng or sensing Skills -- Part 7
Developing Thien Keng or sensing Skills -- Part 8
Developing Thien Keng or sensing Skills -- Part 9
Training of Energy and Mind -- Part 1
Training of Energy and Mind -- Part 2
Training of Energy and Mind -- Part 3
Training of Energy and Mind -- Part 4
Training of Energy and Mind -- Part 5
Training of Energy and Mind -- Part 6
Training of Energy and Mind -- Part 7
Training of Energy and Mind -- Part 8
The Use of Tactics -- Part 1
The Use of Tactics -- Part 2
The Use of Tactics -- Part 3
The Use of Tactics -- Part 4
The Use of Tactics -- Part 5
The Use of Tactics -- Part 6
The Use of Tactics -- Part 7
The Use of Tactics -- Part 8
The Use of Tactics -- Part 9
The Use of Tactics -- Part 10
Sensing with the Mind -- Part 1
Sensing with the Mind -- Part 2
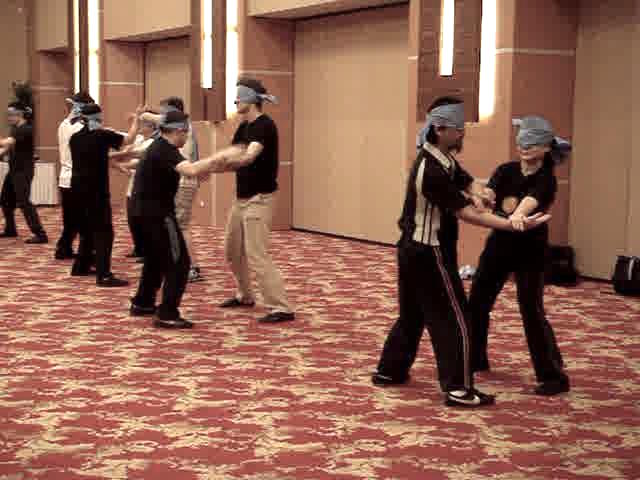 Sensing with the Mind -- Part 3
Sensing with the Mind -- Part 4
Sensing with the Mind -- Part 5
Sensing with the Mind -- Part 6
Sensing with the Mind -- Part 7
Sensing with the Mind -- Part 8
Sensing with the Mind -- Part 9
Sensing with the Mind -- Part 10
Sensing with the Mind -- Part 11
Sensing with the Mind -- Part 12
Sap Luk Sau or Sixteen Hand Techniques -- Part 1
Sap Luk Sau or Sixteen Hand Techniques -- Part 2
Sap Luk Sau or Sixteen Hand Techniques -- Part 3
Sap Luk Sau or Sixteen Hand Techniques -- Part 4
Sap Luk Sau or Sixteen Hand Techniques -- Part 5
Sap Luk Sau or Sixteen Hand Techniques -- Part 6
Sap Luk Sau or Sixteen Hand Techniques -- Part 7
Sap Luk Sau or Sixteen Hand Techniques -- Part 8
Sap Luk Sau or Sixteen Hand Techniques -- Part 1
Performing Sap Luk Sau Blind-Folded -- Part 2
Performing Sap Luk Sau Blind-Folded -- Part 3
Performing Sap Luk Sau Blind-Folded -- Part 4
Performing Sap Luk Sau Blind-Folded -- Part 5
Performing Sap Luk Sau Blind-Folded -- Part 6
Performing Sap Luk Sau Blind-Folded -- Part 7
Performing Sap Luk Sau Blind-Folded -- Part 8
Free Movement Chi Dau in Blind-Fold -- Part 1
Free Movement Chi Dau in Blind-Fold -- Part 2
Free Movement Chi Dau in Blind-Fold -- Part 3
Free Movement Chi Dau in Blind-Fold -- Part 4
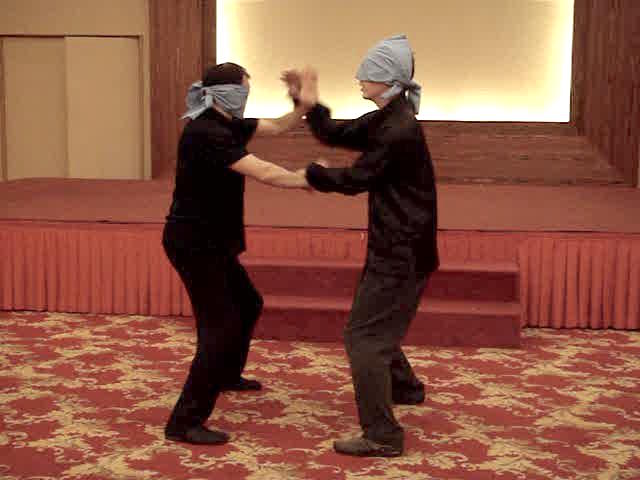 Free Movement Chi Dau in Blind-Fold -- Part 5
Free Movement Chi Dau in Blind-Fold -- Part 6
Free Movement Chi Dau in Blind-Fold -- Part 7
Free Movement Chi Dau in Blind-Fold -- Part 8
Basic Hand Techniques of Stationary Chi Sau -- Overview
Developing Thien Keng or sensing Skills -- Overview
Training of Energy and Mind -- Overview
The Use of Tactics -- Overview
Sensing with the Mind -- Overview
Sap Luk Sau or Sixteen Hand Techniques -- Overview
Performing Sap Luk Sau Blind-Folded -- Overview
Free Movement Chi Dau in Blind-Fold -- Overview
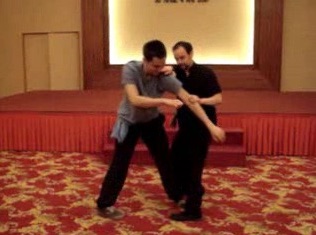 Wing Choon Kungfu -- Wing Choon 04
Taming and Locking an Opponent and
Wing Choon Kungfu -- Wing Choon 04
Taming and Locking an Opponent andSimultaneously Striking Him -- Part 1
Taming and Locking an Opponent and
Simultaneously Striking Him -- Part 2
Taming and Locking an Opponent and
Simultaneously Striking Him -- Part 3
Taming and Locking an Opponent and
Simultaneously Striking Him -- Part 4
Taming and Locking an Opponent and
Simultaneously Striking Him -- Part 5
Taming and Locking an Opponent and Simultaneously Striking Him -- Part 7
Taming and Locking an Opponent and Simultaneously Striking Him -- Part 8
Excellent Counters Proposed by Course Participants -- Part 1
Excellent Counters Proposed by Course Participants -- Part 2
Excellent Counters Proposed by Course Participants -- Part 3
Excellent Counters Proposed by Course Participants -- Part 4
Excellent Counters Proposed by Course Participants -- Part 5
Excellent Counters Proposed by Course Participants -- Part 6
Excellent Counters Proposed by Course Participants -- Part 7
Excellent Counters Proposed by Course Participants -- Part 8
Exploiting Opponent's Weaknesses in Combat -- Part 1
Exploiting Opponent's Weaknesses in Combat -- Part 2
Exploiting Opponent's Weaknesses in Combat -- Part 3
Exploiting Opponent's Weaknesses in Combat -- Part 4
Exploiting Opponent's Weaknesses in Combat -- Part 5
Exploiting Opponent's Weaknesses in Combat -- Part 6
Exploiting Opponent's Weaknesses in Combat -- Part 7
Exploiting Opponent's Weaknesses in Combat -- Part 8
Exploiting Opponent's Weaknesses in Combat -- Part 9
When you are being Locked and Pressed against a Wall -- Part 1
When you are being Locked and Pressed against a Wall -- Part 2
When you are being Locked and Pressed against a Wall -- Part 3
When you are being Locked and Pressed against a Wall -- Part 4
When you are being Locked and Pressed against a Wall -- Part 5
When you are being Locked and Pressed against a Wall -- Part 6
 Learning the Forms of Phew Chee -- Part 1
Learning the Forms of Phew Chee -- Part 2
Learning the Forms of Phew Chee -- Part 3
Learning the Forms of Phew Chee -- Part 4
Learning the Forms of Phew Chee -- Part 5
Learning the Forms of Phew Chee -- Part 6
Learning the Forms of Phew Chee -- Part 7
Learning the Forms of Phew Chee -- Part 8
Learning the Forms of Phew Chee -- Part 9
Learning the Forms of Phew Chee -- Part 10
Learning the Forms of Phew Chee -- Part 11
Learning the Forms of Phew Chee -- Part 12
From Pattern Practice to Free Sparring -- Part 1
From Pattern Practice to Free Sparring -- Part 2
From Pattern Practice to Free Sparring -- Part 3
From Pattern Practice to Free Sparring -- Part 4
When you are being Locked a dPrressed against a Wall -- Part 7
When you are being Locked a dPrressed against a Wall -- Part 8
Moving from In-Gate to Out-Gate and Vice Versa -- Part 1
Moving from In-Gate to Out-Gate and Vice Versa -- Part 2
Moving from In-Gate to Out-Gate and Vice Versa -- Part 3
Moving from In-Gate to Out-Gate and Vice Versa -- Part 4
Moving from In-Gate to Out-Gate and Vice Versa -- Part 5
Moving from In-Gate to Out-Gate and Vice Versa -- Part 6
Moving from In-Gate to Out-Gate and Vice Versa -- Part 7
Moving from In-Gate to Out-Gate and Vice Versa -- Part 8
Moving from In-Gate to Out-Gate and Vice Versa -- Part 9
Effective Counters against Grips and Locks -- Part 1
Effective Counters against Grips and Locks -- Part 2
Effective Counters against Grips and Locks -- Part 3
 Effective Counters against Grips and Locks -- Part 4
Effective Counters against Grips and Locks -- Part 5
Effective Counters against Grips and Locks -- Part 6
Effective Counters against Grips and Locks -- Part 7
Effective Counters against Grips and Locks -- Part 8
Effective Counters against Grips and Locks -- Part 9
Effective Counters against Grips and Locks -- Part 10
No Defence Direct Counter against Formidable
Bottom Attacks -- Part 1
No Defence Direct Counter against Formidable
Bottom Attacks -- Part 2
No Defence Direct Counter against Formidable Bottom Attacks -- Part 3
No Defence Direct Counter against Formidable Bottom Attacks -- Part 4
No Defence Direct Counter against Formidable Bottom Attacks -- Part 5
No Defence Direct Counter against Formidable Bottom Attacks -- Part 6
No Defence Direct Counter against Formidable Bottom Attacks -- Part 7
No Defence Direct Counter against Formidable Bottom Attacks -- Part 8
No Defence Direct Counter against Formidable Bottom Attacks -- Part 9
No Defence Direct Counter against Formidable Bottom Attacks -- Part 10
No Defence Direct Counter against Formidable Bottom Attacks -- Part 11
Horizontal Chops and Crane Beaks in Side Attacks -- Part 1
Horizontal Chops and Crane Beaks in Side Attacks -- Part 2
Horizontal Chops and Crane Beaks in Side Attacks -- Part 3
Horizontal Chops and Crane Beaks in Side Attacks -- Part 4
Horizontal Chops and Crane Beaks in Side Attacks -- Part 5
Horizontal Chops and Crane Beaks in Side Attacks -- Part 6
Horizontal Chops and Crane Beaks in Side Attacks -- Part 7
Horizontal Chops and Crane Beaks in Side Attacks -- Part 8
Horizontal Chops and Crane Beaks in Side Attacks -- Part 9
Horizontal Chops and Crane Beaks in Side Attacks -- Part 10
Horizontal Chops and Crane Beaks in Side Attacks -- Part 11
Top and Middle Attacks and their Counters -- Part 1
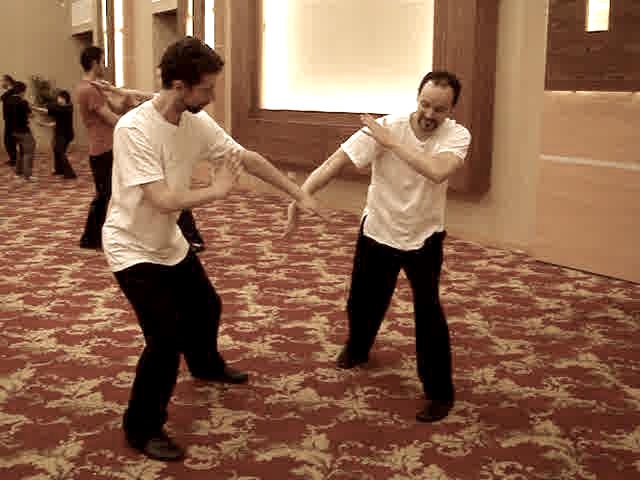 Top and Middle Attacks and their Counters -- Part 2
Top and Middle Attacks and their Counters -- Part 3
Top and Middle Attacks and their Counters -- Part 4
Top and Middle Attacks and their Counters -- Part 5
Top and Middle Attacks and their Counters -- Part 6
Top and Middle Attacks and their Counters -- Part 7
Top and Middle Attacks and their Counters -- Part 8
Top and Middle Attacks and their Counters -- Part 9
Top and Middle Attacks and their Counters -- Part 10
Top and Middle Attacks and their Counters -- Part 11
Top and Middle Attacks and their Counters -- Part 12
Botton and Side Attacks and their Counters -- Part 1
Botton and Side Attacks and their Counters -- Part 2
Botton and Side Attacks and their Counters -- Part 3
Botton and Side Attacks and their Counters -- Part 4
Botton and Side Attacks and their Counters -- Part 5
Botton and Side Attacks and their Counters -- Part 6
Botton and Side Attacks and their Counters -- Part 7
Botton and Side Attacks and their Counters -- Part 8
Botton and Side Attacks and their Counters -- Part 9
From Pattern Practice to Free Sparring -- Part 5
From Pattern Practice to Free Sparring -- Part 6
From Pattern Practice to Free Sparring -- Part 7
From Pattern Practice to Free Sparring -- Part 8
From Pattern Practice to Free Sparring -- Part 9
Taming and Locking an Opponent and Simultaneously Striking Him -- Overview
Excellent Counters Proposed by Course Participants -- Overview
Exploiting Opponent's Weaknesses in Combat -- Overview
When you are being Locked and Pressed against a Wall -- Overview
Moving from In-Gate to Out-Gate and Vice Versa -- Overview
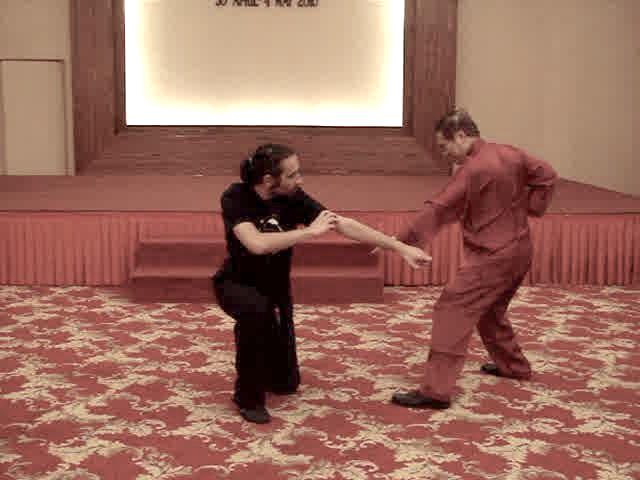 Effective Counters against Grips and Locks -- Overview
No Defence Direct Counter against Formidable Bottom Attacks -- Overview
Horizontal Chops and Crane Beaks in Side Attacks -- Overview
Top and Middle Attacks and their Counters -- Overview
Botton and Side Attacks and their Counters -- Overview
Learning the Forms of Phew Chee -- Overview
From Pattern Practice to Free Sparring -- Overview
Wing Choon Kungfu -- Wing Choon 05 Thrust Kicks and their Counters -- Part 1
Thrust Kicks and their Counters -- Part 2
Thrust Kicks and their Counters -- Part 3
Thrust Kicks and their Counters -- Part 4
Thrust Kicks and their Counters -- Part 5
Thrust Kicks and their Counters -- Part 6
Thrust Kicks and their Counters -- Part 7
Thrust Kicks and their Counters -- Part 8
Thrust Kicks and their Counters -- Part 9
Smart Practice Makes Perfect -- Part 1
Smart Practice Makes Perfect -- Part 2
Smart Practice Makes Perfect -- Part 3
Smart Practice Makes Perfect -- Part 4
Smart Practice Makes Perfect -- Part 5
Smart Practice Makes Perfect -- Part 6
Smart Practice Makes Perfect -- Part 7
Smart Practice Makes Perfect -- Part 8
Understanding Wing Choon Principles and Practice -- Part 1
Understanding Wing Choon Principles and Practice -- Part 2
Understanding Wing Choon Principles and Practice -- Part 3
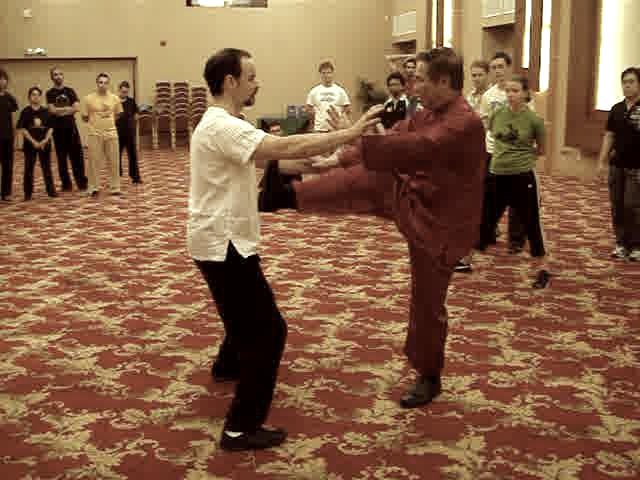 Understanding Wing Choon Principles and Practice -- Part 4
Understanding Wing Choon Principles and Practice -- Part 5
Understanding Wing Choon Principles and Practice -- Part 6
Understanding Wing Choon Principles and Practice -- Part 7
Understanding Wing Choon Principles and Practice -- Part 8
Understanding Wing Choon Principles and Practice -- Part 9
Practicing Chi Sau while being Blind-Folded -- Part 1
Practicing Chi Sau while being Blind-Folded -- Part 2
Practicing Chi Sau while being Blind-Folded -- Part 3
Practicing Chi Sau while being Blind-Folded -- Part 4
Practicing Chi Sau while being Blind-Folded -- Part 5
Practicing Chi Sau while being Blind-Folded -- Part 6
Practicing Chi Sau while being Blind-Folded -- Part 7
Practicing Chi Sau while being Blind-Folded -- Part 8
Practicing Chi Sau while being Blind-Folded -- Part 9
Practicing Chi Sau while being Blind-Folded -- Part 10
Practicing Chi Sau while being Blind-Folded -- Part 11
Thrust Kicks and their Counters -- Overview
Smart Practice Makes Perfect -- Overview
Understanding Wing Choon Principles and Practice -- Overview
Practicing Chi Sau while being Blind-Folded -- Overview
Wing Choon Kungfu -- Wing Choon 06 Effective Counters against Kicks -- Part 1
Effective Counters against Kicks -- Part 2
Effective Counters against Kicks -- Part 3
Effective Counters against Kicks -- Part 4
Effective Counters against Kicks -- Part 5
Effective Counters against Kicks -- Part 6
Effective Counters against Kicks -- Part 7
Effective Counters against Kicks -- Part 8
Effective Counters against Kicks -- Part 9
Effective Counters against Kicks -- Part 10
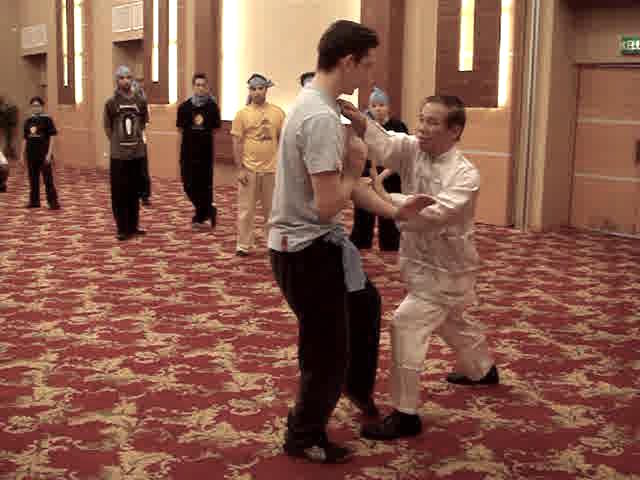 Effective Counters against Kicks -- Part 11
Cockerel Kicks against Whirlwind Kicks -- Part 1
Cockerel Kicks against Whirlwind Kicks -- Part 2
Cockerel Kicks against Whirlwind Kicks -- Part 3
Cockerel Kicks against Whirlwind Kicks -- Part 4
Cockerel Kicks against Whirlwind Kicks -- Part 5
Cockerel Kicks against Whirlwind Kicks -- Part 6
Cockerel Kicks against Whirlwind Kicks -- Part 7
Cockerel Kicks against Whirlwind Kicks -- Part 8
Cockerel Kicks against Whirlwind Kicks -- Part 9
Cockerel Kicks against Whirlwind Kicks -- Part 10
Cockerel Kicks against Whirlwind Kicks -- Part 11
Cockerel Kicks against Whirlwind Kicks -- Part 12
Cockerel Kicks against Whirlwind Kicks -- Part 13
Counters against Low Sweeping Kicks -- Part 1
Counters against Low Sweeping Kicks -- Part 2
Counters against Low Sweeping Kicks -- Part 3
Counters against Low Sweeping Kicks -- Part 4
Counters against Low Sweeping Kicks -- Part 5
Counters against Low Sweeping Kicks -- Part 6
Counters against Low Sweeping Kicks -- Part 7
Counters against Low Sweeping Kicks -- Part 8
Striking or Intercepting Opponent's Kicks -- Part 1
Striking or Intercepting Opponent's Kicks -- Part 2
Striking or Intercepting Opponent's Kicks -- Part 3
Striking or Intercepting Opponent's Kicks -- Part 4
Striking or Intercepting Opponent's Kicks -- Part 5
Striking or Intercepting Opponent's Kicks -- Part 6
Striking or Intercepting Opponent's Kicks -- Part 7
Striking or Intercepting Opponent's Kicks -- Part 8
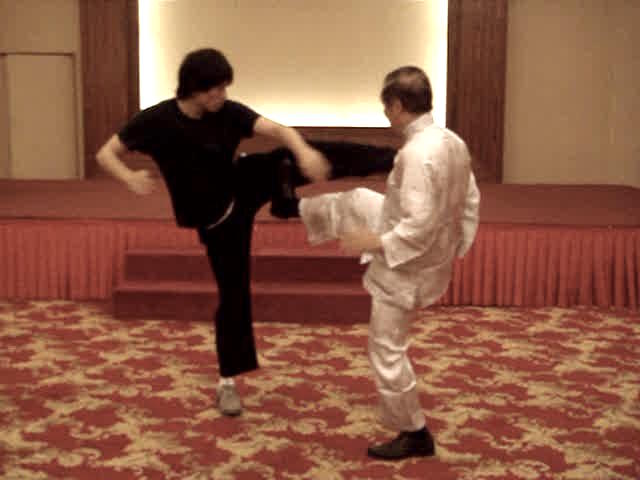 Striking or Intercepting Opponent's Kicks -- Part 9
Striking or Intercepting Opponent's Kicks -- Part 10
Striking or Intercepting Opponent's Kicks -- Part 11
Striking or Intercepting Opponent's Kicks -- Part 12
Helping One Another and Having Fun -- Part 1
Helping One Another and Having Fun -- Part 2
Sap Ye Thiak or Twelve Kicks -- Part 1
Helping One Another and Having Fun -- Part 3
Sap Ye Thiak or Twelve Kicks -- Part 2
Helping One Another and Having Fun -- Part 4
Sap Ye Thiak or Twelve Kicks -- Part 3
Helping One Another and Having Fun -- Part 5
Sap Ye Thiak or Twelve Kicks -- Part 4
Helping One Another and Having Fun -- Part 6
Sap Ye Thiak or Twelve Kicks -- Part 5
Helping One Another and Having Fun -- Part 7
Sap Ye Thiak or Twelve Kicks -- Part 6
Helping One Another and Having Fun -- Part 8
Helping One Another and Having Fun -- Part 9
Helping One Another and Having Fun -- Part 10
Helping One Another and Having Fun -- Part 11
Helping One Another and Having Fun -- Part 12
How do You Escape this Difficult Situation? -- Part 1
How do You Escape this Difficult Situation? -- Part 2
How do You Escape this Difficult Situation? -- Part 3
How do You Escape this Difficult Situation? -- Part 4
How do You Escape this Difficult Situation? -- Part 5
How do You Escape this Difficult Situation? -- Part 6
How do You Escape this Difficult Situation? -- Part 7
How do You Escape this Difficult Situation? -- Part 8
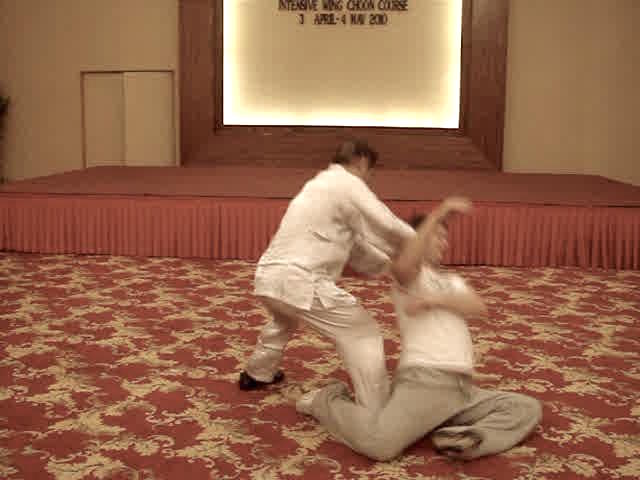 How do You Escape this Difficult Situation? -- Part 9
How do You Escape this Difficult Situation? -- Part 10
Felling a Giant Almost Effortlessly -- Part 1
Felling a Giant Almost Effortlessly -- Part 2
Felling a Giant Almost Effortlessly -- Part 3
Felling a Giant Almost Effortlessly -- Part 4
Felling a Giant Almost Effortlessly -- Part 5
Felling a Giant Almost Effortlessly -- Part 6
Felling a Giant Almost Effortlessly -- Part 7
Felling a Giant Almost Effortlessly -- Part 8
Felling a Giant Almost Effortlessly -- Part 9
Felling a Giant Almost Effortlessly -- Part 10
Felling a Giant Almost Effortlessly -- Part 11
Effective Counters against Kicks -- Overview
Cockerel Kicks against Whirlwind Kicks -- Overview
Counters against Low Sweeping Kicks -- Overview
Striking or Intercepting Opponent's Kicks -- Overview
Helping One Another and Having Fun -- Overview
Sap Ye Thiak or Twelve Kicks -- Overview
How do You Escape this Difficult Situation? -- Overview
Felling a Giant Almost Effortlessly -- Overview
Wing Choon Kungfu -- Wing Choon 07 Turning a Weakness into a Strength -- Part 1
Turning a Weakness into a Strength -- Part 2
Turning a Weakness into a Strength -- Part 3
Turning a Weakness into a Strength -- Part 4
Turning a Weakness into a Strength -- Part 5
Turning a Weakness into a Strength -- Part 6
Turning a Weakness into a Strength -- Part 7
Turning a Weakness into a Strength -- Part 8
Turning a Weakness into a Strength -- Part 9
Turning a Weakness into a Strength -- Part 10
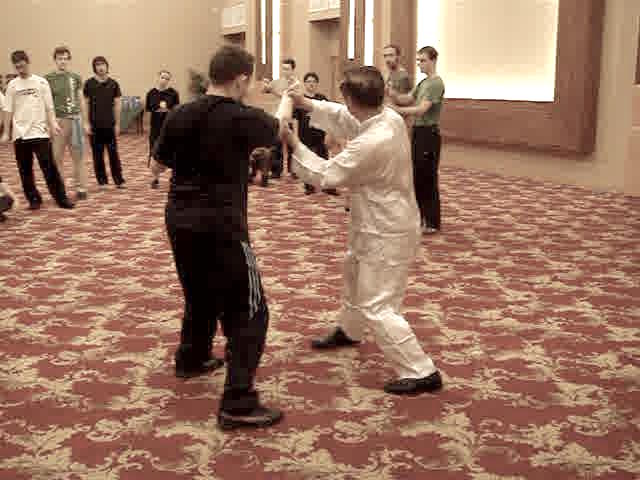 Turning a Weakness into a Strength -- Part 11
Butterfly Palms against Double Grip Chin-Na Attack -- Part 1
Butterfly Palms against Double Grip Chin-Na Attack -- Part 2
Butterfly Palms against Double Grip Chin-Na Attack -- Part 3
Butterfly Palms against Double Grip Chin-Na Attack -- Part 4
Butterfly Palms against Double Grip Chin-Na Attack -- Part 5
Butterfly Palms against Double Grip Chin-Na Attack -- Part 6
Butterfly Palms against Double Grip Chin-Na Attack -- Part 7
Butterfly Palms against Double Grip Chin-Na Attack -- Part 8
Butterfly Palms against Double Grip Chin-Na Attack -- Part 9
Butterfly Palms against Double Grip Chin-Na Attack -- Part 10
Do You Know the Combat Applications of these Apparently Useless Patterns? -- Part 1
Do You Know the Combat Applications of these Apparently Useless Patterns? -- Part 2
Do You Know the Combat Applications of these Apparently Useless Patterns? -- Part 3
Do You Know the Combat Applications of these Apparently Useless Patterns? -- Part 4
Do You Know the Combat Applications of these Apparently Useless Patterns? -- Part 5
Do You Know the Combat Applications of these Apparently Useless Patterns? -- Part 6
Do You Know the Combat Applications of these Apparently Useless Patterns? -- Part 7
Do You Know the Combat Applications of these Apparently Useless Patterns? -- Part 8
Do You Know the Combat Applications of these Apparently Useless Patterns? -- Part 9
Do You Know the Combat Applications of these Apparently Useless Patterns? -- Part 10
Sophisticated Applications of Seemingly Harmless Patterns -- Part 1
Sophisticated Applications of Seemingly Harmless Patterns -- Part 2
Sophisticated Applications of Seemingly Harmless Patterns -- Part 3
Sophisticated Applications of Seemingly Harmless Patterns -- Part 4
Sophisticated Applications of Seemingly Harmless Patterns -- Part 5
Sophisticated Applications of Seemingly Harmless Patterns -- Part 6
Sophisticated Applications of Seemingly Harmless Patterns -- Part 7
Sophisticated Applications of Seemingly Harmless Patterns -- Part 8
Sophisticated Applications of Seemingly Harmless Patterns -- Part 9
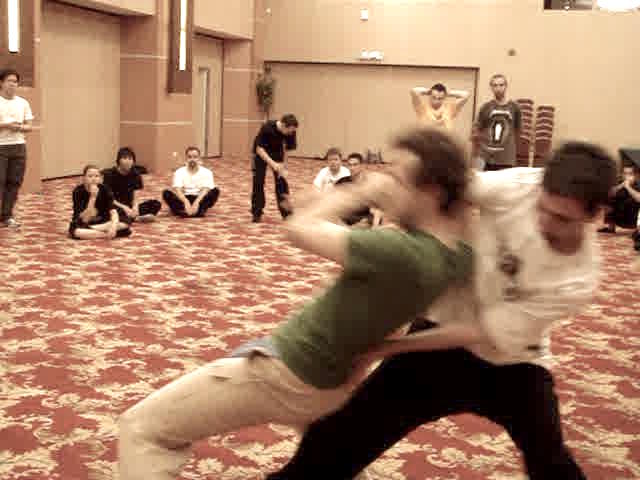 Sophisticated Applications of Seemingly Harmless
Patterns -- Part 10
Have Fun Deciphering Sophisticated Applications
from Innocent-Looking Patterns -- Part 1
Have Fun Deciphering Sophisticated Applications
from Innocent-Looking Patterns -- Part 2
Have Fun Deciphering Sophisticated Applications
from Innocent-Looking Patterns -- Part 3
Have Fun Deciphering Sophisticated Applications
from Innocent-Looking Patterns -- Part 4
Have Fun Deciphering Sophisticated Applications
from Innocent-Looking Patterns -- Part 5
Have Fun Deciphering Sophisticated Applications from Innocent-Looking Patterns -- Part 6
Have Fun Deciphering Sophisticated Applications from Innocent-Looking Patterns -- Part 7
Have Fun Deciphering Sophisticated Applications from Innocent-Looking Patterns -- Part 8
Have Fun Deciphering Sophisticated Applications from Innocent-Looking Patterns -- Part 9
Have Fun Deciphering Sophisticated Applications from Innocent-Looking
Patterns -- Part 10
Have Fun Deciphering Sophisticated Applications from Innocent-Looking
Patterns -- Part 11
Big and Small Movements in Wing Choon Hand Techniques -- Part 1
Big and Small Movements in Wing Choon Hand Techniques -- Part 2
Big and Small Movements in Wing Choon Hand Techniques -- Part 3
Big and Small Movements in Wing Choon Hand Techniques -- Part 4
Big and Small Movements in Wing Choon Hand Techniques -- Part 5
Big and Small Movements in Wing Choon Hand Techniques -- Part 6
Big and Small Movements in Wing Choon Hand Techniques -- Part 7
Big and Small Movements in Wing Choon Hand Techniques -- Part 8
Big and Small Movements in Wing Choon Hand Techniques -- Part 9
The Course is Full of Interesting Surprises -- Part 1
The Course is Full of Interesting Surprises -- Part 2
The Course is Full of Interesting Surprises -- Part 3
The Course is Full of Interesting Surprises -- Part 4
The Course is Full of Interesting Surprises -- Part 5
The Course is Full of Interesting Surprises -- Part 6
The Course is Full of Interesting Surprises -- Part 7
The Course is Full of Interesting Surprises -- Part 8
The Course is Full of Interesting Surprises -- Part 9
 Turning a Weakness into a Strength -- Overview
Butterfly Palms against Double Grip Chin-Na
Attack -- Overview
Do You Know the Combat Applications of these
Apparently Useless Patterns? -- Overview
Sophisticated Applications of Seemingly Harmless
Patterns -- Overview
Have Fun Deciphering Sophisticated Applications
from Innocent-Looking Patterns -- Overview
Big and Small Movements in Wing Choon Hand
Techniques -- Overview
The Course is Full of Interesting Surprises -- Overview
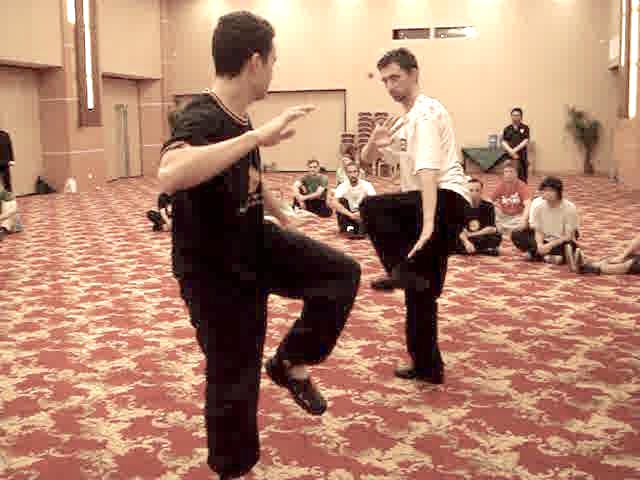 Wing Choon Kungfu -- Wing Choon 08
Felling Techniques in Wing Choon Kungfu -- Part 1
Wing Choon Kungfu -- Wing Choon 08
Felling Techniques in Wing Choon Kungfu -- Part 1Felling Techniques in Wing Choon Kungfu -- Part 2
Felling Techniques in Wing Choon Kungfu -- Part 3
Felling Techniques in Wing Choon Kungfu -- Part 4
Felling Techniques in Wing Choon Kungfu -- Part 5
Felling Techniques in Wing Choon Kungfu -- Part 6
Felling Techniques in Wing Choon Kungfu -- Part 7
Felling Techniques in Wing Choon Kungfu -- Part 8
Felling Techniques in Wing Choon Kungfu -- Part 9
Neutralizing Opponents' Attacks with your Legs -- Part 1
Neutralizing Opponents' Attacks with your Legs -- Part 2
Neutralizing Opponents' Attacks with your Legs -- Part 3
Neutralizing Opponents' Attacks with your Legs -- Part 4
Neutralizing Opponents' Attacks with your Legs -- Part 5
Neutralizing Opponents' Attacks with your Legs -- Part 6
Neutralizing Opponents' Attacks with your Legs -- Part 7
Neutralizing Opponents' Attacks with your Legs -- Part 8
Chin-Na Attacks and their Counters -- Part 1
Chin-Na Attacks and their Counters -- Part 2
Chin-Na Attacks and their Counters -- Part 3
Chin-Na Attacks and their Counters -- Part 4
Chin-Na Attacks and their Counters -- Part 5
Chin-Na Attacks and their Counters -- Part 6
Chin-Na Attacks and their Counters -- Part 7
Chin-Na Attacks and their Counters -- Part 8
Chin-Na Attacks and their Counters -- Part 9
Thiet-Cheit-Na or Fell-Knee-Grip -- Part 1
Thiet-Cheit-Na or Fell-Knee-Grip -- Part 2
Thiet-Cheit-Na or Fell-Knee-Grip -- Part 3
Thiet-Cheit-Na or Fell-Knee-Grip -- Part 4
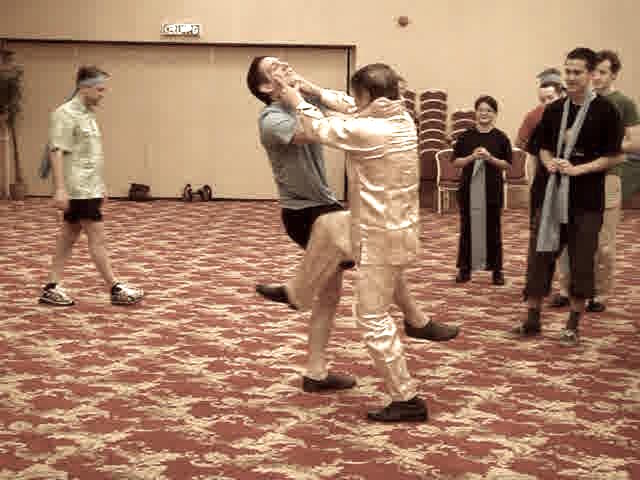 Thiet-Cheit-Na or Fell-Knee-Grip -- Part 5
Thiet-Cheit-Na or Fell-Knee-Grip -- Part 6
Thiet-Cheit-Na or Fell-Knee-Grip -- Part 7
Thiet-Cheit-Na or Fell-Knee-Grip -- Part 8
How Elegant Ladies can Handle Muscular Brutes -- Part 1
How Elegant Ladies can Handle Muscular Brutes -- Part 2
How Elegant Ladies can Handle Muscular Brutes -- Part 3
How Elegant Ladies can Handle Muscular Brutes -- Part 4
How Elegant Ladies can Handle Muscular Brutes -- Part 5
How Elegant Ladies can Handle Muscular Brutes -- Part 6
How Elegant Ladies can Handle Muscular Brutes -- Part 7
Free Sparring while being Blind-Folded -- Part 1
Free Sparring while being Blind-Folded -- Part 2
Free Sparring while being Blind-Folded -- Part 3
Free Sparring while being Blind-Folded -- Part 4
Free Sparring while being Blind-Folded -- Part 5
Free Sparring while being Blind-Folded -- Part 6
Free Sparring while being Blind-Folded -- Part 7
Free Sparring while being Blind-Folded -- Part
Deflecting Attacks without Looking at Them -- Part 1
Deflecting Attacks without Looking at Them -- Part 2
Deflecting Attacks without Looking at Them -- Part 3
Deflecting Attacks without Looking at Them -- Part 4
Deflecting Attacks without Looking at Them -- Part 5
Deflecting Attacks without Looking at Them -- Part 6
Deflecting Attacks without Looking at Them -- Part 7
Deflecting Attacks without Looking at Them -- Part 8
Felling Techniques in Wing Choon Kungfu -- Overview
Neutralizing Opponents' Attacks with your Legs! -- Overview
Chin-Na Attacks and their Counters -- Overview
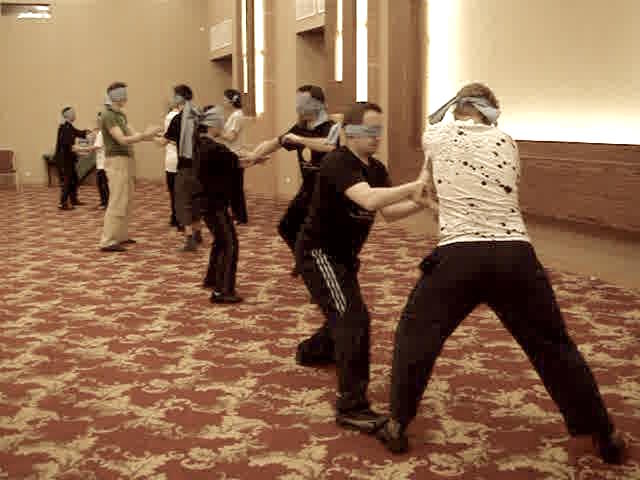 Thiet-Cheit-Na or Fell-Knee-Grip -- Overview
How Elegant Ladies can Handle Muscular Brutes -- Overview
Free Sparring while being Blind-Folded -- Overview
Deflecting Attacks without Looking at Them -- Overview
Wing Choon Kungfu -- Wing Choon 09 Moving from Technique-Level to Sequence-Level
in Sparring -- Part 1
Moving from Technique-Level to Sequence-Level
in Sparring -- Part 2
Moving from Technique-Level to Sequence-Level in Sparring -- Part 3
Moving from Technique-Level to Sequence-Level in Sparring -- Part 4
Moving from Technique-Level to Sequence-Level in Sparring -- Part 5
Moving from Technique-Level to Sequence-Level in Sparring -- Part 6
Moving from Technique-Level to Sequence-Level in Sparring -- Part 7
Moving from Technique-Level to Sequence-Level in Sparring -- Part 8
Moving from Technique-Level to Sequence-Level in Sparring -- Part 9
Moving from Technique-Level to Sequence-Level in Sparring -- Part 10
Small Difference in Movements can make Big Difference in Results -- Part 1
Small Difference in Movements can make Big Difference in Results -- Part 2
Small Difference in Movements can make Big Difference in Results -- Part 3
Small Difference in Movements can make Big Difference in Results -- Part 4
Small Difference in Movements can make Big Difference in Results -- Part 5
Small Difference in Movements can make Big Difference in Results -- Part 6
Small Difference in Movements can make Big Difference in Results -- Part 7
Small Difference in Movements can make Big Difference in Results -- Part 8
Small Difference in Movements can make Big Difference in Results -- Part 9
Small Difference in Movements can make Big Difference in Results -- Part 10
Small Difference in Movements can make Big Difference in Results -- Part 11
Applying Planned Sequence Irrrespective of Opponent's Response! -- Part 1
Applying Planned Sequence Irrrespective of Opponent's Response! -- Part 2
Applying Planned Sequence Irrrespective of Opponent's Response! -- Part 3
Applying Planned Sequence Irrrespective of Opponent's Response! -- Part 4
Applying Planned Sequence Irrrespective of Opponent's Response! -- Part 5
Applying Planned Sequence Irrrespective of Opponent's Response! -- Part 6
Applying Planned Sequence Irrrespective of Opponent's Response! -- Part 7
Applying Planned Sequence Irrrespective of Opponent's Response! -- Part 8
Applying Planned Sequence Irrrespective of Opponent's Response! -- Part 9
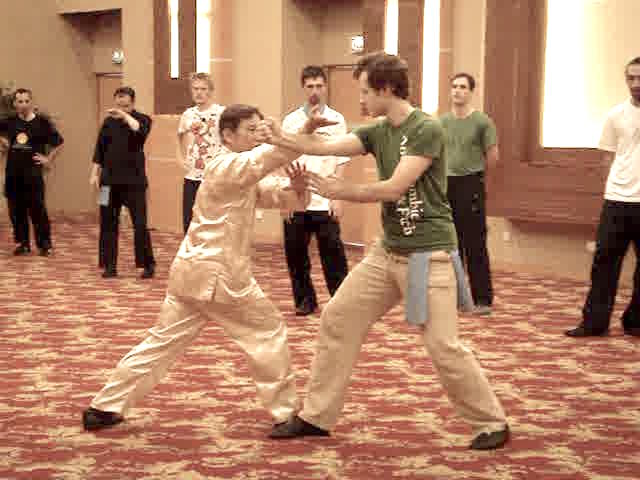 Applying Planned Sequence Irrrespective of
Opponent's Response! -- Part 10
Applying Planned Sequence Irrrespective of
Opponent's Response! -- Part 11
Applying Planned Sequence Irrrespective of
Opponent's Response! -- Part 12
Don't Hand your Defeat to your Opponent -- Part 1
Don't Hand your Defeat to your Opponent -- Part 2
Don't Hand your Defeat to your Opponent -- Part 3
Don't Hand your Defeat to your Opponent -- Part 4
Don't Hand your Defeat to your Opponent -- Part 5
Don't Hand your Defeat to your Opponent -- Part 6
Don't Hand your Defeat to your Opponent -- Part 7
Don't Hand your Defeat to your Opponent -- Part 8
Don't Hand your Defeat to your Opponent -- Part 9
Marvelous Techniques beget Marvelous Techniques -- Part 1
Marvelous Techniques beget Marvelous Techniques -- Part 2
Marvelous Techniques beget Marvelous Techniques -- Part 3
Marvelous Techniques beget Marvelous Techniques -- Part 4
Marvelous Techniques beget Marvelous Techniques -- Part 5
Marvelous Techniques beget Marvelous Techniques -- Part 6
Marvelous Techniques beget Marvelous Techniques -- Part 7
Marvelous Techniques beget Marvelous Techniques -- Part 8
Marvelous Techniques beget Marvelous Techniques -- Part 9
Marvelous Techniques beget Marvelous Techniques -- Part 10
Creating Opportunity to Defeat Opponent -- Part 1
Creating Opportunity to Defeat Opponent -- Part 2
Creating Opportunity to Defeat Opponent -- Part 3
Creating Opportunity to Defeat Opponent -- Part 4
Creating Opportunity to Defeat Opponent -- Part 5
Creating Opportunity to Defeat Opponent -- Part 6
Creating Opportunity to Defeat Opponent -- Part 7
Secrets of Crane Beak and Double Punch -- Part 1
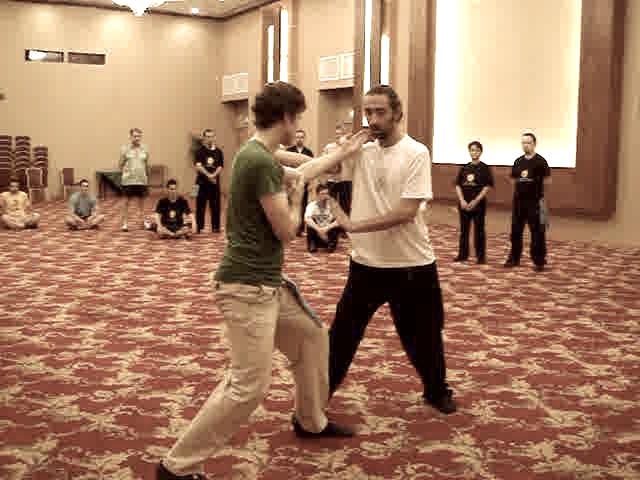 Secrets of Crane Beak and Double Punch -- Part 2
Secrets of Crane Beak and Double Punch -- Part 3
Secrets of Crane Beak and Double Punch -- Part 4
Secrets of Crane Beak and Double Punch -- Part 5
Secrets of Crane Beak and Double Punch -- Part 6
Secrets of Crane Beak and Double Punch -- Part 7
Secrets of Crane Beak and Double Punch -- Part 8
Open Secrets and Close Secrets -- Part 1
Open Secrets and Close Secrets -- Part 2
Open Secrets and Close Secrets -- Part 3
Open Secrets and Close Secrets -- Part 4
Open Secrets and Close Secrets -- Part 5
Open Secrets and Close Secrets -- Part 6
Open Secrets and Close Secrets -- Part 7
Open Secrets and Close Secrets -- Part 8
Open Secrets and Close Secrets -- Part 9
Secrets of Sequence Sparring -- Part 1
Secrets of Sequence Sparring -- Part 2
Secrets of Sequence Sparring -- Part 3
Secrets of Sequence Sparring -- Part 4
Secrets of Sequence Sparring -- Part 5
Secrets of Sequence Sparring -- Part 6
Secrets of Sequence Sparring -- Part 7
Moving from Technique-Level to Sequence-Level in Sparring -- Overview
Small Difference in Movements can make Big Difference in Results -- Overview
Applying Planned Sequence Irrrespective of Opponent's Response! -- Overview
Don't Hand your Defeat to your Opponent -- Overview
Marvelous Techniques beget Marvelous Techniques -- Overview
Creating Opportunity to Defeat Opponent -- Overview
Secrets of Crane Beak and Double Punch -- Overview
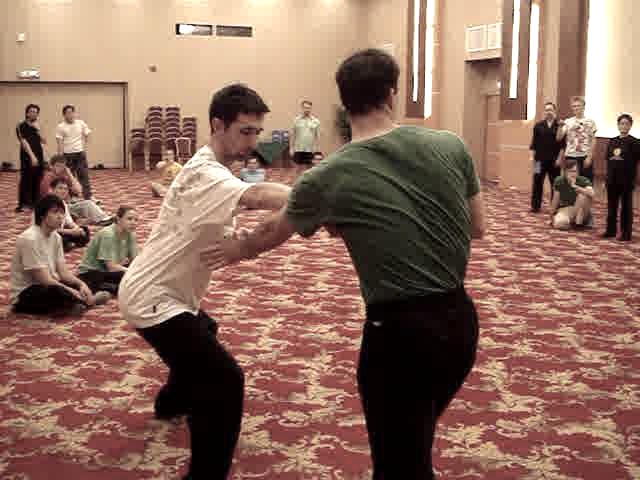 Open Secrets and Close Secrets -- Overview
Secrets of Sequence Sparring -- Overview
Wing Choon Kungfu -- Wing Choon 10 Covering the Fast Strikes of a Boxer -- Part 1
Covering the Fast Strikes of a Boxer -- Part 2
Covering the Fast Strikes of a Boxer -- Part 3
Covering the Fast Strikes of a Boxer -- Part 4
Covering the Fast Strikes of a Boxer -- Part 5
Covering the Fast Strikes of a Boxer -- Part 6
Covering the Fast Strikes of a Boxer -- Part 7
Covering the Fast Strikes of a Boxer -- Part 8
Covering the Fast Strikes of a Boxer -- Part 9
Covering the Fast Strikes of a Boxer -- Part 10
Avoliding a Boxer's Strong Points and Attacking his Weakness -- Part 1
Avoliding a Boxer's Strong Points and Attacking his Weakness -- Part 2
Avoliding a Boxer's Strong Points and Attacking his Weakness -- Part 3
Avoliding a Boxer's Strong Points and Attacking his Weakness -- Part 4
Avoliding a Boxer's Strong Points and Attacking his Weakness -- Part 5
Avoliding a Boxer's Strong Points and Attacking his Weakness -- Part 6
Avoliding a Boxer's Strong Points and Attacking his Weakness -- Part 7
Counters against Hooks and Undercuts -- Part 1
Counters against Hooks and Undercuts -- Part 2
Counters against Hooks and Undercuts -- Part 3
Counters against Hooks and Undercuts -- Part 4
Counters against Hooks and Undercuts -- Part 5
Counters against Hooks and Undercuts -- Part 6
Counters against Hooks and Undercuts -- Part 7
Counters against Hooks and Undercuts -- Part 8
Counters against Hooks and Undercuts -- Part 9
Counters against Hooks and Undercuts -- Part 10
Counters against Hooks and Undercuts -- Part 11
Counters against Hooks and Undercuts -- Part 12
Counters against Hooks and Undercuts -- Part 13
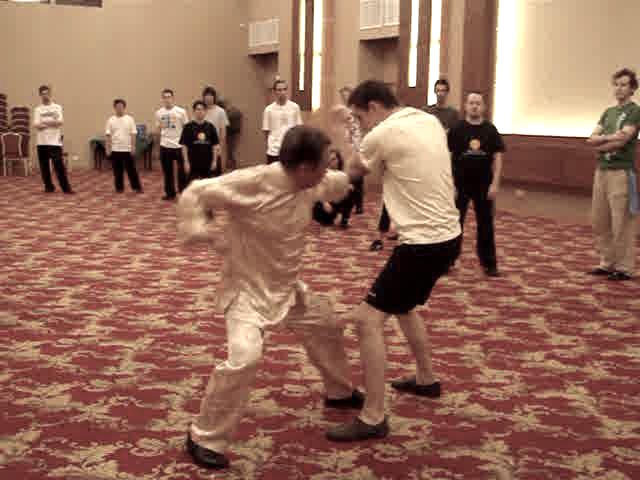 Handling Aggressive Attacks and Counters against
Chain Punches -- Part 1
Handling Aggressive Attacks and Counters against
Chain Punches -- Part 2
Handling Aggressive Attacks and Counters against
Chain Punches -- Part 3
Handling Aggressive Attacks and Counters against
Chain Punches -- Part 4
Handling Aggressive Attacks and Counters against
Chain Punches -- Part 5
Handling Aggressive Attacks and Counters against
Chain Punches -- Part 6
Handling Aggressive Attacks and Counters against Chain Punches -- Part 7
Handling Aggressive Attacks and Counters against Chain Punches -- Part 8
Handling Aggressive Attacks and Counters against Chain Punches -- Part 9
Handling Aggressive Attacks and Counters against Chain Punches -- Part 10
Handling Aggressive Attacks and Counters against Chain Punches -- Part 11
Handling Aggressive Attacks and Counters against Chain Punches -- Part 12
Handling Aggressive Attacks and Counters against Chain Punches -- Part 13
Handling Aggressive Attacks and Counters against Chain Punches -- Part 14
Handling Aggressive Attacks and Counters against Chain Punches -- Part 15
Attacking the Weaknesses of Kick-Boxers -- Part 1
Attacking the Weaknesses of Kick-Boxers -- Part 2
Attacking the Weaknesses of Kick-Boxers -- Part 3
Attacking the Weaknesses of Kick-Boxers -- Part 4
Attacking the Weaknesses of Kick-Boxers -- Part 5
Attacking the Weaknesses of Kick-Boxers -- Part 6
Attacking the Weaknesses of Kick-Boxers -- Part 7
Attacking the Weaknesses of Kick-Boxers -- Part 8
Attacking the Weaknesses of Kick-Boxers -- Part 9
Moving to the Back of an Opponent who Kicks -- Part 1
Moving to the Back of an Opponent who Kicks -- Part 2
Moving to the Back of an Opponent who Kicks -- Part 3
Moving to the Back of an Opponent who Kicks -- Part 4
Moving to the Back of an Opponent who Kicks -- Part 5
Moving to the Back of an Opponent who Kicks -- Part 6
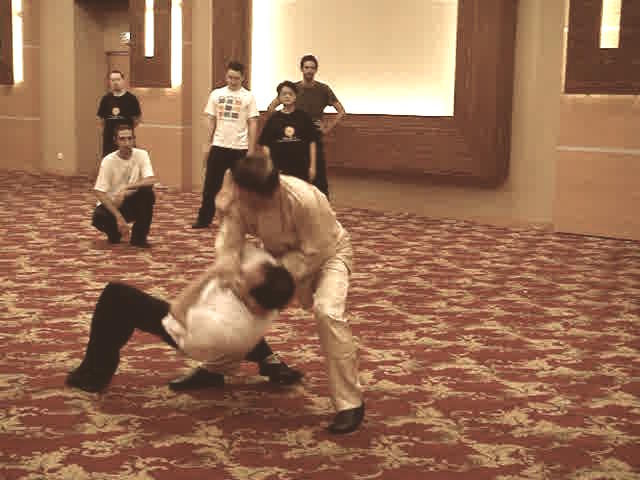 Moving to the Back of an Opponent who Kicks -- Part 7
Moving to the Back of an Opponent who Kicks -- Part 8
Moving to the Back of an Opponent who Kicks -- Part 9
Effective Counters against Taekwondo Kicks -- Part 1
Effective Counters against Taekwondo Kicks -- Part 2
Effective Counters against Taekwondo Kicks -- Part 3
Effective Counters against Taekwondo Kicks -- Part 4
Effective Counters against Taekwondo Kicks -- Part 5
Effective Counters against Taekwondo Kicks -- Part 6
Effective Counters against Taekwondo Kicks -- Part 7
Effective Counters against Taekwondo Kicks -- Part 8
Effective Counters against Taekwondo Kicks -- Part 9
Covering the Fast Strikes of a Boxer -- Overview
Avoliding a Boxer's Strong Points and Attacking his Weakness -- Overview
Counters against Hooks and Undercuts -- Overview
Handling Aggressive Attacks and Counters against Chain Punches -- Overview
Attacking the Weaknesses of Kick-Boxers -- Overview
Moving to the Back of an Opponent who Kicks -- Overview
Effective Counters against Taekwondo Kicks -- Overview
Wing Choon Kungfu -- Wing Choon 11 Counters against Muay Thai Attacks -- Part 1
Counters against Muay Thai Attacks -- Part 2
Counters against Muay Thai Attacks -- Part 3
Counters against Muay Thai Attacks -- Part 4
Counters against Muay Thai Attacks -- Part 5
Counters against Muay Thai Attacks -- Part 6
Counters against Muay Thai Attacks -- Part 7
Counters against Muay Thai Attacks -- Part 8
Counters against Muay Thai Attacks -- Part 9
Counters against Muay Thai Attacks -- Part 10
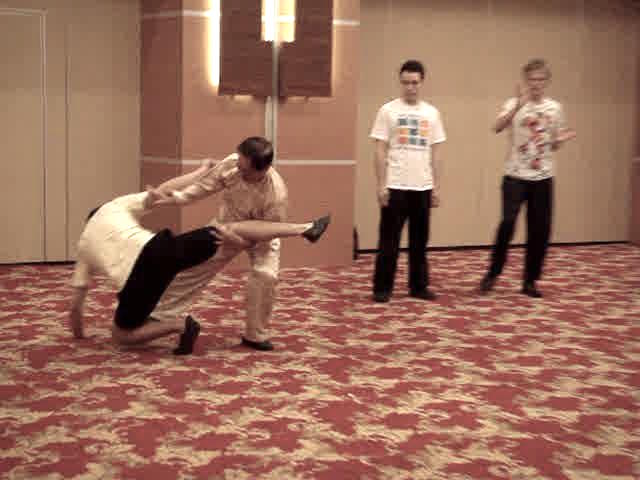 When Leg Comes, Counter with Leg -- Part 1
When Leg Comes, Counter with Leg -- Part 2
When Leg Comes, Counter with Leg -- Part 3
When Leg Comes, Counter with Leg -- Part 4
When Leg Comes, Counter with Leg -- Part 5
When Leg Comes, Counter with Leg -- Part 6
When Leg Comes, Counter with Leg -- Part 7
When Leg Comes, Counter with Leg -- Part 8
Shoots, Lifts and Pin-Downs -- Part 1
Shoots, Lifts and Pin-Downs -- Part 2
Shoots, Lifts and Pin-Downs -- Part 3
Shoots, Lifts and Pin-Downs -- Part 4
Shoots, Lifts and Pin-Downs -- Part 5
Shoots, Lifts and Pin-Downs -- Part 6
Shoots, Lifts and Pin-Downs -- Part 7
Shoots, Lifts and Pin-Downs -- Part 8
Shoots, Lifts and Pin-Downs -- Part 9
Shoots, Lifts and Pin-Downs -- Part 10
Shoots, Lifts and Pin-Downs -- Part 11
Shoots, Lifts and Pin-Downs -- Part 12
Lazy Man Snokes Pipe -- Part 1
Lazy Man Snokes Pipe -- Part 2
Lazy Man Snokes Pipe -- Part 3
Lazy Man Snokes Pipe -- Part 4
Lazy Man Snokes Pipe -- Part 5
Lazy Man Snokes Pipe -- Part 6
Lazy Man Snokes Pipe -- Part 7
Lazy Man Snokes Pipe -- Part 8
Lazy Man Snokes Pipe -- Part 9
Having Fun with Wrestling Attacks and Counters -- Part 1
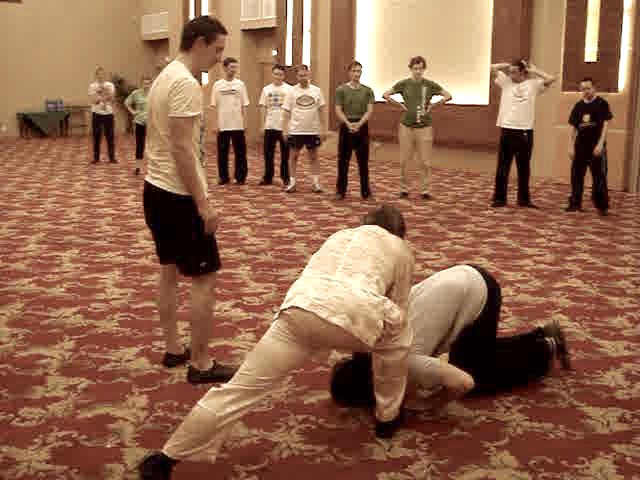 Having Fun with Wrestling Attacks and Counters -- Part 2
Having Fun with Wrestling Attacks and Counters -- Part 3
Having Fun with Wrestling Attacks and Counters -- Part 4
Having Fun with Wrestling Attacks and Counters -- Part 5
Having Fun with Wrestling Attacks and Counters -- Part 6
Having Fun with Wrestling Attacks and Counters -- Part 7
Having Fun with Wrestling Attacks and Counters -- Part 8
Having Fun with Wrestling Attacks and Counters -- Part 9
Having Fun with Wrestling Attacks and Counters -- Part 10
Having Fun with Wrestling Attacks and Counters -- Part 11
How did Past Wing Choon Masters Deal with Wrestler and Grapplers -- Part 1
How did Past Wing Choon Masters Deal with Wrestler and Grapplers -- Part 2
How did Past Wing Choon Masters Deal with Wrestler and Grapplers -- Part 3
How did Past Wing Choon Masters Deal with Wrestler and Grapplers -- Part 4
How did Past Wing Choon Masters Deal with Wrestler and Grapplers -- Part 5
How did Past Wing Choon Masters Deal with Wrestler and Grapplers -- Part 6
>How did Past Wing Choon Masters Deal with Wrestler and Grapplers -- Part 7
How did Past Wing Choon Masters Deal with Wrestler and Grapplers -- Part 8
How did Past Wing Choon Masters Deal with Wrestler and Grapplers -- Part 9
How did Past Wing Choon Masters Deal with Wrestler and Grapplers -- Part 10
How did Past Wing Choon Masters Deal with Wrestler and Grapplers -- Part 11
Free Movement Chi Sau while being Blind-Folded -- Part 1
Free Movement Chi Sau while being Blind-Folded -- Part 2
Free Movement Chi Sau while being Blind-Folded -- Part 3
Free Movement Chi Sau while being Blind-Folded -- Part 4
Free Movement Chi Sau while being Blind-Folded -- Part 5
Free Movement Chi Sau while being Blind-Folded -- Part 6
Free Movement Chi Sau while being Blind-Folded -- Part 7
Free Movement Chi Sau while being Blind-Folded -- Part 8
Free Movement Chi Sau while being Blind-Folded -- Part 9
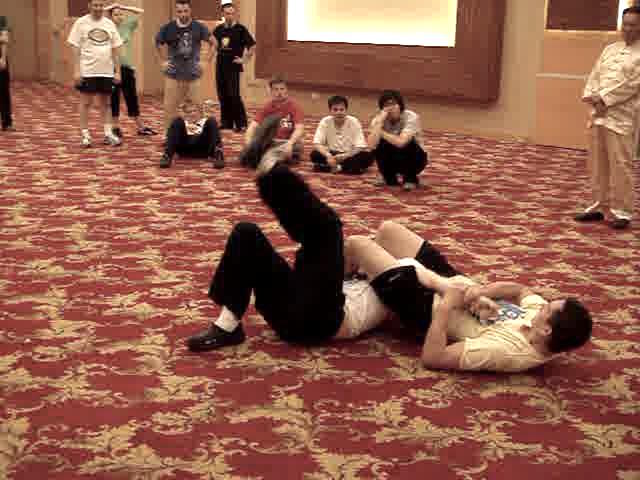 Free Movement Chi Sau while being Blind-Folded -- Part 10
Free Movement Chi Sau while being Blind-Folded -- Part 11
Free Movement Chi Sau while being Blind-Folded -- Part 12
Free Movement Chi Sau while being Blind-Folded -- Part 13
Counters against Muay Thai Attacks -- Overview
When Leg Comes, Counter with Leg -- Overview
Shoots, Lifts and Pin-Downs -- Overview
Lazy Man Snokes Pipe -- Overview
Having Fun with Wrestling Attacks and Counters -- Overview
How did Past Wing Choon Masters Deal with Wrestler
and Grapplers -- Overview
Free Movement Chi Sau while being Blind-Folded -- Overview
Wing Choon Kungfu Sets -- Overview