VIDEO-CLIPS-3: TITLES
 36-Pattern Tiger-Crane Set
Combat Sequences from Shaolin Five Animals -- Sequence 1
Combat Sequences from Shaolin Five Animals -- Sequence 2
Combat Sequences from Dragon Style Set -- Part 1
Combat Sequences from Dragon Style Set -- Part 2
Combat Sequences from Dragon Style Set -- Part 3
Combat Sequences from Dragon Style Set -- Part 4
Application of Tiger Claws
Application of Crane Beak
Learning the Tiger-Crane Set
Learning the Monkey Set -- Part 1
Learning the Monkey Set -- Part 2
Learning the Monkey Set -- Part 3
Spiritual Monkey Emerges from Cave
Some Examples of Monkey Tricks
Black Ape Shows Rage
Spiritual Monkey Emerges from Cave
Monkey Set -- Striking Vital Points
Black Ape Shows Rage
Shaolin Traveling Dragon Pakua Set
Shaolin Pakua Set -- Old Video
Staff Training and Sparring from Movie
Combat Application of Shaolin Long Staff -- Abstract from Movie
Staff Training Method -- Abstract from Movie
Combat Sequences from Tiger-Crane Set -- Sequence 1
Combat Sequences from Tiger-Crane Set -- Sequence 2
Combat Sequences from Tiger-Crane Set -- Sequence 3
Tiger-Crane Set
Overview of Combat Sequences -- Toronto Special Kungfu Course
Video-Clips-3: Titles
 Andorra
Sharing Secrets in Combat Application -- Overview
Andorra
Sharing Secrets in Combat Application -- OverviewSharing Secrets in Combat Application -- Part 1
Applying Kungfu Patterns in Free Sparring -- Overview
Sharing Secrets in Combat Application -- Part 2
Sharing Secrets in Combat Application -- Part 3
Sharing Secrets in Combat Application -- Part 4
Sharing Secrets in Combat Application -- Part 5
Sharing Secrets in Combat Application -- Part 6
Sharing Secrets in Combat Application -- Part 7
Sharing Secrets in Combat Application -- Part 8
Sharing Secrets in Combat Application -- Part 9
Sharing Secrets in Combat Application -- Part 10
Sharing Secrets in Combat Application -- Part 11
Sharing Secrets in Combat Application -- Part 12
Sharing Secrets in Combat Application -- Part 13
Sharing Secrets in Combat Application -- Part 14
Sharing Secrets in Combat Application -- Part 15
Applying Kungfu Patterns in Free Sparring -- Part 1
Applying Kungfu Patterns in Free Sparring -- Part 2
Applying Kungfu Patterns in Free Sparring -- Part 3
Applying Kungfu Patterns in Free Sparring -- Part 4
Applying Kungfu Patterns in Free Sparring -- Part 5
Applying Kungfu Patterns in Free Sparring -- Part 6
Applying Kungfu Patterns in Free Sparring -- Part 7
Applying Kungfu Patterns in Free Sparring -- Part 8
Applying Kungfu Patterns in Free Sparring -- Part 9
Applying Kungfu Patterns in Free Sparring -- Part 10
Applying Kungfu Patterns in Free Sparring -- Part 11
Applying Kungfu Patterns in Free Sparring -- Part 12
Regional Shaolin Kungfu Course in Andorra 2006 -- Overview
 Andorra -- Videos 01
Initiator's Mode of Sequence 1 in Patterns
Andorra -- Videos 01
Initiator's Mode of Sequence 1 in PatternsResponder's Mode of Sequence 1 in Patterns
Combat Application of Sequence 1
Initiator's Mode of Sequence 1 in Sequence
Responder's Mode of Sequence 1 in Sequence
Initiator's Mode of Sequence 2 in Sequence
Responder's Mode of Sequence 2 in Sequence
Combat Application of Sequence 2
Three-Step Sparring of Sequence 2
Fast, Powerful and Relaxed in Shaolin Kungfu
Elegance, Balance and Agility in Shaolin Kungfu
Benefiting from Knowledge and Experiences of Past Masters
Remarkable Result for Beginning Students
Co-Operation for Mutual Benefits in Shaolin Training
Addition and Subtraction in Shaolin Combat
Sharing Secrets in Combat Application -- Overview
Andorra -- Videos 02 Combining Two Sequences into One
Training of Energy and Mind in Shaolin Kungfu
Instantaneous Change in Shaolin Combat
Graceful and Elegant in Sparring
Addition and Subtraction in Shaolin Sparring
Securing Technical Advantages in Sparring
Introducing Randomness in Pre-Arranged Sequences
Continuous Attakcs and Safety First in Shaolin Kungfu
All in One Sequence Like Continuous Waves
Performance in Picture-Perfect Form
 Fast yet Relaxed and Powerful and Not Panting for Breath
Performance in Patterns and Performance in Sequence
Learning to use Kungfu Patterns in Free Sparring
Blue Mountain 2007 The Secret of the Interna Force Masters -- Part 1
The Secret of the Interna Force Masters -- Part 2
The Secret of the Interna Force Masters -- Part 3
The Secret of the Interna Force Masters -- Part 4
The Secret of the Interna Force Masters -- Part 5
The Secret of the Interna Force Masters -- Part 6
The Secret of the Interna Force Masters -- Part 7
The Secret of the Interna Force Masters -- Part 8
The Secret of the Interna Force Masters -- Part 9
The Secret of the Interna Force Masters -- Part 10
Cloud Hands: from Chi Flow Movements to Patterns
and Sets -- Part 1
Cloud Hands: from Chi Flow Movements to Patterns
and Sets -- Part 2
Cloud Hands: from Chi Flow Movements to Patterns
and Sets -- Part 3
Cloud Hands: from Chi Flow Movements to Patterns
and Sets -- Part 4
Cloud Hands: from Chi Flow Movements to Patterns
and Sets -- Part 5
Cloud Hands: from Chi Flow Movements to Patterns
and Sets -- Part 6
Cloud Hands: from Chi Flow Movements to Patterns
and Sets -- Part 7
Cloud Hands: from Chi Flow Movements to Patterns
and Sets -- Part 8
Cloud Hands: from Chi Flow Movements to Patterns
and Sets -- Part 9
Cloud Hands: from Chi Flow Movements to Patterns
and Sets -- Part 10
Developing Combat Skills in Pushing Hands -- Part 1
Developing Combat Skills in Pushing Hands -- Part 2
Developing Combat Skills in Pushing Hands -- Part 3
Developing Combat Skills in Pushing Hands -- Part 4
Developing Combat Skills in Pushing Hands -- Part 5
Developing Combat Skills in Pushing Hands -- Part 6
Developing Combat Skills in Pushing Hands -- Part 7
Developing Combat Skills in Pushing Hands -- Part 8
Developing Combat Skills in Pushing Hands -- Part 9
Developing Combat Skills in Pushing Hands -- Part 10
 Developing Combat Skills in Pushing Hands -- Part 11
Developing Combat Skills in Pushing Hands -- Part 12
Practicing Combat Techniques in Striking Hands -- Part 1
Practicing Combat Techniques in Striking Hands -- Part 2
Practicing Combat Techniques in Striking Hands -- Part 3
Practicing Combat Techniques in Striking Hands -- Part 4
Practicing Combat Techniques in Striking Hands -- Part 5
Practicing Combat Techniques in Striking Hands -- Part 6
Practicing Combat Techniques in Striking Hands -- Part 7
Practicing Combat Techniques in Striking Hands -- Part 8
Applying Kicks, Throws and Grips in Striking Hands -- Part 1
Applying Kicks, Throws and Grips in Striking Hands -- Part 2
Applying Kicks, Throws and Grips in Striking Hands -- Part 3
Applying Kicks, Throws and Grips in Striking Hands -- Part 4
Applying Kicks, Throws and Grips in Striking Hands -- Part 5
Applying Kicks, Throws and Grips in Striking Hands -- Part 6
Applying Kicks, Throws and Grips in Striking Hands -- Part 7
Applying Kicks, Throws and Grips in Striking Hands -- Part 8
Applying Kicks, Throws and Grips in Striking Hands -- Part 9
Applying Kicks, Throws and Grips in Striking Hands -- Part 10
Applying Kicks, Throws and Grips in Striking Hands -- Part 11
Combat Sequences 1 and 2: Top, Middle, Bottom, Sides -- Part 1
Combat Sequences 1 and 2: Top, Middle, Bottom, Sides -- Part 2
Combat Sequences 1 and 2: Top, Middle, Bottom, Sides -- Part 3
Combat Sequences 1 and 2: Top, Middle, Bottom, Sides -- Part 4
Combat Sequences 1 and 2: Top, Middle, Bottom, Sides -- Part 5
Combat Sequences 1 and 2: Top, Middle, Bottom, Sides -- Part 6
Combat Sequences 1 and 2: Top, Middle, Bottom, Sides -- Part 7
Combat Sequences 1 and 2: Top, Middle, Bottom, Sides -- Part 8
Combat Sequences 1 and 2: Top, Middle, Bottom, Sides -- Part 9
 Combat Sequence 3: Pressing Attacks and How to Defend
against Them -- Part 1
Combat Sequence 3: Pressing Attacks and How to Defend
against Them -- Part 2
Combat Sequence 3: Pressing Attacks and How to Defend
against Them -- Part 3
Combat Sequence 3: Pressing Attacks and How to Defend
against Them -- Part 4
Combat Sequence 3: Pressing Attacks and How to Defend
against Them -- Part 5
Combat Sequence 3: Pressing Attacks and How to Defend
against Them -- Part 6
Combat Sequence 3: Pressing Attacks and How to Defend
against Them -- Part 7
Combat Sequence 3: Pressing Attacks and How to Defend
against Them -- Part 8
Combat Sequence 3: Pressing Attacks and How to Defend
against Them -- Part 9
Combat Sequence 3: Pressing Attacks and How to Defend
against Them -- Part 10
Combat Sequence 3: Pressing Attacks and How to
Defend against Them -- Part 11
Combat Sequence 3: Pressing Attacks and How to
Defend against Them -- Part 12
Combat Sequences 4 and 5: Thrust Kick, Side Kick and
Whirlwind Kick -- Part 1
Combat Sequences 4 and 5: Thrust Kick, Side Kick and
Whirlwind Kick -- Part 2
Combat Sequences 4 and 5: Thrust Kick, Side Kick and
Whirlwind Kick -- Part 3
Combat Sequences 4 and 5: Thrust Kick, Side Kick and
Whirlwind Kick -- Part 4
Combat Sequences 4 and 5: Thrust Kick, Side Kick and
Whirlwind Kick -- Part 5
Combat Sequences 4 and 5: Thrust Kick, Side Kick and
Whirlwind Kick -- Part 6
Combat Sequences 4 and 5: Thrust Kick, Side Kick and
Whirlwind Kick -- Part 7
Combat Sequences 4 and 5: Thrust Kick, Side Kick and
Whirlwind Kick -- Part 8
Combat Sequences 4 and 5: Thrust Kick, Side Kick and
Whirlwind Kick -- Part 9
Combat Sequences 4 and 5: Thrust Kick, Side Kick and
Whirlwind Kick -- Part 10
Combat Sequences 4 and 5: Thrust Kick, Side Kick and
Whirlwind Kick -- Part 11
Combat Sequences 4 and 5: Thrust Kick, Side Kick and
Whirlwind Kick -- Part 12
Combat Sequences 4 and 5: Thrust Kick, Side Kick and
Whirlwind Kick -- Part 13
Combat Sequence 6: Felling Opponents with Carrying Tiger
Back to Mountain -- Part 1
Combat Sequence 6: Felling Opponents with Carrying Tiger
Back to Mountain -- Part 2
Combat Sequence 6: Felling Opponents with Carrying Tiger
Back to Mountain -- Part 3
Combat Sequence 6: Felling Opponents with Carrying Tiger
Back to Mountain -- Part 4
Combat Sequence 6: Felling Opponents with Carrying Tiger
Back to Mountain -- Part 5
 Combat Sequence 6: Felling Opponents with Carrying Tiger
Back to Mountain -- Part 6
Combat Sequence 6: Felling Opponents with Carrying Tiger
Back to Mountain -- Part 7
Combat Sequence 6: Felling Opponents with Carrying Tiger
Back to Mountain -- Part 8
Combat Sequences 7 and 8: Chin-Na or Gripping Attacks and
their Defences -- Part 1
Combat Sequences 7 and 8: Chin-Na or Gripping Attacks and
their Defences -- Part 2
Combat Sequences 7 and 8: Chin-Na or Gripping Attacks and
their Defences -- Part 3
Combat Sequences 7 and 8: Chin-Na or Gripping Attacks and
their Defences -- Part 4
Combat Sequences 7 and 8: Chin-Na or Gripping Attacks and
their Defences -- Part 5
Combat Sequences 7 and 8: Chin-Na or Gripping Attacks and
their Defences -- Part 6
Combat Sequences 7 and 8: Chin-Na or Gripping Attacks and
their Defences -- Part 7
Combat Sequences 7 and 8: Chin-Na or Gripping Attacks and
their Defences -- Part 8
Combat Sequences 7 and 8: Chin-Na or Gripping Attacks and
their Defences -- Part 9
Combat Sequences 7 and 8: Chin-Na or Gripping Attacks and
their Defences -- Part 10
Combat Sequences 7 and 8: Chin-Na or Gripping Attacks and
their Defences -- Part 11
Combat Sequences 7 and 8: Chin-Na or Gripping Attacks and
their Defences -- Part 12
From Guided Sparring to Free Sparring in Wahnam Taijiquan -- Part 1
From Guided Sparring to Free Sparring in Wahnam Taijiquan -- Part 2
From Guided Sparring to Free Sparring in Wahnam Taijiquan -- Part 3
From Guided Sparring to Free Sparring in Wahnam Taijiquan -- Part 4
From Guided Sparring to Free Sparring in Wahnam Taijiquan -- Part 5
From Guided Sparring to Free Sparring in Wahnam Taijiquan -- Part 6
From Guided Sparring to Free Sparring in Wahnam Taijiquan -- Part 7
From Guided Sparring to Free Sparring in Wahnam Taijiquan -- Part 8
From Guided Sparring to Free Sparring in Wahnam Taijiquan -- Part 9
Wahnam Taijiquan Training from Basics to Free Sparring -- Overview
Photos
Eight Simplified Combat Sequences of Wahnam Taijiquan -- Part 1
Eight Simplified Combat Sequences of Wahnam Taijiquan -- Part 2
Eight Simplified Combat Sequences of Wahnam Taijiquan -- Part 3
Eight Simplified Combat Sequences of Wahnam Taijiquan -- Part 4
 Eight Simplified Combat Sequences of Wahnam
Taijiquan -- Part 5
Eight Simplified Combat Sequences of Wahnam
Taijiquan -- Part 6
Eight Simplified Combat Sequences of Wahnam
Taijiquan -- Part 7
Eight Simplified Combat Sequences of Wahnam
Taijiquan -- Part 8
The Secret of the Internal Force Mastrs -- Overview
Cloud Hands: from Chi Flow Movements to Patternw and Sets -- Overview
Developing Combat Skills in Pushing Hands -- Overview
Practicing Combat Techniques in Striking Hands -- Overview
Applying Kicks, Throws and Grips in Striking Hands -- Overview
Combat Sequences 1 and 2: Top, Middle, Bottom, Sides -- Overview
Combat Sequence 3: Pressing Attacks and How to
Defend against Them -- Overview
Combat Sequences 4 and 5: Thrust Kick, Side-Kick
and Whirlwind Kick -- Overview
Combat Sequence 6: Felling Opponents with Carry Tiger
Back to Mountain -- Overview
Combat Sequences 7 and 8: Chimn-Na or Gripping Attacks and
their Defencess -- Overview
Eight Simplified Combat Sequences of Wahnam Taijiquan -- Overview
From Guided Sparring to Free Sparring in Wahnam Taijiquan -- Overview
Blue Mountain 2007 -- Videos Wahnam Taijiquan Training from Basics to Free
Sparring -- Overview
Secret of Internal Force Masters
Cloud Hands -- from Chi Flow Movements to Patterns and Sets
Developing Combat Skills in Pushing Hands
Practicing Combat Techniques in Striking Hands
Applying Kicks, Throws and Grips in Striking Hands
Combat Sequences 1 and 2 -- Top, Middle, Bottom and Sides
Combat Sequence 3 -- Pressing Attacks and How
to Defend against Them
Combat Sequences 4 and 5 -- Thrust Kick, Side
Kick and Whirlwind Kick
Combat Sequence 6 -- Felling Opponents with
Carrying Tiger Back to Mountain
 Combat Sequences 7 and 8 -- Chin-na or Gripping Attacks
and their Defences
Eight Simplified Combat Sequences of Wahnam Taijiquan
From Guided Sparring to Free Sparring in Wahnam Taijiquan
Canterbury 2006 Free Sparring Galore
Free Sparring between Nick and Lorena
Free Sparring between Rob and Masita
Free Sparring between Gabrriel and Claude
Free Sparring between Steve and Rob
Free Sparring between James and Shamsher
Free Sparring between Gabriel and Andrian
Free Sparring between Jordan and Andy
Free Sparring between James and Alex
Free Sparring between George and Jordan
Free Sparring between Andrian and Alisder
Free Sparring between Jordan and Pete
Free Sparring between Andrea and Clare
Free Sparring between Gabriel and Masita
Free Sparring between Lorena and Rob
Free Sparring between Eugene and Tom
Free Sparring between Georrge and Alisder
Free Sparring between Andrew and James
Free Sparring between Alex and Pete
Free Sparring between Andrea and Fleur
Free Sparring between Shaim and Clare
Free Sparring between James and Alex
Free Sparring between Jordan and Gabriel
Free Sparring between Jordan and Gabriel
Free Sparring between Steve and Lorena
Free Sparring between Andrew and Rob
Free Sparring between Shamsher and Ben
Free Sparring between Eugene and Andy
 10
Canterbury 2006 -- Eighteen
Shaolin Chi Kung Eighteen Techniques -- Part 1
10
Canterbury 2006 -- Eighteen
Shaolin Chi Kung Eighteen Techniques -- Part 1Shaolin Chi Kung Eighteen Techniques -- Part 2
Shaolin Chi Kung Eighteen Techniques -- Part 3
Shaolin Chi Kung Eighteen Techniques
Canterbury 2006 -- Taijiquan Sparring Free Sparring in Taijiquan -- Overview
Free Sparring in Taijiquan -- Part 1
Free Sparring in Taijiquan -- Part 2
Free Sparring in Taijiquan -- Part 3
Free Sparring in Taijiquan -- Part 4
Free Sparring in Taijiquan -- Part 5
Free Sparring in Taijiquan -- Part 6
Free Sparring in Taijiquan -- Part 7
Free Sparring in Taijiquan -- Part 8
Free Sparring in Taijiquan -- Part 9
Free Sparring in Taijiquan -- Part 10
Free Sparring in Taijiquan -- Part 11
Free Sparring in Taijiquan -- Part 12
Free Sparring in Taijiquan -- Part 13
Free Sparring in Taijiquan -- Part 14
Free Sparring in Taijiquan -- Part 15
Free Sparring in Taijiquan -- Part 16
Free Sparring in Taijiquan -- Part 17
Free Sparring in Taijiquan -- Part 18
Free Sparring in Taijiquan -- Part 19
Free Sparring in Taijiquan -- Part 20
Free Sparring in Taijiquan -- Part 21
Free Sparring in Taijiquan -- Part 22
Free Sparring in Taijiquan -- Part 23
Free Sparring in Taijiquan -- Part 24
 Canterbury 2006 -- Taijiquan Sparring Videos
Free Sparring Using Taijiquan -- Canterbury 2006
Canterbury 2006 -- Taijiquan Sparring Videos
Free Sparring Using Taijiquan -- Canterbury 2006Free Sparring Using Taijiquan -- Canterbury 2006 -- Part 1
Free Sparring Using Taijiquan -- Canterbury 2006 -- Part 2
Free Sparring Using Taijiquan -- Canterbury 2006 -- Part 3
Free Sparring Using Taijiquan -- Canterbury 2006 -- Part 4
Canterbury 2006 -- Videos Videos on Free Sparring (1)
Videos on Free Sparring (2)
Videos on Free Sparring (3)
Videos on Free Sparring (4)
Videos on Free Sparring Galore
Chin-Na -- Chin-Na 01 Mind Training and Forrce Development are More Important
than Techniques -- Overview
Applying Strategies and Tactics in Chin-Na Techniques -- Overview
More Sophisticated Chin-Na Techniques -- Overview
Following the Opponent's Momentum in Chin-Na Attacks and
Counters -- Overview
Glimpses of Special Chin-Na Course -- Overview
Importance of Mind and Force in Chin-Na -- Part 1
Importance of Mind and Force in Chin-Na -- Part 2
Importance of Mind and Force in Chin-Na -- Part 3
Importance of Mind and Force in Chin-Na -- Part 4
Importance of Mind and Force in Chin-Na -- Part 5
Importance of Mind and Force in Chin-Na -- Part 6
Importance of Mind and Force in Chin-Na -- Part 7
Importance of Mind and Force in Chin-Na -- Part 8
Applying Strategies and Tactics in Chin-Na Techniques -- Part 1
Applying Strategies and Tactics in Chin-Na Techniques -- Part 2
Applying Strategies and Tactics in Chin-Na Techniques -- Part 3
Applying Strategies and Tactics in Chin-Na Techniques -- Part 4
Applying Strategies and Tactics in Chin-Na Techniques -- Part 5
Applying Strategies and Tactics in Chin-Na Techniques -- Part 6
Applying Strategies and Tactics in Chin-Na Techniques -- Part 7
 More Sophisticated Chin-Na Techniques -- Part 1
More Sophisticated Chin-Na Techniques -- Part 2
More Sophisticated Chin-Na Techniques -- Part 3
More Sophisticated Chin-Na Techniques -- Part 4
More Sophisticated Chin-Na Techniques -- Part 5
More Sophisticated Chin-Na Techniques -- Part 6
More Sophisticated Chin-Na Techniques -- Part 7
More Sophisticated Chin-Na Techniques -- Part 8
More Sophisticated Chin-Na Techniques -- Part 9
More Sophisticated Chin-Na Techniques -- Part 10
More Sophisticated Chin-Na Techniques -- Part 11
More Sophisticated Chin-Na Techniques -- Part 12
More Sophisticated Chin-Na Techniques -- Part 13
More Sophisticated Chin-Na Techniques -- Part 14
More Sophisticated Chin-Na Techniques -- Part 15
More Sophisticated Chin-Na Techniques -- Part 16
Following the Opponent's Momentum in Chin-Na Attacks
and Counters -- Part 1
Following the Opponent's Momentum in Chin-Na Attacks
and Counters -- Part 2
Following the Opponent's Momentum in Chin-Na Attacks
and Counters -- Part 3
Following the Opponent's Momentum in Chin-Na Attacks
and Counters -- Part 4
Following the Opponent's Momentum in Chin-Na Attacks
and Counters -- Part 5
Following the Opponent's Momentum in Chin-Na Attacks
and Counters -- Part 6
Following the Opponent's Momentum in Chin-Na Attacks
and Counters -- Part 7
Following the Opponent's Momentum in Chin-Na Attacks
and Counters -- Part 8
Following the Opponent's Momentum in Chin-Na Attacks
and Counters -- Part 9
 Chin-Na -- Chin-Na 02
How to Subdue your Opponent with Chin-Na even When he
Chin-Na -- Chin-Na 02
How to Subdue your Opponent with Chin-Na even When heKnows the Counter -- Overview
Chin-Na Techniques for Dislocating Wrists -- Overview
Some Examples of Chin-Na Combat Sequences -- Overview
Marvelous Techniques Beget Marvelous Techniques -- Overview
Three Points of Time to Counter Chin-Na Attacks -- Overview
How to Subdue your Opponent with Chin-Na even When he
Knows the Counter -- Part 1
How to Subdue your Opponent with Chin-Na even When he
Knows the Counter -- Part 2
How to Subdue your Opponent with Chin-Na even When he
Knows the Counter -- Part 3
How to Subdue your Opponent with Chin-Na even When he
Knows the Counter -- Part 4
How to Subdue your Opponent with Chin-Na even When he
Knows the Counter -- Part 5
How to Subdue your Opponent with Chin-Na even When he
Knows the Counter -- Part 6
How to Subdue your Opponent with Chin-Na even When he
Knows the Counter -- Part 7
Chin-Na Techniques for Dislocating Wrists -- Part 1
Chin-Na Techniques for Dislocating Wrists -- Part 2
Chin-Na Techniques for Dislocating Wrists -- Part 3
Chin-Na Techniques for Dislocating Wrists -- Part 4
Chin-Na Techniques for Dislocating Wrists -- Part 5
Chin-Na Techniques for Dislocating Wrists -- Part 6
Chin-Na Techniques for Dislocating Wrists -- Part 7
Chin-Na Techniques for Dislocating Wrists -- Part 8
Chin-Na Techniques for Dislocating Wrists -- Part 9
Some Examples of Chin-Na Combat Sequences -- Part 1
Some Examples of Chin-Na Combat Sequences -- Part 2
Some Examples of Chin-Na Combat Sequences -- Part 3
Some Examples of Chin-Na Combat Sequences -- Part 4
Some Examples of Chin-Na Combat Sequences -- Part 5
Some Examples of Chin-Na Combat Sequences -- Part 6
Some Examples of Chin-Na Combat Sequences -- Part 7
Some Examples of Chin-Na Combat Sequences -- Part 8
Some Examples of Chin-Na Combat Sequences -- Part 9
 Some Examples of Chin-Na Combat Sequences -- Part 10
Marvelous Techniques Beget Marvelous Techniques -- Part 1
Marvelous Techniques Beget Marvelous Techniques -- Part 2
Marvelous Techniques Beget Marvelous Techniques -- Part 3
Marvelous Techniques Beget Marvelous Techniques -- Part 4
Marvelous Techniques Beget Marvelous Techniques -- Part 5
Marvelous Techniques Beget Marvelous Techniques -- Part 6
Marvelous Techniques Beget Marvelous Techniques -- Part 7
Marvelous Techniques Beget Marvelous Techniques -- Part 8
Marvelous Techniques Beget Marvelous Techniques -- Part 9
Three Points of Time to Counter Chin-Na Attacks -- Part 1
Three Points of Time to Counter Chin-Na Attacks -- Part 2
Three Points of Time to Counter Chin-Na Attacks -- Part 3
Three Points of Time to Counter Chin-Na Attacks -- Part 4
Three Points of Time to Counter Chin-Na Attacks -- Part 5
Three Points of Time to Counter Chin-Na Attacks -- Part 6
Three Points of Time to Counter Chin-Na Attacks -- Part 7
Three Points of Time to Counter Chin-Na Attacks -- Part 8
Chin-Na -- Chin-Na 03 Countering Sophisticated Chin-Na Attacks -- Overview
Successful Application of Chin-Na Attacks and Three
Point of Counters -- Overview
Good Timing an Good Spacing -- Overview
Close Body Fighting and Rapid Punches -- Overview
Listening To Winds and Catching Goats -- Overview
Countering Sophisticated Chin-Na Attacks -- Part 1
Countering Sophisticated Chin-Na Attacks -- Part 2
Countering Sophisticated Chin-Na Attacks -- Part 3
Countering Sophisticated Chin-Na Attacks -- Part 4
Countering Sophisticated Chin-Na Attacks -- Part 5
 15
Countering Sophisticated Chin-Na Attacks -- Part 6
15
Countering Sophisticated Chin-Na Attacks -- Part 6Countering Sophisticated Chin-Na Attacks -- Part 7
Countering Sophisticated Chin-Na Attacks -- Part 8
Countering Sophisticated Chin-Na Attacks -- Part 9
Countering Sophisticated Chin-Na Attacks -- Part 10
Successful Application of Chin-Na Attacks and Three
Points of Counters -- Part 1
Successful Application of Chin-Na Attacks and Three
Points of Counters -- Part 2
Successful Application of Chin-Na Attacks and Three
Points of Counters -- Part 3
Successful Application of Chin-Na Attacks and Three
Points of Counters -- Part 4
Successful Application of Chin-Na Attacks and Three
Points of Counters -- Part 5
Successful Application of Chin-Na Attacks and Three
Points of Counters -- Part 6
Successful Application of Chin-Na Attacks and Three
Points of Counters -- Part 7
Successful Application of Chin-Na Attacks and Three
Points of Counters -- Part 8
Successful Application of Chin-Na Attacks and Three
Points of Counters -- Part 9
Good Timing Good Spacing -- Part 1
Good Timing Good Spacing -- Part 2
Good Timing Good Spacing -- Part 3
Good Timing Good Spacing -- Part 4
Good Timing Good Spacing -- Part 5
Good Timing Good Spacing -- Part 6
Good Timing Good Spacing -- Part 7
Good Timing Good Spacing -- Part 8
Good Timing Good Spacing -- Part 9
Good Timing Good Spacing -- Part 10
Good Timing Good Spacing -- Part 11
Good Timing Good Spacing -- Part 12
Close Body Fighting and Rapid Punches -- Part 1
Close Body Fighting and Rapid Punches -- Part 2
Close Body Fighting and Rapid Punches -- Part 3
Close Body Fighting and Rapid Punches -- Part 4
 Close Body Fighting and Rapid Punches -- Part 5
Close Body Fighting and Rapid Punches -- Part 6
Close Body Fighting and Rapid Punches -- Part 7
Listening to Winds and Catching Goats -- Part 1
Listening to Winds and Catching Goats -- Part 2
Listening to Winds and Catching Goats -- Part 3
Listening to Winds and Catching Goats -- Part 4
Listening to Winds and Catching Goats -- Part 5
Listening to Winds and Catching Goats -- Part 6
Listening to Winds and Catching Goats -- Part 7
Listening to Winds and Catching Goats -- Part 8
Listening to Winds and Catching Goats -- Part 9
Listening to Winds and Catching Goats -- Part 10
Listening to Winds and Catching Goats -- Part 11
Chin-Na -- Combat Sequences Combat Sequences of Shaolin Chin-Na -- Overview
Combat Sequences of Shaolin Chin-Na -- Sequences 01 to 10
Combat Sequences of Shaolin Chin-Na -- Sequences 11 to 20
Combat Sequences of Shaolin Chin-Na -- Sequences 21 to 30
Combat Sequences of Shaolin Chin-Na -- Sequences 31 to 40
Combat Sequences of Shaolin Chin-Na -- Sequences 41 to 50
Combat Sequences of Shaolin Chin-Na -- Sequences 51 to 60
Combat Sequences of Shaolin Chin-Na -- Sequences 71 to 72
Chin-Na -- Secret Videos Shaolin 72 Chin-Na Techniques in Sequences -- Overview
Vidoes of Shaolin 72 Chin-Na Techniques Part 1 -- Sequences 1 to 5
Vidoes of Shaolin 72 Chin-Na Techniques Part 2 -- Sequences 6 to 10
Vidoes of Shaolin 72 Chin-Na Techniques Part 3 -- Sequences 11 to 15
Vidoes of Shaolin 72 Chin-Na Techniques Part 4 -- Sequences 16 to 20
Vidoes of Shaolin 72 Chin-Na Techniques Part 5 -- Sequences 21 to 25
Vidoes of Shaolin 72 Chin-Na Techniques Part 6 -- Sequences 26 to 30
Vidoes of Shaolin 72 Chin-Na Techniques Part 7 -- Sequences 31 to 35
Vidoes of Shaolin 72 Chin-Na Techniques Part 8 -- Sequences 35 to 40
Vidoes of Shaolin 72 Chin-Na Techniques Part 9 -- Sequences 41 to 45
 Vidoes of Shaolin 72 Chin-Na Techniques Part 10
-- Sequences 46 to 50
Vidoes of Shaolin 72 Chin-Na Techniques Part 11
-- Sequences 51 to 55
Vidoes of Shaolin 72 Chin-Na Techniques Part 12
-- Sequences 56 to 60
Vidoes of Shaolin 72 Chin-Na Techniques Part 13
-- Sequences 61 to 65
Vidoes of Shaolin 72 Chin-Na Techniques Part 14
-- Sequences 66 to 72
Chin-Na -- Sequences 72 Sequences of Shaolin Chin-Na -- Overview
Shaolin Chin-Na Sequence 1 -- Single Tiger Emerges from Cave
Shaolin Chin-Na Sequence 2 -- White Tiger Presents Claw
Shaolin Chin-Na Sequence 3 -- Lead Horse Back to Stable
Shaolin Chin-Na Sequence 4 -- Golden Dragon Shoots Tongue
Shaolin Chin-Na Sequence 5 -- Lohan Tames Tiger
Shaolin Chin-Na Sequence 6 -- Circling Hand Eagle Claw
Shaolin Chin-Na Sequence 7 -- Single Leg Lift Guitar
Shaolin Chin-Na Sequence 8 -- Beautiful Girl Turns Shuttle
Shaolin Chin-Na Sequence 9 -- Cross-Road Hand Lock/a>
Shaolin Chin-Na Sequence 10 -- White Ape Grips Branch
Shaolin Chin-Na Sequence 11 -- Grand Lord Catches Fish
Shaolin Chin-Na Sequence 12 -- Guan Ping Carries Insignia
Shaolin Chin-Na Sequence 13 -- Hungry Tiger Leans against Fence
Shaolin Chin-Na Sequence 14 -- Pull Tiger's Tail
Shaolin Chin-Na Sequence 15 -- Running with Hidden Tiger's Tail
Shaolin Chin-Na Sequence 16 -- Hand Technique of a Balance
Shaolin Chin-Na Sequence 17 -- Old Eagle Catches Snake
Shaolin Chin-Na Sequence 18 -- Lohan Strikes Drum
Shaolin Chin-Na Sequence 19 -- Immortal Tames Tiger
 Shaolin Chin-Na Sequence 20 -- Bar the Big Boss
Shaolin Chin-Na Sequence 21 -- Enter Sea to Catch Serpent
Shaolin Chin-Na Sequence 22 -- Small Soldier Carries Umbrella
Shaolin Chin-Na Sequence 23 -- Immortal Carries Sticks
Shaolin Chin-Na Sequence 24 -- Nun Carries Umbrrella
Shaolin Chin-Na Sequence 25 -- Sitting Double Lifting Palms
Shaolin Chin-Na Sequence 26 -- Double Dragons
Subdue Serpent
Shaolin Chin-Na Sequence 27 -- Jade Girl Plucks Flowers
Shaolin Chin-Na Sequence 28 -- Receive Wind Bend Willow
Shaolin Chin-Na Sequence 29 -- Spiral Hand Technique
Shaolin Chin-Na Sequence 30 -- Counter against Spiral Hand
Shaolin Chin-Na Sequence 31 -- Squatting to Pluck Flowers
Shaolin Chin-Na Sequence 32 -- Immortal Plays Clappers
Shaolin Chin-Na Sequence 33 -- Golden Boy Worships Buddha
Shaolin Chin-Na Sequence 34 -- Squatting to Bend Lotus
Shaolin Chin-Na Sequence 35 -- Golden Cockerel Locks Throat
Shaolin Chin-Na Sequence 36 -- Eagle Claws Catch Dragon
Shaolin Chin-Na Sequence 37 -- Double Dragons Carry Pearl
Shaolin Chin-Na Sequence 38 -- Rotten Tree Exposes Roots
Shaolin Chin-Na Sequence 39 -- Golden Thread Hands Gourd
Shaolin Chin-Na Sequence 40 -- Squatting to Lock Throat
Shaolin Chin-Na Sequence 41 -- Golden Bird Grips Eyebrow
Shaolin Chin-Na Sequence 42 -- Hungry Eagle Charges at Prey
Shaolin Chin-Na Sequence 43 -- Old Monk Grinds Rice
Shaolin Chin-Na Sequence 44 -- Spiritual Monkey Plucks Fruit
Shaolin Chin-Na Sequence 45 -- Double Bows Embrace Moon
Shaolin Chin-Na Sequence 46 -- Double Dragons Play with Water
Shaolin Chin-Na Sequence 47 -- Reverse Showing Bull's Tail
Shaolin Chin-Na Sequence 48 -- Ride Dragon Pull Tendon
Shaolin Chin-Na Sequence 49 -- Two Tigers Subdue Dragon
 Shaolin Chin-Na Sequence 50 -- Fierce Tiger Crouches
on Ground
Shaolin Chin-Na Sequence 51 -- Hungry Tiger Retreats
from Den
Shaolin Chin-Na Sequence 52 -- Little Devil Removes Shoe
Shaolin Chin-Na Sequence 53 -- White Ape Ascends Tree
Shaolin Chin-Na Sequence 54 -- White Monkey Catches Boar
Shaolin Chin-Na Sequence 55 -- Monkey Stealds Plum
Shaolin Chin-Na Sequence 56 -- Steal Plum Under Leaf
Shaolin Chin-Na Sequence 57 -- Immortal Plucks Totamto
Shaolin Chin-Na Sequence 58 -- Bail Moon from Sea
Shaolin Chin-Na Sequence 59 -- Catch Tiger in Mountain
Shaolin Chin-Na Sequence 60 -- Under Leaf Pluck Lotus
Shaolin Chin-Na Sequence 61 -- Near-Body Tiger-Claw
Shaolin Chin-Na Sequence 62 -- Second Auntie Catches Crab
Shaolin Chin-Na Sequence 63 -- Embrace Moon in Bosom
Shaolin Chin-Na Sequence 64 -- White Tiger Cleanses Claw
Shaolin Chin-Na Sequence 65 -- Black Tiger Guards Door
Shaolin Chin-Na Sequence 66 -- General Leads Horse
Shaolin Chin-Na Sequence 67 -- Lohan Embraces Buddha
Shaolin Chin-Na Sequence 68 -- Tang Soldier Retains Guest
Shaolin Chin-Na Sequence 69 -- Tame Tiger Listen to Wind
Shaolin Chin-Na Sequence 70 -- Fierce Tiger Crouching at Cliff
Shaolin Chin-Na Sequence 71 -- Fierce Tiger Descends Mountain
Shaolin Chin-Na Sequence 72 -- Hungry Tiger Catches Goat
Chin-Na -- Videos Imortance of Mind Training and Force Development
Applying Strategies and Tactics in Effective Chin-Na Techniques
More Sophisticated Shaolin Chin-Na Techniques
Following Opponent's Movement in Chin-Na Attacks and Counters
How to Subdue Opponent with Chin-Na even When he Knows
the Counter
Chin_Na Techniques for Dislocating Wrists
Some Examples of Chin-Na Combat Sequences
Marvelous Techniques Beget Marvelous Techniques
Three Points of Time to Counter Chin-Na Attacks
Countering Sophisticated Chin-Na Techniques
 20
Successful Application of Chin-Na Attacks and Three
20
Successful Application of Chin-Na Attacks and ThreePoints of Counter
Good Timing and Good Spacing in Shaolin Chin-Na
Close-Body Fighting and Rapid Punches in Shaolin Chin-Na
Listening to Winds and Catching Goat in Shaolin Chin-Na
Shaolin 72 Chin-Na Techniques -- Overview
Finland 2006 Free Sparring in Finland using Kungfu Patterns
Free Sparring in Finland 2006 -- Part 1
Free Sparring in Finland 2006 -- Part 2
Free Sparring in Finland 2006 -- Part 3
Free Sparring in Finland 2006 -- Part 4
Free Sparring in Finland 2006 -- Part 5
Free Sparring in Finland 2006 -- Part 6
Four Gates Cross-Roads at Four Gates -- Pictures
Cross-Roads at Four Gates -- Videos
Intensive 2006 Fundamental Shaolin Kungfu Training Programme of
Shaolin Wahnam -- Overview
Intensive 2006 -- Application One-Step Sparring to Develop Combat Skills -- Overview
One-Step Sparring to Develop Combat Skills -- 1
One-Step Sparring to Develop Combat Skills -- 2
One-Step Sparring to Develop Combat Skills -- 3
One-Step Sparring to Develop Combat Skills -- 4
One-Step Sparring to Develop Combat Skills -- 5
One-Step Sparring to Develop Combat Skills -- 6
One-Step Sparring to Develop Combat Skills -- 7
One-Step Sparring to Develop Combat Skills -- 8
One-Step Sparring to Develop Combat Skills -- 9
 One-Step Sparring to Develop Combat Skills -- 10
One-Step Sparring to Develop Combat Skills -- 11
One-Step Sparring to Develop Combat Skills -- 12
One-Step Sparring to Develop Combat Skills -- 13
Intensive 2006 -- Boxing Working out Ways to Fight a Boxer -- Part 1
Working out Ways to Fight a Boxer -- Part 2
Working out Ways to Fight a Boxer -- Part 3
Working out Ways to Fight a Boxer -- Part 4
Working out Ways to Fight a Boxer -- Part 5
Working out Ways to Fight a Boxer -- Part 6
Working out Ways to Fight a Boxer -- Part 7
Working out Ways to Fight a Boxer -- Part 8
Working out Ways to Fight a Boxer -- Part 9
Working out Ways to Fight a Boxer -- Part 10
Working out Ways to Fight a Boxer -- Part 11
Working out Ways to Fight a Boxer -- Part 12
Working out Ways to Fight a Boxer -- Part 13
Working out Ways to Fight a Boxer -- Part 14
Working out Ways to Fight a Boxer -- Part 15
Working out Ways to Fight a Boxer -- Overview
Effective Tactics and Techniques against Boxers -- Part 1
Effective Tactics and Techniques against Boxers -- Part 2
Effective Tactics and Techniques against Boxers -- Part 3
Effective Tactics and Techniques against Boxers -- Part 4
 Effective Tactics and Techniques against Boxers -- Part 5
Effective Tactics and Techniques against Boxers -- Part 6
Effective Tactics and Techniques against Boxers -- Part 7
Effective Tactics and Techniques against Boxers -- Part 8
Effective Tactics and Techniques against Boxers -- Part 9
Effective Tactics and Techniques against Boxers -- Part 10
Effective Tactics and Techniques against Boxers -- Part 11
Effective Tactics and Techniques against Boxers -- Part 12
Effective Tactics and Techniques against Boxers -- Part 13
Effective Tactics and Techniques against Boxers -- Part 14
From Gross Outline to Fine Details -- Part 1
From Gross Outline to Fine Details -- Part 2
From Gross Outline to Fine Details -- Part 3
From Gross Outline to Fine Details -- Part 4
From Gross Outline to Fine Details -- Part 5
From Gross Outline to Fine Details -- Part 6
From Gross Outline to Fine Details -- Part 7
From Gross Outline to Fine Details -- Part 8
From Gross Outline to Fine Details -- Part 9
From Gross Outline to Fine Details -- Part 10
From Gross Outline to Fine Details -- Part 11
From Gross Outline to Fine Details -- Part 12
From Gross Outline to Fine Details -- Part 13
Exploiting Advantage to Clinch Victory -- Part 1
Exploiting Advantage to Clinch Victory -- Part 2
Exploiting Advantage to Clinch Victory -- Part 3
Exploiting Advantage to Clinch Victory -- Part 4
Exploiting Advantage to Clinch Victory -- Part 5
Exploiting Advantage to Clinch Victory -- Part 6
Exploiting Advantage to Clinch Victory -- Part 7
 Exploiting Advantage to Clinch Victory -- Part 8
Exploiting Advantage to Clinch Victory -- Part 9
Exploiting Advantage to Clinch Victory -- Part 10
Exploiting Advantage to Clinch Victory -- Part 11
Exploiting Advantage to Clinch Victory -- Part 12
Exploiting Advantage to Clinch Victory -- Part 13
Variety of Kungfu Techniques against Boxers -- Part 1
Variety of Kungfu Techniques against Boxers -- Part 2
Variety of Kungfu Techniques against Boxers -- Part 3
Variety of Kungfu Techniques against Boxers -- Part 4
Variety of Kungfu Techniques against Boxers -- Part 5
Variety of Kungfu Techniques against Boxers -- Part 6
Analysis of Techniques used agaisnt Boxers -- Part 1
Analysis of Techniques used agaisnt Boxers -- Part 2
Analysis of Techniques used agaisnt Boxers -- Part 3
Analysis of Techniques used agaisnt Boxers -- Part 4
Analysis of Techniques used agaisnt Boxers -- Part 5
Analysis of Techniques used agaisnt Boxers -- Part 6
Analysis of Techniques used agaisnt Boxers -- Part 7
Analysis of Techniques used agaisnt Boxers -- Part 8
Analysis of Techniques used agaisnt Boxers -- Part 9
Analysis of Techniques used agaisnt Boxers -- Part 10
Analysis of Techniques used agaisnt Boxers -- Part 11
Effective Tactics and Techinques against Boxers -- Overview
From Gross Outline to Fine Details -- Overview
Exploiting Advantage to Clinch Victory -- Overview
Variety of Kungfu Techniques against Boxers -- Overview
Analysis of Techiques used against Boxers -- Overview
Using Shaolin Kungfu against Boxing in Free Sparring -- Overview
 Using Shaolin Kungfu against Boxing in Free Sparring -- Part 1
Using Shaolin Kungfu against Boxing in Free Sparring -- Part 2
Using Shaolin Kungfu against Boxing in Free Sparring -- Part 3
Using Shaolin Kungfu against Boxing in Free Sparring -- Part 4
Using Shaolin Kungfu against Boxing in Free Sparring -- Part 5
Using Shaolin Kungfu against Boxing in Free Sparring -- Part 6
Using Shaolin Kungfu against Boxing in Free Sparring -- Part 7
Using Shaolin Kungfu against Boxing in Free Sparring -- Part 8
Using Shaolin Kungfu against Boxing in Free Sparring -- Part 9
Using Shaolin Kungfu against Boxing in Free Sparring -- Part 10
Using Shaolin Kungfu against Boxing in Free Sparring -- Part 11
Using Shaolin Kungfu against Boxing in Free Sparring -- Part 12
Intensive 2006 -- Fell Shaolin Felling Techniques and their Defences -- Overveiw
Shaolin Felling Techniques and their Defences -- Part 1
Safety First before Executing Felling Techniques -- Overview
Shaolin Felling Techniques and their Defences -- Part 2
From Combat Sequences to Free Sparring -- Overview
Shaolin Felling Techniques and their Defences -- Part 3
Shaolin Felling Techniques and their Defences -- Part 4
Shaolin Felling Techniques and their Defences -- Part 5
Shaolin Felling Techniques and their Defences -- Part 6
Shaolin Felling Techniques and their Defences -- Part 7
Shaolin Felling Techniques and their Defences -- Part 8
Shaolin Felling Techniques and their Defences -- Part 9
Shaolin Felling Techniques and their Defences -- Part 10
Safety First before Executing Felling Techniques -- Part 1
Safety First before Executing Felling Techniques -- Part 2
Safety First before Executing Felling Techniques -- Part 3
Safety First before Executing Felling Techniques -- Part 4
Safety First before Executing Felling Techniques -- Part 5
Safety First before Executing Felling Techniques -- Part 6
Safety First before Executing Felling Techniques -- Part 7
 Safety First before Executing Felling Techniques -- Part 8
Safety First before Executing Felling Techniques -- Part 9
Safety First before Executing Felling Techniques -- Part 10
From Combat Sequences to Free Sparring -- Part 1
From Combat Sequences to Free Sparring -- Part 2
From Combat Sequences to Free Sparring -- Part 3
From Combat Sequences to Free Sparring -- Part 4
From Combat Sequences to Free Sparring -- Part 5
From Combat Sequences to Free Sparring -- Part 6
From Combat Sequences to Free Sparring -- Part 7
From Combat Sequences to Free Sparring -- Part 8
From Combat Sequences to Free Sparring -- Part 9
Intensive 2006 -- Form From Random Fighting to Patterns, and from Patterns
to Sequences and Sets -- Overview
Picture-Perfect Forms and Flowing Movements -- Overview
Picture-Perfect Forms and Flowing Movements -- Part 1
Picture-Perfect Forms and Flowing Movements -- Part 2
Picture-Perfect Forms and Flowing Movements -- Part 3
Picture-Perfect Forms and Flowing Movements -- Part 4
Picture-Perfect Forms and Flowing Movements -- Part 5
Picture-Perfect Forms and Flowing Movements -- Part 6
Picture-Perfect Forms and Flowing Movements -- Part 7
Picture-Perfect Forms and Flowing Movements -- Part 8
Picture-Perfect Forms and Flowing Movements -- Part 9
Picture-Perfect Forms and Flowing Movements -- Part 10
Picture-Perfect Forms and Flowing Movements -- Part 11
Picture-Perfect Forms and Flowing Movements -- Part 12
Picture-Perfect Forms and Flowing Movements -- Part 13
Picture-Perfect Forms and Flowing Movements -- Part 14
From Random Fighting to Patterns, and from Patterns
to Sequences and Sets -- Part 1
From Random Fighting to Patterns, and from Patterns
to Sequences and Sets -- Part 2
From Random Fighting to Patterns, and from Patterns
to Sequences and Sets -- Part 3
From Random Fighting to Patterns, and from Patterns
to Sequences and Sets -- Part 4
 From Random Fighting to Patterns, and from Patterns
to Sequences and Sets -- Part 5
From Random Fighting to Patterns, and from Patterns
to Sequences and Sets -- Part 6
From Random Fighting to Patterns, and from Patterns
to Sequences and Sets -- Part 7
From Random Fighting to Patterns, and from Patterns
to Sequences and Sets -- Part 8
Intensive 2006 -- Karate How to Handle a Karate Exponent -- Overview
How to Handle a Karate Exponent -- Part 1
How to Handle a Karate Exponent -- Part 2
How to Handle a Karate Exponent -- Part 3
How to Handle a Karate Exponent -- Part 4
How to Handle a Karate Exponent -- Part 5
How to Handle a Karate Exponent -- Part 6
Intensive 2006 -- Kick-Boxing Effective Shaolin Tactics and Techniques against Kick-Boxing -- Overview
Shaolin Kungfu against Kick-Boxing in Free Sparring -- Overview
Effective Teactics and Techniques against Kick-Boxing -- Part 1
Effective Teactics and Techniques against Kick-Boxing -- Part 2
Effective Teactics and Techniques against Kick-Boxing -- Part 3
Effective Teactics and Techniques against Kick-Boxing -- Part 4
Effective Teactics and Techniques against Kick-Boxing -- Part 5
Effective Teactics and Techniques against Kick-Boxing -- Part 6
Effective Teactics and Techniques against Kick-Boxing -- Part 7
Effective Teactics and Techniques against Kick-Boxing -- Part 8
Effective Teactics and Techniques against Kick-Boxing -- Part 9
Effective Teactics and Techniques against Kick-Boxing -- Part 10
Effective Teactics and Techniques against Kick-Boxing -- Part 11
Effective Teactics and Techniques against Kick-Boxing -- Part 12
Shaolin Kungfu against Kick-Boxing in Free Sparring -- Part 1
Shaolin Kungfu against Kick-Boxing in Free Sparring -- Part 2
Shaolin Kungfu against Kick-Boxing in Free Sparring -- Part 3
Shaolin Kungfu against Kick-Boxing in Free Sparring -- Part 4
Shaolin Kungfu against Kick-Boxing in Free Sparring -- Part 5
Shaolin Kungfu against Kick-Boxing in Free Sparring -- Part 6
 Shaolin Kungfu against Kick-Boxing in Free Sparring -- Part 7
Shaolin Kungfu against Kick-Boxing in Free Sparring -- Part 8
Effective Teactics and Techniques against Kick-Boxing -- Part 13
Effective Teactics and Techniques against Kick-Boxing -- Part 14
Shaolin Kungfu against Kick-Boxing in Free Sparring -- Part 9
Shaolin Kungfu against Kick-Boxing in Free Sparring -- Part 10
Shaolin Kungfu against Kick-Boxing in Free Sparring -- Part 11
Shaolin Kungfu against Kick-Boxing in Free Sparring -- Part 12
Intensive 2006 -- Kicks The Secrets of Side Kicks and Continuous Cannons -- Overview
How You may Defeat Opponents Experienced in Random
Free Sparring -- Overview
How would a Fragile Girl Counter a Powerful Sweeping
Kick from a Muay Thai Fighter -- Overview
Five Basic Kicks -- Overview
Five Basic Kicks -- Part 1
Five Basic Kicks -- Part 2
Five Basic Kicks -- Part 3
Five Basic Kicks -- Part 4
Five Basic Kicks -- Part 5
Five Basic Kicks -- Part 6
Five Basic Kicks -- Part 7
Five Basic Kicks -- Part 8
Five Basic Kicks -- Part 9
Five Basic Kicks -- Part 10
The Secrets of Side Kicks and Continuous Cannons -- Part 1
The Secrets of Side Kicks and Continuous Cannons -- Part 2
The Secrets of Side Kicks and Continuous Cannons -- Part 3
The Secrets of Side Kicks and Continuous Cannons -- Part 4
The Secrets of Side Kicks and Continuous Cannons -- Part 5
The Secrets of Side Kicks and Continuous Cannons -- Part 6
The Secrets of Side Kicks and Continuous Cannons -- Part 7The Secrets of Side Kicks and Continuous Cannons -- Part 8
The Secrets of Side Kicks and Continuous Cannons -- Part 9
How You may Defeat Opponents Experienced in Random
Free Sparring -- Part 7
How You may Defeat Opponents Experienced in Random
Free Sparring -- Part 8
How You may Defeat Opponents Experienced in Random
Free Sparring -- Part 9
How You may Defeat Opponents Experienced in Random
Free Sparring -- Part 10
How You may Defeat Opponents Experienced in Random
Free Sparring -- Part 11
How You may Defeat Opponents Experienced in Random
Free Sparring -- Part 12
How You may Defeat Opponents Experienced in Random
Free Sparring -- Part 13
How You may Defeat Opponents Experienced in Random
Free Sparring -- Part 1
How You may Defeat Opponents Experienced in Random
Free Sparring -- Part 2
How You may Defeat Opponents Experienced in Random
Free Sparring -- Part 3
How You may Defeat Opponents Experienced in Random
Free Sparring -- Part 4
How You may Defeat Opponents Experienced in Random
Free Sparring -- Part 5
How You may Defeat Opponents Experienced in Random
Free Sparring -- Part 6
How You may Defeat Opponents Experienced in Random
Free Sparring -- Part 14
How You may Defeat Opponents Experienced in Random
Free Sparring -- Part 15
How would a Fragile Girl Counter a Powerful Sweeping
Kick from a Muay Thai Fighter -- Part 1
How would a Fragile Girl Counter a Powerful Sweeping
Kick from a Muay Thai Fighter -- Part 2
How would a Fragile Girl Counter a Powerful Sweeping Kick
from a Muay Thai Fighter -- Part 3
How would a Fragile Girl Counter a Powerful Sweeping Kick
from a Muay Thai Fighter -- Part 4
How would a Fragile Girl Counter a Powerful Sweeping Kick
from a Muay Thai Fighter -- Part 5
How would a Fragile Girl Counter a Powerful Sweeping
Kick from a Muay Thai Fighter -- Part 6
How would a Fragile Girl Counter a Powerful Sweeping
Kick from a Muay Thai Fighter -- Part 7
How would a Fragile Girl Counter a Powerful Sweeping
Kick from a Muay Thai Fighter -- Part 8
 Intensive 2006 -- Movement
Moving to Different
Drections using Different Ways
Intensive 2006 -- Movement
Moving to Different
Drections using Different Waysto Gain Advangates
Footwork Secrets for Health, Efficiency and Elegance
Footwork Secrets for Health, Efficiency and Elegance -- Part 1
Footwork Secrets for Health, Efficiency and Elegance -- Part 2
Footwork Secrets for Health, Efficiency and Elegance -- Part 3
Footwork Secrets for Health, Efficiency and Elegance -- Part 4
Footwork Secrets for Health, Efficiency and Elegance -- Part 5
Footwork Secrets for Health, Efficiency and Elegance -- Part 6
Footwork Secrets for Health, Efficiency and Elegance -- Part 7
Footwork Secrets for Health, Efficiency and Elegance -- Part 8
Footwork Secrets for Health, Efficiency and Elegance -- Part 9
Footwork Secrets for Health, Efficiency and Elegance -- Part 10
Footwork Secrets for Health, Efficiency and Elegance -- Part 11
Footwork Secrets for Health, Efficiency and Elegance -- Part 12
Footwork Secrets for Health, Efficiency and Elegance -- Part 13
Footwork Secrets for Health, Efficiency and Elegance -- Part 14
Footwork Secrets for Health, Efficiency and Elegance -- Part 15
Moving to Various Directions using Different Ways to
Gain Advantages -- Part 1
Moving to Various Directions using Different Ways to
Gain Advantages -- Part 2
Moving to Various Directions using Different Ways to
Gain Advantages -- Part 3
Moving to Various Directions using Different Ways to
Gain Advantages -- Part 4
Moving to Various Directions using Different Ways to
Gain Advantages -- Part 5
Moving to Various Directions using Different Ways to
Gain Advantages -- Part 6
Moving to Various Directions using Different Ways to
Gain Advantages -- Part 7
Moving to Various Directions using Different Ways to
Gain Advantages -- Part 8
Moving to Various Directions using Different Ways to
Gain Advantages -- Part 9
Moving to Various Directions using Different Ways to
Gain Advantages -- Part 10
Moving to Various Directions using Different Ways to
Gain Advantages -- Part 11
Moving to Various Directions using Different Ways to
Gain Advantages -- Part 12
Moving to Various Directions using Different Ways to
Gain Advantages -- Part 13
 30
Intensive 2006 -- Muay Thai
Understanding the Typical Attacks of Muay Thai
30
Intensive 2006 -- Muay Thai
Understanding the Typical Attacks of Muay ThaiFighters -- Part 1
Understanding the Typical Attacks of Muay Thai
Fighters -- Part 2
Understanding the Typical Attacks of Muay Thai
Fighters -- Part 3
Understanding the Typical Attacks of Muay Thai
Fighters -- Part 4
Understanding the Typical Attacks of Muay Thai
Fighters -- Part 5
Understanding the Typical Attacks of Muay Thai Fighters -- Part 6
Understanding the Typical Attacks of Muay Thai Fighters -- Part 7
Understanding the Typical Attacks of Muay Thai Fighters -- Part 8
Understanding the Typical Attacks of Muay Thai Fighters -- Part 9
Understanding the Typical Attacks of Muay Thai Fighters -- Part 10
Grandmaster Ho's Secrets in Countering Muay Thai Fighters -- Part 1
Grandmaster Ho's Secrets in Countering Muay Thai Fighters -- Part 2
Grandmaster Ho's Secrets in Countering Muay Thai Fighters -- Part 3
Grandmaster Ho's Secrets in Countering Muay Thai Fighters -- Part 4
Grandmaster Ho's Secrets in Countering Muay Thai Fighters -- Part 5
Grandmaster Ho's Secrets in Countering Muay Thai Fighters -- Part 6
Grandmaster Ho's Secrets in Countering Muay Thai Fighters -- Part 7
Grandmaster Ho's Secrets in Countering Muay Thai Fighters -- Part 8
Grandmaster Ho's Secrets in Countering Muay Thai Fighters -- Part 9
Grandmaster Ho's Secrets in Countering Muay Thai Fighters -- Part 10
Grandmaster Ho's Secrets in Countering Muay Thai Fighters -- Part 11
Grandmaster Ho's Secrets in Countering Muay Thai Fighters -- Part 12
First Avoid Defeat, Then Secure Victory -- Part 1
First Avoid Defeat, Then Secure Victory -- Part 2
First Avoid Defeat, Then Secure Victory -- Part 3
First Avoid Defeat, Then Secure Victory -- Part 4
First Avoid Defeat, Then Secure Victory -- Part 5
First Avoid Defeat, Then Secure Victory -- Part 6
First Avoid Defeat, Then Secure Victory -- Part 7
First Avoid Defeat, Then Secure Victory -- Part 8
 First Avoid Defeat, Then Secure Victory -- Part 9
First Avoid Defeat, Then Secure Victory -- Part 10
Grandmaster Ho's Secrets in Countering Muay Thai
Fighters -- Part 11
Countering the Elbow and Knee Attacks of Muay Thai
Fighters -- Part 1
Countering the Elbow and Knee Attacks of Muay Thai
Fighters -- Part 2
Countering the Elbow and Knee Attacks of Muay Thai
Fighters -- Part 3
Countering the Elbow and Knee Attacks of Muay Thai
Fighters -- Part 4
Countering the Elbow and Knee Attacks of Muay Thai Fighters -- Part 5
Countering the Elbow and Knee Attacks of Muay Thai Fighters -- Part 6
Countering the Elbow and Knee Attacks of Muay Thai Fighters -- Part 7
Countering the Elbow and Knee Attacks of Muay Thai Fighters -- Part 8
Countering the Elbow and Knee Attacks of Muay Thai Fighters -- Part 9
Countering the Elbow and Knee Attacks of Muay Thai Fighters -- Part 10
Countering the Elbow and Knee Attacks of Muay Thai Fighters -- Part 11
Understanding the Typical Attacks of Muay Thai Fighters -- Overview
Grandmaster Ho's Secrets in Countering Muay Thai Fighters -- Overview
Grandmaster Ho's Secrets in Countering Muay Thai Fighters -- Overview
Countering the Elbow and Knee Attacks of Muay Thai Fighters -- Overview
Intensive 2006 -- Sequences From Pre-Arranged Sparring to Guided Sparring -- Overview
Using Techniques and Tactics in Sparring -- Overview
From Pre-Arranged Sparring to Guided Sparring -- Part 1
From Pre-Arranged Sparring to Guided Sparring -- Part 2
From Pre-Arranged Sparring to Guided Sparring -- Part 3
From Pre-Arranged Sparring to Guided Sparring -- Part 4
From Pre-Arranged Sparring to Guided Sparring -- Part 5
From Pre-Arranged Sparring to Guided Sparring -- Part 6
From Pre-Arranged Sparring to Guided Sparring -- Part 7
From Pre-Arranged Sparring to Guided Sparring -- Part 8
 From Pre-Arranged Sparring to Guided Sparring -- Part 9
From Pre-Arranged Sparring to Guided Sparring -- Part 10
From Pre-Arranged Sparring to Guided Sparring -- Part 11
From Pre-Arranged Sparring to Guided Sparring -- Part 12
From Pre-Arranged Sparring to Guided Sparring -- Part 13
From Pre-Arranged Sparring to Guided Sparring -- Part 14
From Pre-Arranged Sparring to Guided Sparring -- Part 15
Using Techniques and Tactics in Sparring -- Part 1
Using Techniques and Tactics in Sparring -- Part 2
Using Techniques and Tactics in Sparring -- Part 3
Using Techniques and Tactics in Sparring -- Part 4
Using Techniques and Tactics in Sparring -- Part 5
Using Techniques and Tactics in Sparring -- Part 6
Using Techniques and Tactics in Sparring -- Part 7
Using Techniques and Tactics in Sparring -- Part 8
Using Techniques and Tactics in Sparring -- Part 9
Using Techniques and Tactics in Sparring -- Part 10
Using Techniques and Tactics in Sparring -- Part 11
Using Techniques and Tactics in Sparring -- Part 12
Using Techniques and Tactics in Sparring -- Part 13
Using Techniques and Tactics in Sparring -- Part 14
Using Techniques and Tactics in Sparring -- Part 15
Intensive 2006 -- Set Kungfu Set: Black Tiger Steals Heart
Kungfu Set: Fierce Tiger Speeds through Valley
Kungfu Set: Happy Bird Hops up Branch
Kungfu Set: Lohan Asks the Way
Sixteen Combat Sequences and Five Kungfu Sets -- Overview
Combat Sequence 1: Black Tiger Steals Heart
Combat Sequence 2: Poisonous Snake Shoots Venom
Combat Sequence 3: Precious Duck Swims through Lotus
Combat Sequence 4: Hang a Golden Star
Combat Sequence 5: Fierce Tiger Speeds through Valley
 Combat Sequence 6: Dark Dragon Draws Water
Combat Sequence 7: Chop the Hua Mountain
Combat Sequence 8: Horizontally Sweep Thoudand Armies
Combat Sequence 9: Happy Bird Hops up Branch
Combat Sequence 10: White Horse Presents Hoof
Combat Sequence 11: Yellow Bird Plays with Water
Combat Sequence 12: Naughty Monkey Kicks at Tree
Combat Sequence 13: Fell Tree with Roots
Combat Sequence 14: Lead Horse Back to Stable
Combat Sequence 15: Farmer Hoes Rice Field
Combat Sequence 16: Fierce Tiger Pushes Mountain
Kungfu Set: Fell Tree with Roots
Intensive 2006 -- Stances Stances: the Foundation for Internal Force and Combat Efficiency -- Part 1
Stances: the Foundation for Internal Force and Combat Efficiency -- Part 2
Stances: the Foundation for Internal Force and Combat Efficiency -- Part 3
Stances: the Foundation for Internal Force and Combat Efficiency -- Part 4
Stances: the Foundation for Internal Force and Combat Efficiency -- Part 5
Stances: the Foundation for Internal Force and Combat Efficiency -- Part 6
Stances: the Foundation for Internal Force and Combat Efficiency -- Part 7
Stances: the Foundation for Internal Force and Combat Efficiency -- Part 8
Stances: the Foundation for Internal Force and Combat Efficiency -- Part 9
Stances: the Foundation for Internal Force and Combat Efficiency -- Part 10
Stances: the Foundation for Internal Force and Combat Efficiency
Intensive 2006 -- Surprise Surprise your Attacker with a Counter-Attack -- Overview
Surprise your Attacker with a Counter-Attack -- Part 1
Surprise your Attacker with a Counter-Attack -- Part 2
Surprise your Attacker with a Counter-Attack -- Part 3
Surprise your Attacker with a Counter-Attack -- Part 4
Surprise your Attacker with a Counter-Attack -- Part 5
Surprise your Attacker with a Counter-Attack -- Part 6
Surprise your Attacker with a Counter-Attack -- Part 7
Surprise your Attacker with a Counter-Attack -- Part 8
Surprise your Attacker with a Counter-Attack -- Part 9
 Surprise your Attacker with a Counter-Attack -- Part 10
Surprise your Attacker with a Counter-Attack -- Part 11
Surprise your Attacker with a Counter-Attack -- Part 12
Surprise your Attacker with a Counter-Attack -- Part 13
Surprise your Attacker with a Counter-Attack -- Part 14
Surprise your Attacker with a Counter-Attack -- Part 15
Surprise your Attacker with a Counter-Attack -- Part 16
Surprise your Attacker with a Counter-Attack -- Part 17
Surprise your Attacker with a Counter-Attack -- Part 18
Surprise your Attacker with a Counter-Attack -- Part 19
Surprise your Attacker with a Counter-Attack -- Part 20
Surprise your Attacker with a Counter-Attack -- Part 21
Surprise your Attacker with a Counter-Attack -- Part 22
Surprise your Attacker with a Counter-Attack -- Part 23
Surprise your Attacker with a Counter-Attack -- Part 24
Surprise your Attacker with a Counter-Attack -- Part 25
Surprise your Attacker with a Counter-Attack -- Part 26
Surprise your Attacker with a Counter-Attack -- Part 27
Surprise your Attacker with a Counter-Attack -- Part 28
Surprise your Attacker with a Counter-Attack -- Part 29
Surprise your Attacker with a Counter-Attack -- Part 30
Surprise your Attacker with a Counter-Attack -- Part 31
Surprise your Attacker with a Counter-Attack -- Part 32
Surprise your Attacker with a Counter-Attack -- Part 33
Surprise your Attacker with a Counter-Attack -- Part 34
Surprise your Attacker with a Counter-Attack -- Part 35
Surprise your Attacker with a Counter-Attack -- Part 36
Surprise your Attacker with a Counter-Attack -- Part 37
Surprise your Attacker with a Counter-Attack -- Part 38
Surprise your Attacker with a Counter-Attack -- Part 39
 Surprise your Attacker with a Counter-Attack -- Part 40
Surprise your Attacker with a Counter-Attack -- Part 41
Surprise your Attacker with a Counter-Attack -- Part 42
Surprise your Attacker with a Counter-Attack -- Part 43
Surprise your Attacker with a Counter-Attack -- Part 44
Surprise your Attacker with a Counter-Attack -- Part 45
Surprise your Attacker with a Counter-Attack -- Part 46
Surprise your Attacker with a Counter-Attack -- Part 47
Surprise your Attacker with a Counter-Attack -- Part 48
Surprise your Attacker with a Counter-Attack -- Part 49
Surprise your Attacker with a Counter-Attack -- Part 50
Surprise your Attacker with a Counter-Attack -- Part 51
Surprise your Attacker with a Counter-Attack -- Part 52
Surprise your Attacker with a Counter-Attack -- Part 53
Surprise your Attacker with a Counter-Attack -- Part 64
Intensive 2006 -- Taekwondo How to Handle a a Taekwondo Exponent
How to Handle a a Taekwondo Exponent -- Part 1
How to Handle a a Taekwondo Exponent -- Part 2
How to Handle a a Taekwondo Exponent -- Part 3
How to Handle a a Taekwondo Exponent -- Part 4
How to Handle a a Taekwondo Exponent -- Part 5
How to Handle a a Taekwondo Exponent -- Part 6
How to Handle a a Taekwondo Exponent -- Part 7
How to Handle a a Taekwondo Exponent -- Part 8
How to Handle a a Taekwondo Exponent -- Part 9
 Intensive 2006 -- Videos
Fundamental Shaolin Kungfu Training Programme of
Intensive 2006 -- Videos
Fundamental Shaolin Kungfu Training Programme ofShaolin Wahnam -- Overview
Stances -- Foundation for Internal Force and Combat
Effeciency
Footwork Secrets of Health, Efficiency and Elegance
Moving into Same Direction using Different Ways
to Gain Advantages
Picture-Perfect Forms and Flowing Movements
From Random Fighting to Patterns, then to Sequences
and Sets
One-Step Sparring to Develop Combat Skills
From Pre-Arranged Sparring to Guided Sparring
Using Techniques and Tactics in Sparring
Five Basic Kicks of Shaolin Kungfu
Secrets of Side-Kicks and Continuous Cannons
How You may Defeat Opponents Experienced in Random
Free Sparring
How would a Fragile Girl Counter a Powerful Sweeping
Kick from a Muay Thai Fighter?
Shaolin Felling Techniques and ther Defences
Safety First before Executing Felling Techniques
From Combat Sequences to Free Sparring
Sixteen Kungfu Sequences and Five Kungfu Sets
Surprise your Attacker with a Counter-Attack
Working out Ways to Fight a Boxer
Effective Tactics and Techniques against Boxers
From Gross Outline to Fine Details
Exploiting Advantages to Clinch Victory
Variety of Shaolin Techniques against Boxers
Analysis os Shaolin Techniques against Boxers
Using Shaolin Kungfu against Boxing in Free Sparring
Effective Shaolin Tactics and Techniques against Kick-Boxing
Shaolin Kungfu against Kick-boxing in Free Sparring
How to Handle a Karate Exponent
How to Handle a Tawkwondo Exponent
How to Handle a Wrestling Exponent
 Understanding Typical Attacks of Muay Thai Fighters
Grandmaster Ho Fatt Nam's Secrets in Countering Muay
Thai Fighters
Firt Avoid Defeat, Then Clinch Victory
Shaolin Counters against Elbow and Knee Attacks
of Muay Thai
Intensive 2006 -- Wrestling How to Handle a Wrestling Exponent -- Part 1
How to Handle a Wrestling Exponent -- Part 2
How to Handle a Wrestling Exponent -- Part 3
How to Handle a Wrestling Exponent -- Part 4
How to Handle a Wrestling Exponent -- Part 5
How to Handle a Wrestling Exponent -- Part 6
How to Handle a Wrestling Exponent -- Part 7
How to Handle a Wrestling Exponent -- Part 8
How to Handle a Wrestling Exponent -- Part 9
How to Handle a Wrestling Exponent -- Part 10
How to Handle a Wrestling Exponent -- Part 11
How to Handle a Wrestling Exponent -- Part 12
How to Handle a Wrestling Exponent -- Part 13
How to Handle a Wrestling Exponent -- Part 14
How to Handle a Wrestling Exponent -- Part 15
How to Handle a Wrestling Exponent -- Overview
 Japan Shaolin 2007
Wu Nian or Non-Thought
Japan Shaolin 2007
Wu Nian or Non-ThoughtIntroductory Shaolin Kungfu Course in Japan -- Overview
Importance of Being Relaxed
Shaolin Four-Sequence Four-Attack Set -- Overview
Foundation of Internal Force: Stance Training -- Part 1
Foundation of Internal Force: Stance Training -- Part 2
Foundation of Internal Force: Stance Training -- Part 3
Foundation of Internal Force: Stance Training -- Part 4
Foundation of Internal Force: Stance Training -- Part 5
Foundation of Internal Force: Stance Training -- Part 6
Foundation of Internal Force: Stance Training -- Part 7
Foundation of Internal Force: Stance Training -- Part 8
Foundation of Internal Force: Stance Training -- Part 9
Foundation of Internal Force: Stance Training -- Part 10
Foundation of Internal Force: Stance Training -- Part 11
Flexibility and Footwork in Shaolin Kungfu -- Part 1
Flexibility and Footwork in Shaolin Kungfu -- Part 2
Flexibility and Footwork in Shaolin Kungfu -- Part 3
Flexibility and Footwork in Shaolin Kungfu -- Part 4
Flexibility and Footwork in Shaolin Kungfu -- Part 5
Flexibility and Footwork in Shaolin Kungfu -- Part 6
Flexibility and Footwork in Shaolin Kungfu -- Part 7
Flexibility and Footwork in Shaolin Kungfu -- Part 8
Basic Hand Forms of Shaolin Kungfu -- Part 1
Basic Hand Forms of Shaolin Kungfu -- Part 2
Basic Hand Forms of Shaolin Kungfu -- Part 3
Basic Hand Forms of Shaolin Kungfu -- Part 4
Basic Hand Forms of Shaolin Kungfu -- Part 5
Basic Hand Forms of Shaolin Kungfu -- Part 6
Basic Hand Forms of Shaolin Kungfu -- Part 7
 Basic Hand Forms of Shaolin Kungfu -- Part 8
Basic Hand Forms of Shaolin Kungfu -- Part 9
Basic Hand Forms of Shaolin Kungfu -- Part 10
The Mechanics of Exploding Force -- Part 1
The Mechanics of Exploding Force -- Part 2
The Mechanics of Exploding Force -- Part 3
The Mechanics of Exploding Force -- Part 4
The Mechanics of Exploding Force -- Part 5
The Mechanics of Exploding Force -- Part 6
The Mechanics of Exploding Force -- Part 7
The Mechanics of Exploding Force -- Part 8
The Mechanics of Exploding Force -- Part 9
The Mechanics of Exploding Force -- Part 10
Safety First is the First Principle of Combat -- Part 1
Safety First is the First Principle of Combat -- Part 2
Safety First is the First Principle of Combat -- Part 3
Basic Shaolin Kungfu Patterns -- Part 1
Basic Shaolin Kungfu Patterns -- Part 2
Basic Shaolin Kungfu Patterns -- Part 3
Basic Shaolin Kungfu Patterns -- Part 4
Basic Shaolin Kungfu Patterns -- Part 5
Basic Shaolin Kungfu Patterns -- Part 6
Basic Shaolin Kungfu Patterns -- Part 7
Basic Shaolin Kungfu Patterns -- Part 8
Basic Shaolin Kungfu Patterns -- Part 9
Basic Shaolin Kungfu Patterns -- Part 10
Basic Shaolin Kungfu Patterns -- Part 11
Basic Shaolin Kungfu Patterns -- Part 12
Basic Shaolin Kungfu Patterns -- Part 13
Spacing and Timing in Shaolin Kungfu -- Part 1
 40
Spacing and Timing in Shaolin Kungfu -- Part 2
40
Spacing and Timing in Shaolin Kungfu -- Part 2Spacing and Timing in Shaolin Kungfu -- Part 3
Spacing and Timing in Shaolin Kungfu -- Part 4
Spacing and Timing in Shaolin Kungfu -- Part 5
Spacing and Timing in Shaolin Kungfu -- Part 6
Spacing and Timing in Shaolin Kungfu -- Part 7
Spacing and Timing in Shaolin Kungfu -- Part 8
Spacing and Timing in Shaolin Kungfu -- Part 9
Spacing and Timing in Shaolin Kungfu -- Part 10
Spacing and Timing in Shaolin Kungfu -- Part 11
Spacing and Timing in Shaolin Kungfu -- Part 12
Spacing and Timing in Shaolin Kungfu -- Part 13
Spacing and Timing in Shaolin Kungfu -- Part 14
Spacing and Timing in Shaolin Kungfu -- Part 15
Spacing and Timing in Shaolin Kungfu -- Part 16
Spacing and Timing in Shaolin Kungfu -- Part 17
Spacing and Timing in Shaolin Kungfu -- Part 18
How to Move into an Opponent in Combat -- Part 1
How to Move into an Opponent in Combat -- Part 2
How to Move into an Opponent in Combat -- Part 3
How to Move into an Opponent in Combat -- Part 4
How to Move into an Opponent in Combat -- Part 5
How to Move into an Opponent in Combat -- Part 6
Sequence Sparring is very Important in our School -- Part 1
Sequence Sparring is very Important in our School -- Part 2
Sequence Sparring is very Important in our School -- Part 3
Sequence Sparring is very Important in our School -- Part 4
Sequence Sparring is very Important in our School -- Part 5
Sequence Sparring is very Important in our School -- Part 6
Sequence Sparring is very Important in our School -- Part 7
 Sequence Sparring is very Important in our School -- Part 8
Handling Various Hand Attacks in Combat -- Part 1
Handling Various Hand Attacks in Combat -- Part 2
Handling Various Hand Attacks in Combat -- Part 3
Shaolin Four Abridged Combat Sequences -- Part 1
Handling Various Hand Attacks in Combat -- Part 4
Handling Various Hand Attacks in Combat -- Part 5
Handling Various Hand Attacks in Combat -- Part 6
Handling Various Hand Attacks in Combat -- Part 7
Handling Various Hand Attacks in Combat -- Part 8
Handling Various Hand Attacks in Combat -- Part 9
Handling Various Hand Attacks in Combat -- Part 10
Handling Various Hand Attacks in Combat -- Part 11
Handling Various Hand Attacks in Combat -- Part 12
Applying Variations in Combat Sequences -- Part 1
Applying Variations in Combat Sequences -- Part 2
Applying Variations in Combat Sequences -- Part 3
Applying Variations in Combat Sequences -- Part 4
Applying Variations in Combat Sequences -- Part 5
Applying Variations in Combat Sequences -- Part 6
Applying Variations in Combat Sequences -- Part 7
Applying Variations in Combat Sequences -- Part 8
Applying Variations in Combat Sequences -- Part 9
Applying Variations in Combat Sequences -- Part 10
Applying Variations in Combat Sequences -- Part 11
Applying Variations in Combat Sequences -- Part 12
Pressing Attacks in Shaolin Combat -- Part 1
Pressing Attacks in Shaolin Combat -- Part 2
Pressing Attacks in Shaolin Combat -- Part 3
Pressing Attacks in Shaolin Combat -- Part 4
 Pressing Attacks in Shaolin Combat -- Part 5
Pressing Attacks in Shaolin Combat -- Part 6
Pressing Attacks in Shaolin Combat -- Part 7
Pressing Attacks in Shaolin Combat -- Part 8
Pressing Attacks in Shaolin Combat -- Part 9
Pressing Attacks in Shaolin Combat -- Part 10
Pressing Attacks in Shaolin Combat -- Part 11
Pressing Attacks in Shaolin Combat -- Part 12
Double Kicks in Shaolin Combat Application -- Part 1
Double Kicks in Shaolin Combat Application -- Part 2
Double Kicks in Shaolin Combat Application -- Part 3
Double Kicks in Shaolin Combat Application -- Part 4
Double Kicks in Shaolin Combat Application -- Part 5
Double Kicks in Shaolin Combat Application -- Part 6
Double Kicks in Shaolin Combat Application -- Part 7
Double Kicks in Shaolin Combat Application -- Part 8
Double Kicks in Shaolin Combat Application -- Part 9
Double Kicks in Shaolin Combat Application -- Part 10
Double Kicks in Shaolin Combat Application -- Part 11
Double Kicks in Shaolin Combat Application -- Part 12
Shaolin Four Abridged Combat Sequences -- Part 2
Variations of Shaolin Combat Seqjuences -- Part 1
Variations of Shaolin Combat Seqjuences -- Part 2
Variations of Shaolin Combat Seqjuences -- Part 3
Variations of Shaolin Combat Seqjuences -- Part 4
Variations of Shaolin Combat Seqjuences -- Part 5
Variations of Shaolin Combat Seqjuences -- Part 6
Variations of Shaolin Combat Seqjuences -- Part 7
Variations of Shaolin Combat Seqjuences -- Part 8
Variations of Shaolin Combat Seqjuences -- Part 9
 Variations of Shaolin Combat Seqjuences -- Part 10
Variations of Shaolin Combat Seqjuences -- Part 11
Variations of Shaolin Combat Seqjuences -- Part 12
Variations of Shaolin Combat Seqjuences -- Part 13
Variations of Shaolin Combat Seqjuences -- Part 14
Variations of Shaolin Combat Seqjuences -- Part 15
Felling Techniques in Shaoin Kungfu -- Part 1
Felling Techniques in Shaoin Kungfu -- Part 2
Felling Techniques in Shaoin Kungfu -- Part 3
Felling Techniques in Shaoin Kungfu -- Part 4
Felling Techniques in Shaoin Kungfu -- Part 5
Felling Techniques in Shaoin Kungfu -- Part 6
Felling Techniques in Shaoin Kungfu -- Part 7
Felling Techniques in Shaoin Kungfu -- Part 8
Felling Techniques in Shaoin Kungfu -- Part 9
Felling Techniques in Shaoin Kungfu -- Part 10
Felling Techniques in Shaoin Kungfu -- Part 11
Felling Techniques in Shaoin Kungfu -- Part 12
Whirlwind Kick of Shaolin Kungfu -- Part 1
Whirlwind Kick of Shaolin Kungfu -- Part 2
Whirlwind Kick of Shaolin Kungfu -- Part 3
Whirlwind Kick of Shaolin Kungfu -- Part 4
Whirlwind Kick of Shaolin Kungfu -- Part 5
Shaolin Four Abridged Combat Sequences -- Part 3
Whirlwind Kick of Shaolin Kungfu -- Part 6
Whirlwind Kick of Shaolin Kungfu -- Part 7
Whirlwind Kick of Shaolin Kungfu -- Part 8
Sequnce Sparring in Shaolin Kungfu -- Part 1
Sequnce Sparring in Shaolin Kungfu -- Part 2
Sequnce Sparring in Shaolin Kungfu -- Part 3
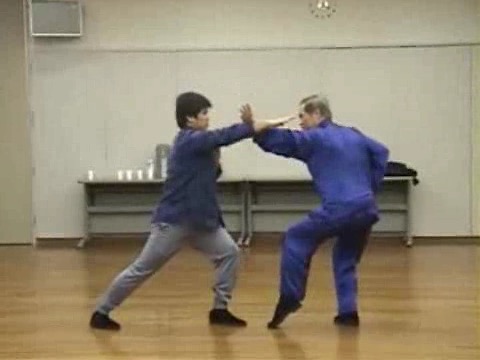 Sequnce Sparring in Shaolin Kungfu -- Part 4
Sequnce Sparring in Shaolin Kungfu -- Part 5
Sequnce Sparring in Shaolin Kungfu -- Part 6
Sequnce Sparring in Shaolin Kungfu -- Part 7
Sequnce Sparring in Shaolin Kungfu -- Part 8
Shaolin Combat Sequence 4: Chin-Na -- Part 1
Shaolin Combat Sequence 4: Chin-Na -- Part 2
Shaolin Combat Sequence 4: Chin-Na -- Part 3
Shaolin Combat Sequence 4: Chin-Na -- Part 4
Shaolin Combat Sequence 4: Chin-Na -- Part 5
Shaolin Combat Sequence 4: Chin-Na -- Part 6
Shaolin Combat Sequence 4: Chin-Na -- Part 7
Shaolin Combat Sequence 4: Chin-Na -- Part 8
Shaolin Kungfu can be Gentle and Graceful -- Part 1
Shaolin Kungfu can be Gentle and Graceful -- Part 2
Shaolin Kungfu can be Gentle and Graceful -- Part 3
Shaolin Kungfu can be Gentle and Graceful -- Part 4
Shaolin Kungfu can be Gentle and Graceful -- Part 5
Shaolin Kungfu can be Gentle and Graceful -- Part 6
Shaolin Kungfu can be Gentle and Graceful -- Part 7
Shaolin Kungfu can be Gentle and Graceful -- Part 8
Use Internal Force but Not Strength -- Part 1
Use Internal Force but Not Strength -- Part 2
Use Internal Force but Not Strength -- Part 3
Use Internal Force but Not Strength -- Part 4
Use Internal Force but Not Strength -- Part 5
Use Internal Force but Not Strength -- Part 6
Zen in Shaolin Kungfu -- Part 1
Zen in Shaolin Kungfu -- Part 2
Zen in Shaolin Kungfu -- Part 3
Zen in Shaolin Kungfu -- Part 4Zen in Shaolin Kungfu -- Part 5
Zen in Shaolin Kungfu -- Part 6
Taming Tiger in Shaolin Kungfu -- Part 1
Taming Tiger in Shaolin Kungfu -- Part 2
Taming Tiger in Shaolin Kungfu -- Part 3
Taming Tiger in Shaolin Kungfu -- Part 4
Taming Tiger in Shaolin Kungfu -- Part 5
Taming Tiger in Shaolin Kungfu -- Part 6
Shaolin Four Abridged Combat Sequences -- Part 4
Taming Tiger in Shaolin Kungfu -- Part 7
Use Footwork to Neutralize Chin-Na -- Part 1
Use Footwork to Neutralize Chin-Na -- Part 2
Use Footwork to Neutralize Chin-Na -- Part 3
Use Footwork to Neutralize Chin-Na -- Part 4
Use Footwork to Neutralize Chin-Na -- Part 5
Use Footwork to Neutralize Chin-Na -- Part 6
Use Footwork to Neutralize Chin-Na -- Part 7
Use Footwork to Neutralize Chin-Na -- Part 8
Solo Performance of Abridged Clombat Sequences -- Part 1
Solo Performance of Abridged Clombat Sequences -- Part 2
Solo Performance of Abridged Clombat Sequences -- Part 3
Solo Performance of Abridged Clombat Sequences -- Part 4
Solo Performance of Abridged Clombat Sequences -- Part 5
Solo Performance of Abridged Clombat Sequences -- Part 6
Shaolin Four Abridged Combat Sequences -- Part 1
Solo Performance of Abridged Clombat Sequences -- Part 7
Four Abridged Combat Sequences -- Part 2
Solo Performance of Abridged Clombat Sequences -- Part 8
Set in Solo Practice -- Part 1
 Solo Performance of Abridged Clombat Sequences -- Part 9
Set in Solo Practice -- Part 2
Solo Performance of Abridged Clombat Sequences -- Part 10
From Pre-Arranged to Free Sparring -- Part 1
From Pre-Arranged to Free Sparring -- Part 2
From Pre-Arranged to Free Sparring -- Part 3
From Pre-Arranged to Free Sparring -- Part 4
From Pre-Arranged to Free Sparring -- Part 5
From Pre-Arranged to Free Sparring -- Part 6
From Pre-Arranged to Free Sparring -- Part 7
From Pre-Arranged to Free Sparring -- Part 8
From Pre-Arranged to Free Sparring -- Part 9
From Pre-Arranged to Free Sparring -- Part 10
From Pre-Arranged to Free Sparring -- Part 11
The Basics as Trained by Past Masters -- Overview
Crystalization of the Past Mast4ers: Part 1 -- the Basics (Extra)
Crystallization of Past Masters
The Foundation of Internal Force -- Stance Training
Flexibility and Footwork in Shaolin Kungfu
Basic Hand Forms of Shaolin Kungfu
The Foundation of Internal Force -- Stance Training
Safety First is the First Principle of Combat
Crystalization of the Past Masters -- Extra
Crystalization of the Past Masters -- Overview
Basic Shaolin Kungfu Patterns
Spacing and Timing in Shaolin Kungfu
How to Move into an Opponent in Combat
Sequence Sparring is very Important in our School -- Overview
Sequence Sparring is very Important in our School -- Overview (Extra)
Applying Shaolin Skills and Techniques for Combat -- Overview
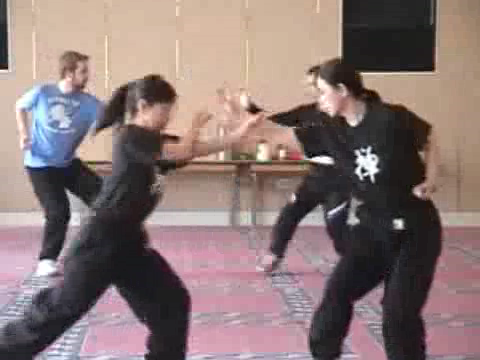 Crystalization of the Past Masters overview
Applying Variations in Combat Squences -- Overview
Pressing Attacks in Shaolin Combat -- Overview
Double Kicks in Shaolin Combat Application -- Overview
Variations of Shaolin Combat Sequences -- Overview
Felling Techinques in Shaolin Kungfu -- Overview
Whirlwind Kick of Shaolin Kungfu -- Overview
Sequence Sparring in Shaolin Kungfu -- Overview
Shaolin Kungfu in Japan, December 2007 -- Overview (Extra)
Crystalization ofthePast Masters -- Overview
Combat Sequence 4: Chin-Na -- Overview
Shaolin Kungfu can be Gentle and Graceful -- Overview
Use Internal Force but Not Strength -- Overview
Zen in Shaolin Kungfu-- Overview
Taming Tiger in Shaolin Kungfu -- Overview
JUse Footwork to Neutralize Chin-Na-- Overview
Solo Performance of Abridged Combat Sequences -- Overview
Crystalization of the Past Masters -- Overview
Japan Shaolin 2007 -- Videos Stance Training
Flexibility and Footwork
Hand Forms
Explode Force and Safety First
Basic Patterns
Spacing and Timing
Covering Opponent Adequately
Moving In
Sequence Sparring
Handling Various Hand Attacks
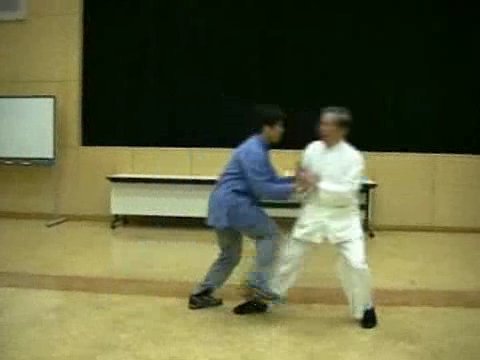 Applying Variations in Combat
Pressing Attack in Shaolin Combat
Double Kicks in Shaolin Combat Application
Variations of Shaolin Combat Sequences
Felling Attakcs in Shaolin Kungfu
Whirlwind Kick of Shaolin Kungfu
Sequence Sparring
Sequence 4 -- Chin-Na
Gentle and Graceful
Don't Use Strength
A Touch of Zen
Taming Tiger
Use Footwork to Neutralize Chin-Na
Move Stance Cnage Step
Solo Performance of Abridged Combat Sequences
From Pre-Arranged to Free Sparring
Combat Application of Four Abridged Sequences
Solo Performance of Four Abridged Sequences
Importance of being Relaxed
Rotation of Waist in Shaolin Kungfu
Wu Nian or Non-Thought
Introductory Shaolin Kungfu Course Japan 2007 -- Overview
Japan 2007 Chi Flow and Stance Traikning -- Part 1
Chi Flow and Stance Traikning -- Part 2
Chi Flow and Stance Traikning -- Part 3
Chi Flow and Stance Traikning -- Part 4
Chi Flow and Stance Traikning -- Part 5
Chi Flow and Stance Traikning -- Part 6
Chi Flow and Stance Traikning -- Part 7
Chi Flow and Stance Traikning -- Part 8
Basic Skills of Taijiquan Pushing Hands -- Part 1
Basic Skills of Taijiquan Pushing Hands -- Part 2
 Basic Skills of Taijiquan Pushing Hands -- Part 3
Basic Skills of Taijiquan Pushing Hands -- Part 4
Basic Skills of Taijiquan Pushing Hands -- Part 5
Basic Skills of Taijiquan Pushing Hands -- Part 6
Basic Skills of Taijiquan Pushing Hands -- Part 7
Basic Skills of Taijiquan Pushing Hands -- Part 8
Basic Skills of Taijiquan Pushing Hands -- Part 9
Basic Skills of Taijiquan Pushing Hands -- Part 10
Frontal Pushing Hands (1) -- Part 1
Frontal Pushing Hands (1) -- Part 2
Frontal Pushing Hands (1) -- Part 3
Frontal Pushing Hands (1) -- Part 4
Frontal Pushing Hands (1) -- Part 5
Frontal Pushing Hands (1) -- Part 6
Frontal Pushing Hands (1) -- Part 7
Frontal Pushing Hands (1) -- Part 8
Frontal Pushing Hands (1) -- Part 9
Frontal Pushing Hands (2) -- Part 1
Frontal Pushing Hands (2) -- Part 2
Frontal Pushing Hands (2) -- Part 3
Frontal Pushing Hands (2) -- Part 4
Frontal Pushing Hands (2) -- Part 5
Frontal Pushing Hands (2) -- Part 6
Frontal Pushing Hands (2) -- Part 7
Frontal Pushing Hands (2) -- Part 8
Frontal Pushing Hands (2) -- Part 9
Frontal Pushing Hands (3) -- Part 1
Frontal Pushing Hands (3) -- Part 2
Frontal Pushing Hands (3) -- Part 3
Frontal Pushing Hands (3) -- Part 4
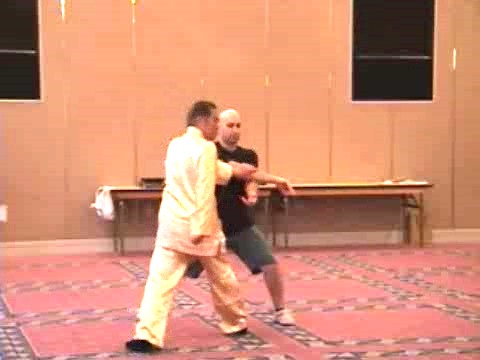 50
Frontal Pushing Hands (3) -- Part 5
50
Frontal Pushing Hands (3) -- Part 5Frontal Pushing Hands (3) -- Part 6
Frontal Pushing Hands (3) -- Part 7
Frontal Pushing Hands (3) -- Part 8
Frontal Pushing Hands (3) -- Part 9
Frontal Pushing Hands (3) -- Part 10
Pushing Hands: Right Side -- Part 1
Pushing Hands: Right Side -- Part 2
Pushing Hands: Right Side -- Part 3
Pushing Hands: Right Side -- Part 4
Pushing Hands: Right Side -- Part 5
Pushing Hands: Right Side -- Part 6
Pushing Hands: Right Side -- Part 7
Pushing Hands: Left Side -- Part 1
Pushing Hands: Left Side -- Part 2
Pushing Hands: Left Side -- Part 3
Pushing Hands: Miscellaneous -- Part 1
Moving to his Back to Push an Opponent -- Part 1
Moving to his Back to Push an Opponent -- Part 2
Moving to his Back to Push an Opponent -- Part 3
Moving to his Back to Push an Opponent -- Part 4
Pushing Hands: Miscellaneous -- Part 2
Using Tactics in Pushing Hands -- Part 1
Using Tactics in Pushing Hands -- Part 2
Using Tactics in Pushing Hands -- Part 3
Using Tactics in Pushing Hands -- Part 4
Using Tactics in Pushing Hands -- Part 5
Using Tactics in Pushing Hands -- Part 6
Using Tactics in Pushing Hands -- Part 7
Using Tactics in Pushing Hands -- Part 8
 Combat Sequence 1: Striking (1) -- Part 1
Combat Sequence 1: Striking (1) -- Part 2
Combat Sequence 1: Striking (1) -- Part 3
Combat Sequence 1: Striking (1) -- Part 4
Combat Sequence 1: Striking (1) -- Part 5
Combat Sequence 1: Striking (1) -- Part 6
Combat Sequence 1: Striking (1) -- Part 7
Combat Sequence 1: Striking (1) -- Part 8
Combat Sequence 1: Striking (1) -- Part 9
Combat Sequence 1: Striking (1) -- Part 10
Combat Sequence 1: Striking (1) -- Part 11
Combat Sequence 1: Striking (1) -- Part 12
Combat Sequence 1: Striking (2) -- Part 1
Combat Sequence 1: Striking (2) -- Part 2
Combat Sequence 1: Striking (2) -- Part 3
Combat Sequence 1: Striking (2) -- Part 4
Combat Sequence 1: Striking (2) -- Part 5
Combat Sequence 1: Striking (2) -- Part 6
Combat Sequence 1: Striking (2) -- Part 7
Combat Sequence 1: Striking (2) -- Part 8
Combat Sequence 1: Striking (2) -- Part 9
Combat Sequence 1: Striking (2) -- Part 10
Combat Sequence 1: Striking (2) -- Part 11
Combat Sequence 1: Striking (2) -- Part 12
Combat Sequence 1: Striking (3) -- Part 1
Combat Sequence 1: Striking (3) -- Part 2
Combat Sequence 1: Striking (3) -- Part 3
Combat Sequence 1: Striking (3) -- Part 4
Combat Sequence 1: Striking (3) -- Part 5
Combat Sequence 1: Striking (3) -- Part 6
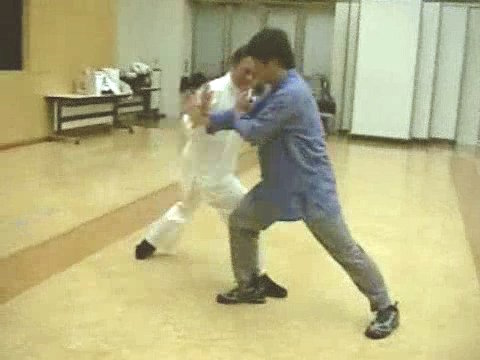 Combat Sequence 1: Striking (3) -- Part 7
Combat Sequence 1: Striking (3) -- Part 8
Combat Sequence 1: Striking (3) -- Part 9
Combat Sequence 1: Striking (3) -- Part 10
Combat Sequence 1: Striking (3) -- Part 11
Combat Sequence 1: Striking (3) -- Part 12
Combat Sequence 1: Striking (4) -- Part 1
Combat Sequence 1: Striking (4) -- Part 2
Combat Sequence 1: Striking (4) -- Part 3
Combat Sequence 1: Striking (4) -- Part 4
Combat Sequence 1: Striking (4) -- Part 5
Combat Sequence 1: Striking (4) -- Part 6
Combat Sequence 1: Striking (4) -- Part 7
Combat Sequence 1: Striking (4) -- Part 8
Combat Sequence 1: Striking (4) -- Part 9
Combat Sequence 1: Striking (4) -- Part 10
Combat Sequence 1: Striking (4) -- Part 11
Combat Sequence 1: Striking (4) -- Part 12
Combat Sequence 1: Striking (4) -- Part 13
Combat Sequence 1: Striking (4) -- Part 14
Combat Sequence 1: Striking (4) -- Part 15
Combat Sequence 2: Kicking -- Part 1
Combat Sequence 2: Kicking -- Part 2
Combat Sequence 2: Kicking -- Part 3
Combat Sequence 2: Kicking -- Part 4
Combat Sequence 2: Kicking -- Part 5
Combat Sequence 2: Kicking -- Part 6
Combat Sequence 2: Kicking -- Part 7
Combat Sequence 2: Kicking -- Part 8
Combat Sequence 2: Kicking -- Part 9
 Combat Sequence 2: Kicking -- Part 10
Combat Sequence 2: Kicking -- Part 11
Combat Sequence 2: Kicking -- Part 12
Combat Sequence 2: Kicking -- Part 13
Combat Sequence 3: Felling (1) -- Part 1
Combat Sequence 3: Felling (1) -- Part 2
Combat Sequence 3: Felling (1) -- Part 3
Combat Sequence 3: Felling (1) -- Part 4
Combat Sequence 3: Felling (1) -- Part 5
Combat Sequence 3: Felling (1) -- Part 6
Combat Sequence 3: Felling (1) -- Part 7
Combat Sequence 3: Felling (1) -- Part 8
Combat Sequence 3: Felling (2) -- Part 1
Combat Sequence 3: Felling (2) -- Part 2
Combat Sequence 3: Felling (2) -- Part 3
Combat Sequence 3: Felling (2) -- Part 4
Combat Sequence 3: Felling (2) -- Part 5
Combat Sequence 3: Felling (2) -- Part 6
Combat Sequence 3: Felling (2) -- Part 7
Combat Sequence 3: Felling (2) -- Part 8
Combat Sequence 3: Felling (2) -- Part 9
Combat Sequence 4: Chin-Na -- Part 1
Combat Sequence 4: Chin-Na -- Part 2
Combat Sequence 4: Chin-Na -- Part 3
Combat Sequence 4: Chin-Na -- Part 4
Combat Sequence 4: Chin-Na -- Part 5
Combat Sequence 4: Chin-Na -- Part 6
Combat Sequence 4: Chin-Na -- Part 7
Combat Sequence 4: Chin-Na -- Part 8
Combat Sequence 4: Chin-Na -- Part 9
 Introductory Wahnam Taijquan Course -- Overview
Basic Skills and Techniques of Pushing Hands
-- Overview (Reserve)
Basic Skills and Techniques of Pushing Hands -- Overview
Chi Flow and Stance Training -- Overview
Basic Skills of Taijiquan Pushing Hands -- Overview
Frontal Pushing Hands (1) -- Overview
Frontal Pushing Hands (2) -- Overview
Frontal Pushing Hands (3) -- Overview
Frontal Pushing Hands (Reseve)
Frontal Pushing Hands -- Overview
Pushing Hands: Right Side -- Overview
Pushing Hands: Left Side -- Overview
Moving to his Back to Push an Opponent -- Overview
Using Tactics in Pushing Hands -- Overview
Pushing Hands: Miscellaneous -- Overview
Four Taijiquan Combat Sequences on Striking, Kicking,
Felling and Chin-Na (Reserve) -- Overview
Four Taijiquan Combat Sequences on Striking, Kicking,
Felling and Chin-Na -- Overview
Combat Sequence 1: Striking (1) -- Overview
Combat Sequence 1: Striking (2) -- Overview
Combat Sequence 1: Striking (3) -- Overview
Combat Sequence 1: Striking (4) -- Overview
Combat Sequence 1: Striking -- Reserve
Combat Sequence 1: Striking -- Overview
Combat Sequence 2: Kicking -- Overview
Combat Sequence 3: Felling (1) -- Overview
Combat Sequence 3: Felling (2) -- Overview
Combat Sequence 3: Felling -- Reserve
Combat Sequence 3: Felling -- Overview
Combat Sequence 4: Chin-Na -- Overview
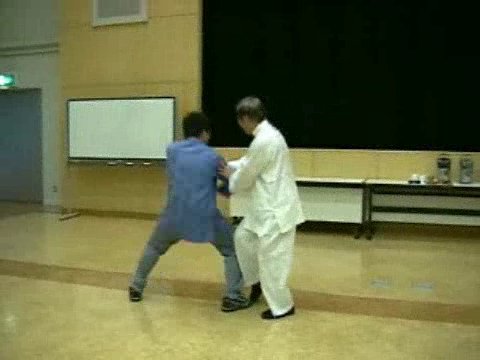 Japan 2007 -- Videos
Introductory Wahnam Taijiquan Course,
Japan 2007 -- Videos
Introductory Wahnam Taijiquan Course,Japan 2007 -- Overview
Chi Flow and Stance Training
Basic Skills of Taijiquan Pushing Hands
Pushing Hands -- Front Push (1)
Pushing Hands -- Front Push (2)
Pushing Hands -- Front Push (3)
Pushing Hands -- Right Push
Pushing Hands -- Left Push
Pushing Hands -- Push from the Back
Pushing Hands -- Tactics
Pushing Hands -- Miscellaneous
Learning Abridged Conbat Sequence 1 -- Part 1
Learning Abridged Conbat Sequence 1 -- Part 2
Learning Abridged Conbat Sequence 1 -- Part 3
Learning Abridged Conbat Sequence 1 -- Part 4
Learning Abridged Conbat Sequence 2
Learning Abridged Conbat Sequence 3 -- Part 1
Learning Abridged Conbat Sequence 3 -- Part 2
Learning Abridged Conbat Sequence 4
Portugal 2007 From Combat Sequences to Free Sparring -- Overview
Training Combat Sequences to Prepare for Free Sparring -- Overview
Counters against Kicks and Throws -- Overview
Systematic and Gradual Prrogression to Free Sparring -- Overview
Some Formidable Attacks and their Beautiful Counters -- Overview
Gentle and Elegant, yet Forceful and Combat Effective -- Overview
Training Combat Sequences to Prepare for Free Sparring -- Part 1
Training Combat Sequences to Prepare for Free Sparring -- Part 2
Training Combat Sequences to Prepare for Free Sparring -- Part 3
Training Combat Sequences to Prepare for Free Sparring -- Part 4
 Training Combat Sequences to Prepare for
Free Sparring -- Part 5
Training Combat Sequences to Prepare for
Free Sparring -- Part 6
Training Combat Sequences to Prepare for
Free Sparring -- Part 7
Training Combat Sequences to Prepare for
Free Sparring -- Part 8
Training Combat Sequences to Prepare for
Free Sparring -- Part 9
Training Combat Sequences to Prepare for
Free Sparring -- Part 10
Training Combat Sequences to Prepare for Free Sparring -- Part 11
Training Combat Sequences to Prepare for Free Sparring -- Part 12
Counters against Kicks and Throws -- Part 1
Counters against Kicks and Throws -- Part 2
Counters against Kicks and Throws -- Part 3
Counters against Kicks and Throws -- Part 4
Counters against Kicks and Throws -- Part 5
Counters against Kicks and Throws -- Part 6
Counters against Kicks and Throws -- Part 7
Counters against Kicks and Throws -- Part 8
Counters against Kicks and Throws -- Part 9
Counters against Kicks and Throws -- Part 10
Counters against Kicks and Throws -- Part 11
Counters against Kicks and Throws -- Part 12
Systematic and Gradual Prrogression to Free Sparring -- Part 1
Systematic and Gradual Prrogression to Free Sparring -- Part 2
Systematic and Gradual Prrogression to Free Sparring -- Part 3
Systematic and Gradual Prrogression to Free Sparring -- Part 4
Systematic and Gradual Prrogression to Free Sparring -- Part 5
Systematic and Gradual Prrogression to Free Sparring -- Part 6
Systematic and Gradual Prrogression to Free Sparring -- Part 7
Systematic and Gradual Prrogression to Free Sparring -- Part 8
Systematic and Gradual Prrogression to Free Sparring -- Part 9
Systematic and Gradual Prrogression to Free Sparring -- Part 10
 Systematic and Gradual Prrogression to Free Sparring -- Part 11
Some Formidable Attacks and their Beautiful Counters -- Part 1
Some Formidable Attacks and their Beautiful Counters -- Part 2
Some Formidable Attacks and their Beautiful Counters -- Part 3
Some Formidable Attacks and their Beautiful Counters -- Part 4
Some Formidable Attacks and their Beautiful Counters -- Part 5
Some Formidable Attacks and their Beautiful Counters -- Part 6
Some Formidable Attacks and their Beautiful Counters -- Part 7
Some Formidable Attacks and their Beautiful Counters -- Part 8
Some Formidable Attacks and their Beautiful Counters -- Part 9
Some Formidable Attacks and their Beautiful Counters -- Part 10
Gentle and Elegant, yet Forceful and Combat Effective -- Part 1
Gentle and Elegant, yet Forceful and Combat Effective -- Part 2
Gentle and Elegant, yet Forceful and Combat Effective -- Part 3
Gentle and Elegant, yet Forceful and Combat Effective -- Part 4
Gentle and Elegant, yet Forceful and Combat Effective -- Part 5
Gentle and Elegant, yet Forceful and Combat Effective -- Part 6
Gentle and Elegant, yet Forceful and Combat Effective -- Part 7
Gentle and Elegant, yet Forceful and Combat Effective -- Part 8
Gentle and Elegant, yet Forceful and Combat Effective -- Part 9
Gentle and Elegant, yet Forceful and Combat Effective -- Part 10
Gentle and Elegant, yet Forceful and Combat Effective -- Part 11
Portugal 2007 -- Videos The Portugese Shaolin Kungfu Show 2007 -- Overview
Training Combat Sequences to Prrepare for Free Sparring
Counters against Kicks and Throws
Systematic and Gradual Progression to Free Sparring
Some Formidable Attacks and their Beautiful Counters
Gentle and Elegant, yet Forceful and Combat Effective
 Pt Taiji 2008
Introductory Wahnam Taijiquan Course -- Overview
Pt Taiji 2008
Introductory Wahnam Taijiquan Course -- OverviewKicks and Felling Techniques in Sequence Sparrring (1)
Kicks and Felling Techniques in Sequence Sparrring (2)
Kicks and Felling Techniques in Sequence Sparrring (3)
Fundamentak Movements in Taijiquan -- Part 1
Fundamentak Movements in Taijiquan -- Part 2
Fundamentak Movements in Taijiquan -- Part 3
Fundamentak Movements in Taijiquan -- Part 4
Fundamentak Movements in Taijiquan -- Part 5
Fundamentak Movements in Taijiquan -- Part 6
Fundamentak Movements in Taijiquan -- Part 7
Fundamentak Movements in Taijiquan -- Part 8
Fundamentak Movements in Taijiquan -- Part 9
Fundamentak Movements in Taijiquan -- Part 10
Fundamentak Movements in Taijiquan -- Part 11
Fundamentak Movements in Taijiquan -- Part 12
Fundamentak Movements in Taijiquan -- Part 13
Fundamentak Movements in Taijiquan -- Part 14
Fundamentak Movements in Taijiquan -- Part 15
Fundamentak Movements in Taijiquan -- Part 16
Fundamentak Movements in Taijiquan -- Part 17
Fundamentak Movements in Taijiquan -- Part 18
Fundamentak Movements in Taijiquan -- Part 19
Pushing Hands and Striking Hands -- Part 1
Pushing Hands and Striking Hands -- Part 2
Pushing Hands and Striking Hands -- Part 3
Pushing Hands and Striking Hands -- Part 4
Pushing Hands and Striking Hands -- Part 5
Pushing Hands and Striking Hands -- Part 6
Pushing Hands and Striking Hands -- Part 7
Pushing Hands and Striking Hands -- Part 8Pushing Hands and Striking Hands -- Part 9
Pushing Hands and Striking Hands -- Part 10
Pushing Hands and Striking Hands -- Part 11
Pushing Hands and Striking Hands -- Part 12
Pushing Hands and Striking Hands -- Part 13
Pushing Hands and Striking Hands -- Part 14
Kicks and Felling Techniques in Sequence Sparrring -- Part 1
Kicks and Felling Techniques in Sequence Sparrring -- Part 2
Kicks and Felling Techniques in Sequence Sparrring -- Part 3
Kicks and Felling Techniques in Sequence Sparrring -- Part 4
Kicks and Felling Techniques in Sequence Sparrring -- Part 5
Kicks and Felling Techniques in Sequence Sparrring -- Part 6
Kicks and Felling Techniques in Sequence Sparrring -- Part 7
Kicks and Felling Techniques in Sequence Sparrring -- Part 8
Kicks and Felling Techniques in Sequence Sparrring -- Part 9
Kicks and Felling Techniques in Sequence Sparrring -- Part 10
Kicks and Felling Techniques in Sequence Sparrring -- Part 11
Kicks and Felling Techniques in Sequence Sparrring -- Part 12
Kicks and Felling Techniques in Sequence Sparrring -- Part 13
Kicks and Felling Techniques in Sequence Sparrring -- Part 14
Kicks and Felling Techniques in Sequence Sparrring -- Part 15
Kicks and Felling Techniques in Sequence Sparrring -- Part 16
Kicks and Felling Techniques in Sequence Sparrring -- Part 17
Kicks and Felling Techniques in Sequence Sparrring -- Part 18
Kicks and Felling Techniques in Sequence Sparrring -- Part 19
Kicks and Felling Techniques in Sequence Sparrring -- Part 20
Kicks and Felling Techniques in Sequence Sparrring -- Part 21
Kicks and Felling Techniques in Sequence Sparrring -- Part 22
Kicks and Felling Techniques in Sequence Sparrring -- Part 23
 60
Kicks and Felling Techniques in Sequence
60
Kicks and Felling Techniques in SequenceSparrring -- Part 24
Kicks and Felling Techniques in Sequence
Sparrring -- Part 25
Elegance and Flow in Taijiquan Combat -- Part 1
Elegance and Flow in Taijiquan Combat -- Part 2
Elegance and Flow in Taijiquan Combat -- Part 3
Elegance and Flow in Taijiquan Combat -- Part 4
Elegance and Flow in Taijiquan Combat -- Part 5
Elegance and Flow in Taijiquan Combat -- Part 6
Elegance and Flow in Taijiquan Combat -- Part 7
Elegance and Flow in Taijiquan Combat -- Part 8
Elegance and Flow in Taijiquan Combat -- Part 9
Elegance and Flow in Taijiquan Combat -- Part 10
Elegance and Flow in Taijiquan Combat -- Part 11
Elegance and Flow in Taijiquan Combat -- Part 12
Elegance and Flow in Taijiquan Combat -- Part 13
Elegance and Flow in Taijiquan Combat -- Part 14
Elegance and Flow in Taijiquan Combat -- Part 15
Elegance and Flow in Taijiquan Combat -- Part 16
Elegance and Flow in Taijiquan Combat -- Part 17
Elegance and Flow in Taijiquan Combat -- Part 18
Elegance and Flow in Taijiquan Combat -- Part 19
Elegance and Flow in Taijiquan Combat -- Part 20
Elegance and Flow in Taijiquan Combat -- Part 21
Elegance and Flow in Taijiquan Combat -- Part 22
Elegance and Flow in Taijiquan Combat -- Part 23
Elegance and Flow in Taijiquan Combat -- Part 24
Elegance and Flow in Taijiquan Combat -- Part 25
Elegance and Flow in Taijiquan Combat -- Part 26
Elegance and Flow in Taijiquan Combat -- Part 27
Elegance and Flow in Taijiquan Combat -- Part 28
 Elegance and Flow in Taijiquan Combat -- Part 29
Elegance and Flow in Taijiquan Combat -- Part 30
Elegance and Flow in Taijiquan Combat -- Part 31
Elegance and Flow in Taijiquan Combat -- Part 32
Elegance and Flow in Taijiquan Combat -- Part 33
Sequeces of Four-Sequence Four Attack Set -- Part 1
Sequeces of Four-Sequence Four Attack Set -- Part 2
Sequeces of Four-Sequence Four Attack Set -- Part 3
Sequeces of Four-Sequence Four Attack Set -- Part 4
Taijiquan Four-Sequence Four-Attack Set -- Part 1
Taijiquan Four-Sequence Four-Attack Set -- Part 2
Taijiquan Four-Sequence Four-Attack Set -- Part 3
Taijiquan Four-Sequence Four-Attack Set -- Part 4
Fundamental Movements in Taijiquan -- Overview
Pushing Hands and Striking Hands -- Overview
Kickes and Felling Techniques in Sequence Sparring -- Overview
Elegance and Flow in Taijiquan Combat -- Overview
General Survey of Portugal Taijiquan Course, March 2008 -- Overview
Pt Taiji 2008 -- Videos Grasping Sparrow's Tail
Green Dragon Shoots Pearl
Pushing Hands of Wahnam Taijiquan
Striking Hands of Wahnam Taijiquan
Kicks and Pressing Attacks
Felling and Kicking Attacks
Combat Sequences 1 to 3 of Wahnam Taijiquan
Defence cum Counter in Wahnam Taijiquan
Taijiquan Chin-Na
Elegance and Flow in Wahnam Taijiquan
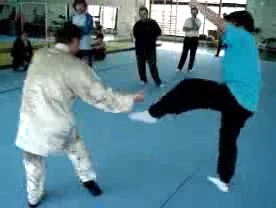 Sequences and Sets in Wahnam Taijiquan
Four Abridged Combat Sequences
Four-Sequence Four-Attack Set
Introductory Wahnam Taijiquan Course,
Lisbon 2008 -- Overview
Punches Various Ways of Striking with the Fist in Shaolin Kungfu
The Twelve Punches of Shaolin Kungfu
Shaolin Counters against Strikes and Kicks
Effective Shaloin Counters With or Without Gloves
Shaolin Counters against Strikes, Kicks and Grips
Smashing Fist and Circulation Arm
Chopping the Hua Mountain
Shaolin Counters against Felling and Gripping Attacks
The Twelve Punches of Shaolin Kungfu
Sabah 2007 -- Sabah 01 Fundamental Combat Skills -- Part 1
Fundamental Combat Skills -- Part 2
Fundamental Combat Skills -- Part 3
Fundamental Combat Skills -- Part 4
Fundamental Combat Skills -- Part 5
Fundamental Combat Skills -- Part 6
Fundamental Combat Skills -- Part 7
Fundamental Combat Skills -- Part 8
Fundamental Combat Skills -- Part 9
Fundamental Combat Skills -- Part 10
Fundamental Combat Skills -- Part 11
Fundamental Combat Skills -- Part 12
Defeat you Hand to your Opponent, Victory you
Create Yourself -- Part 1
Defeat you Hand to your Opponent, Victory you
Create Yourself -- Part 2
Defeat you Hand to your Opponent, Victory you
Create Yourself -- Part 3
Defeat you Hand to your Opponent, Victory you
Create Yourself -- Part 4
Defeat you Hand to your Opponent, Victory you
Create Yourself -- Part 5
Defeat you Hand to your Opponent, Victory you
Create Yourself -- Part 6
Defeat you Hand to your Opponent, Victory you
Create Yourself -- Part 7
Defeat you Hand to your Opponent, Victory you
Create Yourself -- Part 8
 Defeat you Hand to your Opponent, Victory you
 Create Yourself -- Part 9
Defeat you Hand to your Opponent, Victory you
Create Yourself -- Part 10
Defeat you Hand to your Opponent, Victory you
Create Yourself -- Part 11
Defeat you Hand to your Opponent, Victory you
Create Yourself -- Part 12
Defeat you Hand to your Opponent, Victory you
Create Yourself -- Part 13
Defeat you Hand to your Opponent, Victory you
Create Yourself -- Part 14
Defeat you Hand to your Opponent, Victory you
Create Yourself -- Part 15
Defeat you Hand to your Opponent, Victory you
Create Yourself -- Part 16
Avoiding Disadvantages and Seeking Advantages -- Part 1
Avoiding Disadvantages and Seeking Advantages -- Part 2
Avoiding Disadvantages and Seeking Advantages -- Part 3
Avoiding Disadvantages and Seeking Advantages -- Part 4
Avoiding Disadvantages and Seeking Advantages -- Part 5
Avoiding Disadvantages and Seeking Advantages -- Part 6
Avoiding Disadvantages and Seeking Advantages -- Part 7
Avoiding Disadvantages and Seeking Advantages -- Part 8
Avoiding Disadvantages and Seeking Advantages -- Part 9
Avoiding Disadvantages and Seeking Advantages -- Part 10
Basic Principles and Tactics of Combat -- Part 1
Basic Principles and Tactics of Combat -- Part 2
Basic Principles and Tactics of Combat -- Part 3
Basic Principles and Tactics of Combat -- Part 4
Basic Principles and Tactics of Combat -- Part 5
Basic Principles and Tactics of Combat -- Part 6
Basic Principles and Tactics of Combat -- Part 7
Basic Principles and Tactics of Combat -- Part 8
Basic Principles and Tactics of Combat -- Part 9
Fundamental Combat Skills -- Overview
Defeat you Hand to your Opponent, Victory you Create
Yourself -- Overview
Avoiding Disadvantages and Seeking Advantages -- Overview
Basic Principles and Tactics of Combat -- Overview
 Sabah 2007 -- Sabah 02
Skills Derived from Sparring can be Rewardingly
Sabah 2007 -- Sabah 02
Skills Derived from Sparring can be Rewardinglyused in Daily Life -- Part 1
Skills Derived from Sparring can be Rewardingly
used in Daily Life -- Part 2
Skills Derived from Sparring can be Rewardingly
used in Daily Life -- Part 3
Skills Derived from Sparring can be Rewardingly
used in Daily Life -- Part 4
Skills Derived from Sparring can be Rewardingly
used in Daily Life -- Part 5
Skills Derived from Sparring can be Rewardingly
used in Daily Life -- Part 6
Skills Derived from Sparring can be Rewardingly
used in Daily Life -- Part 7
Skills Derived from Sparring can be Rewardingly
used in Daily Life -- Part 8
Skills Derived from Sparring can be Rewardingly
used in Daily Life -- Part 9
Some Secrets in Practicing Geuine Kungfu -- Part 1
Some Secrets in Practicing Geuine Kungfu -- Part 2
Some Secrets in Practicing Geuine Kungfu -- Part 3
Some Secrets in Practicing Geuine Kungfu -- Part 4
Some Secrets in Practicing Geuine Kungfu -- Part 5
Some Secrets in Practicing Geuine Kungfu -- Part 6
Some Secrets in Practicing Geuine Kungfu -- Part 7
Various Ways to Move into an Opponent -- Part 1
Various Ways to Move into an Opponent -- Part 2
Various Ways to Move into an Opponent -- Part 3
Various Ways to Move into an Opponent -- Part 4
Various Ways to Move into an Opponent -- Part 5
Various Ways to Move into an Opponent -- Part 6
Skills Derived from Sparring can be Rewardingly
used in Daily Life -- Overview
Some Secrets in Practicing Geuine Kungfu -- Overview
Various Ways to Move into an Opponent -- Overview
Sabah 2007 -- Sabah 03 Applying Combat Sequences in Sparring -- Part 1
Applying Combat Sequences in Sparring -- Part 2
Applying Combat Sequences in Sparring -- Part 3
Applying Combat Sequences in Sparring -- Part 4
Applying Combat Sequences in Sparring -- Part 5
Applying Combat Sequences in Sparring -- Part 6
Applying Combat Sequences in Sparring -- Part 7
Applying Combat Sequences in Sparring -- Part 8
Applying Combat Sequences in Sparring -- Part 9
Applying Combat Sequences in Sparring -- Part 10
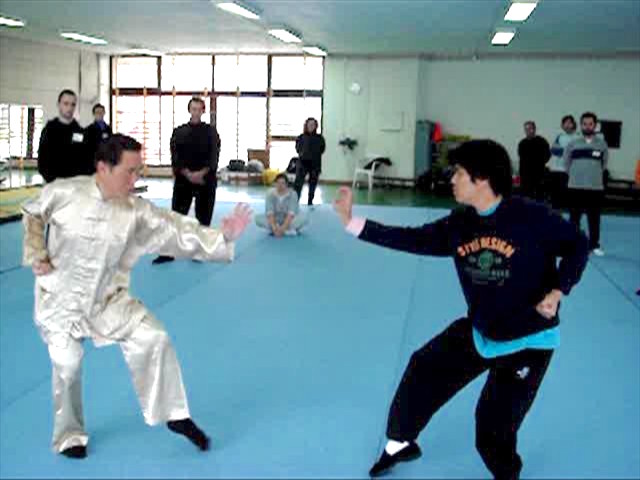 Linking Sequences to be More Efficient -- Part 1
Linking Sequences to be More Efficient -- Part 2
Linking Sequences to be More Efficient -- Part 3
Linking Sequences to be More Efficient -- Part 4
Linking Sequences to be More Efficient -- Part 5
Linking Sequences to be More Efficient -- Part 6
Linking Sequences to be More Efficient -- Part 7
Linking Sequences to be More Efficient -- Part 8
Linking Sequences to be More Efficient -- Part 9
Linking Sequences to be More Efficient -- Part 10
Linking Sequences to be More Efficient -- Part 11
Linking Sequences to be More Efficient -- Part 12
Linking Sequences to be More Efficient -- Part 13
The Secrets of Continuous Cannon -- Part 1
The Secrets of Continuous Cannon -- Part 2
The Secrets of Continuous Cannon -- Part 3
The Secrets of Continuous Cannon -- Part 4
The Secrets of Continuous Cannon -- Part 5
The Secrets of Continuous Cannon -- Part 6
The Secrets of Continuous Cannon -- Part 7
The Secrets of Continuous Cannon -- Part 8
The Secrets of Continuous Cannon -- Part 9
The Mechanics of Continuation -- Part 1
The Mechanics of Continuation -- Part 2
The Mechanics of Continuation -- Part 3
The Mechanics of Continuation -- Part 4
The Mechanics of Continuation -- Part 5
Marvelous Techniques Beget Marvelous Techniques -- Part 1
Marvelous Techniques Beget Marvelous Techniques -- Part 2
Marvelous Techniques Beget Marvelous Techniques -- Part 3
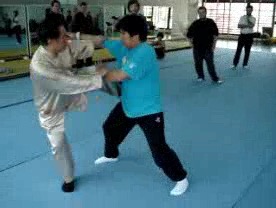 Marvelous Techniques Beget Marvelous Techniques -- Part 4
Marvelous Techniques Beget Marvelous Techniques -- Part 5
Marvelous Techniques Beget Marvelous Techniques -- Part 6
Marvelous Techniques Beget Marvelous Techniques -- Part 7
Marvelous Techniques Beget Marvelous Techniques -- Part 8
Marvelous Techniques Beget Marvelous Techniques -- Part 9
Perfecting Forms and Developing Force -- Part 1
Perfecting Forms and Developing Force -- Part 2
Perfecting Forms and Developing Force -- Part 3
Perfecting Forms and Developing Force -- Part 4
Perfecting Forms and Developing Force -- Part 5
Perfecting Forms and Developing Force -- Part 6
Perfecting Forms and Developing Force -- Part 7
Perfecting Forms and Developing Force -- Part 8
Perfecting Forms and Developing Force -- Part 9
Perfecting Forms and Developing Force -- Part 10
Perfecting Forms and Developing Force -- Part 11
Applying Tactics in Combat -- Part 1
Applying Tactics in Combat -- Part 2
Applying Tactics in Combat -- Part 3
Applying Tactics in Combat -- Part 4
Applying Tactics in Combat -- Part 5
Applying Tactics in Combat -- Part 6
Objectives of Form Training in Solo -- Part 1
Objectives of Form Training in Solo -- Part 2
Objectives of Form Training in Solo -- Part 3
Objectives of Form Training in Solo -- Part 4
Objectives of Form Training in Solo -- Part 5
Objectives of Form Training in Solo -- Part 6
Objectives of Form Training in Solo -- Part 7
 Objectives of Form Training in Solo -- Part 8
Applying Combat Sequences in Sparring -- Overview
Linking Sequences to be More Efficient -- Overview
The Secrets of Continuous Cannon -- Overview
The Mechanics of Continuation -- Overview
Marvelous Techniques Beget Marvelous Techniques -- Overview
Perfecting Forms and Developing Force -- Overview
Applying Tactics in Combat -- Overview
Objectives of Form Training in Solo -- Overview
Sabah 2007 -- Sabah 04 The Legacy of Uncle Righteousness -- Part 1
The Legacy of Uncle Righteousness -- Part 2
The Legacy of Uncle Righteousness -- Part 3
Being Fluent in Kicking Techniques before Applying
them in Combat -- Part 1
Being Fluent in Kicking Techniques before Applying
them in Combat -- Part 2
Being Fluent in Kicking Techniques before Applying
them in Combat -- Part 3
Being Fluent in Kicking Techniques before Applying
them in Combat -- Part 4
Being Fluent in Kicking Techniques before Applying
them in Combat -- Part 5
Being Fluent in Kicking Techniques before Applying
them in Combat -- Part 6
Using Tactics in Kicking Attacks and Defences -- Part 1
Using Tactics in Kicking Attacks and Defences -- Part 2
Using Tactics in Kicking Attacks and Defences -- Part 3
Using Tactics in Kicking Attacks and Defences -- Part 4
Using Tactics in Kicking Attacks and Defences -- Part 5
Using Tactics in Kicking Attacks and Defences -- Part 6
Using Tactics in Kicking Attacks and Defences -- Part 7
Different Levels of Sophistication in Sparring and Fighting -- Part 1
Different Levels of Sophistication in Sparring and Fighting -- Part 2
Different Levels of Sophistication in Sparring and Fighting -- Part 3
Different Levels of Sophistication in Sparring and Fighting -- Part 4
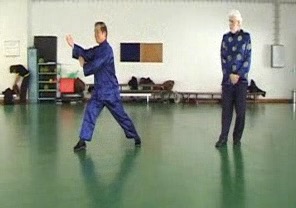 Different Levels of Sophistication in Sparring and
Fighting -- Part 5
Different Levels of Sophistication in Sparring and
Fighting -- Part 6
Different Levels of Sophistication in Sparring and
Fighting -- Part 7
Different Levels of Sophistication in Sparring and
Fighting -- Part 8
Different Levels of Sophistication in Sparring and
Fighting -- Part 9
Different Levels of Sophistication in Sparring and Fighting -- Part 10
The Legacy of Uncle Righteousness -- Part 3
The Legacy of Uncle Righteousness -- Part 4
The Legacy of Uncle Righteousness -- Part 5
The Legacy of Uncle Righteousness -- Part 6
The Legacy of Uncle Righteousness -- Part 7
The Legacy of Uncle Righteousness -- Part 8
Benefiting from the Experiences and Teaching of Past Masters -- Part 1
Benefiting from the Experiences and Teaching of Past Masters -- Part 2
Benefiting from the Experiences and Teaching of Past Masters -- Part 3
Benefiting from the Experiences and Teaching of Past Masters -- Part 4
Benefiting from the Experiences and Teaching of Past Masters -- Part 5
Benefiting from the Experiences and Teaching of Past Masters -- Part 6
Benefiting from the Experiences and Teaching of Past Masters -- Part 7
Benefiting from the Experiences and Teaching of Past Masters -- Part 8
Using Tactics in Kicking Attacks and Defences -- Overview
Using Tactics in Kicking Attacks and Defences -- Overview
Different Levels of Sophistication in Sparring and Fighting -- Overview
The Legacy of Uncle Righteousness -- Overview
Benefiting from the Experiences and Teaching of Past Masters -- Overview
Sabah 2007 -- Sabah 05 Poetic Patterns can be very Deadly -- Part 1
Poetic Patterns can be very Deadly -- Part 2
Poetic Patterns can be very Deadly -- Part 3
Poetic Patterns can be very Deadly -- Part 4
Poetic Patterns can be very Deadly -- Part 5
Poetic Patterns can be very Deadly -- Part 6
Moving Back One Step when in Difficult Situations -- Part 1
Moving Back One Step when in Difficult Situations -- Part 2
Moving Back One Step when in Difficult Situations -- Part 3
Moving Back One Step when in Difficult Situations -- Part 4
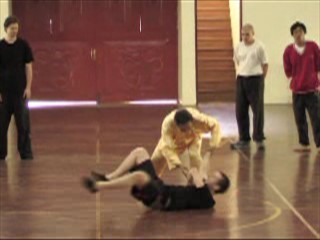 Moving Back One Step when in Difficult Situations -- Part 5
Moving Back One Step when in Difficult Situations -- Part 6
Moving Back One Step when in Difficult Situations -- Part 7
Moving Back One Step when in Difficult Situations -- Part 8
Moving Back One Step when in Difficult Situations -- Part 9
Linking Sequences to Form a Kungfu Set -- Part 1
Linking Sequences to Form a Kungfu Set -- Part 2
Linking Sequences to Form a Kungfu Set -- Part 3
Linking Sequences to Form a Kungfu Set -- Part 4
Linking Sequences to Form a Kungfu Set -- Part 5
Linking Sequences to Form a Kungfu Set -- Part 6
Linking Sequences to Form a Kungfu Set -- Part 7
Linking Sequences to Form a Kungfu Set -- Part 8
Felling Techniques in Kungfu are Different from those in
Judo and Wrestling -- Part 1
Felling Techniques in Kungfu are Different from those in
Judo and Wrestling -- Part 2
Felling Techniques in Kungfu are Different from those in
Judo and Wrestling -- Part 3
Felling Techniques in Kungfu are Different from those in
Judo and Wrestling -- Part 4
Felling Techniques in Kungfu are Different from those in
Judo and Wrestling -- Part 5
Felling Techniques in Kungfu are Different from those in
Judo and Wrestling -- Part 6
Felling Techniques in Kungfu are Different from those in
Judo and Wrestling -- Part 7
Felling Techniques in Kungfu are Different from those in
Judo and Wrestling -- Part 8
Felling Techniques in Kungfu are Different from those in
Judo and Wrestling -- Part 9
Butterfly Palms and Hiding Flowers are Excellent in
Countering Gripping and Felling Attacks -- Part 1
Butterfly Palms and Hiding Flowers are Excellent in
Countering Gripping and Felling Attacks -- Part 2
Butterfly Palms and Hiding Flowers are Excellent in
Countering Gripping and Felling Attacks -- Part 3
Butterfly Palms and Hiding Flowers are Excellent in
Countering Gripping and Felling Attacks -- Part 4
Butterfly Palms and Hiding Flowers are Excellent in
Countering Gripping and Felling Attacks -- Part 5
Butterfly Palms and Hiding Flowers are Excellent in
Countering Gripping and Felling Attacks -- Part 6
Butterfly Palms and Hiding Flowers are Excellent in
Countering Gripping and Felling Attacks -- Part 7
Butterfly Palms and Hiding Flowers are Excellent in
Countering Gripping and Felling Attacks -- Part 8
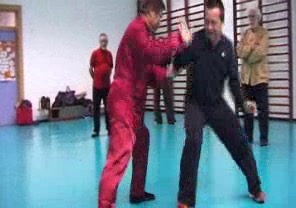 70
Let Mercy Flow from the Hands -- Part 1
70
Let Mercy Flow from the Hands -- Part 1Let Mercy Flow from the Hands -- Part 2
Let Mercy Flow from the Hands -- Part 3
Let Mercy Flow from the Hands -- Part 4
Let Mercy Flow from the Hands -- Part 5
Let Mercy Flow from the Hands -- Part 6
Let Mercy Flow from the Hands -- Part 7
Let Mercy Flow from the Hands -- Part 8
Let Mercy Flow from the Hands -- Part 9
Let Mercy Flow from the Hands -- Part 10
Benefits of Solo Set Practice: Combat Sequences 13-16 -- Part 1
Benefits of Solo Set Practice: Combat Sequences 13-16 -- Part 2
Benefits of Solo Set Practice: Combat Sequences 13-16 -- Part 3
Benefits of Solo Set Practice: Combat Sequences 13-16 -- Part 4
Benefits of Solo Set Practice: Combat Sequences 13-16 -- Part 5
Benefits of Solo Set Practice: Combat Sequences 13-16 -- Part 6
Benefits of Solo Set Practice: Combat Sequences 13-16 -- Part 7
Benefits of Solo Set Practice: Combat Sequences 13-16 -- Part 8
Poetic Patterns can be ery Deadly -- Overview
Moving Back One Step when in Difficult Situations -- Overview
Linking Sequences to Form a Kungfu Set -- Overview
Felling Techniques in Kungfu are Different from those in
Judo and Wrestling -- Overview
Butterfly Palms and Hiding Flowers are Excellent in
Countering Gripping and Felling Attacks -- Overview
Let Mercy Flow from the Hands -- Overview
Benefits of Solo Set Practice: Combat Sequences 13-16 -- Overview
 Sabah 2007 -- Sabah 06
From Pre-Choice Sequences to Free Sparring -- Part 1
Sabah 2007 -- Sabah 06
From Pre-Choice Sequences to Free Sparring -- Part 1From Pre-Choice Sequences to Free Sparring -- Part 2
From Pre-Choice Sequences to Free Sparring -- Part 3
From Pre-Choice Sequences to Free Sparring -- Part 4
From Pre-Choice Sequences to Free Sparring -- Part 5
From Pre-Choice Sequences to Free Sparring -- Part 6
From Pre-Choice Sequences to Free Sparring -- Part 7
From Pre-Choice Sequences to Free Sparring -- Part 8
Applying Shaolin Patterns Correctly and Spontaneously
in Free Sparring -- Part 1
Applying Shaolin Patterns Correctly and Spontaneously
in Free Sparring -- Part 2
Applying Shaolin Patterns Correctly and Spontaneously
in Free Sparring -- Part 3
Applying Shaolin Patterns Correctly and Spontaneously
in Free Sparring -- Part 4
Applying Shaolin Patterns Correctly and Spontaneously
in Free Sparring -- Part 5
Applying Shaolin Patterns Correctly and Spontaneously
in Free Sparring -- Part 6
Applying Shaolin Patterns Correctly and Spontaneously
in Free Sparring -- Part 7
Applying Shaolin Patterns Correctly and Spontaneously
in Free Sparring -- Part 8
Applying Shaolin Patterns Correctly and Spontaneously
in Free Sparring -- Part 9
Applying Shaolin Patterns Correctly and Spontaneously
in Free Sparring -- Part 10
Applying Shaolin Patterns Correctly and Spontaneously
in Free Sparring -- Part 11
Applying Shaolin Patterns Correctly and Spontaneously
in Free Sparring -- Part 12
Applying Shaolin Patterns Correctly and Spontaneously
in Free Sparring -- Part 13
Applying Shaolin Patterns Correctly and Spontaneously
in Free Sparring -- Part 14
Applying Shaolin Patterns Correctly and Spontaneously
in Free Sparring -- Part 15
Shaolin Kungfu against Boxing and Kick-Boxing -- Part 1
Shaolin Kungfu against Boxing and Kick-Boxing -- Part 2
Shaolin Kungfu against Boxing and Kick-Boxing -- Part 3
Shaolin Kungfu against Boxing and Kick-Boxing -- Part 4
Shaolin Kungfu against Boxing and Kick-Boxing -- Part 5
Shaolin Kungfu against Boxing and Kick-Boxing -- Part 6
Shaolin Kungfu against Boxing and Kick-Boxing -- Part 7
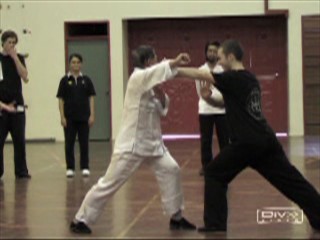 Shaolin Kungfu against Boxing and Kick-Boxing -- Part 8
Shaolin Kungfu against Boxing and Kick-Boxing -- Part 9
Shaolin Kungfu against Boxing and Kick-Boxing -- Part 10
Shaolin Kungfu against Boxing and Kick-Boxing -- Part 11
Shaolin Kungfu against Boxing and Kick-Boxing -- Part 12
Shaolin Kungfu against Boxing and Kick-Boxing -- Part 13
Shaolin Kungfu against Boxing and Kick-Boxing -- Part 14
Shaolin Kungfu against Boxing and Kick-Boxing -- Part 15
Shaolin Kungfu against Boxing and Kick-Boxing -- Part 16
Shaolin Kungfu against Boxing and Kick-Boxing -- Part 17
Shaolin Kungfu against Boxing and Kick-Boxing -- Part 18
The Secret of Grandmaster Ho Fatt Nam -- Part 1
The Secret of Grandmaster Ho Fatt Nam -- Part 2
The Secret of Grandmaster Ho Fatt Nam -- Part 3
The Secret of Grandmaster Ho Fatt Nam -- Part 4
The Secret of Grandmaster Ho Fatt Nam -- Part 5
The Secret of Grandmaster Ho Fatt Nam -- Part 6
The Secret of Grandmaster Ho Fatt Nam -- Part 7
The Secret of Grandmaster Ho Fatt Nam -- Part 8
The Secret of Grandmaster Ho Fatt Nam -- Part 9
Shaolin Counters against Wrestling Shoots -- Part 1
Shaolin Counters against Wrestling Shoots -- Part 2
Shaolin Counters against Wrestling Shoots -- Part 3
Shaolin Counters against Wrestling Shoots -- Part 4
Shaolin Counters against Wrestling Shoots -- Part 5
Shaolin Counters against Wrestling Shoots -- Part 6
Shaolin Counters against Wrestling Shoots -- Part 7
Shaolin Counters against Wrestling Shoots -- Part 8
From Pre-Choice Sequences to Free Sparring -- Overview
Applying Shaolin Patterns Correctly and Spontaneously in
Free Sparring -- Overview
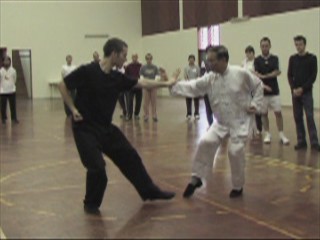 Shaolin Kungfu against Boxing and Kick-Boxing -- Overview
Shaolin Counters against Wrestling Shoots -- Overview
The Secret of Grandmaster Ho Fatt Nam -- Overview
Sabah 2007 -- Sabah 07 Why Shaolin Kungfu is Technically Faster than Boxing -- Part 1
Why Shaolin Kungfu is Technically Faster than Boxing -- Part 2
Why Shaolin Kungfu is Technically Faster than Boxing -- Part 3
Why Shaolin Kungfu is Technically Faster than Boxing -- Part 4
Why Shaolin Kungfu is Technically Faster than Boxing -- Part 5
Why Shaolin Kungfu is Technically Faster than Boxing -- Part 6
Why Shaolin Kungfu is Technically Faster than Boxing -- Part 7
Shaolin Techniques, Tactics and Strategies against Boxing -- Part 1
Shaolin Techniques, Tactics and Strategies against Boxing -- Part 2
Shaolin Techniques, Tactics and Strategies against Boxing -- Part 3
Shaolin Techniques, Tactics and Strategies against Boxing -- Part 4
Shaolin Techniques, Tactics and Strategies against Boxing -- Part 5
Shaolin Techniques, Tactics and Strategies against Boxing -- Part 6
Shaolin Techniques, Tactics and Strategies against Boxing -- Part 7
Why Shaolin Kungfu is Technically Faster than Boxing -- Overview
Shaolin Techniques, Tactics and Strategies against Boxing -- Overview
Sabah 2007 -- Taijiquan Revealing Secrets of Past Taijiquan Masters -- Overview
Overwhelming Opponents with just One Pattern -- Overview
Poetry and Elegance in Effective Combat -- Overview
Revealing Secrets of Past Taijiquan Masters -- Part 1
Revealing Secrets of Past Taijiquan Masters -- Part 2
Revealing Secrets of Past Taijiquan Masters -- Part 3
Revealing Secrets of Past Taijiquan Masters -- Part 4
Revealing Secrets of Past Taijiquan Masters -- Part 5
Revealing Secrets of Past Taijiquan Masters -- Part 6
Revealing Secrets of Past Taijiquan Masters -- Part 7
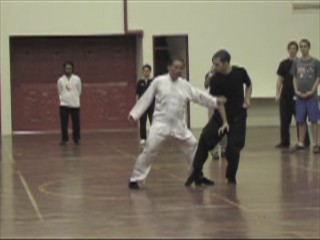 Revealing Secrets of Past Taijiquan Masters -- Part 8
Revealing Secrets of Past Taijiquan Masters -- Part 9
Revealing Secrets of Past Taijiquan Masters -- Part 10
Revealing Secrets of Past Taijiquan Masters -- Part 11
Revealing Secrets of Past Taijiquan Masters -- Part 12
Overwhelming Opponents wtth just One Pattern -- Part 1
Overwhelming Opponents wtth just One Pattern -- Part 2
Overwhelming Opponents wtth just One Pattern -- Part 3
Overwhelming Opponents wtth just One Pattern -- Part 4
Overwhelming Opponents wtth just One Pattern -- Part 5
Overwhelming Opponents wtth just One Pattern -- Part 6
Overwhelming Opponents wtth just One Pattern -- Part 7
Overwhelming Opponents wtth just One Pattern -- Part 8
Overwhelming Opponents wtth just One Pattern -- Part 9
Overwhelming Opponents wtth just One Pattern -- Part 10
Poetry and Elegance in Effective Combat -- Part 1
Poetry and Elegance in Effective Combat -- Part 2
Poetry and Elegance in Effective Combat -- Part 3
Poetry and Elegance in Effective Combat -- Part 4
Poetry and Elegance in Effective Combat -- Part 5
Poetry and Elegance in Effective Combat -- Part 6
Poetry and Elegance in Effective Combat -- Part 7
Poetry and Elegance in Effective Combat -- Part 8
Poetry and Elegance in Effective Combat -- Part 9
Poetry and Elegance in Effective Combat -- Part 10
Poetry and Elegance in Effective Combat -- Part 11
Poetry and Elegance in Effective Combat -- Part 12
Poetry and Elegance in Effective Combat -- Part 13
Poetry and Elegance in Effective Combat -- Part 14
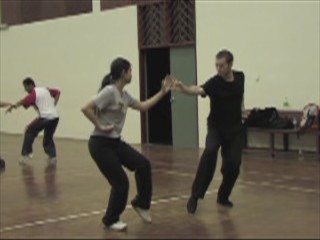 Sabah 2007 -- Videos
The Sabah Kungfu Show 2007 -- Overview
Sabah 2007 -- Videos
The Sabah Kungfu Show 2007 -- OverviewBasics of Shaolin Kungfu Training
Fundamental Combat Skills of Shaolin Kungfu
Defeat you Hand to Opponent, Victiry you Create Yourself
Avoiding Disadvantages and Seeking Advantages in
Shaolin Kungfu
Basic Principles and Tactics of Combat
Skills Derived from Sparring can be Rewardingly used
in Daily Life
Some Secrets in Practicing Genuine Kungfu
Various Ways to Move into an Opponent
Applying Combat Sequences in Sparring
Linking Sequences to be More Combat Efficient
Secrets of Continuous Cannons
Mechanics of Continuation in Shaolin Combat
Marvelous Techniques Beget Marvelous Techniques
Perfecting Forms and Developing Internal Force
Applying Tactics in Combat
Objectives of Form Training in Solo Practice
Being Fluent in Kicking Techniques before Appying them in Combat
Using Tactics in Kicking Attacks and Defences
Different Levels of Sophistitation in Sparring and Fighting
Legacy ofUncle Righteousness -- Continuous Cannons
Benefiting from Experiences and Teachings of Past Masters
Poetic Patterns can be very Deadly
Moving Back One Step when in Difficult Situations
Linking Sequences to Form Kungfu Set
Felling Techniques in Shaolin Kungfu are Different from those
in Judo and Wrestling
Butterfly Palms and Hiding Flowers are Excellent to Counter
Throws and Grips
Let Mercy Flow from Hand
Benefits ofSolo Set Practice -- Combat Sequences 13 to 16
From Pre-Choise Sequences to Free Sparring
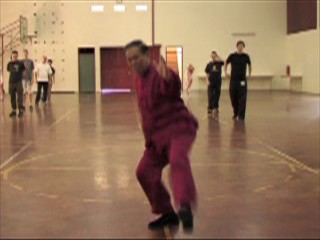 Applying Shaolin Patterns Correctly an Spontaneously in
Free Sparring
Shaolin Kungfu against Boxing and Kick-Boxing
Shaolin Counters against Wrestling Shoots
Secret of Grandmaster Ho Fatt Nam -- Planting Willow in
Front of Camp
Why Shaolin Kungfu is Technicaly Faster than Boxing
Shaolin Techniques, Tactics and Strategies against Boxing
Revealing Secrets of Past Taijiquan Masters
Overwhelming Opponents with just One Pattern!
Poetry and Elegance in Effective Combat
Overview 1: Fundamentals of Shaolin Kungfu Training
Overview 2: the 16 Combat Sequences
Overview 3: Are They Performing Kungfu Dance?
Shaolin -- Barcelona Videos From Shaolin to Instinctive Fighting to Boxing
Basic Counters against a Boxer's Jabs
Chasing after a Boxer's Retreat
One-Step, Two-Step or Multiple-Step Chase
Practicing on your Own, then Testing it on your Partner
Counters against a Boxer's Left Jabs
Handling Unexpected Attacks Competently and Spontaneously
Progressing to Realistic Sparring with a Boxer
Employing Appropriate Tactics to Defeat a Boxer
Sticking to a Boxer as he Tries to Bounce Away
Advantage of Bow-Arrow Stance over Boxer's Footwork
Practicing Numerous Tactis against Boxers
Handling a Boxer Competently Despite his Speed and Size
Understanding and Implementing Techniques, Tactics and
Skills against Boxers
Countring the Left-Left-Right of Boxers
Kick a Boxer whenever he uses his Right Hand
Various Tactics to Handle Boxers
Attacking a Boxer with a Planned Sequence
Flling Opponent as he Attacks with Undercuts
Various Ways to Fell Opponents
 Knee Strikes and Counters
From Simple Techniques to Sophisticated Patterns
Why Many Kungfu Practitioers are Unable to Counter Muay
Thai and Kick-Boxing Attacks
Superiority of Kungfu Stances, Footwork and Techniques
Counters against Muay Thai and Kick-Boxing Attacks
Effective Tactics and Techniques against Continuous Attacks
How do you Counter Continuous Kicks
Exploiting the Innate Weaknesses of Kicks to Counter Them
Throwing an Opponent as he Kicks
Striking an Opponent as he Attempts to Shoot
Countering a Shoot when an Attacker has Grabbed You or
Pushed You onto the Ground
Shaolin Kungfu against Boing, Kick-Boxing, Muay Thai and
Wrestling -- Overview
Shaolin -- Boxing 01 From Shaolin to Instinctive Fighting to Boxing
Basic Counters against a Boxer's Jabs
Chasing after a Boexer's Retreat
One-Step, Two-Step or Multiple-Step Chase
Practicing on your Own, Then Testing iton your Partner
Counters agaisnt a Boxer's Left Jabs
Handling Unexpected Attacks Correctly and Spontaneously
Progressing to Realistic Sparring with a Boxer
From Shaolin to Intuitive Fighting Boxing -- Part 1
From Shaolin to Intuitive Fighting Boxing -- Part 2
From Shaolin to Intuitive Fighting Boxing -- Part 3
From Shaolin to Intuitive Fighting Boxing -- Part 4
From Shaolin to Intuitive Fighting Boxing -- Part 5
From Shaolin to Intuitive Fighting Boxing -- Part 6
Basic Counters against a Boxer's Jabs -- Part 1
Basic Counters against a Boxer's Jabs -- Part 2
Basic Counters against a Boxer's Jabs -- Part 3
Basic Counters against a Boxer's Jabs -- Part 4
Basic Counters against a Boxer's Jabs -- Part 5
Basic Counters against a Boxer's Jabs -- Part 6
 Chasing after a Boxer's Retreat -- Part 1
Chasing after a Boxer's Retreat -- Part 2
Chasing after a Boxer's Retreat -- Part 3
Chasing after a Boxer's Retreat -- Part 4
Chasing after a Boxer's Retreat -- Part 5
Chasing after a Boxer's Retreat -- Part 6
One-Step, Two-Step and Multiple-Step Chase -- Part 1
One-Step, Two-Step and Multiple-Step Chase -- Part 2
One-Step, Two-Step and Multiple-Step Chase -- Part 3
One-Step, Two-Step and Multiple-Step Chase -- Part 4
One-Step, Two-Step and Multiple-Step Chase -- Part 5
Practicing on your Own, Then Testing it on your Partner -- Part 1
Practicing on your Own, Then Testing it on your Partner -- Part 2
Practicing on your Own, Then Testing it on your Partner -- Part 3
Practicing on your Own, Then Testing it on your Partner -- Part 4
Counters against a Boxer's Left Jabs -- Part 1
Counters against a Boxer's Left Jabs -- Part 2
Counters against a Boxer's Left Jabs -- Part 3
Counters against a Boxer's Left Jabs -- Part 4
Counters against a Boxer's Left Jabs -- Part 5
Handling Unexpected Attacks Correctly and Spontaneously -- Part 1
Handling Unexpected Attacks Correctly and Spontaneously -- Part 2
Handling Unexpected Attacks Correctly and Spontaneously -- Part 3
Handling Unexpected Attacks Correctly and Spontaneously -- Part 4
Handling Unexpected Attacks Correctly and Spontaneously -- Part 5
Progressing to Realistic Sparring with a Boxer -- Part 1
Progressing to Realistic Sparring with a Boxer -- Part 2
Progressing to Realistic Sparring with a Boxer -- Part 3
Progressing to Realistic Sparring with a Boxer -- Part 4
Progressing to Realistic Sparring with a Boxer -- Part 5
Basic Shaolin Kungfu against Boxing, Kick-Boxing, Muay Thai and
Wrestling -- Overview
 Shaolin -- Boxing 02
Employing Appropriate Tactics to Defeat a Boxer -- Overview
Shaolin -- Boxing 02
Employing Appropriate Tactics to Defeat a Boxer -- OverviewSticking to a Boexer as ne Tries to Bounch Away -- Overview
Advantages of the Biw-Arrow Stance over a Boxer's
Footwork -- Overview
Practicing Numerous Tactics Boexers -- Overview
Handling a Boxer Competently Despite his Speed
and Size -- Overview
Understanding and Implementing Techniques, Tactics and
Skills against Boxers -- Overview
Countring the Left-Left-Right of Boxers -- Overview
Tactics to Defeat a Boxer -- Part 1
Tactics to Defeat a Boxer -- Part 2
Tactics to Defeat a Boxer -- Part 3
Tactics to Defeat a Boxer -- Part 4
Tactics to Defeat a Boxer -- Part 5
Tactics to Defeat a Boxer -- Part 6
Sticking to a Boxer as he Tries to Boune Away -- Part 1
Sticking to a Boxer as he Tries to Boune Away -- Part 2
Sticking to a Boxer as he Tries to Boune Away -- Part 3
Sticking to a Boxer as he Tries to Boune Away -- Part 4
Sticking to a Boxer as he Tries to Boune Away -- Part 5
Sticking to a Boxer as he Tries to Boune Away -- Part 6
Advantages of the Bow-Arrow Stance over a Bxer's Footwork -- Part 1
Advantages of the Bow-Arrow Stance over a Bxer's Footwork -- Part 2
Advantages of the Bow-Arrow Stance over a Bxer's Footwork -- Part 3
Advantages of the Bow-Arrow Stance over a Bxer's Footwork -- Part 4
Advantages of the Bow-Arrow Stance over a Bxer's Footwork -- Part 5
Advantages of the Bow-Arrow Stance over a Bxer's Footwork -- Part 6
Practicing Numeros Tactics against Boxers -- Part 1
Practicing Numeros Tactics against Boxers -- Part 2
Practicing Numeros Tactics against Boxers -- Part 3
Practicing Numeros Tactics against Boxers -- Part 4
Handling a Boxer Competently Despite his Speed and Size -- Part 1
 80
Handling a Boxer Competently Despite his Speed
80
Handling a Boxer Competently Despite his Speedand Size -- Part 2
Handling a Boxer Competently Despite his Speed
and Size -- Part 3
Handling a Boxer Competently Despite his Speed
and Size -- Part 4
Understanding and Implementing Techniques, Tactics and
Skills against Boxers -- Part 1
Understanding and Implementing Techniques, Tactics and
Skills against Boxers -- Part 2
Understanding and Implementing Techniques, Tactics and
Skills against Boxers -- Part 3
Understanding and Implementing Techniques, Tactics and
Skills against Boxers -- Part 4
Understanding and Implementing Techniques, Tactics and
Skills against Boxers -- Part 5
Countering the Left-Left-Right of Boxers -- Part 1
Countering the Left-Left-Right of Boxers -- Part 2
Countering the Left-Left-Right of Boxers -- Part 3
Countering the Left-Left-Right of Boxers -- Part 4
Countering the Left-Left-Right of Boxers -- Part 5
Shaolin -- Boxing 03 Kick a Bxer whenever he Uses his Right Hand -- Overview
Various Tactics to Handle a Boxer -- Overview
Attacking a Boxer with a Planned Sequence -- Overview
Felling an Opponent as he Attacks with an Indercut -- Overview
Various Ways to Fell an Opponent -- Overview
Knee Strikes and their Counters -- Overview
From Simple Techniques to Sophisticated Patterns -- Overview
Why Many Kungfu Practitioners are Unable to Counter Muay
Thai and Kick-Boxing Attacks -- Overview
Superiority of Shaolin Stances, Folotwork and Techniques
(New) -- Overview
Superiority of Shaolin Stances, Folotwork and Techniques -- Overview
Kick a Bxer whenever he Uses his Right Hand -- Part 1
Kick a Bxer whenever he Uses his Right Hand -- Part 2
Kick a Bxer whenever he Uses his Right Hand -- Part 3
Kick a Bxer whenever he Uses his Right Hand -- Part 4
Kick a Bxer whenever he Uses his Right Hand -- Part 5
Kick a Bxer whenever he Uses his Right Hand -- Part 6
Various Tactics to Handle a Boxer -- Part 1
Various Tactics to Handle a Boxer -- Part 2
Various Tactics to Handle a Boxer -- Part 3
Various Tactics to Handle a Boxer -- Part 4
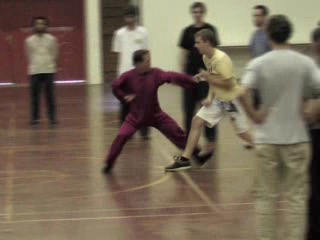 Various Tactics to Handle a Boxer -- Part 5
Various Tactics to Handle a Boxer -- Part 6
Attacking a Boxer wtih a Planned Sequence -- Part 1
Attacking a Boxer wtih a Planned Sequence -- Part 2
Attacking a Boxer wtih a Planned Sequence -- Part 3
Attacking a Boxer wtih a Planned Sequence -- Part 4
Attacking a Boxer wtih a Planned Sequence -- Part 5
Attacking a Boxer wtih a Planned Sequence -- Part 6
Felling an Opponent as he Attacks with an Undercut -- Part 1
Felling an Opponent as he Attacks with an Undercut -- Part 2
Felling an Opponent as he Attacks with an Undercut -- Part 3
Felling an Opponent as he Attacks with an Undercut -- Part 4
Felling an Opponent as he Attacks with an Undercut -- Part 5
Felling an Opponent as he Attacks with an Undercut -- Part 6
Various Ways to Fell an Opponent -- Part 1
Felling an Opponent as he Attacks with an Undercut -- Part 7
Various Ways to Fell an Opponent -- Part 2
Various Ways to Fell an Opponent -- Part 3
Various Ways to Fell an Opponent -- Part 4
Various Ways to Fell an Opponent -- Part 5
Various Ways to Fell an Opponent -- Part 6
Various Ways to Fell an Opponent -- Part 7
Knee Strikes and their Counter -- Part 1
Knee Strikes and their Counter -- Part 2
Knee Strikes and their Counter -- Part 3
Knee Strikes and their Counter -- Part 4
Knee Strikes and their Counter -- Part 5
Knee Strikes and their Counter -- Part 6
From Simple Technique to Sophisticated Patterns -- Part 1
From Simple Technique to Sophisticated Patterns -- Part 2
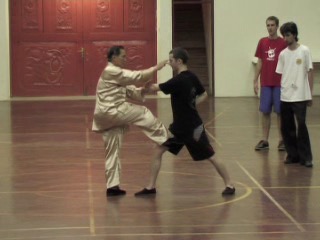 From Simple Technique to Sophisticated Patterns -- Part 3
From Simple Technique to Sophisticated Patterns -- Part 4
From Simple Technique to Sophisticated Patterns -- Part 5
From Simple Technique to Sophisticated Patterns -- Part 6
Why Many Kungfu Practitioners are Unable to Counter
Muay Thai and Kick-Boxing Attacks -- Part 1
Why Many Kungfu Practitioners are Unable to Counter
Muay Thai and Kick-Boxing Attacks -- Part 2
Why Many Kungfu Practitioners are Unable to Counter
Muay Thai and Kick-Boxing Attacks -- Part 3
Why Many Kungfu Practitioners are Unable to Counter
Muay Thai and Kick-Boxing Attacks -- Part 4
Why Many Kungfu Practitioners are Unable to Counter Muay Thai
and Kick-Boxing Attacks -- Part 5
Why Many Kungfu Practitioners are Unable to Counter Muay Thai
and Kick-Boxing Attacks -- Part 6
Why Many Kungfu Practitioners are Unable to Counter Muay Thai
and Kick-Boxing Attacks -- Part 7
Superiority of Shaolin Stances, Footwork and Technique -- Part 1
Superiority of Shaolin Stances, Footwork and Technique -- Part 2
Superiority of Shaolin Stances, Footwork and Technique -- Part 3
Superiority of Shaolin Stances, Footwork and Technique -- Part 4
Superiority of Shaolin Stances, Footwork and Technique -- Part 5
Superiority of Shaolin Stances, Footwork and Technique -- Part 6
Superiority of Shaolin Stances, Footwork and Technique -- Part 7
Shaolin -- Boxing 04 Throwing an Opponent as he Kicks -- Overview
Striking the Attacker as he Attempts a Shoot -- Overview
Countering the Shoot when an Attacker has Grabbed you or
Pushed you onto the Ground -- Overview
Counters against Muay Thai and Kick-Boxing Attacks -- Part 1
Counters against Muay Thai and Kick-Boxing Attacks -- Part 2
Counters against Muay Thai and Kick-Boxing Attacks -- Part 3
Counters against Muay Thai and Kick-Boxing Attacks -- Part 4
Counters against Muay Thai and Kick-Boxing Attacks -- Part 5
Counters against Muay Thai and Kick-Boxing Attacks -- Part 6
Effective Tactis and Techniques against Continuous Attacks Mixed
with Feint Moves -- Part 1
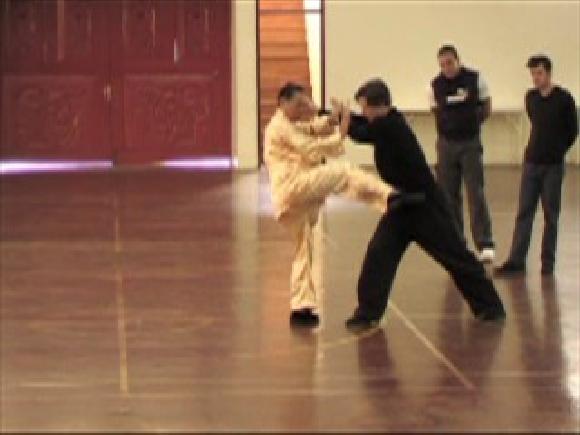 Effective Tactis and Techniques against Continuous
Attacks Mixed with Feint Moves -- Part 2
Effective Tactis and Techniques against Continuous
Attacks Mixed with Feint Moves -- Part 3
Effective Tactis and Techniques against Continuous
Attacks Mixed with Feint Moves -- Part 4
Effective Tactis and Techniques against Continuous
Attacks Mixed with Feint Moves -- Part 5
How would You Counter Continuous Kicks? -- Part 1
How would You Counter Continuous Kicks? -- Part 2
How would You Counter Continuous Kicks? -- Part 3
How would You Counter Continuous Kicks? -- Part 4
How would You Counter Continuous Kicks? -- Part 5
How would You Counter Continuous Kicks? -- Part 6
How would You Counter Continuous Kicks? -- Part 7
How would You Counter Continuous Kicks? -- Part 8
Exploiting the Innate Weaknesses of Kicks toCounter Them --Part 1
Exploiting the Innate Weaknesses of Kicks toCounter Them --Part 2
Exploiting the Innate Weaknesses of Kicks toCounter Them --Part 3
Exploiting the Innate Weaknesses of Kicks toCounter Them --Part 4
Exploiting the Innate Weaknesses of Kicks toCounter Them --Part 5
Exploiting the Innate Weaknesses of Kicks toCounter Them --Part 6
Exploiting the Innate Weaknesses of Kicks toCounter Them --Part 7
Exploiting the Innate Weaknesses of Kicks toCounter Them --Part 8
Throwing an Opponent as he Kicks -- Part 1
Throwing an Opponent as he Kicks -- Part 2
Throwing an Opponent as he Kicks -- Part 3
Throwing an Opponent as he Kicks -- Part 4
Throwing an Opponent as he Kicks -- Part 5
Throwing an Opponent as he Kicks -- Part 6
Throwing an Opponent as he Kicks -- Part 7
Throwing an Opponent as he Kicks -- Part 8
Strikimng the Attacker as he Attempts a Shoot -- Part 1
Strikimng the Attacker as he Attempts a Shoot -- Part 2
 Strikimng the Attacker as he Attempts a Shoot -- Part 3
Strikimng the Attacker as he Attempts a Shoot -- Part 4
Strikimng the Attacker as he Attempts a Shoot -- Part 5
Countering the Shoot when an Attacker has Grabbed you or
Pushed you onto the Ground -- Part 1
Countering the Shoot when an Attacker has Grabbed you or
Pushed you onto the Ground -- Part 2
Countering the Shoot when an Attacker has Grabbed you or
Pushed you onto the Ground -- Part 3
Countering the Shoot when an Attacker has Grabbed you or
Pushed you onto the Ground -- Part 4
Countering the Shoot when an Attacker has Grabbed you or
Pushed you onto the Ground -- Part 5
Countering the Shoot when an Attacker has Grabbed you or
Pushed you onto the Ground -- Part 6
Countering the Shoot when an Attacker has Grabbed you or
Pushed you onto the Ground -- Part 7
Shaolin -- Butterfly Knives Introducing the Butterfly Knives -- Part 1
Introducing the Butterfly Knives -- Part 2
Introducing the Butterfly Knives -- Part 3
Introducing the Butterfly Knives -- Part 4
Introducing the Butterfly Knives -- Part 5
Introducing the Butterfly Knives -- Part 6
Fierce Tiger and Moon-Gazing Rhinoceros -- Part 1
Fierce Tiger and Moon-Gazing Rhinoceros -- Part 2
Fierce Tiger and Moon-Gazing Rhinoceros -- Part 3
Fierce Tiger and Moon-Gazing Rhinoceros -- Part 4
Fierce Tiger and Moon-Gazing Rhinoceros -- Part 5
Fierce Tiger and Moon-Gazing Rhinoceros -- Part 6
Fierce Tiger and Moon-Gazing Rhinoceros -- Part 7
How would You Counter a pear Thrust? -- Part 1
How would You Counter a pear Thrust? -- Part 2
How would You Counter a pear Thrust? -- Part 3
How would You Counter a pear Thrust? -- Part 4
How would You Counter a pear Thrust? -- Part 5
How would You Counter a pear Thrust? -- Part 6
How would You Counter a pear Thrust? -- Part 7
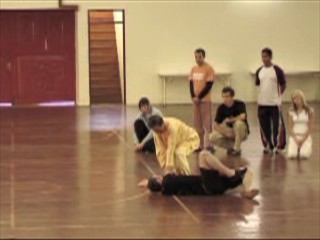 Counters against Chops and Sweeps of Heavier
Weapons -- Part 1
Counters against Chops and Sweeps of Heavier
Weapons -- Part 2
Counters against Chops and Sweeps of Heavier
Weapons -- Part 3
Counters against Chops and Sweeps of Heavier
Weapons -- Part 4
Counters against Chops and Sweeps of Heavier
Weapons -- Part 5
Counters against Chops and Sweeps of Heavier
Weapons -- Part 6
Counters against Chops and Sweeps of Heavier Weapons -- Part 7
Butterrfly Knives against a Sabre -- Part 1
Butterrfly Knives against a Sabre -- Part 2
Butterrfly Knives against a Sabre -- Part 3
Butterrfly Knives against a Sabre -- Part 4
Butterrfly Knives against a Sabre -- Part 5
Butterrfly Knives against a Sabre -- Part 6
Butterrfly Knives against a Sabre -- Part 7
The Secret of Performing Butterly Knives with Force and Speed
but Without being Tired -- Part 1
The Secret of Performing Butterly Knives with Force and Speed
but Without being Tired -- Part 1a
The Secret of Performing Butterly Knives with Force and Speed
but Without being Tired -- Part 2
The Secret of Performing Butterly Knives with Force and Speed
but Without being Tired -- Part 3
The Secret of Performing Butterly Knives with Force and Speed
but Without being Tired -- Part 4
The Secret of Performing Butterly Knives with Force and Speed
but Without being Tired -- Part 5
The Secret of Performing Butterly Knives with Force and Speed
but Without being Tired -- Part 6
The Secret of Performing Butterly Knives with Force and Speed
but Without being Tired -- Part 7
The Secret of Performing Butterly Knives with Force and Speed
but Without being Tired -- Part 8
The Secret of Performing Butterly Knives with Force and Speed
but Without being Tired -- Part 9
The Secret of Performing Butterly Knives with Force and Speed
but Without being Tired -- Part 10
The Secret of Performing Butterly Knives with Force and Speed
but Without being Tired -- Part 11
The Secret of Performing Butterly Knives with Force and Speed
but Without being Tired -- Part 12
Introducing the Butterfly Knives -- Overview
Fierce Tiger and Moon-Gazing Rhinoceros -- Overview
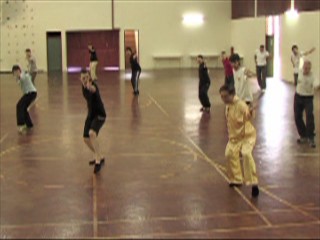 How would You Counter a Spear Thrust? -- Overview
Counters against Chops and Sweeps of Heavier
Weapons -- Overview
Butterfly Knives against a Sabre -- Overview
The Secret of Performing Butterly Knives with Force
and Speed but Without being Tired -- Overview
Shaolin -- Butterfly Knives 02 Yin-Yang Butterfly Knives and Close-Combat
Application -- Part 1
Yin-Yang Butterfly Knives and Close-Combat Application -- Part 2
Yin-Yang Butterfly Knives and Close-Combat Application -- Part 3
Yin-Yang Butterfly Knives and Close-Combat Application -- Part 4
Yin-Yang Butterfly Knives and Close-Combat Application -- Part 5
Yin-Yang Butterfly Knives and Close-Combat Application -- Part 6
Yin-Yang Butterfly Knives and Close-Combat Application -- Part 7
Yin-Yang Butterfly Knives and Close-Combat Application -- Part 8
Yin-Yang Butterfly Knives and Close-Combat Application -- Part 9
Yin-Yang Butterfly Knives and Close-Combat Application -- Part 10
Yin-Yang Butterfly Knives and Close-Combat Application -- Part 11
Yin-Yang Butterfly Knives and Close-Combat Application -- Part 12
Some Intresting Application of Butterfly Knives Held in Reverse -- Part 1
Some Intresting Application of Butterfly Knives Held in Reverse -- Part 2
Some Intresting Application of Butterfly Knives Held in Reverse -- Part 3
Some Intresting Application of Butterfly Knives Held in Reverse -- Part 4
Some Intresting Application of Butterfly Knives Held in Reverse -- Part 5
Some Intresting Application of Butterfly Knives Held in Reverse -- Part 6
Some Intresting Application of Butterfly Knives Held in Reverse -- Part 7
Some Intresting Application of Butterfly Knives Held in Reverse -- Part 8
Some Intresting Application of Butterfly Knives Held in Reverse -- Part 9
Combat Training with Wepons Must be Injury Free -- Part 1
Combat Training with Wepons Must be Injury Free -- Part 2
Combat Training with Wepons Must be Injury Free -- Part 3
Combat Training with Weapons Must be Injury Free -- Part 4
Combat Training with Weapons Must be Injury Free -- Part 5
Combat Training with Weapons Must be Injury Free -- Part 6
Combat Training with Weapons Must be Injury Free -- Part 7
How do You Release your Butterfly Knives from being Locked -- Part 1
How do You Release your Butterfly Knives from being Locked -- Part 2
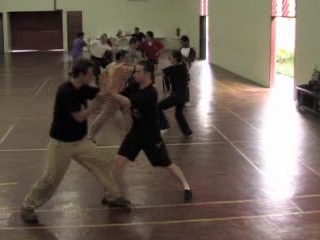 How do You Release your Butterfly Knives from being
Locked -- Part 3
How do You Release your Butterfly Knives from being
Locked -- Part 4
How do You Release your Butterfly Knives from being
Locked -- Part 5
How do You Release your Butterfly Knives from being
Locked -- Part 6
How do You Release your Butterfly Knives from being
Locked -- Part 7
Learing How to Make Flowers Systemmatically -- Part 1
Learing How to Make Flowers Systemmatically -- Part 2
Learing How to Make Flowers Systemmatically -- Part 3
Learing How to Make Flowers Systemmatically -- Part 4
Learing How to Make Flowers Systemmatically -- Part 5
Learing How to Make Flowers Systemmatically -- Part 6
Combat Applications of Double Buttrflies Flying -- Part 1
Combat Applications of Double Buttrflies Flying -- Part 2
Combat Applications of Double Butterflies Flying -- Part 3
Combat Applications of Double Buttrflies Flying -- Part 4
Combat Applications of Double Buttrflies Flying -- Part 5
Combat Applications of Double Buttrflies Flying -- Part 7
Combat Applications of Double Buttrflies Flying -- Part 6
Combat Applications of Double Buttrflies Flying -- Part 8
Combat Applications of Double Butterflies Flying -- Part 9
Human-Character and Cross-Road are Found Here -- Part 1
Human-Character and Cross-Road are Found Here -- Part 2
Human-Character and Cross-Road are Found Here -- Part 3
Human-Character and Cross-Road are Found Here -- Part 4
Human-Character and Cross-Road are Found Here -- Part 5
Human-Character and Cross-Road are Found Here -- Part 6
Human-Character and Cross-Road are Found Here -- Part 7
Human-Character and Cross-Road are Found Here -- Part 8
Human-Character and Cross-Road are Found Here -- Part 9
Kungfu Training and Mental Clarity -- Part 1
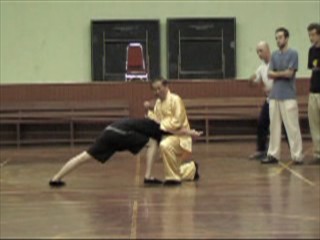 Kungfu Training and Mental Clarity -- Part 2
Kungfu Training and Mental Clarity -- Part 3
Kungfu Training and Mental Clarity -- Part 4
Kungfu Training and Mental Clarity -- Part 5
Learning the Combat Applications of the Butterfly
Knives against Other Weapons -- Part 1
Learning the Combat Applications of the Butterfly
Knives against Other Weapons -- Part 2
Learning the Combat Applications of the Butterfly
Knives against Other Weapons -- Part 3
Learning the Combat Applications of the Butterfly
Knives against Other Weapons -- Part 4
Learning the Combat Applications of the Butterfly Knives against Other Weapons -- Part 5
Learning the Combat Applications of the Butterfly Knives against Other Weapons -- Part 6
Learning the Combat Applications of the Butterfly Knives against Other Weapons -- Part 7
Benefits of Combat Application of Classical Weapons -- Part 1
Benefits of Combat Application of Classical Weapons -- Part 2
Benefits of Combat Application of Classical Weapons -- Part 3
Benefits of Combat Application of Classical Weapons -- Part 4
Benefits of Combat Application of Classical Weapons -- Part 5
Benefits of Combat Application of Classical Weapons -- Part 6
From Slow and Systematic to Fast and Spontaneous -- Part 1
From Slow and Systematic to Fast and Spontaneous -- Part 2
From Slow and Systematic to Fast and Spontaneous -- Part 3
From Slow and Systematic to Fast and Spontaneous -- Part 4
From Slow and Systematic to Fast and Spontaneous -- Part 5
From Slow and Systematic to Fast and Spontaneous -- Part 6
First-Class Kungfu Calls for Great Skills and Techniques -- Part 1
First-Class Kungfu Calls for Great Skills and Techniques -- Part 2
First-Class Kungfu Calls for Great Skills and Techniques -- Part 3
First-Class Kungfu Calls for Great Skills and Techniques -- Part 4
First-Class Kungfu Calls for Great Skills and Techniques -- Part 5
First-Class Kungfu Calls for Great Skills and Techniques -- Part 6
First- Class Kungfu Calls for Great Skills and Techniques -- Part 7
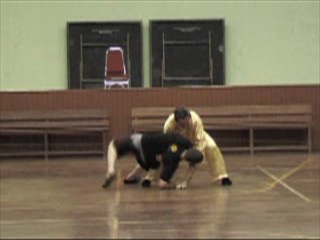 Yin-Yang Butterfly Knives and Close-Combat Applications
-- Overview
Some Intresting Application of Butterfly Knives Held in
Reverse -- Overview
Combat Application of Weapons Must be Injury Free
-- Overview
How do You Release your Butterfly Knives from being
Locked -- Overview
Learning How to Make Flowers Systematically -- Overview
Combat Applications of Double Butterflies Flying -- Overview
Human-Character and Cross-Road are Found Here -- Overview
Kungfu Training and Mental Clarity -- Overview
Learning the Combat Applications of the Butterfly Knives
against Other Weapons -- Overview
Benefits of Combat Application with Classical Weapons -- Overview
From Slow and Systematic to Fast and Spontaneous -- Overview
First-Class Kungfu Calls fro Great Skills and Techniques -- Overview
Shaolin -- Frankfurt Combat Application of Tantui (with jpeg)
Combat Application of Tantui
Combat Sequences of Tantui (with jpeg)
Combat Application of Tantui
Shaolin -- Pakua Shaolin Pakua Set by Sifu Goh Kok Hin -- Part 1
Shaolin Pakua Set by Sifu Goh Kok Hin -- Part 2
Shaolin Pakua Set by Sifu Goh Kok Hin -- Part 3
Shaolin Pakua Set by Sifu Goh Kok Hin -- Part 4
Shaolin Pakua Set -- Old Picture Series
Shaolin Pakua Set by Sifu Goh Kok Hin
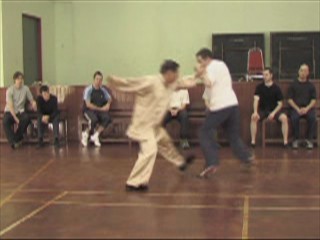 90
Shaolin -- Single Tiger Combat
8 Shaolin Distilled Combat Sequences
90
Shaolin -- Single Tiger Combat
8 Shaolin Distilled Combat SequencesEight Distilled Shaolin Combat Sequences
Eight Distilled Shaolin Combat Sequences -- Sequence 1
Eight Distilled Shaolin Combat Sequences -- Sequence 2
Eight Distilled Shaolin Combat Sequences -- Sequence 3
Eight Distilled Shaolin Combat Sequences -- Sequence 4
Eight Distilled Shaolin Combat Sequences -- Sequence 5
Eight Distilled Shaolin Combat Sequences -- Sequence 6
Eight Distilled Shaolin Combat Sequences -- Sequence 7
Eight Distilled Shaolin Combat Sequences -- Sequence 8
Shaolin -- Special 01 How to Thnik and Act as a Master -- Overview
Returning to the Basics -- Part 1
Returning to the Basics -- Part 2
Returning to the Basics -- Part 3
Returning to the Basics -- Part 4
Returning to the Basics -- Part 5
Returning to the Basics -- Part 6
Returning to the Basics -- Part 7
Returning to the Basics -- Part 8
Returning to the Basics -- Part 9
Form, Force, Flow and Element of Threat -- Part 1
Form, Force, Flow and Element of Threat -- Part 2
Form, Force, Flow and Element of Threat -- Part 3
Form, Force, Flow and Element of Threat -- Part 4
Form, Force, Flow and Element of Threat -- Part 5
Form, Force, Flow and Element of Threat -- Part 6
Form, Force, Flow and Element of Threat -- Part 7
Form, Force, Flow and Element of Threat -- Part 8
Form, Force, Flow and Element of Threat -- Part 9
Reviewing the Basic Combat Sequences -- Part 1
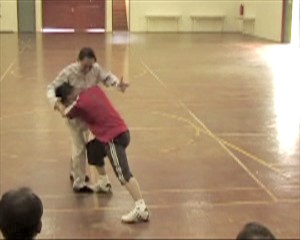 Reviewing the Basic Combat Sequences -- Part 2
Reviewing the Basic Combat Sequences -- Part 3
Reviewing the Basic Combat Sequences -- Part 4
Reviewing the Basic Combat Sequences -- Part 5
Reviewing the Basic Combat Sequences -- Part 6
Reviewing the Basic Combat Sequences -- Part 7
Reviewing the Basic Combat Sequences -- Part 8
Reviewing the Basic Combat Sequences -- Part 9
Devising Strategies using Combat Sequences -- Part 1
Devising Strategies using Combat Sequences -- Part 2
Devising Strategies using Combat Sequences -- Part 3
Devising Strategies using Combat Sequences -- Part 4
Devising Strategies using Combat Sequences -- Part 5
Devising Strategies using Combat Sequences -- Part 6
Devising Strategies using Combat Sequences -- Part 7
Devising Strategies using Combat Sequences -- Part 8
Devising Strategies using Combat Sequences -- Part 9
Appplying Strategies for Effective Combat -- Part 1
Appplying Strategies for Effective Combat -- Part 2
Appplying Strategies for Effective Combat -- Part 3
Appplying Strategies for Effective Combat -- Part 4
Appplying Strategies for Effective Combat -- Part 5
Appplying Strategies for Effective Combat -- Part 6
Free Sparring with Prescribed Conditions -- Part 1
Free Sparring with Prescribed Conditions -- Part 2
Free Sparring with Prescribed Conditions -- Part 3
Free Sparring with Prescribed Conditions -- Part 4
Free Sparring with Prescribed Conditions -- Part 5
Combat Sequences to Train Spontaneous Attacks and Reponses -- Part 1
Combat Sequences to Train Spontaneous Attacks and Reponses -- Part 2
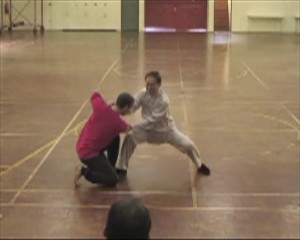 Combat Sequences to
Train Spontaneous Attacks
Combat Sequences to
Train Spontaneous Attacksand Reponses -- Part 3
Combat Sequences to Train Spontaneous Attacks
and Reponses -- Part 4
Combat Sequences to Train Spontaneous Attacks
and Reponses -- Part 5
Combat Sequences to Train Spontaneous Attacks
and Reponses -- Part 6
Combat Sequences to Train Spontaneous Attacks
and Reponses -- Part 7
Combat Sequences to Train Spontaneous Attacks
and Reponses -- Part 8
Using Strategies and Tactics in Attack and Defence -- Part 1
Using Strategies and Tactics in Attack and Defence -- Part 2
Using Strategies and Tactics in Attack and Defence -- Part 3
Using Strategies and Tactics in Attack and Defence -- Part 4
Using Strategies and Tactics in Attack and Defence -- Part 5
Using Strategies and Tactics in Attack and Defence -- Part 6
Using Strategies and Tactics in Attack and Defence -- Part 7
Using Strategies and Tactics in Attack and Defence -- Part 8
Using Strategies and Tactics in Attack and Defence -- Part 9
Using Strategies and Tactics in Attack and Defence -- Part 10
Using Strategies and Tactics in Attack and Defence -- Part 11
Using Strategies and Tactics in Attack and Defence -- Part 12
Using Strategies and Tactics in Attack and Defence -- Part 13
It is Heartening to See so Many People using Shaolin Kungfu in
Free Sparring -- Part 1
It is Heartening to See so Many People using Shaolin Kungfu in
Free Sparring -- Part 2
It is Heartening to See so Many People using Shaolin Kungfu in
Free Sparring -- Part 3
It is Heartening to See so Many People using Shaolin Kungfu in
Free Sparring -- Part 4
It is Heartening to See so Many People using Shaolin Kungfu in
Free Sparring -- Part 5
It is Heartening to See so Many People using Shaolin Kungfu in
Free Sparring -- Part 6
It is Heartening to See so Many People using Shaolin Kungfu in
Free Sparring -- Part 7
It is Heartening to See so Many People using Shaolin Kungfu in
Free Sparring -- Part 8
It is Heartening to See so Many People using Shaolin Kungfu in
Free Sparring -- Part 9
Returning to the Basics -- Overview
Form, Force, Flow and Element of Threat -- Overview
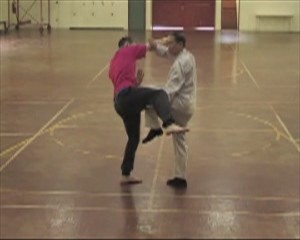 Reviewing the Basic Combat Sequences -- Overview
Devising Strategies using Combat Sequences -- Overview
Appplying Strategies for Effective Combat -- Overview
Free Sparring with Prescribed Conditions -- Overview
Combat Sequences to Train Spontaneous Attacks
and Reponses -- Overview
Using Strategies and Tactics in Attack and Defence
-- Overview
It is Heartening to See so Many People using Shaolin
Kungfu in Free Sparring -- Overview
Shaolin -- Special 02 Felling and Gripping Techniques in Shaolin Kungfu -- Part 1
Felling and Gripping Techniques in Shaolin Kungfu -- Part 2
Felling and Gripping Techniques in Shaolin Kungfu -- Part 3
Felling and Gripping Techniques in Shaolin Kungfu -- Part 4
Felling and Gripping Techniques in Shaolin Kungfu -- Part 5
Felling and Gripping Techniques in Shaolin Kungfu -- Part 6
Felling and Gripping Techniques in Shaolin Kungfu -- Part 7
Felling and Gripping Techniques in Shaolin Kungfu -- Part 8
Felling and Gripping Techniques in Shaolin Kungfu -- Part 9
Felling and Gripping Techniques in Shaolin Kungfu -- Part 10
Felling and Gripping Techniques in Shaolin Kungfu -- Part 11
Felling and Gripping Techniques in Shaolin Kungfu -- Part 12
How Sequence Training and Chi Flow Enhance Combat
Efficiency -- Part 1
How Sequence Training and Chi Flow Enhance Combat
Efficiency -- Part 2
How Sequence Training and Chi Flow Enhance Combat
Efficiency -- Part 3
How Sequence Training and Chi Flow Enhance Combat
Efficiency -- Part 4
How Sequence Training and Chi Flow Enhance Combat
Efficiency -- Part 5
How Sequence Training and Chi Flow Enhance Combat
Efficiency -- Part 6
The Tiger-Crane Set -- Part 1
The Tiger-Crane Set -- Part 2
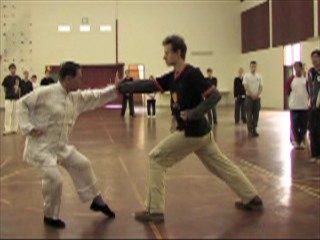 The Tiger-Crane Set -- Part 3
The Tiger-Crane Set -- Part 4
The Tiger-Crane Set -- Part 5
The Tiger-Crane Set -- Part 6
The Tiger-Crane Set -- Part 7
The Tiger-Crane Set -- Part 8
The Tiger-Crane Set -- Part 9
The Tiger-Crane Set -- Part 10
The Dragon-Tiger Set -- Part 1
The Dragon-Tiger Set -- Part 2
The Dragon-Tiger Set -- Part 3
The Dragon-Tiger Set -- Part 4
The Dragon-Tiger Set -- Part 5
The Dragon-Tiger Set -- Part 6
The Dragon-Tiger Set -- Part 7
The Dragon-Tiger Set -- Part 8
The Dragon-Tiger Set -- Part 9
The Dragon-Tiger Set -- Part 10
The Dragon Form Set of Northern Shaolin -- Part 1
The Dragon Form Set of Northern Shaolin -- Part 2
The Dragon Form Set of Northern Shaolin -- Part 3
The Dragon Form Set of Northern Shaolin -- Part 4
The Dragon Form Set of Northern Shaolin -- Part 5
The Dragon Form Set of Northern Shaolin -- Part 6
The Monkey Set - Part 1
The Monkey Set - Part 2
The Monkey Set - Part 3
The Monkey Set - Part 4
The Monkey Set - Part 5
The Monkey Set - Part 6
 The Monkey Set - Part 7
Shaolin Five-Animal Set -- Part 1
Shaolin Five-Animal Set -- Part 2
Shaolin Five-Animal Set -- Part 3
Shaolin Five-Animal Set -- Part 4
Shaolin Five-Animal Set -- Part 5
Shaolin Five-Animal Set -- Part 6
Shaolin Five-Animal Set -- Part 7
Shaolin Five-Animal Set -- Part 8
Shaolin Five-Animal Set -- Part 9
Shaolin Five-Animal Set -- Part 10
Shaolin Pakua Set -- Part 1
Shaolin Pakua Set -- Part 2
Shaolin Pakua Set -- Part 3
Combat Application of Pakua Set -- Part 1
Combat Application of Pakua Set -- Part 2
Combat Application of Pakua Set -- Part 3
Combat Application of Pakua Set -- Part 4
Combat Application of Pakua Set -- Part 5
Shaolin Pakua Set -- Part 5
Shaolin Pakua Set -- Part 6
Shaolin Pakua Set -- Part 7
Shaolin Pakua Set -- Part 8
Shaolin Pakua Set -- Part 9
Combat Application of Pakua Set -- Part 6
Combat Application of Pakua Set -- Part 7
Shaolin Pakua Set -- Part 10
Shaolin Pakua Set -- Part 11
Shaolin Pakua Set -- Part 12
Shaolin Pakua Set -- Part 13
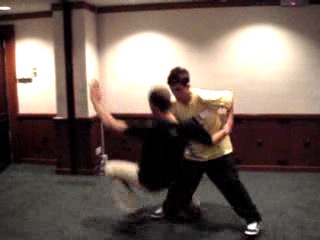 Combat Application of Pakua Set -- Part 8
Combat Application of Pakua Set -- Part 9
Shaolin Pakua Set -- Part 14
Felling and Gripping Techiques in Shaolin Kungfu -- Overview
How Sequence Training and Chi Flow Enhance Combat
Efficiency -- Overview
The Tiger-Crane Set -- Overview
The Dragon-Tiger Set: Crystalization of Two Wahnam
Traditions -- Overview
The Dragon-Form Set of Northern Shaolin -- Overview
Shaolin Monkey Set -- Overview
Shaolin Five-Animal Set -- Overview
Shaolin Pakua Set -- Overview
Combat Application of Pakua Set -- Overview
Shaolin -- Special 03 Beginning to Learn Some Monkey Tricks -- Part 1
Beginning to Learn Some Monkey Tricks -- Part 2
Beginning to Learn Some Monkey Tricks -- Part 3
Beginning to Learn Some Monkey Tricks -- Part 4
Beginning to Learn Some Monkey Tricks -- Part 5
Beginning to Learn Some Monkey Tricks -- Part 6
Beginning to Learn Some Monkey Tricks -- Part 7
Beginning to Learn Some Monkey Tricks -- Part 8
Beginning to Learn Some Monkey Tricks -- Part 9
Refining Techniques in Combat -- Part 1
Refining Techniques in Combat -- Part 2
Refining Techniques in Combat -- Part 3
Refining Techniques in Combat -- Part 4
Some Examples of High Level Combat -- Part 1
Some Examples of High Level Combat -- Part 2
Some Examples of High Level Combat -- Part 3
Some Examples of High Level Combat -- Part 4
Some Examples of High Level Combat -- Part 5
Collective Effort for Greater Benefits -- Part 1
Collective Effort for Greater Benefits -- Part 2
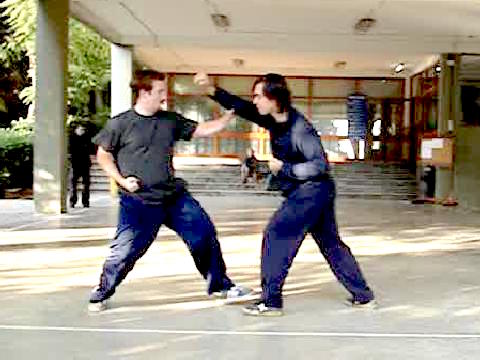 Collective Effort for Greater Benefits -- Part 3
Collective Effort for Greater Benefits -- Part 4
Collective Effort for Greater Benefits -- Part 5
Can Sophisticated Kungfu Techniques be used
in Combat -- Part 1
Can Sophisticated Kungfu Techniques be used
in Combat -- Part 2
Can Sophisticated Kungfu Techniques be used
in Combat -- Part 3
Can Sophisticated Kungfu Techniques be used
in Combat -- Part 4
Can Sophisticated Kungfu Techniques be used in Combat -- Part 5
Can Sophisticated Kungfu Techniques be used in Combat -- Part 6
Can Sophisticated Kungfu Techniques be used in Combat -- Part 7
Can Sophisticated Kungfu Techniques be used in Combat -- Part 8
Can Sophisticated Kungfu Techniques be used in Combat -- Part 9
Skills are Usually More Important than Techniques -- Part 1
Skills are Usually More Important than Techniques -- Part 2
Skills are Usually More Important than Techniques -- Part 3
Skills are Usually More Important than Techniques -- Part 4
Skills are Usually More Important than Techniques -- Part 5
Skills are Usually More Important than Techniques -- Part 6
Skills are Usually More Important than Techniques -- Part 7
Skills are Usually More Important than Techniques -- Part 8
One-Finger Shooting Zen: the Treasure of Shaolin Wahnam -- Part 1
One-Finger Shooting Zen: the Treasure of Shaolin Wahnam -- Part 2
One-Finger Shooting Zen: the Treasure of Shaolin Wahnam -- Part 3
One-Finger Shooting Zen: the Treasure of Shaolin Wahnam -- Part 4
One-Finger Shooting Zen: the Treasure of Shaolin Wahnam -- Part 5
One-Finger Shooting Zen: the Treasure of Shaolin Wahnam -- Part 6
One-Finger Shooting Zen: the Treasure of Shaolin Wahnam -- Part 7
One-Finger Shooting Zen: the Treasure of Shaolin Wahnam -- Part 8
One-Finger Shooting Zen: the Treasure of Shaolin Wahnam -- Part 9
One-Finger Shooting Zen: the Treasure of Shaolin Wahnam -- Part 10
 One-Finger Shooting Zen: the Treasure of Shaolin
Wahnam -- Part 11
One-Finger Shooting Zen: the Treasure of Shaolin
Wahnam -- Part 12
Raising Levels of Techniques and Tactics in Combat -- Part 1
Raising Levels of Techniques and Tactics in Combat -- Part 2
Raising Levels of Techniques and Tactics in Combat -- Part 3
Raising Levels of Techniques and Tactics in Combat -- Part 4
Raising Levels of Techniques and Tactics in Combat -- Part 5
Raising Levels of Techniques and Tactics in Combat -- Part 6
Raising Levels of Techniques and Tactics in Combat -- Part 7
Bringing Combat Skills to More Sophisticated Levels -- Part 1
Bringing Combat Skills to More Sophisticated Levels -- Part 2
Bringing Combat Skills to More Sophisticated Levels -- Part 3
Bringing Combat Skills to More Sophisticated Levels -- Part 4
Bringing Combat Skills to More Sophisticated Levels -- Part 5
Bringing Combat Skills to More Sophisticated Levels -- Part 6
Bringing Combat Skills to More Sophisticated Levels -- Part 7
Bringing Combat Skills to More Sophisticated Levels -- Part 8
Bringing Combat Skills to More Sophisticated Levels -- Part 9
Bringing Combat Skills to More Sophisticated Levels -- Part 10
Beginning to Learn Some Monkey Tricks -- Overview
Refining Techniques in Combat -- Overview
Some Examples of High Level Combat -- Overview
Collective Effort for Greater Benefits -- Overview
Can Sophisticated Kungfu Techniques be used in Combat?-- Overview
Skills are Usually More Important than Techniques -- Overview
One-Finger Shooting Zen: the Treasure of Shaolin Wahnam -- Overview
Raising Levels of Techniques and Tactics in Combat -- Overview
Bringing Combat Skills to More Sophisticated Levels -- Overview
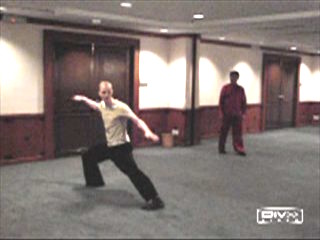 Shaolin -- Special 04
Monkey Techniques are Flowing and Agile but can be very
Shaolin -- Special 04
Monkey Techniques are Flowing and Agile but can be veryDevastating -- Part 1
Monkey Techniques are Flowing and Agile but can be very
Devastating -- Part 2
Monkey Techniques are Flowing and Agile but can be very
Devastating -- Part 3
Monkey Techniques are Flowing and Agile but can be very
Devastating -- Part 4
Beware of Monkey Tricks -- Part 1
Beware of Monkey Tricks -- Part 2
Beware of Monkey Tricks -- Part 3
Monkey Techniques are Flowing and Agile but can be very
Devastating -- Part 5
Monkey Techniques are Flowing and Agile but can be very
Devastating -- Part 6
Flowing with the Oponent's Momentum -- Part 1
Flowing with the Oponent's Momentum -- Part 2
Flowing with the Oponent's Momentum -- Part 3
Flowing with the Oponent's Momentum -- Part 4
Flowing with the Oponent's Momentum -- Part 5
Flowing with the Oponent's Momentum -- Part 6
Flowing with the Oponent's Momentum -- Part 7
Flowing with the Oponent's Momentum -- Part 8
Flowing with the Oponent's Momentum -- Part 9
Beware of Monkey Tricks -- Part 4
Beware of Monkey Tricks -- Part 5
Beware of Monkey Tricks -- Part 6
Beware of Monkey Tricks -- Part 7
Marvelous Techniques Beget Marvelous Techniques -- Part 1
Marvelous Techniques Beget Marvelous Techniques -- Part 2
Marvelous Techniques Beget Marvelous Techniques -- Part 3
Marvelous Techniques Beget Marvelous Techniques -- Part 4
Marvelous Techniques Beget Marvelous Techniques -- Part 5
Marvelous Techniques Beget Marvelous Techniques -- Part 6
Marvelous Techniques Beget Marvelous Techniques -- Part 7
How to Raise your Combat to Higher Levels -- Part 1
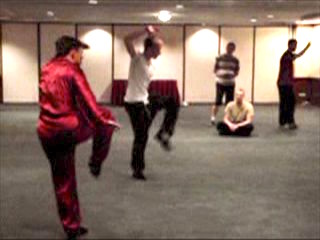 100
How to Raise your Combat to Higher Levels -- Part 2
100
How to Raise your Combat to Higher Levels -- Part 2How to Raise your Combat to Higher Levels -- Part 3
How to Raise your Combat to Higher Levels -- Part 4
How to Raise your Combat to Higher Levels -- Part 5
How You can Defeat your Opponents -- Part 1
How You can Defeat your Opponents -- Part 2
How You can Defeat your Opponents -- Part 3
How You can Defeat your Opponents -- Part 5
How You can Defeat your Opponents -- Part 4
Monkey Techiques are Flowing and Agile but can be very
Devastating -- Overview
Flowing with the Opponent's Momentum -- Overview
Beware of Mponkey Tricks -- Overview>
Marvelous Techniques Beget Marvelous Techniques -- Overview
Shaolin -- Special 05 Employing Sophisticated Kungfu Techniques to Enhance
Combat Efficency -- Part 1
Employing Sophisticated Kungfu Techniques to Enhance
Combat Efficency -- Part 2
Employing Sophisticated Kungfu Techniques to Enhance
Combat Efficency -- Part 3
Employing Sophisticated Kungfu Techniques to Enhance
Combat Efficency -- Part 4
Employing Sophisticated Kungfu Techniques to Enhance
Combat Efficency -- Part 5
Employing Sophisticated Kungfu Techniques to Enhance
Combat Efficency -- Part 6
Systematic Training is Essential for Combat Efficency -- Part 1
Systematic Training is Essential for Combat Efficency -- Part 2
Systematic Training is Essential for Combat Efficency -- Part 3
Systematic Training is Essential for Combat Efficency -- Part 4
 Systematic Training is Essential for Combat Efficency -- Part 5
Systematic Training is Essential for Combat Efficency -- Part 6
Raising Combat Efficiency from Basic to Advanced Levels
-- Part 1
Raising Combat Efficiency from Basic to Advanced Levels
-- Part 2
Raising Combat Efficiency from Basic to Advanced Levels
-- Part 3
Raising Combat Efficiency from Basic to Advanced Levels
-- Part 4
Raising Combat Efficiency from Basic to Advanced Levels
-- Part 5
Raising Combat Efficiency from Basic to Advanced Levels -- Part 6
Raising Combat Efficiency from Basic to Advanced Levels -- Part 7
Kungfu Philosophy and Swaying Willows -- Part 1
Kungfu Philosophy and Swaying Willows -- Part 2
Kungfu Philosophy and Swaying Willows -- Part 3
Kungfu Philosophy and Swaying Willows -- Part 4
Kungfu Philosophy and Swaying Willows -- Part 5
Kungfu Philosophy and Swaying Willows -- Part 6
Hands Pave the Way, Kicks to Clinch Victory -- Part 1
Hands Pave the Way, Kicks to Clinch Victory -- Part 2
Hands Pave the Way, Kicks to Clinch Victory -- Part 3
Hands Pave the Way, Kicks to Clinch Victory -- Part 4
Hands Pave the Way, Kicks to Clinch Victory -- Part 5
Hands Pave the Way, Kicks to Clinch Victory -- Part 6
Six Harmonies in Double Tiger Claws -- Part 1
Six Harmonies in Double Tiger Claws -- Part 2
Six Harmonies in Double Tiger Claws -- Part 3
Six Harmonies in Double Tiger Claws -- Part 4
Six Harmonies in Double Tiger Claws -- Part 5
Six Harmonies in Double Tiger Claws -- Part 6
The Amazement and Effectiveness of Monkey Kicks - Part 1
The Amazement and Effectiveness of Monkey Kicks - Part 2
The Amazement and Effectiveness of Monkey Kicks - Part 3
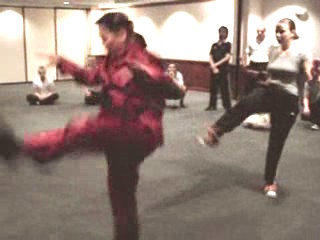 The Amazement and Effectiveness of Monkey Kicks - Part 4
The Amazement and Effectiveness of Monkey Kicks - Part 5
The Amazement and Effectiveness of Monkey Kicks - Part 6
The Amazement and Effectiveness of Monkey Kicks - Part 7
A Bag Full of Monkey Tricks -- Part 1
A Bag Full of Monkey Tricks -- Part 2
A Bag Full of Monkey Tricks -- Part 3
A Bag Full of Monkey Tricks -- Part 4
A Bag Full of Monkey Tricks -- Part 5
A Bag Full of Monkey Tricks -- Part 6
A Bag Full of Monkey Tricks -- Part 7
Gentle and Flowing, yet very Powerful -- Part 1
Gentle and Flowing, yet very Powerful -- Part 2
Gentle and Flowing, yet very Powerful -- Part 3
Gentle and Flowing, yet very Powerful -- Part 4
Gentle and Flowing, yet very Powerful -- Part 5
Can your Responses Still be Correct and Spontaneous
in Real Fights? -- Part 1
Can your Responses Still be Correct and Spontaneous
in Real Fights? -- Part 2
Can your Responses Still be Correct and Spontaneous
in Real Fights? -- Part 3
Can your Responses Still be Correct and Spontaneous
in Real Fights? -- Part 4
Can your Responses Still be Correct and Spontaneous in
Real Fights? -- Part 5
Can your Responses Still be Correct and Spontaneous in
Real Fights? -- Part 6
Employing Sophisticated Kungfu Techniques to Enhance
Combat Efficency -- Overview
Systematic Training is Essential for Combat Efficency -- Overview
Raising Combat Efficiency from Basic to Advanced Levels -- Overview
Kungfu Philosophy and Swaying Willows -- Overview
Hands Pave the Way, Kicks to Clinch Victory -- Overview
Six Harmonies in Double Tiger Claws -- Overview
The Amazement and Effectiveness of Monkey Kicks -- Overview
A Bag Full of Monkey Tricks -- Overview
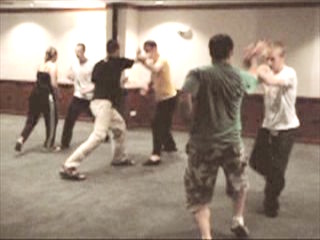 Gentle and Flowing, yet very Powerful -- Overview
Can your Responses Still be Correct and Spontaneous in
Real Fights? -- Overview
Shaolin -- Special 06 Incorporating Kicks into Combat Sequences -- Part 1
Incorporating Kicks into Combat Sequences -- Part 2
Incorporating Kicks into Combat Sequences -- Part 3
Incorporating Kicks into Combat Sequences -- Part 4
Incorporating Kicks into Combat Sequences -- Part 5
Incorporating Kicks into Combat Sequences -- Part 6
Incorporating Kicks into Combat Sequences -- Part 7
Incorporating Kicks into Combat Sequences -- Part 8
Elabrate Patterns to Meet Complex Combat Situations -- Part 1
Elabrate Patterns to Meet Complex Combat Situations -- Part 2
Elabrate Patterns to Meet Complex Combat Situations -- Part 3
Elabrate Patterns to Meet Complex Combat Situations -- Part 4
Elabrate Patterns to Meet Complex Combat Situations -- Part 5
Elabrate Patterns to Meet Complex Combat Situations -- Part 6
Elabrate Patterns to Meet Complex Combat Situations -- Part 7
Benefits of Understanding and Applying Kungfu Philosophy -- Part 1
Benefits of Understanding and Applying Kungfu Philosophy -- Part 2
Benefits of Understanding and Applying Kungfu Philosophy -- Part 3
Benefits of Understanding and Applying Kungfu Philosophy -- Part 4
Benefits of Understanding and Applying Kungfu Philosophy -- Part 5
Benefits of Understanding and Applying Kungfu Philosophy -- Part 6
Benefits of Understanding and Applying Kungfu Philosophy -- Part 7
Benefits of Understanding and Applying Kungfu Philosophy -- Part 8
Benefits of Understanding and Applying Kungfu Philosophy -- Part 9
Our Kungfu is a Training of Energy and Mind -- Part 1
Our Kungfu is a Training of Energy and Mind -- Part 2
Our Kungfu is a Training of Energy and Mind -- Part 3
Our Kungfu is a Training of Energy and Mind -- Part 4
Our Kungfu is a Training of Energy and Mind -- Part 5
Our Kungfu is a Training of Energy and Mind -- Part 6
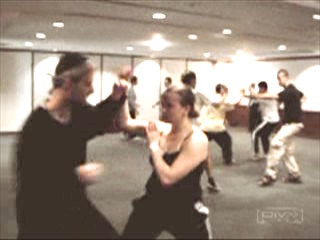 Our Kungfu is a Training of Energy and Mind -- Part 7
Our Kungfu is a Training of Energy and Mind -- Part 8
Ensuring own Safety when Felling Opponents -- Part 1
Ensuring own Safety when Felling Opponents -- Part 2
Ensuring own Safety when Felling Opponents -- Part 3
Ensuring own Safety when Felling Opponents -- Part 4
Ensuring own Safety when Felling Opponents -- Part 5
Ensuring own Safety when Felling Opponents -- Part 6
Ensuring own Safety when Felling Opponents -- Part 7
Beauty and Profundity of Shaolin Felling Techniques -- Part 1
Beauty and Profundity of Shaolin Felling Techniques -- Part 2
Beauty and Profundity of Shaolin Felling Techniques -- Part 3
Beauty and Profundity of Shaolin Felling Techniques -- Part 4
Beauty and Profundity of Shaolin Felling Techniques -- Part 5
Beauty and Profundity of Shaolin Felling Techniques -- Part 6
Beauty and Profundity of Shaolin Felling Techniques -- Part 7
Felling Techniques of the Dragon and the Monkey -- Part 1
Felling Techniques of the Dragon and the Monkey -- Part 2
Felling Techniques of the Dragon and the Monkey -- Part 3
Felling Techniques of the Dragon and the Monkey -- Part 4
Felling Techniques of the Dragon and the Monkey -- Part 5
Felling Techniques of the Dragon and the Monkey -- Part 6
Felling Techniques of the Dragon and the Monkey -- Part 7
Felllg an Opponent without him Realizing what has
Happened -- Part 1
Felllg an Opponent without him Realizing what has
Happened -- Part 2
Felllg an Opponent without him Realizing what has
Happened -- Part 3
Felllg an Opponent without him Realizing what has
Happened -- Part 4
Felllg an Opponent without him Realizing what has
Happened -- Part 5
Felllg an Opponent without him Realizing what has
Happened -- Part 6
Felllg an Opponent without him Realizing what has
Happened -- Part 7
 Felllg an Opponent without him Realizing what has
Happened -- Part 8
Incorporating Kicks into Combat Sequences -- Overview
Elabrate Patterns to Meet Complex Combat Situations
-- Overview
Benefits of Understanding and Applying Kungfu
Philosophy -- Overview
Our Kungfu is a Training of Energy and Mind -- Overview
Ensuring own Safety when Felling Opponents -- Overview
Beauty and Profundity of Shaolin Felling Techniques
-- Overview
Felling Techniques of the Dragon and the Monkey -- Overview
Felllg an Opponent without him Realizing what has
Happened -- Overview
Shaolin -- Special 07 Pattern Analysis of the Tiger-Crane Set -- Part 1
Pattern Analysis of the Tiger-Crane Set -- Part 2
Pattern Analysis of the Tiger-Crane Set -- Part 3
Pattern Analysis of the Tiger-Crane Set -- Part 4
Pattern Analysis of the Tiger-Crane Set -- Part 5
Pattern Analysis of the Tiger-Crane Set -- Part 6
Pattern Analysis of the Tiger-Crane Set -- Part 7
Tiger Patterns for Chin-Na against Kicks and
Countering the Shoots -- Part 1
Tiger Patterns for Chin-Na against Kicks and
Countering the Shoots -- Part 2
Tiger Patterns for Chin-Na against Kicks and
Countering the Shoots -- Part 3
Tiger Patterns for Chin-Na against Kicks and
Countering the Shoots -- Part 4
Tiger Patterns for Chin-Na against Kicks and
Countering the Shoots -- Part 5
Tiger Patterns for Chin-Na against Kicks and
Countering the Shoots -- Part 6
Pattern Analysis of the Dragon-Tiger Set -- Part 1
Pattern Analysis of the Dragon-Tiger Set -- Part 2
Pattern Analysis of the Dragon-Tiger Set -- Part 3
Pattern Analysis of the Dragon-Tiger Set -- Part 4
Pattern Analysis of the Dragon-Tiger Set -- Part 5
Pattern Analysis of the Dragon-Tiger Set -- Part 6
Pattern Analysis of the Dragon-Tiger Set -- Part 7
 Pattern Analysis of the Dragon-Tiger Set -- Part 8
Pattern Analysis of the Dragon-Tiger Set -- Part 9
Revealing the Secret Tactic of Lead Hand -- Part 1
Revealing the Secret Tactic of Lead Hand -- Part 2
Revealing the Secret Tactic of Lead Hand -- Part 3
Revealing the Secret Tactic of Lead Hand -- Part 4
Revealing the Secret Tactic of Lead Hand -- Part 5
Revealing the Secret Tactic of Lead Hand -- Part 6
Revealing the Secret Tactic of Lead Hand -- Part 7
Revealing the Secret Tactic of Lead Hand -- Part 8
From the Level of Techniques to the Levels of Tactics
and Strategies -- Part 1
From the Level of Techniques to the Levels of Tactics
and Strategies -- Part 2
From the Level of Techniques to the Levels of Tactics
and Strategies -- Part 3
From the Level of Techniques to the Levels of Tactics
and Strategies -- Part 4
From the Level of Techniques to the Levels of Tactics
and Strategies -- Part 5
From the Level of Techniques to the Levels of Tactics
and Strategies -- Part 6
From the Level of Techniques to the Levels of Tactics
and Strategies -- Part 7
From the Level of Techniques to the Levels of Tactics
and Strategies -- Part 8
Pattern Analysis of the Dragon-Form Set -- Part 1
Pattern Analysis of the Dragon-Form Set -- Part 2
Pattern Analysis of the Dragon-Form Set -- Part 3
Pattern Analysis of the Dragon-Form Set -- Part 4
Pattern Analysis of the Dragon-Form Set -- Part 5
Pattern Analysis of the Dragon-Form Set -- Part 6
Pattern Analysis of the Dragon-Form Set -- Part 7
Pattern Analysis of the Dragon-Form Set -- Part 8
Pattern Analysis of the Dragon-Form Set -- Part 9
Effective Techniques for Fighting on te Ground -- Part 1
Effective Techniques for Fighting on te Ground -- Part 2
Effective Techniques for Fighting on te Ground -- Part 3
 Effective Techniques for Fighting on te Ground -- Part 4
Effective Techniques for Fighting on te Ground -- Part 5
Effective Techniques for Fighting on te Ground -- Part 6
Effective Techniques for Fighting on te Ground -- Part 7
Effective Techniques for Fighting on te Ground -- Part 8
Effective Techniques for Fighting on te Ground -- Part 9
Pattern Analysis ofthe Tiger-Crane Set -- Overview
Tiger Patterns for Chin-Na against Kicks and Countering
the Shoot -- Overview
Pattern Analysis of the Dragon-Tiger Set -- Overview
Revealing the SEcret Tactic of Leak Hand -- Overview
From the Level of Techniques to the Levels of Tactics
and Strategies -- Overview
Pattern Analysis of the Dragon-Forn Set -- Overview
Effective Techniques for Fighting on te Ground -- Overview
Shaolin -- Special 08 Pattern Analysis of the Monkey Set -- Part 1
Pattern Analysis of the Monkey Set -- Part 2
Pattern Analysis of the Monkey Set -- Part 3
Pattern Analysis of the Monkey Set -- Part 4
Pattern Analysis of the Monkey Set -- Part 5
Pattern Analysis of the Monkey Set -- Part 6
Pattern Analysis of the Monkey Set -- Part 7
Soft Techniques and Internal Force in Monkey Kungfu -- Part 1
Soft Techniques and Internal Force in Monkey Kungfu -- Part 2
Soft Techniques and Internal Force in Monkey Kungfu -- Part 3
Soft Techniques and Internal Force in Monkey Kungfu -- Part 4
Soft Techniques and Internal Force in Monkey Kungfu -- Part 5
Soft Techniques and Internal Force in Monkey Kungfu -- Part 6
Soft Techniques and Internal Force in Monkey Kungfu -- Part 7
Soft Techniques and Internal Force in Monkey Kungfu -- Part 8
Interesting Monkey Patterns that are Deadly for Combat -- Part 1
Interesting Monkey Patterns that are Deadly for Combat -- Part 2
Interesting Monkey Patterns that are Deadly for Combat -- Part 3
Interesting Monkey Patterns that are Deadly for Combat -- Part 4
Interesting Monkey Patterns that are Deadly for Combat -- Part 5
 Interesting Monkey Patterns that are Deadly for
Combat -- Part 6
Interesting Monkey Patterns that are Deadly for
Combat -- Part 7
Interesting Monkey Patterns that are Deadly for
Combat -- Part 8
Pattern Analysis of the Pakua Set -- Part 1
Pattern Analysis of the Pakua Set -- Part 2
Pattern Analysis of the Pakua Set -- Part 3
Pattern Analysis of the Pakua Set -- Part 4
Pattern Analysis of the Pakua Set -- Part 5
Pattern Analysis of the Pakua Set -- Part 6
Pattern Analysis of the Pakua Set -- Part 7
Pattern Analysis of the Pakiua Set -- Part 8
Pattern Analysis of Five-Animal Set -- Part 1
Pattern Analysis of Five-Animal Set -- Part 2
Pattern Analysis of Five-Animal Set -- Part 3
Pattern Analysis of Five-Animal Set -- Part 4
Pattern Analysis of Five-Animal Set -- Part 5
Pattern Analysis of Five-Animal Set -- Part 6
Pattern Analysis of Five-Animal Set -- Part 7
Pattern Analysis of Five-Animal Set -- Part 8
Variety of Techniques in Shaolin Five Animamls -- Part 1
Variety of Techniques in Shaolin Five Animamls -- Part 2
Variety of Techniques in Shaolin Five Animamls -- Part 3
Variety of Techniques in Shaolin Five Animamls -- Part 4
Variety of Techniques in Shaolin Five Animamls -- Part 5
Variety of Techniques in Shaolin Five Animamls -- Part 6
Variety of Techniques in Shaolin Five Animamls -- Part 7
Variety of Techniques in Shaolin Five Animamls -- Part 8
Investigating the Combat Applications of Some Patterns -- Part 1
Investigating the Combat Applications of Some Patterns -- Part 2
Investigating the Combat Applications of Some Patterns -- Part 3
 Investigating the Combat Applications of Some
Patterns -- Part 4
Investigating the Combat Applications of Some
Patterns -- Part 5
Investigating the Combat Applications of Some
Patterns -- Part 6
Investigating the Combat Applications of Some
Patterns -- Part 7
Similar Patterns but Different Applications -- Part 1
Similar Patterns but Different Applications -- Part 2
Similar Patterns but Different Applications -- Part 3
Similar Patterns but Different Applications -- Part 4
Similar Patterns but Different Applications -- Part 5
Similar Patterns but Different Applications -- Part 6
Pattern Analysis of the Monkey Set -- Overview
Soft Techniques and Internal Force in Monkey Kungfu -- Overview
Interesting Monkey Patterns that are Deadly for Combat -- Overview
Pattern Analysis of the Pakua Set -- Overview
Pattern Analysis of Five-Animal Set -- Overview
Variety of Techniques in Shaolin Five Animamls -- Overview
Investigating the Combat Applications of Some Patterns -- Overview
Similar Patterns but Different Applications -- Overview
Shaolin -- Special 09 Effective Counters against Kicks, Grips and Knee Jabs -- Part 1
Effective Counters against Kicks, Grips and Knee Jabs -- Part 2
Effective Counters against Kicks, Grips and Knee Jabs -- Part 3
Effective Counters against Kicks, Grips and Knee Jabs -- Part 4
Effective Counters against Kicks, Grips and Knee Jabs -- Part 5
Effective Counters against Kicks, Grips and Knee Jabs -- Part 6
Effective Counters against Kicks, Grips and Knee Jabs -- Part 7
Effective Counters against Kicks, Grips and Knee Jabs -- Part 8
Effective Counters against Kicks, Grips and Knee Jabs -- Part 9
Effective Counters against Kicks, Grips and Knee Jabs -- Part 10
 Secrets of Cannon Punch in Continupus Attack -- Part 1
Secrets of Cannon Punch in Continupus Attack -- Part 2
Secrets of Cannon Punch in Continupus Attack -- Part 3
Secrets of Cannon Punch in Continupus Attack -- Part 4
Secrets of Cannon Punch in Continupus Attack -- Part 5
Secrets of Cannon Punch in Continupus Attack -- Part 6
Secrets of Cannon Punch in Continupus Attack -- Part 7
Secrets of Cannon Punch in Continupus Attack -- Part 8
Cannon Punch Towards Sky and Crouching Tiger on Ground -- Part 1
Cannon Punch Towards Sky and Crouching Tiger on Ground -- Part 2
Cannon Punch Towards Sky and Crouching Tiger on Ground -- Part 3
Cannon Punch Towards Sky and Crouching Tiger on Ground -- Part 4
Cannon Punch Towards Sky and Crouching Tiger on Ground -- Part 5
Cannon Punch Towards Sky and Crouching Tiger on Ground -- Part 6
Cannon Punch Towards Sky and Crouching Tiger on Ground -- Part 7
Cannon Punch Towards Sky and Crouching Tiger on Ground -- Part 8
Cannon Punch Towards Sky and Crouching Tiger on Ground -- Part 9
Flowing Monkey Techniques against Powerful Tiger Claws -- Part 1
Flowing Monkey Techniques against Powerful Tiger Claws -- Part 2
Flowing Monkey Techniques against Powerful Tiger Claws -- Part 3
Flowing Monkey Techniques against Powerful Tiger Claws -- Part 4
Flowing Monkey Techniques against Powerful Tiger Claws -- Part 5
Flowing Monkey Techniques against Powerful Tiger Claws -- Part 6
Flowing Monkey Techniques against Powerful Tiger Claws -- Part 7
Sophisticated Grips and Sophisticated Counters -- Part 1
Sophisticated Grips and Sophisticated Counters -- Part 2
Sophisticated Grips and Sophisticated Counters -- Part 3
Sophisticated Grips and Sophisticated Counters -- Part 4
Sophisticated Grips and Sophisticated Counters -- Part 5
Sophisticated Grips and Sophisticated Counters -- Part 6
 Breaking an Opponent's Elbow and Wrist -- Part 1
Breaking an Opponent's Elbow and Wrist -- Part 2
Breaking an Opponent's Elbow and Wrist -- Part 3
Breaking an Opponent's Elbow and Wrist -- Part 4
Breaking an Opponent's Elbow and Wrist -- Part 5
Breaking an Opponent's Elbow and Wrist -- Part 6
Breaking an Opponent's Elbow and Wrist -- Part 7
Neutralizing Wrist Lock and the Three Harmonies -- Part 1
Neutralizing Wrist Lock and the Three Harmonies -- Part 2
Neutralizing Wrist Lock and the Three Harmonies -- Part 3
Neutralizing Wrist Lock and the Three Harmonies -- Part 4
Neutralizing Wrist Lock and the Three Harmonies -- Part 5
Neutralizing Wrist Lock and the Three Harmonies -- Part 6
Some Advanced Chin-Na Techniques and Counters -- Part 1
Some Advanced Chin-Na Techniques and Counters -- Part 2
Some Advanced Chin-Na Techniques and Counters -- Part 3
Some Advanced Chin-Na Techniques and Counters -- Part 4
Some Advanced Chin-Na Techniques and Counters -- Part 5
Some Advanced Chin-Na Techniques and Counters -- Part 6
Some Advanced Chin-Na Techniques and Counters -- Part 7
Some Advanced Chin-Na Techniques and Counters -- Part 8
Some Advanced Chin-Na Techniques and Counters -- Part 9
Two Stories about Kicks Part 1
Two Stories about Kicks Part 2
Two Stories about Kicks Part 3
Two Stories about Kicks Part 4
Two Stories about Kicks Part 5
Two Stories about Kicks Part 6
Two Stories about Kicks Part 7
How to Repond to Attacks Spontaneously and Correctly -- Part 1
 How to Repond to Attacks Spontaneously and
Correctly -- Part 2
How to Repond to Attacks Spontaneously and
Correctly -- Part 3
How to Repond to Attacks Spontaneously and
Correctly -- Part 4
How to Repond to Attacks Spontaneously and
Correctly -- Part 5
How to Repond to Attacks Spontaneously and
Correctly -- Part 6
How to Repond to Attacks Spontaneously and
Correctly -- Part 7
How to Repond to Attacks Spontaneously and
Correctly -- Part 8
How to Repond to Attacks Spontaneously and Correctly -- Part 9
How to Repond to Attacks Spontaneously and Correctly -- Part 10
Can Beaiutiful Patterns and Flowing Movementsbe Effective in
Combat? -- Part 1
Can Beaiutiful Patterns and Flowing Movementsbe Effective in
Combat? -- Part 2
Can Beaiutiful Patterns and Flowing Movementsbe Effective in
Combat? -- Part 3
Can Beaiutiful Patterns and Flowing Movementsbe Effective in
Combat? -- Part 4
Can Beaiutiful Patterns and Flowing Movementsbe Effective in
Combat? -- Part 5
Can Beaiutiful Patterns and Flowing Movementsbe Effective in
Combat? -- Part 6
Can Beaiutiful Patterns and Flowing Movementsbe Effective in
Combat? -- Part 7
Can Beaiutiful Patterns and Flowing Movementsbe Effective in
Combat? -- Part 8
effective Counters against Kicks, Grips and Knee Jabs -- Overview
Secrets of Cannon Punch in Continupus Attack -- Overview
Cannon Punch Towards Sky and Crouching Tiger on Ground
-- Overview
Flowing Monkey Techniques against Powerful Tiger Claws
-- Overview
Sophisticated Grips and Sophisticated Counters -- Overview
Breaking an Opponent's Elbow and Wrist -- Overview
Neutralizing Wrist Lock and the Three Harmonies -- Overview
Some Advanced Chin-Na Techniques and Counters -- Overview
Two Stories about Kicks -- Overview
How to Repond to Attacks Spontaneously and Correctly -- Overview
Can Beaiutiful Patterns and Flowing Movementsbe Effective in
Combat? -- Overview
 Shaolin -- Special 10
Linking Combat Sequences into a Set -- Part 1
Shaolin -- Special 10
Linking Combat Sequences into a Set -- Part 1Linking Combat Sequences into a Set -- Part 2
Linking Combat Sequences into a Set -- Part 3
Linking Combat Sequences into a Set -- Part 4
Linking Combat Sequences into a Set -- Part 5
Linking Combat Sequences into a Set -- Part 6
From Pre-Arrranged Sparring to Combat Efficiency -- Part 1
From Pre-Arrranged Sparring to Combat Efficiency -- Part 2
From Pre-Arrranged Sparring to Combat Efficiency -- Part 3
From Pre-Arrranged Sparring to Combat Efficiency -- Part 4
From Pre-Arrranged Sparring to Combat Efficiency -- Part 5
Cryalization of Combat Techniques from Past Masters -- Part 1
Cryalization of Combat Techniques from Past Masters -- Part 2
Cryalization of Combat Techniques from Past Masters -- Part 3
Cryalization of Combat Techniques from Past Masters -- Part 4
Cryalization of Combat Techniques from Past Masters -- Part 5
Cryalization of Combat Techniques from Past Masters -- Part 6
Cryalization of Combat Techniques from Past Masters -- Part 7
Cryalization of Combat Techniques from Past Masters -- Part 8
Hei Sai or the Soirit of Energy -- Part 1
Hei Sai or the Spirit of Energy -- Part 2
Hei Sai or the Spirit of Energy -- Part 3
Hei Sai or the Spirit of Energy -- Part 4
Hei Sai or the Spirit of Energy -- Part 5
Hei Sai or the Spirit of Energy -- Part 6
Hei Sai or the Spirit of Energy -- Part 7
Manifesting the Energy and Spirit of your Form -- Part 1
Manifesting the Energy and Spirit of your Form -- Part 2
Manifesting the Energy and Spirit of your Form -- Part 3
Manifesting the Energy and Spirit of your Form -- Part 4
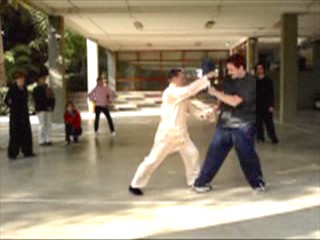 Manifesting the Energy and Spirit of your Form -- Part 5
Manifesting the Energy and Spirit of your Form -- Part 6
Manifesting the Energy and Spirit of your Form -- Part 7
Manifesting the Inner Essence of your Form -- Part 1
Manifesting the Inner Essence of your Form -- Part 2
Manifesting the Inner Essence of your Form -- Part 3
Manifesting the Inner Essence of your Form -- Part 4
Manifesting the Inner Essence of your Form -- Part 5
Manifesting the Inner Essence of your Form -- Part 6
Manifesting the Inner Essence of your Form -- Part 7
Kungfu Practice is Not just Physical Training but also Spiritual
Cultivation -- Part 1
Kungfu Practice is Not just Physical Training but also Spiritual
Cultivation -- Part 2
Kungfu Practice is Not just Physical Training but also Spiritual
Cultivation -- Part 3
Kungfu Practice is Not just Physical Training but also Spiritual
Cultivation -- Part 4
Kungfu Practice is Not just Physical Training but also Spiritual
Cultivation -- Part 5
Kungfu Practice is Not just Physical Training but also Spiritual
Cultivation -- Part 6
Kungfu Practice is Not just Physical Training but also Spiritual
Cultivation -- Part 7
Kungfu Practice is Not just Physical Training but also Spiritual
Cultivation -- Part 8
Fluidity of Florm, Energy and Spirit -- Part 1
Fluidity of Florm, Energy and Spirit -- Part 2
Fluidity of Florm, Energy and Spirit -- Part 3
Fluidity of Florm, Energy and Spirit -- Part 4
Fluidity of Florm, Energy and Spirit -- Part 5
Fluidity of Florm, Energy and Spirit -- Part 6
Fluidity of Florm, Energy and Spirit -- Part 7
Fluidity of Florm, Energy and Spirit -- Part 8
Fluidity of Florm, Energy and Spirit -- Part 9
Fluidity of Florm, Energy and Spirit -- Part 10
Linking Combat Sequences into a Set -- Overview
From Pre-Arrranged Sparring to Combat Efficiency -- Overview
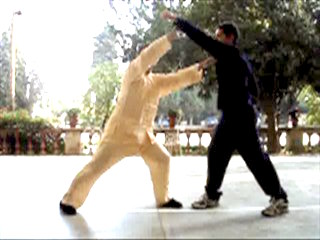 Cryalization of Combat Techniques from Past
Masters -- Overview
Hei Sai or the Spirit of Energy -- Overview
Manifesting the Energy and Spirit of your Form -- Overview
Manifesting the Inner Essence of your Form -- Overview
Kungfu Practice is Not just Physical Training but also
Spiritual Cultivation -- Overview
Fluidity of Florm, Energy and Spirit -- Overview
Shaolin -- Special 11 Shaolin Kungfu is Chi Kung and Meditation -- Part 1
Shaolin Kungfu is Chi Kung and Meditation -- Part 2
Shaolin Kungfu is Chi Kung and Meditation -- Part 3
Shaolin Kungfu is Chi Kung and Meditation -- Part 4
Shaolin Kungfu is Chi Kung and Meditation -- Part 5
Shaolin Kungfu is Chi Kung and Meditation -- Part 6
Shaolin Kungfu is Chi Kung and Meditation -- Part 7
Shaolin Kungfu is Chi Kung and Meditation -- Part 8
Shaolin Kungfu is Chi Kung and Meditation -- Part 9
It is Easy to Fight Against Boxers -- Part 1
It is Easy to Fight Against Boxers -- Part 2
It is Easy to Fight Against Boxers -- Part 3
It is Easy to Fight Against Boxers -- Part 4
It is Easy to Fight Against Boxers -- Part 5
It is Easy to Fight Against Boxers -- Part 6
Avoiding a Boxer's Strong Points and
Attacking his Weaknesses -- Part 1
Avoiding a Boxer's Strong Points and
Attacking his Weaknesses -- Part 2
Avoiding a Boxer's Strong Points and
Attacking his Weaknesses -- Part 3
Avoiding a Boxer's Strong Points and
Attacking his Weaknesses -- Part 4
Avoiding a Boxer's Strong Points and
Attacking his Weaknesses -- Part 5
Avoiding a Boxer's Strong Points andAttacking his Weaknesses -- Part 6
Avoiding a Boxer's Strong Points and
Attacking his Weaknesses -- Part 7
Avoiding a Boxer's Strong Points and
Attacking his Weaknesses -- Part 8
Revealing thr Secrets of Shaolin Master -- Past 1
Revealing thr Secrets of Shaolin Master -- Past 2
Revealing thr Secrets of Shaolin Master -- Past 3
Revealing thr Secrets of Shaolin Master -- Past 4
Revealing thr Secrets of Shaolin Master -- Past 5
Revealing thr Secrets of Shaolin Master -- Past 6
Profundity of Shaolin Cmbat Application -- Part 1
Profundity of Shaolin Cmbat Application -- Part 2
Profundity of Shaolin Cmbat Application -- Part 3
Profundity of Shaolin Cmbat Application -- Part 4
Profundity of Shaolin Cmbat Application -- Part 5
Profundity of Shaolin Cmbat Application -- Part 6
Profundity of Shaolin Cmbat Application -- Part 7
Shaolin Kungfu is Chi Kung and Meditation -- Overview
Revealing thr Secrets of Shaolin Master -- Overview
Profundity of Shaolin Cmbat Application -- Overview
It is Easy to Fight Against Boxers -- Overview
Avoiding a Boxer's Strong Points and Attacking
his Weaknesses -- Overview
Shaolin -- Special 12 Some Effective Tactics against Boxers -- Part 1
Some Effective Tactics against Boxers -- Part 2
Some Effective Tactics against Boxers -- Part 3
Some Effective Tactics against Boxers -- Part 4
Some Effective Tactics against Boxers -- Part 5
Some Effective Tactics against Boxers -- Part 6
Some Effective Tactics against Boxers -- Part 7
Some Effective Tactics against Boxers -- Part 8
Strategy of Not Allowing an Opponent to Escape -- Part 1
Strategy of Not Allowing an Opponent to Escape -- Part 2
 Strategy of Not Allowing an Opponent to Escape -- Part 3
Strategy of Not Allowing an Opponent to Escape -- Part 4
Strategy of Not Allowing an Opponent to Escape -- Part 5
Strategy of Not Allowing an Opponent to Escape -- Part 6
Strategy of Not Allowing an Opponent to Escape -- Part 7
Strategy of Not Allowing an Opponent to Escape -- Part 8
Strategy of Not Allowing an Opponent to Escape -- Part 9
Strategy of Not Allowing an Opponent to Escape -- Part 10
Strategy of Letting Trick Manifesting Trick -- Part 1
Strategy of Letting Trick Manifesting Trick -- Part 2
Strategy of Letting Trick Manifesting Trick -- Part 3
Strategy of Letting Trick Manifesting Trick -- Part 4
Strategy of Letting Trick Manifesting Trick -- Part 5
Strategy of Letting Trick Manifesting Trick -- Part 6
Strategy of Letting Trick Manifesting Trick -- Part 7
Strategies of Interception and of Striking Form -- Part 1
Strategies of Interception and of Striking Form -- Part 2
Strategies of Interception and of Striking Form -- Part 3
Strategies of Interception and of Striking Form -- Part 4
Strategies of Interception and of Striking Form -- Part 5
Strategies of Interception and of Striking Form -- Part 6
Strategies of Interception and of Striking Form -- Part 7
Standardized Routines of Kick-Boxing Attacks -- Part 1
Standardized Routines of Kick-Boxing Attacks -- Part 2
Standardized Routines of Kick-Boxing Attacks -- Part 3
Standardized Routines of Kick-Boxing Attacks -- Part 4
Standardized Routines of Kick-Boxing Attacks -- Part 5
Some Effective Counters against Kick-Boxing Attacks -- Part 1
Some Effective Counters against Kick-Boxing Attacks -- Part 2
Some Effective Counters against Kick-Boxing Attacks -- Part 3
 Some Effective Counters against Kick-Boxing Attacks -- Part 4
Some Effective Counters against Kick-Boxing Attacks -- Part 5
Some Effective Counters against Kick-Boxing Attacks -- Part 6
Some Effective Counters against Kick-Boxing Attacks -- Part 7
Felling a Kick-Boxer when he Kicks -- Part 1
Felling a Kick-Boxer when he Kicks -- Part 2
Felling a Kick-Boxer when he Kicks -- Part 3
Felling a Kick-Boxer when he Kicks -- Part 4
Felling a Kick-Boxer when he Kicks -- Part 5
Felling a Kick-Boxer when he Kicks -- Part 6
Felling a Kick-Boxer when he Kicks -- Part 7
Felling a Kick-Boxer when he Kicks -- Part 8
Felling a Kick-Boxer when he Kicks -- Part 9
Some Effective Tactics against Boxers -- Overview
Strategy of Not Allowing an Opponent to Escape -- Overview
Strategy of Letting Trick Manifesting Trick -- Overview
Strategies of Interception and of Striking Form -- Overview
Standardized Routines of Kick-Boxing Attacks -- Overview
Some Effective Counters against Kick-Boxing Attacks -- Overview
Felling a Kick-Boxer when he Kicks -- Overview
Shaolin -- Special 13 Secrets of Two Tigers Subdue Dragon -- Part 1
Secrets of Two Tigers Subdue Dragon -- Part 2
Secrets of Two Tigers Subdue Dragon -- Part 3
Secrets of Two Tigers Subdue Dragon -- Part 4
Secrets of Two Tigers Subdue Dragon -- Part 5
Secrets of Two Tigers Subdue Dragon -- Part 6
Secrets of Two Tigers Subdue Dragon -- Part 7
Secrets of Two Tigers Subdue Dragon -- Part 8
Shaolin Counters against Kick-Boxing and Karate -- Part 1
Shaolin Counters against Kick-Boxing and Karate -- Part 2
 Shaolin Counters against Kick-Boxing and Karate -- Part 3
Shaolin Counters against Kick-Boxing and Karate -- Part 4
Shaolin Counters against Kick-Boxing and Karate -- Part 5
Shaolin Counters against Kick-Boxing and Karate -- Part 6
Shaolin Counters against Kick-Boxing and Karate -- Part 6
Shaolin Counters against Kick-Boxing and Karate -- Part 7
Some Important Combat Philosophy and Principles -- Part 1
Some Important Combat Philosophy and Principles -- Part 2
Some Important Combat Philosophy and Principles -- Part 3
Some Important Combat Philosophy and Principles -- Part 4
Some Important Combat Philosophy and Principles -- Part 5
Some Important Combat Philosophy and Principles -- Part 6
Some Important Combat Philosophy and Principles -- Part 7
Some Important Combat Philosophy and Principles -- Part 8
It is Relatively Easy to Handle Karate Attacks -- Part 1
It is Relatively Easy to Handle Karate Attacks -- Part 2
It is Relatively Easy to Handle Karate Attacks -- Part 3
It is Relatively Easy to Handle Karate Attacks -- Part 4
It is Relatively Easy to Handle Karate Attacks -- Part 5
It is Relatively Easy to Handle Karate Attacks -- Part 6
It is Relatively Easy to Handle Karate Attacks -- Part 7
It is Relatively Easy to Handle Karate Attacks -- Part 8
It is Relatively Easy to Handle Karate Attacks -- Part 9
Good Spacing when Handing Kicks -- Part 1
Good Spacing when Handing Kicks -- Part 2
Good Spacing when Handing Kicks -- Part 3
Good Spacing when Handing Kicks -- Part 4
Good Spacing when Handing Kicks -- Part 5
Good Spacing when Handing Kicks -- Part 6
Good Spacing when Handing Kicks -- Part 7
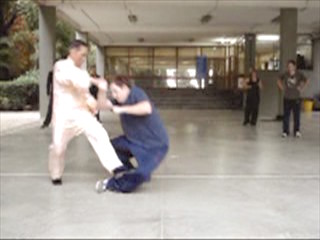 Variety of Taekwondo Kicks -- Part 1
Variety of Taekwondo Kicks -- Part 2
Variety of Taekwondo Kicks -- Part 3
Variety of Taekwondo Kicks -- Part 4
Variety of Taekwondo Kicks -- Part 5
Variety of Taekwondo Kicks -- Part 6
Variety of Taekwondo Kicks -- Part 7
Variety of Taekwondo Kicks -- Part 8
Secrets of Two Tigers Subdue Dragon -- Overview
Shaolin Counters against Kick-Boxing and Karate -- Overview
Some Important Combat Philosophy and Principles -- Overview
It is Relatively Easy to Handle Karate Attacks -- Overview
Good Spacing when Handing Kicks -- Overview
A Variety of Taekwondo Kicks -- Overview
Shaolin -- Special 14 Having Fun in Throws and their Counters -- Part 1
Having Fun in Throws and their Counters -- Part 2
Having Fun in Throws and their Counters -- Part 3
Having Fun in Throws and their Counters -- Part 4
Having Fun in Throws and their Counters -- Part 5
Having Fun in Throws and their Counters -- Part 6
Having Fun in Throws and their Counters -- Part 7
Sharing the Secret of Move Stance Change Step -- Part 1
Sharing the Secret of Move Stance Change Step -- Part 2
Sharing the Secret of Move Stance Change Step -- Part 3
Sharing the Secret of Move Stance Change Step -- Part 4
Sharing the Secret of Move Stance Change Step -- Part 5
Sharing the Secret of Move Stance Change Step -- Part 6
Some Unorthodox Feling Techniques Not Commonly Seen -- Part 1
Some Unorthodox Feling Techniques Not Commonly Seen -- Part 2
Some Unorthodox Feling Techniques Not Commonly Seen -- Part 3
Some Unorthodox Feling Techniques Not Commonly Seen -- Part 4
Some Unorthodox Feling Techniques Not Commonly Seen -- Part 5
Some Unorthodox Feling Techniques Not Commonly Seen -- Part 6
Some Unorthodox Feling Techniques Not Commonly Seen -- Part 7
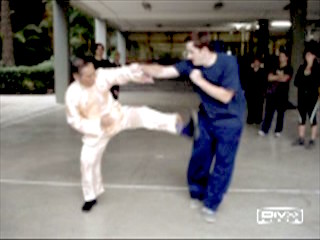 Some Unorthodox Feling Techniques Not Commonl
y Seen -- Part 8
Felling Opponents with your Stances -- Part 1
Felling Opponents with your Stances -- Part 2
Felling Opponents with your Stances -- Part 3
Felling Opponents with your Stances -- Part 4
Felling Opponents with your Stances -- Part 5
Felling Opponents with your Stances -- Part 6
Felling Opponents with your Stances -- Part 7
Felling Opponents with your Stances -- Part 8
Felling Opponents with your Stances -- Part 9
Effective Shaolin Counters against Taekwondo Kicks -- Part 1
Effective Shaolin Counters against Taekwondo Kicks -- Part 2
Effective Shaolin Counters against Taekwondo Kicks -- Part 3
Effective Shaolin Counters against Taekwondo Kicks -- Part 4
Effective Shaolin Counters against Taekwondo Kicks -- Part 5
Effective Shaolin Counters against Taekwondo Kicks -- Part 6
Effective Shaolin Counters against Taekwondo Kicks -- Part 7
Trapping Legs and Subduing Opponents -- Part 1
Trapping Legs and Subduing Opponents -- Part 2
Trapping Legs and Subduing Opponents -- Part 3
Trapping Legs and Subduing Opponents -- Part 4
Trapping Legs and Subduing Opponents -- Part 5
Trapping Legs and Subduing Opponents -- Part 6
Making Expedient Changes to Surprised Attacks -- Part 1
Making Expedient Changes to Surprised Attacks -- Part 3
Making Expedient Changes to Surprised Attacks -- Part 3
Making Expedient Changes to Surprised Attacks -- Part 4
Making Expedient Changes to Surprised Attacks -- Part 5
Making Expedient Changes to Surprised Attacks -- Part 6
The Legacy of Sigung Ho Fatt Nam: Planting Willow in Front
of Camp -- Part 1
 The Legacy of Sigung Ho Fatt Nam: Planting Willow in Front
of Camp -- Part 2
The Legacy of Sigung Ho Fatt Nam: Planting Willow in Front
of Camp -- Part 3
The Legacy of Sigung Ho Fatt Nam: Planting Willow in Front
of Camp -- Part 4
The Legacy of Sigung Ho Fatt Nam: Planting Willow in Front
of Camp -- Part 5
The Legacy of Sigung Ho Fatt Nam: Planting Willow in Front
of Camp -- Part 6
Effective Shaolin Counters against Taekwondo Kicks -- Overview
Trapping Legs and Subduing Opponents -- Overview
Making Expedient Changes to Surprised Attacks -- Overview
The Legacy of Sigung Ho Fatt Nam: Planting Willow in Front
of Camp -- Overview
Having Fun in Throws and their Counters -- Overview
Sharing the Secret of Move Stance Change Step -- Overview
Some Unorthodox Feling Techniques Not Commonly Seen -- Overview
Felling Opponents with your Stances -- Overview
Shaolin -- Special 15 Beware of Monkeys; they are Expert at Plucking Peaches -- Part 1
Beware of Monkeys; they are Expert at Plucking Peaches -- Part 2
Beware of Monkeys; they are Expert at Plucking Peaches -- Part 3
Beware of Monkeys; they are Expert at Plucking Peaches -- Part 4
Beware of Monkeys; they are Expert at Plucking Peaches -- Part 5
Beware of Monkeys; they are Expert at Plucking Peaches -- Part 6
Beware of Monkeys; they are Expert at Plucking Peaches -- Part 7
Sophisticated Footwork and Leg Techniques of
Monkeys and Gorillas -- Part 1
Sophisticated Footwork and Leg Techniques of
Monkeys and Gorillas -- Part 2
Sophisticated Footwork and Leg Techniques of
Monkeys and Gorillas -- Part 3
Sophisticated Footwork and Leg Techniques of
Monkeys and Gorillas -- Part 4
Sophisticated Footwork and Leg Techniques of
Monkeys and Gorillas -- Part 5
Sophisticated Footwork and Leg Techniques of
Monkeys and Gorillas -- Part 6
Sophisticated Footwork and Leg Techniques of
Monkeys and Gorillas -- Part 7
Sophisticated Footwork and Leg Techniques of
Monkeys and Gorillas -- Part 8
Sophisticated Footwork and Leg Techniques of
Monkeys and Gorillas -- Part 9
Wrestling Throws are Found in Shaolin Kungfu Too -- Part 1
Wrestling Throws are Found in Shaolin Kungfu Too -- Part 2
Wrestling Throws are Found in Shaolin Kungfu Too -- Part 3
Wrestling Throws are Found in Shaolin Kungfu Too -- Part 4
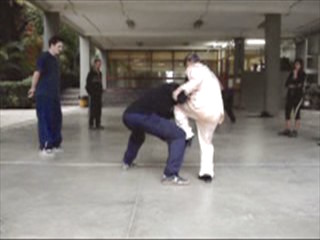 Wrestling Throws are Found in Shaolin Kungfu Too -- Part 5
Wrestling Throws are Found in Shaolin Kungfu Too -- Part 6
Wrestling Throws are Found in Shaolin Kungfu Too -- Part 7
Wrestling Throws are Found in Shaolin Kungfu Too -- Part 8
Wrestling Throws are Found in Shaolin Kungfu Too -- Part 9
Wrestling Throws are Found in Shaolin Kungfu Too -- Part 10
Real Fighting is Different from Martial Sports -- Part 1
Real Fighting is Different from Martial Sports -- Part 2
Real Fighting is Different from Martial Sports -- Part 3
Real Fighting is Different from Martial Sports -- Part 4
Real Fighting is Different from Martial Sports -- Part 5
Real Fighting is Different from Martial Sports -- Part 6
Real Fighting is Different from Martial Sports -- Part 7
Who Says there is No Ground-Fighting in
Shaolin Kungfu -- Part 1
Who Says there is No Ground-Fighting in
Shaolin Kungfu -- Part 2
Who Says there is No Ground-Fighting in
Shaolin Kungfu -- Part 3
Who Says there is No Ground-Fighting in
Shaolin Kungfu -- Part 4
Who Says there is No Ground-Fighting in
Shaolin Kungfu -- Part 5
who Says there is No Ground-Fighting in
Shaolin Kungfu -- Part 6
Who Says there is No Ground-Fighting in
Shaolin Kungfu -- Part 7
An Incredible Secret lof One-Finger Zen -- Part 1
An Incredible Secret lof One-Finger Zen -- Part 2
An Incredible Secret lof One-Finger Zen -- Part 3
An Incredible Secret lof One-Finger Zen -- Part 4
An Incredible Secret lof One-Finger Zen -- Part 5
An Incredible Secret lof One-Finger Zen -- Part 6
An Incredible Secret lof One-Finger Zen -- Part 7
Beware of Monkeys; they are Expert at Plucking
Peaches -- Overview
Sophisticated Footwork and Leg Techniques of
Monkeys and Gorillas -- Overview
Wrestling Throws are Found in Shaolin Kungfu
Too -- Overview
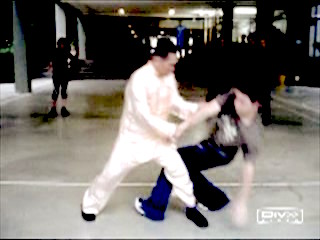 Real Fighting is Different from Martial Sports
-- Overview
Who Says there is No Ground-Fighting in Shaolin
Kungfu -- Overview
An Incredible Secret lof One-Finger Zen -- Overview
Shaolin -- Special 16 Understanding Muay Thai Fighting Strategies
and Techniques -- Part 1
Understanding Muay Thai Fighting Strategies
and Techniques -- Part 2
Understanding Muay Thai Fighting Strategies
and Techniques -- Part 3
Understanding Muay Thai Fighting Strategies
and Techniques -- Part 4
Understanding Muay Thai Fighting Strategies
and Techniques -- Part 5
Understanding Muay Thai Fighting Strategies
and Techniques -- Part 6
Understanding Muay Thai Fighting Strategies
and Techniques -- Part 7
Understanding Muay Thai Fighting Strategies
and Techniques -- Part 8
Understanding Muay Thai Fighting Strategies
and Techniques -- Part 9
Understanding Muay Thai Fighting Strategies
and Techniques -- Part 10
Understanding Muay Thai Fighting Strategies
and Techniques -- Part 11
Various Strategies to Counter Muay Thai Fighters -- Part 1
Various Strategies to Counter Muay Thai Fighters -- Part 2
Various Strategies to Counter Muay Thai Fighters -- Part 3
Various Strategies to Counter Muay Thai Fighters -- Part 4
Various Strategies to Counter Muay Thai Fighters -- Part 5
Various Strategies to Counter Muay Thai Fighters -- Part 6
Various Strategies to Counter Muay Thai Fighters -- Part 7
Various Strategies to Counter Muay Thai Fighters -- Part 8
Responding to Muay Thai Attacks Spontaneously
and Correctly -- Part 1
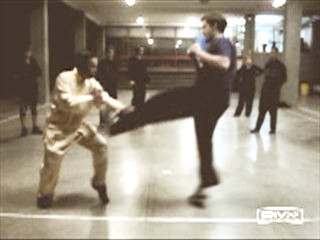 Responding to Muay Thai Attacks Spontaneously
and Correctly -- Part 2
Responding to Muay Thai Attacks Spontaneously
and Correctly -- Part 3
Responding to Muay Thai Attacks Spontaneously
and Correctly -- Part 4
Responding to Muay Thai Attacks Spontaneously
and Correctly -- Part 5
Responding to Muay Thai Attacks Spontaneously
and Correctly -- Part 6
Responding to Muay Thai Attacks Spontaneously
and Correctly -- Part 7
Responding to Muay Thai Attacks Spontaneously
and Correctly -- Part 8
Avoiding Opponent's Strength andf Attacking is Weakness -- Part 1
Avoiding Opponent's Strength andf Attacking is Weakness -- Part 2
Avoiding Opponent's Strength andf Attacking is Weakness -- Part 3
Avoiding Opponent's Strength andf Attacking is Weakness -- Part 4
Avoiding Opponent's Strength andf Attacking is Weakness -- Part 5
Avoiding Opponent's Strength andf Attacking is Weakness -- Part 6
Avoiding Opponent's Strength andf Attacking is Weakness -- Part 7
Avoiding Opponent's Strength andf Attacking is Weakness -- Part 8
Effective Ways to Counter Sweeping Kicks -- Part 1
Effective Ways to Counter Sweeping Kicks -- Part 2
Effective Ways to Counter Sweeping Kicks -- Part 3
Effective Ways to Counter Sweeping Kicks -- Part 4
Effective Ways to Counter Sweeping Kicks -- Part 5
Effective Ways to Counter Sweeping Kicks -- Part 6
Effective Ways to Counter Sweeping Kicks -- Part 7
Effective Counterrs against Knee and Elbow Strikes -- Part 1
Effective Counterrs against Knee and Elbow Strikes -- Part 2
Effective Counterrs against Knee and Elbow Strikes -- Part 3
Effective Counterrs against Knee and Elbow Strikes -- Part 4
Effective Counterrs against Knee and Elbow Strikes -- Part 5
Effective Counterrs against Knee and Elbow Strikes -- Part 6
Effective Counterrs against Knee and Elbow Strikes -- Part 7
Effective Counterrs against Knee and Elbow Strikes -- Part 8
 Effective Counterrs against Knee and Elbow Strikes -- Part 9
Crouching Tiger against Grab Neck Elbow Strike -- Part 1
Crouching Tiger against Grab Neck Elbow Strike -- Part 2
Crouching Tiger against Grab Neck Elbow Strike -- Part 3
Crouching Tiger against Grab Neck Elbow Strike -- Part 4
Crouching Tiger against Grab Neck Elbow Strike -- Part 5
Crouching Tiger against Grab Neck Elbow Strike -- Part 6
Shaolin Kungfu for Combat Efficiency, Good Health and
Spiritual Development -- Part 1
Shaolin Kungfu for Combat Efficiency, Good Health and
Spiritual Development -- Part 2
Shaolin Kungfu for Combat Efficiency, Good Health and
Spiritual Development -- Part 3
Shaolin Kungfu for Combat Efficiency, Good Health and
Spiritual Development -- Part 4
Shaolin Kungfu for Combat Efficiency, Good Health and
Spiritual Development -- Part 5
Shaolin Kungfu for Combat Efficiency, Good Health and
Spiritual Development -- Part 6
Shaolin Kungfu for Combat Efficiency, Good Health and
Spiritual Development -- Part 7
Shaolin Kungfu for Combat Efficiency, Good Health and
Spiritual Development -- Part 8
Shaolin Kungfu for Combat Efficiency, Good Health and
Spiritual Development -- Part 9
Shaolin Kungfu for Combat Efficiency, Good Health and
Spiritual Development -- Part 10
Understanding Muay Thai Fighting Strategies
and Techniques -- Overview
Various Strategies to Counter Muay Thai Fighters -- Overview
Responding to Muay Thai Attacks Spontaneously and
Correctly -- Overview
Avoiding Opponent's Strength andf Attacking is Weakness
-- Overview
Effective Ways to Counter Sweeping Kicks -- Overview
Effective Counterrs against Knee and Elbow Strikes -- Overview
Crouching Tiger against Grab Neck Elbow Strike -- Overview
Shaolin Kungfu for Combat Efficiency, Good Health and
Spiritual Development -- Overview
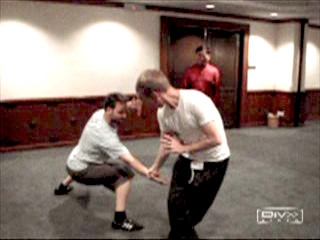 Shaolin -- Special Videos
How to Think and Act as a Master -- Overview of Videos
Shaolin -- Special Videos
How to Think and Act as a Master -- Overview of VideosReturning to Basics
Form, Force, Flow and Element of Threat
Reviewing Basic Comnbat Sequences of Shaolin Kungfu
Devising Stratgies using Shaolin Combat Sequences
Applying Shaolin Strategies for Effective Combat
Free Sparring with Prescribed Conditions
Combat Sequences to Train Spontaneous Attacks
and Responses
Using Strategies and Tactics in Attack and Defence
It is Heartening to See so Many People using Shaolin Kungfu
in Free Sparring
Felling and Gripping Techniques in Shaolin Kungfu
How Sequence Training and Chi Flow Enhance
Combat Efficiency
Tiger-Crane Set -- Manifesting the Hard and the Soft
in Shaolin Kungfu
Dragon-Tiger Set -- Crystallization of Two Wahnam Traditions
Dragon-Form Set -- Demonstrating that Softness can
be very Powerful
Shaolin Monkey Set -- Symbolozing Spiritual Path from
Cheekiness to Enlightenment
Shaolin Five-Animal Set -- Gist of Shaolin Form and Essence
Shaolin Pakua Set -- Excellent Set Fit for Kings and Generals
Combat Application of Pakua -- Sharing Secrets of Combat Efficiency
Beginning to Learn some Monkey Tricks
Refining Techniques in Combat
Some Examples of High Level Combat
Collective Effort for Greater Benefits
Can Sophisticated Kungfu Techniques be used in Combat?
Skills are Usually More Important than Techniques
One-Finger Shooting Zen -- Treasure of Shaolin Wahnam
Raising Levels of Techniques and Tactics in Combat
Bringing Combat Skills to More Sophisticatd Levels
Moankey Techniques are Flowing and Agile but can be
very Devastating
Flowing with Opponent's Momentum in Shaolin Combat
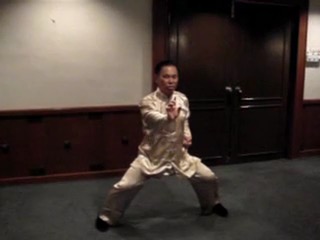 Beware of Monkey Tricks
Marvelous Techniques Beget Marvelous Techniques
How to Raise your Combat to Higher Levels
How you can Defeat your Opponent
Employing Sophisticated Shaolin Kungfu Techniques to
Enhance Combat Efficiency
Systematical Training is Essential for Combat Efficiency
Raising Combat Efficiency from Basic to Advanced Levels
Kungfu Philosophy and Swaying Willows
Hands Pave the Way, Kicks to Clinch Victory
Six Harmonies of Double Tiger Claws
Amazement and Effectiveness of Monkey Kicks
Bag Full of Monkey Tricks
Gentle and Flowing, yet very Powerful
Can your Responses Still be Spontaneous and Correct
in Real Fights?
Incorporating Kicks into Combat Sequences
Elaborated Patterns to Meet Complex Combat Situations
Beneits of Understanding and Applhying Kungfu Philosophy
Our Kungfu is a Training of Energy and Mind
Ensuring Own Safety when Felling Opponents
Beauty and Profundity of Shaolin Felling Techniques
Felling Techniques of the Dragon and the Monkey
Felling an Opponent without him Realizing what
has Happened
Pattern Analysis of Tiger-Crane Set
Tiger Patterns for Chin-Na, against Kicks and
Countering the Shoot
Pattern Analysis of Dragon-Tiger Set
Revealing Secret Tactic of Leak Hand
From Level of Techniques to Levels of Tactics and Strategies
Pattern Analysis of Dragon-Form Set
Effective Techniques for Fighting on Ground
Pattern Analysis of Monkey Set
 Soft Techniques and Internal Force in Monkey Kungfu
Interesting Monkey Patterns that are Deadly for Combat
Pattern Analysis of Pakua Set
Pattern Analysis of Five-Animal Set
Variety of Techniquens in Shaolin Five Animals
Instigating the Combat Applications of Some Shaolin Patterns
Similar Shaolin Patterns but Different Combat Applications
Effective Counters against Kicks, Grips and Knee Jabs
Secrets of Skyward Cannon Punch against Continuous Attacks
Cannon Punch Towards Sky and Fierce Tiger
Crouching on Ground
Flowing Monkey Techniques against Powerful Tiger Claws
Sophisticated Grips and Sophisticated Counters
Breaking Opponent's Elbow and Wrist
Neutralizing Wrist Lock and Three Harmonies
Advanced Chin-Na Techniques and Counterrs
Two Stories about Kicks
How to Respond to Attacks Spontanepusly and Corrrectly
Can Beautiful Patterns and Flowing Movements be
Effective in Combat?
Linking Combat Sequences into Set
From Pre-Arranged Sparring to Combat Efficiency
Crystallication of Combat Techniques from Past Masters
Hei Sai or Spirit of Enerrgy
Manifesting the Energy and Spirit of your Form
Manifesting the Spirit or Inner Essence of Form
Kungfu Practice is Not just Physcial Training but
also Spiritual Cultivation
Fluidity of Form, Energy and Spirit
Shaolin Kungfu is Chi Kung and Meditation
Revealing the Secrets of Shaolin Masters
Profundity of Shaolin Combat Application
It is Easy to Fight against Boxers
 Avoiding Boxers' Strong Points and Attacking their
Weaknesses
Some Effective Techniques against Boxers
Strategy of Not Allowing Opponents to Escape
Strategy of Letting Trick Manifesting Trick
Strategies of Interception and of Striking Form
Standardized Routines of Kick-Boxing Attacks
Some Effective Counters against Kick-Boxing Attacks
Felling a Kick-Boxer when he Kicks
Secrets of Two Tigers Subdue Dragon
Shaolin Counters against Kick-Boxing and Karate
Some Important Combat Philosophy and Principles
It is Relatively Easy to Handle Karate Attacks
Good Spacing when Executing Kicks
Variety of Taekwondo Kicks
Effective Shaolin Counters against Taekwondo Kicks
Trapping Legs and Subduing Opponents
Making Expedient Changes against Surprised Attacks
Legacy of Sigung Ho Fatt Nam -- Planting Willow in
Front of Camp
Having Fun in Throws and Counters
Sharing the Scret of Molve Stance Change Step
Some Unorthodox Feling Techniques Not Commonly Seen
Felling Opponents with Stances
Beware lof Monkeys, they are Expert at Plucking Peaches
Sophisticated Footwork and Leg Techniques of Monkeys
and Gorillas
Wrestling Throws are Found in Shaolin Kungfu Too
Real Fighting is Different from Martial Sports
Who Says There's No Ground Fighting in Shaolin Kungfu?
An incredible Secret of One-Finger Zen
Understanding Muay Thai Fighting Strategies and Techniques
Various Strategies to Counter Muay Thai Fighters
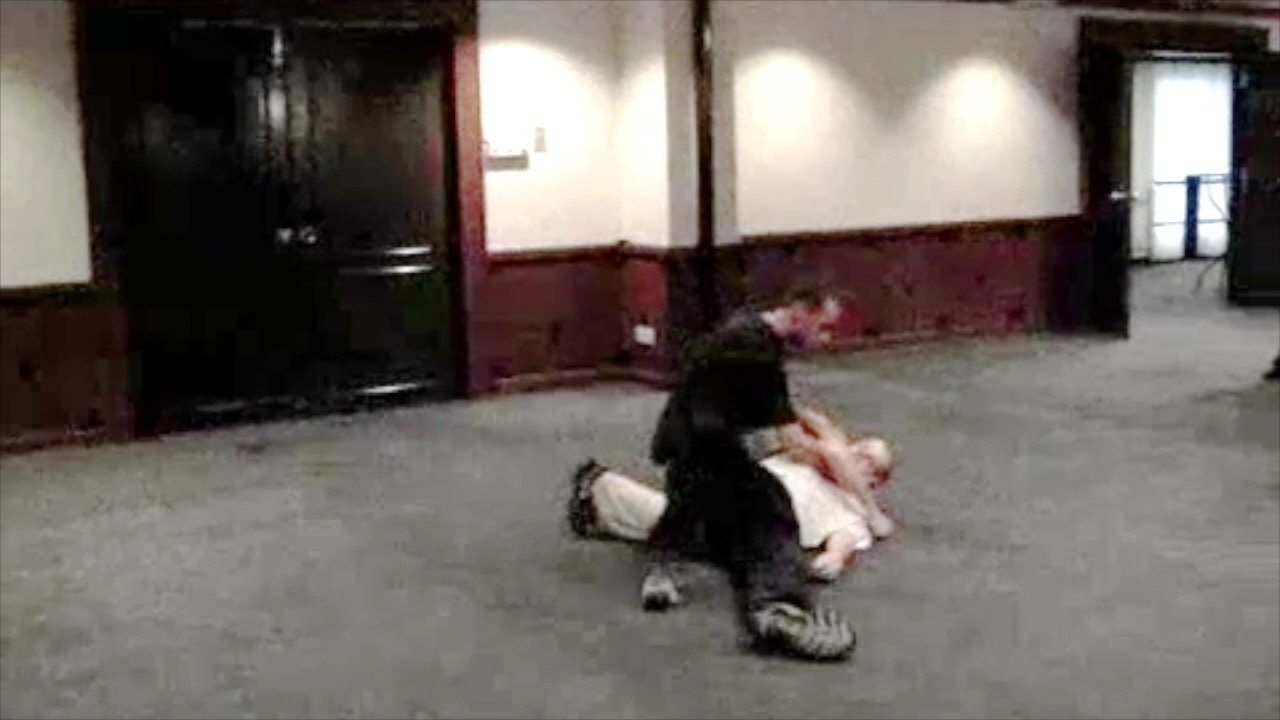 Responding to Muay Thai Attacks Spontaneously and Correctly
Avoiding Opponent's Strength and Attacking his Weakness
Shaolin Techniques to Counter Sweeping Kicks
Shaolin Counters against Knee and Elbw Strikes
Crouching Tiger against Neck Grab Elbow Strike
Shaolin Kungfu for Combat Efficiency, Good Health and
Spiritual Development
Shaolin -- Tantui Against Kicks
Against Pin Downs
Basics of Tantui
Tantui against Boxer
Break Lock
Chasing and Covering
Clas Practice
Covering an Opponent
Double Flying Kics
Exploding Force
Felling Techniques and Counterrs
Flowing Force
Impirtance of Footwork
Forcing Boxers Back
Grip and Strike
Releasing Grips
Hanging Double Hooks
Hold Horrse before Cliff
Knee Jab
Lift-Strike
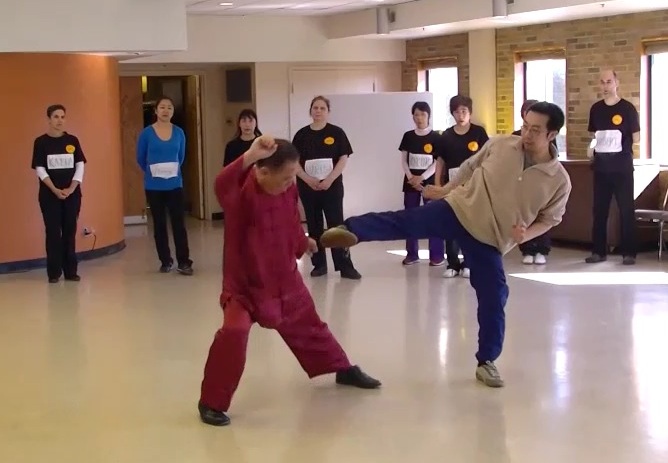 Minimizing Opponent's Force
Organ-Seeking Kick
The Magic of Tantui -- Overview
Pressing with Chosen Sequence
Some Questions on Combat
Rotation of Waist
Secrets of Tantui Thrust Punch
Combat Sequence 1
Combat Sequence 2
Combat Sequence 3
Combat Sequence 4
Combat Sequence 5
Combat Sequence 6
Combat Sequence 7
Combat Sequence 8
Combat Sequence 9
Combat Sequence 10
Combat Sequences 11 and 12
Combat Sequences 4, 5, 6
Three Rings Round the Moon
Wrist, Elbow and Shoulder
Tantui Combat Sequence 7
Tantui Combat Sequence 8
Tantui Combat Sequence 9
Tantui Combat Sequence 10
Tantui Combat Sequence 11
Tantui Combat Sequence 12
Tantui Combat Application Set 3 Part 1
Tantui Combat Application Set 3 Part 2
Tantui Combat Application Set 3 Part 3
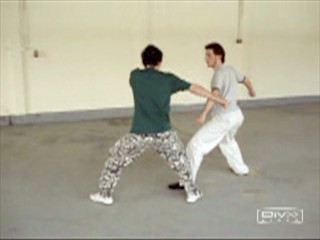 Tantui Combat Application Set 4 Part 1
Tantui Combat Application Set 4 Part 2
Tantui Combat Application Set 4 Part 3
Tantui Combat Application Set 1 Part 1
Tantui Combat Application Set 1 Part 2
Tantui Combat Application Set 1 Part 3
Tantui Combat Application Set 2 Part 1
Tantui Combat Application Set 2 Part 2
Tantui Combat Application Set 2 Part 3
Tantui Combat Sequence 1
Tantui Combat Sequence 2
Tantui Combat Sequence 3
Tantui Combat Sequence 4
Tantui Combat Sequence 5
Tantui Combat Sequence 6
Tantui, the Essence of Northermn Shaolin (with jpg)
Tantui, the Essence of Northern Shaolin
Videos of Tantui Combat Sequences and Combat Application Set
Combat Sequences and Sets of Tantui -- Overview
Video Clips for UK Summer Camp 2007 (Old)
Shaolin -- Tantui 2 The Technical Advantages of Shaolin Kungfu (with jpeg)
The Technical Advantages of Shaolin Kungfu
Tantui against Boxing and Kick-Boxing -- Part 1
Tantui against Boxing and Kick-Boxing -- Part 2
Tantui against Boxing and Kick-Boxing -- Part 3
Tantui against Boxing and Kick-Boxing -- Part 4
Tantui against Boxing and Kick-Boxing -- Part 5
Tantui against Boxing and Kick-Boxing -- Part 6
Tantui against Boxing and Kick-Boxing -- Part 7
The Technical Advantages of Shaolin Kungfu -- Part 1
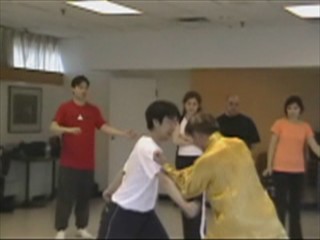 The Technical Advantages of Shaolin Kungfu -- Part 2
The Technical Advantages of Shaolin Kungfu -- Part 3
The Technical Advantages of Shaolin Kungfu -- Part 4
The Technical Advantages of Shaolin Kungfu -- Part 5
The Technical Advantages of Shaolin Kungfu -- Part 6
The Technical Advantages of Shaolin Kungfu -- Part 7
The Technical Advantages of Shaolin Kungfu -- Part 8
The Technical Advantages of Shaolin Kungfu -- Part 9
The Technical Advantages of Shaolin Kungfu -- Part 10
The Technical Advantages of Shaolin Kungfu -- Part 11
The Technical Advantages of Shaolin Kungfu -- Part 12
The Technical Advantages of Shaolin Kungfu -- Part 13
Wonders of Tantui Seqence 1 -- Part 1
Wonders of Tantui Seqence 1 -- Part 2
Wonders of Tantui Seqence 1 -- Part 3
Wonders of Tantui Seqence 1 -- Part 4
Wonders of Tantui Seqence 1 -- Part 5
Wonders of Tantui Seqence 1 -- Part 6
Tantui against Boxing and Kick-Boxing (with jpeg)
Tantui against Boxing and Kick-Boxing
The Wonders of Tantui Sequence 1 (with jpg)
The Wonders of Tantui Sequence 1
Shaolin -- Tantui 3 Making Kungfu Alive -- Part 1
Making Kungfu Alive -- Part 2
Making Kungfu Alive -- Part 3
Making Kungfu Alive -- Part 4
Making Kungfu Alive -- Part 5
Making Kungfu Alive -- Part 6
Making Kungfu Alive -- Part 7
Making Kungfu Alive -- Part 8
Two Combat sequences to Handle Mlost Ordinary Opponents -- Part 1
Two Combat sequences to Handle Mlost Ordinary Opponents -- Part 2
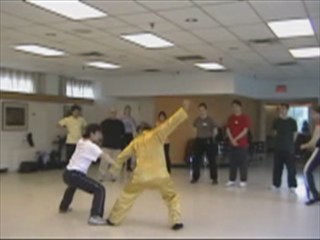 Two Combat sequences to Handle Most Ordinary
Opponents -- Part 3
Two Combat sequences to Handle Most Ordinary
Opponents -- Part 4
Two Combat sequences to Handle Most Ordinary
Opponents -- Part 5
Two Combat sequences to Handle Most Ordinary
Opponents -- Part 6
A Counter against any Kick Part 1
A Counter against any Kick Part 2
A Counter against any Kick Part 3
A Counter against any Kick Part 4
A Counter against any Kick Part 5
A Counter against any Kick Part 6
A Counter against any Kick Part 7
A Counter against any Kick Part 8
The Formidable Three Rings Around the Moon -- Part 1
The Formidable Three Rings Around the Moon -- Part 2
The Formidable Three Rings Around the Moon -- Part 3
The Formidable Three Rings Around the Moon -- Part 4
The Formidable Three Rings Around the Moon -- Part 5
The Formidable Three Rings Around the Moon -- Part 6
The Formidable Three Rings Around the Moon -- Part 7
Penetrating the Impernetratable -- Part 1
Penetrating the Impernetratable -- Part 2
Penetrating the Impernetratable -- Part 3
Penetrating the Impernetratable -- Part 4
Penetrating the Impernetratable -- Part 5
Penetrating the Impernetratable -- Part 6
Penetrating the Impernetratable -- Part 7
Penetrating the Impernetratable -- Part 8
Penetrating the Impernetratable -- Part 9
Countering Elbow and Knee Strikes from Muay Thai Fighters -- Part 1
Countering Elbow and Knee Strikes from Muay Thai Fighters -- Part 2
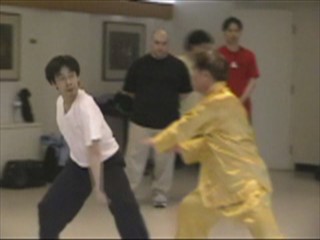 Countering Elbow and Knee Strikes from Muay Thai
Fighters -- Part 3
Countering Elbow and Knee Strikes from Muay Thai
Fighters -- Part 4
Countering Elbow and Knee Strikes from Muay Thai
Fighters -- Part 5
Countering Elbow and Knee Strikes from Muay Thai
Fighters -- Part 6
Countering Elbow and Knee Strikes from Muay Thai
Fighters -- Part 7
Fascinating Combat Application of Tantui in Striking, Kicking,
Felling and Gripping -- Part 1
Fascinating Combat Application of Tantui in Striking, Kicking,
Felling and Gripping -- Part 2
Fascinating Combat Application of Tantui in Striking, Kicking,
Felling and Gripping -- Part 3
Fascinating Combat Application of Tantui in Striking, Kicking,
Felling and Gripping -- Part 4
Fascinating Combat Application of Tantui in Striking, Kicking,
Felling and Gripping -- Part 5
Fascinating Combat Application of Tantui in Striking, Kicking,
Felling and Gripping -- Part 6
Fascinating Combat Application of Tantui in Striking, Kicking,
Felling and Gripping -- Part 7
Fascinating Combat Application of Tantui in Striking, Kicking,
Felling and Gripping -- Part 8
Fascinating Combat Application of Tantui in Striking, Kicking,
Felling and Gripping -- Part 9
Spotting Secrets Hidden in the Open Part 1
Spotting Secrets Hidden in the Open Part 2
Spotting Secrets Hidden in the Open Part 3
Spotting Secrets Hidden in the Open Part 4
Spotting Secrets Hidden in the Open Part 5
Spotting Secrets Hidden in the Open Part 6
Spotting Secrets Hidden in the Open Part 7
Spotting Secrets Hidden in the Open Part 8
Helping One Another and Having Fun in Sparring -- Part 1
Helping One Another and Having Fun in Sparring -- Part 2
Helping One Another and Having Fun in Sparring -- Part 3
Helping One Another and Having Fun in Sparring -- Part 4
Helping One Another and Having Fun in Sparring -- Part 5
Helping One Another and Having Fun in Sparring -- Part 6
Helping One Another and Having Fun in Sparring -- Part 7
Helping One Another and Having Fun in Sparring -- Part 8
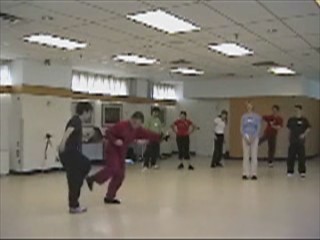 Combat Application Set 1: Second Brother Asks
the Way -- Part 1
Combat Application Set 2: Lift Lantern Lead
Way -- Part 2
Combat Application Set 3: Actor-Warrior Appears
on Stage -- Part 3
Combat Application Set 4: Second Brother Lifts Caldron
-- Part 4
Makig Kungfu Alive (with jpeg) -- Overview
Making Kungfu Alive -- Overview
Two Combat Sequences to Handle Most Ordinary
Opponents (with jpeg) -- Overview
Two Combat Sequences to Handle Most Ordinary
Opponents -- Overview
A Counter against an Kick (with jpeg) -- Overview
A Counter against an Kick -- Overview
The Formidable Three Rings Around the Moon (with jpeg)
-- Overview
The Formidable Three Rings Around the Moon -- Overview
Penetrating the Impenetrable (with jpeg) -- Overview
Penetrating the Impenetrable -- Overview
Countering Elbow an Knee Strikes from Muay Thai Fighters
(with jpeg) -- Overview
Countering Elbow an Knee Strikes from Muay Thai Fighters -- Overview
Fascinating Combat Applications of Tantui in Striking, Kicking,
Felling and Gripping (with jpeg) -- Overview
Fascinating Combat Applications of Tantui in Striking, Kicking,
Felling and Gripping -- Overview
Spotting Secrets hidden in the Open (with jpeg) -- Overview
Spotting Secrets hidden in the Open -- Overview
Helping One Another and Having Fun in Sparring (with jpeg) -- Overview
Helping One Another and Having Fun in Sparring -- Overview
Linking Sequences to Form Set (with jpeg) -- Overview
Linking Sequences to Form Set -- Overview
Shaolin -- Tantui 4 Produndity of 12 Tantui Combat Sequences -- Part 1
Produndity of 12 Tantui Combat Sequences -- Part 2
Produndity of 12 Tantui Combat Sequences -- Part 3
Produndity of 12 Tantui Combat Sequences -- Part 4
Produndity of 12 Tantui Combat Sequences -- Part 5
Produndity of 12 Tantui Combat Sequences -- Part 6
Produndity of 12 Tantui Combat Sequences -- Part 7
Produndity of 12 Tantui Combat Sequences -- Part 8
Produndity of 12 Tantui Combat Sequences -- Part 9
Produndity of 12 Tantui Combat Sequences -- Part 10
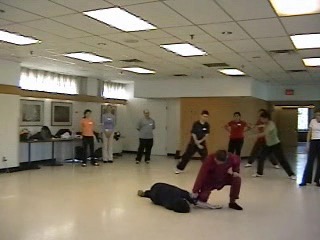 Produndity of 12 Tantui Combat Sequences -- Part 11
Produndity of 12 Tantui Combat Sequences -- Part 12
Laying Foundation before Training Combat -- Part 1
Laying Foundation before Training Combat -- Part 2
Laying Foundation before Training Combat -- Part 3
Laying Foundation before Training Combat -- Part 4
Laying Foundation before Training Combat -- Part 5
Laying Foundation before Training Combat -- Part 6
Laying Foundation before Training Combat -- Part 7
Laying Foundation before Training Combat -- Part 8
Laying Foundation before Training Combat -- Part 9
Laying Foundation before Training Combat -- Part 10
From Form to Flow to Force -- Part 1
From Form to Flow to Force -- Part 2
From Form to Flow to Force -- Part 3
From Form to Flow to Force -- Part 4
From Form to Flow to Force -- Part 5
From Form to Flow to Force -- Part 6
From Form to Flow to Force -- Part 7
From Form to Flow to Force -- Part 8
From Form to Flow to Force -- Part 9
From Form to Flow to Force -- Part 10
From Form to Flow to Force -- Part 11
Laying Foundation before Training Combat (with jpeg) -- Overview
Laying Foundation before Training Combat -- Overview
From Form to Flow to Force (with jpeg) -- Overview
From Form to Flow to Force -- Overview
The Produndity of 12 Tantui Combat Sequences (with jpeg) -- Overview
Produndity of 12 Tantui Combat Sequences -- Overview
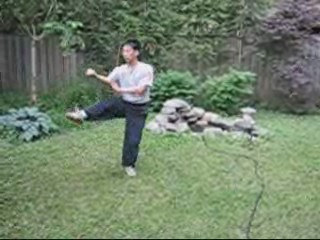 Shaolin -- Tantui 5
Tantiat UK Summer Camp -- Overview
Shaolin -- Tantui 5
Tantiat UK Summer Camp -- OverviewSecrets of Building Internal Force
Experiencing the Effects of Deviated Practice
Basic Footwork Training
From Correct Movements to Speed and Elegance
Different Ways of Turning
Secrets of Building Internal Force -- Part 1
Secrets of Building Internal Force -- Part 2
Secrets of Building Internal Force -- Part 3
Secrets of Building Internal Force -- Part 4
Secrets of Building Internal Force -- Part 5
Secrets of Building Internal Force -- Part 6
Secrets of Building Internal Force -- Part 7
Secrets of Building Internal Force -- Part 8
Secrets of Building Internal Force -- Part 9
Secrets of Building Internal Force -- Part 10
Secrets of Building Internal Force -- Part 11
Secrets of Building Internal Force -- Part 12
Secrets of Building Internal Force -- Part 13
Secrets of Building Internal Force -- Part 14
Secrets of Building Internal Force -- Part 15
Experiencing the Effects of Deviated Practice 1
Experiencing the Effects of Deviated Practice 2
Experiencing the Effects of Deviated Practice 3
Experiencing the Effects of Deviated Practice 4
Experiencing the Effects of Deviated Practice 5
Experiencing the Effects of Deviated Practice 6
Experiencing the Effects of Deviated Practice 7
Experiencing the Effects of Deviated Practice 8
Experiencing the Effects of Deviated Practice 9
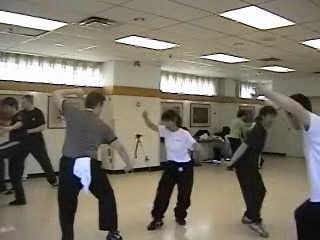 Basic Footwork Training -- Part 1
Basic Footwork Training -- Part 2
Basic Footwork Training -- Part 3
Basic Footwork Training -- Part 4
Basic Footwork Training -- Part 5
Basic Footwork Training -- Part 6
Basic Footwork Training -- Part 7
Basic Footwork Training -- Part 8
Basic Footwork Training -- Part 9
Basic Footwork Training -- Part 10
From Correct Movements to Speed and Elegance -- Part 1
From Correct Movements to Speed and Elegance -- Part 2
From Correct Movements to Speed and Elegance -- Part 3
From Correct Movements to Speed and Elegance -- Part 4
From Correct Movements to Speed and Elegance -- Part 5
From Correct Movements to Speed and Elegance -- Part 6
From Correct Movements to Speed and Elegance -- Part 7
From Correct Movements to Speed and Elegance -- Part 8
From Correct Movements to Speed and Elegance -- Part 9
From Correct Movements to Speed and Elegance -- Part 10
From Correct Movements to Speed and Elegance -- Part 11
Different Ways of Turning -- Part 1
Different Ways of Turning -- Part 2
Different Ways of Turning -- Part 3
Different Ways of Turning -- Part 4
Different Ways of Turning -- Part 5
Different Ways of Turning -- Part 6
Different Ways of Turning -- Part 7
Different Ways of Turning -- Part 8
Different Ways of Turning -- Part 9
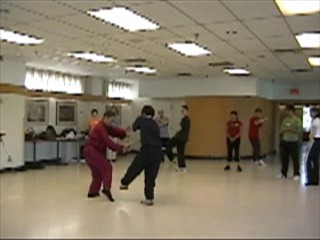 Different Ways of Turning -- Part 10
Different Ways of Turning -- Part 11
Different Ways of Turning -- Part 12
Shaolin -- Tantui 6 Adding Hand Forms to Stances to Form Patterns -- Overview
The Mechanics of Fa-Jing or Exploding Force -- Overview
Bo-Fa and Shen-Fa or Footwork and Body-Movement
-- Overview
The Three Harmonies of Legs, Body and Hands -- Overview
Tantui Sequence 1 -- Thrust Punch -- Overview
The Three Fs -- Form, Force and Flow -- Overview
Every Kungfu Session is a training of Energy and Mind -- Overview
Adding Hand Forms to Stances to Form Patterns -- Part 1
Adding Hand Forms to Stances to Form Patterns -- Part 2
Adding Hand Forms to Stances to Form Patterns -- Part 3
Adding Hand Forms to Stances to Form Patterns -- Part 4
Adding Hand Forms to Stances to Form Patterns -- Part 5
Adding Hand Forms to Stances to Form Patterns -- Part 6
Adding Hand Forms to Stances to Form Patterns -- Part 7
The Mechanic of Fa-Jing or Exploding Force -- Part 1
The Mechanic of Fa-Jing or Exploding Force -- Part 2
The Mechanic of Fa-Jing or Exploding Force -- Part 3
The Mechanic of Fa-Jing or Exploding Force -- Part 4
The Mechanic of Fa-Jing or Exploding Force -- Part 5
The Mechanic of Fa-Jing or Exploding Force -- Part 6
The Mechanic of Fa-Jing or Exploding Force -- Part 7
The Mechanic of Fa-Jing or Exploding Force -- Part 8
Bo-Fa and Shen-Fa or Footwork and Body-Movement -- Part 1
Bo-Fa and Shen-Fa or Footwork and Body-Movement -- Part 2
Bo-Fa and Shen-Fa or Footwork and Body-Movement -- Part 3
Bo-Fa and Shen-Fa or Footwork and Body-Movement -- Part 4
Bo-Fa and Shen-Fa or Footwork and Body-Movement -- Part 5
Bo-Fa and Shen-Fa or Footwork and Body-Movement -- Part 6
Bo-Fa and Shen-Fa or Footwork and Body-Movement -- Part 7
Bo-Fa and Shen-Fa or Footwork and Body-Movement -- Part 8
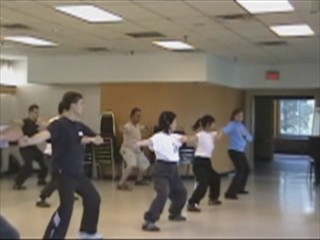 Bo-Fa and Shen-Fa or Footwork and Body-Movement -- Part 9
Bo-Fa and Shen-Fa or Footwork and Body-Movement -- Part 10
The Three Harmonies of Legs, Body and Hands -- Part 1
The Three Harmonies of Legs, Body and Hands -- Part 2
The Three Harmonies of Legs, Body and Hands -- Part 3
The Three Harmonies of Legs, Body and Hands -- Part 4
The Three Harmonies of Legs, Body and Hands -- Part 5
The Three Harmonies of Legs, Body and Hands -- Part 6
The Three Harmonies of Legs, Body and Hands -- Part 7
The Three Harmonies of Legs, Body and Hands -- Part 8
Tantui Sequence 1 -- Thrust Punch -- Part 1
Tantui Sequence 1 -- Thrust Punch -- Part 2
Tantui Sequence 1 -- Thrust Punch -- Part 3
Tantui Sequence 1 -- Thrust Punch -- Part 4
Tantui Sequence 1 -- Thrust Punch -- Part 5
Tantui Sequence 1 -- Thrust Punch -- Part 6
Tantui Sequence 1 -- Thrust Punch -- Part 7
Tantui Sequence 1 -- Thrust Punch -- Part 8
Tantui Sequence 1 -- Thrust Punch -- Part 9
The Three Fs: Form, Force, and Flow -- Part 1
The Three Fs: Form, Force, and Flow -- Part 2
The Three Fs: Form, Force, and Flow -- Part 3
The Three Fs: Form, Force, and Flow -- Part 4
The Three Fs: Form, Force, and Flow -- Part 5
The Three Fs: Form, Force, and Flow -- Part 6
Every Kungfu Session is a training of Energy and Mind -- Part 1
Every Kungfu Session is a training of Energy and Mind -- Part 2
Every Kungfu Session is a training of Energy and Mind -- Part 3
Every Kungfu Session is a training of Energy and Mind -- Part 4
Every Kungfu Session is a training of Energy and Mind -- Part 5
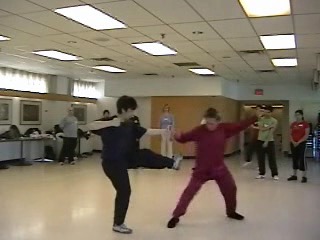 Every Kungfu Session is a training of Energy and Mind -- Part 6
Bo-Fa and Shen-Fa or Footwork and Body-Movement -- Part 11
Bo-Fa and Shen-Fa or Footwork and Body-Movement -- Part 12
Bo-Fa and Shen-Fa or Footwork and Body-Movement -- Part 13
Bo-Fa and Shen-Fa or Footwork and Body-Movement -- Part 14
Shaolin -- Tantui 7 Simple in Appearance but Profound in Application -- Overview
If you Use a Lot of Kicks, you should also know their Counters
-- Overview
It is Necessary to have an Element of Threat in Combat -- Overview
Counters against Formidabke Muay Thai Knee Jabs -- Overview
Against Shoots, Against Throws, and Felling Opponents -- Overview
Simple in Appearance but Profound in Application -- Part 1
Simple in Appearance but Profound in Application -- Part 2
Simple in Appearance but Profound in Application -- Part 3
Simple in Appearance but Profound in Application -- Part 4
Simple in Appearance but Profound in Application -- Part 5
Simple in Appearance but Profound in Application -- Part 6
Simple in Appearance but Profound in Application -- Part 7
Simple in Appearance but Profound in Application -- Part 8
If you Use a Lot of Kicks, you should also know their Counters -- Part 1
If you Use a Lot of Kicks, you should also know their Counters -- Part 2
If you Use a Lot of Kicks, you should also know their Counters -- Part 3
If you Use a Lot of Kicks, you should also know their Counters -- Part 4
If you Use a Lot of Kicks, you should also know their Counters -- Part 5
If you Use a Lot of Kicks, you should also know their Counters -- Part 6
If you Use a Lot of Kicks, you should also know their Counters -- Part 7
It is Necessary to have an Element of Threat in Combat -- Part 1
It is Necessary to have an Element of Threat in Combat -- Part 2
It is Necessary to have an Element of Threat in Combat -- Part 3
It is Necessary to have an Element of Threat in Combat -- Part 4
It is Necessary to have an Element of Threat in Combat -- Part 5
It is Necessary to have an Element of Threat in Combat -- Part 6
It is Necessary to have an Element of Threat in Combat -- Part 7
It is Necessary to have an Element of Threat in Combat -- Part 8
Counters against Formidabke Muay Thai Knee Jabs -- Part 1
Counters against Formidabke Muay Thai Knee Jabs -- Part 2
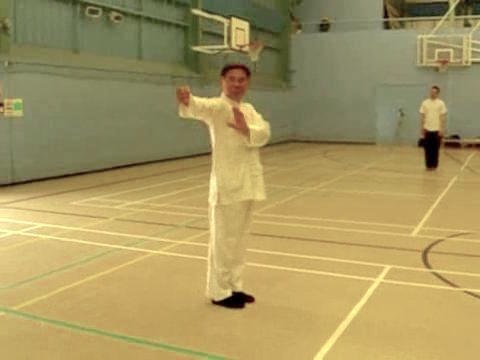 Counters against Formidabke Muay Thai Knee Jabs -- Part 3
Counters against Formidabke Muay Thai Knee Jabs -- Part 4
Counters against Formidabke Muay Thai Knee Jabs -- Part 5
Counters against Formidabke Muay Thai Knee Jabs -- Part 6
Counters against Formidabke Muay Thai Knee Jabs -- Part 7
Counters against Formidabke Muay Thai Knee Jabs -- Part 8
Against Shoots, Against Throws, and Felling Opponents -- Part 1
Against Shoots, Against Throws, and Felling Opponents -- Part 2
Against Shoots, Against Throws, and Felling Opponents -- Part 3
Against Shoots, Against Throws, and Felling Opponents -- Part 4
Against Shoots, Against Throws, and Felling Opponents -- Part 5
Against Shoots, Against Throws, and Felling Opponents -- Part 6
Against Shoots, Against Throws, and Felling Opponents -- Part 7
Against Shoots, Against Throws, and Felling Opponents -- Part 8
Against Shoots, Against Throws, and Felling Opponents -- Part 9
Shaolin -- Tantui 8 Learning Tantui Sequences 1, 2 and 3 -- Overview
Learning Tantui Sequences 4, 5 and 6 -- Overview
Learning Tantui Sequences 7, 8 and 9 -- Overview
Learning Tantui Sequences 10, 11 and 12 -- Overview
Applications of Single Spread and Breaking Lock -- Overview
Breaking almost any Lock with the Breaking Lock Technique -- Overview
The Richness of Tantui Combat Applications -- Overview
Learning Tantui Sequences 1, 2 and 3 -- Part 3
Learning Tantui Sequences 1, 2 and 3 -- Part 4
Learning Tantui Sequences 1, 2 and 3 -- Part 5
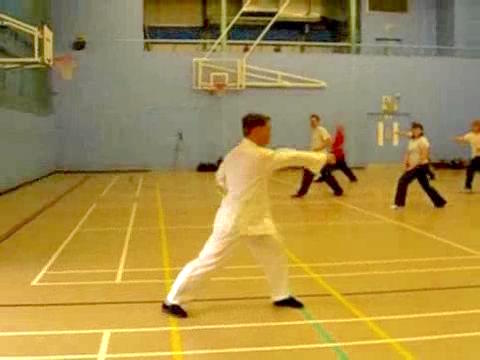 Learning Tantui Sequences 1, 2 and 3 -- Part 6
Learning Tantui Sequences 1, 2 and 3 -- Part 7
Learning Tantui Sequences 1, 2 and 3 -- Part 1
Learning Tantui Sequences 1, 2 and 3 -- Part 8
Learning Tantui Sequences 4, 5 and 6 -- Part 11
Learning Tantui Sequences 4, 5 and 6 -- Part 2
Learning Tantui Sequences 4, 5 and 6 -- Part 3
Learning Tantui Sequences 4, 5 and 6 -- Part 4
Learning Tantui Sequences 4, 5 and 6 -- Part 5
Learning Tantui Sequences 4, 5 and 6 -- Part 6
Learning Tantui Sequences 4, 5 and 6 -- Part 7
Learning Tantui Sequences 4, 5 and 6 -- Part 8
Learning Tantui Sequences 7, 8 and 9 -- Part 1
Learning Tantui Sequences 7, 8 and 9 -- Part 4
Learning Tantui Sequences 1, 2 and 3 -- Part 2
Learning Tantui Sequences 7, 8 and 9 -- Part 2
Learning Tantui Sequences 7, 8 and 9 -- Part 3
Learning Tantui Sequences 7, 8 and 9 -- Part 5
Applications of Single Spread and Breaking Lock -- Part 1
Applications of Single Spread and Breaking Lock -- Part 2
Learning Tantui Sequences 7, 8 and 9 -- Part 6
Learning Tantui Sequences 7, 8 and 9 -- Part 7
Learning Tantui Sequences 7, 8 and 9 -- Part 8
Learning Tantui Sequences 7, 8 and 9 -- Part 9
Applications of Single Spread and Breaking Lock -- Part 3
Applications of Single Spread and Breaking Lock -- Part 4
Applications of Single Spread and Breaking Lock -- Part 5
Applications of Single Spread and Breaking Lock -- Part 6
Applications of Single Spread and Breaking Lock -- Part 7
Applications of Single Spread and Breaking Lock -- Part 8
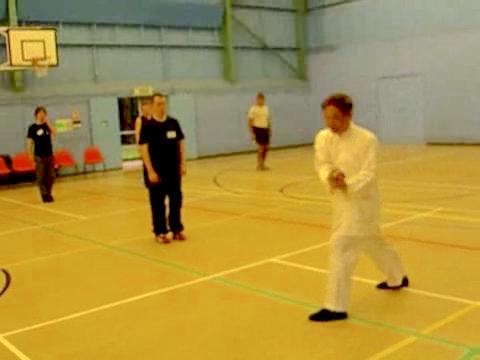 Breaking Almost any Lock with the Breaking Lock
Technique -- Part 1
Breaking Almost any Lock with the Breaking Lock
Technique -- Part 2
Breaking Almost any Lock with the Breaking Lock
Technique -- Part 3
Breaking Almost any Lock with the Breaking Lock
Technique -- Part 4
Breaking Almost any Lock with the Breaking Lock
Technique -- Part 5
Breaking Almost any Lock with the Breaking Lock
Technique -- Part 6
Breaking Almost any Lock with the Breaking Lock Technique -- Part 7
Breaking Almost any Lock with the Breaking Lock Technique -- Part 8
Breaking Almost any Lock with the Breaking Lock Technique -- Part 9
Learning Tantui Sequences 10, 11 and 12 -- Part 1
Learning Tantui Sequences 10, 11 and 12 -- Part 2
Learning Tantui Sequences 10, 11 and 12 -- Part 3
Learning Tantui Sequences 10, 11 and 12 -- Part 4
Learning Tantui Sequences 10, 11 and 12 -- Part 5
Learning Tantui Sequences 10, 11 and 12 -- Part 6
The Richness of Tantui Combat Applications -- Part 1
The Richness of Tantui Combat Applications -- Part 2
The Richness of Tantui Combat Applications -- Part 3
The Richness of Tantui Combat Applications -- Part 4
The Richness of Tantui Combat Applications -- Part 5
The Richness of Tantui Combat Applications -- Part 6
The Richness of Tantui Combat Applications -- Part 7
The Richness of Tantui Combat Applications -- Part 8
The Richness of Tantui Combat Applications -- Part 9
The Richness of Tantui Combat Applications -- Part 10
Learning Tantui Sequences 10, 11 and 12 -- Part 7
Learning Tantui Sequences 10, 11 and 12 -- Part 8
Learning Tantui Sequences 10, 11 and 12 -- Part 9
The Richness of Tantui Combat Applications -- Part 11
Learning Tantui Sequences 10, 11 and 12 -- Part 10
Learning Tantui Sequences 10, 11 and 12 -- Part 11
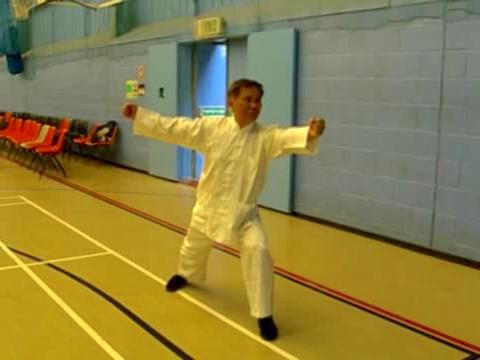 Shaolin -- Tantui 9
Second Brother and White Horse -- Overview
Shaolin -- Tantui 9
Second Brother and White Horse -- OverviewAn Effective Sequence against Boxers -- Overview
Three Harmonies in Tantui Combat Sequence One -- Overview
Second Brother and White Horse -- Part 1
Second Brother and White Horse -- Part 2
Second Brother and White Horse -- Part 3
Second Brother and White Horse -- Part 4
Second Brother and White Horse -- Part 5
Second Brother and White Horse -- Part 6
Second Brother and White Horse -- Part 7
Second Brother and White Horse -- Part 8
Second Brother and White Horse -- Part 9
An Effective Sequence against Boxers -- Part 1
An Effective Sequence against Boxers -- Part 2
An Effective Sequence against Boxers -- Part 3
An Effective Sequence against Boxers -- Part 4
An Effective Sequence against Boxers -- Part 5
An Effective Sequence against Boxers -- Part 6
An Effective Sequence against Boxers -- Part 7
An Effective Sequence against Boxers -- Part 8
An Effective Sequence against Boxers -- Part 9
An Effective Sequence against Boxers -- Part 10
An Effective Sequence against Boxers -- Part 11
An Effective Sequence against Boxers -- Part 11
Three Harmonies in Tantui Combat Sequence One -- Part 1
Three Harmonies in Tantui Combat Sequence One -- Part 2
Three Harmonies in Tantui Combat Sequence One -- Part 3
Three Harmonies in Tantui Combat Sequence One -- Part 4
Three Harmonies in Tantui Combat Sequence One -- Part 5
Three Harmonies in Tantui Combat Sequence One -- Part 6
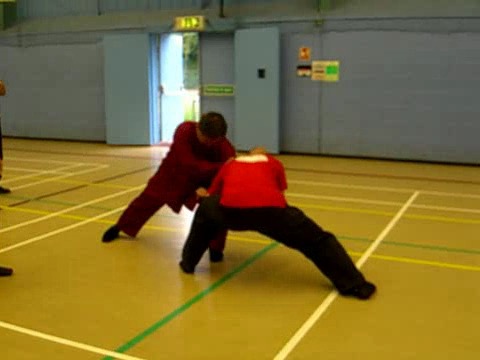 Three Harmonies in Tantui Combat Sequence One -- Part 7
Three Harmonies in Tantui Combat Sequence One -- Part 8
Three Harmonies in Tantui Combat Sequence One -- Part 9
Three Harmonies in Tantui Combat Sequence One -- Part 10
Three Harmonies in Tantui Combat Sequence One -- Part 11
Three Harmonies in Tantui Combat Sequence One -- Part 12
Shaolin -- Tantui 10 White Horse Returns Head -- Overview
Adjustments and Modifications in Varied Situations
-- Overview
Effective Techniques against Boxers -- Overview
Combat Skills against Boxers -- Overview
Applying the Tactics of Covering and Chasing against
Boxers -- Overview
The Unbelievable Effectiveness of Tantui Combat Sequence
One -- Overview
Old Elephant Drops Tusk in Combat Sequence Two -- Overview
Rising Dragon Galloping Tiger -- Overview
Combining Sequences in Combat Training -- Overview
The Importance of Skills in Applying Combat Sequences
-- Overview
Some Effective Skills for Combat -- Overview
White Horse Returns Head -- Part 1
White Horse Returns Head -- Part 2
White Horse Returns Head -- Part 3
White Horse Returns Head -- Part 4
White Horse Returns Head -- Part 5
White Horse Returns Head -- Part 6
White Horse Returns Head -- Part 7
White Horse Returns Head -- Part 8
White Horse Returns Head -- Part 9
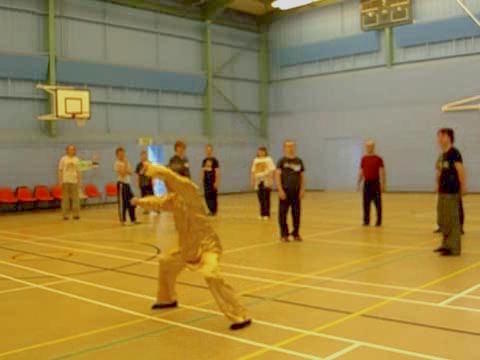 Adjustments and Modifications in Varied Situations -- Part 1
Adjustments and Modifications in Varied Situations -- Part 2
Adjustments and Modifications in Varied Situations -- Part 3
Adjustments and Modifications in Varied Situations -- Part 4
Adjustments and Modifications in Varied Situations -- Part 5
Adjustments and Modifications in Varied Situations -- Part 6
Adjustments and Modifications in Varied Situations -- Part 7
Adjustments and Modifications in Varied Situations -- Part 8
Adjustments and Modifications in Varied Situations -- Part 9
Effective Techniques against Boxers -- Part 1
Effective Techniques against Boxers -- Part 2
Effective Techniques against Boxers -- Part 3
Effective Techniques against Boxers -- Part 4
Effective Techniques against Boxers -- Part 5
Effective Techniques against Boxers -- Part 6
Effective Techniques against Boxers -- Part 7
Effective Techniques against Boxers -- Part 8
Combat Skills against Boxers -- Part 1
Combat Skills against Boxers -- Part 2
Combat Skills against Boxers -- Part 3
Combat Skills against Boxers -- Part 4
Combat Skills against Boxers -- Part 5
Combat Skills against Boxers -- Part 6
Combat Skills against Boxers -- Part 7
Combat Skills against Boxers -- Part 8
Combat Skills against Boxers -- Part 9
Combat Skills against Boxers -- Part 10
Combat Skills against Boxers -- Part 11
Combat Skills against Boxers -- Part 12
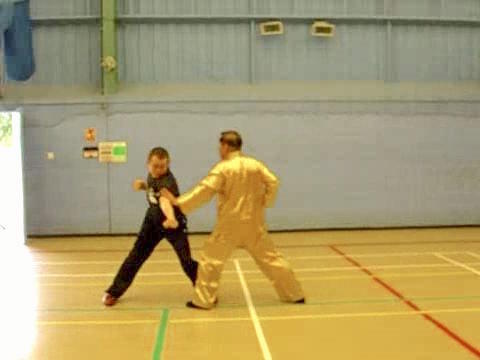 Applying the Tactics of Covering and Chasing against
Boxers -- Part 1
Applying the Tactics of Covering and Chasing against
Boxers -- Part 2
Applying the Tactics of Covering and Chasing against
Boxers -- Part 3
Applying the Tactics of Covering and Chasing against
Boxers -- Part 4
Applying the Tactics of Covering and Chasing against
Boxers -- Part 5
Applying the Tactics of Covering and Chasing against
Boxers -- Part 6
Applying the Tactics of Covering and Chasing against Boxers -- Part 7
Applying the Tactics of Covering and Chasing against Boxers -- Part 8
Applying the Tactics of Covering and Chasing against Boxers -- Part 9
Applying the Tactics of Covering and Chasing against Boxers -- Part 10
The Unbelievable Effectiveness of Tantui Combat Sequence One -- Part 1
The Unbelievable Effectiveness of Tantui Combat Sequence One -- Part 2
The Unbelievable Effectiveness of Tantui Combat Sequence One -- Part 3
The Unbelievable Effectiveness of Tantui Combat Sequence One -- Part 4
The Unbelievable Effectiveness of Tantui Combat Sequence One -- Part 5
The Unbelievable Effectiveness of Tantui Combat Sequence One -- Part 6
The Unbelievable Effectiveness of Tantui Combat Sequence One -- Part 7
The Unbelievable Effectiveness of Tantui Combat Sequence One -- Part 8
Old Elephant Drops Tusk in Combat Seqquence Two -- Part 1
Old Elephant Drops Tusk in Combat Seqquence Two -- Part 2
Old Elephant Drops Tusk in Combat Seqquence Two -- Part 3
Old Elephant Drops Tusk in Combat Seqquence Two -- Part 4
Old Elephant Drops Tusk in Combat Seqquence Two -- Part 5
Old Elephant Drops Tusk in Combat Seqquence Two -- Part 6
Old Elephant Drops Tusk in Combat Seqquence Two -- Part 7
Old Elephant Drops Tusk in Combat Seqquence Two -- Part 8
Old Elephant Drops Tusk in Combat Seqquence Two -- Part 9
Rising Dragon Galloping Tiger -- Part 1
Rising Dragon Galloping Tiger -- Part 2
Rising Dragon Galloping Tiger -- Part 3
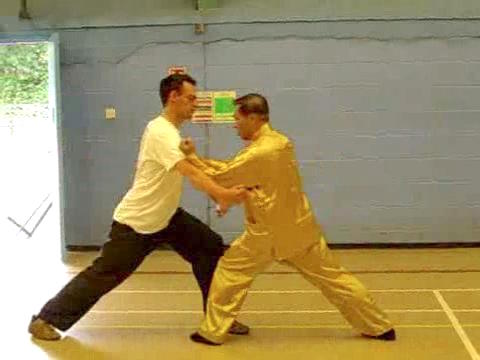 Rising Dragon Galloping Tiger -- Part 4
Rising Dragon Galloping Tiger -- Part 5
Rising Dragon Galloping Tiger -- Part 6
Rising Dragon Galloping Tiger -- Part 7
Rising Dragon Galloping Tiger -- Part 8
Rising Dragon Galloping Tiger -- Part 9
Combining Sequences in Combat Training -- Part 1
Combining Sequences in Combat Training -- Part 2
Combining Sequences in Combat Training -- Part 3
Combining Sequences in Combat Training -- Part 4
Combining Sequences in Combat Training -- Part 5
Combining Sequences in Combat Training -- Part 6
Combining Sequences in Combat Training -- Part 7
Combining Sequences in Combat Training -- Part 8
Combining Sequences in Combat Training -- Part 9
The Importance of Skills in Applying Combat Sequences -- Part 1
The Importance of Skills in Applying Combat Sequences -- Part 2
The Importance of Skills in Applying Combat Sequences -- Part 3
The Importance of Skills in Applying Combat Sequences -- Part 4
The Importance of Skills in Applying Combat Sequences -- Part 5
The Importance of Skills in Applying Combat Sequences -- Part 6
The Importance of Skills in Applying Combat Sequences -- Part 7
The Importance of Skills in Applying Combat Sequences -- Part 8
The Importance of Skills in Applying Combat Sequences -- Part 9
Some Effective Skills for Combat -- Part 1
Some Effective Skills for Combat -- Part 2
Some Effective Skills for Combat -- Part 3
Some Effective Skills for Combat -- Part 4
Some Effective Skills for Combat -- Part 5
Some Effective Skills for Combat -- Part 6
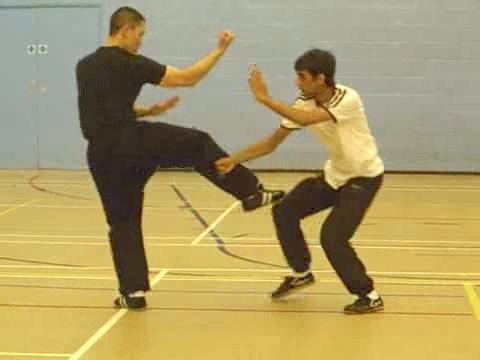 Some Effective Skills for Combat -- Part 7
Some Effective Skills for Combat -- Part 8
Shaolin -- Tantui 11 Three Rings Around the Moon in Tantui Combat Sequence
Three -- Overview
Applying Chin-Na and Countering Chin-Na -- Overview
Solo Performance to Enhance Combat Efficiency -- Overview
Simple in Solo Performance, Profound in Combat Application
-- Overview
Counter against Formidable Muay Thai Knee Jabs -- Overview
Felling an Opponnt without Throwing Him -- Overview
Tantui Combat Sequences One, Two and Three -- Overview
Chopping Firewood and Hook Thrust in Combat Sequences 3 and
4 -- Overview
Three Rings Around the Moon in Tantui Combat Sequence Three -- Part 1
Three Rings Around the Moon in Tantui Combat Sequence Three -- Part 2
Three Rings Around the Moon in Tantui Combat Sequence Three -- Part 3
Three Rings Around the Moon in Tantui Combat Sequence Three -- Part 4
Three Rings Around the Moon in Tantui Combat Sequence Three -- Part 5
Three Rings Around the Moon in Tantui Combat Sequence Three -- Part 6
Three Rings Around the Moon in Tantui Combat Sequence Three -- Part 7
Three Rings Around the Moon in Tantui Combat Sequence Three -- Part 8
Applying Chin-Na and Countering Chin-Na -- Part 1
Applying Chin-Na and Countering Chin-Na -- Part 2
Applying Chin-Na and Countering Chin-Na -- Part 3
Applying Chin-Na and Countering Chin-Na -- Part 4
Applying Chin-Na and Countering Chin-Na -- Part 5
Applying Chin-Na and Countering Chin-Na -- Part 6
Applying Chin-Na and Countering Chin-Na -- Part 7
Solo Performance to Enhance Combat Efficiency -- Part 1
Solo Performance to Enhance Combat Efficiency -- Part 2
Solo Performance to Enhance Combat Efficiency -- Part 3
Solo Performance to Enhance Combat Efficiency -- Part 4
Solo Performance to Enhance Combat Efficiency -- Part 5
Solo Performance to Enhance Combat Efficiency -- Part 6
Solo Performance to Enhance Combat Efficiency -- Part 7
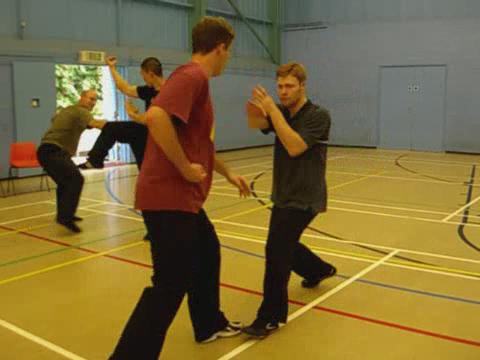 Solo Performance to Enhance Combat Efficiency -- Part 8
Simple in Solo Performance, Profound in Combat
Application -- Part 1
Simple in Solo Performance, Profound in Combat
Application -- Part 2
Simple in Solo Performance, Profound in Combat
Application -- Part 3
Simple in Solo Performance, Profound in Combat
Application -- Part 4
Simple in Solo Performance, Profound in Combat
Application -- Part 5
Simple in Solo Performance, Profound in Combat Application -- Part 6
Simple in Solo Performance, Profound in Combat Application -- Part 7
Simple in Solo Performance, Profound in Combat Application -- Part 8
Simple in Solo Performance, Profound in Combat Application -- Part 9
Counter against Formidable Muay Thai Knee Jabs -- Part 1
Counter against Formidable Muay Thai Knee Jabs -- Part 2
Counter against Formidable Muay Thai Knee Jabs -- Part 3
Counter against Formidable Muay Thai Knee Jabs -- Part 4
Counter against Formidable Muay Thai Knee Jabs -- Part 5
Counter against Formidable Muay Thai Knee Jabs -- Part 6
Felling an Opponnt without Throwing Him -- Part 1
Felling an Opponnt without Throwing Him -- Part 2
Felling an Opponnt without Throwing Him -- Part 3
Felling an Opponnt without Throwing Him -- Part 4
Felling an Opponnt without Throwing Him -- Part 5
Felling an Opponnt without Throwing Him -- Part 6
Felling an Opponnt without Throwing Him -- Part 7
Tantui Combat Sequences One, Two and Three -- Part 1
Tantui Combat Sequences One, Two and Three -- Part 2
Tantui Combat Sequences One, Two and Three -- Part 3
Tantui Combat Sequences One, Two and Three -- Part 4
Tantui Combat Sequences One, Two and Three -- Part 5
Tantui Combat Sequences One, Two and Three -- Part 6
Tantui Combat Sequences One, Two and Three -- Part 7
 Chopping Firewood and Hook Thrust in Combat
Sequences 3 and 4 -- Part 1
Chopping Firewood and Hook Thrust in Combat
Sequences 3 and 4 -- Part 2
Chopping Firewood and Hook Thrust in Combat
Sequences 3 and 4 -- Part 3
Chopping Firewood and Hook Thrust in Combat
Sequences 3 and 4 -- Part 4
Chopping Firewood and Hook Thrust in Combat
Sequences 3 and 4 -- Part 5
Chopping Firewood and Hook Thrust in Combat
Sequences 3 and 4 -- Part 6
Chopping Firewood and Hook Thrust in Combat Sequences 3 and 4 -- Part 7
Chopping Firewood and Hook Thrust in Combat Sequences 3 and 4 -- Part 8
Shaolin -- Tantui 12 The Techique of Double Spread in the Pattern Carry
Moon in Bosom -- Overview
Reviewing Combat Sequences 4, 5 and 6 in Solo and
in Partner Combination -- Overview
Sounding the Bell to Handle Fast, Continuous Strikes -- Overview
Using a Nail Kick to Counte a Whirlwind Kick -- Overview
Cloud Hand and Horn Punch against Chin-Na and
Throat Strike -- Overview
A Little Jump as a Trick -- Overview
Striking our Opponent before he Realizes with Shooting Spear
at Yun Pavilion -- Overview
A Hand Technique to Counter any Hand Attatcks, and a Leg
Technique to Counter any Low Kicks -- Overview
Amazing Combat Functions in Combat Sequences
7, 8 and 9 -- Overview
Countering any Attacks and Tempting an Opponent into
a Trap -- Overview
The Technique of Double Spread in the Pattern Carry Moon in
Bosom -- Part 1
The Technique of Double Spread in the Pattern Carry Moon in
Bosom -- Part 2
The Technique of Double Spread in the Pattern Carry Moon in
Bosom -- Part 3
The Technique of Double Spread in the Pattern Carry Moon in
Bosom -- Part 4
The Technique of Double Spread in the Pattern Carry Moon in
Bosom -- Part 5
The Technique of Double Spread in the Pattern Carry Moon in
Bosom -- Part 6
The Technique of Double Spread in the Pattern Carry Moon in
Bosom -- Part 7
The Technique of Double Spread in the Pattern Carry Moon in
Bosom -- Part 8
The Technique of Double Spread in the Pattern Carry Moon in
Bosom -- Part 9
 The Technique of Double Spread in the Pattern Carry
Moon in Bosom -- Part 10
Reviewing Combat Sequences 4, 5 and 6 in Solo and in
Partner Combination -- Part 1
Reviewing Combat Sequences 4, 5 and 6 in Solo and in
Partner Combination -- Part 2
Reviewing Combat Sequences 4, 5 and 6 in Solo and in
Partner Combination -- Part 3
Reviewing Combat Sequences 4, 5 and 6 in Solo and in
Partner Combination -- Part 4
Reviewing Combat Sequences 4, 5 and 6 in Solo and in
Partner Combination -- Part 5
Reviewing Combat Sequences 4, 5 and 6 in Solo and in
Partner Combination -- Part 6
Reviewing Combat Sequences 4, 5 and 6 in Solo and in
Partner Combination -- Part 7
Reviewing Combat Sequences 4, 5 and 6 in Solo and in
Partner Combination -- Part 8
Reviewing Combat Sequences 4, 5 and 6 in Solo and in
Partner Combination -- Part 9
Reviewing Combat Sequences 4, 5 and 6 in Solo and in
Partner Combination -- Part 10
Reviewing Combat Sequences 4, 5 and 6 in Solo and in
Partner Combination -- Part 11
Sounding the Bell to Handle Fast, Continuous Strikes -- Part 1
Sounding the Bell to Handle Fast, Continuous Strikes -- Part 2
Sounding the Bell to Handle Fast, Continuous Strikes -- Part 3
Sounding the Bell to Handle Fast, Continuous Strikes -- Part 4
Sounding the Bell to Handle Fast, Continuous Strikes -- Part 5
Sounding the Bell to Handle Fast, Continuous Strikes -- Part 6
Sounding the Bell to Handle Fast, Continuous Strikes -- Part 7
Using a Nail Kick to Counte a Whirlwind Kick -- Part 1
Using a Nail Kick to Counte a Whirlwind Kick -- Part 2
Using a Nail Kick to Counte a Whirlwind Kick -- Part 3
Using a Nail Kick to Counte a Whirlwind Kick -- Part 4
Using a Nail Kick to Counte a Whirlwind Kick -- Part 5
Using a Nail Kick to Counte a Whirlwind Kick -- Part 6
Using a Nail Kick to Counte a Whirlwind Kick -- Part 7
Cloud Hand and Horn Punch against Chin-Na and
Throat Strike -- Part 1
Cloud Hand and Horn Punch against Chin-Na and
Throat Strike -- Part 2
Cloud Hand and Horn Punch against Chin-Na and
Throat Strike -- Part 3
Cloud Hand and Horn Punch against Chin-Na and
Throat Strike -- Part 4
 Cloud Hand and Horn Punch against Chin-Na and
Throat Strike -- Part 5
Cloud Hand and Horn Punch against Chin-Na and
Throat Strike -- Part 6
A Little Jump as a Trick -- Part 1
A Little Jump as a Trick -- Part 2
A Little Jump as a Trick -- Part 3
A Little Jump as a Trick -- Part 4
A Little Jump as a Trick -- Part 5
A Little Jump as a Trick -- Part 6
A Little Jump as a Trick -- Part 7
A Little Jump as a Trick -- Part 8
Striking our Opponent before he Realizes with Shooting Spear
at Yun Pavilion -- Part 1
Striking our Opponent before he Realizes with Shooting Spear
at Yun Pavilion -- Part 2
Striking our Opponent before he Realizes with Shooting Spear
at Yun Pavilion -- Part 3
Striking our Opponent before he Realizes with Shooting Spear
at Yun Pavilion -- Part 4
Striking our Opponent before he Realizes with Shooting Spear
at Yun Pavilion -- Part 5
Striking our Opponent before he Realizes with Shooting Spear
at Yun Pavilion -- Part 6
A Technique to Counter any Chin-Na or Gripping Attacks -- Part 1
A Technique to Counter any Chin-Na or Gripping Attacks -- Part 2
A Technique to Counter any Chin-Na or Gripping Attacks -- Part 3
A Technique to Counter any Chin-Na or Gripping Attacks -- Part 4
A Technique to Counter any Chin-Na or Gripping Attacks -- Part 5
A Technique to Counter any Chin-Na or Gripping Attacks -- Part 6
A Technique to Counter any Chin-Na or Gripping Attacks -- Part 7
A Technique to Counter any Chin-Na or Gripping Attacks -- Part 8
A Hand Technique to Counter any Hand Attatcks, and a Leg Technique
to Counter any Low Kicks -- Part 1
A Hand Technique to Counter any Hand Attatcks, and a Leg Technique
to Counter any Low Kicks -- Part 2
A Hand Technique to Counter any Hand Attatcks, and a Leg Technique
to Counter any Low Kicks -- Part 3
A Hand Technique to Counter any Hand Attatcks, and a Leg Technique
to Counter any Low Kicks -- Part 4
A Hand Technique to Counter any Hand Attatcks, and a Leg Technique
to Counter any Low Kicks -- Part 5
A Hand Technique to Counter any Hand Attatcks, and a Leg Technique
to Counter any Low Kicks -- Part 6
 A Hand Technique to Counter any Hand Attatcks, and a
Leg Technique to Counter any Low Kicks -- Part 7
A Hand Technique to Counter any Hand Attatcks, and a
Leg Technique to Counter any Low Kicks -- Part 8
A Hand Technique to Counter any Hand Attatcks, and a
Leg Technique to Counter any Low Kicks -- Part 9
A Hand Technique to Counter any Hand Attatcks, and a
Leg Technique to Counter any Low Kicks -- Part 10
A Hand Technique to Counter any Hand Attatcks, and a
Leg Technique to Counter any Low Kicks -- Part 11
Amazing Combat Functions in Combat Sequences
7, 8 and 9 -- Part 1
Amazing Combat Functions in Combat Sequences 7, 8 and 9 -- Part 2
Amazing Combat Functions in Combat Sequences 7, 8 and 9 -- Part 3
Amazing Combat Functions in Combat Sequences 7, 8 and 9 -- Part 4
Amazing Combat Functions in Combat Sequences 7, 8 and 9 -- Part 5
Amazing Combat Functions in Combat Sequences 7, 8 and 9 -- Part 6
Amazing Combat Functions in Combat Sequences 7, 8 and 9 -- Part 7
Amazing Combat Functions in Combat Sequences 7, 8 and 9 -- Part 8
Countering any Attacks and Tempting an Opponent into a Trap -- Part 1
Countering any Attacks and Tempting an Opponent into a Trap -- Part 2
Countering any Attacks and Tempting an Opponent into a Trap -- Part 3
Countering any Attacks and Tempting an Opponent into a Trap -- Part 4
Countering any Attacks and Tempting an Opponent into a Trap -- Part 5
Countering any Attacks and Tempting an Opponent into a Trap -- Part 6
Countering any Attacks and Tempting an Opponent into a Trap -- Part 7
Countering any Attacks and Tempting an Opponent into a Trap -- Part 8
Countering any Attacks and Tempting an Opponent into a Trap -- Part 9
Countering any Attacks and Tempting an Opponent into a Trap -- Part 10
Shaolin -- Tantui 13 Continuou Attcks in Combat Sequence 10 -- Overview
Pressing Attacks with Continuous Spring Kicks -- Overview
Picture-Perfect Form in Planned Sequence of Pressing Attacks -- Overview
Two Sophisticated Felling Techniques in Combat Sequence 11 -- Overview
Arresting Horse and Kicking Carriage -- Overview
Taming Tiger and Striking Rock -- Overview
Solo Practice of Combat Sequences 10, 11 and 12 -- Overview
Using Tantui Patterns in Free Sparring, Especially against Boxing-- Overview
Questions and Answers, and Handling Kick-Boxing -- Overview
Continuou Attcks in Combat Sequence 10 -- Part 1
 Continuou Attcks in Combat Sequence 10 -- Part 2
Continuou Attcks in Combat Sequence 10 -- Part 3
Continuou Attcks in Combat Sequence 10 -- Part 4
Continuou Attcks in Combat Sequence 10 -- Part 5
Continuou Attcks in Combat Sequence 10 -- Part 6
Continuou Attcks in Combat Sequence 10 -- Part 7
Pressing Attakcs with Continuous Spring Kicks -- Part 1
Pressing Attakcs with Continuous Spring Kicks -- Part 2
Pressing Attakcs with Continuous Spring Kicks -- Part 3
Pressing Attakcs with Continuous Spring Kicks -- Part 4
Pressing Attakcs with Continuous Spring Kicks -- Part 5
Pressing Attakcs with Continuous Spring Kicks -- Part 6
Pressing Attakcs with Continuous Spring Kicks -- Part 7
Pressing Attakcs with Continuous Spring Kicks -- Part 8
Pressing Attakcs with Continuous Spring Kicks -- Part 9
Picture-Perfect Form in Planned Sequence of Pressing Attacks -- Part 1
Picture-Perfect Form in Planned Sequence of Pressing Attacks -- Part 2
Picture-Perfect Form in Planned Sequence of Pressing Attacks -- Part 3
Picture-Perfect Form in Planned Sequence of Pressing Attacks -- Part 4
Picture-Perfect Form in Planned Sequence of Pressing Attacks -- Part 5
Picture-Perfect Form in Planned Sequence of Pressing Attacks -- Part 6
Picture-Perfect Form in Planned Sequence of Pressing Attacks -- Part 7
Two Sophisticated Felling Techniques in Combat Sequence 11 -- Part 1
Two Sophisticated Felling Techniques in Combat Sequence 11 -- Part 2
Two Sophisticated Felling Techniques in Combat Sequence 11 -- Part 3
Two Sophisticated Felling Techniques in Combat Sequence 11 -- Part 4
Two Sophisticated Felling Techniques in Combat Sequence 11 -- Part 5
Arresting Horse and Kicking Carriage -- Part 1
Arresting Horse and Kicking Carriage -- Part 2
Arresting Horse and Kicking Carriage -- Part 3
 Arresting Horse and Kicking Carriage -- Part 4
Arresting Horse and Kicking Carriage -- Part 5
Arresting Horse and Kicking Carriage -- Part 6
Arresting Horse and Kicking Carriage -- Part 7
Arresting Horse and Kicking Carriage -- Part 8
Taming Tiger and Striking Rock -- Part 1
Taming Tiger and Striking Rock -- Part 2
Taming Tiger and Striking Rock -- Part 3
Taming Tiger and Striking Rock -- Part 4
Taming Tiger and Striking Rock -- Part 5
Taming Tiger and Striking Rock -- Part 6
Taming Tiger and Striking Rock -- Part 7
Taming Tiger and Striking Rock -- Part 8
Taming Tiger and Striking Rock -- Part 9
Taming Tiger and Striking Rock -- Part 10
Taming Tiger and Striking Rock -- Part 11
Solo Practice of Combat Sequences 10, 11 and 12 -- Part 1
Solo Practice of Combat Sequences 10, 11 and 12 -- Part 2
Solo Practice of Combat Sequences 10, 11 and 12 -- Part 3
Solo Practice of Combat Sequences 10, 11 and 12 -- Part 4
Solo Practice of Combat Sequences 10, 11 and 12 -- Part 5
Solo Practice of Combat Sequences 10, 11 and 12 -- Part 6
Using Tantui Patterns in Free Sparring, Especially against Boing -- Part 1
Using Tantui Patterns in Free Sparring, Especially against Boing -- Part 2
Using Tantui Patterns in Free Sparring, Especially against Boing -- Part 3
Using Tantui Patterns in Free Sparring, Especially against Boing -- Part 4
Using Tantui Patterns in Free Sparring, Especially against Boing -- Part 5
Using Tantui Patterns in Free Sparring, Especially against Boing -- Part 6
Using Tantui Patterns in Free Sparring, Especially against Boing -- Part 1
Using Tantui Patterns in Free Sparring, Especially against Boing -- Part 2
 Using Tantui Patterns in Free Sparring, Especially
against Boing -- Part 3
Using Tantui Patterns in Free Sparring, Especially
against Boing -- Part 4
Using Tantui Patterns in Free Sparring, Especially
against Boing -- Part 5
Using Tantui Patterns in Free Sparring, Especially
against Boing -- Part 6
Shaolin -- Tantui 14 12 Sequences of Shaolin Tantui -- Pictures
Shaolin -- Tantui UK Videos Shaolin Tantui and Combat Application, UK Summer Camp
2007 -- Overview
Secrets of Internal Force Training
Purposely Experiencing the Effects of Deviated Practice
Basic Footwork Training
From Correct Movement to Speed and Elegance
Various Ways of Turning
Adding Hand Forms to Stances to Florm Patterns
Mechanics of Fa-Jing or Explode Force
Bo-Fa and Shen-Fa, or Footwork and Body-Movement
Three Harmonies of Legs, Body and Hands
Tantui Sequence 1 -- Thrrust Punch
The Three Fs -- Fprm, Force and Flow
Every Kungfu Session is a Training of Energy and Mind/a>
Simple in Appearnace but Prodound in Application
If you Use a Lot of Kicks, you should also Know their Counters
It is Necessary to have an Element of Threat in Combat
Felling Opponent as he Execites Knee Strikes
Against Shoots, Against Throws, and Felling Opponents
Learning Tantui Sequences 1, 2 and 3
Learning Tantui Sequences 4, 5 and 6
 Learning Tantui Sequences 7, 8 and 9
Learning Tantui Sequences 10, 11 and 12
Applications of Single Sprread and Breaking Lock
Breaking almost any Lock with Breaking Lock Technique
Richness of Tantui Combat Applications
Second Brother and White Horse
Effective Sequence against Boxers
Three Harmonies in Tantui Sequence 1
White Horse Returns Head
Adjustments and Modifications in Varied Situations
Effective Techniques Against Boxers
Combat Skils against Boxers
Tactics of Covering and Chasing against Boxers
Unbelievable Effectiveness of Tantui Combats Sequence 1
Old Elephant Drops Tusk in Tantui Combat Sequence 2
Rising Dragon Galloping Tiger
Combining Sequences in Combat Training
Importance of Skills in Applying Combat Sequences
Some Effective Skills for Combat
Three Rings Around Moon in Tantui Combat Sequence 3
Applying Chin-Na and Countering Chin-Na
Solo Performance to Enhance Combat Efficiency
Simple in Solo Performance, Profound in Combat Application
Counters against Formidable Muay Thai Knee Jabs
Felling Opponents without Throwing Them
Tantui Combat Sequences 1, 2 and 3
Chopping Firwood and Hook-Thrust in Shaolin Tantui
Technique of Double Spread in Carry Moon in Bosom
Combat Sequences 4, 5 and 6 in Solo Practice and Partner Combination
Sounding Bell to Handle Fast, Continuous Strikes
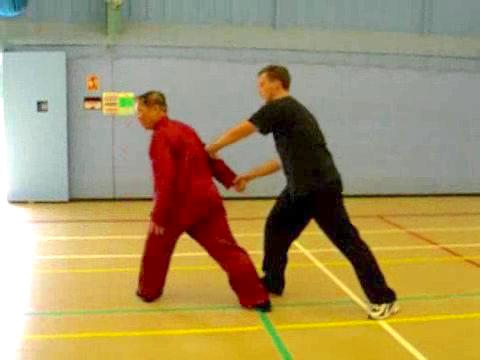 Using a Nail Kick to Counter a Whirlwind Kick
Cloud Hans and Horn Punch agaist Chin-Na and Thrust-Strike
A Little Jump as a Trick
Striking Opponent with Shooting Spear before he Realizes
Technique to Counter Chin-Na or Gripping Attack
Hand Techniques to Counter Hand Strikes, and Leg
Techniques to Counter Low Kicks
Amazing Combat Functions in Combat Sequences 7, 8 and 9
Countering any Attack and Tempting Opponent into a Trap
Continuous Attacks of Combat Sequence 10
Pressing Attacks with Continuous Spring Kicks
Picture-Perfect Form of Planned Sequence in Pressing Attacks
Two Sophisticated Felling Techniques in Combat Sequence 11
Arresting Horse and Kicking Carriage
Taming Tiger and Striking Rock
Solo Practice of Combat Sequences 10, 11 and 12
Tantui Patterns in Free Sparring, Especially against Boxing
Questions and Answers, and Handling Kick-Boxing
Shaolin -- Tantui Videos Tantui; Essentail of Northern Shaolin, Toronto and Frankfrut
2007 -- Overview
12 Sequences of Shaolin Tantui
12 Combat Sequences of Tantui
Shaolin Tantui Application Set
Shaolin Tantui against Boxing and Kick-Boxing
Technical Advantages of Shaolin Kungfu as Shown in Tantui
Wonders of Shaolin Tantui Sequence 1
Making Kungfu Alive through Shaolin Tantui
Two Combat Sequecnes Adequate to Handle Almost any Ordinary
Opponents
A Shaolin Tantui Counter against any Kick!
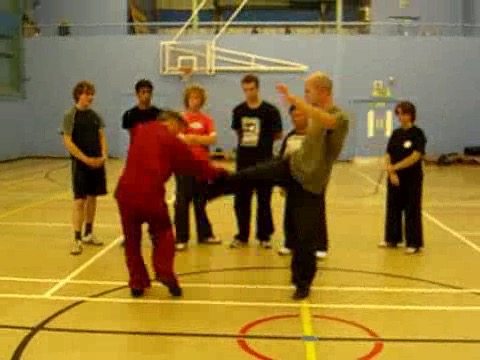 Formidable Three Ring Around the Moon of Tantui
Sequence 3
Penetrating the Impenetrable in Shaolin Tantui
Countering Elbow and Knee Strikes from Muay Thai Fighters
Shaolin Tantui Applications in Striking, Kicking,
Felling and Gripping
Secrets Hidden in the Open in Shaolin Tantui
Helping One Another and Having Fun in Tantui Sparring
Laying Foundation before Combat Training
From Form to Flow to Force in Shaolin Tantui
Linking Sequences o Form Sets in Shaolin Tantui
Profundity of 12 Tantui Combat Sequences
12 Tantui Sequences at UK Summer Camp
Single Tiger Single Tiger Emerges from Cave -- Overview (Pictures)
Single Tiger Emerges from Cave -- Overview 2 (Pictures)
Combat Sequences -- Part 1
Combat Sequences -- Part 2
Combat Sequences -- Part 3
Combat Sequences -- Part 4
Combat Sequences -- Part 5
Combat Sequences -- Part 6
Combat Sequences -- Part 7
Combat Sequences -- Part 8
Combat Sequences -- Part 9
Combat Sequences -- Part 10
Combat Sequences -- Part 11
Combat Sequences -- Part 12
Combat Sequences -- Part 13
Combat Sequences -- Part 14
Combat Sequences -- Part 15
Combat Sequences -- Part 16
Two Big Secrets in Single Tiger Emerges from Cave
 Special Test 2008
Breaking the Bottom of two Bricks -- Overview
Special Test 2008
Breaking the Bottom of two Bricks -- OverviewBrick Breaking Galore -- Overview
Brick Breaking Galore -- Part 1
Brick Breaking Galore -- Part 2
Brick Breaking Galore -- Part 3
Brick Breaking Galore -- Part 4
Brick Breaking Galore -- Part 5
Brick Breaking Galore -- Part 6
Brick Breaking Galore -- Part 7
Brick Breaking Galore -- Part 8
Brick Breaking Galore -- Part 9
Brick Breaking Galore -- Part 10
Brick Breaking Galore -- Part 11
Brick Breaking Galore -- Part 12
Brick Breaking Galore -- Part 13
Brick Breaking Galore -- Part 14
Brick Breaking Galore -- Part 15
Brick Breaking Galore -- Part 16
Breaking the Bottom of Two Bricks -- Part 1
Breaking the Bottom of Two Bricks -- Part 2
Breaking the Bottom of Two Bricks -- Part 3
Breaking the Bottom of Two Bricks -- Part 4
Breaking the Bottom of Two Bricks -- Part 5
Breaking the Bottom of Two Bricks -- Part 6
Sugar Cane, Eggs and Candle Flame -- Part 5
Sugar Cane, Eggs and Candle Flame -- Part 6
Sugar Cane, Eggs and Candle Flame -- Part 7
Sugar Cane, Eggs and Candle Flame -- Part 8
Sugar Cane, Eggs and Candle Flame -- Part 9
Sugar Cane, Eggs and Candle Flame
 Sugar Cane, Eggs and Candle Flame -- Part 1
Sugar Cane, Eggs and Candle Flame -- Part 2
Sugar Cane, Eggs and Candle Flame -- Part 3
Sugar Cane, Eggs and Candle Flame -- Part 4
Standardized Test and Brick Breaking Galore -- Overview
Special Standardized Test 2008 -- Overview
Special Standardized Test 2008 -- Part 1
Special Standardized Test 2008 -- Part 2
Special Standardized Test 2008 -- Part 3
Special Standardized Test 2008 -- Part 4
Special Standardized Test 2008 -- Part 5
Special Standardized Test 2008 -- Part 6
Special Standardized Test 2008 -- Part 7
Special Standardized Test 2008 -- Part 8
Special Standardized Test 2008 -- Part 9
Special Standardized Test 2008 -- Part 10
Special Standardized Test 2008 -- Part 11
Special Standardized Test 2008 -- Part 12
Special Standardized Test 2008 -- Part 13
Special Standardized Test 2008 -- Part 14
Special Standardized Test 2008 -- Part 15
Special Standardized Test 2008 -- Part 16
Special Standardized Test 2008 -- Part 17
Special Standardized Test 2008 -- Part 18
Special Standardized Test 2008 -- Part 19
Special Standardized Test 2008 -- Part 20
Special Standardized Test 2008 -- Part 21
Special Standardized Test 2008 -- Part 22
Special Standardized Test 2008 -- Part 23
Special Standardized Test 2008 -- Part 24
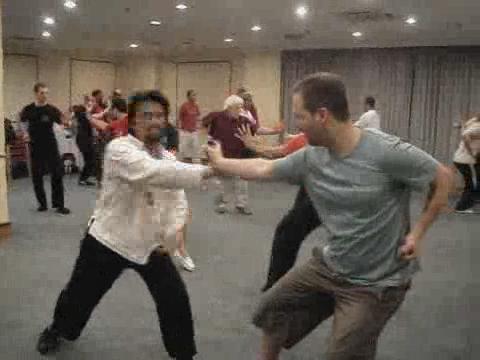 Special Standardized Test 2008 -- Part 25
Special Standardized Test 2008 -- Part 26
Special Standardized Test 2008 -- Part 27
Switzerland 2006 -- Free Sparring Using Kungfu fro Free Sparring is Certainly Possible
-- Overview
Using Kungfu fro Free Sparring is Certainly Possible --Part 1
Using Kungfu fro Free Sparring is Certainly Possible --Part 2
Using Kungfu fro Free Sparring is Certainly Possible --Part 3
Using Kungfu fro Free Sparring is Certainly Possible --Part 4
Using Kungfu fro Free Sparring is Certainly Possible --Part 5
Using Kungfu fro Free Sparring is Certainly Possible --Part 6
Using Kungfu fro Free Sparring is Certainly Possible --Part 7
Using Kungfu fro Free Sparring is Certainly Possible --Part 8
Using Kungfu fro Free Sparring is Certainly Possible --Part 9
Using Kungfu fro Free Sparring is Certainly Possible --Part 10
Using Kungfu fro Free Sparring is Certainly Possible --Part 11
Using Kungfu fro Free Sparring is Certainly Possible --Part 12
Using Kungfu fro Free Sparring is Certainly Possible --Part 13
Using Kungfu fro Free Sparring is Certainly Possible --Part 14
Using Kungfu fro Free Sparring is Certainly Possible --Part 15
Using Kungfu fro Free Sparring is Certainly Possible --Part 16
Using Kungfu fro Free Sparring is Certainly Possible --Part 17
Using Kungfu fro Free Sparring is Certainly Possible --Part 18
Using Kungfu fro Free Sparring is Certainly Possible --Part 19
Using Kungfu fro Free Sparring is Certainly Possible --Part 20
Using Kungfu fro Free Sparring is Certainly Possible --Part 21
Using Kungfu fro Free Sparring is Certainly Possible --Part 22
Using Kungfu fro Free Sparring is Certainly Possible --Part 23
Using Kungfu fro Free Sparring is Certainly Possible --Part 24
Using Kungfu fro Free Sparring is Certainly Possible --Part 25
Using Kungfu fro Free Sparring is Certainly Possible --Part 26
Using Kungfu fro Free Sparring is Certainly Possible --Part 27
Using Kungfu fro Free Sparring is Certainly Possible --Part 28
Using Kungfu fro Free Sparring is Certainly Possible --Part 29
Using Kungfu fro Free Sparring is Certainly Possible --Part 30
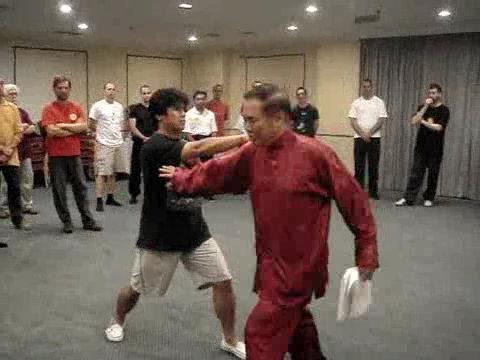 Switzerland 2006 -- Sequences
Secrets in Free Sparring Methodology -- Overview
Switzerland 2006 -- Sequences
Secrets in Free Sparring Methodology -- OverviewSecrets in Free Sparring Methodology -- Part 1
Secrets in Free Sparring Methodology -- Part 2
Secrets in Free Sparring Methodology -- Part 3
Secrets in Free Sparring Methodology -- Part 4
Secrets in Free Sparring Methodology -- Part 5
Secrets in Free Sparring Methodology -- Part 6
Secrets in Free Sparring Methodology -- Part 7
Secrets in Free Sparring Methodology -- Part 8
Secrets in Free Sparring Methodology -- Part 9
Secrets in Free Sparring Methodology -- Part 10
Secrets in Free Sparring Methodology -- Part 11
Secrets in Free Sparring Methodology -- Part 12
Secrets in Free Sparring Methodology -- Part 13
Secrets in Free Sparring Methodology -- Part 14
Secrets in Free Sparring Methodology -- Part 15
Secrets in Free Sparring Methodology -- Part 16
Secrets in Free Sparring Methodology -- Part 17
Secrets in Free Sparring Methodology -- Part 18
Switzerland 2006 -- Set Single Tiger Emerges from Cave -- Overview
Single Tiger Emerges from Cave -- Sequence 1
Single Tiger Emerges from Cave -- Sequences 2 and 3
Single Tiger Emerges from Cave -- Sequence 4
Single Tiger Emerges from Cave -- Sequence 5
Single Tiger Emerges from Cave -- Sequence 6
Single Tiger Emerges from Cave -- Sequence 7
Single Tiger Emerges from Cave -- Sequence 8
Single Tiger Emerges from Cave -- Set Part 1
Single Tiger Emerges from Cave -- Set Part 2
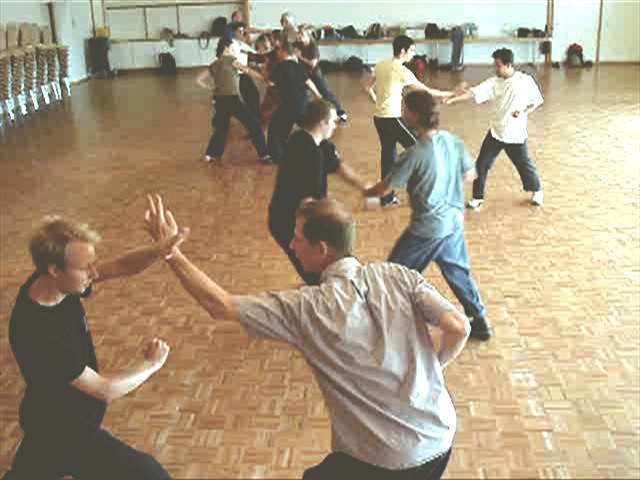 Single Tiger Emerges from Cave -- Set Part 3
Single Tiger Emerges from Cave -- Set Part 4
Combat Application of SEquence 8
Switzerland 2006 -- Set-Pictures Single Tiger Emerge from Cave (Old)
Single Tiger Emerge from Cave -- Picture Series
Switzerland 2006 -- Teaching Learning Combat Sequences for Free Sparring -- Part 1
Learning Combat Sequences for Free Sparring -- Part 2
Learning Combat Sequences for Free Sparring -- Part 3
Learning Combat Sequences for Free Sparring -- Part 4
Learning Combat Sequences for Free Sparring -- Part 5
Learning Combat Sequences for Free Sparring -- Part 6
Learning Combat Sequences for Free Sparring -- Part 7
Learning Combat Sequences for Free Sparring -- Part 8
Learning Combat Sequences for Free Sparring -- Part 9
Learning Combat Sequences for Free Sparring -- Part 10
Learning Combat Sequences for Free Sparring -- Part 11
Learning Combat Sequences for Free Sparring -- Part 12
Learning Combat Sequences for Free Sparring -- Part 13
Learning Combat Sequences for Free Sparring -- Part 14
Learning Combat Sequences for Free Sparring -- Part 15
Learning Combat Sequences for Free Sparring -- Part 16
Learning Combat Sequences for Free Sparring -- Part 17
Learning Combat Sequences for Free Sparring -- Part 18
Learning Combat Sequences for Free Sparring -- Overview
 Switzerland 2006 -- Teaching -- Videos
Learning Combat Sequences for Free Sparring (1)
Switzerland 2006 -- Teaching -- Videos
Learning Combat Sequences for Free Sparring (1)Learning Combat Sequences for Free Sparring (2)
Learning Combat Sequences for Free Sparring (3)
Videos of Learning Combat Sequences for Free Sparring
Switzerland 2006 -- Videos Using Kungfu in Free Sparring is Certainly Possible -- Videos
Using Kungfu in Free Sparring -- Part 1
Using Kungfu in Free Sparring -- Part 2
Using Kungfu in Free Sparring -- Part 3
Using Kungfu in Free Sparring -- Part 4
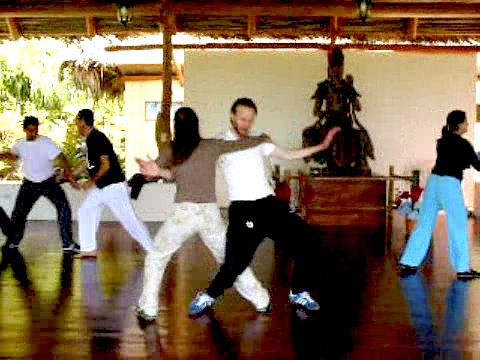 Taijiquan -- Blue Mountain 2008 -- Taiji 01
Tactic of Continuation in Combat Sequences
Taijiquan -- Blue Mountain 2008 -- Taiji 01
Tactic of Continuation in Combat SequencesFelling Techniques in Wahnam Taijiquan
Secquence 1: Immortal Waves Sleeves
Secquence 2: Low Stacne Vertiacal Punch
Secquence 3: White Snake Shoots Venom
Secquence 4: Shoots Green Dragon Pearl
Secquence 5: White Crane Flaps Wings
Secquence 6: Striking Tiger Poise
Secquence 7: Thrust Kick
Secquence 8: Low Stance Single Whip
Secquence 9: Black Bear Sinks Hips
Secquence 10: Shoulder Strike
Secquence 11: Cloud Hands
Secquence 12: Carry Tiger Back to Mountain
Learning the 12 Basic Taijiqna Combat Sequences
Step by Step (Old)
Learning the 12 Basic Taijiqna Combat Sequences
Step by Step
Tactic of Subtraction in Combat Seequences
Break Fall
Elegant Ladies Felling Big Men
Having a Lot of Fun
Techniques and Tactics in Wahnam Taijiquan
Taijiquan -- Blue Mountain 2008 -- Videos Tactic of Continuation in Wahnam Taijiquan
Felling Techniques of Wahnam Taijiquan
Learning 12 Basic Taijiquan Combat Sequences
2008 -- Overview
Wahnam Taijiquan Basic Combat Sequence 1
Wahnam Taijiquan Basic Combat Sequence 2
Wahnam Taijiquan Basic Combat Sequence 3
Wahnam Taijiquan Basic Combat Sequence 4
Wahnam Taijiquan Basic Combat Sequence 5
Wahnam Taijiquan Basic Combat Sequence 6
Wahnam Taijiquan Basic Combat Sequence 7
 Wahnam Taijiquan Basic Combat Sequence 8
Wahnam Taijiquan Basic Combat Sequence 9
Wahnam Taijiquan Basic Combat Sequence 10
Wahnam Taijiquan Basic Combat Sequence 11
Wahnam Taijiquan Basic Combat Sequence 12
Tactic of Subtraction in Wahnam Taijiquan
Taijiquan -- Combat Sequences 4 Taijiquan Abridegd Combat Sequences
Basic Wahnam Taijiquan Combat Sequences
Four Abridged Taijiquan Combat Sequences
Japan Version of Taijiquan Four Combat Sequences --
Combat Sequence 1
Japan Version of Taijiquan Four Combat Sequences --
Combat Sequence 2
Japan Version of Taijiquan Four Combat Sequences --
Combat Sequence 3
Japan Version of Taijiquan Four Combat Sequences --
Combat Sequence 4
Portugal Version of Taijiquan Four Combat Sequences --
Combat Sequence 3
Portugal Version of Taijiquan Four Combat Sequences --
Combat Sequence 1
Portugal Version of Taijiquan Four Combat Sequences --
Combat Sequence 2
Portugal Version of Taijiquan Four Combat Sequences --
Combat Sequence 4
12 Basic Taijiquan Combat Sequences -- Combat Sequence 1
12 Basic Taijiquan Combat Sequences -- Combat Sequence 2
12 Basic Taijiquan Combat Sequences -- Combat Sequence 3
12 Basic Taijiquan Combat Sequences -- Combat Sequence 4
12 Basic Taijiquan Combat Sequences -- Combat Sequence 5
12 Basic Taijiquan Combat Sequences -- Combat Sequence 6
12 Basic Taijiquan Combat Sequences -- Combat Sequence 7
12 Basic Taijiquan Combat Sequences -- Combat Sequence 8
12 Basic Taijiquan Combat Sequences -- Combat Sequence 9
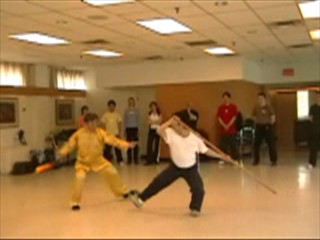 12 Basic Taijiquan Combat Sequences -- Combat Sequence 10
12 Basic Taijiquan Combat Sequences -- Combat Sequence 11
12 Basic Taijiquan Combat Sequences -- Combat Sequence 12
Standardized Version of Four Combat Sequences -- Striking
Standardized Version of Four Combat Sequences -- Kicking
Standardized Version of Four Combat Sequences -- Felling
Standardized Version of Four Combat Sequences -- Chin-Na
Taijiquan -- Learning Combat Sequences Learning the Twelve Wahnam Taijiquan Combat Sequences -- Overview
Sequence 1: Immortal Waves Sleeves
Sequence 2: Low Stance ertical Punch
Sequence 3: White Snake Shoot Venom
Sequence 4: Green Dragon Shoots Pearl
Sequence 5: White Crane Falps Wings
Sequence 6: Striking Tiger Poise
Sequence 7: Thrust Kick
Sequence 8: Shoulder Strike
Sequence 9: Black Bear Sinks Hips
Sequence 10: Shoulder Strike
Sequence 11: Cloud Hands
Sequence 12: Carry Tiger Back to Mountain
Taijiquan -- Taiji Robin Flowing Water Floating Clouds (Old)
Flowing Water Floating Clouds -- Overview
Taijiquan -- Yellow Bee Yellow Bee Sucks Pollen -- Part 1
Yellow Bee Sucks Pollen -- Part 2
Yellow Bee Sucks Pollen -- Part 3
Yellow Bee Sucks Pollen -- Part 4
Yellow Bee Sucks Pollen -- Pictures
Yellow Bee Sucks Pollen -- Videos
 Taijiquan -- Yellow Bee Combat
8 Taijiquan Distilled Combat Sequences
Taijiquan -- Yellow Bee Combat
8 Taijiquan Distilled Combat SequencesYellow Dee Sucks Pollen -- Sequence 1: Top, Middle, Bottom
Yellow Dee Sucks Pollen -- Sequence 2: Side Attack
Yellow Dee Sucks Pollen -- Sequence 3: Continuous Attacks
Yellow Dee Sucks Pollen -- Sequence 4: Double Kicks
Yellow Dee Sucks Pollen -- Sequence 5: Whirlwind Kick
Yellow Dee Sucks Pollen -- Sequence 6: Felling Attack
Yellow Dee Sucks Pollen -- Sequence 7: Chopping Attack
Yellow Dee Sucks Pollen -- Sequence 8: Gripping Attack
Eight Distilled Taijiquan Combat Sequences
 Sword
Amazing Combat Applications of Traveling Dragon
Sword
Amazing Combat Applications of Traveling DragonSword -- Overview
The Dainty Chinese Sword aganst the Mighty Samurai
Sword -- Part 1
The Dainty Chinese Sword aganst the Mighty Samurai
Sword -- Part 2
The Dainty Chinese Sword aganst the Mighty Samurai
Sword -- Part 3
The Dainty Chinese Sword aganst the Mighty Samurai
Sword -- Part 4
The Master' Weapon against the Mother of Weapons -- Part 1
The Master' Weapon against the Mother of Weapons -- Part 2
The Master' Weapon against the Mother of Weapons -- Part 3
The Master' Weapon against the Mother of Weapons -- Part 4
The Master' Weapon against the Mother of Weapons -- Part 5
The Master' Weapon against the Mother of Weapons -- Part 6
The Master' Weapon against the Mother of Weapons -- Part 7
The Marvelous Sword agaist the King of Weapons -- Part 1
The Marvelous Sword agaist the King of Weapons -- Part 2
The Marvelous Sword agaist the King of Weapons -- Part 3
The Marvelous Sword agaist the King of Weapons -- Part 4
The Marvelous Sword agaist the King of Weapons -- Part 5
Traveling Dragon and Ferocious Tiger -- Part 1
Traveling Dragon and Ferocious Tiger -- Part 2
Traveling Dragon and Ferocious Tiger -- Part 3
How would You Defend against a Versatile Three-Sectional Staff? -- Part 1
How would You Defend against a Versatile Three-Sectional Staff? -- Part 2
How would You Defend against a Versatile Three-Sectional Staff? -- Part 3
How would You Defend against a Versatile Three-Sectional Staff? -- Part 4
How would You Defend against a Versatile Three-Sectional Staff? -- Part 5
How would You Defend against a Versatile Three-Sectional Staff? -- Part 6
How would You Defend against a Versatile Three-Sectional Staff? -- Part 7
How would You Defend against a Versatile Three-Sectional Staff? -- Part 8
Secrets that Enhance Combat Effiency and Daily Life -- Part 1
Secrets that Enhance Combat Effiency and Daily Life -- Part 2
 Secrets that Enhance Combat Effiency and Daily Life -- Part 3
Secrets that Enhance Combat Effiency and Daily Life -- Part 4
The Dainty Chinese Sword aganst the Mighty Samurai
Sword -- Overview
The Master' Weapon against the Mother of Weapons
-- Overview
The Marvelous Sword agaist the King of Weapons -- Overview
Traveling Dragon and Ferocious Tiger -- Overview
How would You Defend against a Versatile Three-Sectional
Staff? -- Overview
Secrets that Enhance Combat Effiency and Daily Life
-- Overview
Sword -- Videos Videos of Amazing Combat Applications of Traveling
Dragon Sword -- Overveiw
Dainty Chinese Sword aganst the Mighty Samurai
Sword -- Overview
Sword against Staff -- Master's Weapon against
Mother of Weapons -- Overview
Sword against Spear: Marvelous Weapon against
King of Weapon-- Overview
Sword against Sabre: Traveling Dragon against
Ferocious Tiger -- Overview
How You would Defend against a Three Sectional Staff
with a Dainty Sword -- Overview
Sword against Double Sabres: Secrets that Enhance Combat
Efficency and Daily Life -- Overview
Weapons -- Spear Traveling Dragon Thirteen-Technique Spear -- Overview
Introducing the Traveling Dragon Thirteen-Technique Spear -- Part 1
Introducing the Traveling Dragon Thirteen-Technique Spear -- Part 2
Introducing the Traveling Dragon Thirteen-Technique Spear -- Part 3
Introducing the Traveling Dragon Thirteen-Technique Spear -- Part 4
Introducing the Traveling Dragon Thirteen-Technique Spear -- Part 5
Introducing the Traveling Dragon Thirteen-Technique Spear -- Part 6
Introducing the Traveling Dragon Thirteen-Technique Spear -- Part 7
The Formidable Circling and Shooting Techniques of the Spear -- Part 1
The Formidable Circling and Shooting Techniques of the Spear -- Part 2
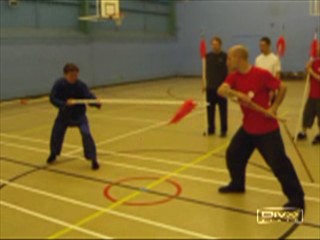 The Formidable Circling and Shooting Techniques of
the Spear -- Part 3
The Formidable Circling and Shooting Techniques of
the Spear -- Part 4
The Formidable Circling and Shooting Techniques of
the Spear -- Part 5
The Formidable Circling and Shooting Techniques of
the Spear -- Part 6
The Formidable Circling and Shooting Techniques of
the Spear -- Part 7
Using the Spear against the Butterfly Knives and the Big
Knife -- Part 1
Using the Spear against the Butterfly Knives and the Big Knife -- Part 2
Using the Spear against the Butterfly Knives and the Big Knife -- Part 3
Using the Spear against the Butterfly Knives and the Big Knife -- Part 4
Using the Spear against the Butterfly Knives and the Big Knife -- Part 5
Using the Spear against the Butterfly Knives and the Big Knife -- Part 6
Spear Counters against the Downward Chop and Horizontal Sweep of the Big Knife -- Part 1
Spear Counters against the Downward Chop and Horizontal Sweep of the Big Knife -- Part 2
Spear Counters against the Downward Chop and Horizontal Sweep of the Big Knife -- Part 3
Spear Counters against the Downward Chop and Horizontal Sweep of the Big Knife -- Part 4
Spear Counters against the Downward Chop and Horizontal Sweep of the Big Knife -- Part 5
Spear Counters against the Downward Chop and Horizontal Sweep of the Big Knife -- Part 6
The Spear against the Versatile Three-Sectional Staff -- Part 1
The Spear against the Versatile Three-Sectional Staff -- Part 2
The Spear against the Versatile Three-Sectional Staff -- Part 3
The Spear against the Versatile Three-Sectional Staff -- Part 4
The Spear against the Versatile Three-Sectional Staff -- Part 5
Circling and Shooting against Various Sweeps -- Part 1
Circling and Shooting against Various Sweeps -- Part 2
Circling and Shooting against Various Sweeps -- Part 3
Circling and Shooting against Various Sweeps -- Part 4
Circling and Shooting against Various Sweeps -- Part 5
Circling and Shooting against Various Sweeps -- Part 6
Introducing the Traveling Dragon Thirteen-Technique Spear -- Overview
The Formidable Circling and Shooting Techniques of the Spear -- Overview
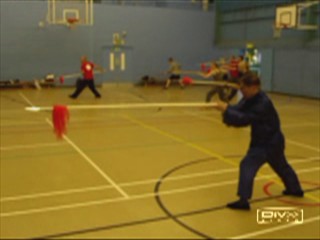 Using the Spear against the Butterfly Knives and the Big
Knife -- Overview
Spear Counters against the Downward Chop and
Horizontal Sweep of the Big Knife -- Overview
The Spear against the Versatile Three-Sectional Staff
-- Overview
Circling and Shooting against Various Sweeps -- Overview
Weapons -- Spear-2 Once you have the Skills, Learnig Techniques comes
Fast and Easy -- Part 1
Once you have the Skills, Learnig Techniques comes Fast and Easy -- Part 2
Once you have the Skills, Learnig Techniques comes Fast and Easy -- Part 3
Once you have the Skills, Learnig Techniques comes Fast and Easy -- Part 4
Once you have the Skills, Learnig Techniques comes Fast and Easy -- Part 5
Once you have the Skills, Learnig Techniques comes Fast and Easy -- Part 6
Once you have the Skills, Learnig Techniques comes Fast and Easy -- Part 7
Sharing Secrets of the Spear -- Part 1
Sharing Secrets of the Spear -- Part 2
Sharing Secrets of the Spear -- Part 3
Sharing Secrets of the Spear -- Part 4
Sharing Secrets of the Spear -- Part 5
Sharing Secrets of the Spear -- Part 6
Sharing Secrets of the Spear -- Part 7
The Shoot: the Most reresentative and Most Deadly of Spear Techniques -- Part 1
The Shoot: the Most representative and Most Deadly of Spear Techniques -- Part 2
The Shoot: the Most reresentative and Most Deadly of Spear Techniques -- Part 3
The Shoot: the Most reresentative and Most Deadly of Spear Techniques -- Part 4
The Shoot: the Most reresentative and Most Deadly of Spear Techniques -- Part 5
The Shoot: the Most reresentative and Most Deadly of Spear Techniques -- Part 6
The Shoot: the Most reresentative and Most Deadly of Spear Techniques -- Part
Learning Various Spear Techniques like Circling, Flicking and Lifting -- Part 1
Learning Various Spear Techniques like Circling, Flicking and Lifting -- Part 2
Learning Various Spear Techniques like Circling, Flicking and Lifting -- Part 3
Learning Various Spear Techniques like Circling, Flicking and Lifting -- Part 4
Learning Various Spear Techniques like Circling, Flicking and Lifting -- Part 5
How would You Counter the Downward Chop of a Big Knife -- Part 1
How would You Counter the Downward Chop of a Big Knife -- Part 2
How would You Counter the Downward Chop of a Big Knife -- Part 3
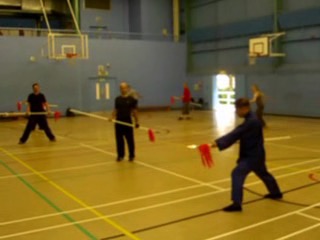 How would You Counter the Downward Chop of a Big
Knife -- Part 4
Using a Spear like a Dagger or a Staff -- Part 1
Using a Spear like a Dagger or a Staff -- Part 2
Using a Spear like a Dagger or a Staff -- Part 3
Using a Spear like a Dagger or a Staff -- Part 4
Using a Spear like a Dagger or a Staff -- Part 5
The Spear Thrust and the Spear Shoot -- Part 1
The Spear Thrust and the Spear Shoot -- Part 2
The Spear Thrust and the Spear Shoot -- Part 3
The Spear Thrust and the Spear Shoot -- Part 4
The Spear Thrust and the Spear Shoot -- Part 5
Reviewing the First Five Sequences of the Set -- Part 1
Reviewing the First Five Sequences of the Set -- Part 2
Reviewing the First Five Sequences of the Set -- Part 3
Reviewing the First Five Sequences of the Set -- Part 4
Reviewing the First Five Sequences of the Set -- Part 5
Reviewing the First Five Sequences of the Set -- Part 6
Reviewing the First Five Sequences of the Set -- Part 7
Reviewing the First Five Sequences of the Set -- Part 8
Once you have the Skills, Learnig Techniques ceomes Fast and Easy -- Overview
Sharing Secrets of the Spear -- Overview
The Shoot: the Most reresentative and Most Deadly of Spear Techniques -- Overview
Learning Various Spear Techniques like Circling, Flicking and Lifting -- Overview
How would You Counter the Downward Chop of a Big Knife -- Overview
Using a Spear like a Dagger or a Staff -- Overview
The Spear Thrust and the Spear Shoot -- Overview
Reviewing the First Five Sequences of the Set -- Overview
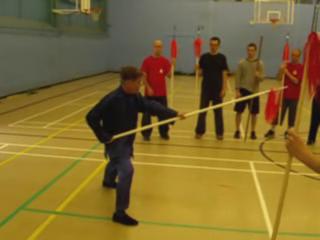 Weapons -- Spear-3
Outside-Door and Inside-Door Applications -- Part 1
Weapons -- Spear-3
Outside-Door and Inside-Door Applications -- Part 1Outside-Door and Inside-Door Applications -- Part 2
Outside-Door and Inside-Door Applications -- Part 3
Outside-Door and Inside-Door Applications -- Part 4
Outside-Door and Inside-Door Applications -- Part 5
Cover the Four Courners against All Attacks -- Part 1
Cover the Four Courners against All Attacks -- Part 2
Cover the Four Courners against All Attacks -- Part 3
Cover the Four Courners against All Attacks -- Part 4
Cover the Four Courners against All Attacks -- Part 5
Cover the Four Courners against All Attacks -- Part 6
Remarkable Achievement at the Weapon Course -- Part 1
Remarkable Achievement at the Weapon Course -- Part 2
Remarkable Achievement at the Weapon Course -- Part 3
Remarkable Achievement at the Weapon Course -- Part 4
Remarkable Achievement at the Weapon Course -- Part 5
Remarkable Achievement at the Weapon Course -- Part 6
Remarkable Achievement at the Weapon Course -- Part 7
Remarkable Achievement at the Weapon Course -- Part 8
Making Flowers with the Spear -- Part 1
Making Flowers with the Spear -- Part 2
Making Flowers with the Spear -- Part 3
Making Flowers with the Spear -- Part 4
Making Flowers with the Spear -- Part 5
Making Flowers with the Spear -- Part 6
Making Flowers with the Spear -- Part 7
Making Flowers with the Spear -- Part 8
Making Flowers with the Spear -- Part 9
Making Flowers with the Spear -- Part 10
Making Flowers with the Spear -- Part 11
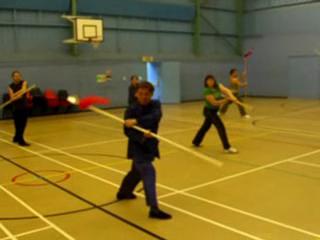 Various Ways of Making Flowers -- Part 1
Various Ways of Making Flowers -- Part 2
Various Ways of Making Flowers -- Part 3
Various Ways of Making Flowers -- Part 4
Various Ways of Making Flowers -- Part 5
Various Ways of Making Flowers -- Part 6
Various Ways of Making Flowers -- Part 7
Various Ways of Making Flowers -- Part 8
Various Ways of Making Flowers -- Part 9
Various Ways of Making Flowers -- Part 10
Various Ways of Making Flowers -- Part 11
Confusing your Opponents with Variation and Changes in Making Flowers -- Part 1
Confusing your Opponents with Variation and Changes in Making Flowers -- Part 2
Confusing your Opponents with Variation and Changes in Making Flowers -- Part 3
Confusing your Opponents with Variation and Changes in Making Flowers -- Part 4
Confusing your Opponents with Variation and Changes in Making Flowers -- Part 5
Confusing your Opponents with Variation and Changes in Making Flowers -- Part 6
Confusing your Opponents with Variation and Changes in Making Flowers -- Part 7
Confusing your Opponents with Variation and Changes in Making Flowers -- Part 8
Confusing your Opponents with Variation and Changes in Making Flowers -- Part 9
Confusing your Opponents with Variation and Changes in Making Flowers -- Part 10
Confusing your Opponents with Variation and Changes in Making Flowers -- Part 11
Outside-Door and Inside-Door Applications -- Overview
Cover the Four Courners against All Attacks -- Overview
Remarkable Achievement at the Weapon Course -- Overview
Making Flowers with the Spea -- Overview
Various Ways of Making Flowers -- Overview
Confusing your Opponents with Variation and Changes in Making Flowers -- Overview
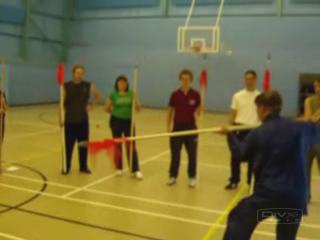 Weapons -- Spear-4
Learning the Spear Set in Just Two Days -- Part 1
Weapons -- Spear-4
Learning the Spear Set in Just Two Days -- Part 1Learning the Spear Set in Just Two Days -- Part 2
Learning the Spear Set in Just Two Days -- Part 3
Learning the Spear Set in Just Two Days -- Part 4
Lerrning the Spear Set in Just Two Days -- Part 5
Learning the Spear Set in Just Two Days -- Part 6
Learning the Spear Set in Just Two Days -- Part 7
The Difference between Patterns and Techniques -- Part 1
The Difference between Patterns and Techniques -- Part 2
The Difference between Patterns and Techniques -- Part 3
The Difference between Patterns and Techniques -- Part 4
The Difference between Patterns and Techniques -- Part 5
Traveling Dragon Thirteen-Technique Spear -- Part 1
Traveling Dragon Thirteen-Technique Spear -- Part 2
Traveling Dragon Thirteen-Technique Spear -- Part 3
Traveling Dragon Thirteen-Technique Spear -- Part 4
Traveling Dragon Thirteen-Technique Spear -- Part 5
Traveling Dragon Thirteen-Technique Spear -- Part 6
Learning the Spear Set in Just Two Days -- Overview
The Difference between Patterns and Techniques -- Overview
Traveling Dragon Thirteen-Technique Spear -- Overview
 Weapons -- Sword
Combat Applications of Traveling Dragon Sword against
Weapons -- Sword
Combat Applications of Traveling Dragon Sword againstSabre and Sumarai Sword -- Overview
Dark Phoenix Falps Wings of Traveling Dragon Sword
-- Overview
A Gentle Touch of Dim-Mark
Traveling Dragon Sword and its Combat Applications
-- Overview
Specific Techniques of the Traveling Dragon Sword
-- Overview
Traveling Dragon Sword: Importance of Wrist Movement -- Part 1
Traveling Dragon Sword: Importance of Wrist Movement -- Part 2
Traveling Dragon Sword: Importance of Wrist Movement -- Part 3
Traveling Dragon Sword: Importance of Wrist Movement -- Part 4
Traveling Dragon Sword: Importance of Wrist Movement -- Part 5
Traveling Dragon Sword: Importance of Wrist Movement -- Part 6
Traveling Dragon Sword: Importance of Wrist Movement -- Part 7
Traveling Dragon Sword: Importance of Wrist Movement -- Part 8
Specific Techniques of the Traveling Dragon Sword -- Part 1
Sifu Kai Uvw Dotted Bernie's Votal Point in Dim Mark
Alex Describing his Experience of Dim Mark and Cleansing
Traveling Dragon Sword: Sequences 1 to 4 -- Part 1
Traveling Dragon Sword: Sequences 1 to 4 -- Part 2
Traveling Dragon Sword: Importance of Wrist Movement -- Part 9
Specific Techniques of the Traveling Dragon Sword -- Part 2
Traveling Dragon Sword: Importance of Wrist Movement -- Part 10
Traveling Dragon Sword: Sequences 1 to 4 -- Part 3
Traveling Dragon Sword: Sequences 1 to 4 -- Part 4
Traveling Dragon Sword: Sequences 1 to 4 -- Part 5
Traveling Dragon Sword: Sequences 1 to 4 -- Part 6
Traveling Dragon Sword: Sequences 1 to 4 -- Part 7
Traveling Dragon Sword: Sequences 1 to 4 -- Part 8
Traveling Dragon Sword: Sequences 1 to 4 -- Part 9
Traveling Dragon Sword: Sequences 1 to 4 -- Part 10
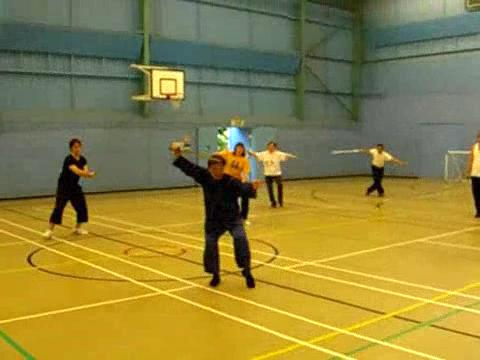 Traveling Dragon Sword: Sequences 1 to 4 -- Part 11
Traveling Dragon Sword: Sequences 1 to 4 -- Part 12
Traveling Dragon Sword: Sequences 1 to 4 -- Part 13
Traveling Dragon Sword: Sequences 1 to 4 -- Part 14
Specific Techniques of the Traveling Dragon Sword -- Part 3
Specific Techniques of the Traveling Dragon Sword -- Part 4
Sword against Sabre -- Part 1
Sword against Sabre -- Part 2
Traveling Dragon Sword: Sequences 5 to 6 -- Part 1
Traveling Dragon Sword: Sequences 5 to 6 -- Part 2
Traveling Dragon Sword: Sequences 5 to 6 -- Part 3
Traveling Dragon Sword: Sequences 5 to 6 -- Part 4
Traveling Dragon Sword: Sequences 5 to 6 -- Part 5
Traveling Dragon Sword: Sequences 5 to 6 -- Part 6
Traveling Dragon Sword: Sequences 5 to 6 -- Part 7
Traveling Dragon Sword: Sequences 5 to 6 -- Part 8
Traveling Dragon Sword: Sequences 5 to 6 -- Part 9
Traveling Dragon Sword: Sequences 5 to 6 -- Part 10
Traveling Dragon Sword: Sequences 5 to 6 -- Part 11
Traveling Dragon Sword: Sequences 5 to 6 -- Part 12
Shaolin Sword agaiknst Sumarai Sword - Part 1
Shaolin Sword agaiknst Sumarai Sword - Part 2
Traveling Dragon Sword: Sequences 2 to 8 -- Part 1
Traveling Dragon Sword: Sequences 2 to 8 -- Part 2
Traveling Dragon Sword: Sequences 2 to 8 -- Part 3
Traveling Dragon Sword: Sequences 2 to 8 -- Part 4
Traveling Dragon Sword: Sequences 2 to 8 -- Part 5
Traveling Dragon Sword: Sequences 2 to 8 -- Part 6
Traveling Dragon Sword: Sequences 2 to 8 -- Part 7
Traveling Dragon Sword: Sequences 2 to 8 -- Part 8
 Traveling Dragon Sword: Sequences 2 to 8 -- Part 9
Traveling Dragon Sword: Sequences 2 to 8 -- Part 10
Traveling Dragon Sword: Sequences 2 to 8 -- Part 11
Traveling Dragon Sword: Sequences 2 to 8 -- Part 12
Traveling Dragon Sword: Sequences 8 to 11 -- Part 1
Traveling Dragon Sword: Sequences 8 to 11 -- Part 2
Traveling Dragon Sword: Sequences 8 to 11 -- Part 3
Traveling Dragon Sword: Sequences 8 to 11 -- Part 4
Traveling Dragon Sword: Sequences 8 to 11 -- Part 5
Traveling Dragon Sword: Sequences 8 to 11 -- Part 6
Traveling Dragon Sword: Sequences 8 to 11 -- Part 7
Traveling Dragon Sword: Sequences 8 to 11 -- Part 8
Traveling Dragon Sword: Sequences 8 to 11 -- Part 9
Specific Technniques of the Traveling Dragon Sword -- Part 5
Specific Technniques of the Traveling Dragon Sword -- Part 6
Specific Technniques of the Traveling Dragon Sword -- Part 7
Specific Technniques of the Traveling Dragon Sword -- Part 8
Specific Technniques of the Traveling Dragon Sword -- Part 9
Specific Technniques of the Traveling Dragon Sword -- Part 10
Specific Technniques of the Traveling Dragon Sword -- Part 11
Traveling Dragon Sword: Sequences 8 to 11 -- Part 10
Traveling Dragon Sword: Sequences 8 to 11 -- Part 11
Traveling Dragon Sword: Sequences 8 to 11 -- Part 12
Traveling Dragon Sword: Sequences 10 to 12 -- Part 1
Traveling Dragon Sword: Sequences 10 to 12 -- Part 2
Traveling Dragon Sword: Sequences 10 to 12 -- Part 3
Traveling Dragon Sword: Sequences 10 to 12 -- Part 4
Traveling Dragon Sword: Sequences 10 to 12 -- Part 5
Traveling Dragon Sword: Sequences 10 to 12 -- Part 6
Traveling Dragon Sword: Sequences 10 to 12 -- Part 7
 Traveling Dragon Sword: Sequences 10 to 12 -- Part 8
Traveling Dragon Sword: Sequences 10 to 12 -- Part 9
Traveling Dragon Sword: Sequences 10 to 12 -- Part 10
Traveling Dragon Sword: Sequences 10 to 12 -- Part 11
Dark Phoxnix Flaps Wings of Traveling Dragon Sword -- Part 1
Dark Phoxnix Flaps Wings of Traveling Dragon Sword -- Part 2
Dark Phoxnix Flaps Wings of Traveling Dragon Sword -- Part 3
Dark Phoxnix Flaps Wings of Traveling Dragon Sword -- Part 4
Dark Phoxnix Flaps Wings of Traveling Dragon Sword -- Part 5
Dark Phoxnix Flaps Wings of Traveling Dragon Sword -- Part 6
Dark Phoxnix Flaps Wings of Traveling Dragon Sword -- Part 7
Dark Phoxnix Flaps Wings of Traveling Dragon Sword -- Part 8
Dark Phoxnix Flaps Wings of Traveling Dragon Sword -- Part 9
Traveling Dragon Sword: Sequences 10 to 12 -- Part 12
Traveling Dragon Sword: Sequences 10 to 12 -- Part 13
Traveling Dragon Sword: Sequences 10 to 12 -- Part 14
Traveling Dragon Sword: Sequences 10 to 12 -- Part 15
Traveling Dragon Sword: Sequences 10 to 12 -- Part 16
Traveling Dragon Sword: Importance of Wrist Movement -- Overview
Traveling Dragon Sword: Sequences 1 to 4 -- Overview
Traveling Dragon Sword: Sequences 5 to 6 -- Overview
Traveling Dragon Sword: Sequences 2 to 8 -- Overview
Traveling Dragon Sword: Sequences 8 to 11 -- Overview
Traveling Dragon Sword: Sequences 10 to 12 -- Overview
 How would You Counter the Downward Chop of a Big Knife?
Using a Spear like a Dagger or a Staff
Spear Thrust and Spear Shoot
Reviewing the First Five Sequences of the Spear Set
Outside-Gate and Inside-Gate Approaches in
Combat Application
Covering Four Corners against all Attacks
Remarkable Achievements at Weapon Course
Making Flowers with the Spear
Various Ways of Making Flowers
Confusing Opponents with Variations and Changes
in Making Flowers
Learning the Spear Set in just Two Days
Difference between Patterns and Techniques
Thirteen Techniques of the Traveling Draglon Spear
Traveling Dragon Sword and Combat Application 2007 -- Overview
Learning the Traveling Dragon Sword -- Part 1
Learning the Traveling Dragon Sword -- Part 2
Learning the Traveling Dragon Sword -- Part 3
Learning the Traveling Dragon Sword -- Part 4
Learning the Traveling Dragon Sword -- Part 5
Learning the Traveling Dragon Sword -- Part 6
Specific Techniques of Traveling Dragon Sword
Dark Phonex Flaps Wings of Traveling Dragon Sword
Traveling Dragon Sword against Sabre
Traveling Dragon Sword against Samurai Sword
Weapons -- Videos Butterfly Knies and their Combat Applications 2007
-- Overview
Introducing the Butterfly Knifes
Fierce Tiger and Moon-Gazing Rhinoceros
How would You Counter a Spear Thrust?
Counters against Chops and Sweeps of Other Weapons
Butterfly Knives against a Sabre
Secret of Performing Butterfly Knives with Force and
Speed but without being Tired
Yin-Yang Butterfly Knives and Close-Combat Applications
Some Interesting Applications of Buttergy Knives Held in Reverse
Combat Training with Weapons must be Injury Free
 How do You Release your Butterfly Knives from being Locked
Learning to Make Flowers Ststematically with Butterfly Knives
Combat Applications of Double Butterflies Flying
Human-Charracter and Cross-Road are found Here
Kungfu Training and Mental Clarity
Learning Combat Applications of Butterfly Knives against
Other Weapons
Benefits of Combat Training with Classical Weapons
From Slow and Systematic to Fast and Spontaneous
First Class Kungfu Calls for Great Skills amd Techniques
Traveling Dragon Thirteen-Technique Spear 2007 Overview
Introducing the Traveling Dragon Thirteen-Technique Spear
Circling and Thrusting Techniques of the Spear
Spear against Butterfly Knives and Big Knife
Spear against Dwonward Chop and Reverse Sweep of Big Knife
Spear against Versatile Three-Sectional Staff
Circling and Shooting against Three-Sectional Staff
Once you have the Skills, Kearning Techniques Become Fst and Easy
Sharing Secrets of the Spear
The Shoot -- the Most Representative and Most Deadly Technique of the Spear
Learning Various Spear Techniques like Circling, Flicking and Lifting
 Taijiquan -- Blue Mountain 2008 -- Taiji 01
Tactic of Continuation in Combat Sequences
Taijiquan -- Blue Mountain 2008 -- Taiji 01
Tactic of Continuation in Combat SequencesFelling Techniques in Wahnam Taijiquan
Secquence 1: Immortal Waves Sleeves
Secquence 2: Low Stacne Vertiacal Punch
Secquence 3: White Snake Shoots Venom
Secquence 4: Shoots Green Dragon Pearl
Secquence 5: White Crane Flaps Wings
Secquence 6: Striking Tiger Poise
Secquence 7: Thrust Kick
Secquence 8: Low Stance Single Whip
Secquence 9: Black Bear Sinks Hips
Secquence 10: Shoulder Strike
Secquence 11: Cloud Hands
Secquence 12: Carry Tiger Back to Mountain
Learning the 12 Basic Taijiqna Combat Sequences
Step by Step (Old)
Learning the 12 Basic Taijiqna Combat Sequences
Step by Step
Tactic of Subtraction in Combat Seequences
Break Fall
Elegant Ladies Felling Big Men
Having a Lot of Fun
Techniques and Tactics in Wahnam Taijiquan
Taijiquan -- Blue Mountain 2008 -- Videos Tactic of Continuation in Wahnam Taijiquan
Felling Techniques of Wahnam Taijiquan
Learning 12 Basic Taijiquan Combat Sequences
2008 -- Overview
Wahnam Taijiquan Basic Combat Sequence 1
Wahnam Taijiquan Basic Combat Sequence 2
Wahnam Taijiquan Basic Combat Sequence 3
Wahnam Taijiquan Basic Combat Sequence 4
Wahnam Taijiquan Basic Combat Sequence 5
Wahnam Taijiquan Basic Combat Sequence 6
Wahnam Taijiquan Basic Combat Sequence 7
Wahnam Taijiquan Basic Combat Sequence 8Wahnam Taijiquan Basic Combat Sequence 9
Wahnam Taijiquan Basic Combat Sequence 10
Wahnam Taijiquan Basic Combat Sequence 11
Wahnam Taijiquan Basic Combat Sequence 12
Tactic of Subtraction in Wahnam Taijiquan
Taijiquan -- Combat Sequences 4 Taijiquan Abridegd Combat Sequences
Basic Wahnam Taijiquan Combat Sequences
Four Abridged Taijiquan Combat Sequences
Japan Version of Taijiquan Four Combat Sequences --
Combat Sequence 1
Japan Version of Taijiquan Four Combat Sequences --
Combat Sequence 2
Japan Version of Taijiquan Four Combat Sequences --
Combat Sequence 3
Japan Version of Taijiquan Four Combat Sequences --
Combat Sequence 4
Portugal Version of Taijiquan Four Combat Sequences --
Combat Sequence 3
Portugal Version of Taijiquan Four Combat Sequences --
Combat Sequence 1
Portugal Version of Taijiquan Four Combat Sequences --
Combat Sequence 2
Portugal Version of Taijiquan Four Combat Sequences --
Combat Sequence 4
12 Basic Taijiquan Combat Sequences -- Combat Sequence 1
12 Basic Taijiquan Combat Sequences -- Combat Sequence 2
12 Basic Taijiquan Combat Sequences -- Combat Sequence 3
12 Basic Taijiquan Combat Sequences -- Combat Sequence 4
12 Basic Taijiquan Combat Sequences -- Combat Sequence 5
12 Basic Taijiquan Combat Sequences -- Combat Sequence 6
12 Basic Taijiquan Combat Sequences -- Combat Sequence 7
12 Basic Taijiquan Combat Sequences -- Combat Sequence 8
12 Basic Taijiquan Combat Sequences -- Combat Sequence 9
12 Basic Taijiquan Combat Sequences -- Combat Sequence 1012 Basic Taijiquan Combat Sequences -- Combat Sequence 11
12 Basic Taijiquan Combat Sequences -- Combat Sequence 12
Standardized Version of Four Combat Sequences -- Striking
Standardized Version of Four Combat Sequences -- Kicking
Standardized Version of Four Combat Sequences -- Felling
Standardized Version of Four Combat Sequences -- Chin-Na
Taijiquan -- Learning Combat Sequences Learning the Twelve Wahnam Taijiquan Combat Sequences -- Overview
Sequence 1: Immortal Waves Sleeves
Sequence 2: Low Stance ertical Punch
Sequence 3: White Snake Shoot Venom
Sequence 4: Green Dragon Shoots Pearl
Sequence 5: White Crane Falps Wings
Sequence 6: Striking Tiger Poise
Sequence 7: Thrust Kick
Sequence 8: Shoulder Strike
Sequence 9: Black Bear Sinks Hips
Sequence 10: Shoulder Strike
Sequence 11: Cloud Hands
Sequence 12: Carry Tiger Back to Mountain
Taijiquan -- Taiji Robin Flowing Water Floating Clouds (Old)
Flowing Water Floating Clouds -- Overview
Taijiquan -- Yellow Bee Yellow Bee Sucks Pollen -- Part 1
Yellow Bee Sucks Pollen -- Part 2
Yellow Bee Sucks Pollen -- Part 3
Yellow Bee Sucks Pollen -- Part 4
Yellow Bee Sucks Pollen -- Pictures
Yellow Bee Sucks Pollen -- Videos
Taijiquan -- Yellow Bee Combat
8 Taijiquan Distilled Combat SequencesYellow Dee Sucks Pollen -- Sequence 1: Top, Middle, Bottom
Yellow Dee Sucks Pollen -- Sequence 2: Side Attack
Yellow Dee Sucks Pollen -- Sequence 3: Continuous Attacks
Yellow Dee Sucks Pollen -- Sequence 4: Double Kicks
Yellow Dee Sucks Pollen -- Sequence 5: Whirlwind Kick
Yellow Dee Sucks Pollen -- Sequence 6: Felling Attack
Yellow Dee Sucks Pollen -- Sequence 7: Chopping Attack
Yellow Dee Sucks Pollen -- Sequence 8: Gripping Attack
Eight Distilled Taijiquan Combat Sequences
Sword Amazing Combat Applications of Traveling Dragon
Sword -- Overview
The Dainty Chinese Sword aganst the Mighty Samurai
Sword -- Part 1
The Dainty Chinese Sword aganst the Mighty Samura
i Sword -- Part 2
The Dainty Chinese Sword aganst the Mighty Samurai
Sword -- Part 3
The Dainty Chinese Sword aganst the Mighty Samurai
Sword -- Part 4
The Master' Weapon against the Mother of Weapons
-- Part 1
The Master' Weapon against the Mother of Weapons
-- Part 2
The Master' Weapon against the Mother of Weapons
-- Part 3
The Master' Weapon against the Mother of Weapons
-- Part 4
The Master' Weapon against the Mother of Weapons
-- Part 5
The Master' Weapon against the Mother of Weapons -- Part 6
The Master' Weapon against the Mother of
Weapons -- Part 7
The Marvelous Sword agaist the King of
Weapons -- Part 1
The Marvelous Sword agaist the King of
Weapons -- Part 2
The Marvelous Sword agaist the King of
Weapons -- Part 3
The Marvelous Sword agaist the King of
Weapons -- Part 4
The Marvelous Sword agaist the King of
Weapons -- Part 5
Traveling Dragon and Ferocious Tiger -- Part 1
Traveling Dragon and Ferocious Tiger -- Part 2
Traveling Dragon and Ferocious Tiger -- Part 3
How would You Defend against a Versatile Three-Sectional
Staff? -- Part 1
How would You Defend against a Versatile Three-Sectional
Staff? -- Part 2
How would You Defend against a Versatile Three-Sectional
Staff? -- Part 3
How would You Defend against a Versatile Three-Sectional
Staff? -- Part 4
How would You Defend against a Versatile Three-Sectional
Staff? -- Part 5
How would You Defend against a Versatile Three-Sectional
Staff? -- Part 6
How would You Defend against a Versatile Three-Sectional
Staff? -- Part 7
How would You Defend against a Versatile Three-Sectional
Staff? -- Part 8
Secrets that Enhance Combat Effiency and Daily Life -- Part 1
Secrets that Enhance Combat Effiency and Daily Life -- Part 2
Secrets that Enhance Combat Effiency and Daily Life -- Part 3Secrets that Enhance Combat Effiency and Daily Life -- Part 4
The Dainty Chinese Sword aganst the Mighty Samurai
Sword -- Overview
The Master' Weapon against the Mother of Weapons -- Overview
The Marvelous Sword agaist the King of Weapons -- Overview
Traveling Dragon and Ferocious Tiger -- Overview
How would You Defend against a Versatile Three-Sectional
Staff? -- Overview
Secrets that Enhance Combat Effiency and Daily Life -- Overview
Sword -- Videos Videos of Amazing Combat Applications of Traveling
Dragon Sword -- Overveiw
Dainty Chinese Sword aganst the Mighty Samurai
Sword -- Overview
Sword against Staff -- Master's Weapon against
Mother of Weapons -- Overview
Sword against Spear: Marvelous Weapon against
King of Weapon-- Overview
Sword against Sabre: Traveling Dragon against
Ferocious Tiger -- Overview
How You would Defend against a Three Sectional Staff
with a Dainty Sword -- Overview
Sword against Double Sabres: Secrets that Enhance Combat
Efficency and Daily Life -- Overview
Weapons -- Spear Traveling Dragon Thirteen-Technique Spear -- Overview
Introducing the Traveling Dragon Thirteen-Technique Spear -- Part 1
Introducing the Traveling Dragon Thirteen-Technique Spear -- Part 2
Introducing the Traveling Dragon Thirteen-Technique Spear -- Part 3
Introducing the Traveling Dragon Thirteen-Technique Spear -- Part 4
Introducing the Traveling Dragon Thirteen-Technique Spear -- Part 5
Introducing the Traveling Dragon Thirteen-Technique Spear -- Part 6
Introducing the Traveling Dragon Thirteen-Technique Spear -- Part 7
The Formidable Circling and Shooting Techniques of the Spear -- Part 1
The Formidable Circling and Shooting Techniques of the Spear -- Part 2
The Formidable Circling and Shooting Techniques of the Spear -- Part 3The Formidable Circling and Shooting Techniques of the Spear -- Part 4
The Formidable Circling and Shooting Techniques of the Spear -- Part 5
The Formidable Circling and Shooting Techniques of the Spear -- Part 6
The Formidable Circling and Shooting Techniques of the Spear -- Part 7
Using the Spear against the Butterfly Knives and the Big Knife -- Part 1
Using the Spear against the Butterfly Knives and the Big Knife -- Part 2
Using the Spear against the Butterfly Knives and the Big Knife -- Part 3
Using the Spear against the Butterfly Knives and the Big Knife -- Part 4
Using the Spear against the Butterfly Knives and the Big Knife -- Part 5
Using the Spear against the Butterfly Knives and the Big Knife -- Part 6
Spear Counters against the Downward Chop and Horizontal Sweep of the Big Knife -- Part 1
Spear Counters against the Downward Chop and Horizontal Sweep of the Big Knife -- Part 2
Spear Counters against the Downward Chop and Horizontal Sweep of the Big Knife -- Part 3
Spear Counters against the Downward Chop and Horizontal Sweep of the Big Knife -- Part 4
Spear Counters against the Downward Chop and Horizontal Sweep of the Big Knife -- Part 5
Spear Counters against the Downward Chop and Horizontal Sweep of the Big Knife -- Part 6
The Spear against the Versatile Three-Sectional Staff -- Part 1
The Spear against the Versatile Three-Sectional Staff -- Part 2
The Spear against the Versatile Three-Sectional Staff -- Part 3
The Spear against the Versatile Three-Sectional Staff -- Part 4
The Spear against the Versatile Three-Sectional Staff -- Part 5
Circling and Shooting against Various Sweeps -- Part 1
Circling and Shooting against Various Sweeps -- Part 2
Circling and Shooting against Various Sweeps -- Part 3
Circling and Shooting against Various Sweeps -- Part 4
Circling and Shooting against Various Sweeps -- Part 5
Circling and Shooting against Various Sweeps -- Part 6
Introducing the Traveling Dragon Thirteen-Technique Spear -- Overview
The Formidable Circling and Shooting Techniques of the Spear -- Overview
Using the Spear against the Butterfly Knives and the Big Knife -- OverviewSpear Counters against the Downward Chop and Horizontal Sweep of the Big Knife -- Overview
The Spear against the Versatile Three-Sectional Staff -- Overview
Circling and Shooting against Various Sweeps -- Overview
Weapons -- Spear-2 Once you have the Skills, Learnig Techniques ceomes Fast and Easy -- Part 1
Once you have the Skills, Learnig Techniques ceomes Fast and Easy -- Part 2
Once you have the Skills, Learnig Techniques ceomes Fast and Easy -- Part 3
Once you have the Skills, Learnig Techniques ceomes Fast and Easy -- Part 4
Once you have the Skills, Learnig Techniques ceomes Fast and Easy -- Part 5
Once you have the Skills, Learnig Techniques ceomes Fast and Easy -- Part 6
Once you have the Skills, Learnig Techniques ceomes Fast and Easy -- Part 7
Sharing Secrets of the Spear -- Part 1
Sharing Secrets of the Spear -- Part 2
Sharing Secrets of the Spear -- Part 3
Sharing Secrets of the Spear -- Part 4
Sharing Secrets of the Spear -- Part 5
Sharing Secrets of the Spear -- Part 6
Sharing Secrets of the Spear -- Part 7
The Shoot: the Most reresentative and Most Deadly of Spear Techniques -- Part 1
The Shoot: the Most representative and Most Deadly of Spear Techniques -- Part 2
The Shoot: the Most reresentative and Most Deadly of Spear Techniques -- Part 3
The Shoot: the Most reresentative and Most Deadly of Spear Techniques -- Part 4
The Shoot: the Most reresentative and Most Deadly of Spear Techniques -- Part 5
The Shoot: the Most reresentative and Most Deadly of Spear Techniques -- Part 6
The Shoot: the Most reresentative and Most Deadly of Spear Techniques -- Part
Learning Various Spear Techniques like Circling, Flicking and Lifting -- Part 1
Learning Various Spear Techniques like Circling, Flicking and Lifting -- Part 2
Learning Various Spear Techniques like Circling, Flicking and Lifting -- Part 3
Learning Various Spear Techniques like Circling, Flicking and Lifting -- Part 4
Learning Various Spear Techniques like Circling, Flicking and Lifting -- Part 5
How would You Counter the Downward Chop of a Big Knife -- Part 1
How would You Counter the Downward Chop of a Big Knife -- Part 2
How would You Counter the Downward Chop of a Big Knife -- Part 3
How would You Counter the Downward Chop of a Big Knife -- Part 4Using a Spear like a Dagger or a Staff -- Part 1
Using a Spear like a Dagger or a Staff -- Part 2
Using a Spear like a Dagger or a Staff -- Part 3
Using a Spear like a Dagger or a Staff -- Part 4
Using a Spear like a Dagger or a Staff -- Part 5
The Spear Thrust and the Spear Shoot -- Part 1
The Spear Thrust and the Spear Shoot -- Part 2
The Spear Thrust and the Spear Shoot -- Part 3
The Spear Thrust and the Spear Shoot -- Part 4
The Spear Thrust and the Spear Shoot -- Part 5
Reviewing the First Five Sequences of the Set -- Part 1
Reviewing the First Five Sequences of the Set -- Part 2
Reviewing the First Five Sequences of the Set -- Part 3
Reviewing the First Five Sequences of the Set -- Part 4
Reviewing the First Five Sequences of the Set -- Part 5
Reviewing the First Five Sequences of the Set -- Part 6
Reviewing the First Five Sequences of the Set -- Part 7
Reviewing the First Five Sequences of the Set -- Part 8
Once you have the Skills, Learnig Techniques ceomes Fast and Easy -- Overview
Sharing Secrets of the Spear -- Overview
The Shoot: the Most reresentative and Most Deadly of Spear Techniques -- Overview
Learning Various Spear Techniques like Circling, Flicking and Lifting -- Overview
How would You Counter the Downward Chop of a Big Knife -- Overview
Using a Spear like a Dagger or a Staff -- Overview
The Spear Thrust and the Spear Shoot -- Overview
Reviewing the First Five Sequences of the Set -- Overview
Weapons -- Spear-3
Outside-Door and Inside-Door Applications -- Part 1Outside-Door and Inside-Door Applications -- Part 2
Outside-Door and Inside-Door Applications -- Part 3
Outside-Door and Inside-Door Applications -- Part 4
Outside-Door and Inside-Door Applications -- Part 5
Cover the Four Courners against All Attacks -- Part 1
Cover the Four Courners against All Attacks -- Part 2
Cover the Four Courners against All Attacks -- Part 3
Cover the Four Courners against All Attacks -- Part 4
Cover the Four Courners against All Attacks -- Part 5
Cover the Four Courners against All Attacks -- Part 6
Remarkable Achievement at the Weapon Course -- Part 1
Remarkable Achievement at the Weapon Course -- Part 2
Remarkable Achievement at the Weapon Course -- Part 3
Remarkable Achievement at the Weapon Course -- Part 4
Remarkable Achievement at the Weapon Course -- Part 5
Remarkable Achievement at the Weapon Course -- Part 6
Remarkable Achievement at the Weapon Course -- Part 7
Remarkable Achievement at the Weapon Course -- Part 8
Making Flowers with the Spear -- Part 1
Making Flowers with the Spear -- Part 2
Making Flowers with the Spear -- Part 3
Making Flowers with the Spear -- Part 4
Making Flowers with the Spear -- Part 5
Making Flowers with the Spear -- Part 6
Making Flowers with the Spear -- Part 7
Making Flowers with the Spear -- Part 8
Making Flowers with the Spear -- Part 9
Making Flowers with the Spear -- Part 10
Making Flowers with the Spear -- Part 11
Various Ways of Making Flowers -- Part 1Various Ways of Making Flowers -- Part 2
Various Ways of Making Flowers -- Part 3
Various Ways of Making Flowers -- Part 4
Various Ways of Making Flowers -- Part 5
Various Ways of Making Flowers -- Part 6
Various Ways of Making Flowers -- Part 7
Various Ways of Making Flowers -- Part 8
Various Ways of Making Flowers -- Part 9
Various Ways of Making Flowers -- Part 10
Various Ways of Making Flowers -- Part 11
Confusing your Opponents with Variation and Changes in Making Flowers -- Part 1
Confusing your Opponents with Variation and Changes in Making Flowers -- Part 2
Confusing your Opponents with Variation and Changes in Making Flowers -- Part 3
Confusing your Opponents with Variation and Changes in Making Flowers -- Part 4
Confusing your Opponents with Variation and Changes in Making Flowers -- Part 5
Confusing your Opponents with Variation and Changes in Making Flowers -- Part 6
Confusing your Opponents with Variation and Changes in Making Flowers -- Part 7
Confusing your Opponents with Variation and Changes in Making Flowers -- Part 8
Confusing your Opponents with Variation and Changes in Making Flowers -- Part 9
Confusing your Opponents with Variation and Changes in Making Flowers -- Part 10
Confusing your Opponents with Variation and Changes in Making Flowers -- Part 11
Outside-Door and Inside-Door Applications -- Overview
Cover the Four Courners against All Attacks -- Overview
Remarkable Achievement at the Weapon Course -- Overview
Making Flowers with the Spea -- Overview
Various Ways of Making Flowers -- Overview
Confusing your Opponents with Variation and Changes in Making Flowers -- Overview
Weapons -- Spear-4
Learning the Spear Set in Just Two Days -- Part 1Learning the Spear Set in Just Two Days -- Part 2
Learning the Spear Set in Just Two Days -- Part 3
Learning the Spear Set in Just Two Days -- Part 4
Lerrning the Spear Set in Just Two Days -- Part 5
Learning the Spear Set in Just Two Days -- Part 6
Learning the Spear Set in Just Two Days -- Part 7
The Difference between Patterns and Techniques -- Part 1
The Difference between Patterns and Techniques -- Part 2
The Difference between Patterns and Techniques -- Part 3
The Difference between Patterns and Techniques -- Part 4
The Difference between Patterns and Techniques -- Part 5
Traveling Dragon Thirteen-Technique Spear -- Part 1
Traveling Dragon Thirteen-Technique Spear -- Part 2
Traveling Dragon Thirteen-Technique Spear -- Part 3
Traveling Dragon Thirteen-Technique Spear -- Part 4
Traveling Dragon Thirteen-Technique Spear -- Part 5
Traveling Dragon Thirteen-Technique Spear -- Part 6
Learning the Spear Set in Just Two Days -- Overview
The Difference between Patterns and Techniques -- Overview
Traveling Dragon Thirteen-Technique Spear -- Overview
Weapons -- Sword
Combat Applications of Traveling Dragon Sword against Sabre and Sumarai Swpord -- OverviewDark Phoenix Falps Wings of Traveling Dragon Sword -- Overview
A Gentle Touch of Dim-Mark
Traveling Dragon Sword and its Combat Applications -- Overview
Specific Techniques of the Traveling Dragon Sword -- Overview
Traveling Dragon Sword: Importance of Wrist Movement -- Part 1
Traveling Dragon Sword: Importance of Wrist Movement -- Part 2
Traveling Dragon Sword: Importance of Wrist Movement -- Part 3
Traveling Dragon Sword: Importance of Wrist Movement -- Part 4
Traveling Dragon Sword: Importance of Wrist Movement -- Part 5
Traveling Dragon Sword: Importance of Wrist Movement -- Part 6
Traveling Dragon Sword: Importance of Wrist Movement -- Part 7
Traveling Dragon Sword: Importance of Wrist Movement -- Part 8
Specific Techniques of the Traveling Dragon Sword -- Part 1
Sifu Kai Uvw Dotted Bernie's Votal Point in Dim Mark
Alex Describing his Experience of Dim Mark and Cleansing
Traveling Dragon Sword: Sequences 1 to 4 -- Part 1
Traveling Dragon Sword: Sequences 1 to 4 -- Part 2
Traveling Dragon Sword: Importance of Wrist Movement -- Part 9
Specific Techniques of the Traveling Dragon Sword -- Part 2
Traveling Dragon Sword: Importance of Wrist Movement -- Part 10
Traveling Dragon Sword: Sequences 1 to 4 -- Part 3
Traveling Dragon Sword: Sequences 1 to 4 -- Part 4
Traveling Dragon Sword: Sequences 1 to 4 -- Part 5
Traveling Dragon Sword: Sequences 1 to 4 -- Part 6
Traveling Dragon Sword: Sequences 1 to 4 -- Part 7
Traveling Dragon Sword: Sequences 1 to 4 -- Part 8
Traveling Dragon Sword: Sequences 1 to 4 -- Part 9
Traveling Dragon Sword: Sequences 1 to 4 -- Part 10
Traveling Dragon Sword: Sequences 1 to 4 -- Part 11Traveling Dragon Sword: Sequences 1 to 4 -- Part 12
Traveling Dragon Sword: Sequences 1 to 4 -- Part 13
Traveling Dragon Sword: Sequences 1 to 4 -- Part 14
Specific Techniques of the Traveling Dragon Sword -- Part 3
Specific Techniques of the Traveling Dragon Sword -- Part 4
Sword against Sabre -- Part 1
Sword against Sabre -- Part 2
Traveling Dragon Sword: Sequences 5 to 6 -- Part 1
Traveling Dragon Sword: Sequences 5 to 6 -- Part 2
Traveling Dragon Sword: Sequences 5 to 6 -- Part 3
Traveling Dragon Sword: Sequences 5 to 6 -- Part 4
Traveling Dragon Sword: Sequences 5 to 6 -- Part 5
Traveling Dragon Sword: Sequences 5 to 6 -- Part 6
Traveling Dragon Sword: Sequences 5 to 6 -- Part 7
Traveling Dragon Sword: Sequences 5 to 6 -- Part 8
Traveling Dragon Sword: Sequences 5 to 6 -- Part 9
Traveling Dragon Sword: Sequences 5 to 6 -- Part 10
Traveling Dragon Sword: Sequences 5 to 6 -- Part 11
Traveling Dragon Sword: Sequences 5 to 6 -- Part 12
Shaolin Sword agaiknst Sumarai Sword - Part 1
Shaolin Sword agaiknst Sumarai Sword - Part 2
Traveling Dragon Sword: Sequences 2 to 8 -- Part 1
Traveling Dragon Sword: Sequences 2 to 8 -- Part 2
Traveling Dragon Sword: Sequences 2 to 8 -- Part 3
Traveling Dragon Sword: Sequences 2 to 8 -- Part 4
Traveling Dragon Sword: Sequences 2 to 8 -- Part 5
Traveling Dragon Sword: Sequences 2 to 8 -- Part 6
Traveling Dragon Sword: Sequences 2 to 8 -- Part 7
Traveling Dragon Sword: Sequences 2 to 8 -- Part 8
Traveling Dragon Sword: Sequences 2 to 8 -- Part 9Traveling Dragon Sword: Sequences 2 to 8 -- Part 10
Traveling Dragon Sword: Sequences 2 to 8 -- Part 11
Traveling Dragon Sword: Sequences 2 to 8 -- Part 12
Traveling Dragon Sword: Sequences 8 to 11 -- Part 1
Traveling Dragon Sword: Sequences 8 to 11 -- Part 2
Traveling Dragon Sword: Sequences 8 to 11 -- Part 3
Traveling Dragon Sword: Sequences 8 to 11 -- Part 4
Traveling Dragon Sword: Sequences 8 to 11 -- Part 5
Traveling Dragon Sword: Sequences 8 to 11 -- Part 6
Traveling Dragon Sword: Sequences 8 to 11 -- Part 7
Traveling Dragon Sword: Sequences 8 to 11 -- Part 8
Traveling Dragon Sword: Sequences 8 to 11 -- Part 9
Specific Technniques of the Traveling Dragon Sword -- Part 5
Specific Technniques of the Traveling Dragon Sword -- Part 6
Specific Technniques of the Traveling Dragon Sword -- Part 7
Specific Technniques of the Traveling Dragon Sword -- Part 8
Specific Technniques of the Traveling Dragon Sword -- Part 9
Specific Technniques of the Traveling Dragon Sword -- Part 10
Specific Technniques of the Traveling Dragon Sword -- Part 11
Traveling Dragon Sword: Sequences 8 to 11 -- Part 10
Traveling Dragon Sword: Sequences 8 to 11 -- Part 11
Traveling Dragon Sword: Sequences 8 to 11 -- Part 12
Traveling Dragon Sword: Sequences 10 to 12 -- Part 1
Traveling Dragon Sword: Sequences 10 to 12 -- Part 2
Traveling Dragon Sword: Sequences 10 to 12 -- Part 3
Traveling Dragon Sword: Sequences 10 to 12 -- Part 4
Traveling Dragon Sword: Sequences 10 to 12 -- Part 5
Traveling Dragon Sword: Sequences 10 to 12 -- Part 6
Traveling Dragon Sword: Sequences 10 to 12 -- Part 7
Traveling Dragon Sword: Sequences 10 to 12 -- Part 8Traveling Dragon Sword: Sequences 10 to 12 -- Part 9
Traveling Dragon Sword: Sequences 10 to 12 -- Part 10
Traveling Dragon Sword: Sequences 10 to 12 -- Part 11
Dark Phoxnix Flaps Wings of Traveling Dragon Sword -- Part 1
Dark Phoxnix Flaps Wings of Traveling Dragon Sword -- Part 2
Dark Phoxnix Flaps Wings of Traveling Dragon Sword -- Part 3
Dark Phoxnix Flaps Wings of Traveling Dragon Sword -- Part 4
Dark Phoxnix Flaps Wings of Traveling Dragon Sword -- Part 5
Dark Phoxnix Flaps Wings of Traveling Dragon Sword -- Part 6
Dark Phoxnix Flaps Wings of Traveling Dragon Sword -- Part 7
Dark Phoxnix Flaps Wings of Traveling Dragon Sword -- Part 8
Dark Phoxnix Flaps Wings of Traveling Dragon Sword -- Part 9
Traveling Dragon Sword: Sequences 10 to 12 -- Part 12
Traveling Dragon Sword: Sequences 10 to 12 -- Part 13
Traveling Dragon Sword: Sequences 10 to 12 -- Part 14
Traveling Dragon Sword: Sequences 10 to 12 -- Part 15
Traveling Dragon Sword: Sequences 10 to 12 -- Part 16
Traveling Dragon Sword: Importance of Wrist Movement -- Overview
Traveling Dragon Sword: Sequences 1 to 4 -- Overview
Traveling Dragon Sword: Sequences 5 to 6 -- Overview
Traveling Dragon Sword: Sequences 2 to 8 -- Overview
Traveling Dragon Sword: Sequences 8 to 11 -- Overview
Traveling Dragon Sword: Sequences 10 to 12 -- Overview
How would You Counter the Downward Chop of a Big Knife?Using a Spear like a Dagger or a Staff
Spear Thrust and Spear Shoot
Reviewing the First Five Sequences of the Spear Set
Outside-Gate and Inside-Gate Approaches in Combat Application
Covering Four Corners against all Attacks
Remarkable Achievements at Weapon Course
Making Flowers with the Spear
Various Ways of Making Flowers
Confusing Opponents with Variations and Changes in Making Flowers
Learning the Spear Set in just Two Days
Difference between Patterns and Techniques
Thirteen Techniques of the Traveling Draglon Spear
Traveling Dragon Sword and Combat Application 2007 -- Overview
Learning the Traveling Dragon Sword -- Part 1
Learning the Traveling Dragon Sword -- Part 2
Learning the Traveling Dragon Sword -- Part 3
Learning the Traveling Dragon Sword -- Part 4
Learning the Traveling Dragon Sword -- Part 5
Learning the Traveling Dragon Sword -- Part 6
Specific Techniques of Traveling Dragon Sword
Dark Phonex Flaps Wings of Traveling Dragon Sword
Traveling Dragon Sword against Sabre
Traveling Dragon Sword against Samurai Sword
Weapons -- Videos
Butterfly Knies and their Combat Applications 2007 -- OverviewIntroducing the Butterfly Knifes
Fierce Tiger and Moon-Gazing Rhinoceros
How would You Counter a Spear Thrust?/a>
Counters against Chops and Sweeps of Other Weapons
Butterfly Knives against a Sabre/a>
Secret of Performing Butterfly Knives with Force and Speed but without being Tired
Yin-Yang Butterfly Knives and Close-Combat Applications
Some Interesting Applications of Buttergy Knives Held in Reverse
Combat Training with Weapons must be Injury Free
Sword Amazing Combat Applications of Traveling Dragon
Sword -- Overview
The Dainty Chinese Sword aganst the Mighty Samurai
Sword -- Part 1
The Dainty Chinese Sword aganst the Mighty Samura
i Sword -- Part 2
The Dainty Chinese Sword aganst the Mighty Samurai
Sword -- Part 3
The Dainty Chinese Sword aganst the Mighty Samurai
Sword -- Part 4
The Master' Weapon against the Mother of Weapons
-- Part 1
The Master' Weapon against the Mother of Weapons
-- Part 2
The Master' Weapon against the Mother of Weapons
-- Part 3
The Master' Weapon against the Mother of Weapons
-- Part 4
The Master' Weapon against the Mother of Weapons
-- Part 5
The Master' Weapon against the Mother of Weapons -- Part 6
The Master' Weapon against the Mother of
Weapons -- Part 7
The Marvelous Sword agaist the King of
Weapons -- Part 1
The Marvelous Sword agaist the King of
Weapons -- Part 2
The Marvelous Sword agaist the King of
Weapons -- Part 3
The Marvelous Sword agaist the King of
Weapons -- Part 4
The Marvelous Sword agaist the King of
Weapons -- Part 5
Traveling Dragon and Ferocious Tiger -- Part 1
Traveling Dragon and Ferocious Tiger -- Part 2
Traveling Dragon and Ferocious Tiger -- Part 3
How would You Defend against a Versatile Three-Sectional
Staff? -- Part 1
How would You Defend against a Versatile Three-Sectional
Staff? -- Part 2
How would You Defend against a Versatile Three-Sectional
Staff? -- Part 3
How would You Defend against a Versatile Three-Sectional
Staff? -- Part 4
How would You Defend against a Versatile Three-Sectional
Staff? -- Part 5
How would You Defend against a Versatile Three-Sectional
Staff? -- Part 6
How would You Defend against a Versatile Three-Sectional
Staff? -- Part 7
How would You Defend against a Versatile Three-Sectional
Staff? -- Part 8
Secrets that Enhance Combat Effiency and Daily Life -- Part 1
Secrets that Enhance Combat Effiency and Daily Life -- Part 2
Secrets that Enhance Combat Effiency and Daily Life -- Part 3Secrets that Enhance Combat Effiency and Daily Life -- Part 4
The Dainty Chinese Sword aganst the Mighty Samurai
Sword -- Overview
The Master' Weapon against the Mother of Weapons -- Overview
The Marvelous Sword agaist the King of Weapons -- Overview
Traveling Dragon and Ferocious Tiger -- Overview
How would You Defend against a Versatile Three-Sectional
Staff? -- Overview
Secrets that Enhance Combat Effiency and Daily Life -- Overview
Sword -- Videos Videos of Amazing Combat Applications of Traveling
Dragon Sword -- Overveiw
Dainty Chinese Sword aganst the Mighty Samurai
Sword -- Overview
Sword against Staff -- Master's Weapon against
Mother of Weapons -- Overview
Sword against Spear: Marvelous Weapon against
King of Weapon-- Overview
Sword against Sabre: Traveling Dragon against
Ferocious Tiger -- Overview
How You would Defend against a Three Sectional Staff
with a Dainty Sword -- Overview
Sword against Double Sabres: Secrets that Enhance Combat
Efficency and Daily Life -- Overview
Weapons -- Spear Traveling Dragon Thirteen-Technique Spear -- Overview
Introducing the Traveling Dragon Thirteen-Technique Spear -- Part 1
Introducing the Traveling Dragon Thirteen-Technique Spear -- Part 2
Introducing the Traveling Dragon Thirteen-Technique Spear -- Part 3
Introducing the Traveling Dragon Thirteen-Technique Spear -- Part 4
Introducing the Traveling Dragon Thirteen-Technique Spear -- Part 5
Introducing the Traveling Dragon Thirteen-Technique Spear -- Part 6
Introducing the Traveling Dragon Thirteen-Technique Spear -- Part 7
The Formidable Circling and Shooting Techniques of the Spear -- Part 1
The Formidable Circling and Shooting Techniques of the Spear -- Part 2
The Formidable Circling and Shooting Techniques of the Spear -- Part 3The Formidable Circling and Shooting Techniques of the Spear -- Part 4
The Formidable Circling and Shooting Techniques of the Spear -- Part 5
The Formidable Circling and Shooting Techniques of the Spear -- Part 6
The Formidable Circling and Shooting Techniques of the Spear -- Part 7
Using the Spear against the Butterfly Knives and the Big Knife -- Part 1
Using the Spear against the Butterfly Knives and the Big Knife -- Part 2
Using the Spear against the Butterfly Knives and the Big Knife -- Part 3
Using the Spear against the Butterfly Knives and the Big Knife -- Part 4
Using the Spear against the Butterfly Knives and the Big Knife -- Part 5
Using the Spear against the Butterfly Knives and the Big Knife -- Part 6
Spear Counters against the Downward Chop and Horizontal Sweep of the Big Knife -- Part 1
Spear Counters against the Downward Chop and Horizontal Sweep of the Big Knife -- Part 2
Spear Counters against the Downward Chop and Horizontal Sweep of the Big Knife -- Part 3
Spear Counters against the Downward Chop and Horizontal Sweep of the Big Knife -- Part 4
Spear Counters against the Downward Chop and Horizontal Sweep of the Big Knife -- Part 5
Spear Counters against the Downward Chop and Horizontal Sweep of the Big Knife -- Part 6
The Spear against the Versatile Three-Sectional Staff -- Part 1
The Spear against the Versatile Three-Sectional Staff -- Part 2
The Spear against the Versatile Three-Sectional Staff -- Part 3
The Spear against the Versatile Three-Sectional Staff -- Part 4
The Spear against the Versatile Three-Sectional Staff -- Part 5
Circling and Shooting against Various Sweeps -- Part 1
Circling and Shooting against Various Sweeps -- Part 2
Circling and Shooting against Various Sweeps -- Part 3
Circling and Shooting against Various Sweeps -- Part 4
Circling and Shooting against Various Sweeps -- Part 5
Circling and Shooting against Various Sweeps -- Part 6
Introducing the Traveling Dragon Thirteen-Technique Spear -- Overview
The Formidable Circling and Shooting Techniques of the Spear -- Overview
Using the Spear against the Butterfly Knives and the Big Knife -- OverviewSpear Counters against the Downward Chop and Horizontal Sweep of the Big Knife -- Overview
The Spear against the Versatile Three-Sectional Staff -- Overview
Circling and Shooting against Various Sweeps -- Overview
Weapons -- Spear-2 Once you have the Skills, Learnig Techniques ceomes Fast and Easy -- Part 1
Once you have the Skills, Learnig Techniques ceomes Fast and Easy -- Part 2
Once you have the Skills, Learnig Techniques ceomes Fast and Easy -- Part 3
Once you have the Skills, Learnig Techniques ceomes Fast and Easy -- Part 4
Once you have the Skills, Learnig Techniques ceomes Fast and Easy -- Part 5
Once you have the Skills, Learnig Techniques ceomes Fast and Easy -- Part 6
Once you have the Skills, Learnig Techniques ceomes Fast and Easy -- Part 7
Sharing Secrets of the Spear -- Part 1
Sharing Secrets of the Spear -- Part 2
Sharing Secrets of the Spear -- Part 3
Sharing Secrets of the Spear -- Part 4
Sharing Secrets of the Spear -- Part 5
Sharing Secrets of the Spear -- Part 6
Sharing Secrets of the Spear -- Part 7
The Shoot: the Most reresentative and Most Deadly of Spear Techniques -- Part 1
The Shoot: the Most representative and Most Deadly of Spear Techniques -- Part 2
The Shoot: the Most reresentative and Most Deadly of Spear Techniques -- Part 3
The Shoot: the Most reresentative and Most Deadly of Spear Techniques -- Part 4
The Shoot: the Most reresentative and Most Deadly of Spear Techniques -- Part 5
The Shoot: the Most reresentative and Most Deadly of Spear Techniques -- Part 6
The Shoot: the Most reresentative and Most Deadly of Spear Techniques -- Part
Learning Various Spear Techniques like Circling, Flicking and Lifting -- Part 1
Learning Various Spear Techniques like Circling, Flicking and Lifting -- Part 2
Learning Various Spear Techniques like Circling, Flicking and Lifting -- Part 3
Learning Various Spear Techniques like Circling, Flicking and Lifting -- Part 4
Learning Various Spear Techniques like Circling, Flicking and Lifting -- Part 5
How would You Counter the Downward Chop of a Big Knife -- Part 1
How would You Counter the Downward Chop of a Big Knife -- Part 2
How would You Counter the Downward Chop of a Big Knife -- Part 3
How would You Counter the Downward Chop of a Big Knife -- Part 4Using a Spear like a Dagger or a Staff -- Part 1
Using a Spear like a Dagger or a Staff -- Part 2
Using a Spear like a Dagger or a Staff -- Part 3
Using a Spear like a Dagger or a Staff -- Part 4
Using a Spear like a Dagger or a Staff -- Part 5
The Spear Thrust and the Spear Shoot -- Part 1
The Spear Thrust and the Spear Shoot -- Part 2
The Spear Thrust and the Spear Shoot -- Part 3
The Spear Thrust and the Spear Shoot -- Part 4
The Spear Thrust and the Spear Shoot -- Part 5
Reviewing the First Five Sequences of the Set -- Part 1
Reviewing the First Five Sequences of the Set -- Part 2
Reviewing the First Five Sequences of the Set -- Part 3
Reviewing the First Five Sequences of the Set -- Part 4
Reviewing the First Five Sequences of the Set -- Part 5
Reviewing the First Five Sequences of the Set -- Part 6
Reviewing the First Five Sequences of the Set -- Part 7
Reviewing the First Five Sequences of the Set -- Part 8
Once you have the Skills, Learnig Techniques ceomes Fast and Easy -- Overview
Sharing Secrets of the Spear -- Overview
The Shoot: the Most reresentative and Most Deadly of Spear Techniques -- Overview
Learning Various Spear Techniques like Circling, Flicking and Lifting -- Overview
How would You Counter the Downward Chop of a Big Knife -- Overview
Using a Spear like a Dagger or a Staff -- Overview
The Spear Thrust and the Spear Shoot -- Overview
Reviewing the First Five Sequences of the Set -- Overview
Weapons -- Spear-3
Outside-Door and Inside-Door Applications -- Part 1Outside-Door and Inside-Door Applications -- Part 2
Outside-Door and Inside-Door Applications -- Part 3
Outside-Door and Inside-Door Applications -- Part 4
Outside-Door and Inside-Door Applications -- Part 5
Cover the Four Courners against All Attacks -- Part 1
Cover the Four Courners against All Attacks -- Part 2
Cover the Four Courners against All Attacks -- Part 3
Cover the Four Courners against All Attacks -- Part 4
Cover the Four Courners against All Attacks -- Part 5
Cover the Four Courners against All Attacks -- Part 6
Remarkable Achievement at the Weapon Course -- Part 1
Remarkable Achievement at the Weapon Course -- Part 2
Remarkable Achievement at the Weapon Course -- Part 3
Remarkable Achievement at the Weapon Course -- Part 4
Remarkable Achievement at the Weapon Course -- Part 5
Remarkable Achievement at the Weapon Course -- Part 6
Remarkable Achievement at the Weapon Course -- Part 7
Remarkable Achievement at the Weapon Course -- Part 8
Making Flowers with the Spear -- Part 1
Making Flowers with the Spear -- Part 2
Making Flowers with the Spear -- Part 3
Making Flowers with the Spear -- Part 4
Making Flowers with the Spear -- Part 5
Making Flowers with the Spear -- Part 6
Making Flowers with the Spear -- Part 7
Making Flowers with the Spear -- Part 8
Making Flowers with the Spear -- Part 9
Making Flowers with the Spear -- Part 10
Making Flowers with the Spear -- Part 11
Various Ways of Making Flowers -- Part 1Various Ways of Making Flowers -- Part 2
Various Ways of Making Flowers -- Part 3
Various Ways of Making Flowers -- Part 4
Various Ways of Making Flowers -- Part 5
Various Ways of Making Flowers -- Part 6
Various Ways of Making Flowers -- Part 7
Various Ways of Making Flowers -- Part 8
Various Ways of Making Flowers -- Part 9
Various Ways of Making Flowers -- Part 10
Various Ways of Making Flowers -- Part 11
Confusing your Opponents with Variation and Changes in Making Flowers -- Part 1
Confusing your Opponents with Variation and Changes in Making Flowers -- Part 2
Confusing your Opponents with Variation and Changes in Making Flowers -- Part 3
Confusing your Opponents with Variation and Changes in Making Flowers -- Part 4
Confusing your Opponents with Variation and Changes in Making Flowers -- Part 5
Confusing your Opponents with Variation and Changes in Making Flowers -- Part 6
Confusing your Opponents with Variation and Changes in Making Flowers -- Part 7
Confusing your Opponents with Variation and Changes in Making Flowers -- Part 8
Confusing your Opponents with Variation and Changes in Making Flowers -- Part 9
Confusing your Opponents with Variation and Changes in Making Flowers -- Part 10
Confusing your Opponents with Variation and Changes in Making Flowers -- Part 11
Outside-Door and Inside-Door Applications -- Overview
Cover the Four Courners against All Attacks -- Overview
Remarkable Achievement at the Weapon Course -- Overview
Making Flowers with the Spea -- Overview
Various Ways of Making Flowers -- Overview
Confusing your Opponents with Variation and Changes in Making Flowers -- Overview
Weapons -- Spear-4
Learning the Spear Set in Just Two Days -- Part 1Learning the Spear Set in Just Two Days -- Part 2
Learning the Spear Set in Just Two Days -- Part 3
Learning the Spear Set in Just Two Days -- Part 4
Lerrning the Spear Set in Just Two Days -- Part 5
Learning the Spear Set in Just Two Days -- Part 6
Learning the Spear Set in Just Two Days -- Part 7
The Difference between Patterns and Techniques -- Part 1
The Difference between Patterns and Techniques -- Part 2
The Difference between Patterns and Techniques -- Part 3
The Difference between Patterns and Techniques -- Part 4
The Difference between Patterns and Techniques -- Part 5
Traveling Dragon Thirteen-Technique Spear -- Part 1
Traveling Dragon Thirteen-Technique Spear -- Part 2
Traveling Dragon Thirteen-Technique Spear -- Part 3
Traveling Dragon Thirteen-Technique Spear -- Part 4
Traveling Dragon Thirteen-Technique Spear -- Part 5
Traveling Dragon Thirteen-Technique Spear -- Part 6
Learning the Spear Set in Just Two Days -- Overview
The Difference between Patterns and Techniques -- Overview
Traveling Dragon Thirteen-Technique Spear -- Overview
Weapons -- Sword
Combat Applications of Traveling Dragon Sword against Sabre and Sumarai Swpord -- OverviewDark Phoenix Falps Wings of Traveling Dragon Sword -- Overview
A Gentle Touch of Dim-Mark
Traveling Dragon Sword and its Combat Applications -- Overview
Specific Techniques of the Traveling Dragon Sword -- Overview
Traveling Dragon Sword: Importance of Wrist Movement -- Part 1
Traveling Dragon Sword: Importance of Wrist Movement -- Part 2
Traveling Dragon Sword: Importance of Wrist Movement -- Part 3
Traveling Dragon Sword: Importance of Wrist Movement -- Part 4
Traveling Dragon Sword: Importance of Wrist Movement -- Part 5
Traveling Dragon Sword: Importance of Wrist Movement -- Part 6
Traveling Dragon Sword: Importance of Wrist Movement -- Part 7
Traveling Dragon Sword: Importance of Wrist Movement -- Part 8
Specific Techniques of the Traveling Dragon Sword -- Part 1
Sifu Kai Uvw Dotted Bernie's Votal Point in Dim Mark
Alex Describing his Experience of Dim Mark and Cleansing
Traveling Dragon Sword: Sequences 1 to 4 -- Part 1
Traveling Dragon Sword: Sequences 1 to 4 -- Part 2
Traveling Dragon Sword: Importance of Wrist Movement -- Part 9
Specific Techniques of the Traveling Dragon Sword -- Part 2
Traveling Dragon Sword: Importance of Wrist Movement -- Part 10
Traveling Dragon Sword: Sequences 1 to 4 -- Part 3
Traveling Dragon Sword: Sequences 1 to 4 -- Part 4
Traveling Dragon Sword: Sequences 1 to 4 -- Part 5
Traveling Dragon Sword: Sequences 1 to 4 -- Part 6
Traveling Dragon Sword: Sequences 1 to 4 -- Part 7
Traveling Dragon Sword: Sequences 1 to 4 -- Part 8
Traveling Dragon Sword: Sequences 1 to 4 -- Part 9
Traveling Dragon Sword: Sequences 1 to 4 -- Part 10